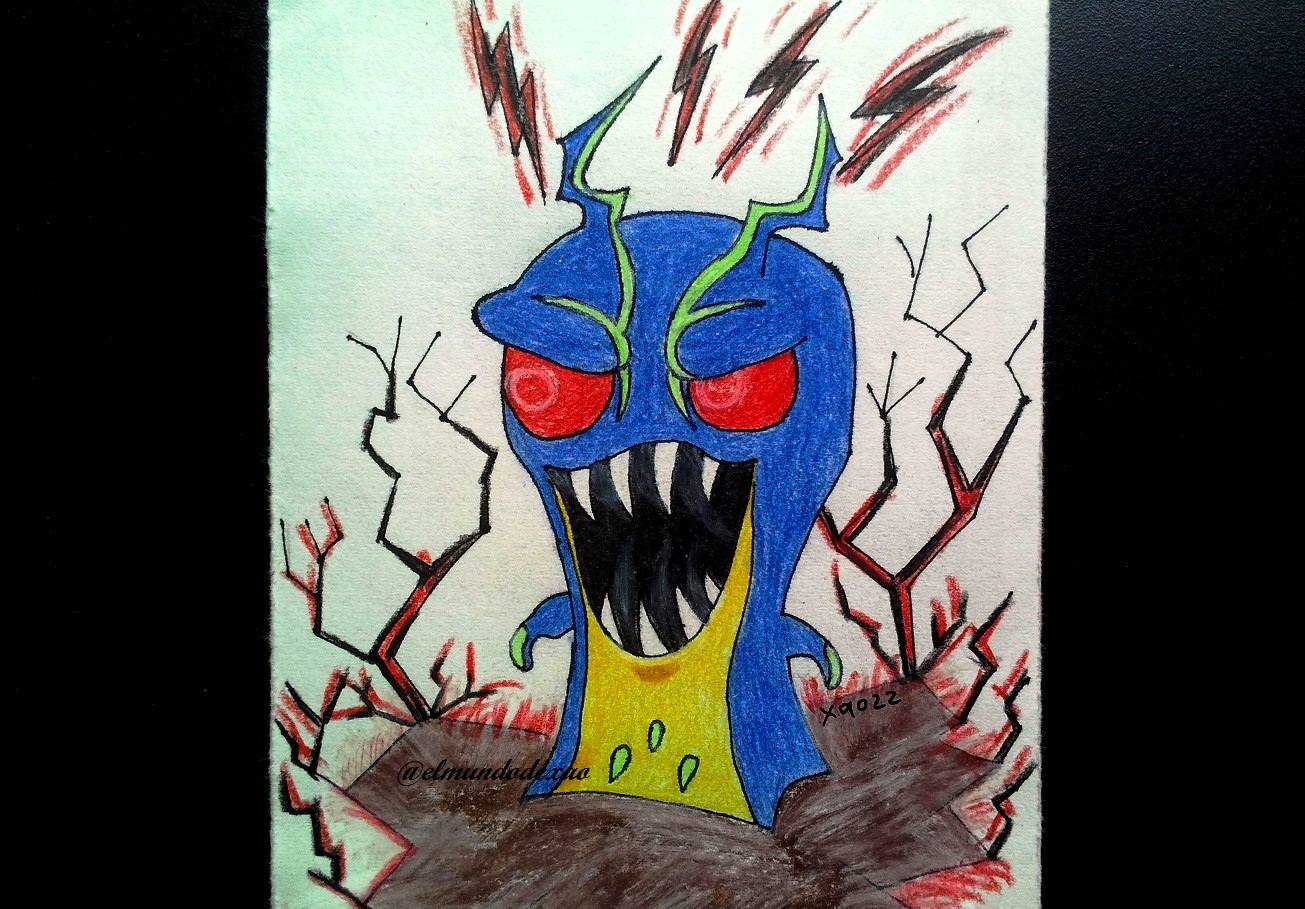
Hello Alien Art Hive community, I hope you are enjoying this weekend; today I will show you my new drawing of evil slugs from the animated series Slugterra, this time it is the Amperling slug that would be the evil version of the Electroshock. Which have electrical powers.
Next I mention the materials used: 52 g white bond paper, 0.5 mechanical pencil, 0.5 marker, eraser and colors (Variety of brands).
Before I continue, I will tell you that part of my learning is developed with videos or images searched on the Internet, so at the end I will leave you the link that I used on this occasion.
Let's start with the step by step drawing:
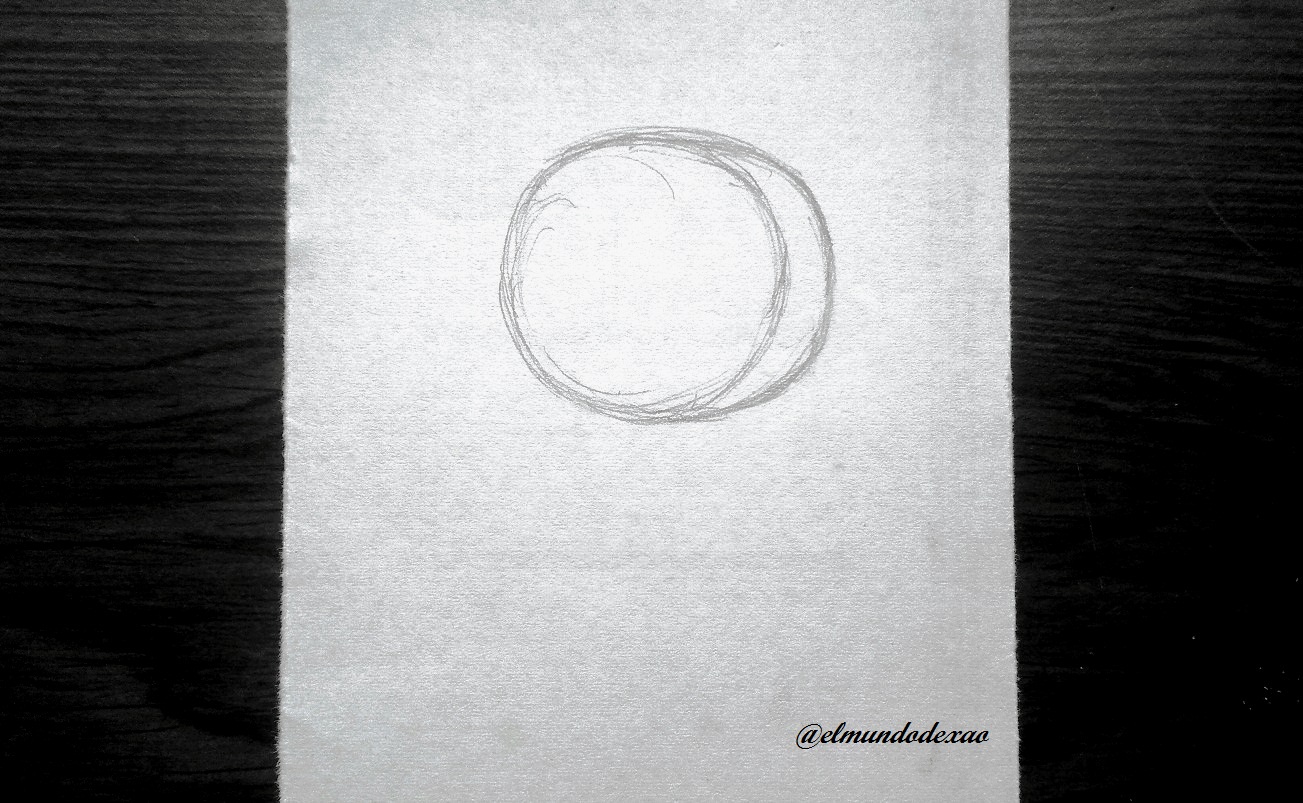
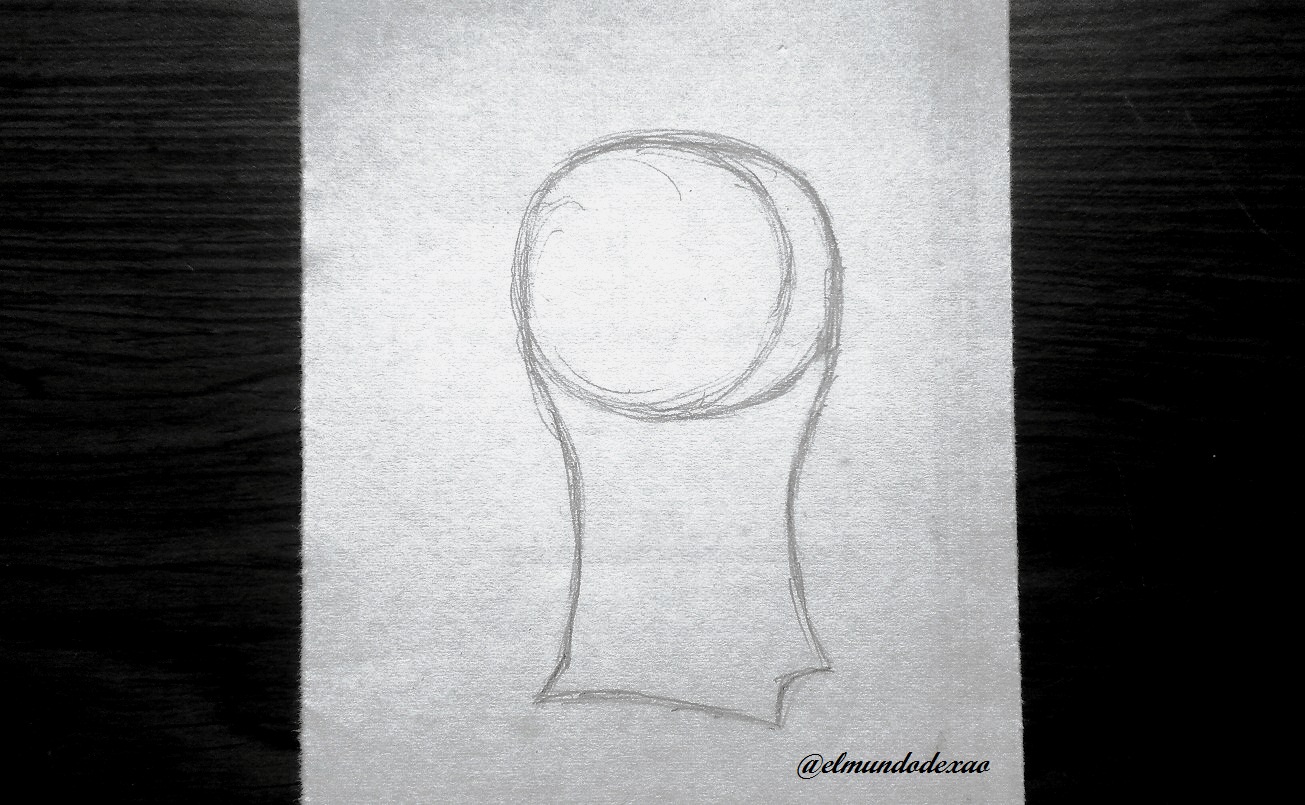
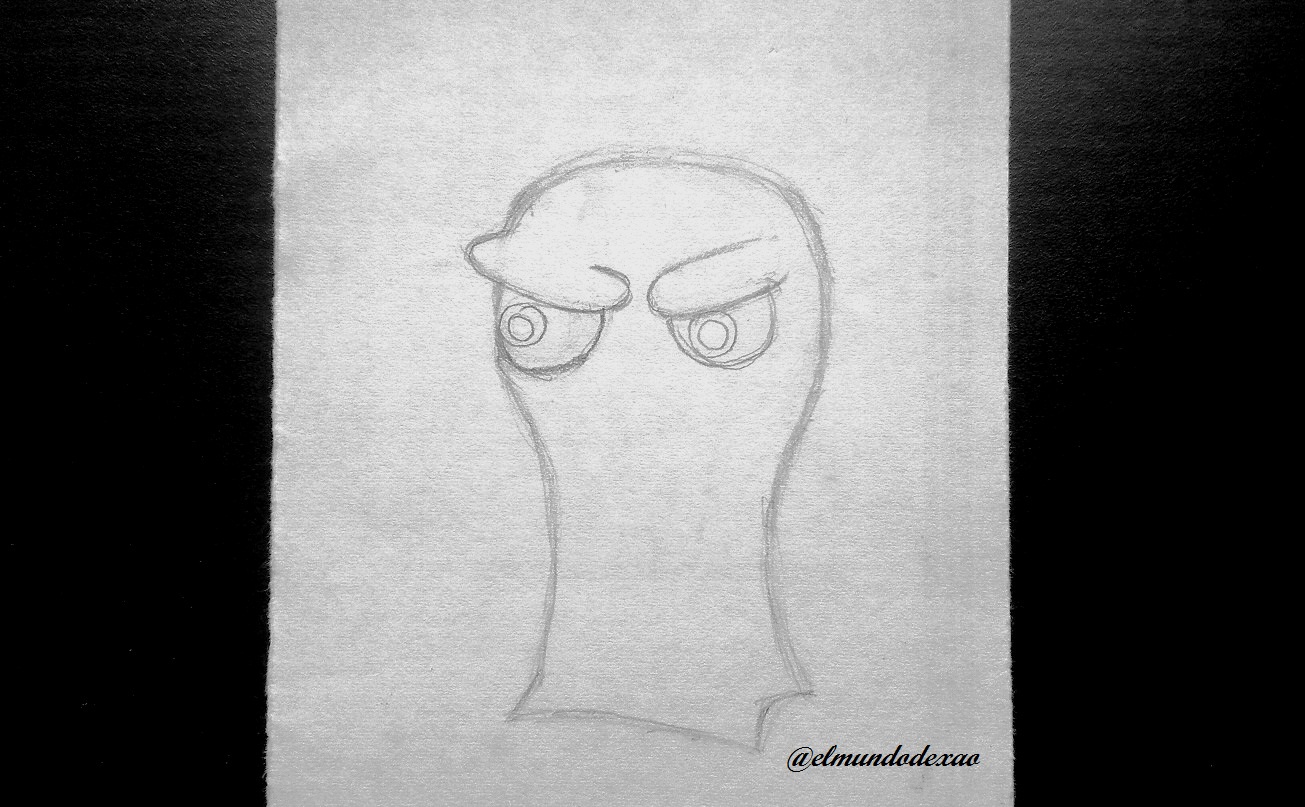
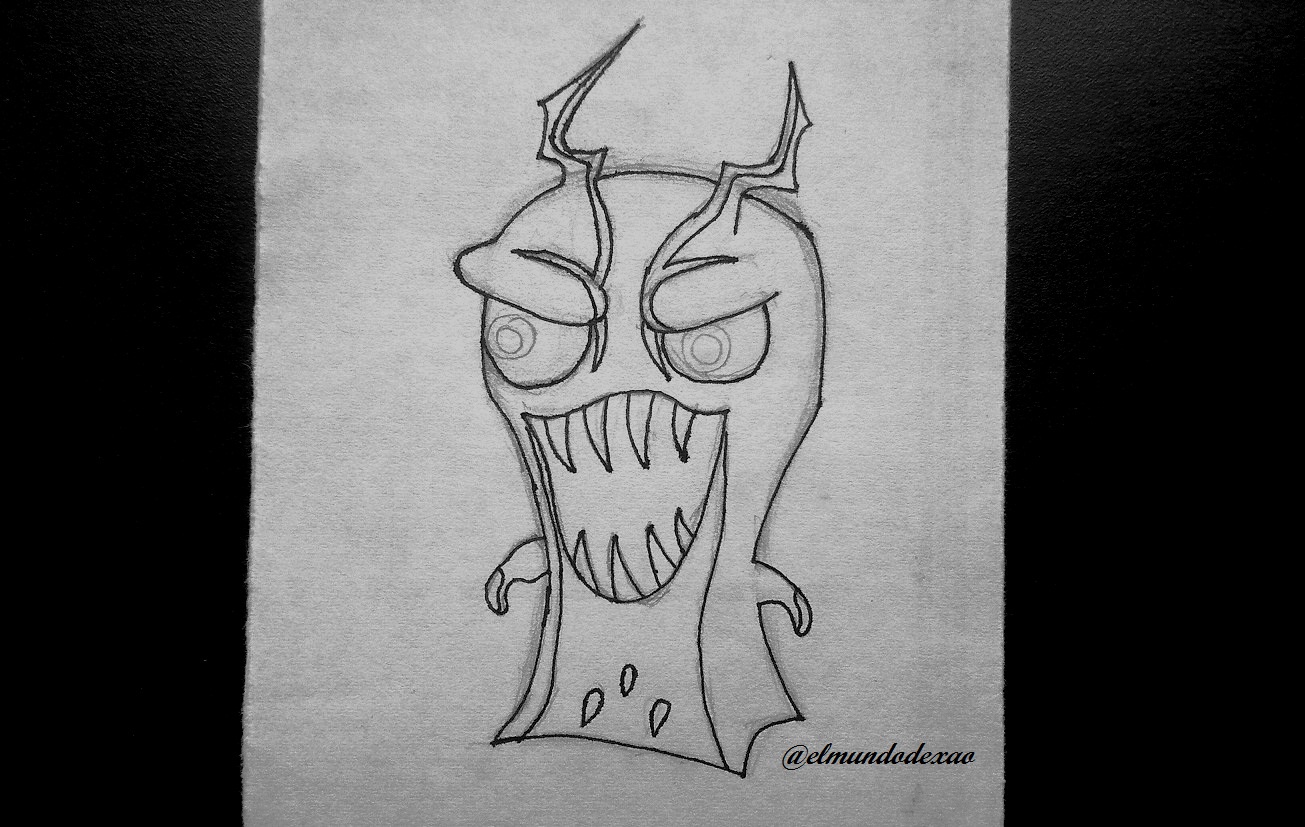
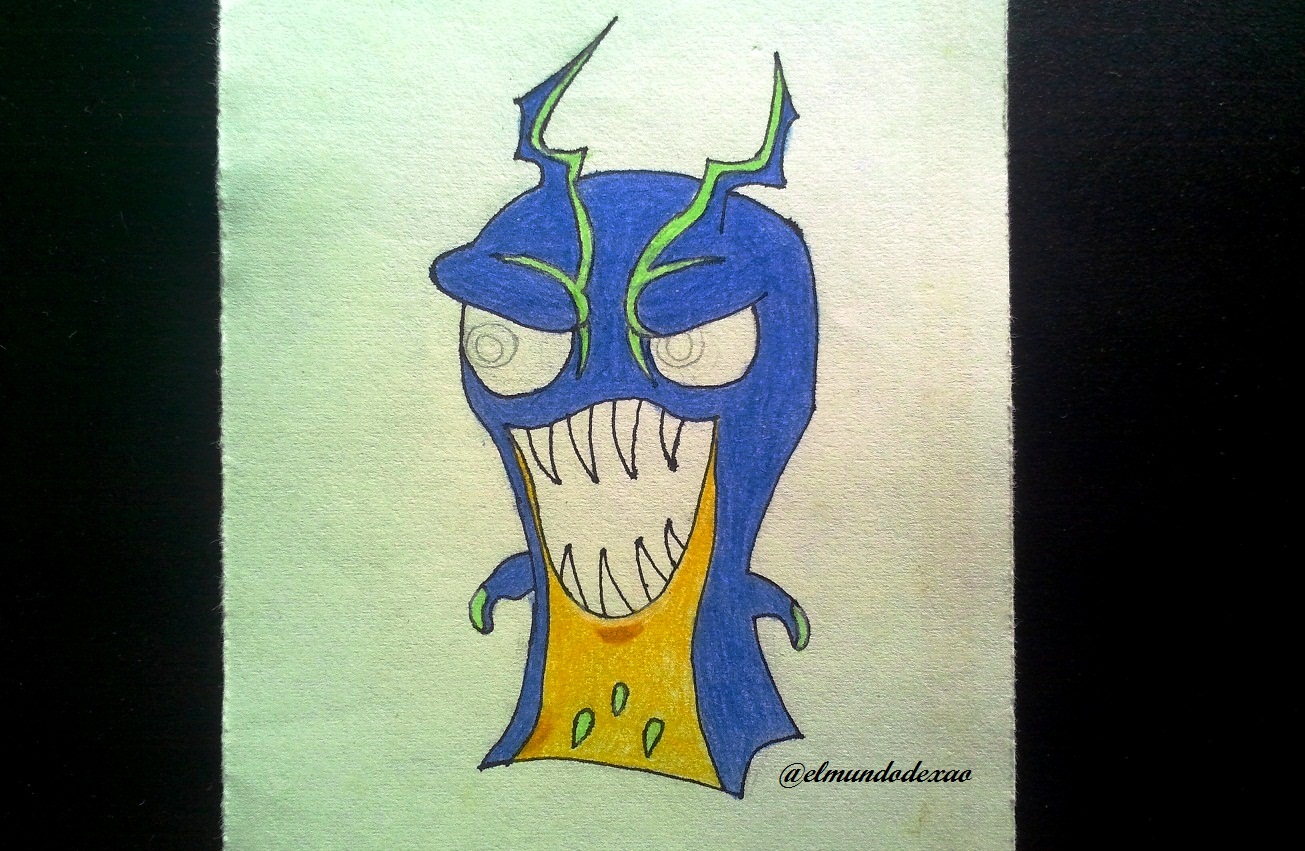
Step # 01: I will start by making an oval for the head but as you can see I got a circle; this kind of thing usually happens to me when I try to make a circle many times I get an oval, to correct this I enlarge it a little to the right and ready I have my oval. Guiding me from the oval I draw a couple of lines down and then at the base I have to take out three points so that the slug has a sideways position.
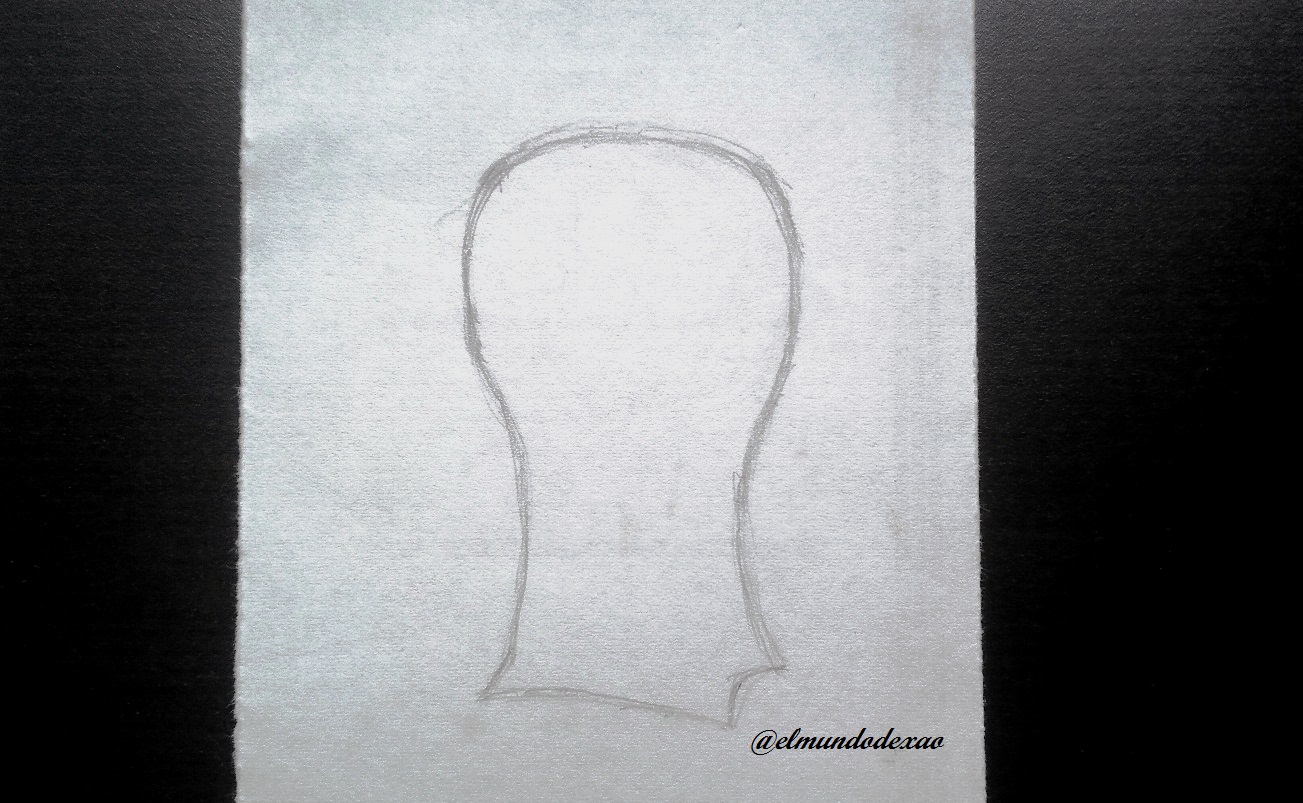
 Step # 02: Now I proceed to erase the lines that defined the circle and the oval so I can make the eyes; first I draw two elongated ovals which will serve for the frown and below these two half circles for the eye sockets; inside these a pair of small circles, one inside the other. It is great when just starting the drawing the characteristics are becoming well defined because many times it gets complicated to the point that I have to leave it and start another one because I don't get even the slightest resemblance.
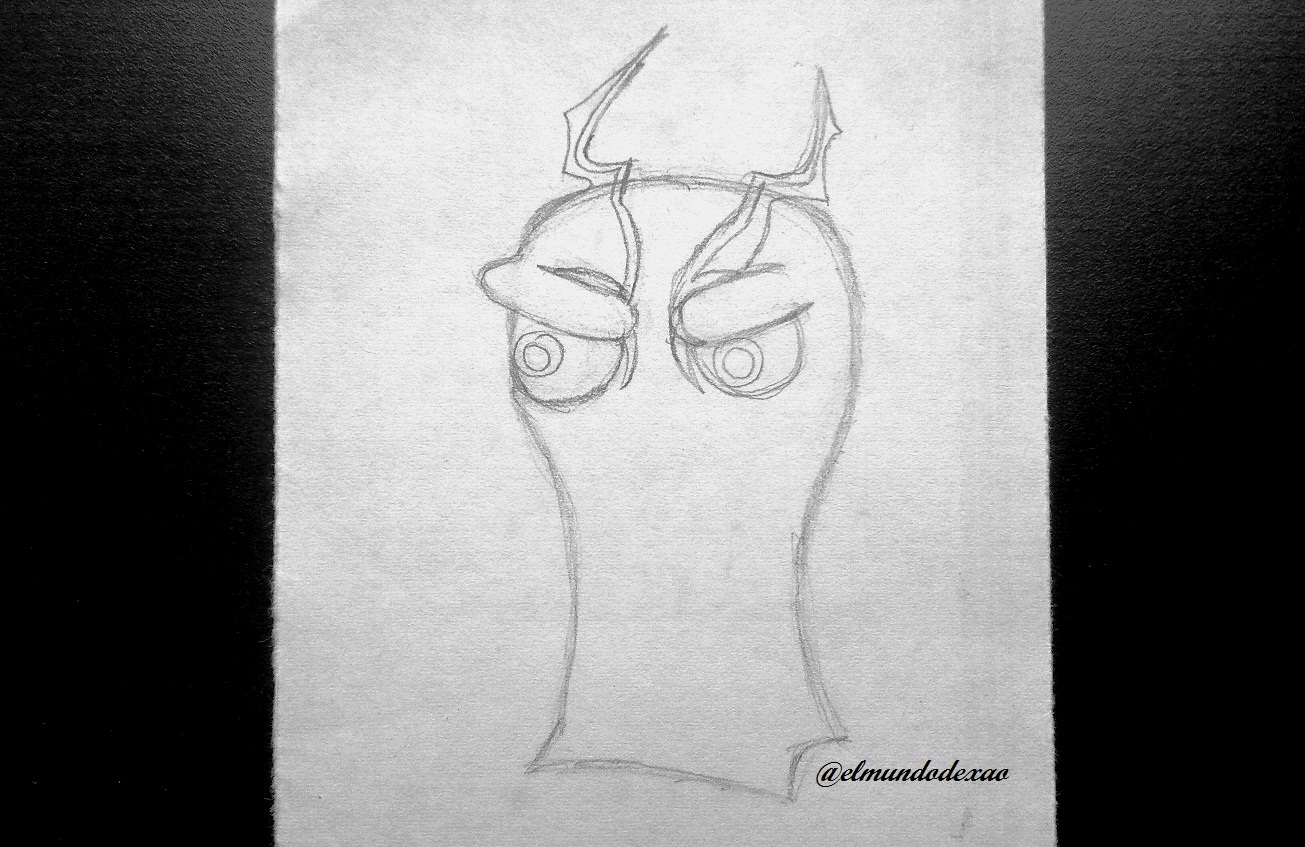
 Step # 03: As I already have the eyes ready; I can center the horns since they have a couple of stripes that go down to the eyes; this part is quite complicated because the colors that the image has does not help much to distinguish some details so I must go solving on my own. I draw a wavy line under the eyes, which will be the upper lip but before continuing with the mouth I will do the hands and clear my mind for a while since the mouth is a bit tedious to do.
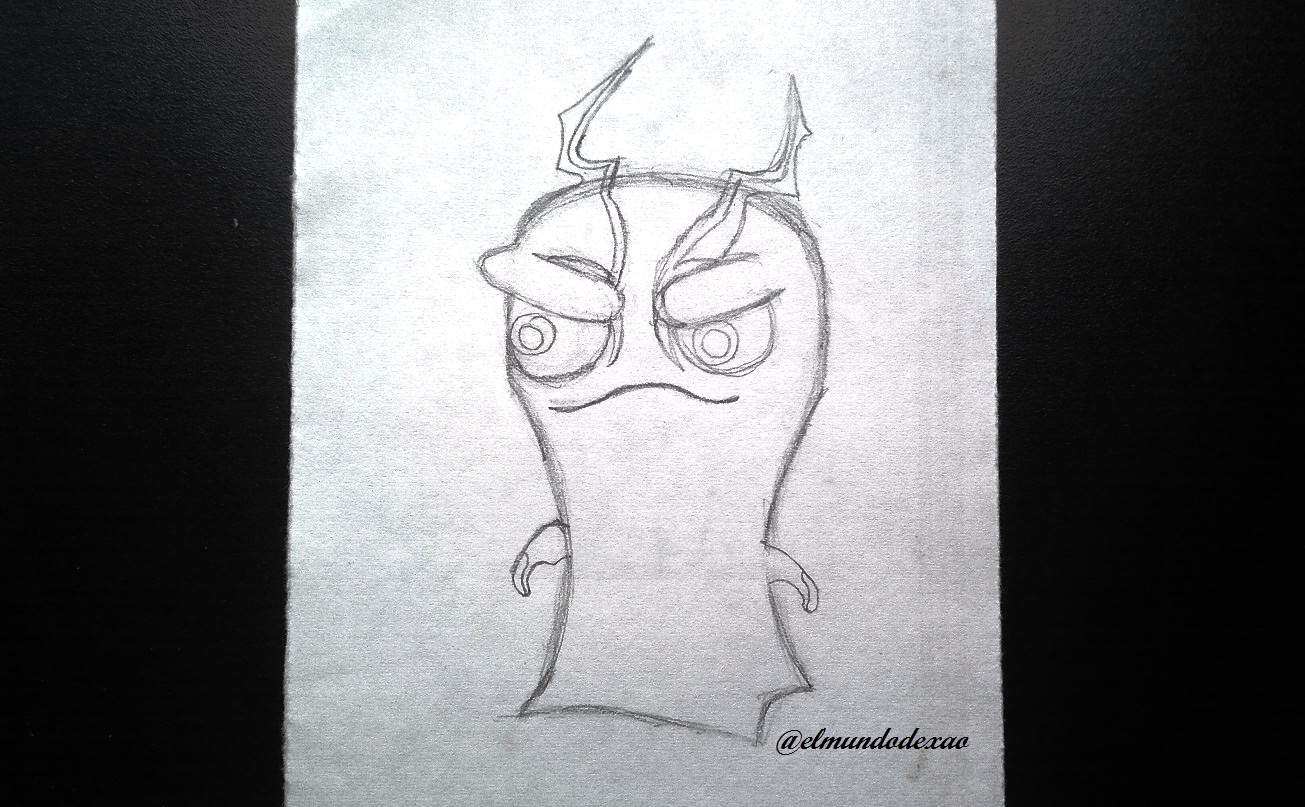 Step # 04: From the upper lip I draw an arched line downwards, like a big smile and then I draw four fangs above and four below and so I just need to make the lines that define the belly, in which I will add some spots similar to three drops of water, only that these are in an upward direction.
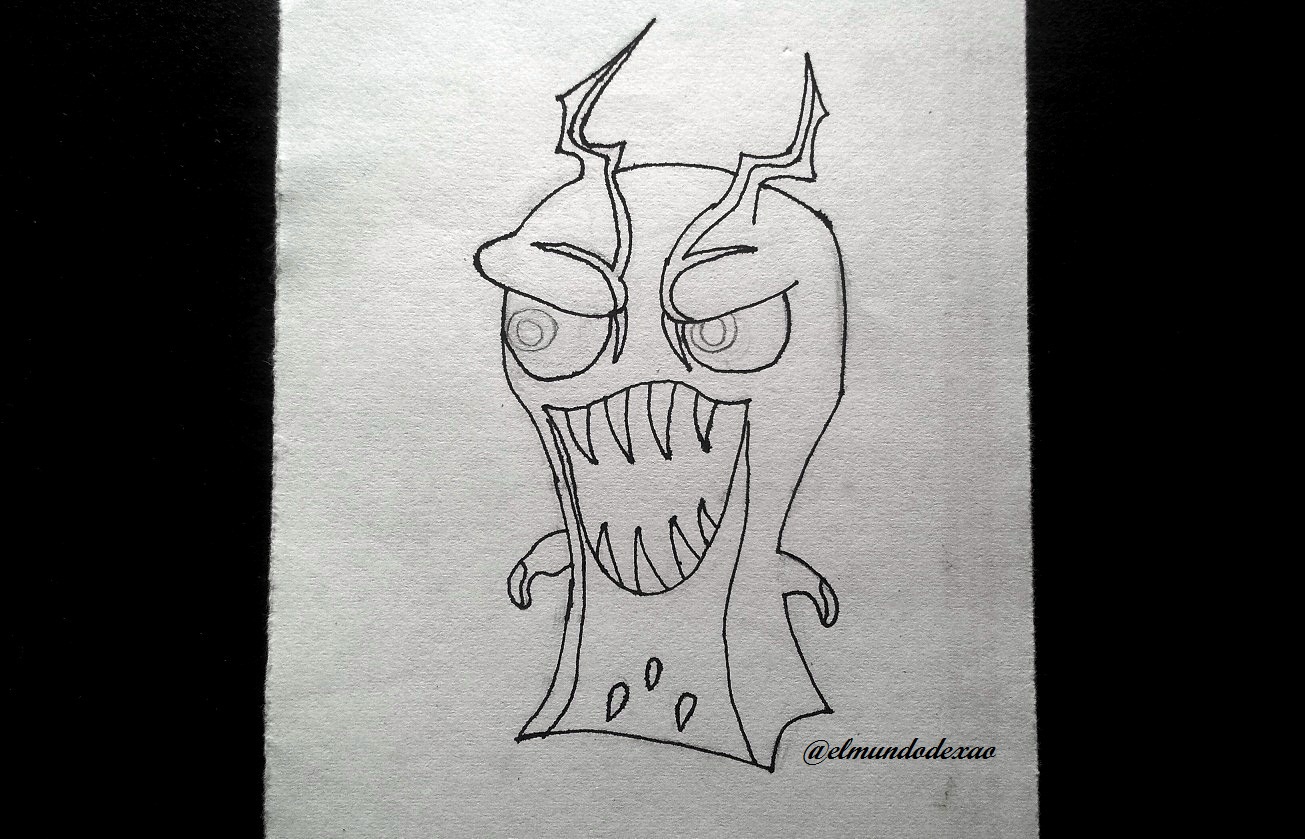
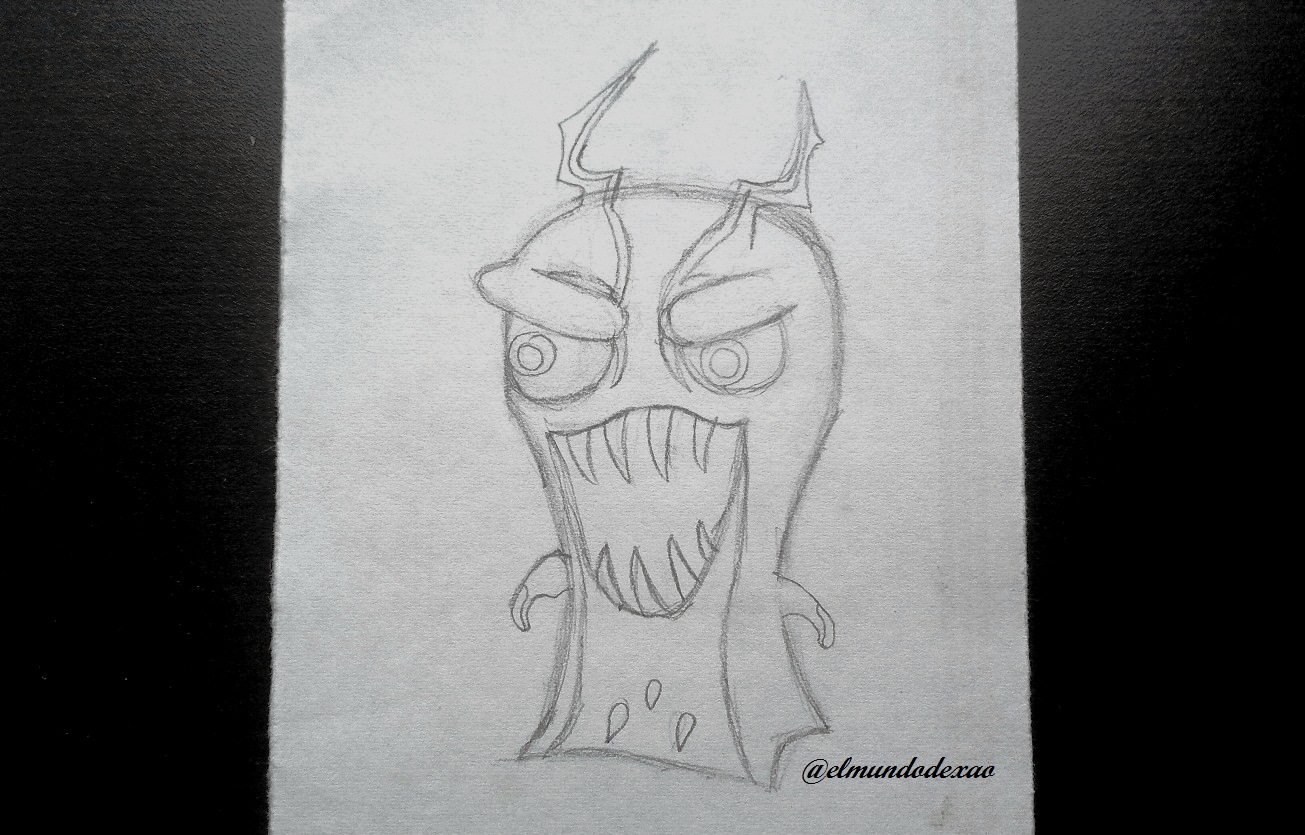 Step # 05: Now I am going to ink it in order to know if any detail is missing; once I finish I erase all the graphite and clean it; as you can see the result is much better than if I only use the pencil.
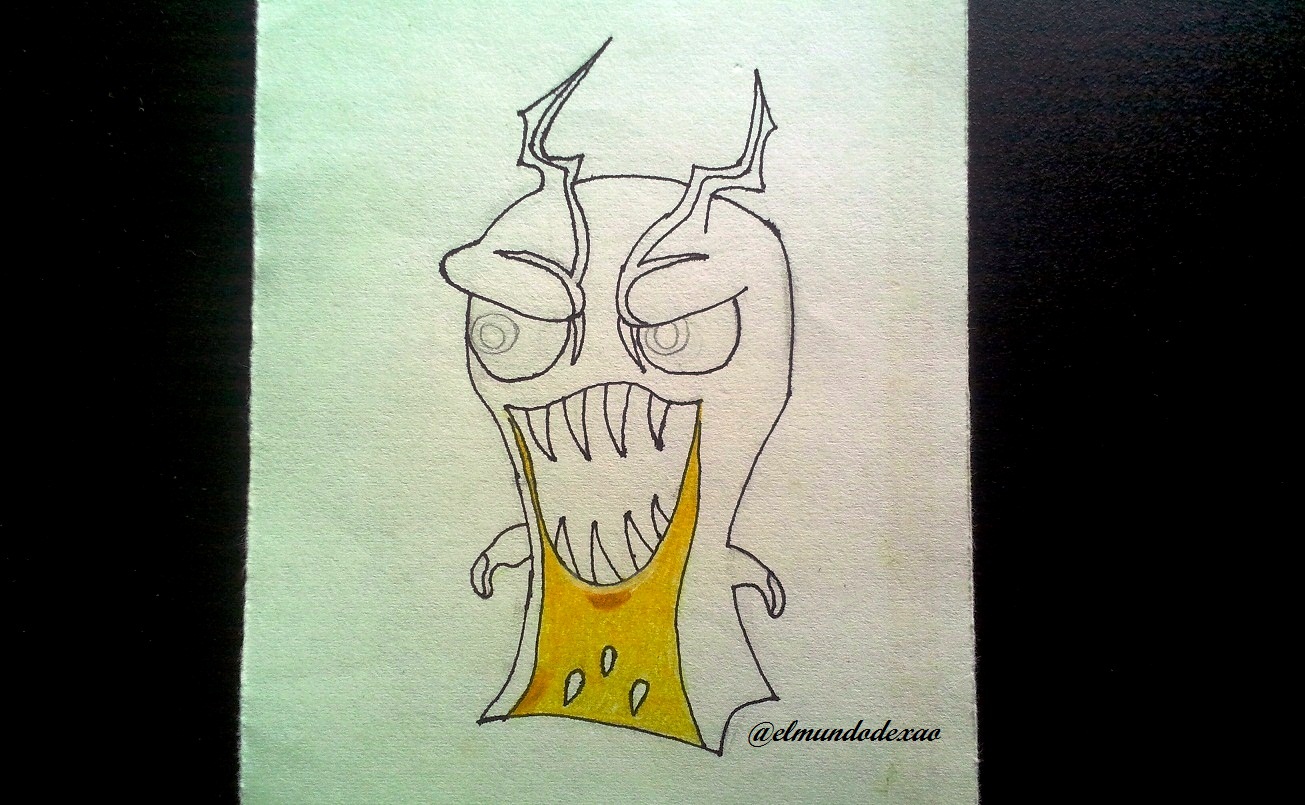
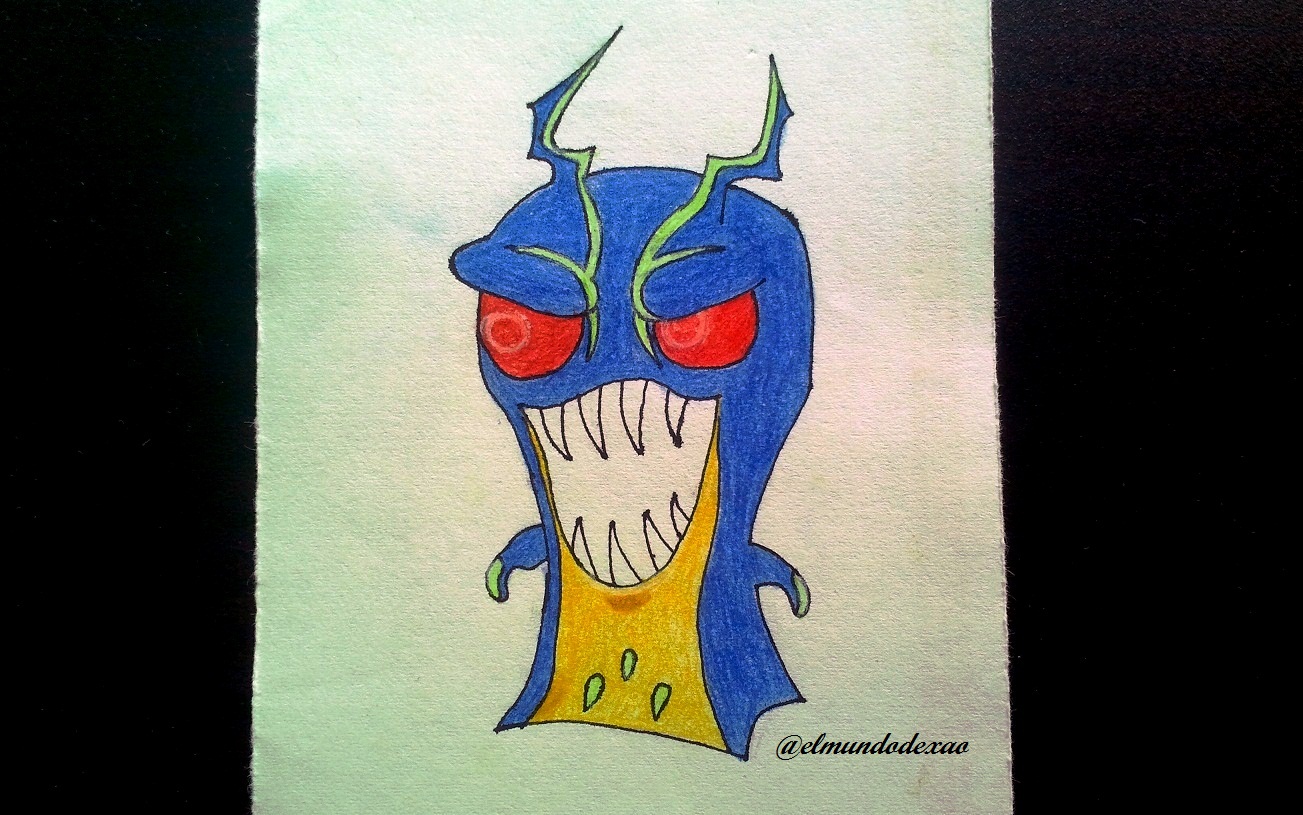
 Step # 06: I start to give her color and I will do it with a yellow tone for the belly and for the shadows I will use a brown; the spots on the belly and hands as well as the stripes on the horns I will use an apple green color. After seeing how it goes up to this point I had my doubts if that green would be the right one.
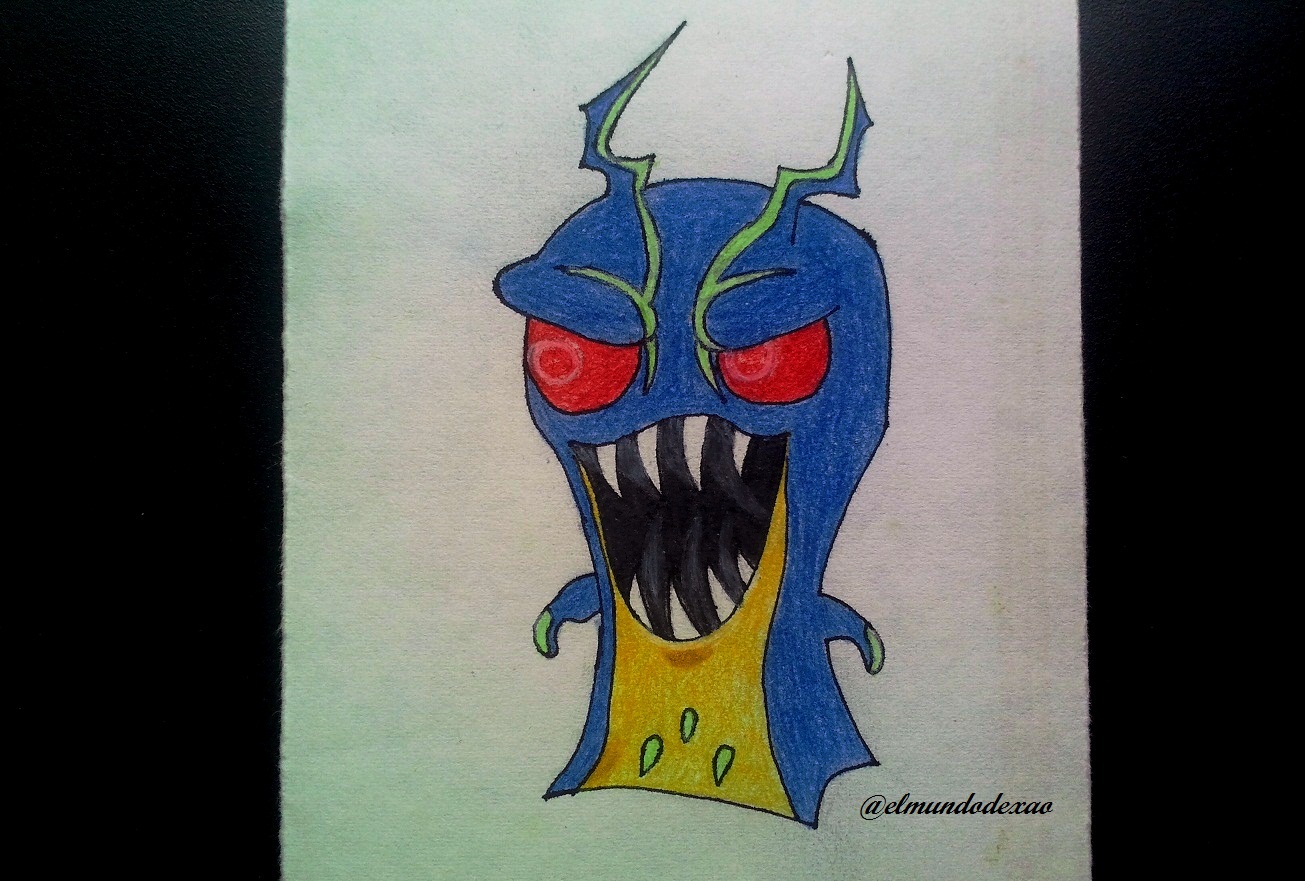
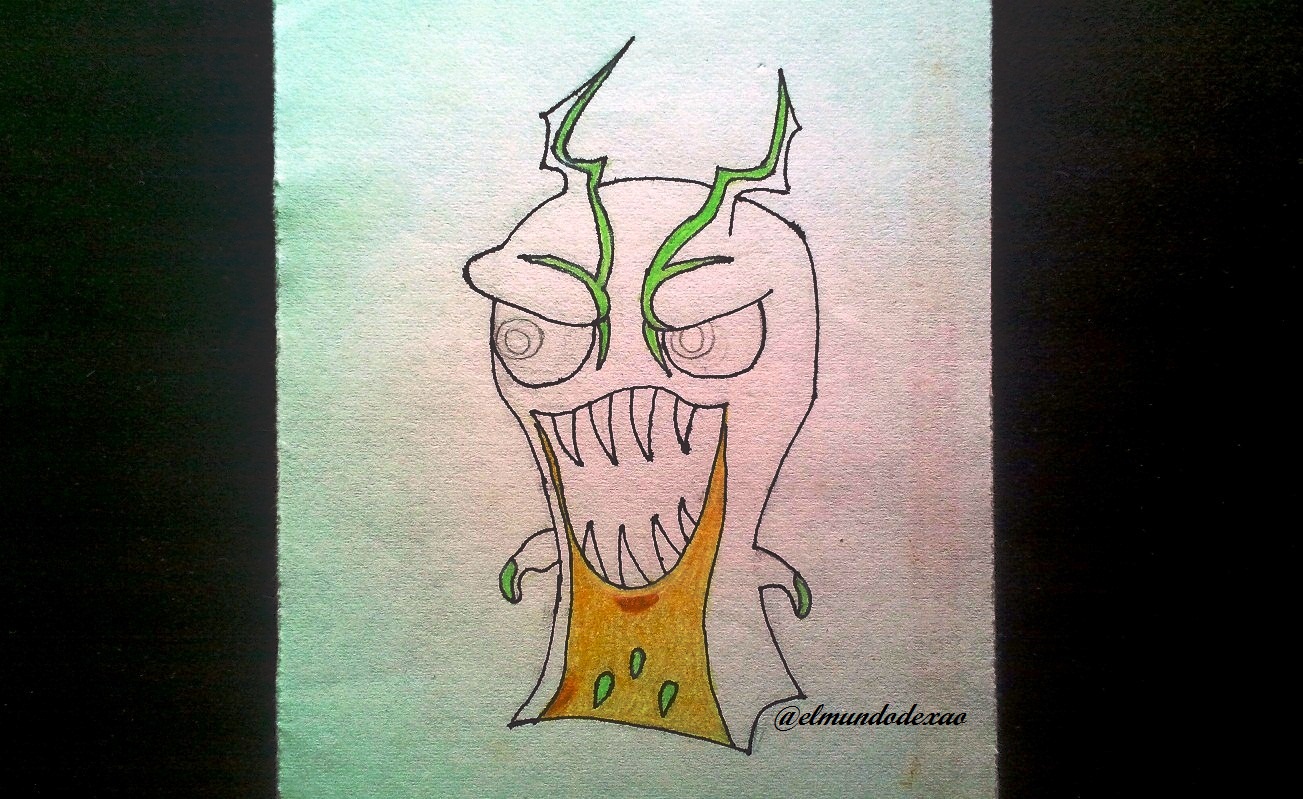 Step # 07: The rest of the body will have a blue color and once I'm done with the body I'm more convinced with the green of the horns. The eyes will be completely red with a small white ring to define the pupil. The inside of the mouth will have a black background and to give it a sense of depth I will use a white color to make arched lines towards the center of it.
 Step # 08: For the environment I wanted to do something that reflects its electric quality; so the ground is cracked by electric emanations that sprout everywhere as well as around its horns you can see some rays and so I end this publication; I say goodbye wishing you a nice morning, afternoon or evening depending on your location.
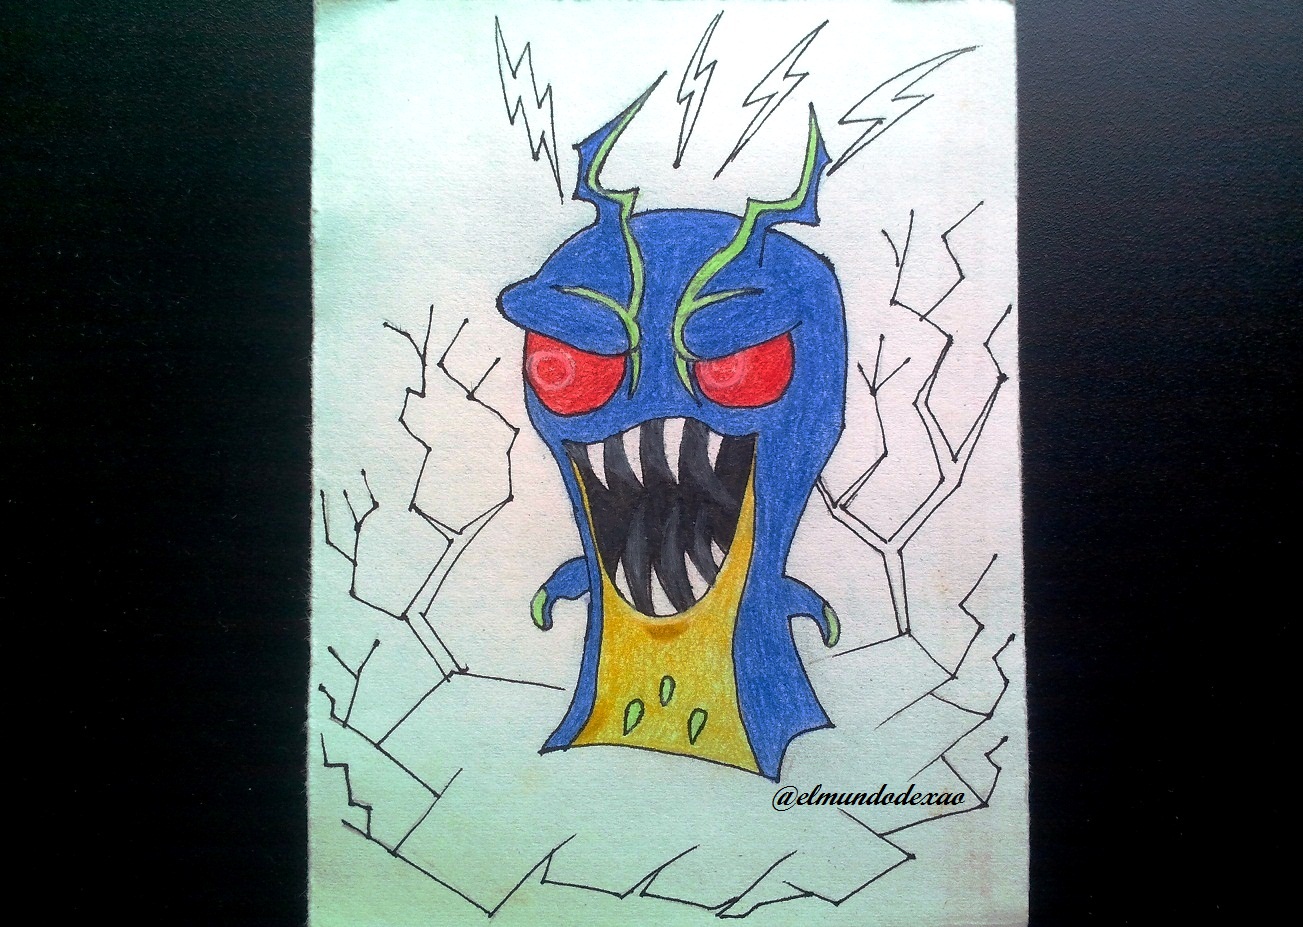
Photo Source: Own photos captured with a Síragon camera.
Modified size: With the Paint Program.
Thanks for visiting my Blog… AH! Don't forget to vote, reblogear, and comment.
Translated with:

www.DeepL.com/Translator (free version)

Dibujando la Babosa Amperling de Bajoterra.
Hola comunidad de Alien Art Hive, espero estén disfrutando de este fin de semana; hoy les mostrare mi nuevo dibujo de babosas malvadas de la serie animada bajoterra, para esta ocasión se trata de la babosa Amperling que vendría siendo la versión malvada de la Electroshock. Las cuales tienen poderes eléctricos.
A continuación menciono los materiales utilizados: Papel bond blanco de 52 g, portaminas 0.5, rotulador de 0.5, borrador y colores (Variedad de marcas).
Antes de continuar les comento que parte de mi aprendizaje lo desarrollo con vídeos o imágenes buscadas en Internet por lo que al final les dejare el enlace que use en esta ocasión.
Comencemos con el paso a paso del dibujo:
Paso # 01: Comenzare haciendo un ovalo para la cabeza pero como pueden ver me ha salido un circulo; este tipo de cosas suelen sucederme cuando trato de hacer un circulo muchas veces me sale un ovalo, para corregir esto lo agrando un poco hacia la derecha y listo ya tengo mi ovalo. Guiándome desde el ovalo trazo un par de líneas hacia abajo y luego en la base debo sacar tres puntas para poder lograr que la babosa tenga una posición de lado.
Paso # 02: Ahora procedo a borrar las líneas que definieron el circulo y el ovalo y así poder hacer los ojos; primero dibujo dos óvalos alargados lo cuales servirán para el ceño fruncido y debajo de estos dos medio círculos para las cuencas de los ojos; dentro de estos un par de pequeños círculos, uno dentro del otro. Es genial cuando apenas empezando el dibujo las características van quedando bien definidas ya que muchas veces se complica al punto que debo dejarlo he iniciar otro porque no me sale ni el más mínimo parecido.
Paso # 03: Como ya tengo los ojos listos; puedo centrar los cuernos ya que estos tienen un par de rayas que bajan hasta los ojos; esta parte es bastante complicada porque los colores que tiene la imagen no ayuda mucho a distinguir algunos detalles por lo que debo ir solucionando por mi cuenta. Trazo una línea ondulada debajo de los ojos, la cual será el labio superior pero antes de continuar con la boca haré las manos y me despejare un rato ya que la boca es un poco tediosa de hacer.
Paso # 04: Desde el labio superior trazo una línea arqueada hacia abajo, como una gran sonrisa y luego dibujo cuatro colmillos arriba y cuatro abajo y así solo falta hacer las líneas que definen la panza, en la que agregare unas manchas parecidas a tres gotas de agua, solo que estas están en dirección hacia arriba.
Paso # 05: Ahora voy a entintarlo para poder saber si falta algún detalle; una vez termino borro todo el grafito y limpio; como podrán observar el resultado queda mucho mejor que si solo utilizo el lápiz.
Paso # 06: Comienzo a darle color y lo haré con un tono amarillo para la panza y para las sombras de esta utilizo un marrón; las manchas que tiene en la panza y manos como también para las rayas de los cuernos voy a usar un color verde manzana. Después de ver cómo va hasta este punto tuve mis dudas si ese verde seria el adecuado.
Paso # 07: El resto del cuerpo llevara un color azul y una vez termino con el cuerpo ya estoy más convencida con el verde de los cuernos. Los ojos serán completamente rojos con un pequeño aro de color blanco para definir la pupila. El interior de la boca tendrá un fondo negro y para darle una sensación de profundidad utilizare un color blanco para hacer trazados arqueados hacia el centro de esta.
Paso # 08: Para el entorno quise hacer algo que refleje su cualidad eléctrica; por lo que el suelo esta cuarteado por emanaciones eléctricas que brotan por todas partes al igual alrededor de sus cuernos se pueden apreciar algunos rayos y así termino esta publicación; me despido deseándoles una linda mañana, tarde o noche según sea su localización.
Fuente de Fotos: Propias capturadas con una cámara Síragon.
Modificado el tamaño: Con el Programa Paint.
Gracias por visitar mi Blog… ¡AH! No se olvide de votar, rebloguear y comentar.
Dear @elmundodexao,
May I ask you to review and support the Dev Marketing Proposal (https://peakd.com/me/proposals/232) we presented on Conference Day 1 at HiveFest?
The campaign aims to onboard new application developers to grow our ecosystem. If you missed the presentation, you can watch it on YouTube.
You cast your vote for the proposal on Peakd, Ecency, Hive.blog or using HiveSigner.
Thank you!
Hi @arcange, it's done.


Calidad esta babosa aunque asusta un poco, je, je.
Hola @lecumberre, me alegra le gustara; la idea es aumentar mi destreza para los detalles que en este tipo de personajes son más difíciles.

Le deseo un feliz inicio de semana.