(ESP - ING) Te enseño a elaborar estos hermosos zarcillos / I teach you how to make these beautiful tendrils
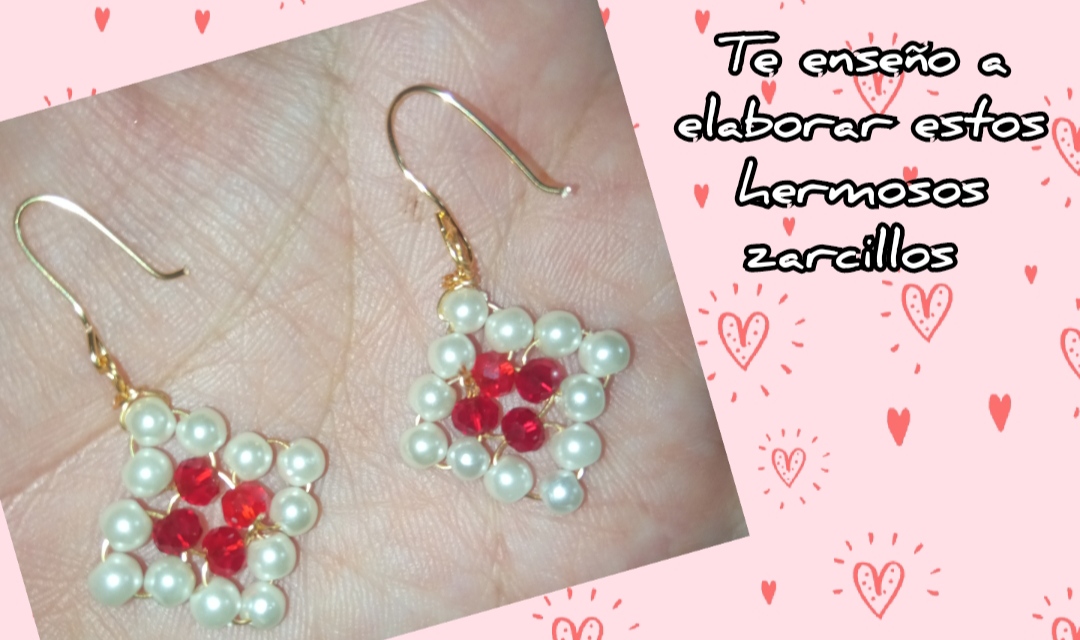
Feliz y bendecido día tengan todos ustedes, siento gran alegría y emoción de poder compartir con ustedes una de mis recientes creaciones unos aretes súper hermosos elegantes pero muy sencillos para crearlos nosotros mismos en casa del color y tamaño de nuestra preferencia y así poder lucirlos en cualquier ocasión. Para todos ustedes elaborado este post en forma de tutorial para que juntos podamos elaborar este hermoso diseño de manera muy fácil y sencilla.
Happy and blessed day to all of you, I feel great joy and excitement to be able to share with you one of my recent creations, super beautiful elegant but very simple earrings to create ourselves at home in the color and size of our preference and thus be able to Wear them on any occasion.
For all of you, I created this post in the form of a tutorial so that together we can create this beautiful design in a very easy and simple way.
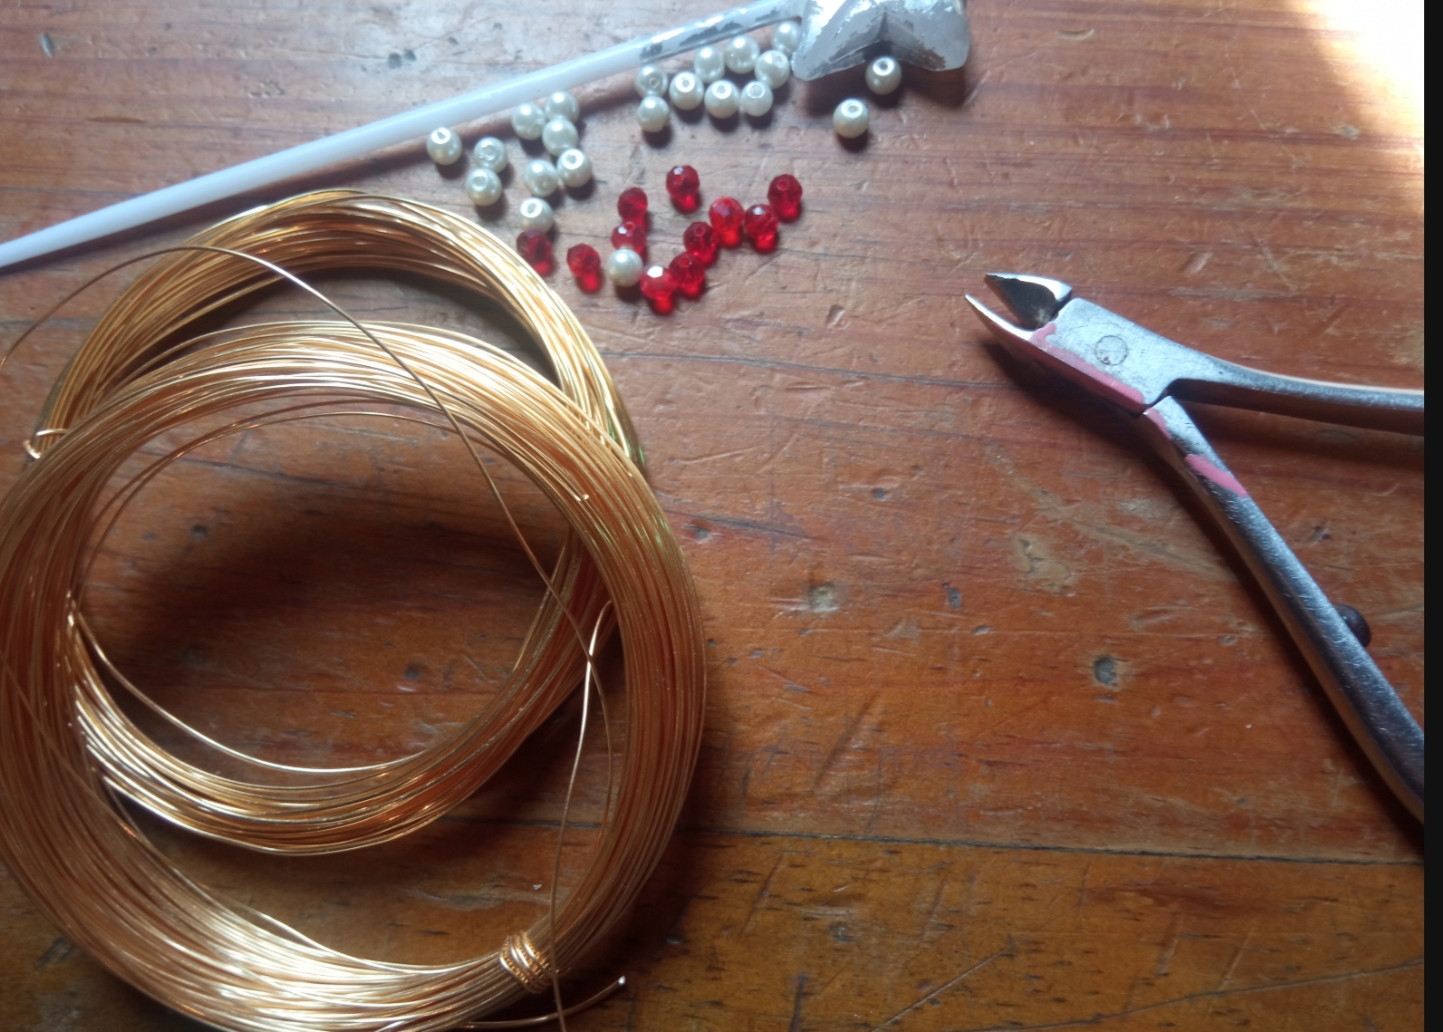
- Alambre de bisutería calibre 20.
- Alambre de bisutería calibre 26 o nylon fino.
- piedras perladas pequeñas.
- Cristales Rojos.
- pinza de bisutería.
- 20 gauge jewelry wire.
- 26 gauge jewelry wire or fine nylon.
- small pearl stones.
- Red Crystals.
- jewelry clamp.
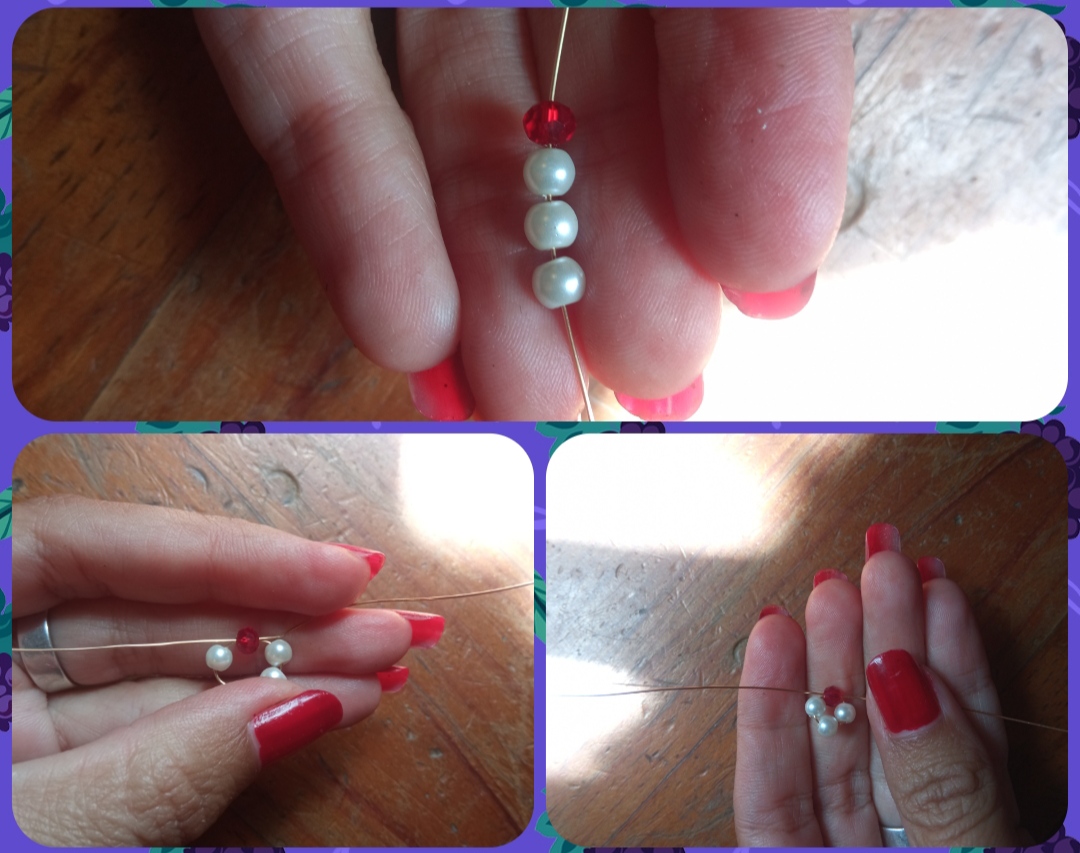
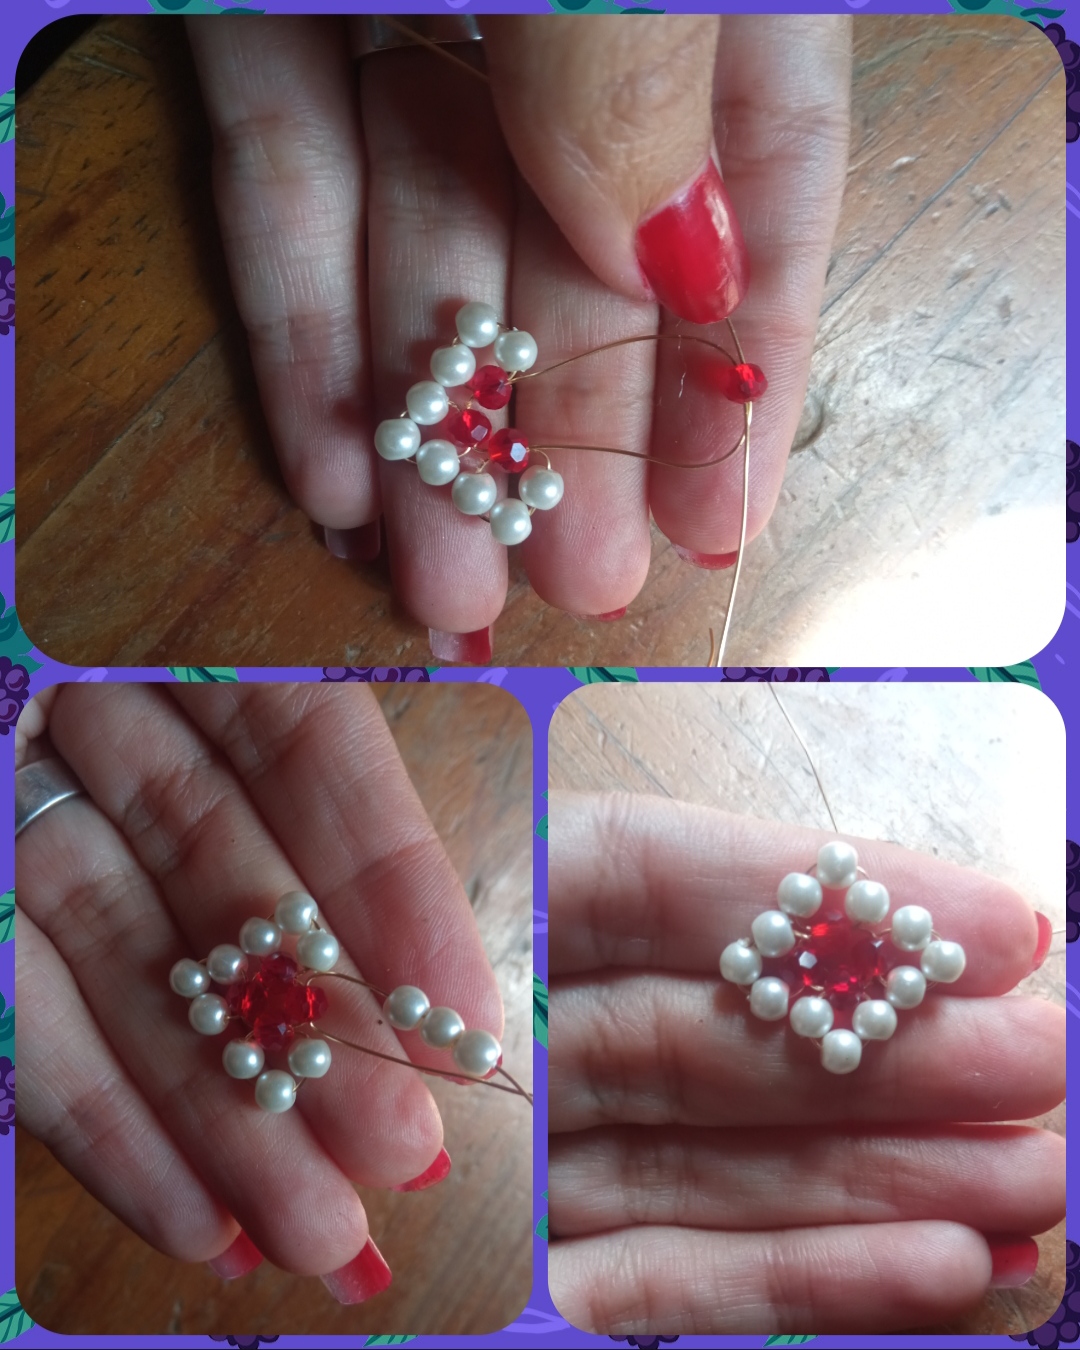
✴️ Paso 1:Como pueden observar en los materiales coloqué que podíamos usar alambre de bisutería calibre 26 o nylon pues con cualquiera de estos materiales podemos realizar estos hermosos zarcillos sin embargo yo los elaboré con alambre pues es el material con el que trabajo, para ustedes de más fácil uso Hernaldo también pueden elaborarlo siguiendo los mismos pasos. para iniciar la elaboración de este muy sencillo diseño lo primero que vamos a realizar es cortar un pedazo de alambre de bisutería calibre 26 o nylon de aproximadamente 15 cm, por este introduciremos tres piedras blancas perladas y un cristal rojo por este último tomaremos el otro extremo del alambre y lo introduciremos por el mismo cristal en forma cruzada que nos queden un extremo del nylo hacia la derecha y uno hacia la izquierda luego hablamos poco a poco y se nos formará esta linda forma que pueden ver a continuación.
✴️ Step 1: As you can see in the materials I indicated that we could use 26 gauge jewelry wire or nylon because with any of these materials we can make these beautiful tendrils, however I made them with wire because it is the material I work with , for those of you who are easier to use, Hernaldo can also make it following the same steps.
To start making this very simple design, the first thing we are going to do is cut a piece of 26 gauge jewelry wire or nylon of approximately 15 cm.
Through this we will insert three white pearl stones and a red crystal. For the latter we will take the other end. of the wire and we will introduce it through the same glass in a cross shape so that we have one end of the nylo to the right and one to the left. Then we talk little by little and this beautiful shape will be formed that you can see below.
✴️ Paso 2: ahora procedemos a a introducir por uno de los extremos del alambre un cristal rojo y tres piedras perladas blancas este alambre lo doblaremos hacia atrás y lo volveremos a introducir por el cristal rojo y hablaremos hasta que la forma quede ajustada tal cual pueden observarlo a continuación. Repetiremos este procedimiento una vez más introduciendo un cristal rojo tres piedras pelada blanca y devolviendo el nylon hacia el cristal rojo.
✴️ Step 2: now we proceed to introduce a red crystal and three white pearl stones through one of the ends of the wire. We will bend this wire backwards and reintroduce it through the red crystal and we will speak until the shape is adjusted as follows. which you can see below. We will repeat this procedure one more time by inserting a red crystal three peeled white stones and returning the nylon towards the red crystal.
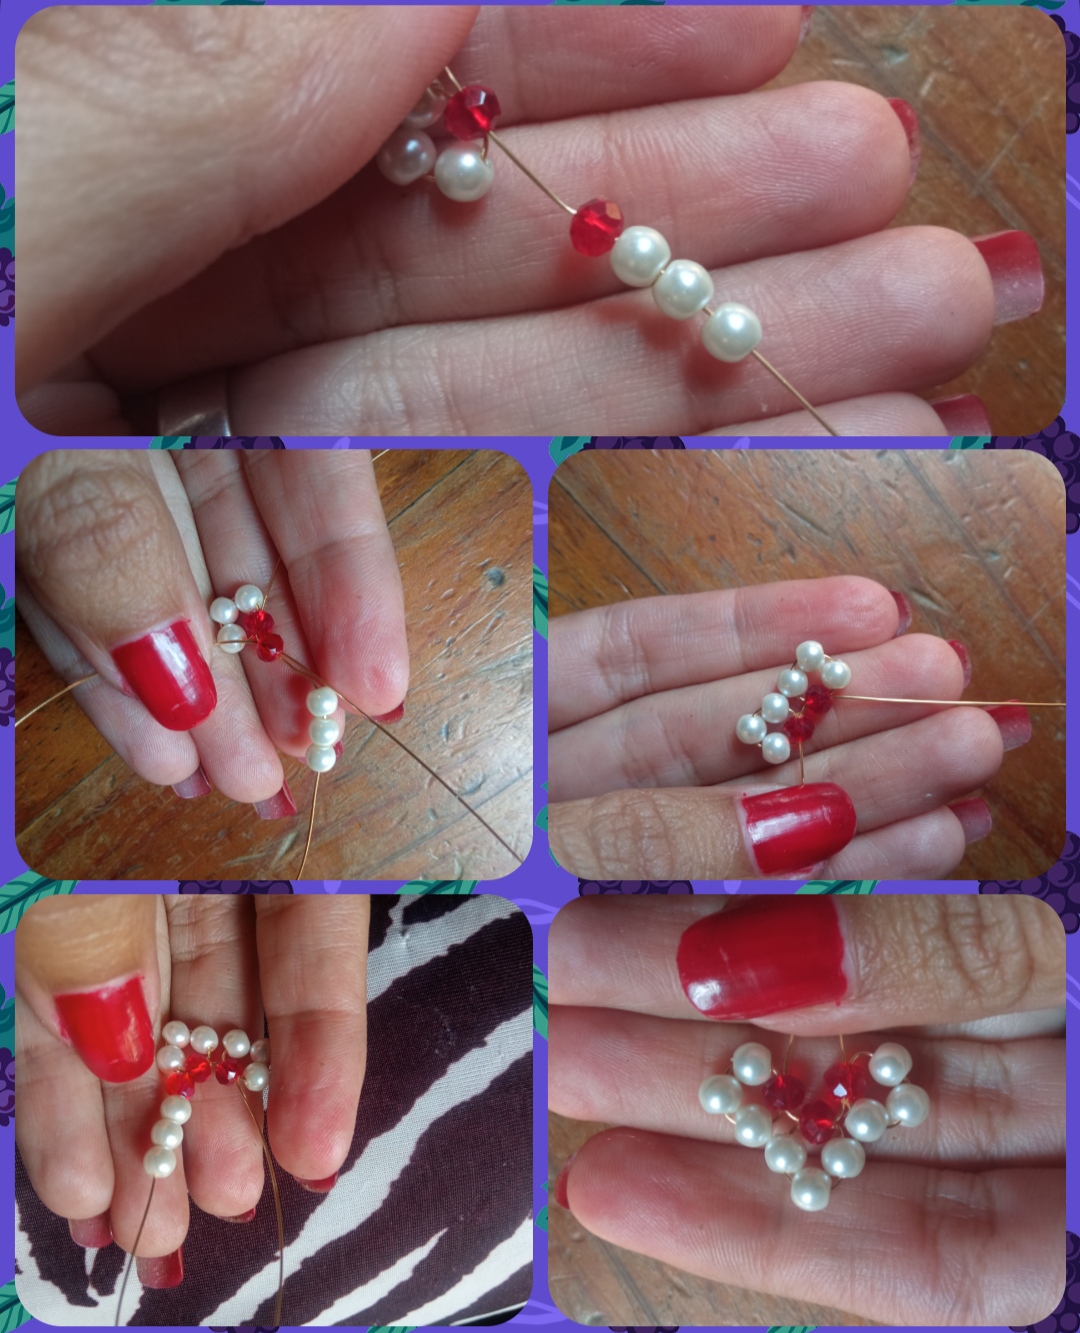
✴️ Paso 3: para continuar introduciremos un cristal rojo por el cual cruzaremos los dos pedazos de alambre y hablaremos para ajustar la forma y para culminar la hermosa creación introduciremos tres piedras perladas blancas por uno de los extremos de alambre y lo cruzaremos por este último cristal rojo. Por último cortaremos los excedentes o puntas del alambre.
✴️ Step 3: to continue we will introduce a red crystal through which we will cross the two pieces of wire and talk to adjust the shape and to complete the beautiful creation we will introduce three white pearl stones through one of the ends of the wire and we will cross it through this last red crystal. Finally we will cut the excess or ends of the wire.
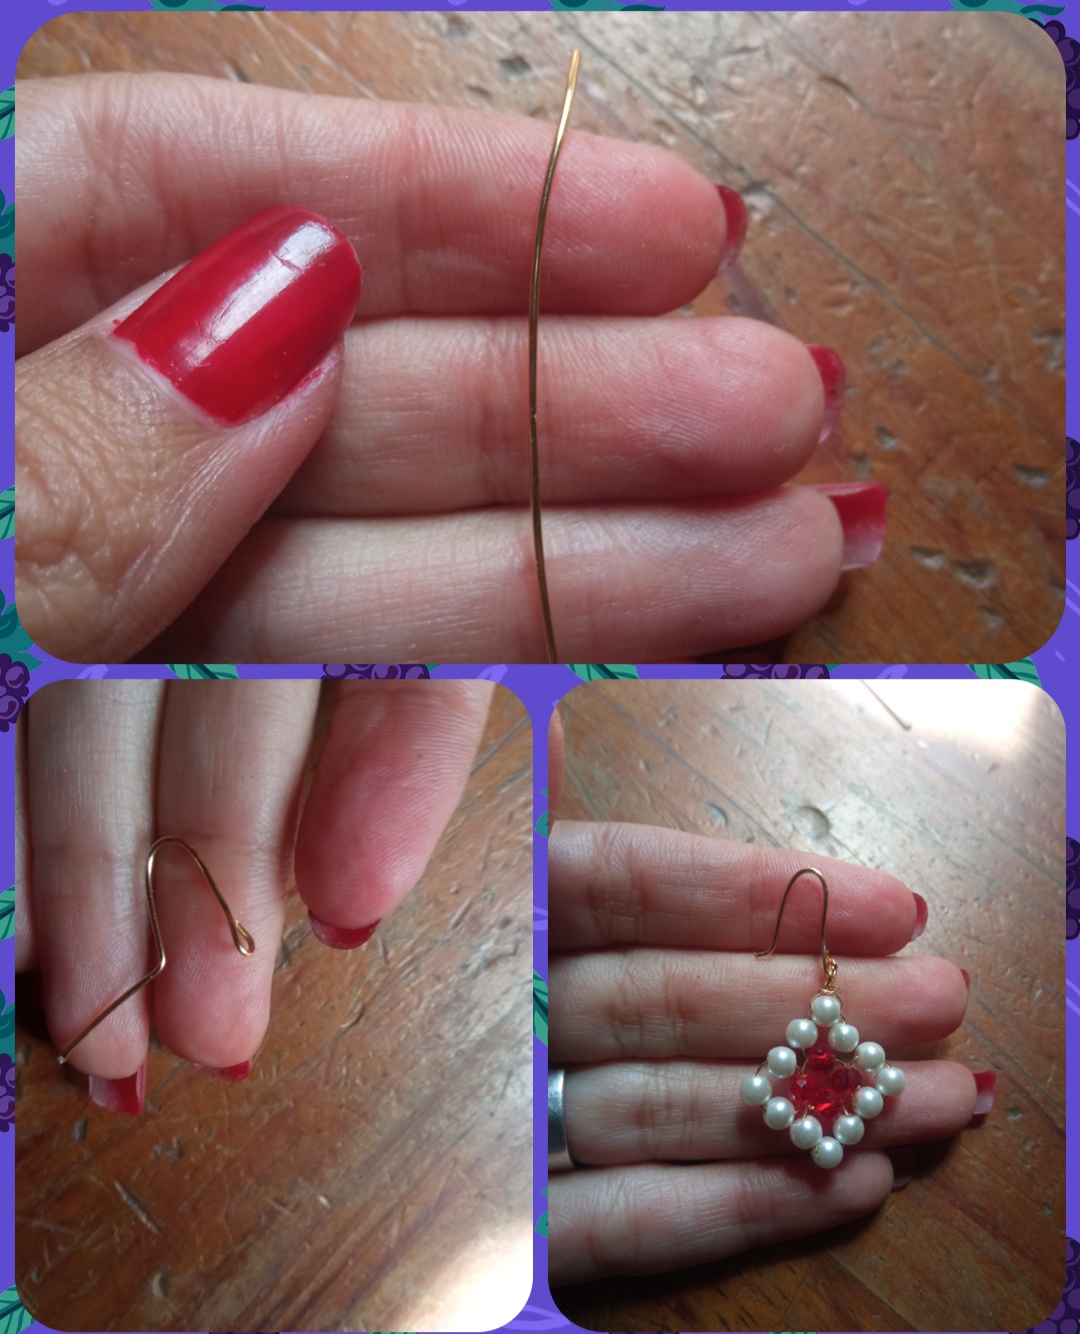
✴️ Paso 4: luego tomaremos otro pedazo de alambre bisutería calibre 26 de aproximadamente 6 cm lo introduciremos por uno de las piedras perladas blancas de las esquinas luego subiremos los extremos del alambre y nos enrollaremos uniéndolos para luego con ayuda de un palillo o la punta de una pinza elaborar una forma circular en forma de argolla como les muestro En las siguientes fotografías.
✴️ Step 4: then we will take another piece of 26 gauge jewelry wire of approximately 6 cm, we will insert it through one of the white pearl stones in the corners then we will raise the ends of the wire and we will roll it up, joining them and then with the help of a toothpick or the tip of a tweezer make a circular shape in the shape of a ring as I show you in the following photographs.
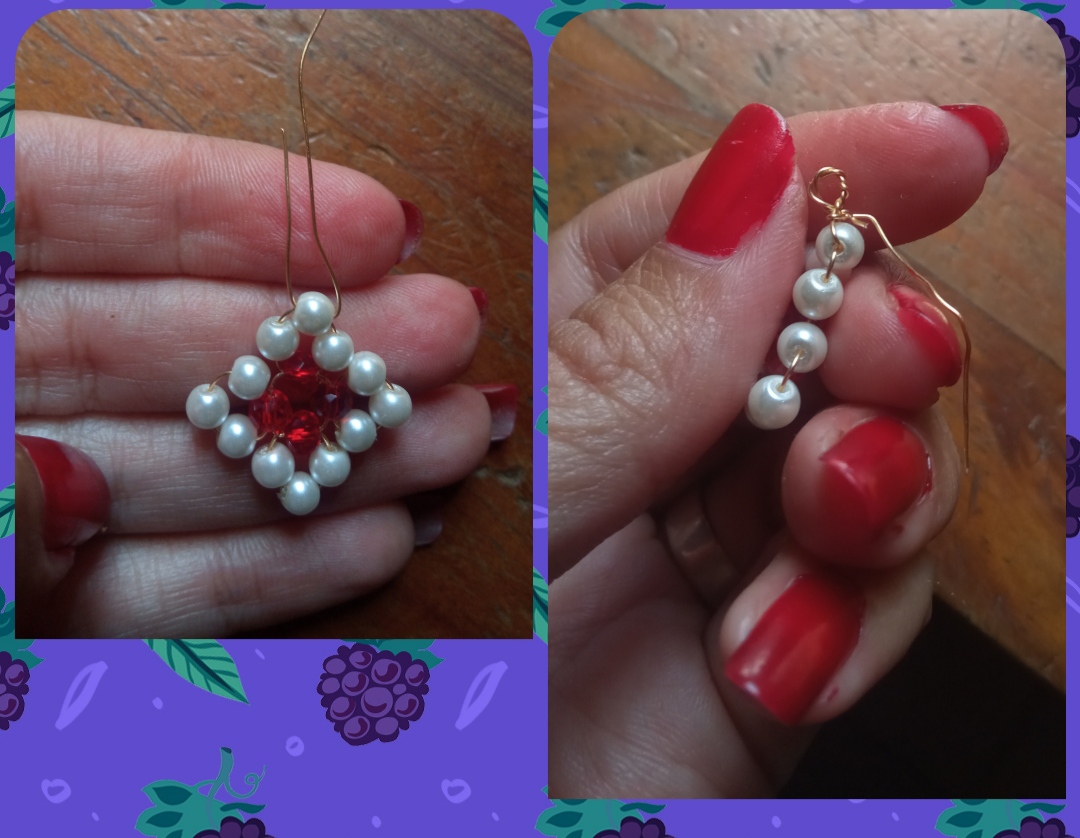
✴️ Paso 5: por último tomaremos 4 cm de alambre de bisutería calibre 20 y con ayuda de la pinza moldearemos y daremos forma a nuestro pequeño anzuelo para zarcillo este lo uniremos a la forma elaborada anteriormente Y así daremos forma a nuestro hermoso zarcillo.
✴️ Step 5: finally we will take 4 cm of 20 gauge jewelry wire and with the help of the tweezers we will mold and shape our small earring hook, we will attach it to the shape made previously and thus we will shape our beautiful earring .
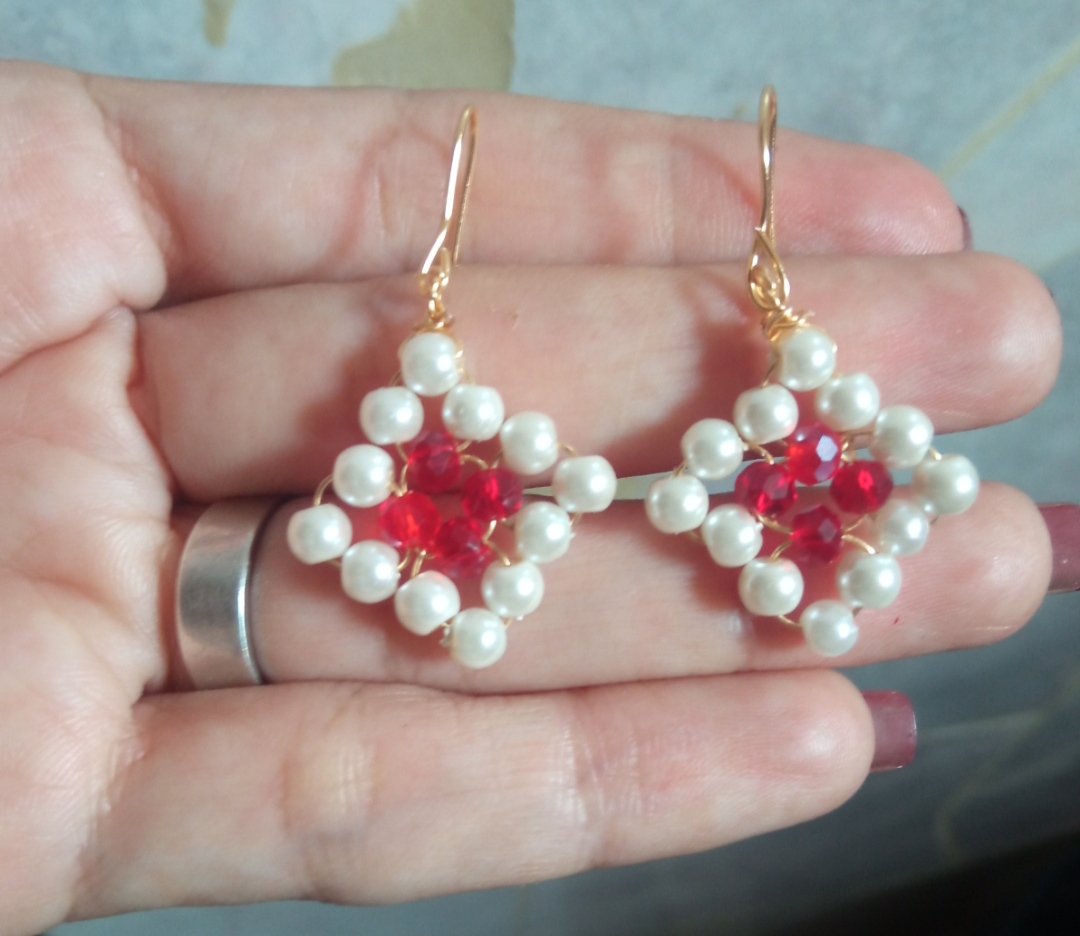
Todas las Fotos son de mi autoría y fueron tomadas con mi Celular Redmi 9And so, my dear and appreciated friends, we can obtain this very beautiful result, a beautiful design of tendrils which we can combine in different colors. I hope that this has been to the liking of all of you and that this simple tutorial will be useful and beneficial to you. I say goodbye for this opportunity, very grateful for your visit. happy weekend to all.
All Photos are my authorship and were taken with my Redmi 9 Cellphone
This is beautiful and nice design.
those are beautiful earnings thanks for sharing. keep sharing great content.
Thank you, I'm glad you liked it.
Hola, @emmaris!! Te han quedado muy hermosos, las perlitas combinadas con color rojo se ven muy bien. Saludos🌷
Me alegra que te haya gustado ☺️.
what beautiful tendrils you made and you used few tools which suits me as I don't have many tools to replicate it. cheers
Que lindos quedaron cariño, encantada de visitar tu publicación 🤗
Muchas gracias amiga 😊
How beautiful, it looks so delicate, wonderful, and your tutorial is excellent.