(ESP - ING) Colitas o moño para el cabello / Pigtails or hair bow
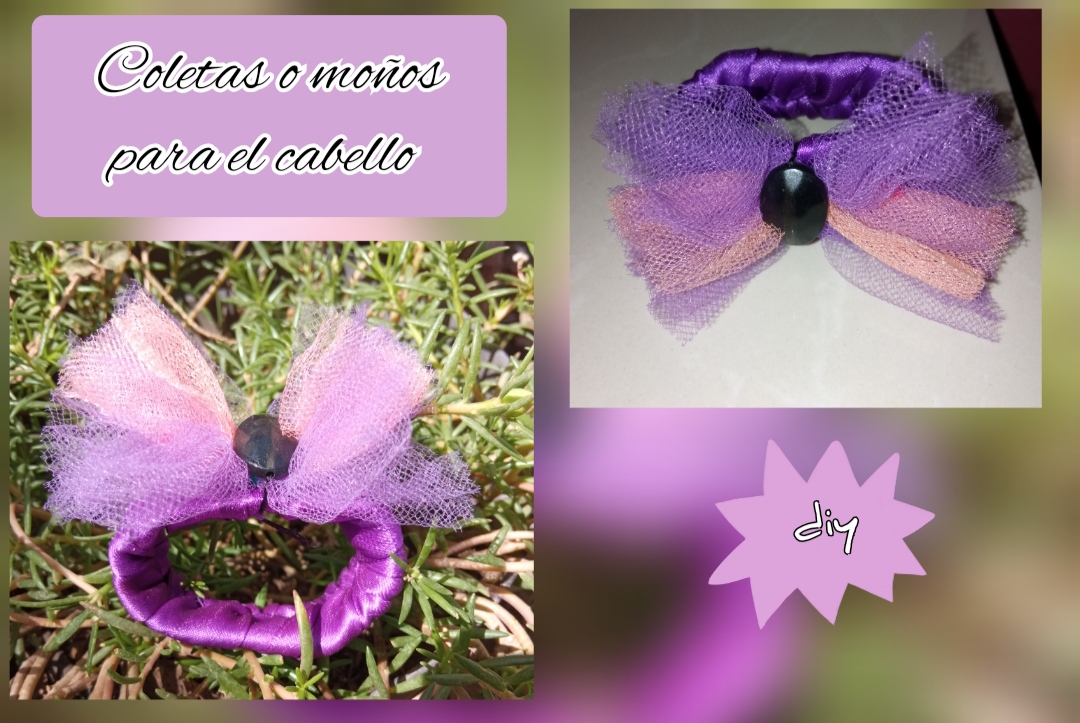
Feliz y bendecido día tengan todos ustedes mis amigos, el día de hoy quiero compartir con todos ustedes una muy sencilla elaboración de un diseño de lindas coletas para el cabello ideal para niñas y adultas, son súper fáciles de elaborar y muy económicas pues podemos realizarla con retazos de tela que tengamos en casa. Acá les comparto un sencillo paso a paso para que juntas podamos elaborar y obtener este lindo resultado.
Happy and blessed day to all of you my friends, today I want to share with all of you a very simple creation of a design of cute hair pigtails ideal for girls and adults, they are super easy to make and very economical because We can make it with scraps of fabric that we have at home.
Here I share a simple step by step so that together we can create and obtain this beautiful result.
- Tira elástica.
- un metro de cinta de 2cm.
- retazos de tela.
- piedra de bisutería.
- hilo y aguja.
- tijera.
- carton
- Elastic strap.
- one meter of 2cm tape.
- Pieces of cloth.
- jewelry stone.
- thread and needle.
- scissors.
- cardboard
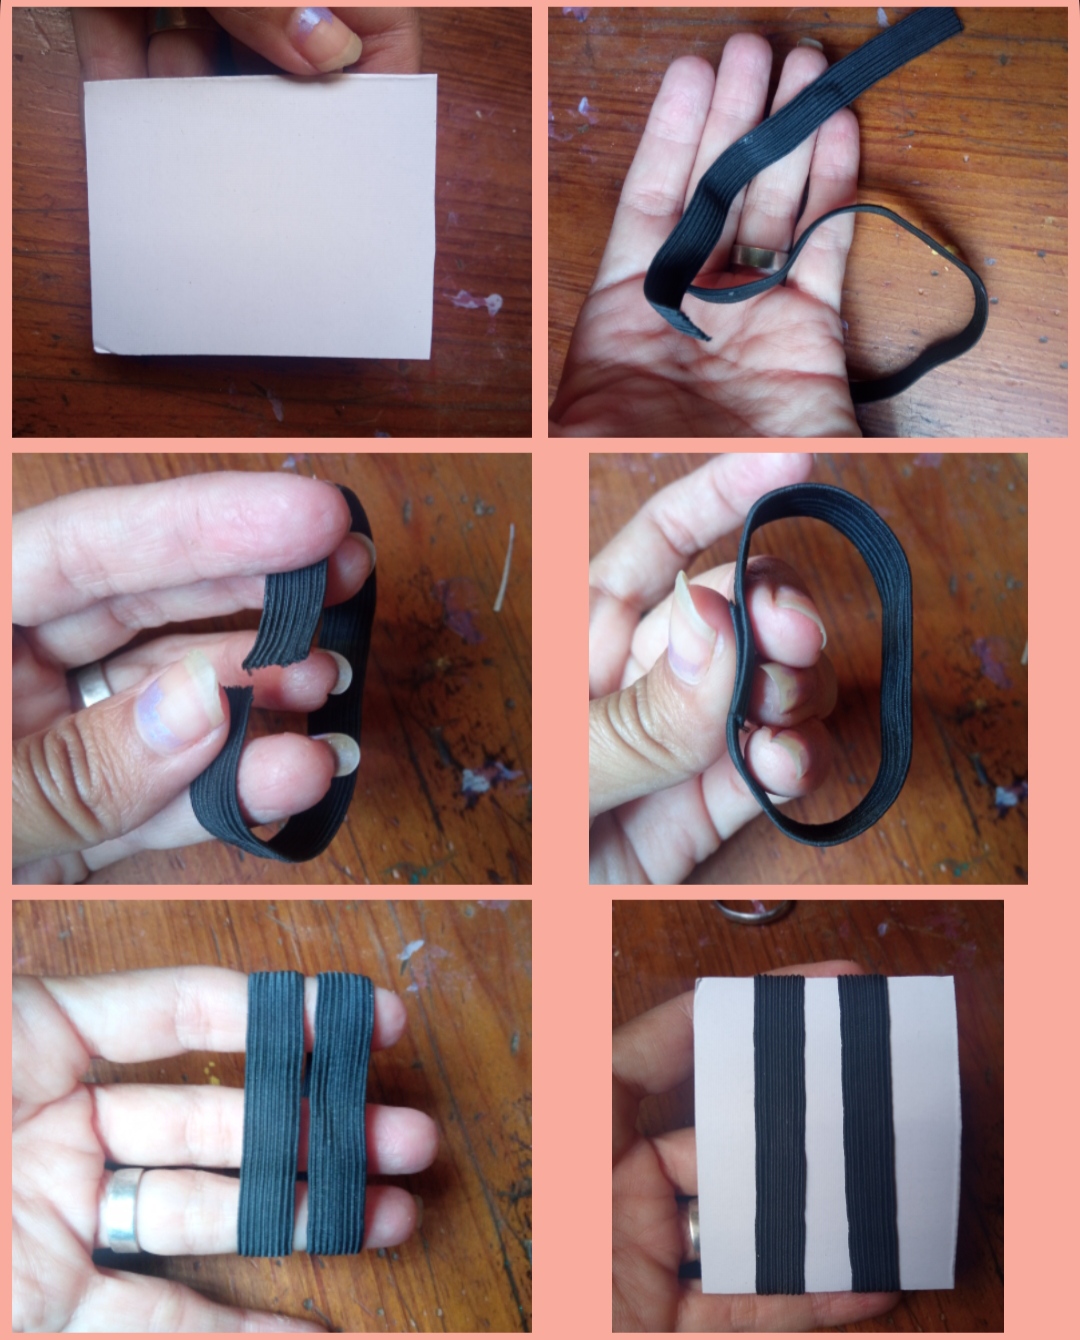
⭐ Paso 1: para iniciar la elaboración de este hermoso diseño lo primero que debemos realizar es tomar el cartón y cortaremos un pequeño rectángulo que nos servirá como base para nuestro trabajo. Seguidamente tomaremos la tira de elástico y cortaremos dos pedazos de aproximadamente 10 cm los cuales uniremos en sus extremos dando una forma circular y este los colocaremos en la base de cartón que hemos cortado anteriormente tal cual pueden observar en las siguientes imágenes.
⭐ Step 1: to start making this beautiful design, the first thing we must do is take the cardboard and we will cut a small rectangle that will serve as a base for our work.
Next we will take the elastic strip and cut two pieces of approximately 10 cm which we will join at their ends giving a circular shape and we will place them on the cardboard base that we have cut previously as you can see in the following images.
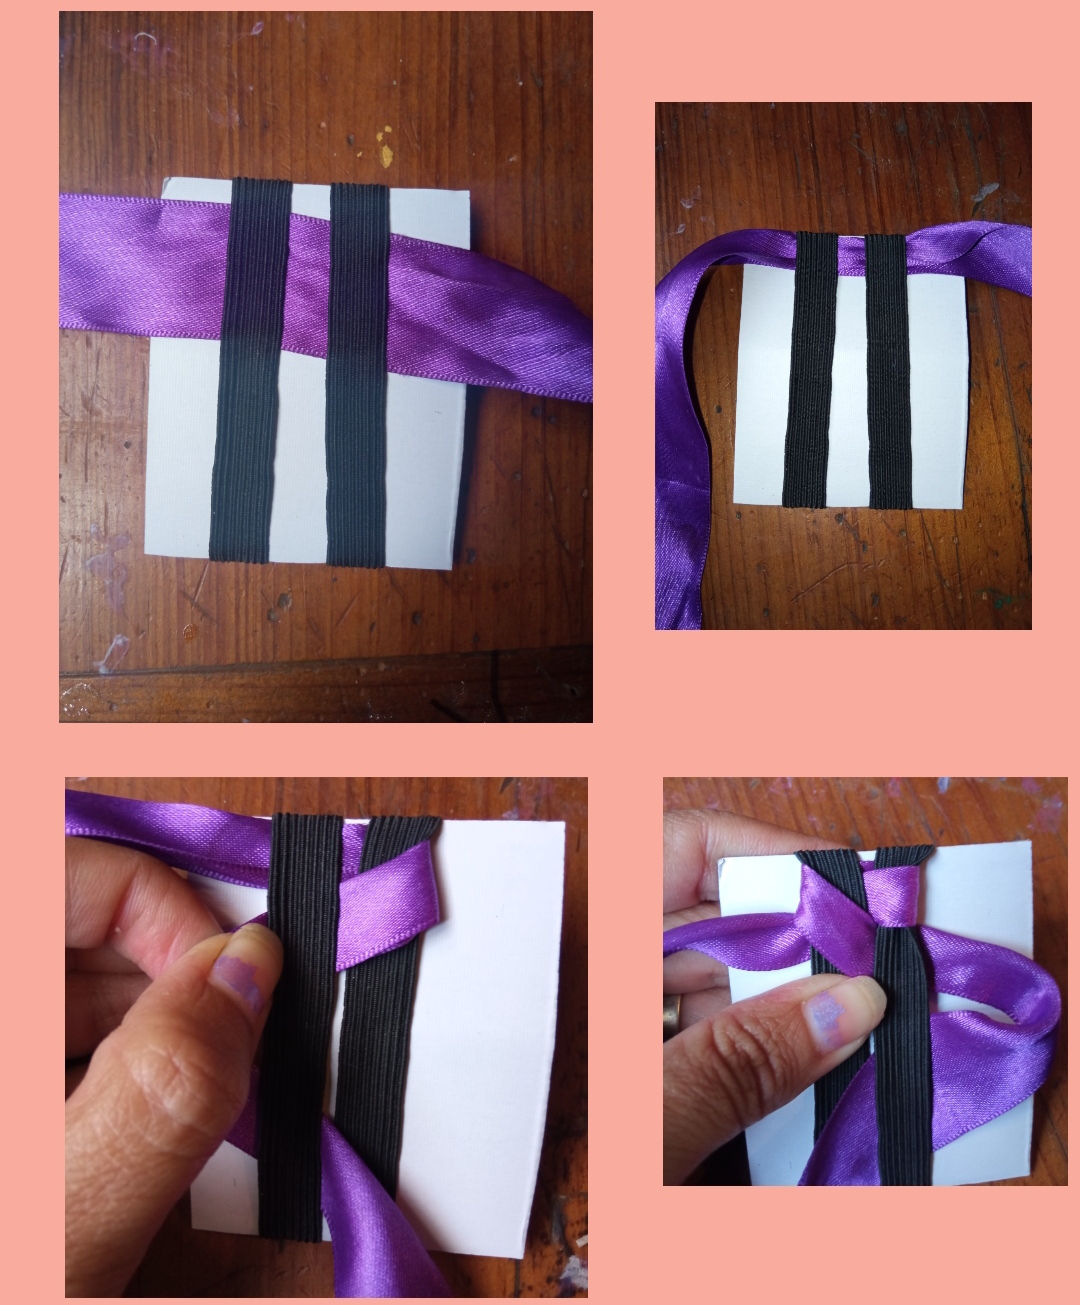
⭐ Paso 2: ahora tomaremos la cinta y la introduciremos por debajo de las dos tiras elásticas doblándola a su mitad y comenzaremos a realizar un tejido cruzando las cintas la delgado derecho la pasaremos por encima de la cinta elástica derecha y por debajo de la cinta elástica izquierda luego tomaremos la cinta del lado izquierdo y la cruzaremos hacia el otro lado por encima de la tira elástica izquierda y por debajo de la tira elástica derecha. Este procedimiento lo vamos a elaborar poco a poco para que se vaya creando un hermoso tejido como pueden observarlo En las siguientes imágenes.
⭐ Step 2: now we will take the tape and introduce it under the two elastic strips, folding it in half and we will begin to make a weave by crossing the tapes. The thin right one will pass it over the right elastic tape and under the left elastic band then we will take the ribbon on the left side and cross it to the other side above the left elastic strip and below the right elastic strip.
We are going to carry out this procedure little by little so that a beautiful fabric is created as you can see in the following images.
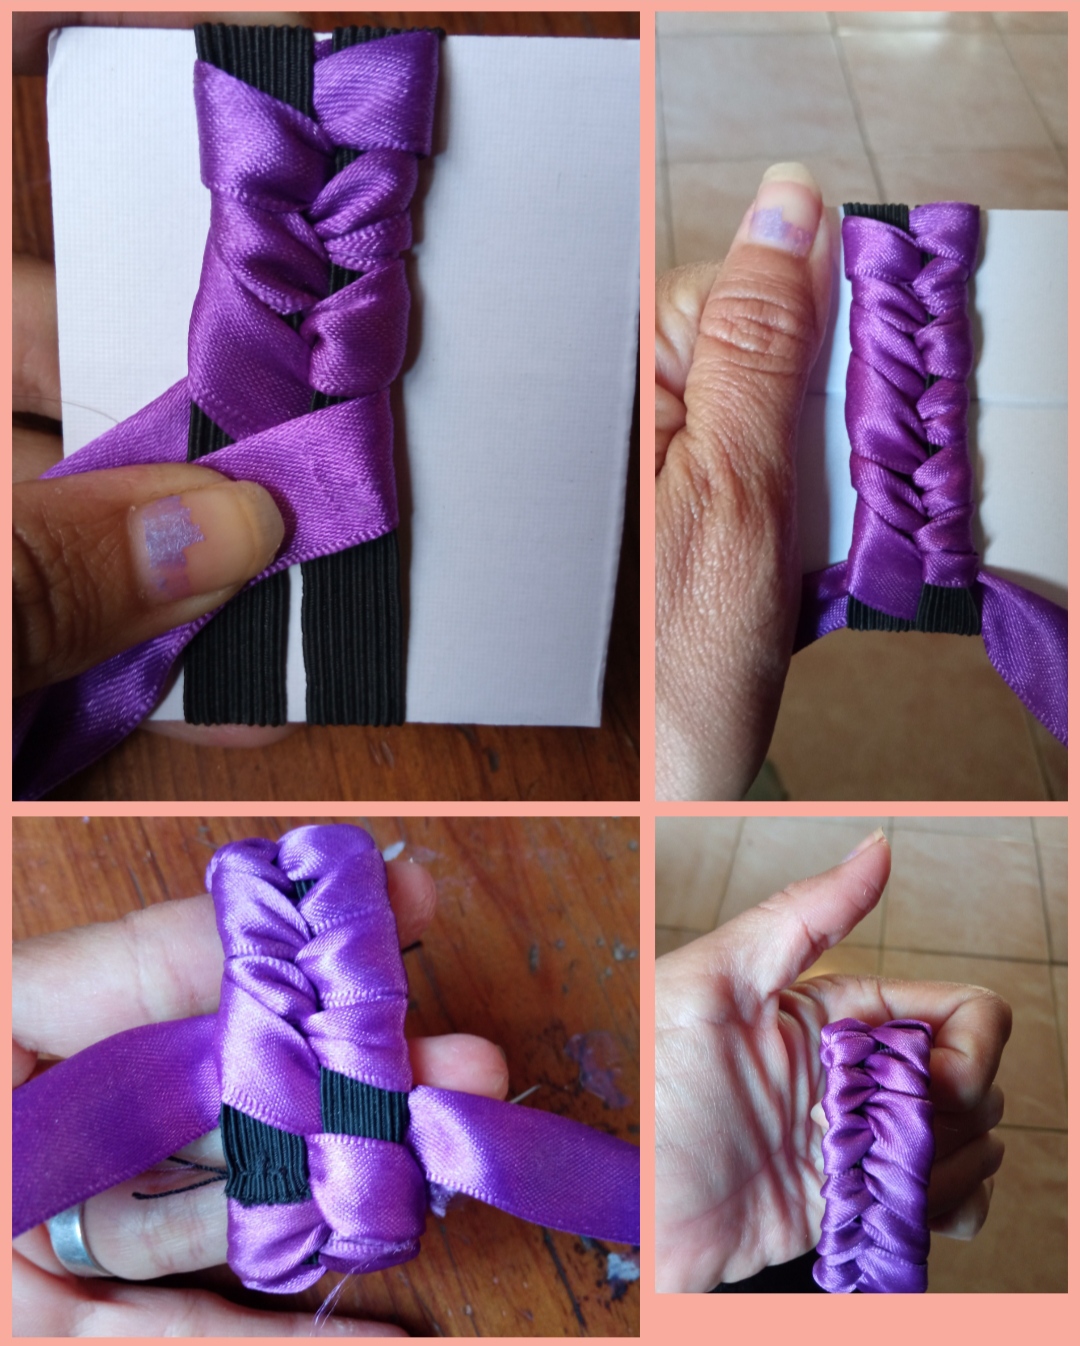
⭐ Paso 3: al culminar nuestro tejido es decir cuando lleguemos al inicio tomaremos el hilo y la aguja y lo uniremos para darle más seguridad a nuestra hermosa cola. Y podemos sacarlo de la base del cartón y podrán observar qué hermoso quedó nuestro tejido y ya así podría usarse sin embargo preferiblemente para tapar la unión debemos elaborar un lazo que le dará más vistosidad a nuestra hermosa cola para el cabello.
⭐ Step 3: at the end of our weaving, that is, when we get to the beginning, we will take the thread and the needle and join it to give more security to our beautiful tail.
And we can take it out of the base of the cardboard and you will be able to see how beautiful our fabric turned out and it could be used, however, preferably to cover the joint we must make a bow that will give more attractiveness to our beautiful hair ponytail.
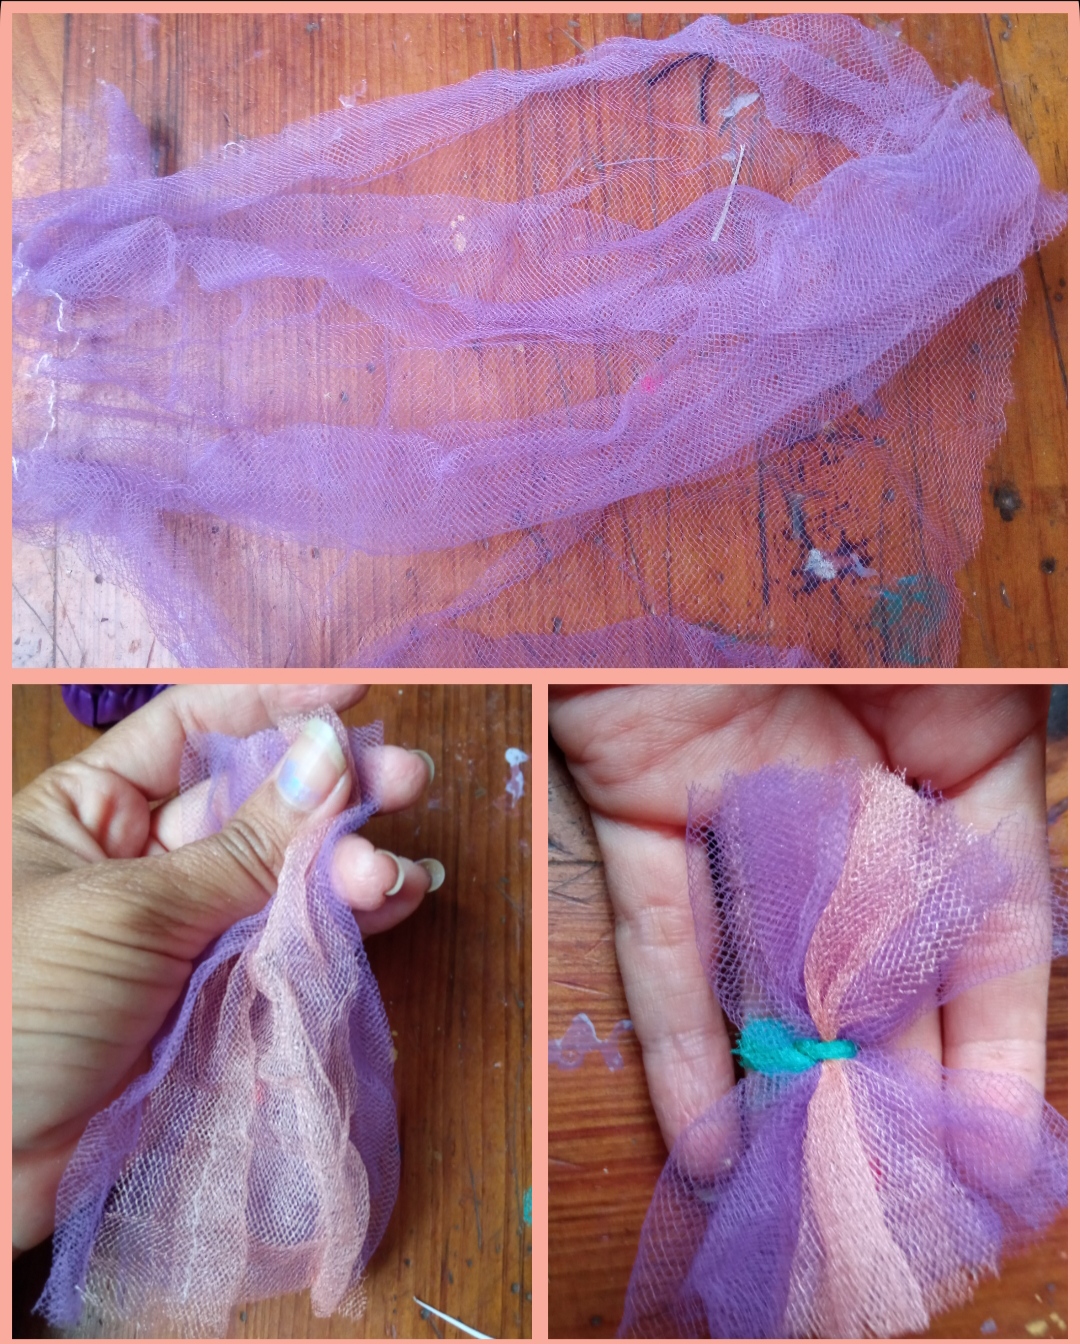
⭐ Paso 4: Para la elaboración de nuestro lazo simplemente tomamos dos tiras de la tela que no seleccionado para la elaboración de este detalle y cortaremos dos pedazos de aproximadamente 8 cm según sea el tamaño del que desee elaborar el lazo colocamos los pedazos uno encima de otro y con una tira muy delgada amarramos en el centro.
⭐ Step 4: To make our bow we simply take two strips of the fabric that was not selected for the making of this detail and we will cut two pieces of approximately 8 cm depending on the size of the one you want to make the bow, we place the pieces one on top of the other and with a very thin strip we tie in the center.
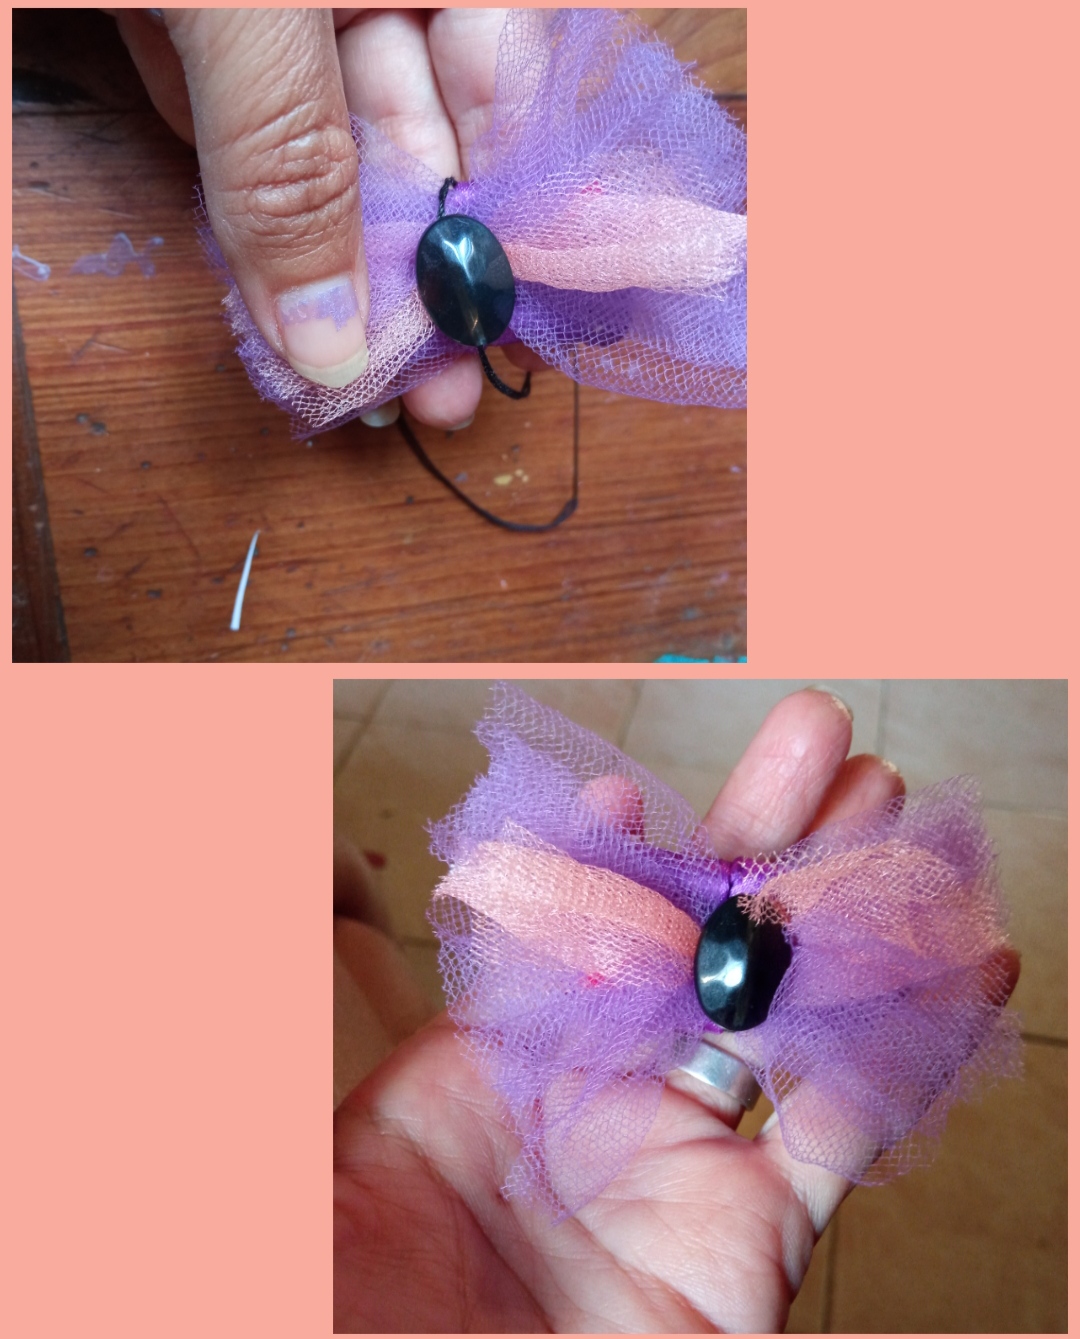
⭐ Paso 5: por último tomamos el lazo que hemos elaborado y con la aguja y el hilo lo unimos a nuestra cola elástica con mucho cuidado para evitar pueda verse La Unión. Como último detalle con el mismo hilo coloqué una hermosa pedrería en el centro del lazo y así culminé mi hermoso moño para el cabello.
⭐ Step 5: finally we take the loop that we have made and with the needle and thread we attach it to our elastic tail very carefully to avoid seeing the Union. As a last detail, with the same thread I placed a beautiful rhinestone in the center of the bow and thus completed my beautiful hair bow.
Todas las Fotos son de mi autoría y fueron tomadas con mi Celular Redmi 9.And so, my dear and appreciated friends, in this simple, quick and economical way we can create beautiful bows for our hair, which would also be an excellent form of entrepreneurship.
I hope that this simple tutorial has been to the liking of all of you. I say goodbye for this opportunity, thanking you for your visit.
All Photos are my authorship and were taken with my Redmi 9 Cellphone
Wow I love this, I should try it out for my daughter
Thank you friend, I'm very glad you liked it 😊
Such a colorful hair bow. Nice work.
que lindas! quedo genial!
how cute! it looks great!