Te enseño a decorar una gorra para niña 🧢 / I teach you how to decorate a cap for a girl 🧢 (ESP - ING)

Feliz y bendecido día tengan todos ustedes mis amigos creativos de esta hermosa comunidad, el día de hoy quiero compartir con todos ustedes paso a paso cómo podríamos decorar o personalizar una gorra para nuestras niñas. Hace un par de días mi suegra como toda abuela sacó una pequeña gorra color azul pues según ella era del papá de la niña cuando era pequeño, la niña la tomó con mucho cariño pero como toda niña al mirar el color dijo que esta gorra era para niños y no la quiso colocar, yo como toda madre creativa enseguida le dije que la íbamos a decorar en casa y que le quedaría muy linda.
Happy and blessed day to all of you my creative friends from this beautiful community, today I want to share with all of you step by step how we could decorate or personalize a cap for our girls. A couple of days ago, my mother-in-law, like every grandmother, took out a small blue cap because according to her, it belonged to the girl's father when she was little.
The girl took it with great affection, but like every girl, when she looked at the color, she said that this cap was for children and she didn't want to put it up, I, like every creative mother, immediately told her that we were going to decorate it at home and that it would look very pretty on her.
I got home and started looking through the materials I had for an idea of how to decorate this little drop that my little girl might like and I came up with this cute decoration that I'm sharing with all of you below.
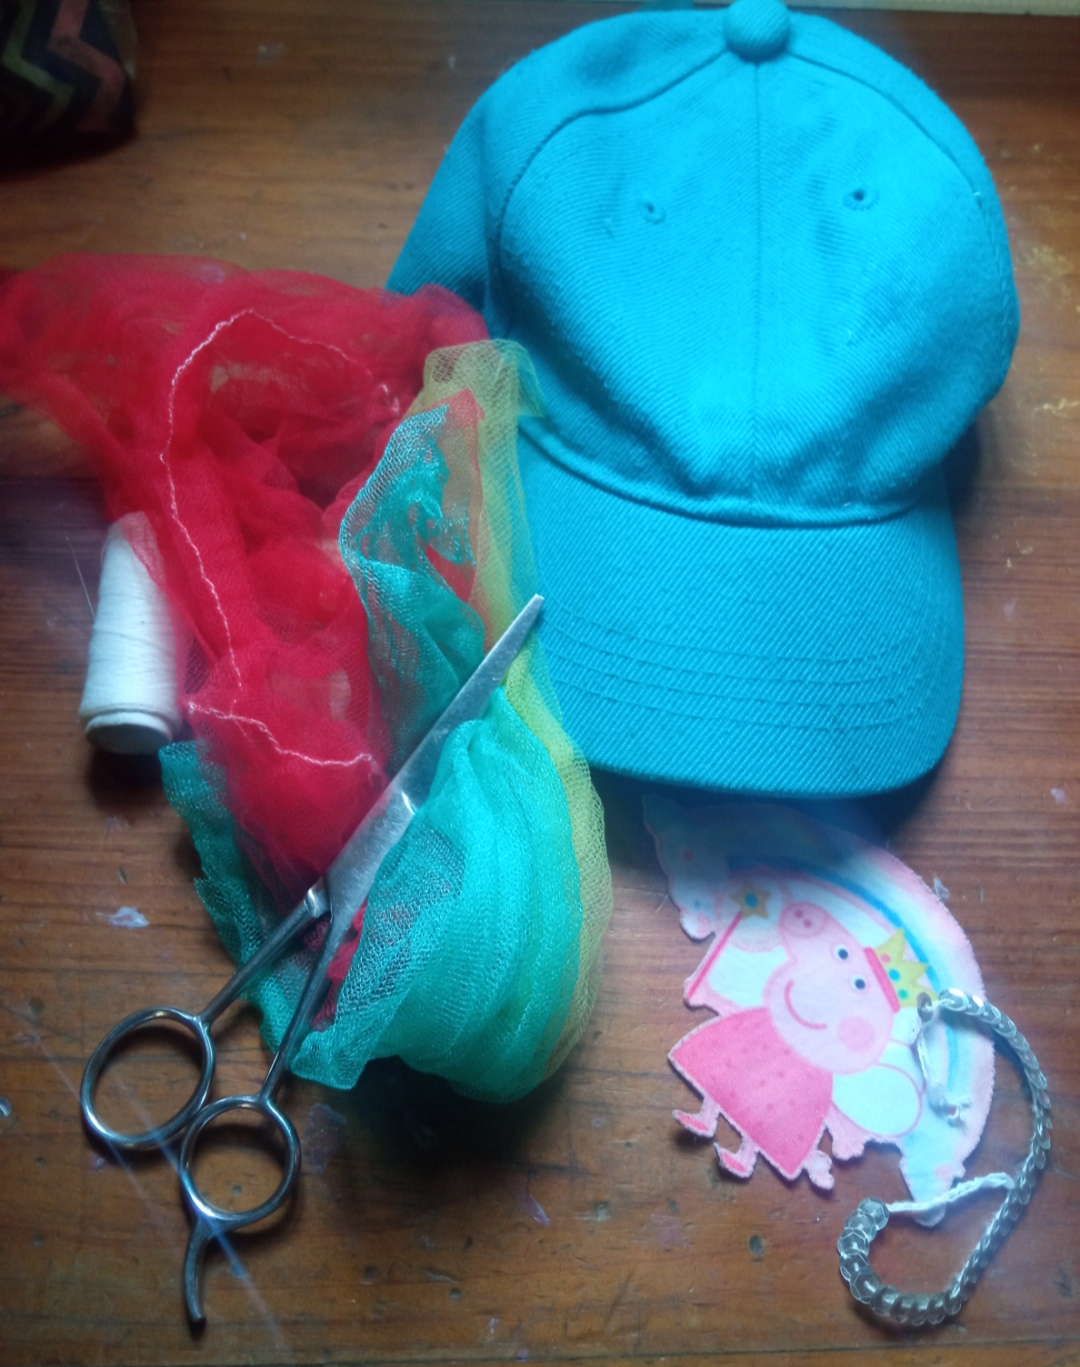
- Tiras de tela.
- linda decoración de muñeco animado
- lentejuelas.
- mostacillas.
- hilo y aguja.
- tijera.
- pega.
- Strips of fabric.
- cute animated doll decoration
- sequins.
- beads.
- thread and needle.
- scissors.
- job.
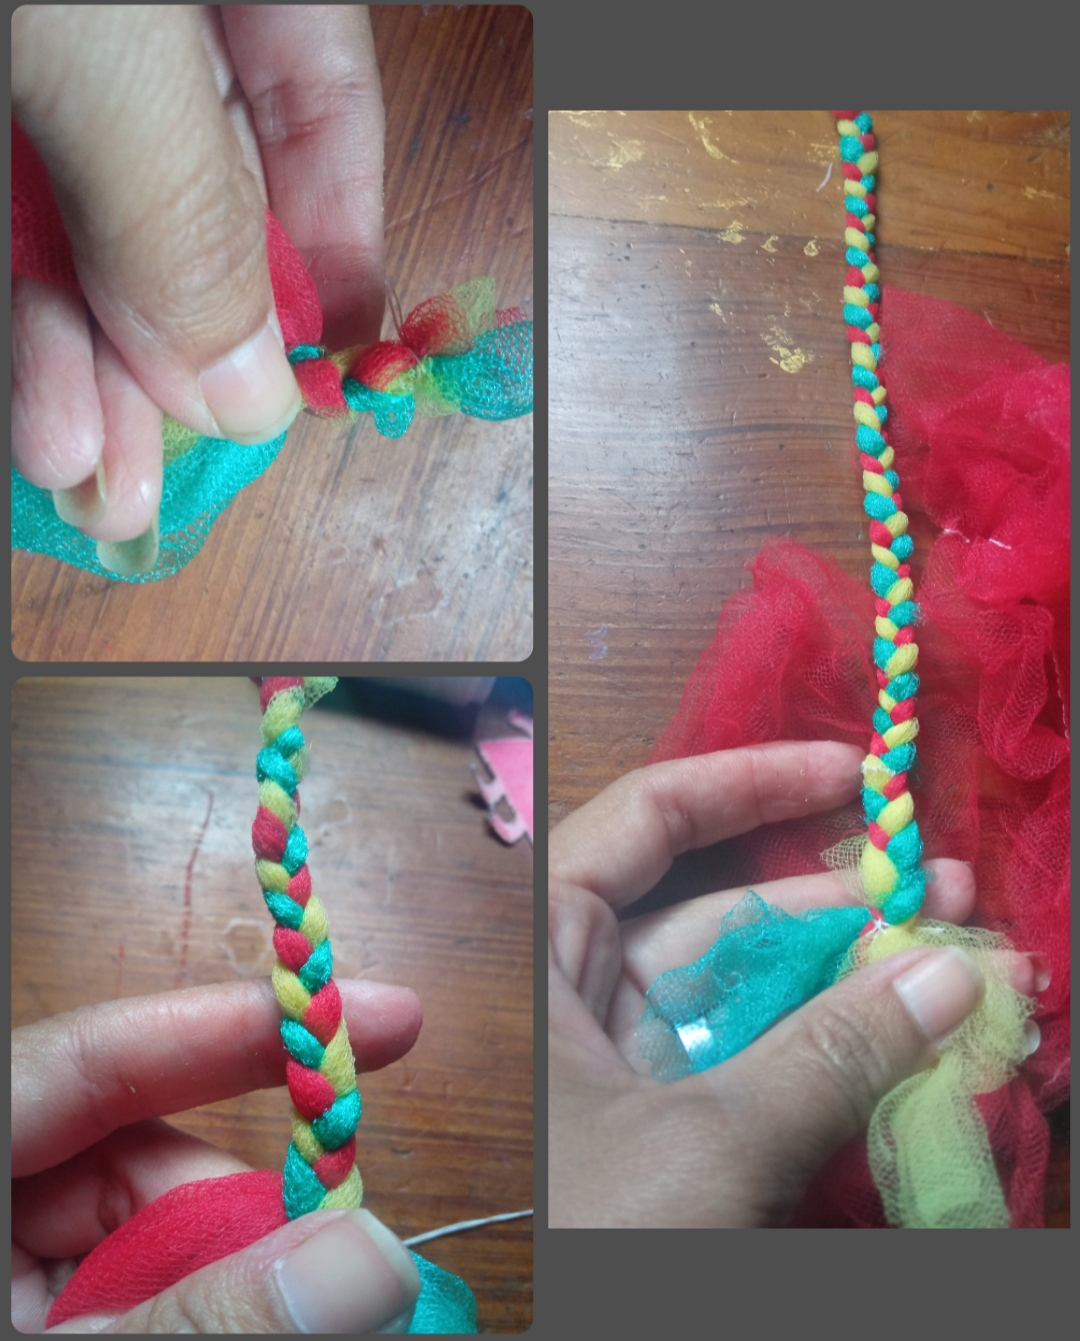
⭐ Paso 1: para iniciar la elaboración de esta hermosa decoración lo primero que hice fue tomar las tiras de tela de tres colores diferentes y uní con una puntada con el hilo y la aguja las puntas de las tres tiras seguidamente inicié a realizar un tejido entrelazando las tres tiras de colores hasta finalizar la tira Y se cree cociendo las tres puntas al final para sujetar así este hermoso tejido.
⭐ Step 1: to start making this beautiful decoration, the first thing I did was take the strips of fabric of three different colors and joined the ends of the three strips with a stitch with the thread and needle, then I started making a fabric intertwining the three colored strips until the end of the strip. And it is created by sewing the three ends at the end to hold this beautiful fabric.
⭐ Paso 2: una vez lista nuestro tejido tricolor procedemos a pegarla por la parte delantera de la pequeña gorra, para ello tomaremos la punta del tejido y lo pegaremos en la parte de adentro de la gorra debajo de la visera y poco a poco con pequeñas puntadas que no sean muy vistas todo encima del tejido vamos cosiendo para sujetar el tejido por el borde frontal de esta hermosa gorra como pueden verlo a continuación.
⭐ Step 2: once our tricolor fabric is ready, we proceed to glue it to the front of the small cap. To do this, we will take the tip of the fabric and glue it to the inside of the cap under the visor and little by little With small stitches that are not very visible, we are sewing everything on top of the fabric to hold the fabric along the front edge of this beautiful cap as you can see below.

⭐ Paso 3: seguidamente tomé una hermosa decoración que tenía en casa de un dibujo animado muy lindo llamado "pepa pig" el cual es un dibujo animado que le encanta a mi pequeña y con una pega que tenía en casa la pegué en la parte central delantera de esta pequeña gorra y si es de nuestro gusto podemos con la aguja de hilo darles pequeñas puntadas por el borde de la imagen para así sujetarla mejor a la misma.
⭐ Step 3: I then took a beautiful decoration that I had at home of a very cute cartoon called "Pepa Pig" which is a cartoon that my little girl loves and with a glue that I had at home I stuck it on the central front part of this small cap and if it is to our liking we can use the thread needle to give small stitches along the edge of the image to better hold it to it.
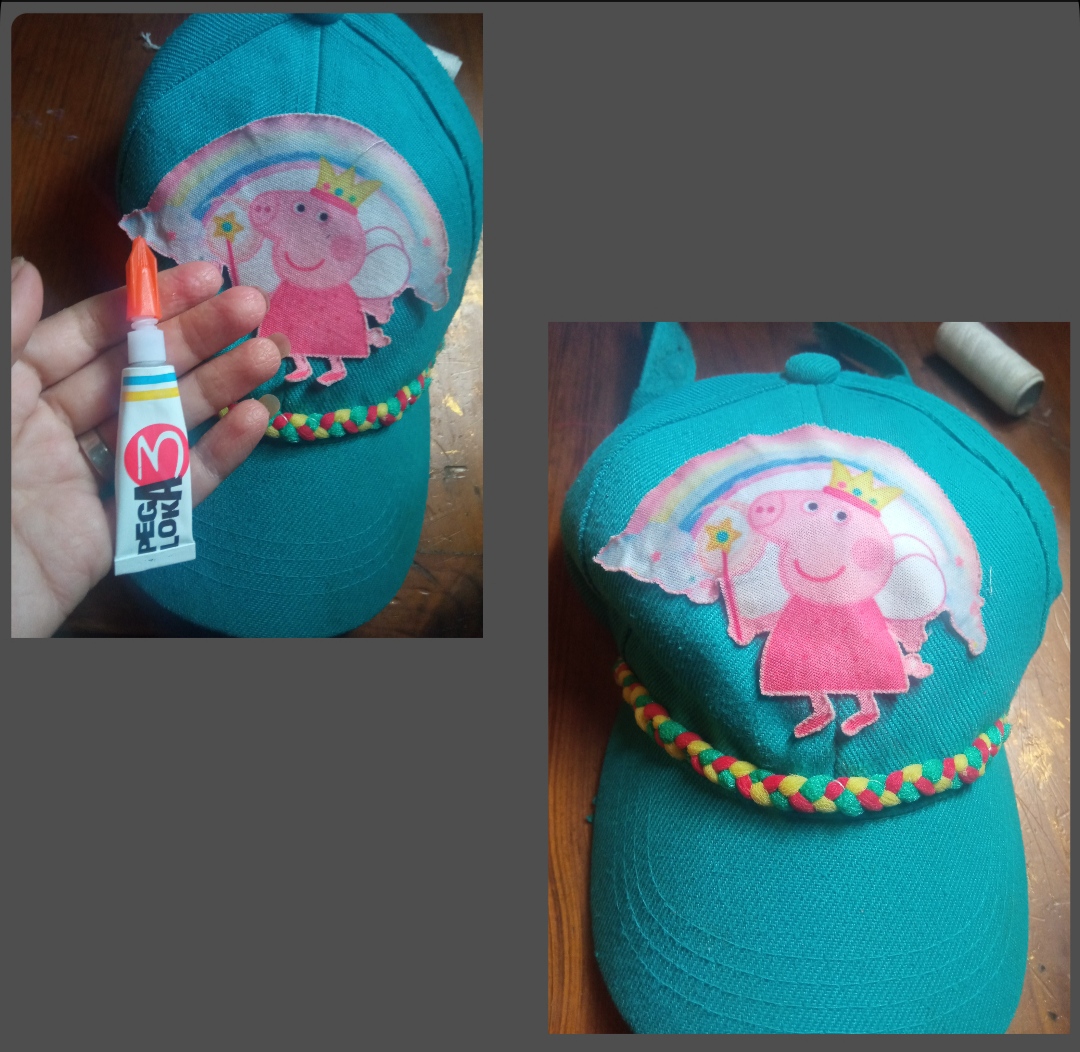
⭐ Paso 4: por último para darle un poco más de vistosidad y resaltar la imagen de esta hermosa decoración tomé el hilo y la aguja y fui colocando pequeñas lentejuelas de procedimiento para pegar estas lentejuelas es muy fácil ya que introducimos y la aguja por la gorra luego introducimos por la aguja la lentejuela y una pequeña mostacilla y luego retrocedemos la aguja introduciendola nuevamente por la ciruela dejando la mostacilla y halamos la aguja hacia abajo para así sujetar con la pequeña piedra la lentejuela a la superficie. Así sucesivamente pegué varias lentejuelas por todo el alrededor del dibujo animado y de esta manera culminé esta decoración.
⭐ Step 4: finally, to give it a little more showiness and highlight the image of this beautiful decoration, I took the thread and the needle and placed small sequins. The procedure to stick these sequins is very easy since we insert and the needle through the cap then we introduce the sequin and a small bead through the needle and then we move the needle back, inserting it again through the plum, leaving the bead and we pull the needle down in order to hold the sequin to the surface with the small stone.
So successively I glued several sequins all around the cartoon and in this way I completed this decoration.


Todas las Fotos son de mi autoría y fueron tomadas con mi Celular Redmi 9.And so, my dear and appreciated friends, in this easy and very economical creative way we can give our little girl the pleasure of decorating her cap to her taste and preference.
My little girl was totally delighted with this decoration and now says that it is a cap for a girl. This has been my preparation today to share with all of you, which I hope has been to your complete liking and can be useful to you. Now I must say goodbye for this opportunity, but not before thanking you for your visit.
Greetings and blessings
All Photos are my authorship and were taken with my Redmi 9 Cellphone
the hat looks super cool with the design. Well done
https://twitter.com/hivediy47901/status/1770657118527394265
Bella esa gorra y los colores hermosos. Recuerdo cuando tenía a mis hijas pequeñas, siempre las decoraba también, ellas son nuestra Inspiración total.
Felicitaciones amiga @emmaris por este proyecto Diy tan bello
¡¡¡Buen trabajo!!! Gracias por publicar tu excelente contenido en Hive Diy, excelente trabajo, una buena forma de agregarle hermosos detalles a una gorra.
Tu comunidad artesana ahora es testigo

Gracias por valorar mi contenido ❤️