Tutorial : Zarcillos Con forma de Hoja 🌿 🍃(ESP - ING)
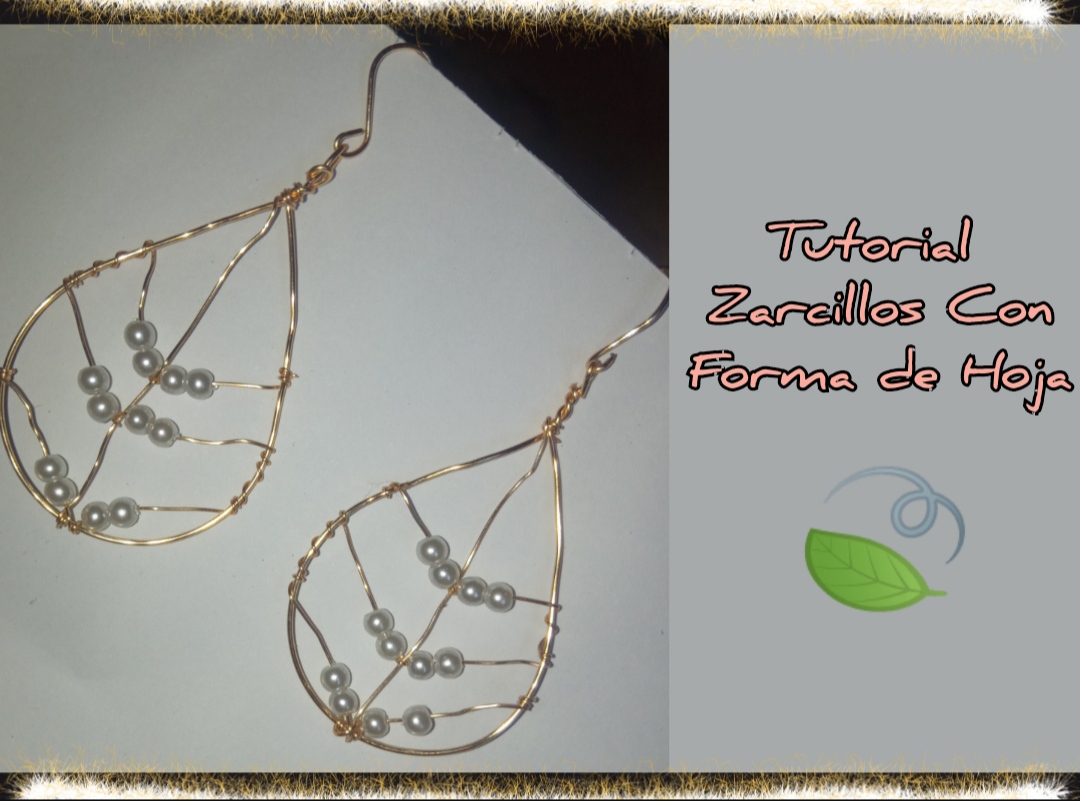
feliz y bendecida noche tengan todos ustedes y el día de hoy cuando iniciamos el mes de mayo quiero compartir con todos ustedes más hermosos arcillos con diseño poco común pues con ellos representamos la naturaleza mediante un lindo hoja. Un diseño súper fácil y muy sencillo de elaborar y acá les comparto un muy sencillo tutorial donde paso a paso crearemos juntos este hermoso y elegante diseño.
Have a happy and blessed night all of you and today when we begin the month of May I want to share with all of you more beautiful clays with unusual designs because with them we represent nature through a beautiful leaf.
A super easy and very simple design to make and here I share a very simple tutorial where step by step we will create this beautiful and elegant design together.
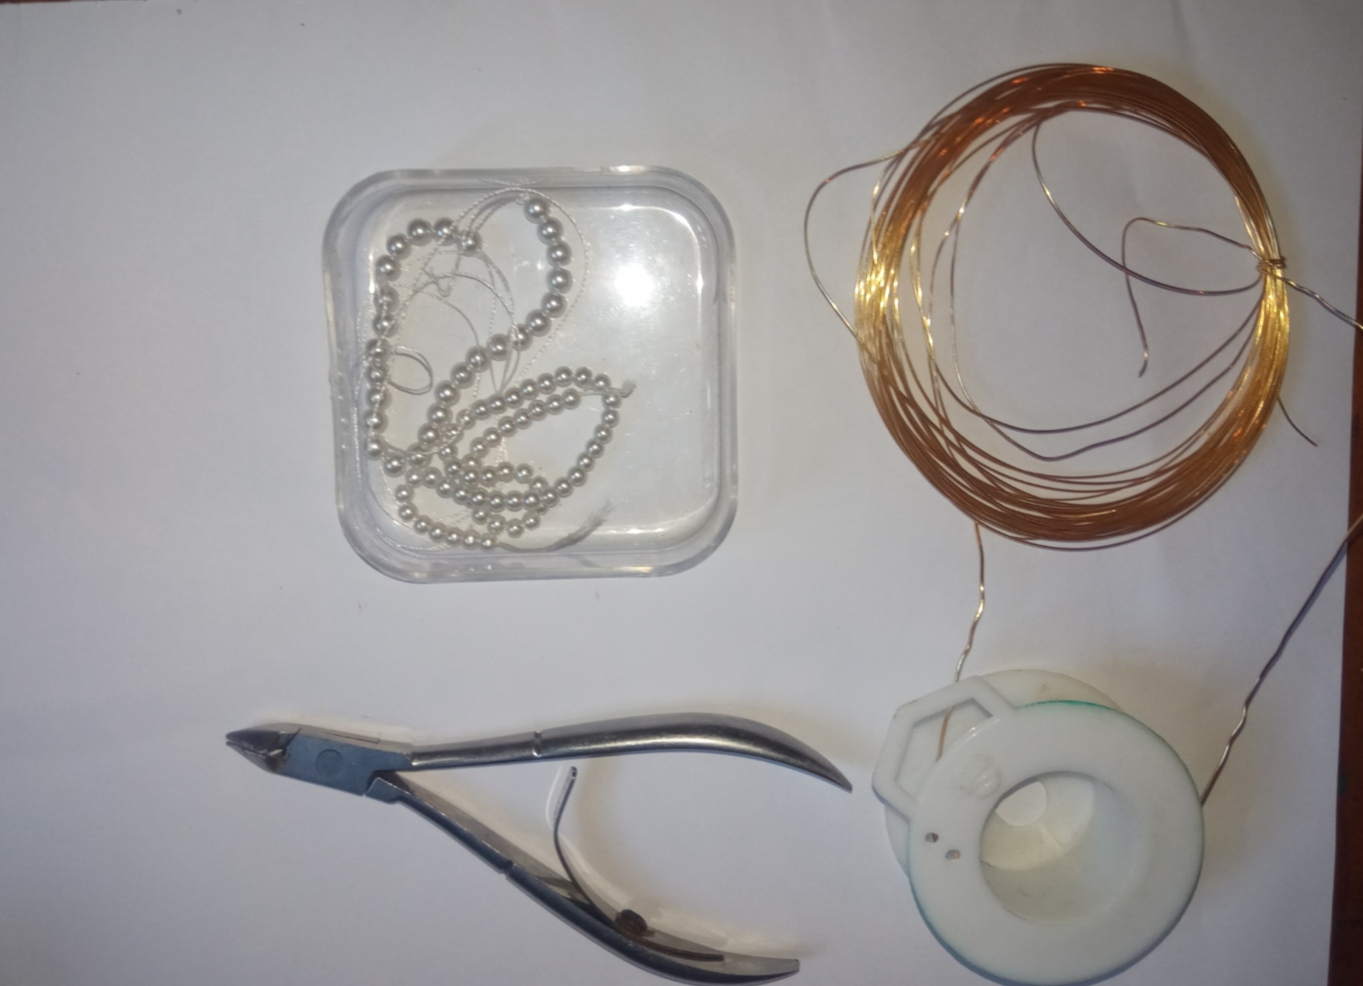
- Alambre de bisutería calibre 20.
- Alambre de bisutería calibre 26
- piedras Perladas blancas.
- pinza de bisutería.
- 20 gauge jewelry wire.
- 26 gauge jewelry wire
- white Pearlized stones.
- jewelry clamp.
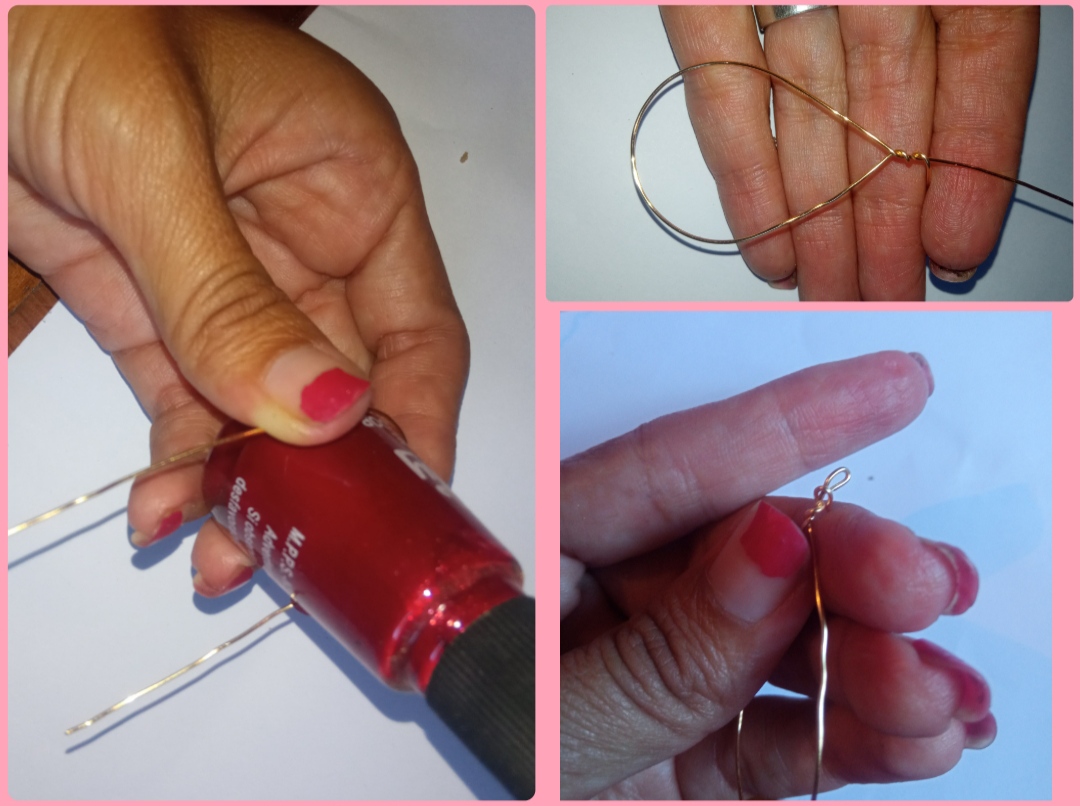
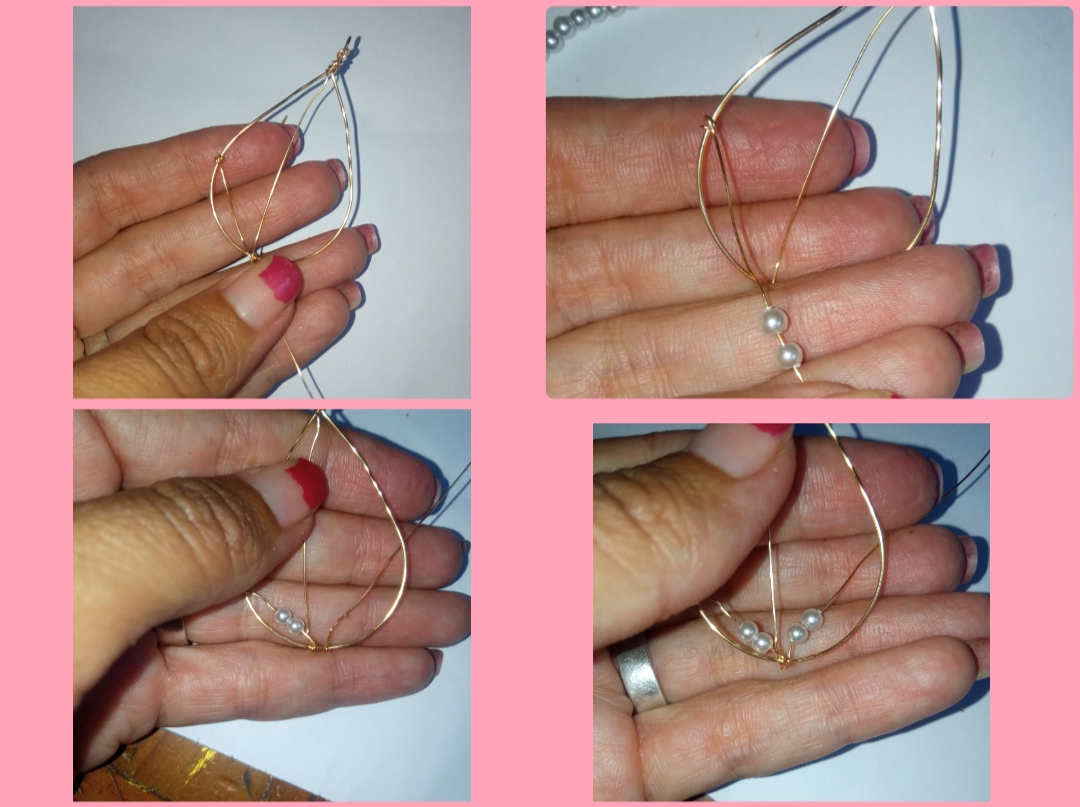
⭐ Paso 1: para iniciar la elaboración de este hermoso diseño lo primero que debemos hacer es tomar el alambre de bisutería calibre 20 y ayudándonos con objetos cilíndrico te avisaremos esta hermosa forma ovalada, cómo pueden observar yo utilicé una base de pintura de uñas para darle forma semicircular a la parte de abajo de nuestra elaboración y cerrando en forma ovalada superior de esta forma. En la parte superior uniremos los dos extremos del alambre y realizaremos un par de formas para sujetar la forma realizada, Y seguramente cortaremos el exceso de uno de los extremos del alambre y el otro lo dejaremos hacia arriba y le doblaremos regresando una pequeña argolla o gancho hacia atrás tal cual pueden observarlo En las siguientes imágenes.
⭐ Step 1: to start making this beautiful design, the first thing we must do is take the 20 gauge jewelry wire and, helping us with cylindrical objects, we will show you this beautiful oval shape. As you can see, I used a paint base of nails to give a semicircular shape to the bottom part of our preparation and closing the upper oval shape in this way.
At the top we will join the two ends of the wire and make a couple of shapes to hold the shape made. And we will surely cut the excess from one of the ends of the wire and leave the other end up and bend it, returning a small ring or hook. backwards as you can see in the following images.
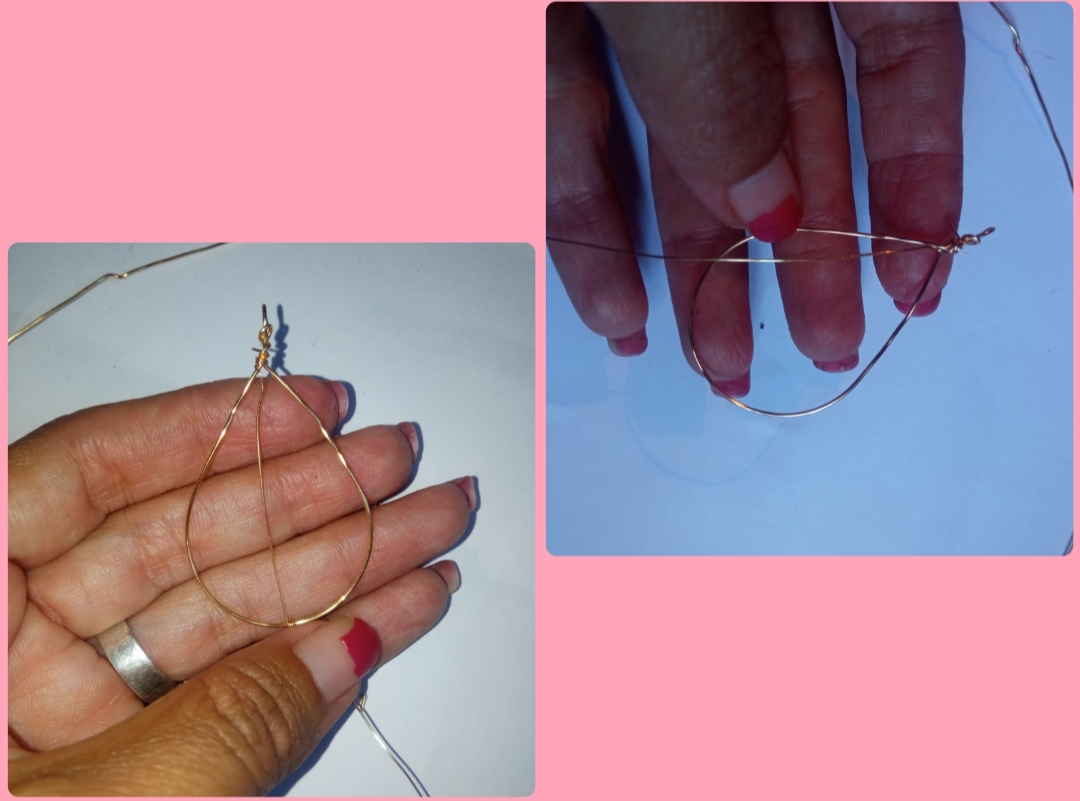
⭐ Paso 2: seguidamente tomaremos un pedazo de alambre de bisutería calibre 26 nos enrollaremos en la parte superior de nuestra forma de hoja y lo cruzaremos por la parte central de la hoja hacia abajo sujetándolo en la parte posterior de la hoja como pueden observar a continuación. Y aquí cortaremos el exceso de alambre para luego en uno de los lados del alambre en la parte de abajo enrollamos nuevamente un pedazo dando el calibre 26 luego introduciremos dos piedras pequeñas perladas y quedaremos el alambre hasta la parte media posterior de la hoja utilizando un par de vueltas luego introducimos dos piedras peladas y llevamos el alambre al mismo dinero pero por lado contrario de la hoja.
⭐ Step 2: Next we will take a piece of 26 gauge jewelry wire, we will wrap it around the top of our leaf shape and we will cross it through the central part of the leaf downwards, securing it to the back of the leaf as you can. observe below.
And here we will cut the excess wire and then on one of the sides of the wire at the bottom we will roll a piece again giving the 26 gauge then we will insert two small pearl stones and we will leave the wire up to the middle back part of the sheet using a pair turns then we introduce two peeled stones and bring the wire to the same money but on the opposite side of the sheet.
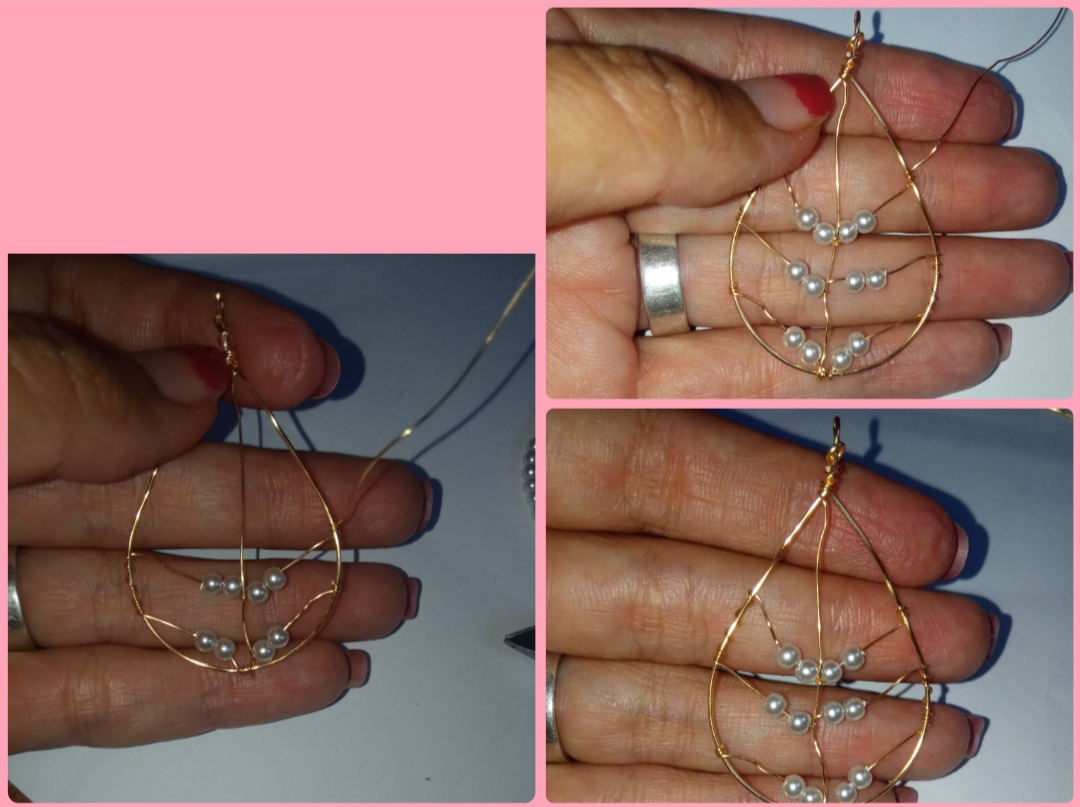
⭐ Paso 3: continuamos llevando nuevamente el alambre introduciendo dos piedras perladas y sujetando el alambre en la parte media de la hoja luego volvemos a introducir dos piedras perladas y cruzamos el alambre hacia el otro extremo realizando así varias líneas en forma diagonal. Siguiendo este mismo paso volveremos a revisar lo mismona vez más, Y luego cortaremos el exceso del alambre de ser necesario. Y así ya tenemos la base con forma de hoja de nuestro hermoso zarcillo.
⭐ Step 3: we continue carrying the wire again, introducing two pearl stones and holding the wire in the middle part of the leaf, then we reintroduce two pearl stones and cross the wire towards the other end, thus making several lines diagonally. Following this same step we will check the same thing again, and then we will cut the excess wire if necessary.
And so we now have the leaf-shaped base of our beautiful tendril.
⭐ Paso 4: por último tomaremos un pedazo de la historia de calibre 20 y elaboraremos con ayuda de la pinza nuestro pequeño anzuelo para zarcillo, uniremos a nuestra elaboración anterior enganchando en la argolla superior de la hoja y así lograremos elaborar este hermoso diseño. Ahora solo debemos repetir el procedimiento para realizar la segunda pieza de este hermoso diseño.
⭐ Step 4: finally we will take a 20 gauge piece of history and make our small tendril hook with the help of the tweezers. We will join our previous creation by hooking it into the upper ring of the leaf and thus we will be able to make this beautiful design.
Now we just have to repeat the procedure to make the second piece of this beautiful design.

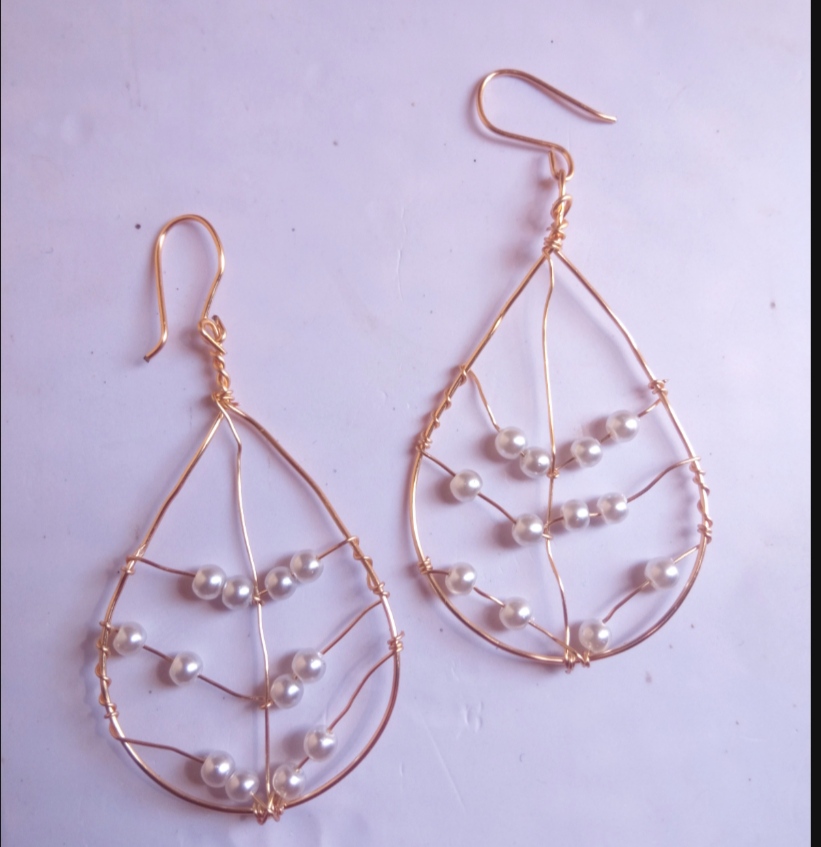
Todas las Fotos son de mi autoría y fueron tomadas con mi Celular Redmi 9.And so my dear and appreciated visitors, members of this beautiful community, we will be able to easily value this beautiful design which you can remove at your convenience by changing the size to the color of the stones used. I really liked it because despite being a slightly large design, they are light in weight and very comfortable to use, ideal for use on any occasion.
Now I must say goodbye for this opportunity, hoping that this beautiful design has been to your complete liking.
All Photos are my authorship and were taken with my Redmi 9 Cellphone
wow those earrings looks nice😍
Thank you, I'm very glad you liked it. thank you for your comment
¡Que lindo aretes!Me gustaron mucho, saludos.
Gracias amiga, me alegra que te haya gustado.
Saludos.
Que bonito amiga, hiciste un buen trabajo ☺️ saludos
It is stylish and beautiful. Good to see how you made this. Nice work! Thank you for sharing this.
Thank you very much, I am glad you liked it.