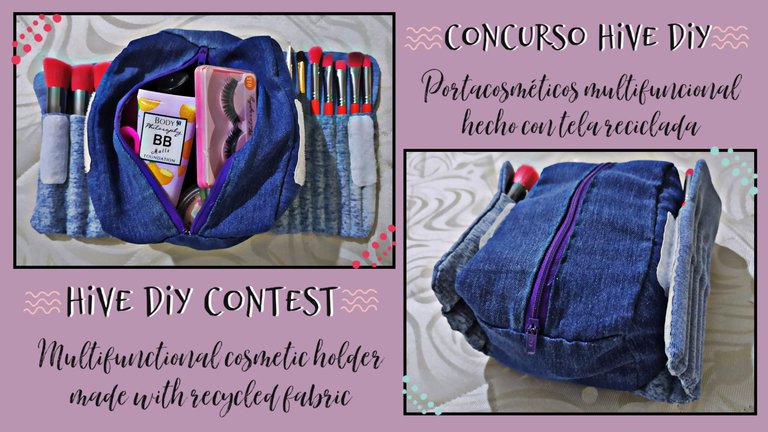
[ES|EN] Mi participación en el concurso HIVE DIY • Portacosméticos multifuncional hecho con tela reciclada | My entry in the HIVE DIY Contest • Multifunctional cosmetic holder made with recycled fabric

Hola amigos de esta creativa comunidad ❤️
Después de un tiempo sin participar, vuelvo nuevamente en esta edición con temática de:
Portacosméticos
Los materiales que utilicé para mi creación fueron:
- Tela de jeans reciclada
- Un trozo de cierre mágico
- Hilo y aguja de coser
- Tijeras
- Alfileres
- 1 cierre de 15 cm
Hello friends of this creative community ❤️
After a while without participating, I'm back again in this edition with theme of:
Cosmetics holder
The materials I used for my creation were:
- Recycled denim fabric
- A piece of magic zipper
- Thread and sewing needle
- Scissors
- Pins
- 1 zipper of 15 cm
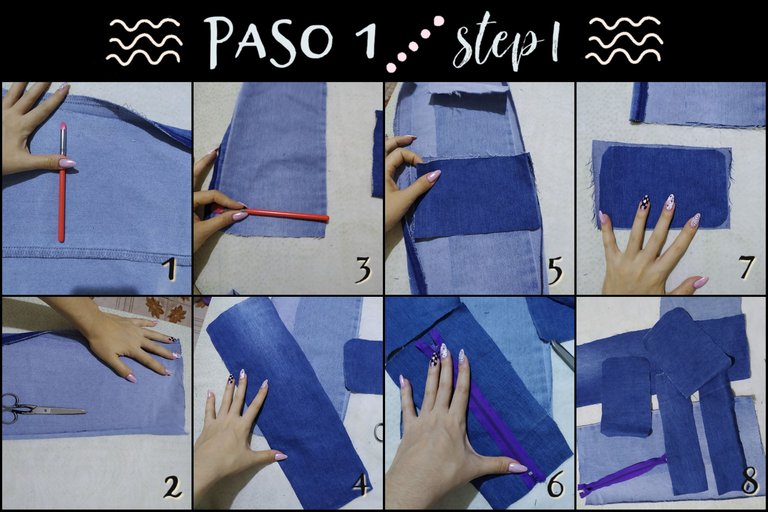
En post de costura anteriores había realizado portacosméticos sencillos, esta vez quise innovar un poco con algo que incluyera mis brochas.
Así que, lo primero que hice fue recortar un trozo de tela largo como un rectángulo de 40 cm x el alto de mis brochas. Ustedes pueden utilizar el largo de sus brochas y obviamente hacer más larga la tira de tela de tener más brochas, pero respetando el espacio en medio donde irá el pequeño bolso que tendrá el resto del maquillaje.
Para forrar esta tira larga recorté otras dos una del mismo largo pero con el alto de la mitad de la brocha, para hacer las separaciones y otra que va debajo de esta.
Para el bolso recortaremos dos rectangulos pequeños, yo les dí forma redondeadas en las esquinas, eso es opcional, y recorté otra tira que abarcara toda la circunferencia de nuestros rectangulos pequeños y del grueso que vamos a querer nuestro bolsito.
Y finalmente, para el cierre, dos tiras pequeñas de la mitad del grosor de la tira anterior, porque obviamente el cierre va en medio.
In previous sewing posts I had made simple cosmetic holders, this time I wanted to innovate a bit with something that included my brushes.
So, the first thing I did was to cut a long piece of fabric as a rectangle of 40 cm x the height of my brushes. You can use the length of your brushes and obviously make the fabric strip longer if you have more brushes, but respecting the space in the middle where the little bag that will hold the rest of the makeup will go.
To line this long strip I cut out two other strips, one of the same length but with the height of half the brush, to make the separations and another one that goes underneath it.
For the bag we cut out two small rectangles, I gave them rounded shape at the corners, that is optional, and cut another strip to cover the entire circumference of our small rectangles and the thickness that we want our bag.
And finally, for the closure, two small strips of half the thickness of the previous strip, because obviously the closure goes in the middle.
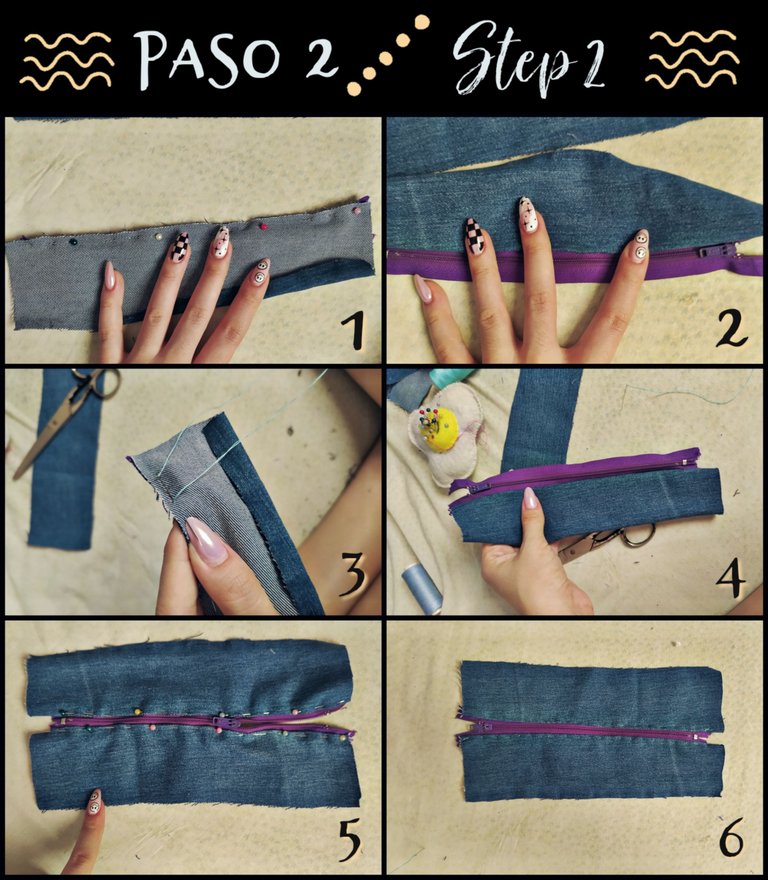
Después de tener todas las piezas de nuestro portacosméticos recortadas vamos a empezar a armar el estuche central.
Iniciamos sujetando con alfileres las tiras pequeñas en ambos lados del cierre, cosiéndolas primero por el revés y luego dándoles una segunda costura por el derecho, en ambos lados del cierre.
After having all the pieces of our cosmetic holder cut out, we will start assembling the central case.
We start by pinning the small strips on both sides of the zipper, sewing them first on the reverse side and then sewing a second seam on the right side, on both sides of the zipper.
Después, vamos a unir la tira larga que será el grosor del estuche con el cierre en ambos extremos. Luego, sujetaremos con alfileres los cuadrados redondeados en las esquinas que habíamos recortado con anterioridad, que estas serán las tapas del estuche.
Todo esto irá sujetado al revés de modo que al voltearlo la costura quede por dentro.
Yo cosí dos veces porque fué a mano, si tienen una máquina de coser obtendrán un mejor resultado.
Next, we are going to join the long strip that will be the thickness of the case with the zipper at both ends. Then, we will pin the rounded squares in the corners that we had previously cut out, which will be the lids of the case.
All of this will be pinned upside down so that when we turn it inside out the seam will be on the inside.
I sewed twice because it was hand sewn, if you have a sewing machine you will get a better result.
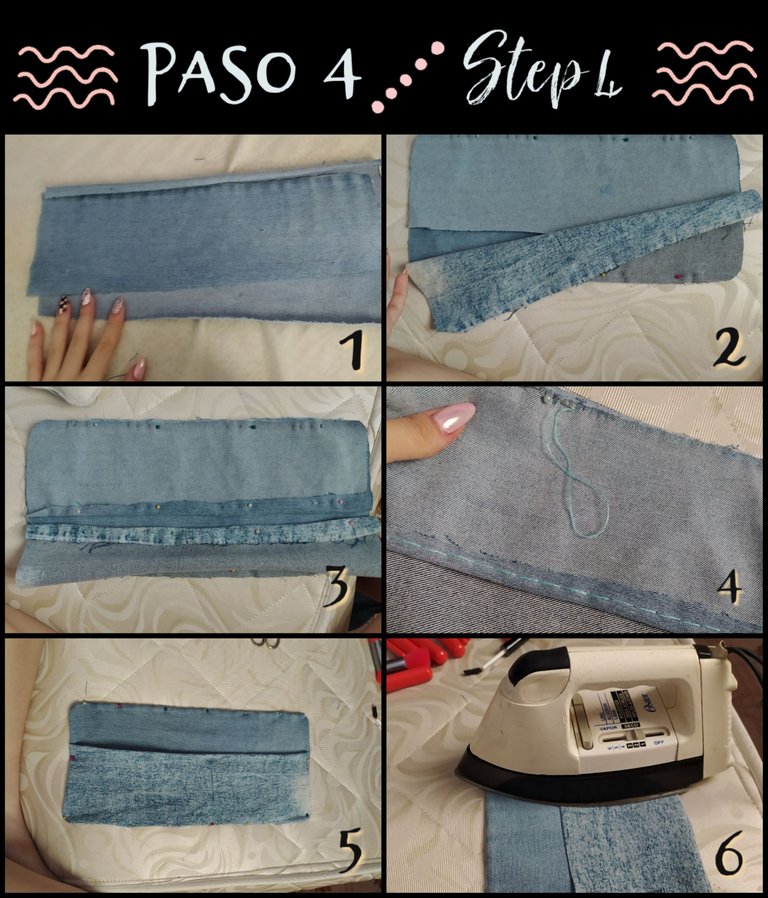
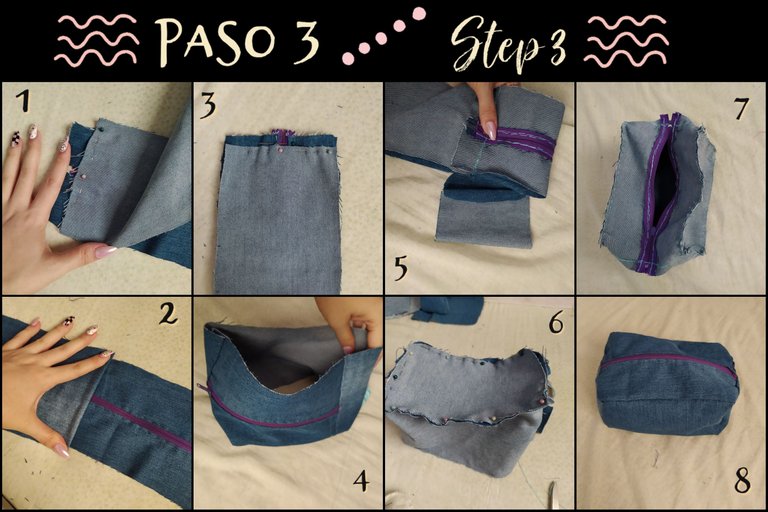
Ya teniendo el estuche listo, vamos a elaborar la parte del portacosméticos donde irán las brochas.
Las 3 tiras largas las sujetamos con alfileres, dejando por encima la parte que irá debajo, y por debajo la tira de tela donde irán las brochas.
Recuerden que todo esto lo hacemos al revés para que la costura quede al derecho, y después de coser es necesario plancharlo para que nos quede bien estirado.
Once the case is ready, we are going to elaborate the part of the cosmetic holder where the brushes will go.
The 3 long strips are pinned together, leaving the part that will go underneath on top, and underneath the strip of fabric where the brushes will go.
Remember that we do all this upside down so that the seam is right side up, and after sewing it is necessary to iron it so that it is well stretched.
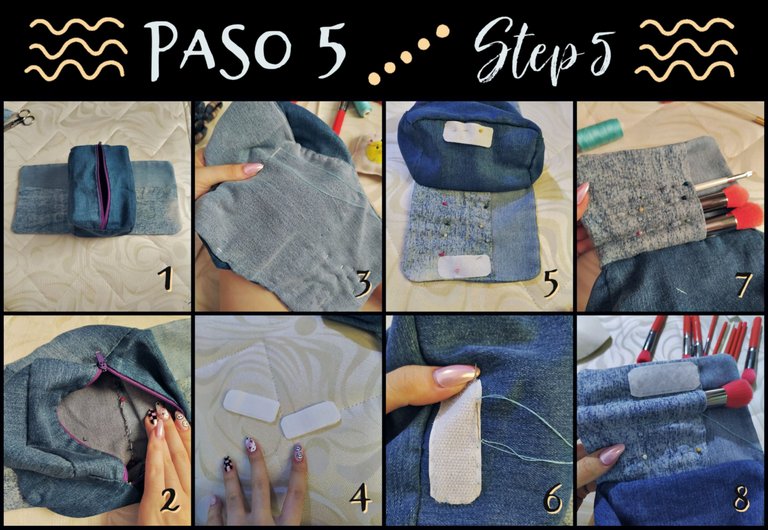
El último paso, es unir las dos piezas anteriores. Así que, calculamos la mitad de la tira de tela donde van las brochas y colocamos el estuche sujetando con alfileres y cosemos.
Luego, vamos introduciendo cada brocha y colocando alfileres para hacer los orificios a la medida, y cosemos.
Y finalmente, colocamos dos trozos de cierre mágico y cosemos muy bien, esto es para unir esas solapas al estuche.
De esta manera finaliza mi creación!📌
The last step is to join the two previous pieces. So, we calculate half of the strip of fabric where the brushes go and we place the case fastening it with pins and sew.
Then, we introduce each brush and place pins to make the holes to measure, and sew.
And finally, we place two pieces of magic clasp and sew very well, this is to attach those flaps to the case.
This is the end of my creation!

Este fue el resultado final del portacosméticos, espero les guste!
Me gustaría invitar a @sorivel, @yasern y @patricia.csc a votar, rebloguear y participar en este concurso 📌
Hasta la próxima!💕
This was the final result of the cosmetic holder, I hope you like it!
I'd like to invite @sorivel, @yasern and @patricia.csc to vote, reblog and participate in this contest 📌
See you next time!💕

Todas las fotografías son de mi autoría
Ediciones elaboradas con PicsArt y PicMonkey
Traducido por DeepL
All photographs are my own
Editions elaborated with PicsArt and PicMonkey
Translated by DeepL

GUao! te quedó espectacular, muchas gracias por enseñarnos cómo se hace y compartir con nuestra comunidad a traves de los concursos. Buena suerte.
Gracias a ustedes por estos concursos tan geniales❤️✨
https://twitter.com/emidvbr/status/1469657753249632257
The rewards earned on this comment will go directly to the person sharing the post on Twitter as long as they are registered with @poshtoken. Sign up at https://hiveposh.com.
Wow this really beautiful thanks for sharing
Cara buat tas yang mudah dan simpel