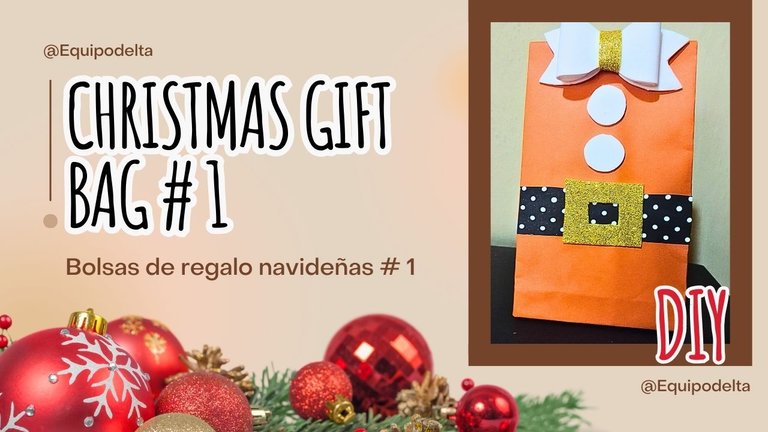
Christmas gift bag / Bolsita de regalo navideña (Esp/Eng)

[Esp]
¡Saludos comunidad DIY!.
Ahora que se acercan las festividades donde se acostumbra a dar obsequios, te muestro una forma económica y hermosa de presentar o envolver los regalos, es una bolsita muy linda, pocos materiales necesitarás para recrearla.
Acostumbro a guardar todos los pedacitos de foami que quedan, siempre me digo que para algo pequeño servirán y no me equivoqué. Me quedan muchos retacitos de los que salen cosas lindas como estas.
Anímate a recrearlo y sorprende a tus seres queridos con envoltorios hechos por ti.
Es fácil, te muestro desde cero, cómo hacer la bolsita y luego el decorado.
La navidad nos pone muy creativos.
Esta es mi primera bolsita he hecho varias, las iré presentando poco a poco, espero que les guste.
! [English version]
[Eng]
**Greetings beautiful community!
Now that the holidays are approaching where it is customary to give gifts, I show you an economical and beautiful way to present or wrap gifts, it is a very nice bag, few materials needed to recreate it.
I use to save all the little pieces of foami that are left, I always tell myself that they will be useful for something small and I wasn't wrong. I have a lot of scraps left over to make cute things like these.
Dare to recreate it and surprise your loved ones with wrappings made by you.
It's easy, I show you from scratch, how to make the bag and then the decoration.
Christmas makes us very creative.
This is my first bag, I have made several, I will be presenting them little by little, I hope you like it.

[Esp]
Los materiales que recomiendo usar, son los que tengas a tu alcance yo usé los siguientes:
Cartulina negra con estampado.
Pega, silicón caliente, tijera.
Foami escarchado dorado y foami blanco.
Papel de colores (a gusto).
! [English version]
[Eng]
- The materials I recommend using, are the ones you have at your fingertips, I used the following:
- Black cardboard with stamping.
- Glue, hot silicone, scissors.
- Gold frosted foami and white foami.
- Colored paper (to taste).

Step 1️⃣/ Paso 1️⃣
 |  |  |
[Esp]
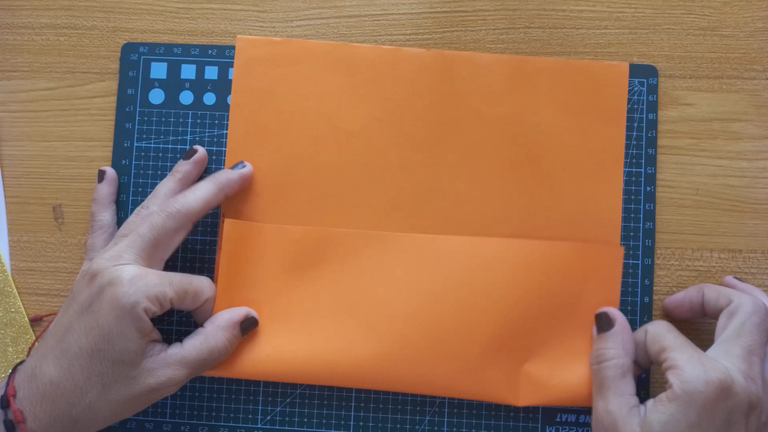
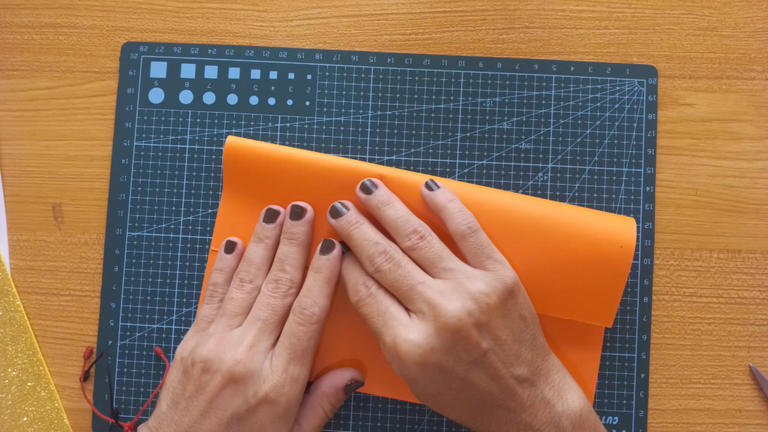
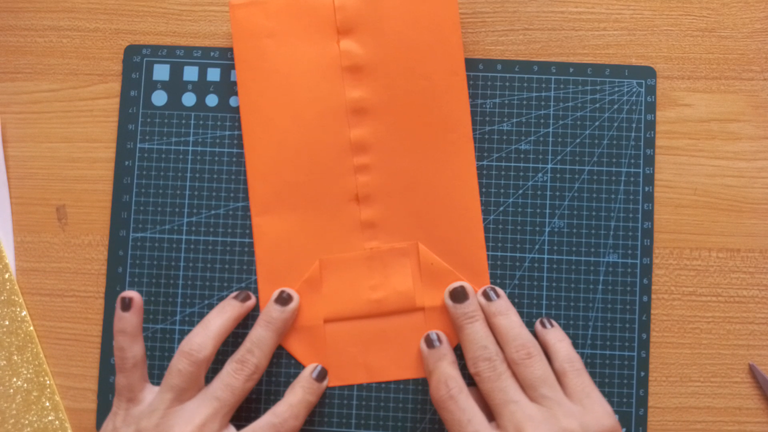
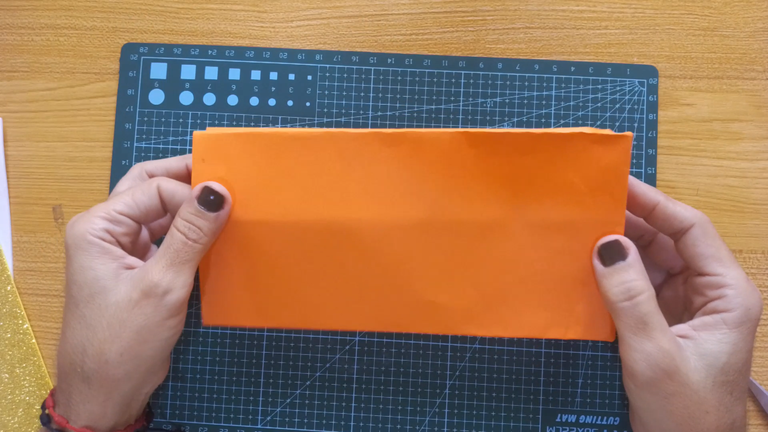
Para hacer la bolsita, es algo estilo origami, pero no te preocupes no es nada complicado.
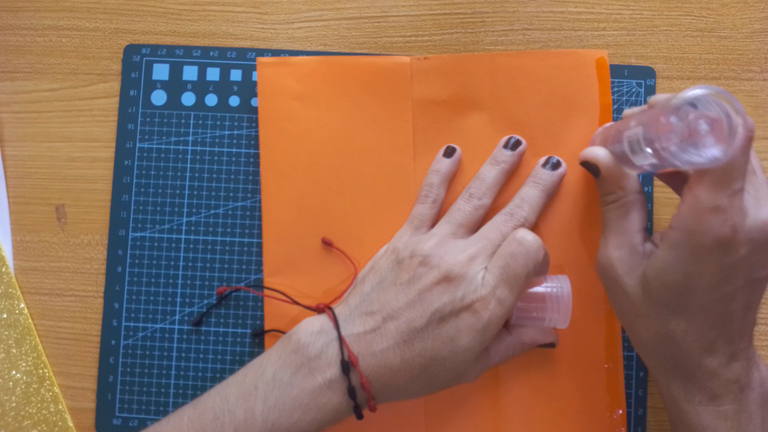
Dobla la primera hoja por la mitad del lado más largo, luego dobla la otra mitad hasta que se junte un poco, aplica pegamento y pega.
Dobla la pestaña de abajo al menos unos 2.5 centímetros.
! [English version]
[Eng]
To make the bag, it's a little origami style, but don't worry, it's not complicated at all.
Fold the first sheet in half on the longer side, then fold the other half until it meets a little, apply glue and glue.
Fold the bottom flap at least 2.5 centimeters.
Step 2️⃣/ paso 2️⃣
 |  |  |
[Esp]
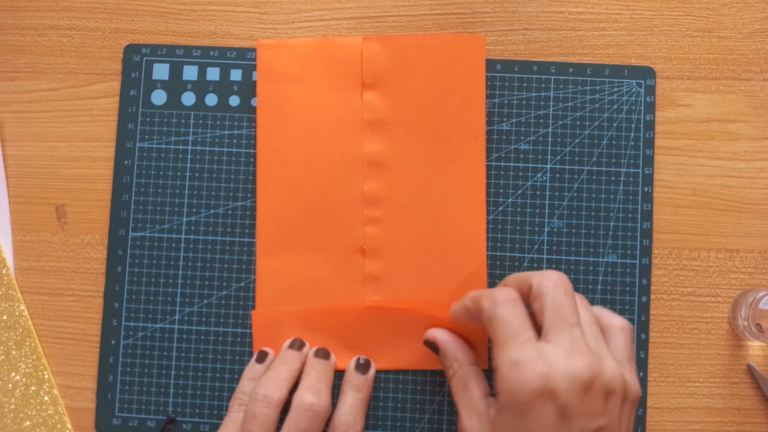
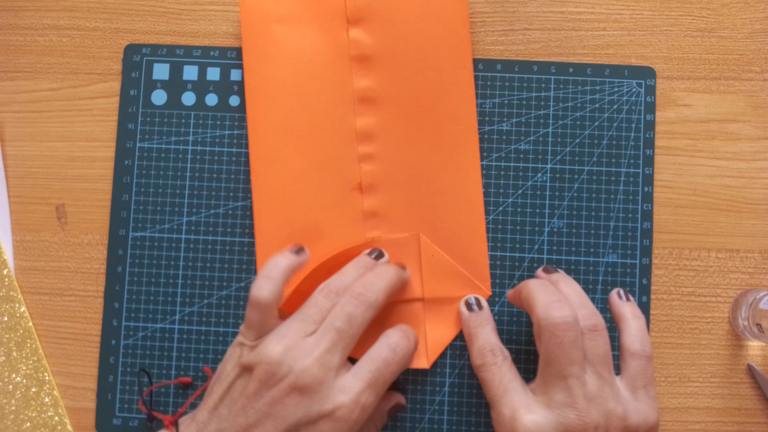
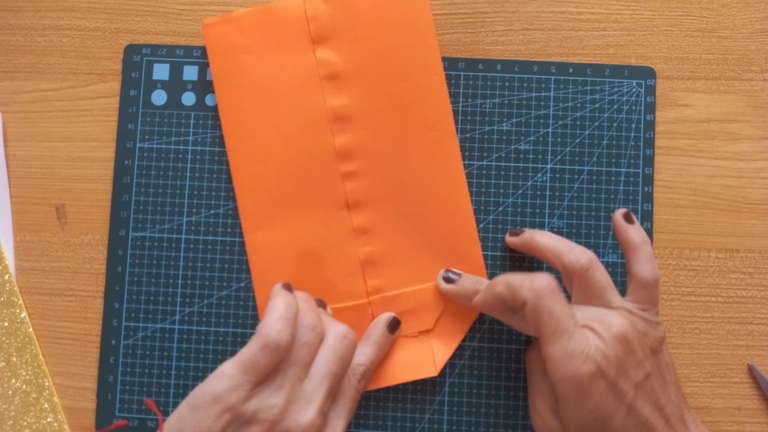
Dobla la esquina hasta formar un triángulo, repite ese procedimiento del otro lado.
Dobla por la mitad una de las pestañas, repite el procedimiento en la pestaña de abajo, aplica pegamento y pega.
! [English version]
[Eng]
Fold the corner to form a triangle, repeat this procedure on the other side.
Fold one of the tabs in half, repeat the procedure on the bottom tab, apply glue and glue.
Step 3️⃣/ paso 3️⃣
 |  |  |
[Esp]
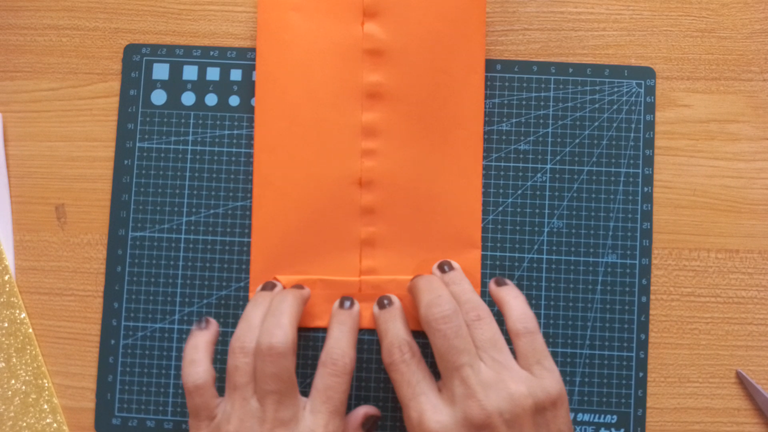
En el mismo lado donde está empatado y doblada la bolsa, dobla uno de los laterales (1.5 Cms) hacia adentro, repite el procedimiento del otro lado.
Ahora voltea la bolsita y las mismas pestañas las doblas del lado contrario.
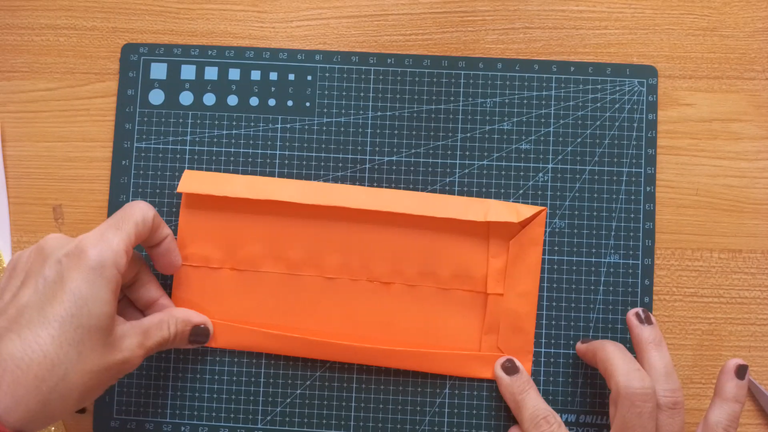
Abre la bolsa con cuidado y dale forma.
! [English version]
[Eng]
On the same side where the bag is tied and folded, fold one of the sides (1.5 cm) inwards, repeat the procedure on the other side.
Now turn the bag over and fold the same tabs on the other side.
Open the bag carefully and shape it.
Step 4️⃣/ paso 4️⃣
 |  | |
 |  |
[Esp]
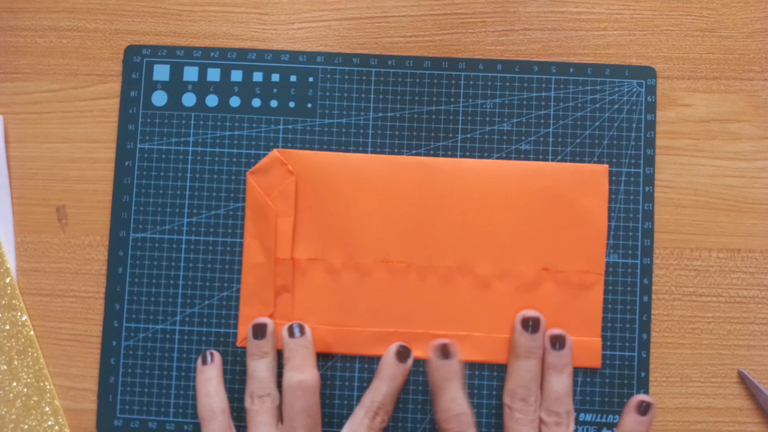
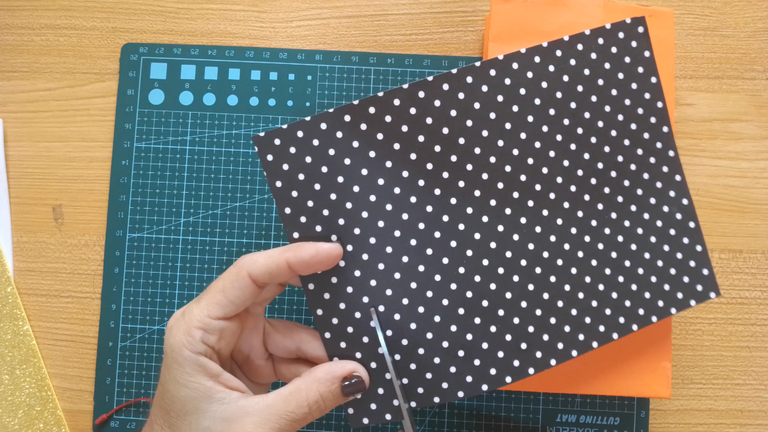
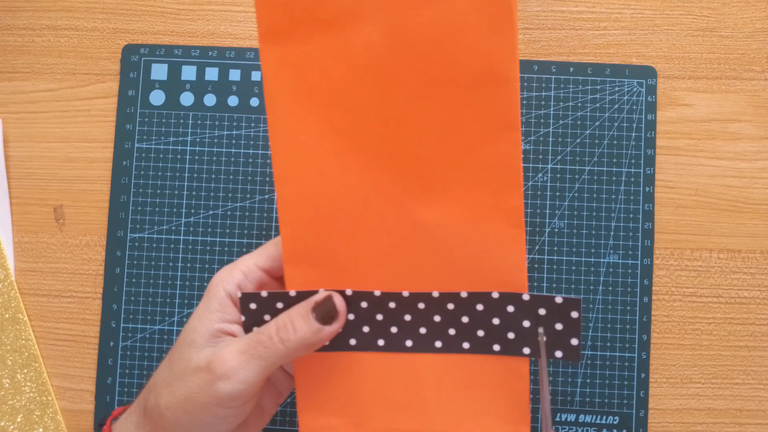
Recorta un trozo de cartulina negra, yo usé esta con lunares porque me encantó su rareza.
Coloca pegamento y pega en la bolsita, recorta los excedentes con cuidado no cortar la bolsa.
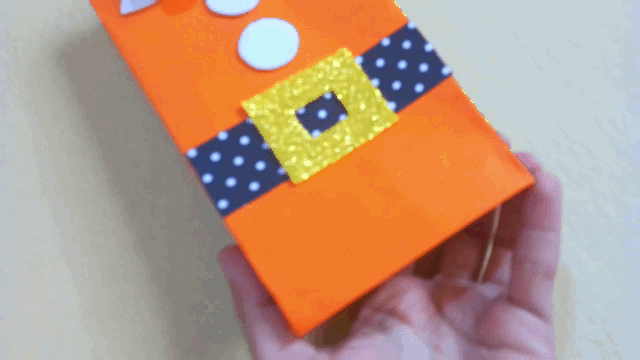
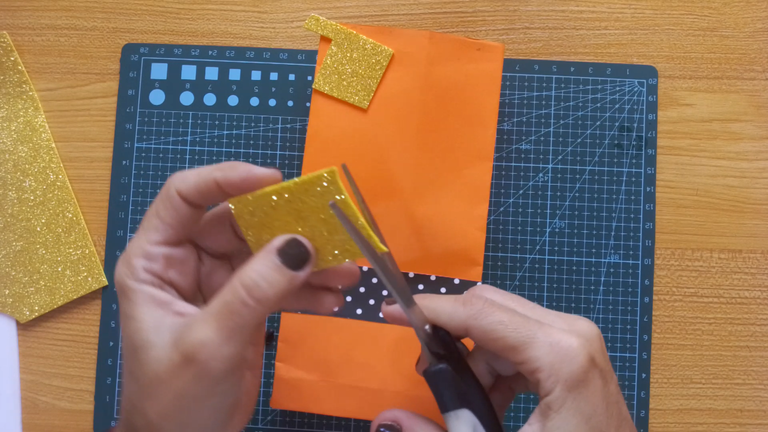
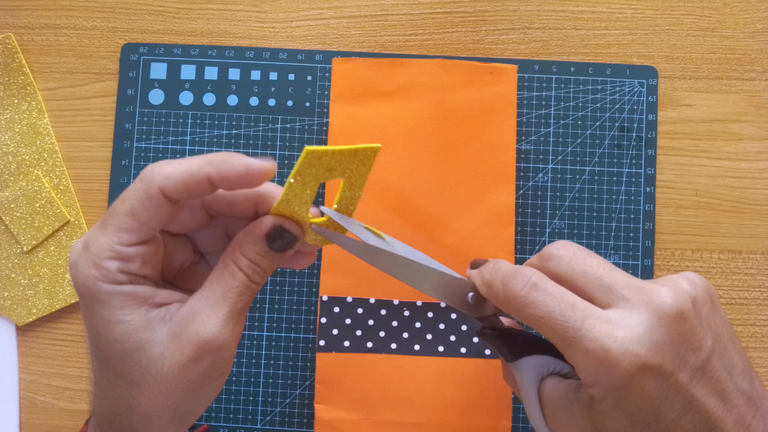
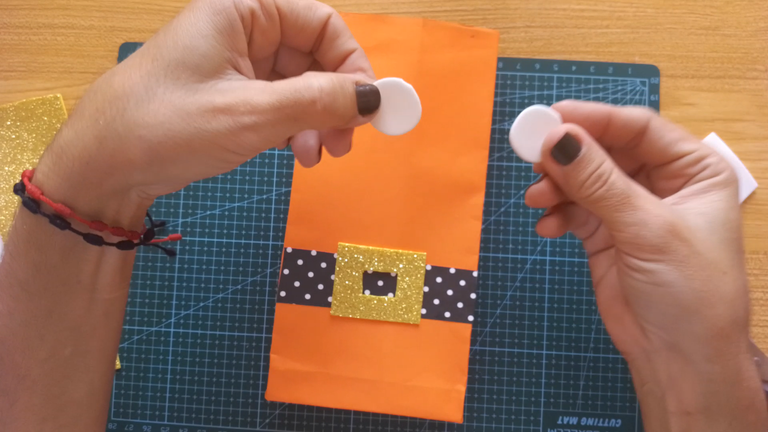
Recorta un trozo de foami escarchado dorado, un rectángulo un poco más ancho que la cartulina que cortaste previamente. Recorta un rectángulo en el centro, esto le dará forma a la hebilla del cinturón de Santa Claus.
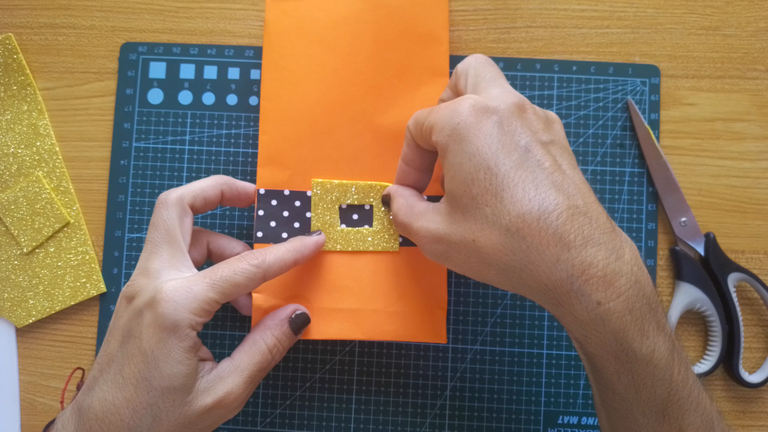
Aplica pegamento y pega en el centro de la bolsa frente a la cartulina.
! [English version]
[Eng]
Cut out a piece of black cardboard, I used this one with polka dots because I loved its rarity.
Put glue and glue on the bag, trim the excess being careful not to cut the bag.
Cut out a piece of gold frosted foami, a rectangle a little wider than the cardboard you previously cut. Cut out a rectangle in the center, this will give shape to Santa's belt buckle.
Apply glue and glue in the center of the bag in front of the cardboard.
Step 5️⃣/ paso 5️⃣
 |  |
 | 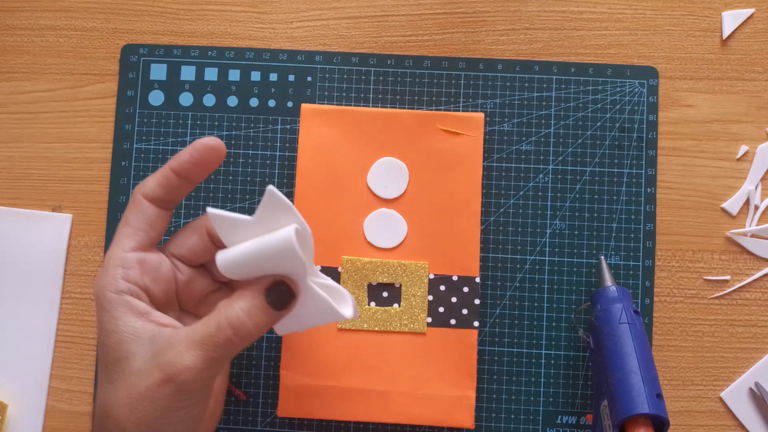 | 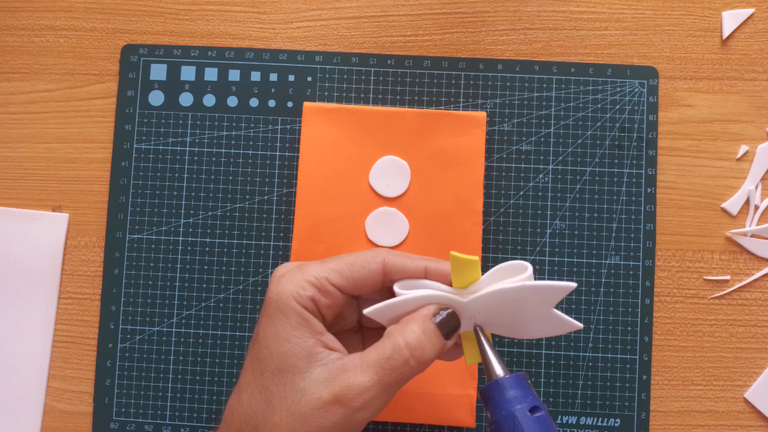 |
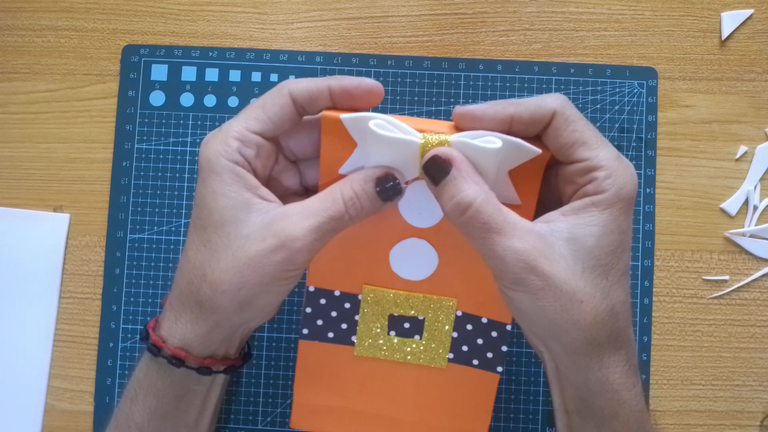
[Esp]
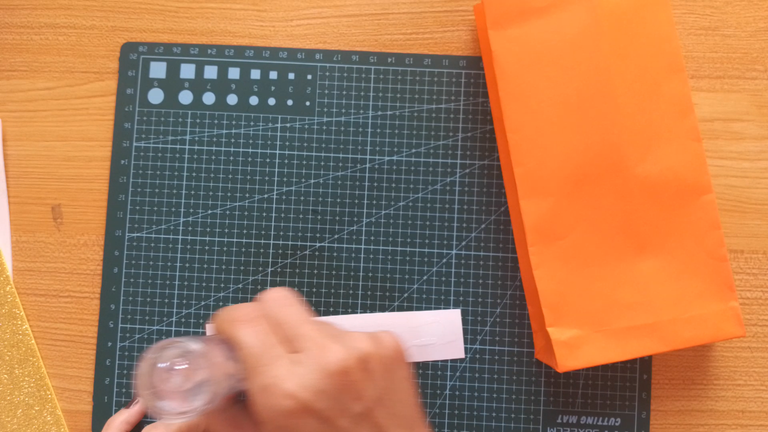
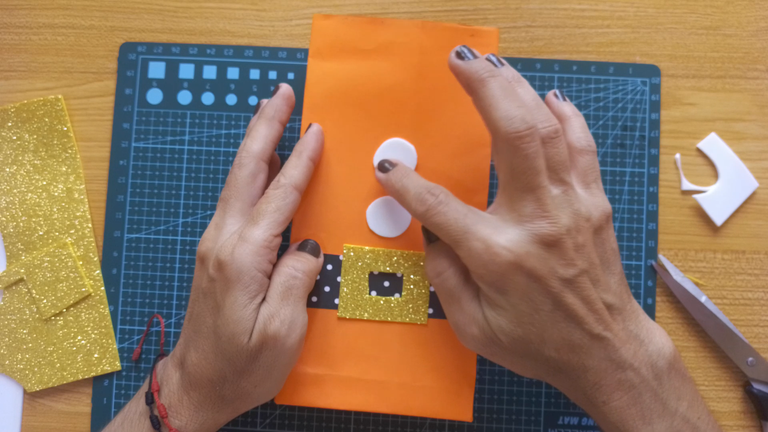
Recorta dos círculos de foami blanco, pégalo como dos botones de camisa a la bolsa.
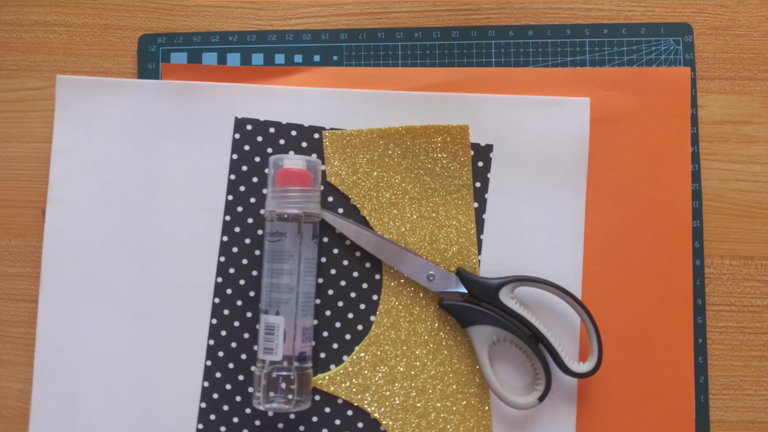
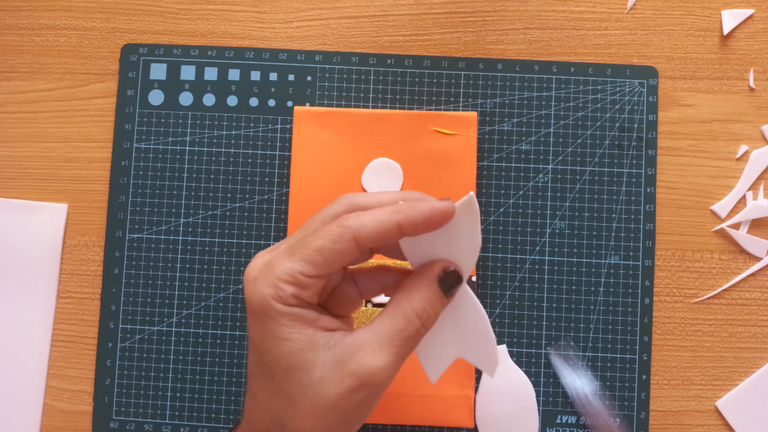
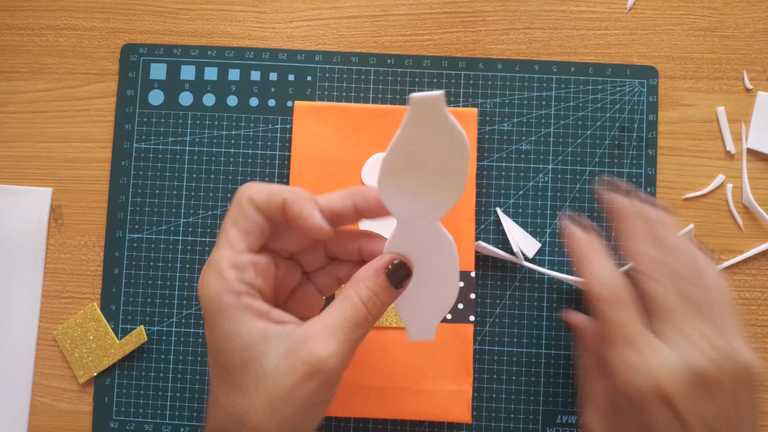
Recorta la forma de un lazo y luego una que parecen unos lentes observa la imagen.
Une ambos extremos al centro (de la forma con lentes), pega en la parte trasera la forma del lazo, recorta una tira delgada de foami escarchado blanco para decorar con una cinta en el medio el lazo.
Pega el lazo en la bolsa y con ello terminamos nuestro envoltorio precioso para obsequios.
Espero les guste.
! [English version]
[Eng]
Cut out two circles of white foami, glue it like two shirt buttons to the bag.
Cut out the shape of a bow and then one that looks like a pair of glasses, see the picture.
Attach both ends to the center (of the glasses shape), glue the bow shape to the back, cut out a thin strip of white frosted foami to decorate with a ribbon in the middle of the bow.
Glue the bow on the bag and that's the end of our beautiful gift wrapping.
I hope you like it.

Program: MediBang Paint Pro.
Tablet Huion model 420
Las fotos fueron tomadas con mi teléfono ZTE Blade A5 2020
The photos were taken with my ZTE Blade A5 2020 phone.

Hecho con amor/ Made with love.
💜💜💜

💜💜💜
![]() 👉
👉 ![]() 👉
👉 ![]() 👉
👉 
Here / Bríndame un café

This post has been manually curated by @steemflow from Indiaunited community. Join us on our Discord Server.
Do you know that you can earn a passive income by delegating to @indiaunited. We share more than 100 % of the curation rewards with the delegators in the form of IUC tokens. HP delegators and IUC token holders also get upto 20% additional vote weight.
Here are some handy links for delegations: 100HP, 250HP, 500HP, 1000HP.
100% of the rewards from this comment goes to the curator for their manual curation efforts. Please encourage the curator @steemflow by upvoting this comment and support the community by voting the posts made by @indiaunited.
Quedó bella amiga
Gracias amiga.
What you say is true, dear friend @equipodelta, Christmas awakens our creative side in us
How beautiful what you have done, and the great thing is that they are from small scraps that remain.
You have done a modern, beautiful and very creative job.
Thank you very much for sharing this beautiful gift bag
have a great day
Hello Jlufer. Now in the schools it is customary to carry cotillions and the teachers and representatives make nice bags for it, this is a good option very economical and excellent for integrating children in their elaboration.
Yo tambien guardo lo que sobra de otras creaciones porque considero que se pueden volver a usar para otras cositas, y es una buena practica y bastante conveniente jeje
Ains es muy linda, siempre me encantaron las bolsitas de regalo (tengo un monton de buhos jaja) y esta es preciosa, con la tematica navideña queda muy bonita, la navidad despierta un lado muy creativo, muy cierto ❤️
Hola amiga, yo guardo muchos retacitos. Tengo una amiga que me dice, Isa! Tienes retacitos de foami que me regales, yo se los doy y luego me sorprendo de las maravillosas creaciones que hace, jajaja lo hago apropósito para que me sorprenda, me encanta.
Felicidades @equipodelta, te quedo muy bonito tu proyecto. Es útil, práctico y fácil de hacer.
Pensé que era el único que guardaba los recortes de los materiales ¡Ja, ja, ja!
Acá en casa siempre me dicen:
¡Para qué acumulas tanta basura!
¿Qué vas a hacer con ese montón de retazos?
Y siempre los uso para darle detalles a los nuevos proyectos, es una manera de reciclar o reutilizar los materiales.
A mundo!!!! jajajajaj digales no es basura es material reciclable
wajajaja, yo los guardo en un cajoncito ordenadamente eso si.
En cuanto a la bolsita, las escuelas se acostumbra a llevar cotillones y las maestra so representantes hacen lindas bolsas para ello, esta es una buena opción muy económica y excelente para integrar a los niños en su elaboracion
This is beautiful and craftily made. I like the color combinations. They commend the effort you put in making this beautiful piece and sharing in with us.
I am glad it is to your liking, these days it is fashionable to surprise family members where we also personalize our gift wrapping. Doubly great.
Yay! 🤗
Your content has been boosted with Ecency Points, by @hive-130560.
Use Ecency daily to boost your growth on platform!
Support Ecency
Vote for new Proposal
Delegate HP and earn more
https://twitter.com/hivediy47901/status/1734286430187233488
Para esta navidad esta perfecta y lo mejor es que podemos hacerla en el color que más nos guste, te envío un saludo.
Hola amiga, saludos de vuelta gracias por pasarte. felices fiestas <3
Congratulations, your post has been upvoted by @dsc-r2cornell, which is the curating account for @R2cornell's Discord Community.
Enhorabuena, su "post" ha sido "up-voted" por @dsc-r2cornell, que es la "cuenta curating" de la Comunidad de la Discordia de @R2cornell.
Que maravillosas tus creaciones navideñas, tienes un gran talento no solo para las ilustraciones y diseños digitales, sino que también para las manualidades. Tienes un gran creatividad cariño.
Besos y abrazos.
Hola mi corazón con respecto alas manualidades estas si me cuestan mucho, jajajaja pero es que me gustan, como digo en diseño, hay que practicar mucho.
Espero estés pasando felices fiestas.
So nicely made
Merry Xmas in advance to all the community.
The gift bag is so beautiful
Thank you, I hope you are having a happy holiday season
Somos team "guardar pedacitos de material por si acaso" 😂 👌 Te quedo muy muy linda Isa, lo que mas me gusta es que por si diseño, sirve tanto para regalar a un niño o a un adulto, y también no importa si es hombre o mujer, es como un diseño universal que resuelve muchisimo. Justo la semana pasada hice una color rosa con amarillo para un encargo pero este modelo me gusta muchisimo mas 🤌 💕
Hola amiga querida!!! Ya tengo un cajón de retazos, jajaja.
A veces se me olvida y necesito un pedacito de un color y en vez de buscar entre retazos termino quitando un pedazo del grande y pues genero otro retazo... jajajajaj!
Estas bolsitas están estupendas para las escuelas y los cotillones.