DIY: Turban very easy to make. Turbante muy fácil de hacer. (Esp/Eng)


[Esp]
¡Saludos comunidad!
Me encantan usar turbantes, pañueleras y gorros, donde vivía era muy común ver a las mujeres con ellas en la cabeza, el clima era algo inestable, en ocasiones hacia frío. Mi madre me las hacía tejidas o las compraba, ahora estoy aprendiendo yo sola a hacerlas, he comprado unas telas muy bonitas, ahora te cuento cómo puedes hacerlas tú mismo, quizá sea una buena idea de emprendimiento.
Es muy fácil. Puedes coserla a mano aun si no tienes una máquina de coser.
! [English version]
Greetings community!
I love to wear turbans, scarves and hats, where I lived it was very common to see women with them on their heads, the weather was somewhat unstable, sometimes it was cold. My mother used to knit or buy them for me, now I am learning how to make them by myself, I bought some very nice fabrics, now I tell you how you can make them yourself, maybe it is a good idea of entrepreneurship.
It is very easy. You can sew it by hand even if you don't have a sewing machine.

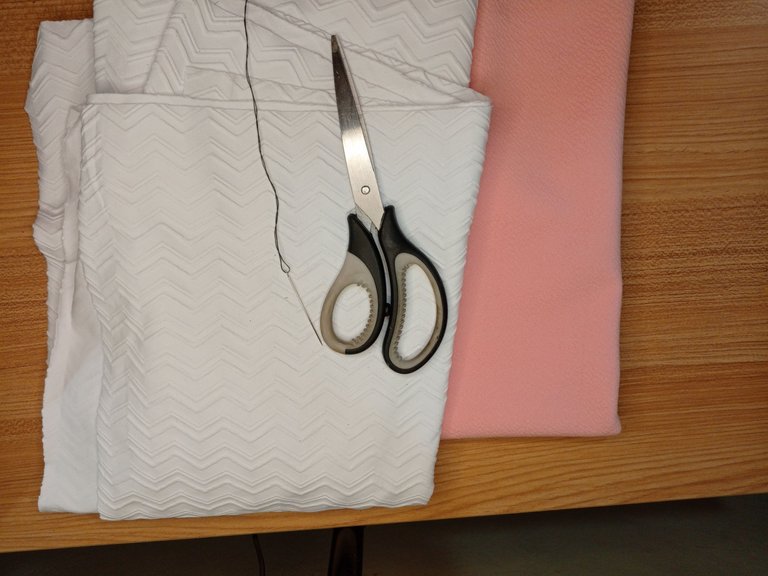
Materiales / materials
| Spanish | English |
|---|---|
| Maquina de coser | Sewing machine |
| Tijera, aguja, hilo | Scissors, needle, thread |
| Tela unicolor lycra o algodón | One-color lycra or cotton fabric |
| Regla o cinta métrica, lápiz | Ruler or tape measure, pencil |
Paso a paso / Step by Step
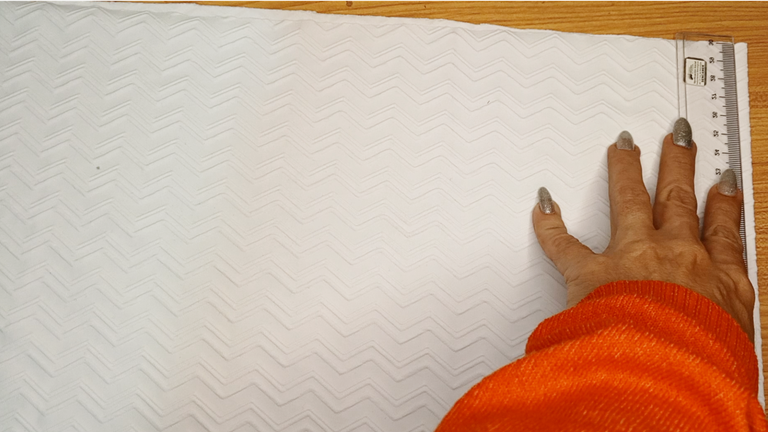
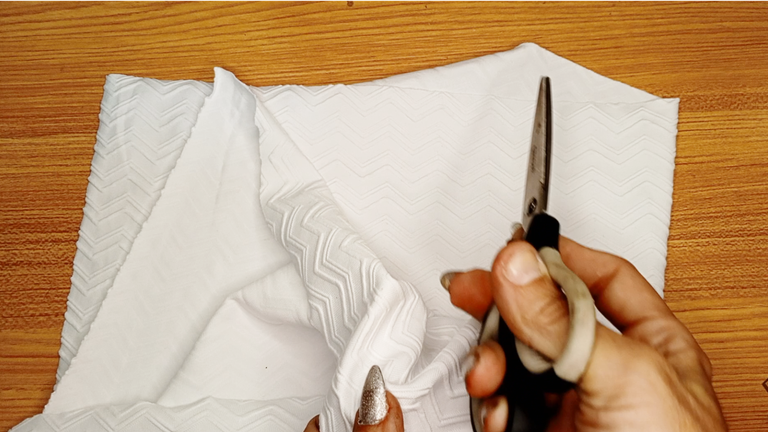
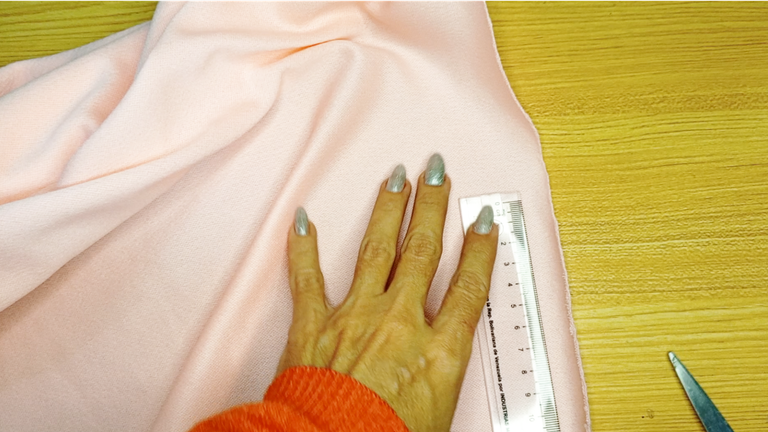
Step 1️⃣/ Paso 1️⃣
 |  | |
 |  |
[Esp]
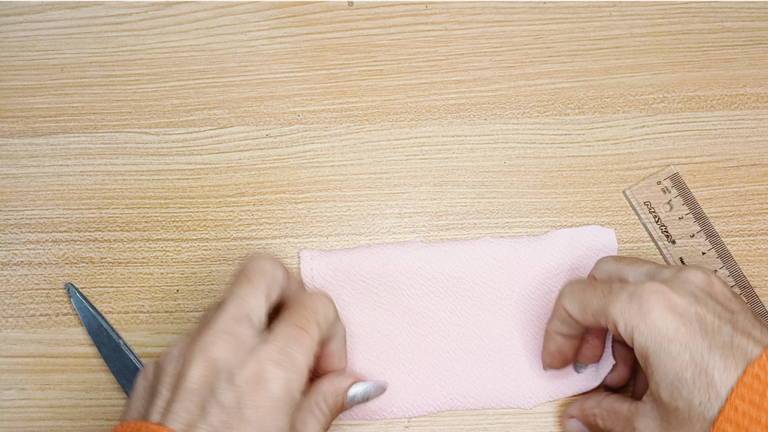
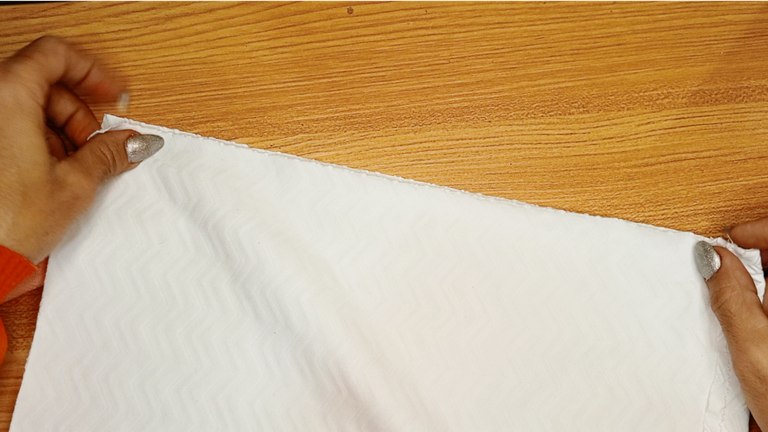
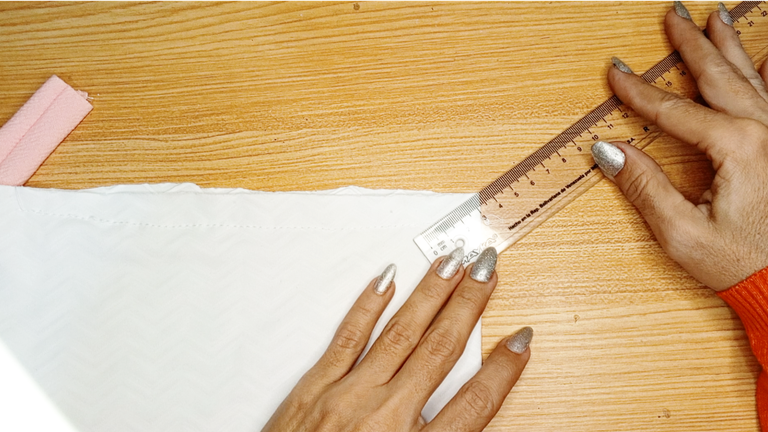
Toma la cinta métrica o la regla y mide la tela 54 Centímetros de largo por 35 centímetros de ancho, recorta.
Recorta un rectángulo de tela de otro color con medidas de 15 centímetros de largo por 8 centímetros de ancho.
Coser el pequeño rectángulo a la mitad por el lado más largo.
! [English version]
Take the tape measure or ruler and measure the fabric 54 centimeters long by 35 centimeters wide, cut out.
Cut out a rectangle of fabric of a different color measuring 15 centimeters long by 8 centimeters wide.
Sew the small rectangle in half on the longer side.
Step 2️⃣/ paso 2️⃣
 |  | |
 |  |
[Esp]
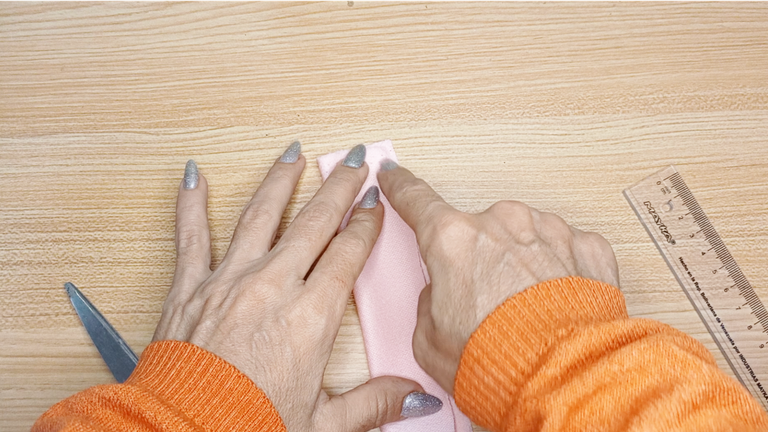
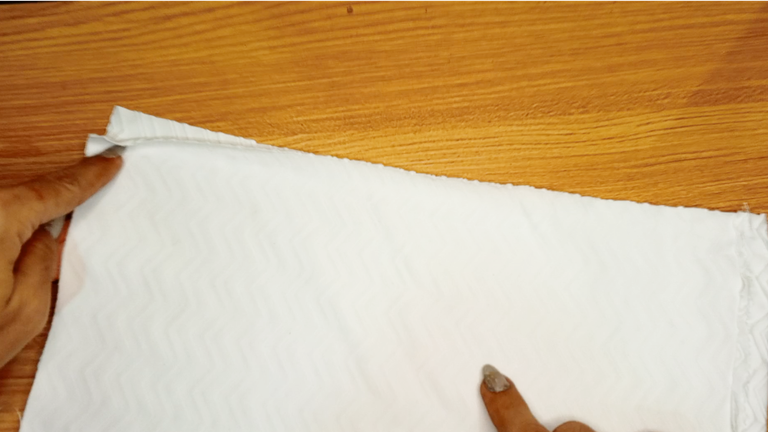
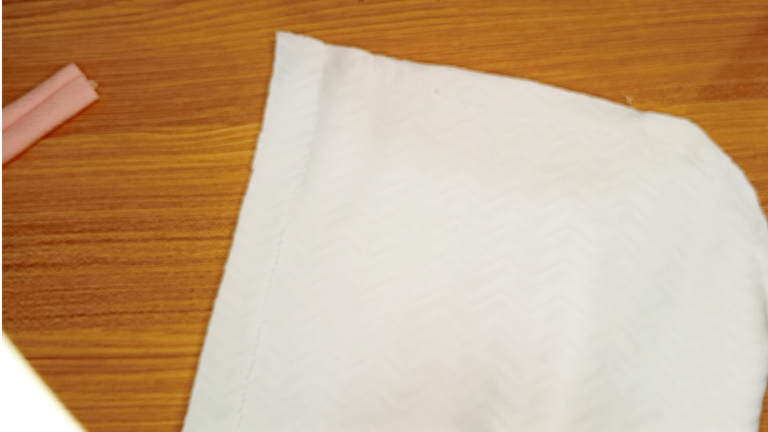
Por el largo de la tela, dobla una pestaña de dos centímetros, cose por todo el largo. Trata de no apretar mucho el punto, porque la tela debe estirar sin problemas.
Coloca la tela derecho con derecho, cose a lo largo cerrando la parte más corta por el lateral, el punto debe estar muy suelto pues el hilo hay que halarlo después para fruncir.
Cose del otro lado que quedó abierto, dejando una abertura de 2 centímetros aproximadamente.
! [English version]
For the length of the fabric, fold a two-centimeter tab, sew along the entire length. Try not to tighten the stitch too much, because the fabric should stretch without problems.
Place the fabric right sides together, sew along the length closing the shortest part on the side, the stitch must be very loose because the thread must be pulled later to gather.
Sew the other side that was left open, leaving an opening of approximately 2 centimeters.
Step 3️⃣/ paso 3️⃣
 |  |
 |  |  |
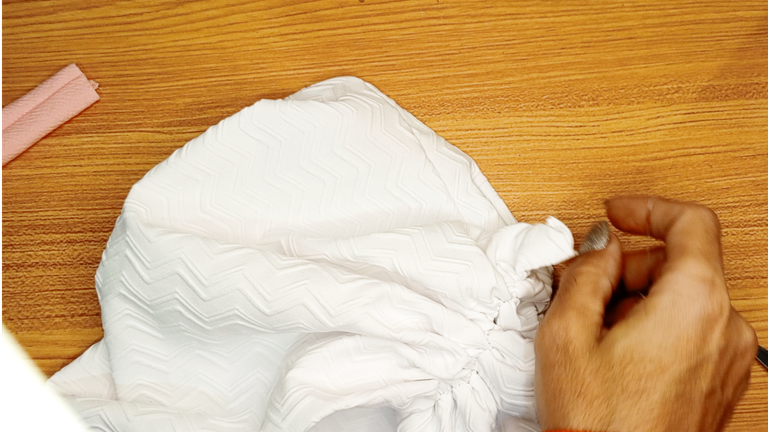
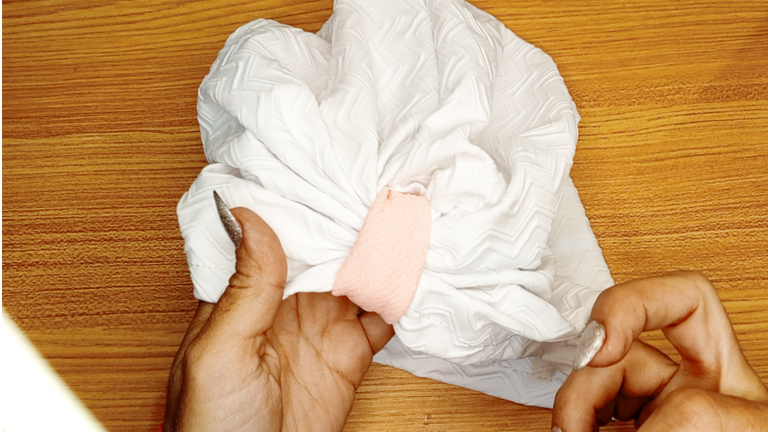
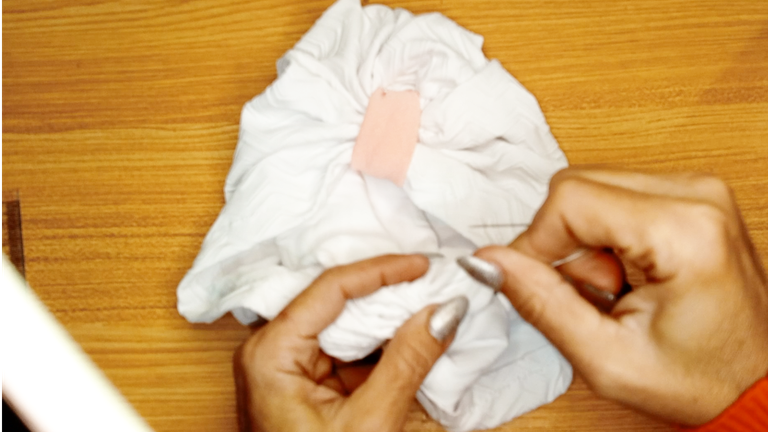
[Esp]
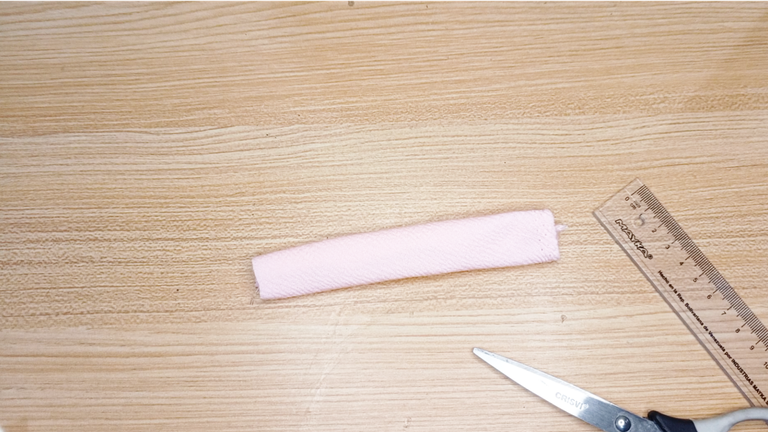
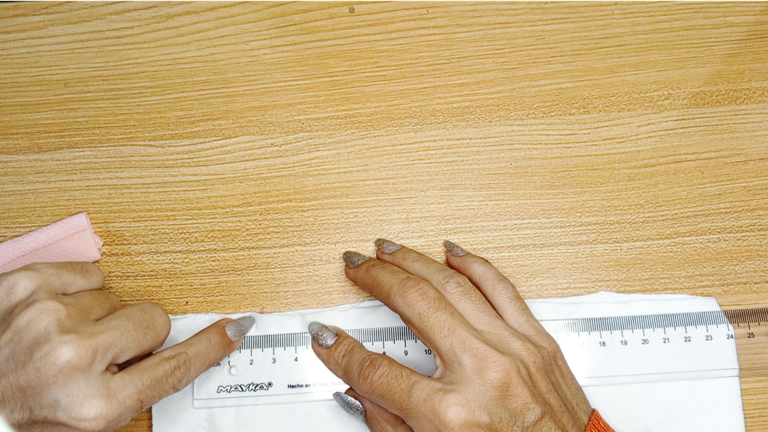
Por la esquina del lado que no tiene costura, marcas 2 centímetros de separación y coser un semi círculo. corta el exceso de tela.
Voltea ahora la pieza.
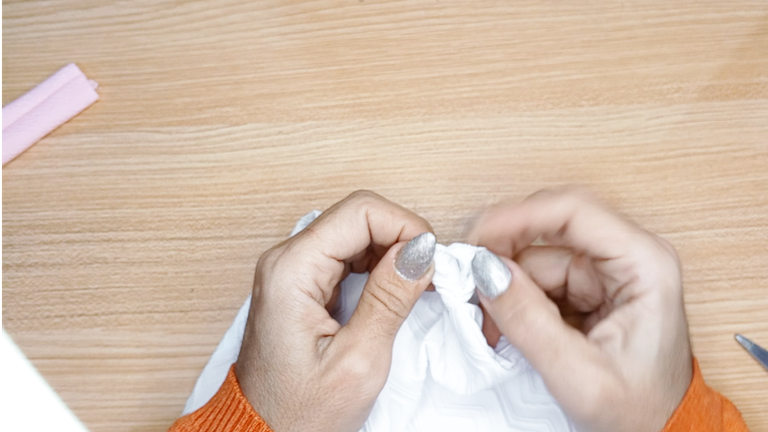
Toma el hilo del frente y comienza a halar para fruncir con mucho cuidado. Realiza un nudo luego de apretar hasta donde más no pueda, para que no se suelte.
! [English version]
On the corner of the seamless side, mark 2 centimeters apart and sew a half circle.
Now flip the piece over.
Take the thread from the front and start pulling to gather very carefully. Tighten the knot as far as it will go, so that it does not come loose.
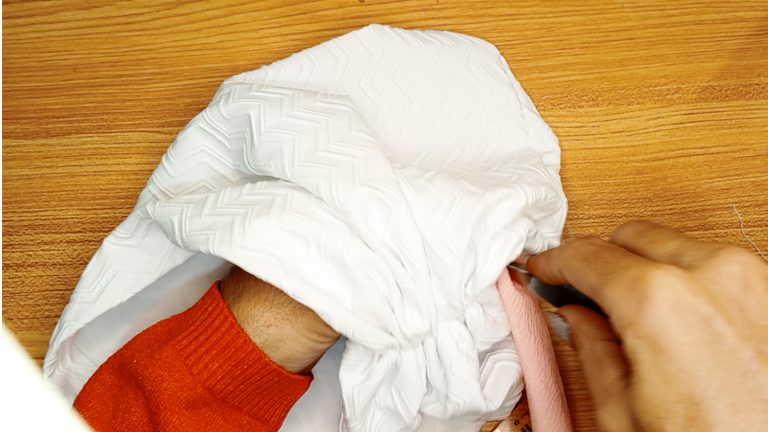
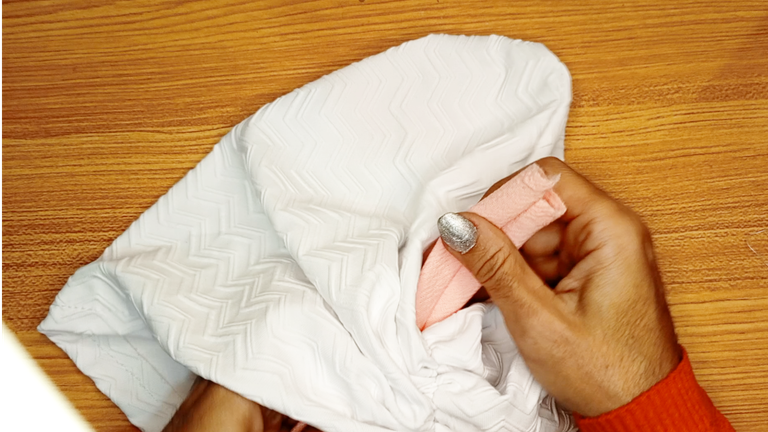
Step 4️⃣/ paso 4️⃣
 |  |
 |  |  |
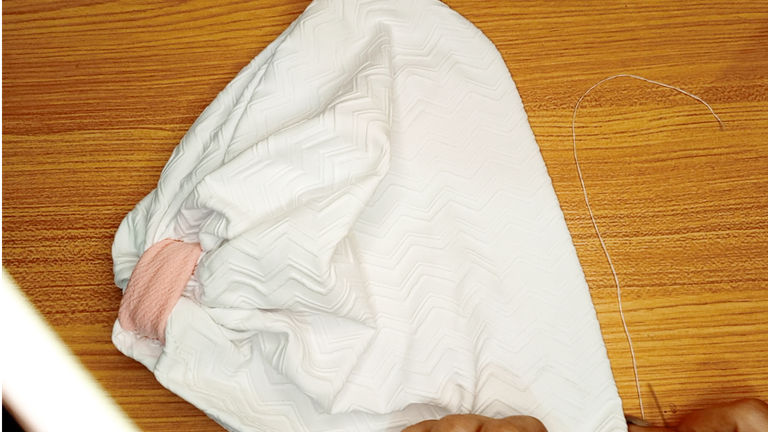
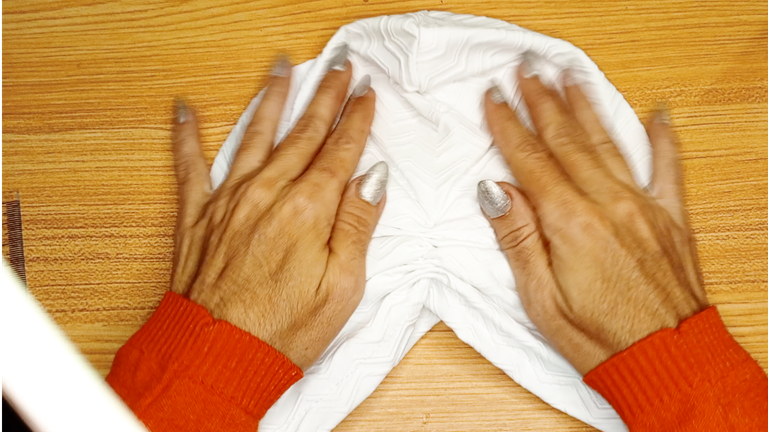
[Esp]
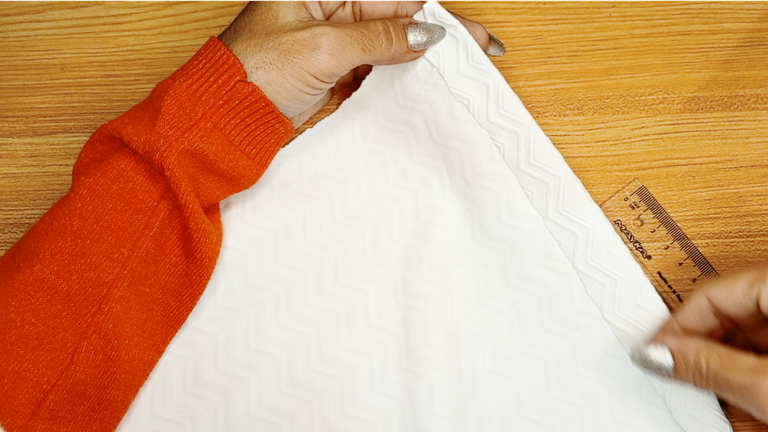
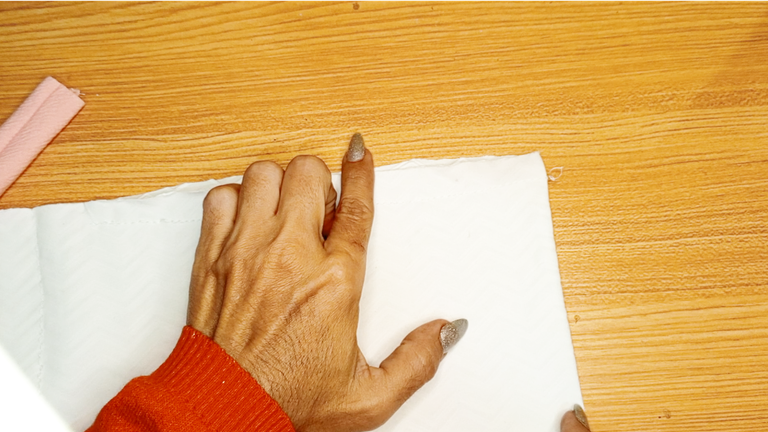
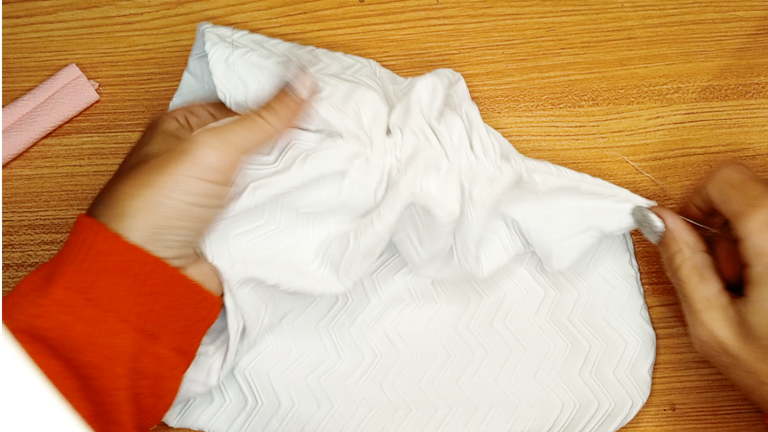
Introduce el rectángulo por la abertura, procura que su costura quede por el lado de adentro. Ajusta y cose. cose por el lado dentro del gorro.
Dobla ahora por la mitad para marcar el medio.
! [English version]
Insert the rectangle through the opening, making sure that its seam is on the inside. Adjust and sew. Sew on the inside of the hat.
Now fold in half to mark the middle.

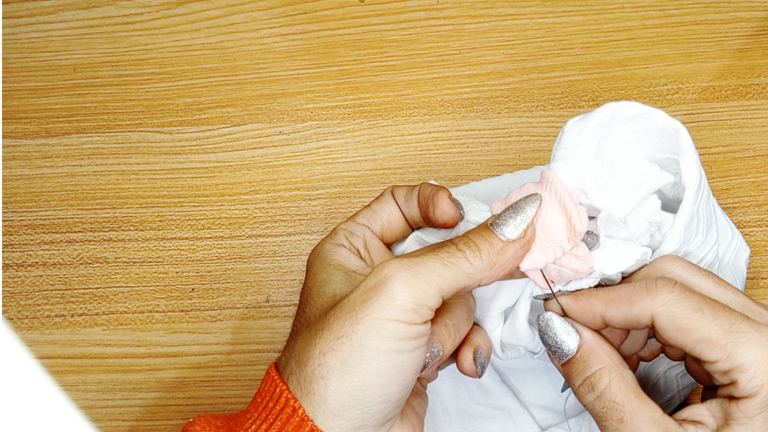
Step 5️⃣/ paso 5️⃣
 |  | |
 |  |
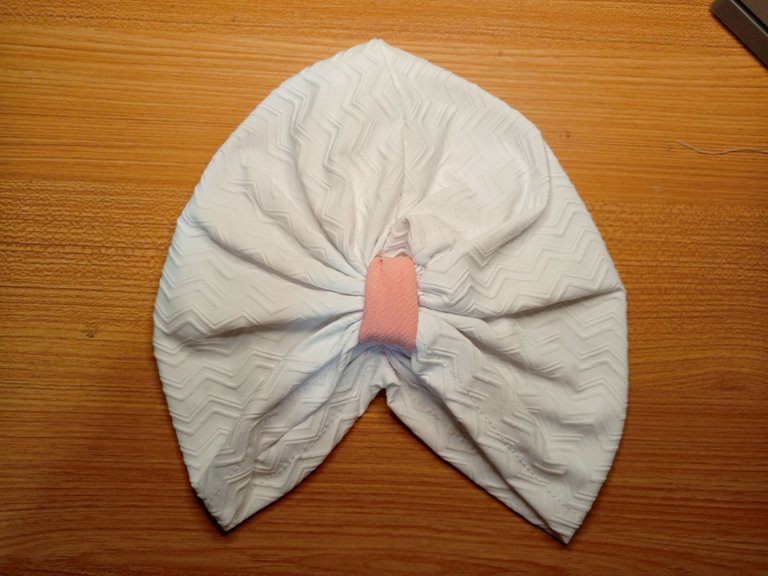
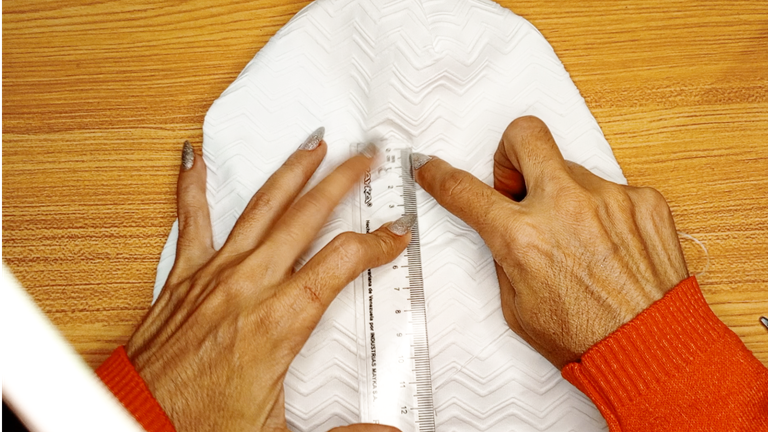
[Esp]
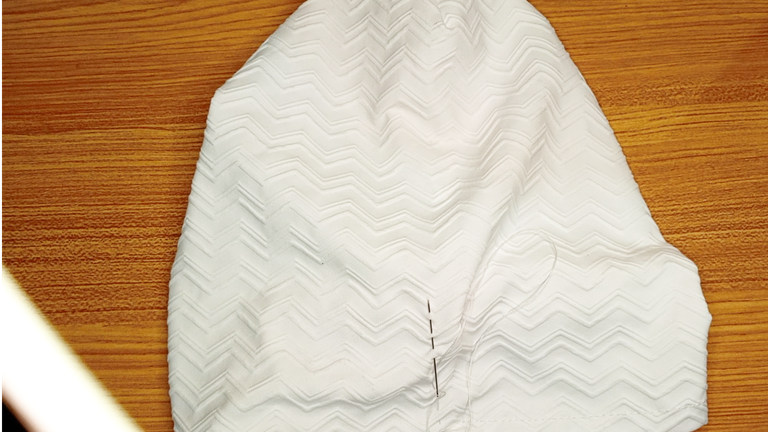
Mide 15 centímetros de largo respetando los dos centímetros del pequeño ruedo que dejaste. Con aguja puedes coser a mano el centro del gorro sin necesitad de apretar mucho el punto.
Comienza a fruncir halando desde arriba el hilo, pasa la aguja por dentro del turbante y ahora cose un nudo para que no se suelte. Este paso es muy similar al que hicimos en el principio por la parte de adelante.
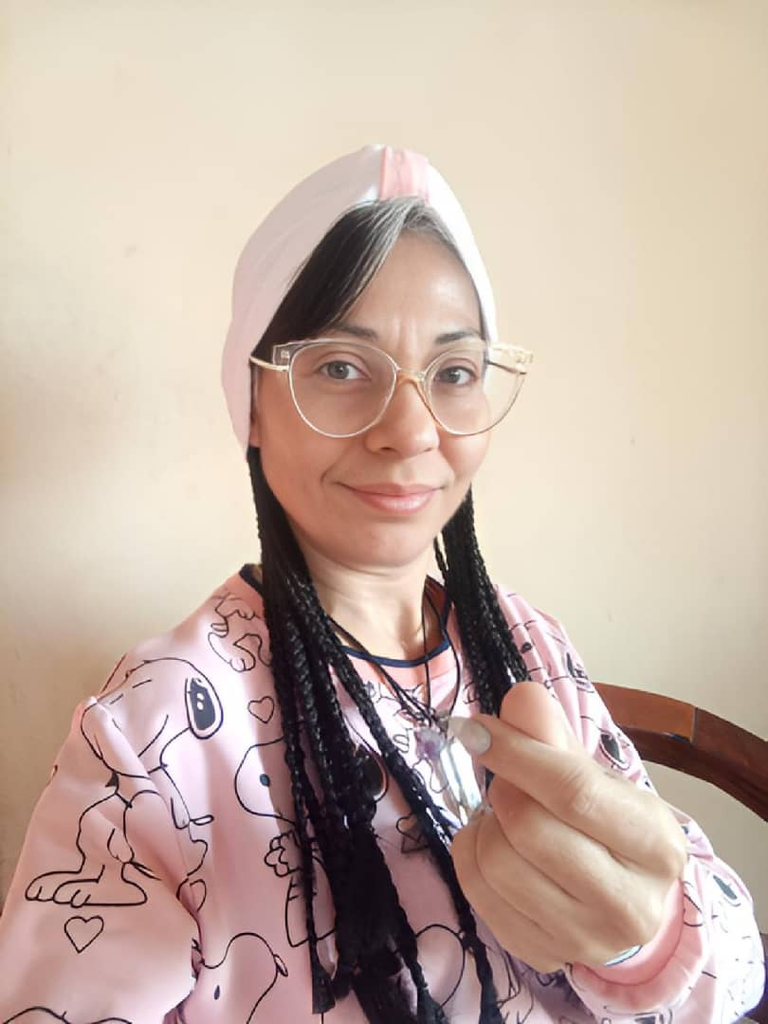
Con ello hemos culminado nuestro turbante super fácil. Espero les guste a mi me ha encantado y me queda bello, me puse una de mis pelucas y a brillar 😅.
! [English version]
Measure 15 centimeters long, respecting the two centimeters of the small ruffle you left. With a needle you can hand sew the center of the hat without needing to tighten the stitch too much.
Begin to gather the yarn by pulling from above, pass the needle through the turban and now sew a knot so that it doesn't come loose. This step is very similar to the one we did in the beginning at the front.
With this we have finished our super easy turban. I hope you like it, I love it and it looks beautiful on me, I put on one of my wigs and let's shine 😅.
Créditos / Credits

👇Support the Hive DIY community as a witness 👇


Que original, lo que se hace a mano siempre es bonito @equipodelta...
Un abrazo!
Lo disfrute mucho amiga, me divertí poniendome las pelucas para lucirla jajaja.
Que guapa ❤️ nunca vi a alguien usando turbantes por aqui, pero son realmente muy bonitos y elegantes, quiza pueda hacerle un turbante de papel a Buhito 😂 jeje
Te quedo muy lindo amiga, lo luces muy bien 🦉 ❤️
Hola buhito lindo, del pueblo donde vengo si era muy común, aquí donde estoy ahora es muy extraño, pero qué importa, yo quiero verme como una turka, indú o lo que sea jajaja
ya te veré con tu turbante, seguro tu mami lo hará.
Hahah...then I gues you have nor seen the India turban...that were actually wrapped up in a long piece of cloth.....The Sikhs community usually does that...
Of course, yes dear, they fascinate me, I love them, I would like to have one, they are too beautiful.
Hahaha....I thought u never comes across them...it was in their rituals to keepnthe head covered.....at many place putting turban is like keeping the prestige.
Saludos bella. Qué lindo te quedó el turbante, me enganchó el color. Un abrazo 🤗
Gracias amiga, si, ando usando mucho blanco ahora, mi tiempo de luto y andar con negro está llegando a su fin al parecer.
Looks super beautiful!
Thanks you so much.
Hi! Let's start messaging privately. Join here https://ecency.com/chats
Magnífico post, me encantó que lo hiciste y además lo modelaste. Eso me gusta mucho porque como siempre digo, yo nunca haría algo que realmente no usaría, y esto es así mismo, muy funcional y bello.
Felicitaciones amiga, quedó genial y el paso a paso se entiende perfecto.
Hola amiga, muchas gracias, es que lo hice para mí, al probarmelo pues, tenía que mostrarlo, jajaja! lo amé.
Hermoso turbante amiga! me encanta!
El paso a paso estuvo genial, muy detallado!
Saludos!
Gracias Yessi, feliz que sea de tu agrado. Un abrazo.
Me encantan me parecen muy elegnates y practicos, gracias a tus instrucciones parece sencillo de hacer, lo voy a intentar.
I have never used turbans of this model but they look very nice, I hope that when I wear one I will also look beautiful.😊💯🥰
Te quedó impresionante es demasiado coqueto, los colores uno de mis favoritos, nunca he usado turbantes de este modelo pero son muy bonitos te luce lindo,espero que cuando use uno también luzca hermosa.😊💯🥰
Bien bonito amiga excelente trabajo 😊👏 muy creativa y propio de tus manos felicidades
Saludos belleza. Me gustó el turbante, es muy funcional.
Uy! que bonita! Gracias por compartir tu paso a paso.
Saludos.