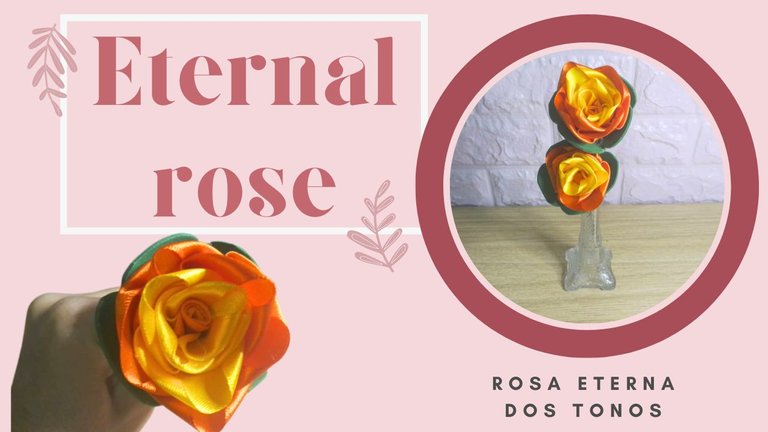
Rosa eterna en dos tonos / Eternal Rose (Esp/Eng)

[Esp]
¡Saludos querida comunidad artesana, craftera y artística! Hoy quise recrear una pequeña flor con cintas de raso y te cuento cómo fue.
Hace días aprovechando que salí, visité una de mis tiendas favoritas para ver si tenían otro frasco o floreros de formas extrañas para mi colección, me alegré mucho de ver aunque sea solo una.
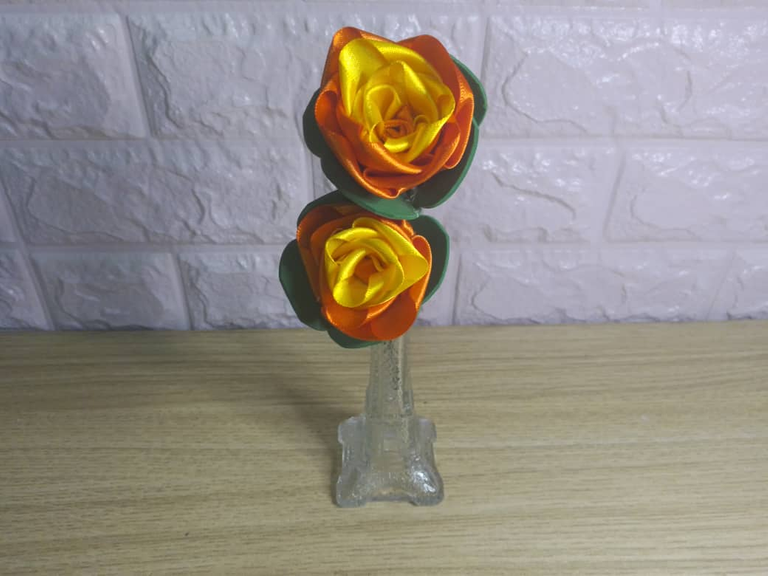
Se trata de un pequeño florero de vidrio con la forma de la Torre Eiffel al que no dudé en comprar, además estaba super económico. Lo traje a casa y me dije, unas flores de raso se verían muy lindas en él, pero pasaron muchas cosas...
Al principio pensé hacer las flores en mi máquina de coser, eso me haría el trabajo más fácil y rápido, no sé por qué al pegarlas del alambre para comenzar armar la rosa, los pétalos quedaban muy mal puestos y apretados. estuve grabando el proceso pero todo fue en vano.
Despegué los pétalos para poder recuperarlos, pues la cinta de raso número 9 aquí esta muy caro el metro (1.25 $) Me pareció exagerado, por lo que solo pude comprar un metro de cada color y no tenían color verde. Una vez despegado los pétalos comencé a usar la pistola de silicón caliente y los volví a pegar, con ello armé la primera rosa a ver cómo me quedaba, a partir de allí la otra rosa sería más sencilla y volví a tomar el paso a paso para mostrarte.
De una vez puedo decir que al menos con la máquina de coser, es casi imposible lograrla o tal vez necesitaba juntar más cada pétalo.
Por ahora solo usé un procedimiento sencillo que cualquiera puede hacer y te invito a ver el paso a paso.
! [Scroll down to read the English version]
[Eng]
Greetings dear artisan, crafty and artistic community! Today I wanted to recreate a small flower with satin ribbons and I'll tell you how it was.
A few days ago when I went out, I visited one of my favorite stores to see if they had another jar or vases of strange shapes for my collection, I was very happy to see even just one.
It was a small glass vase in the shape of the Eiffel Tower which I didn't hesitate to buy, plus it was super cheap. I brought it home and said to myself, some satin flowers would look really cute in it, but a lot of things happened....
At first I thought to make the flowers on my sewing machine, that would make the work easier and faster, I don't know why when I glued them to the wire to start assembling the rose, the petals were very badly placed and tight. I was recording the process but it was all in vain.
I peeled off the petals to recover them, because the satin ribbon number 9 here is very expensive per meter (1.25 $) I thought it was exaggerated, so I could only buy one meter of each color and they did not have green. Once I took off the petals I started to use the hot silicone gun and glued them again, with this I assembled the first rose to see how it looked, from there the other rose would be simpler and I took again the step by step to show you.
At once I can say that at least with the sewing machine, it is almost impossible to achieve it or maybe I needed to gather more each petal.
For now I just used a simple procedure that anyone can do and I invite you to see the step by step.

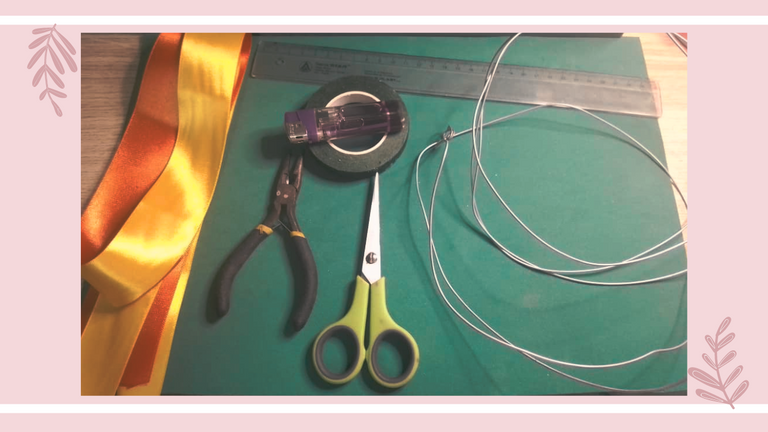
Materiales / Materials
[Esp]
| 1 metro de cada color de Cinta de raso N° 9 |
|---|
| Alambre |
| Floratex |
| Foami color verde |
| Yesquero |
| Tijera |
| Pistola de silicón caliente |
| Regla |
! [Scroll down to read the English version]
[Eng]
| 1 meter of each color of satin ribbon No. 9|
|-|
|Wire|
|Floratex|
|Foami green color|
|Yesquero|
|Scissors|
|Hot silicone gun|
|Ruler|
Step by Step / Paso a Paso
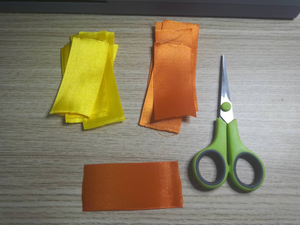
Step 1️⃣/ Paso 1️⃣
[Esp]
Recorta rectángulos de cada cinta, toma la medida de 8 centímetros de largo.
Como muestro en el Gif, procede a sellar quemando las puntas de las cintas con el uso del yesquero.
! [Scroll down to read the English version]
[Eng]
Cut out rectangles of each ribbon, measure 8 centimeters long.
As shown in the Gif, proceed to seal by burning the ends of the ribbons with yesquero.
Step 2️⃣/ paso 2️⃣
[Esp]
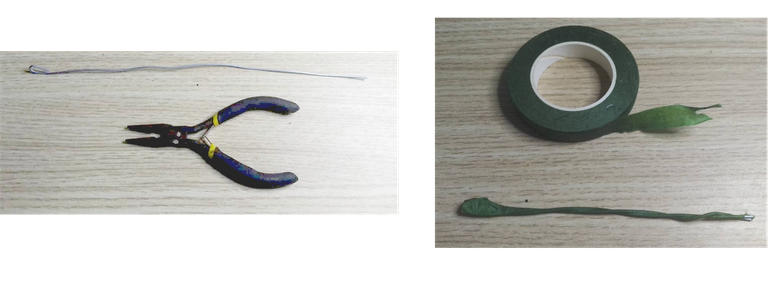
Toma un trozo de alambre de 15 centímetros aproximadamente y corta con la pinza, con ayuda de la misma dobla una de sus puntas hasta formar un pequeño óvalo.
Procede a forrar con el floratex.
! [Scroll down to read the English version]
[Eng]
Take a piece of wire approximately 15 centimeters long and cut it with the pliers. With the help of the pliers, bend one of its ends to form a small oval.
Proceed to cover it with the floratex.
Step 3️⃣/ paso 3️⃣
 |  |

[Esp]
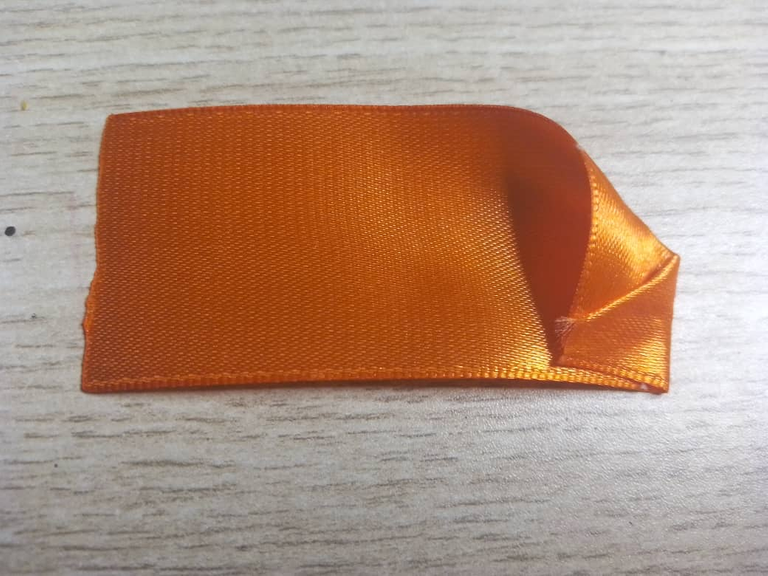
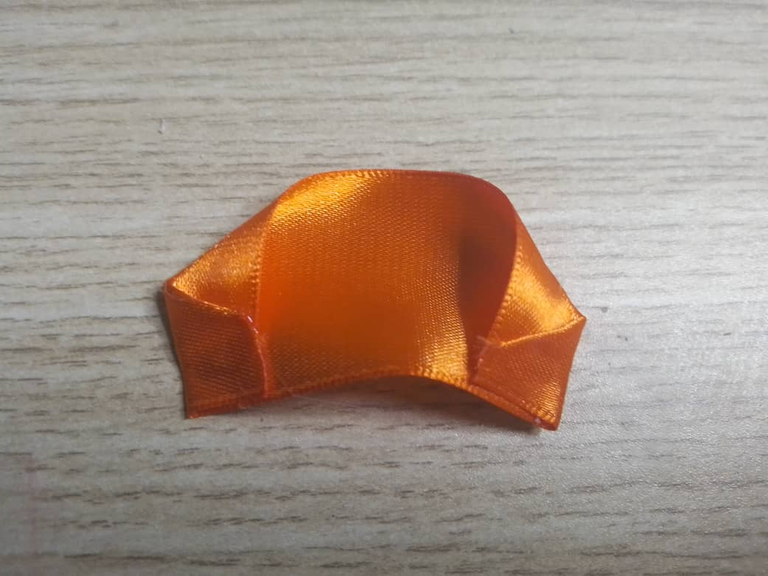
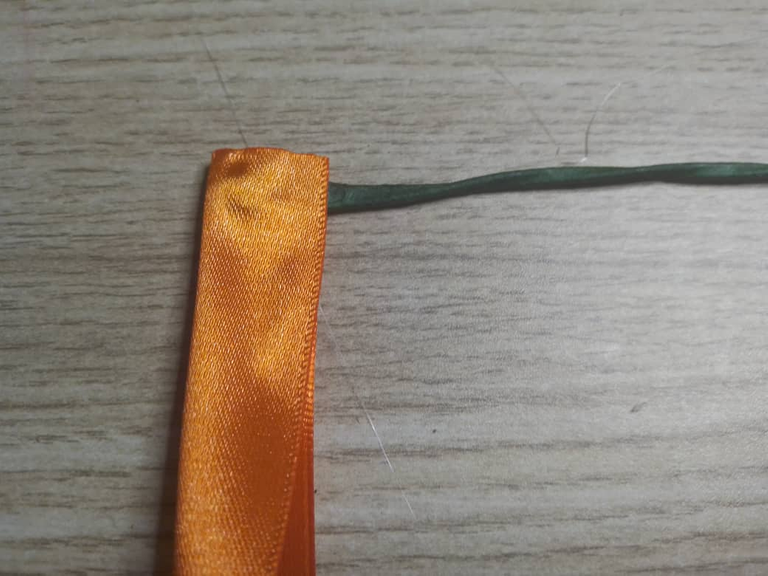
Con el uso de la pistola de silicón caliente, puedes ir pegando la forma de los pétalos, el primer doblez consta de pasar una punta y formar un triángulo, luego volver a doblar para quedar como un trapecio, este paso lo repites en el otro extremo de la cinta.
Repite estos pasos con la cinta del otro color, como puedes apreciar, para cada flor, con un metro de tela, se necesitan 4 piezas de cada una.
! [Scroll down to read the English version]
[Eng]
With the use of the hot silicone gun, you can glue the shape of the petals, the first fold consists of passing a tip and form a triangle, then fold again to be like a trapezoid, this step is repeated at the other end of the tape.
Repeat these steps with the ribbon of the other color, as you can see, for each flower, with one meter of fabric, you need 4 pieces of each one.
Step 4️⃣/ paso 4️⃣
 |  |
 |  |
[Esp]
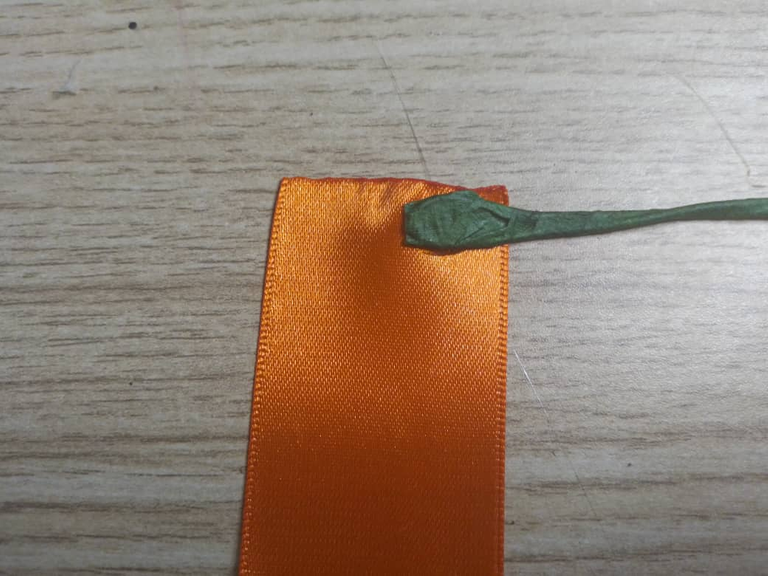
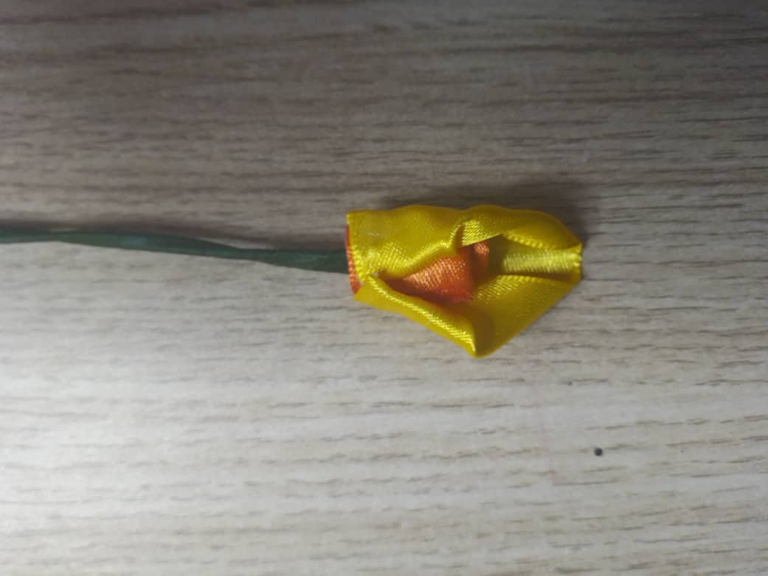
Coloca un punto de pegamento en la mitad de la cinta junto con el alambre que hemos forrado con el floratex, luego dobla y pega el otro extremo, ahora forra la punta.
Comienza a pegar cada pétalo intercalando para que queden ordenados y algo sueltos.
! [Scroll down to read the English version]
[Eng]
Place a dot of glue in the middle of the ribbon along with the wire that we have lined with the floratex, then fold and glue the other end, now line the tip.
<br<
Start gluing each petal in turn so that they are neat and somewhat free.
Step 5️⃣/ paso 5️⃣
 |  |
[Esp]
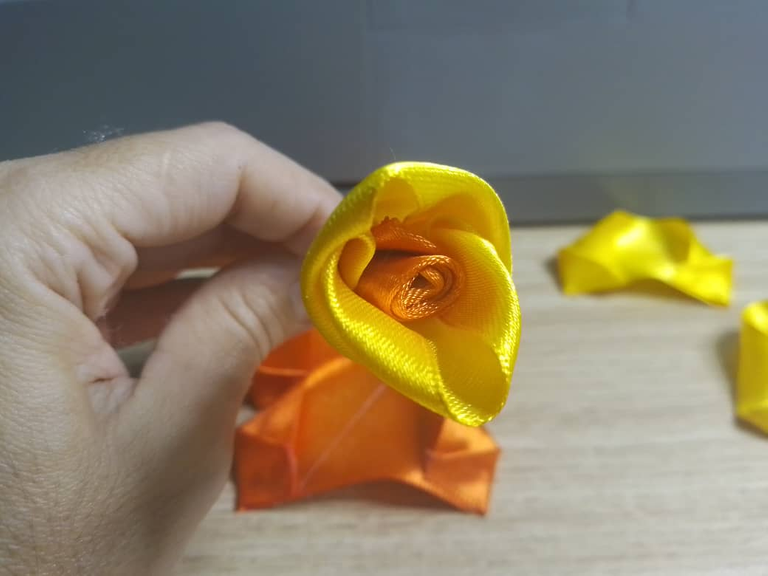
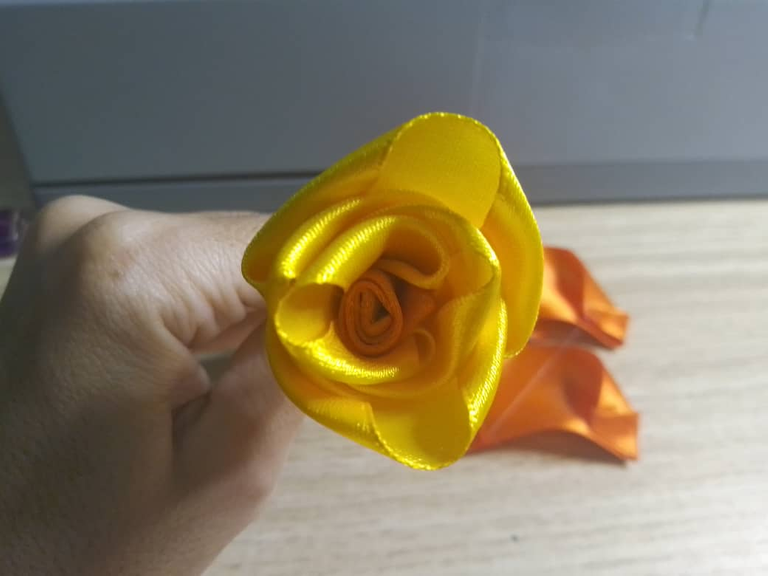
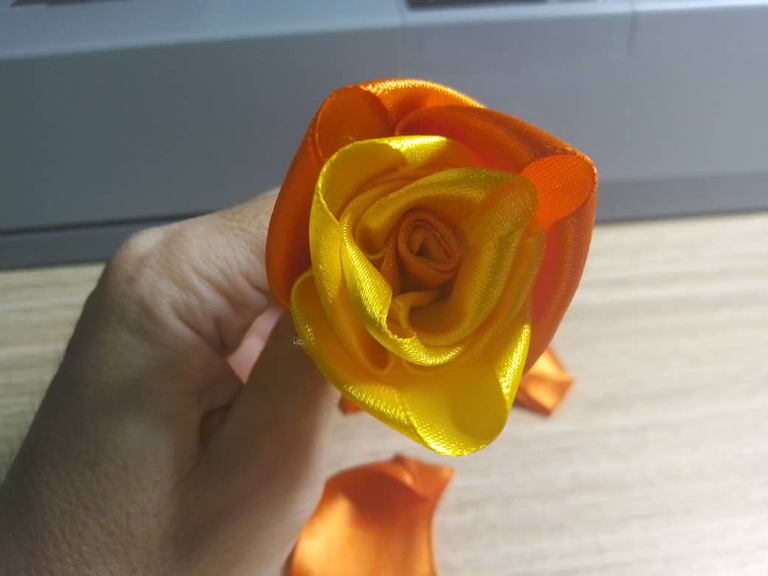
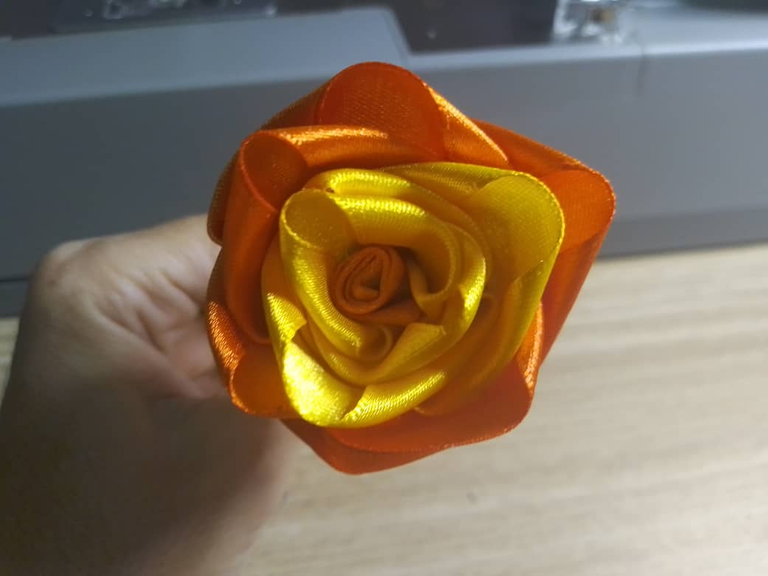
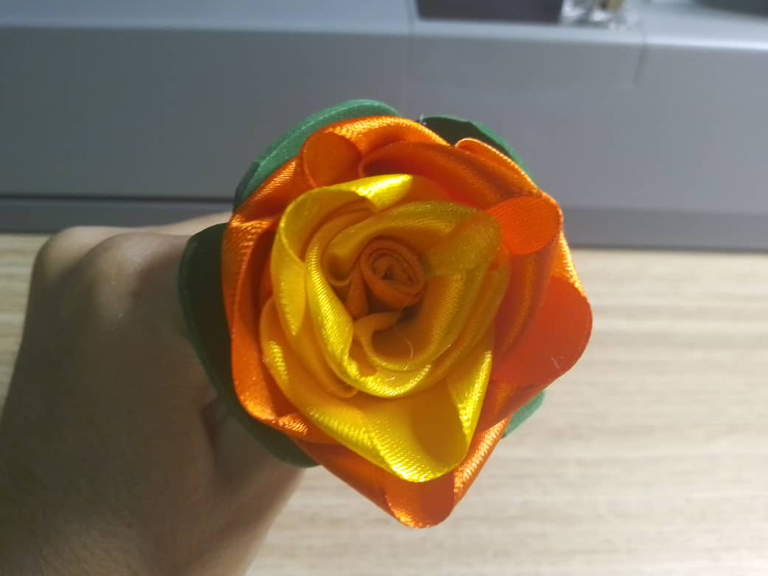
Luego de pegar los pétalos de un color, procede a pegar los del color diferente al que has elegido, yo usé los colores amarillo y naranja porque funcionan muy bien.
Al ir pegando los pétalos vas dando forma.
! [Scroll down to read the English version]
[Eng]
After gluing the petals of one color, proceed to glue the petals of the color different from the one you have chosen, I used yellow and orange because they work very well.
As you glue the petals together you are shaping
Step 6️⃣/ paso 6️⃣
 |  |  |
 |  |  |
[Esp]
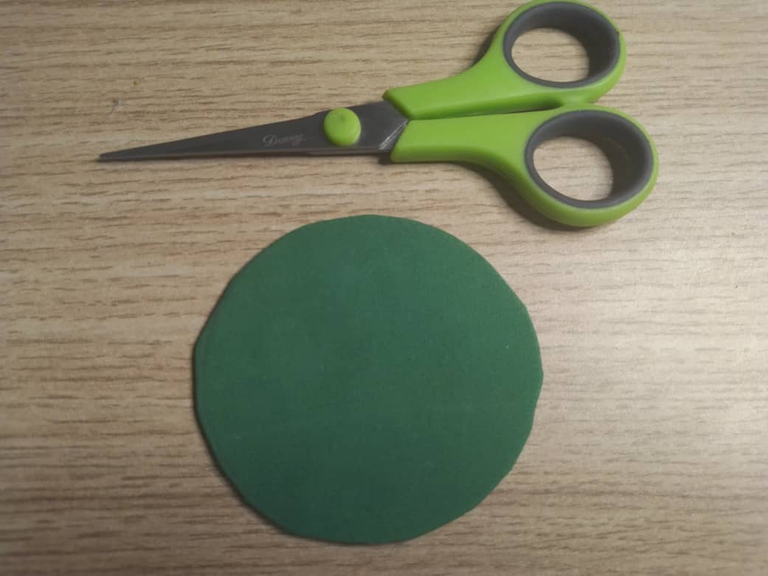
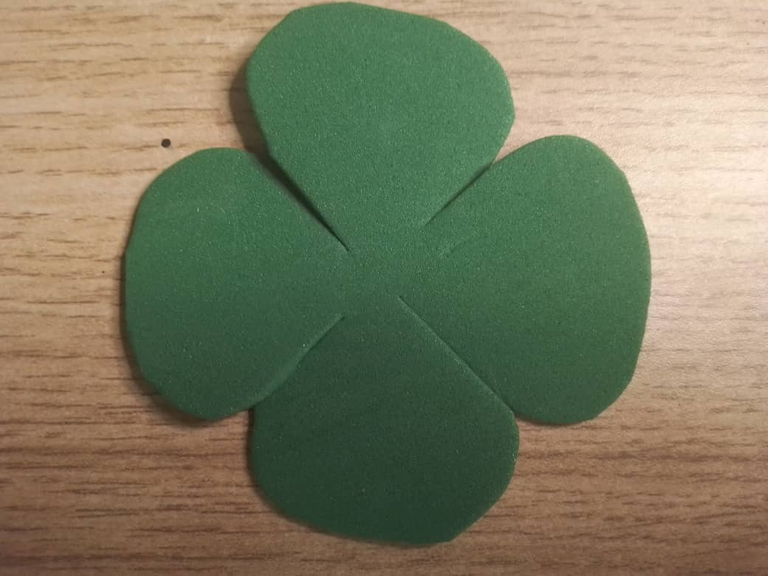
Hubiera preferido colocar las hojas del mismo material que la flor, sin embargo, al verla terminada noté que el uso del foami también fue funcional y quedó bonita.
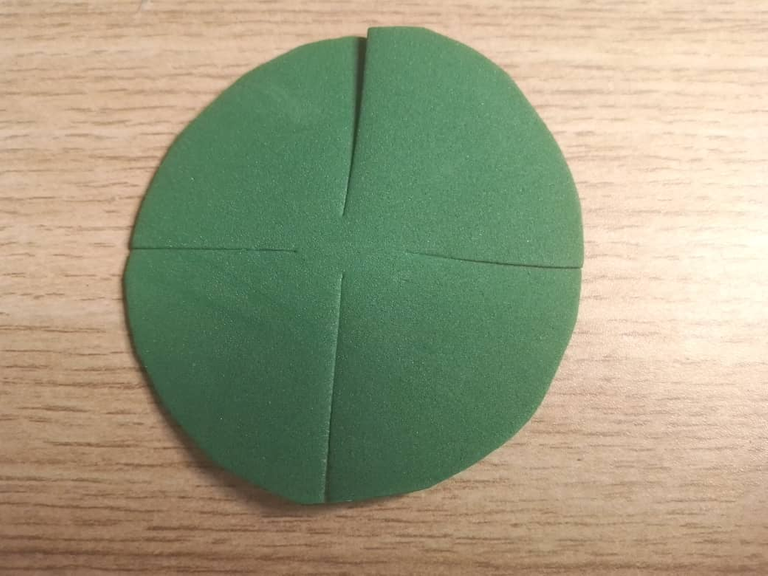
Recorta un circulo de foami (8 centímetros de diámetro), luego realiza un pequeño corte por cada mitad para poder elaborar y dar forma a las hojas.
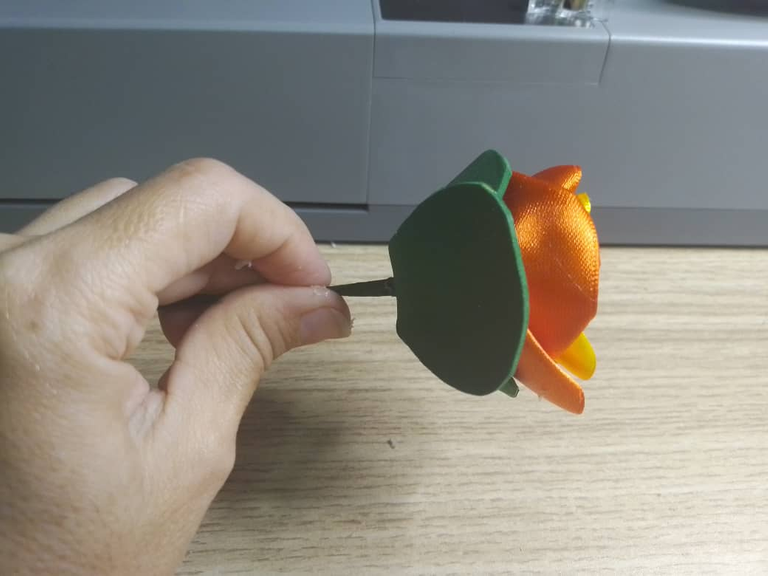
Pasa el tallo por el centro del foami y aplica pegamento, luego cubre la flor de manera que tape las imperfecciones que pudiera haber. Con ello hemos concluido.
Esto lo realicé a modo práctica, cuando haga un viaje al centro de la ciudad, trataré de comprar más materiales para hacerlas más pequeñas y delicadas.
Espero te guste. Aun en los contratiempos, me divertí mucho haciéndola.
! [Scroll down to read the English version]
[Eng]
I would have preferred to place the leaves in the same material as the flower, however, when I saw it finished I noticed that the use of foami was also functional and it looked beautiful.
Cut out a circle of foami (8 centimeters in diameter), then make a small cut in each half to make and shape the leaves.
Pass the stem through the center of the foami and apply glue, then cover the flower in such a way that it covers any imperfections. With that we have concluded.
I did this as a practice, when I make a trip downtown, I will try to buy more materials to make them smaller and more delicate.
I hope you like it. Even with the setbacks, I had a lot of fun making it.
Equipodelta
Credits / Créditos.

All copyrights reserved / Reservados todos mis derechos


Vote la-colmena for witness
By @ylich

Hacks, DIY, Crafts, handmade arts Community
![]() 👉
👉 ![]() 👉
👉 ![]() 👉
👉  👉
👉 ![]()

No sabía que coleccionas floreros. Cuando chama me gustaban muchos los adornos de vidrio, luego cuando tuve mi casa y pensé comprarlos los vi algo costoso y delicados así que desistí.
La flores eternas son bellísimas. Estas se ven muy lindas dentro de tu nuevo florero. Yo aún no me animo a trabajar con cintas, tampoco sabía que están tan costosas.
Bonito trabajo 👏
Si amiga, soy muy fan de coleccionar cosas en miniatura, siempre que puedo compro algo que vea, si el presupuesto me alcanza. Lamentablemente ya no se ven mucho por aqui, el vidrio y el cristal como que migro del pais o ya no los traen.
Ando practicando estas flores, deseo que me salgan mejor para ir haciendolas cada vez más pequeñas.
Me alegra más que hayas conseguido este florero entonces. Reliquias. Saludos.
Ésas flores se ven mu lindas
Después de haber tenido tantos inconvenientes me parece que te quedó bien , se logró el objetivo, lamento lo del vídeo, parece mentira pero cuando uno está grabando hay mucha tensión , generalmente mis tejidos quedan mejor fuera de camaras
Todo iba mal desde el principio, jajaja, pero bueno, aun con todos esos fallos, lo publiqué, todos sabemos que a pesar de todo lo que podamos hacer, no siempre es color de rosa, jijijiji! Espero mejorar esas flores.
Congratulations, your post has been upvoted by @dsc-r2cornell, which is the curating account for @R2cornell's Discord Community.
Enhorabuena, su "post" ha sido "up-voted" por @dsc-r2cornell, que es la "cuenta curating" de la Comunidad de la Discordia de @R2cornell.
Thank you very much for sharing with us, this is really a detailed description and the tutorial is also very easy to understand, always successful
I am very glad it is useful for you
Hola bella @equipodelta, quedaron muy lindas. Realmente esos materiales estan muy costosos. Dios siga bendiciendo tus manos y creatividad.
Hola Dory, yo no puedo creer cómo esté de caro el metro de esa cinta, me parece que exageran, cuando explore otros lugares compararé esos precios.
Que linda esta, la tela se ve super suave que hasta quiero acariciarla jejeje me gustan las manualidades de este estilo y si son florcitas para decorar mejor, me gustan artificiales para el interior del hogar y reales para el jardin jeje
Hola buhito, es porque es raso lo más parecido a la seda. Me gusta tu pensar... aunque, a mi me encantan las flores reales dentro del hogar, lastima que no duren mucho.
Están bonitas las flores... la maquinita de coser seguro se puso triste porque no pudo poner sus puntadas en esa creación. Pero amiga, es verdad, todo está caro y hay que trabajar con sumo cuidado para no desperdiciar el material.
Pero muy bien, te felicito, hiciste unas flores que cualquiera podría ser capaz de hacer. Sencillitas.
;)
Hola amiga, ella las cosió, pero al pegarlas al alambre, fue un desastre, tocó descoserlas y armarlas con pegamento.
Están divinas ,felicidades
Gracias amiga.