[ESP-ENG] Beautiful Headband Design - For my Little Sister | Hermoso Diseño para Cintillos - Para mi Hermanita Pequeña
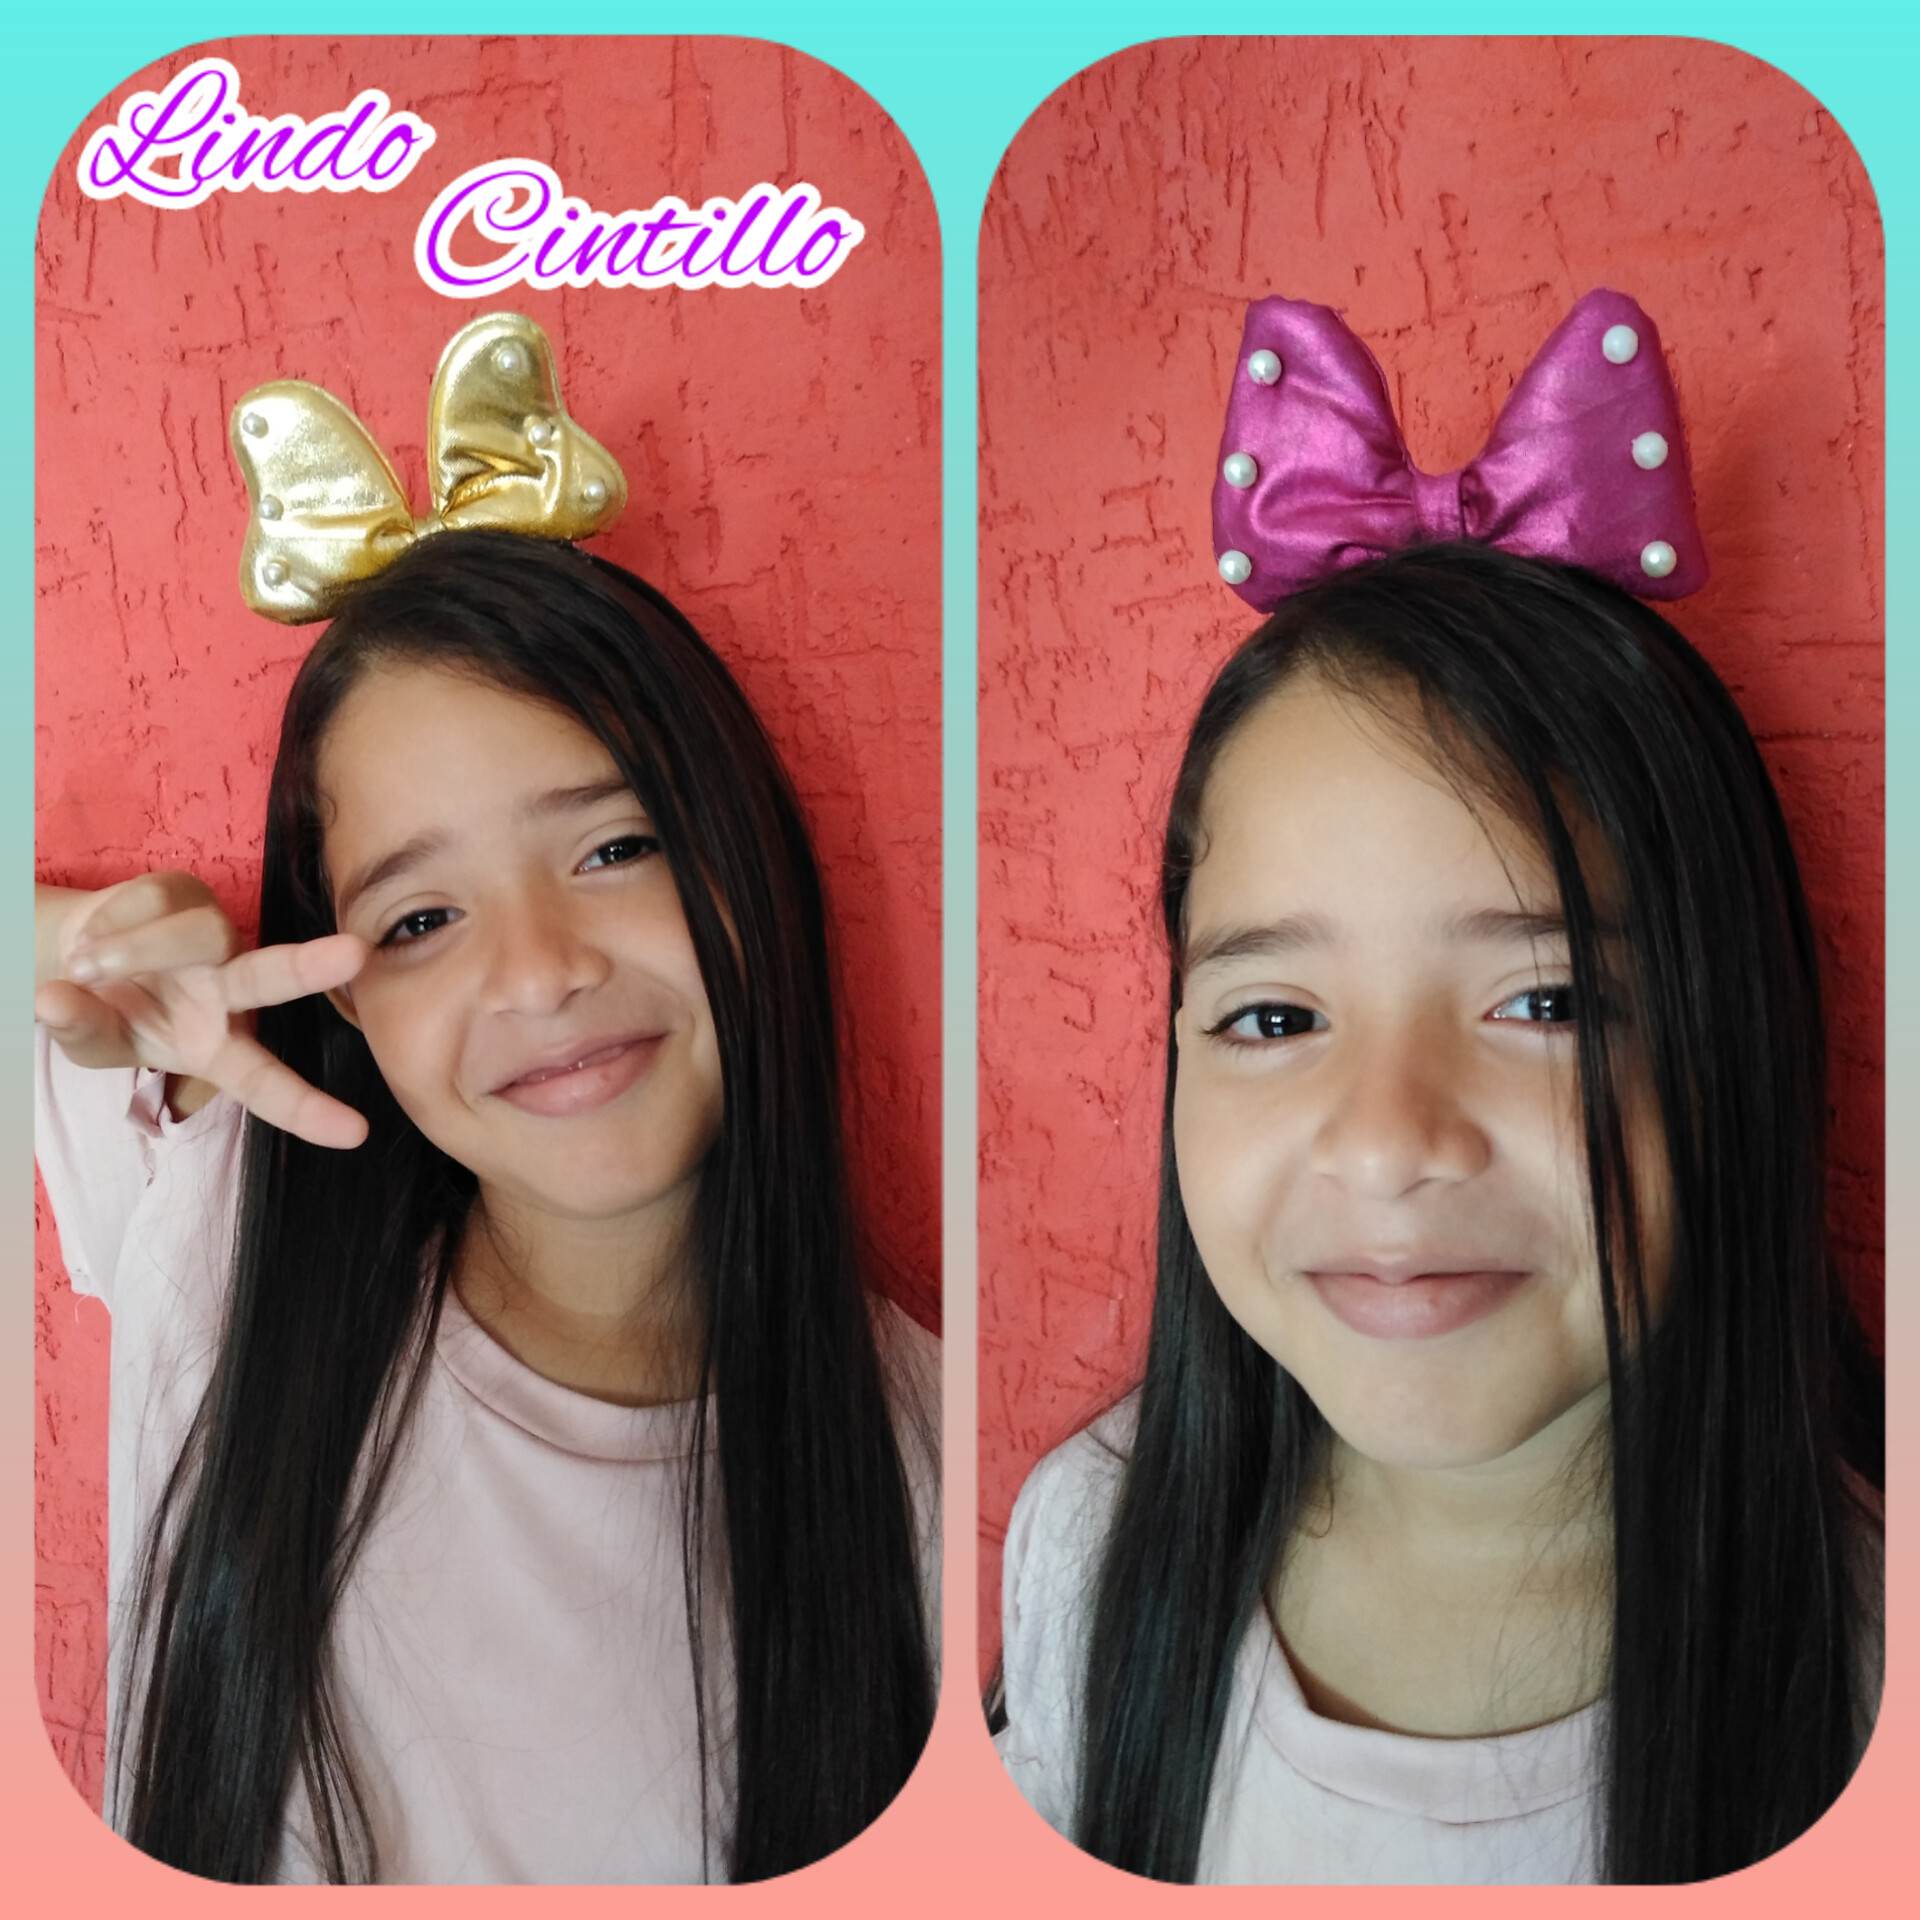
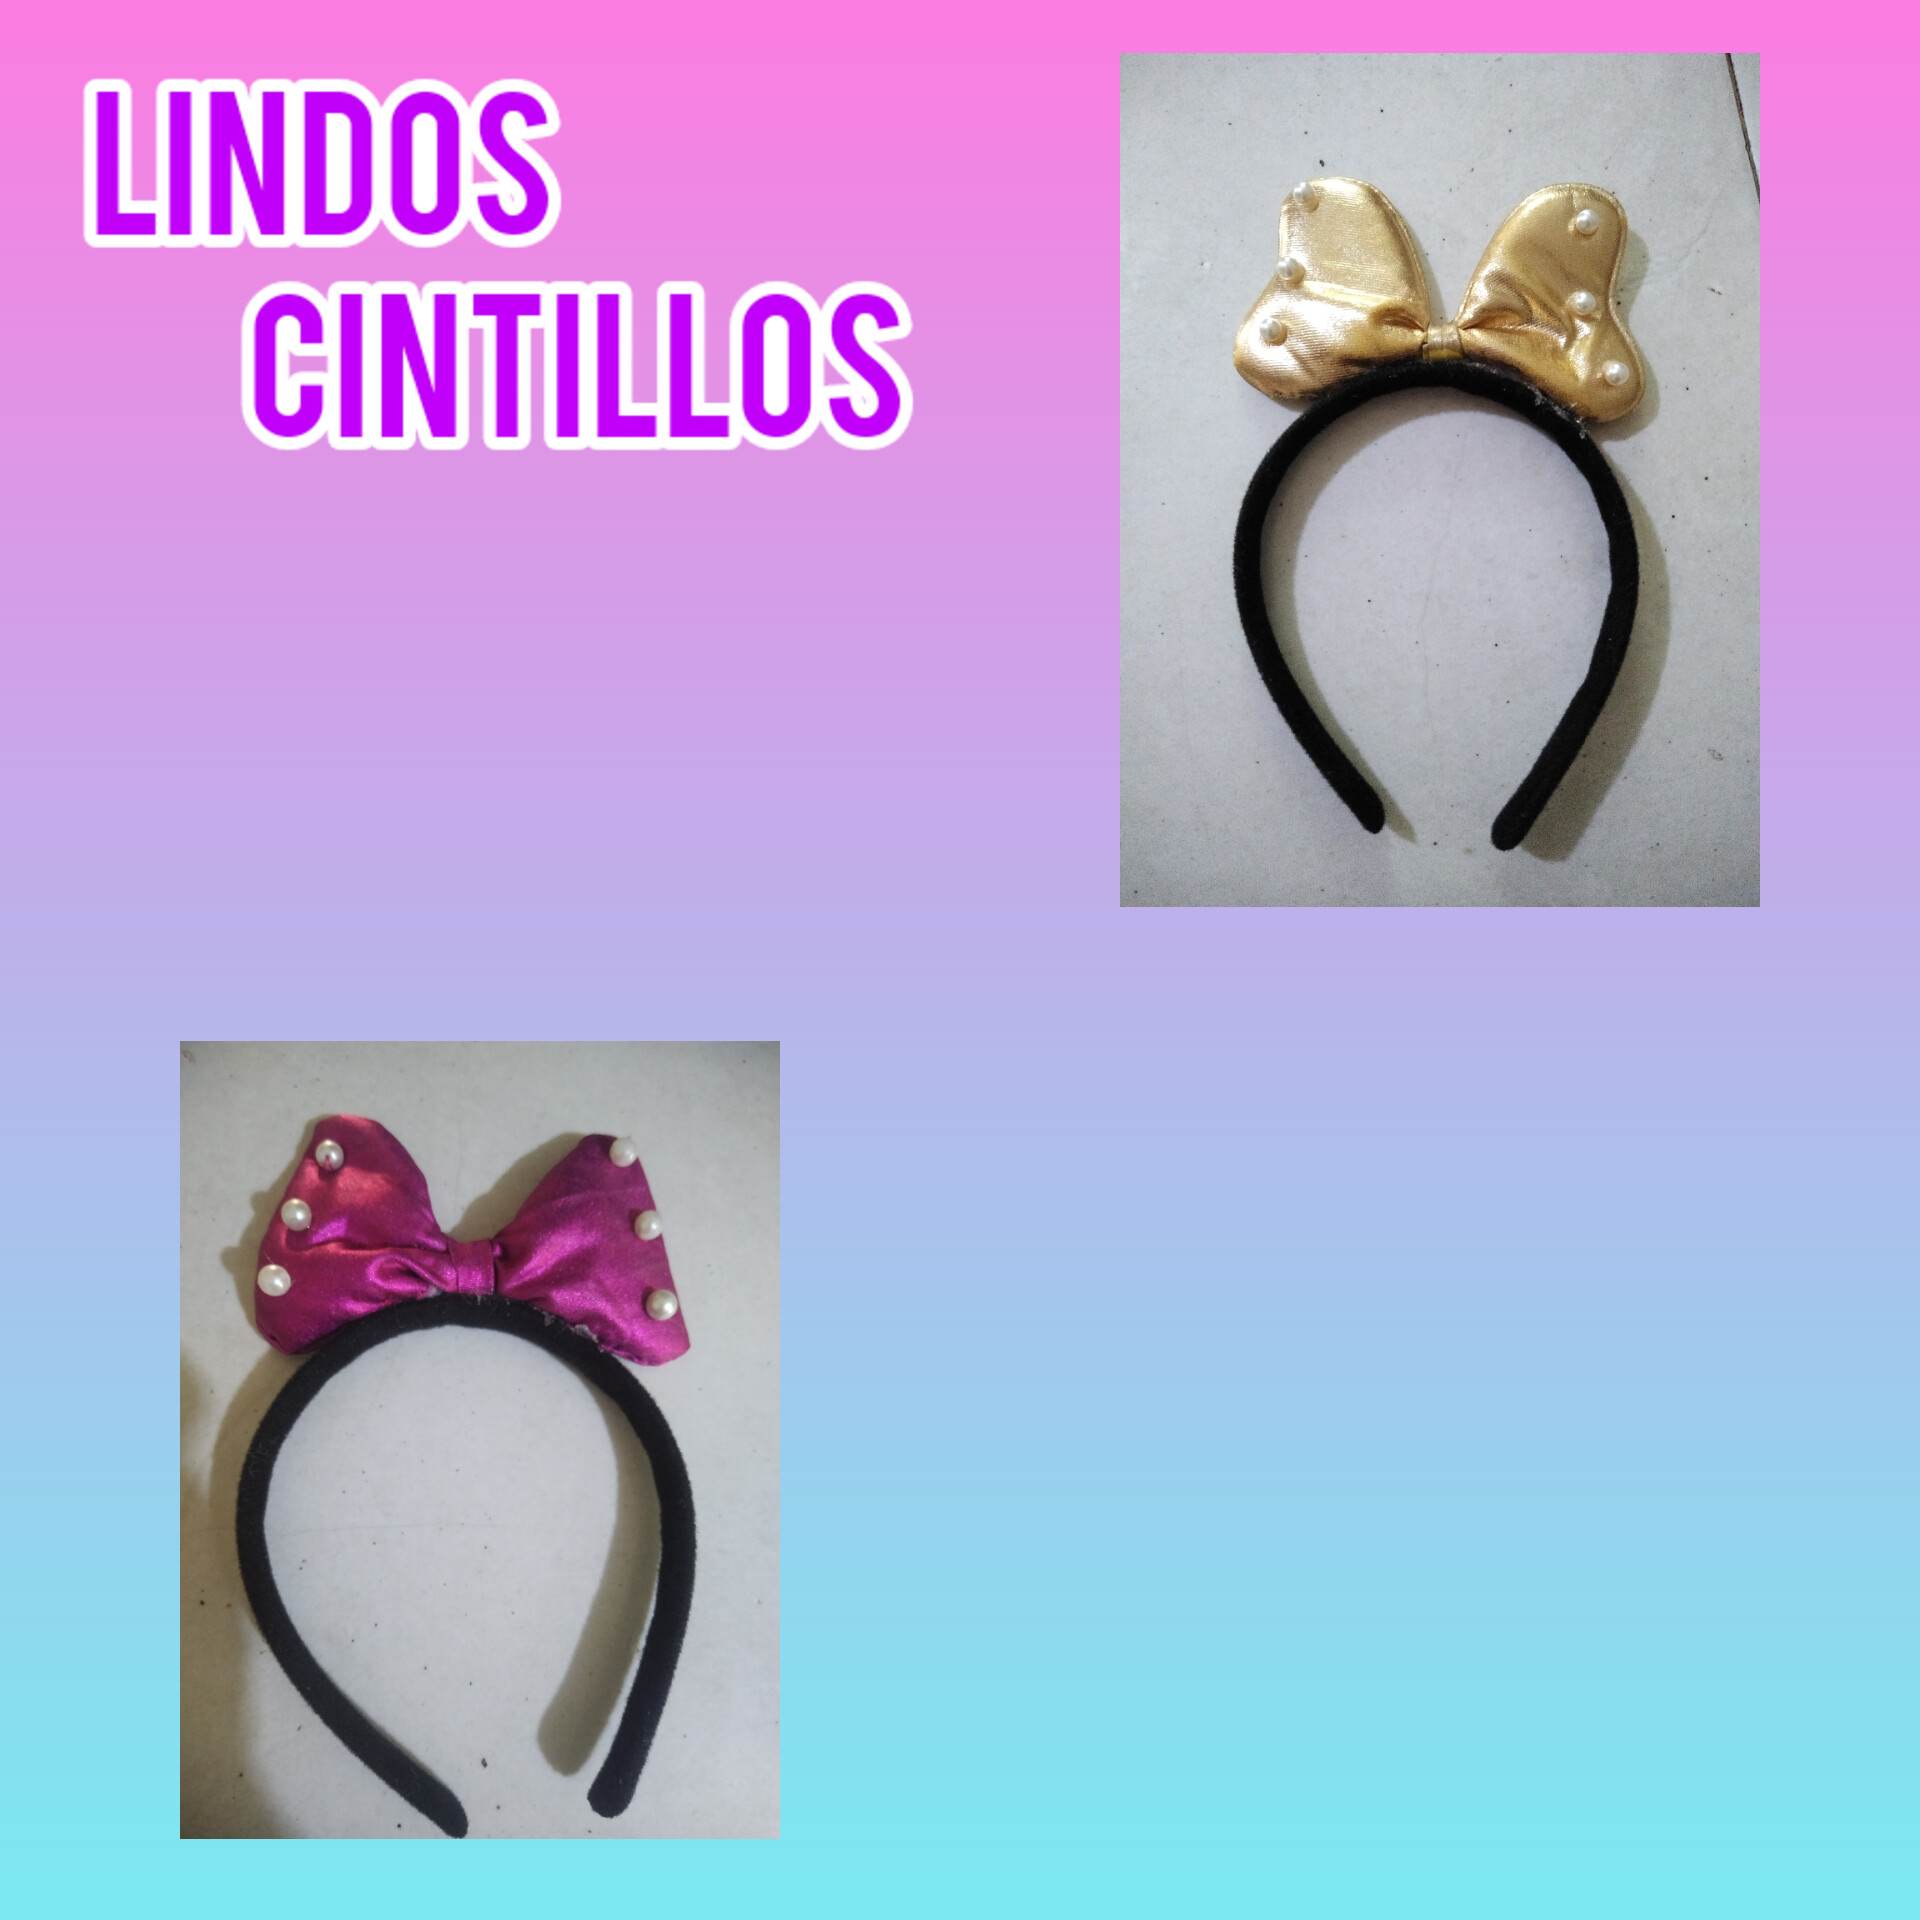
Hello hive friends and beautiful family, I am happy to be with all of you and to be able to share a little experience of how I made a headband for my little sister, I made two identical headbands only different colors, one gold and one fuchsia, aspi that let's see the step by step:

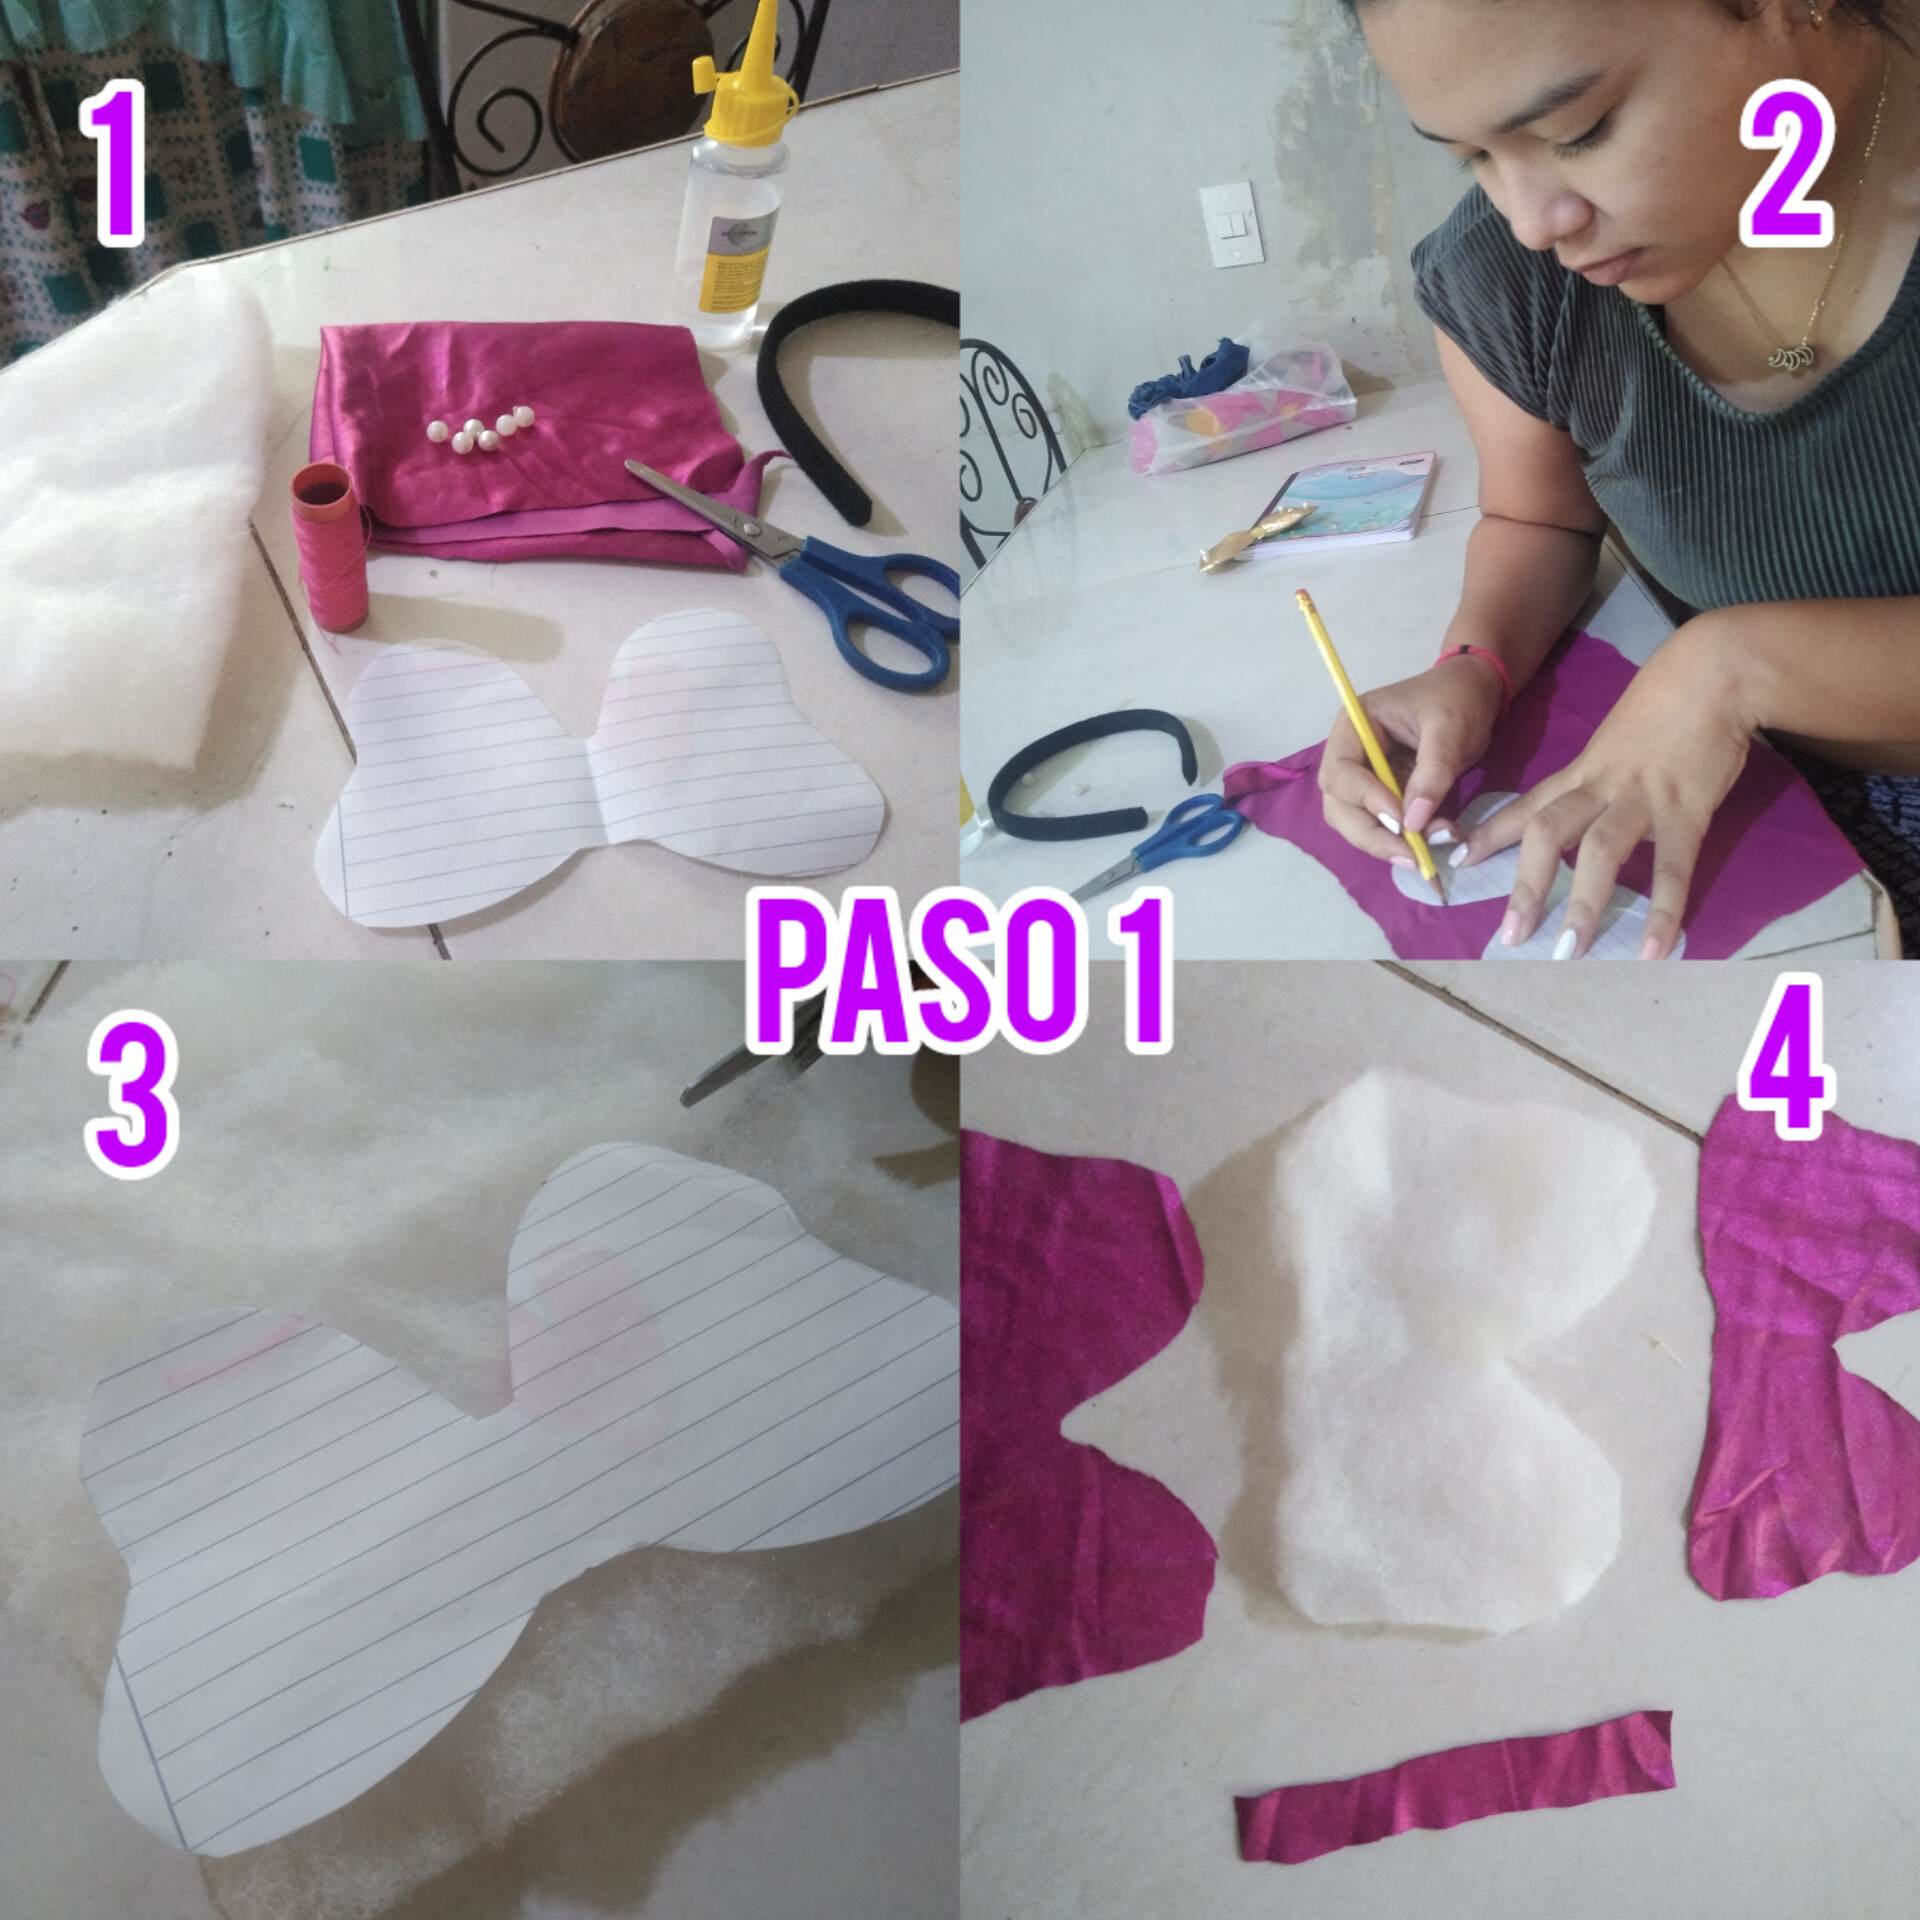
Paso 1: Los materiales que usaremos para hacer este especial cintillo, son materiales sencillos y fáciles de encontrar, en una hoja tendremos el patrón del lazo del cintillo ya cortado, la tela, perlas, hilo y aguja, silicón, tijera y relleno para el cintillo. Procedemos a colocar el patrón encima de la tela y lo vamos a cortar y también cortaremos el relleno para el lazo y la tira que va en el centro para amarrar el lazo.
Step 1: The materials we will use to make this special headband are simple and easy to find. On a sheet of paper we will have the pattern of the headband bow already cut, the fabric, beads, thread and needle, silicone, scissors and stuffing for the headband. We proceed to place the pattern on top of the fabric and we will cut it and we will also cut the stuffing for the bow and the strip that goes in the center to tie the bow.
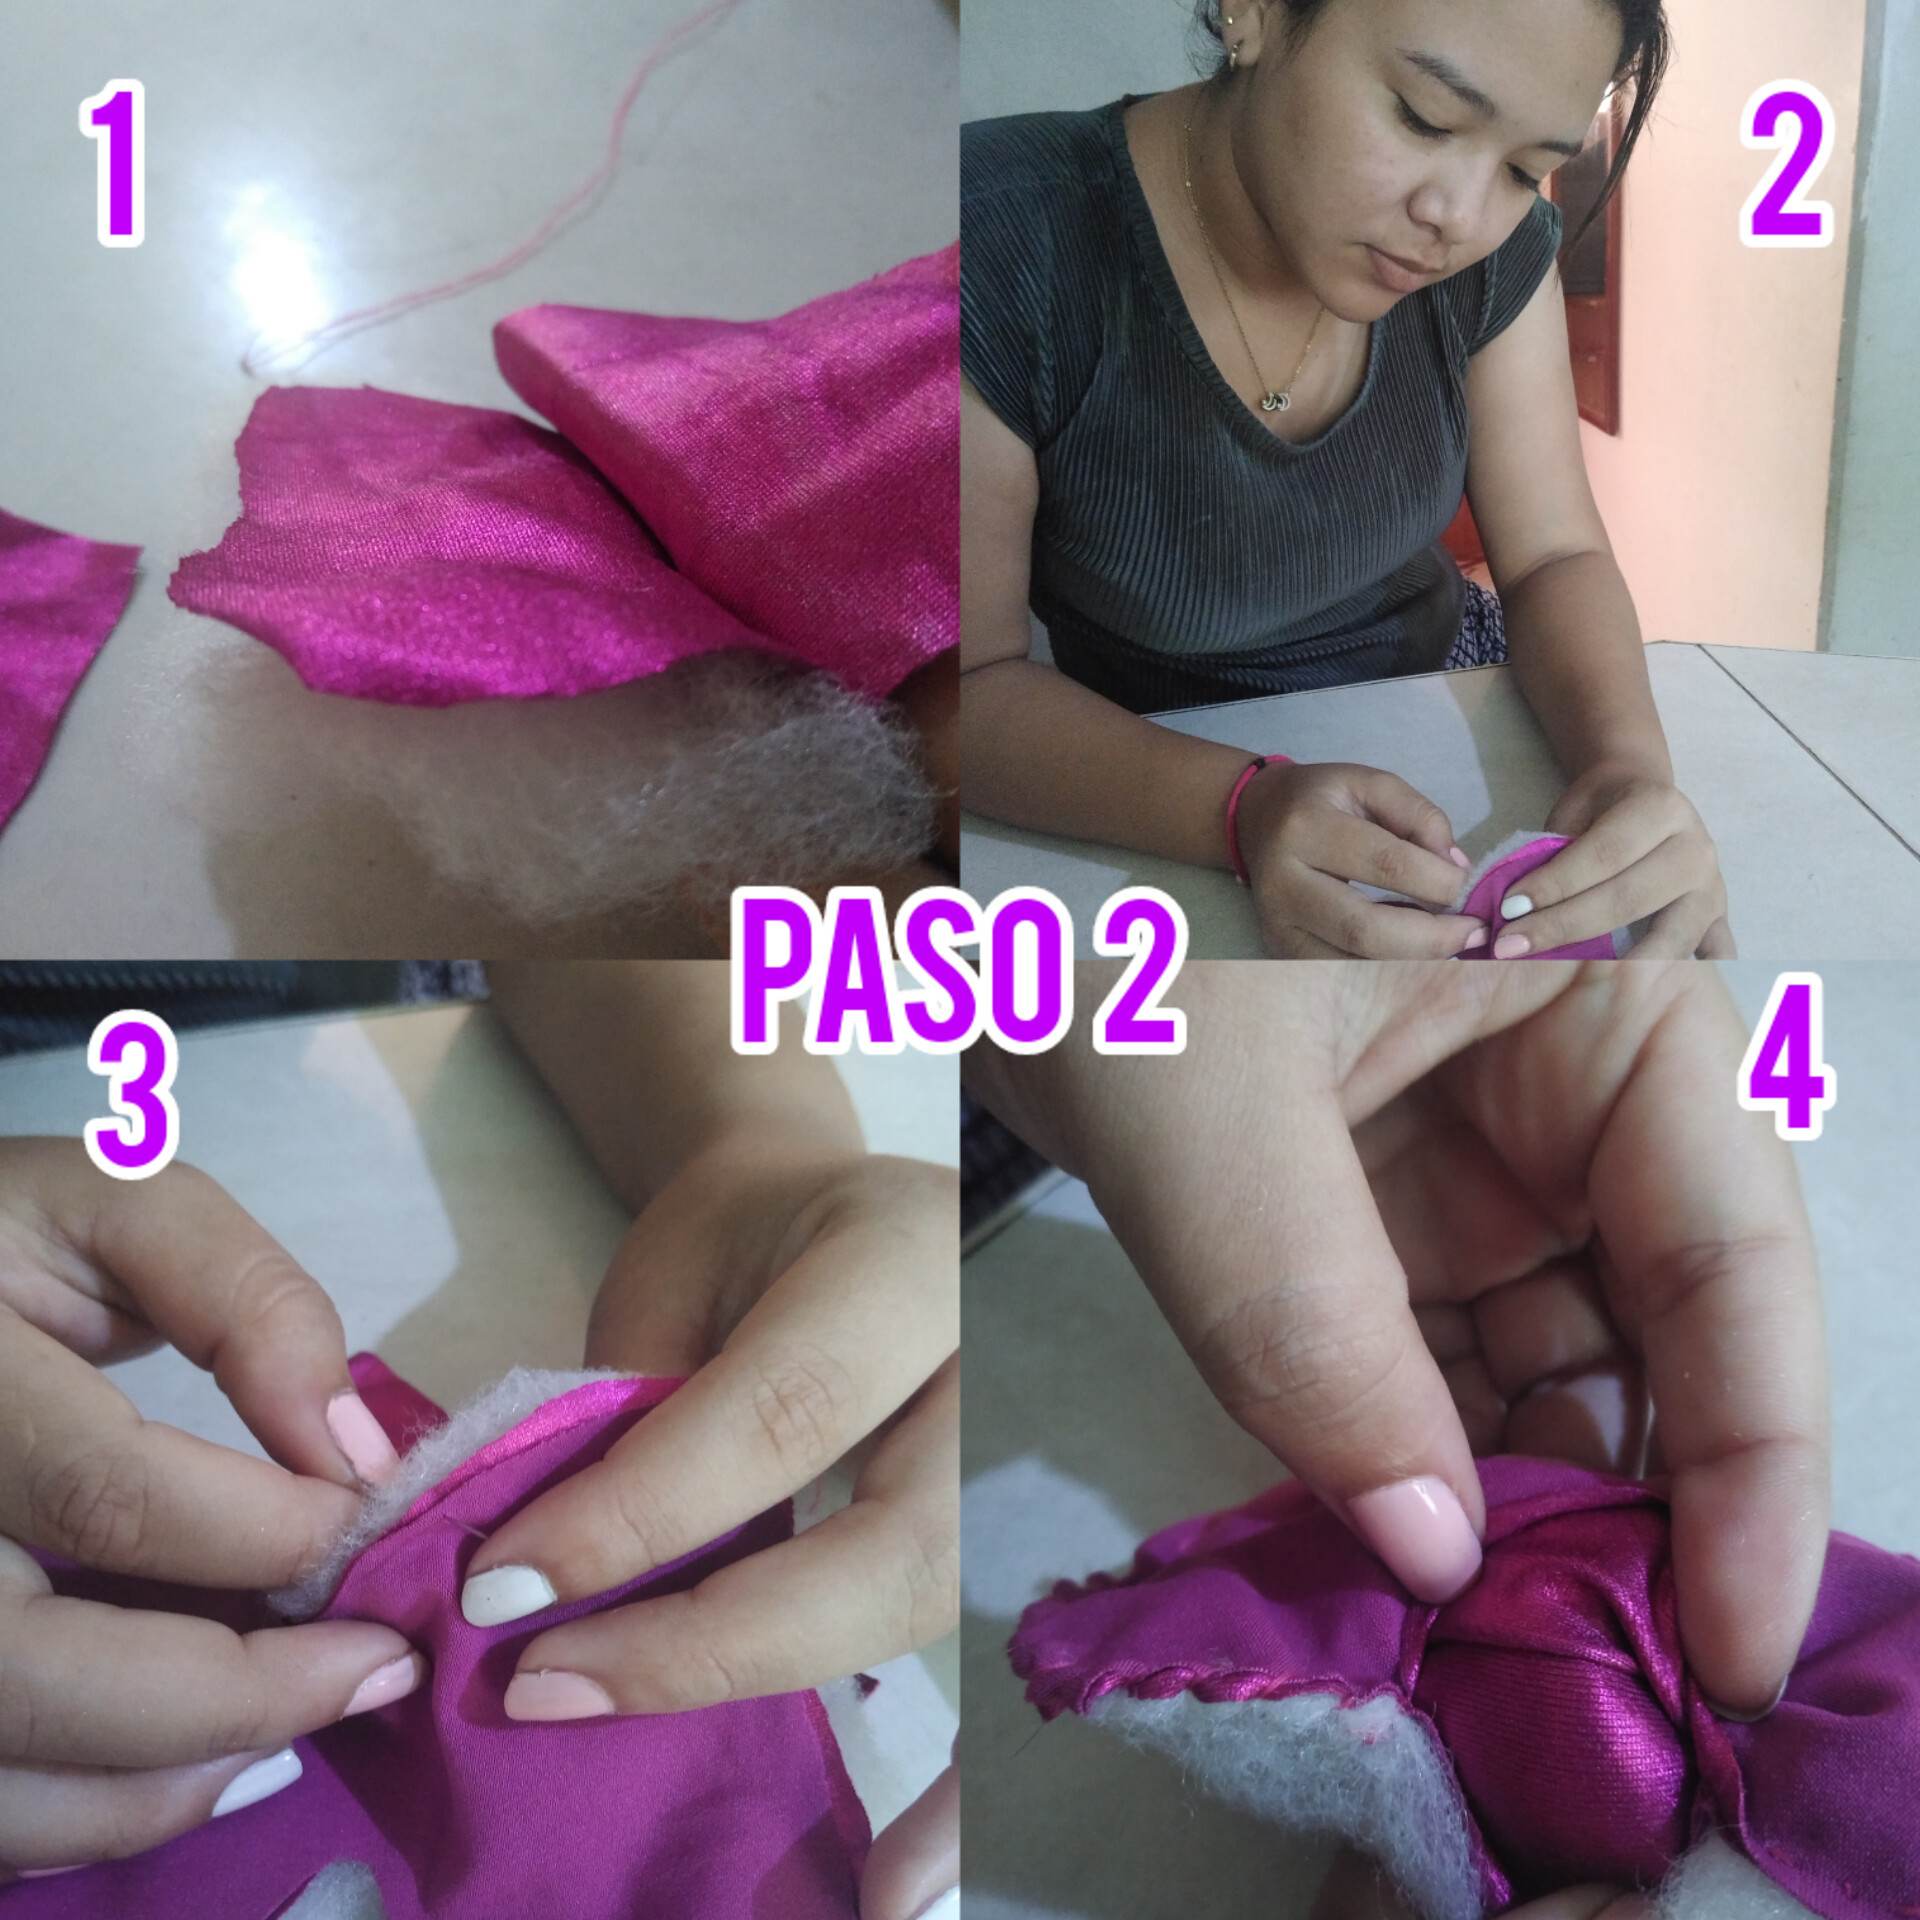
Paso 2: Procedemos a colocar el relleno, luego encima colocamos la parte delantera y trasera de las partes cortadas de las telas, luego procederemos a coser a mano todo el borde y luego de hacerlo vamos a voltear el lazo.
Step 2: We proceed to place the stuffing, then on top we place the front and back of the cut parts of the fabrics, then we will proceed to hand sew the whole edge and after doing so we will flip the loop.
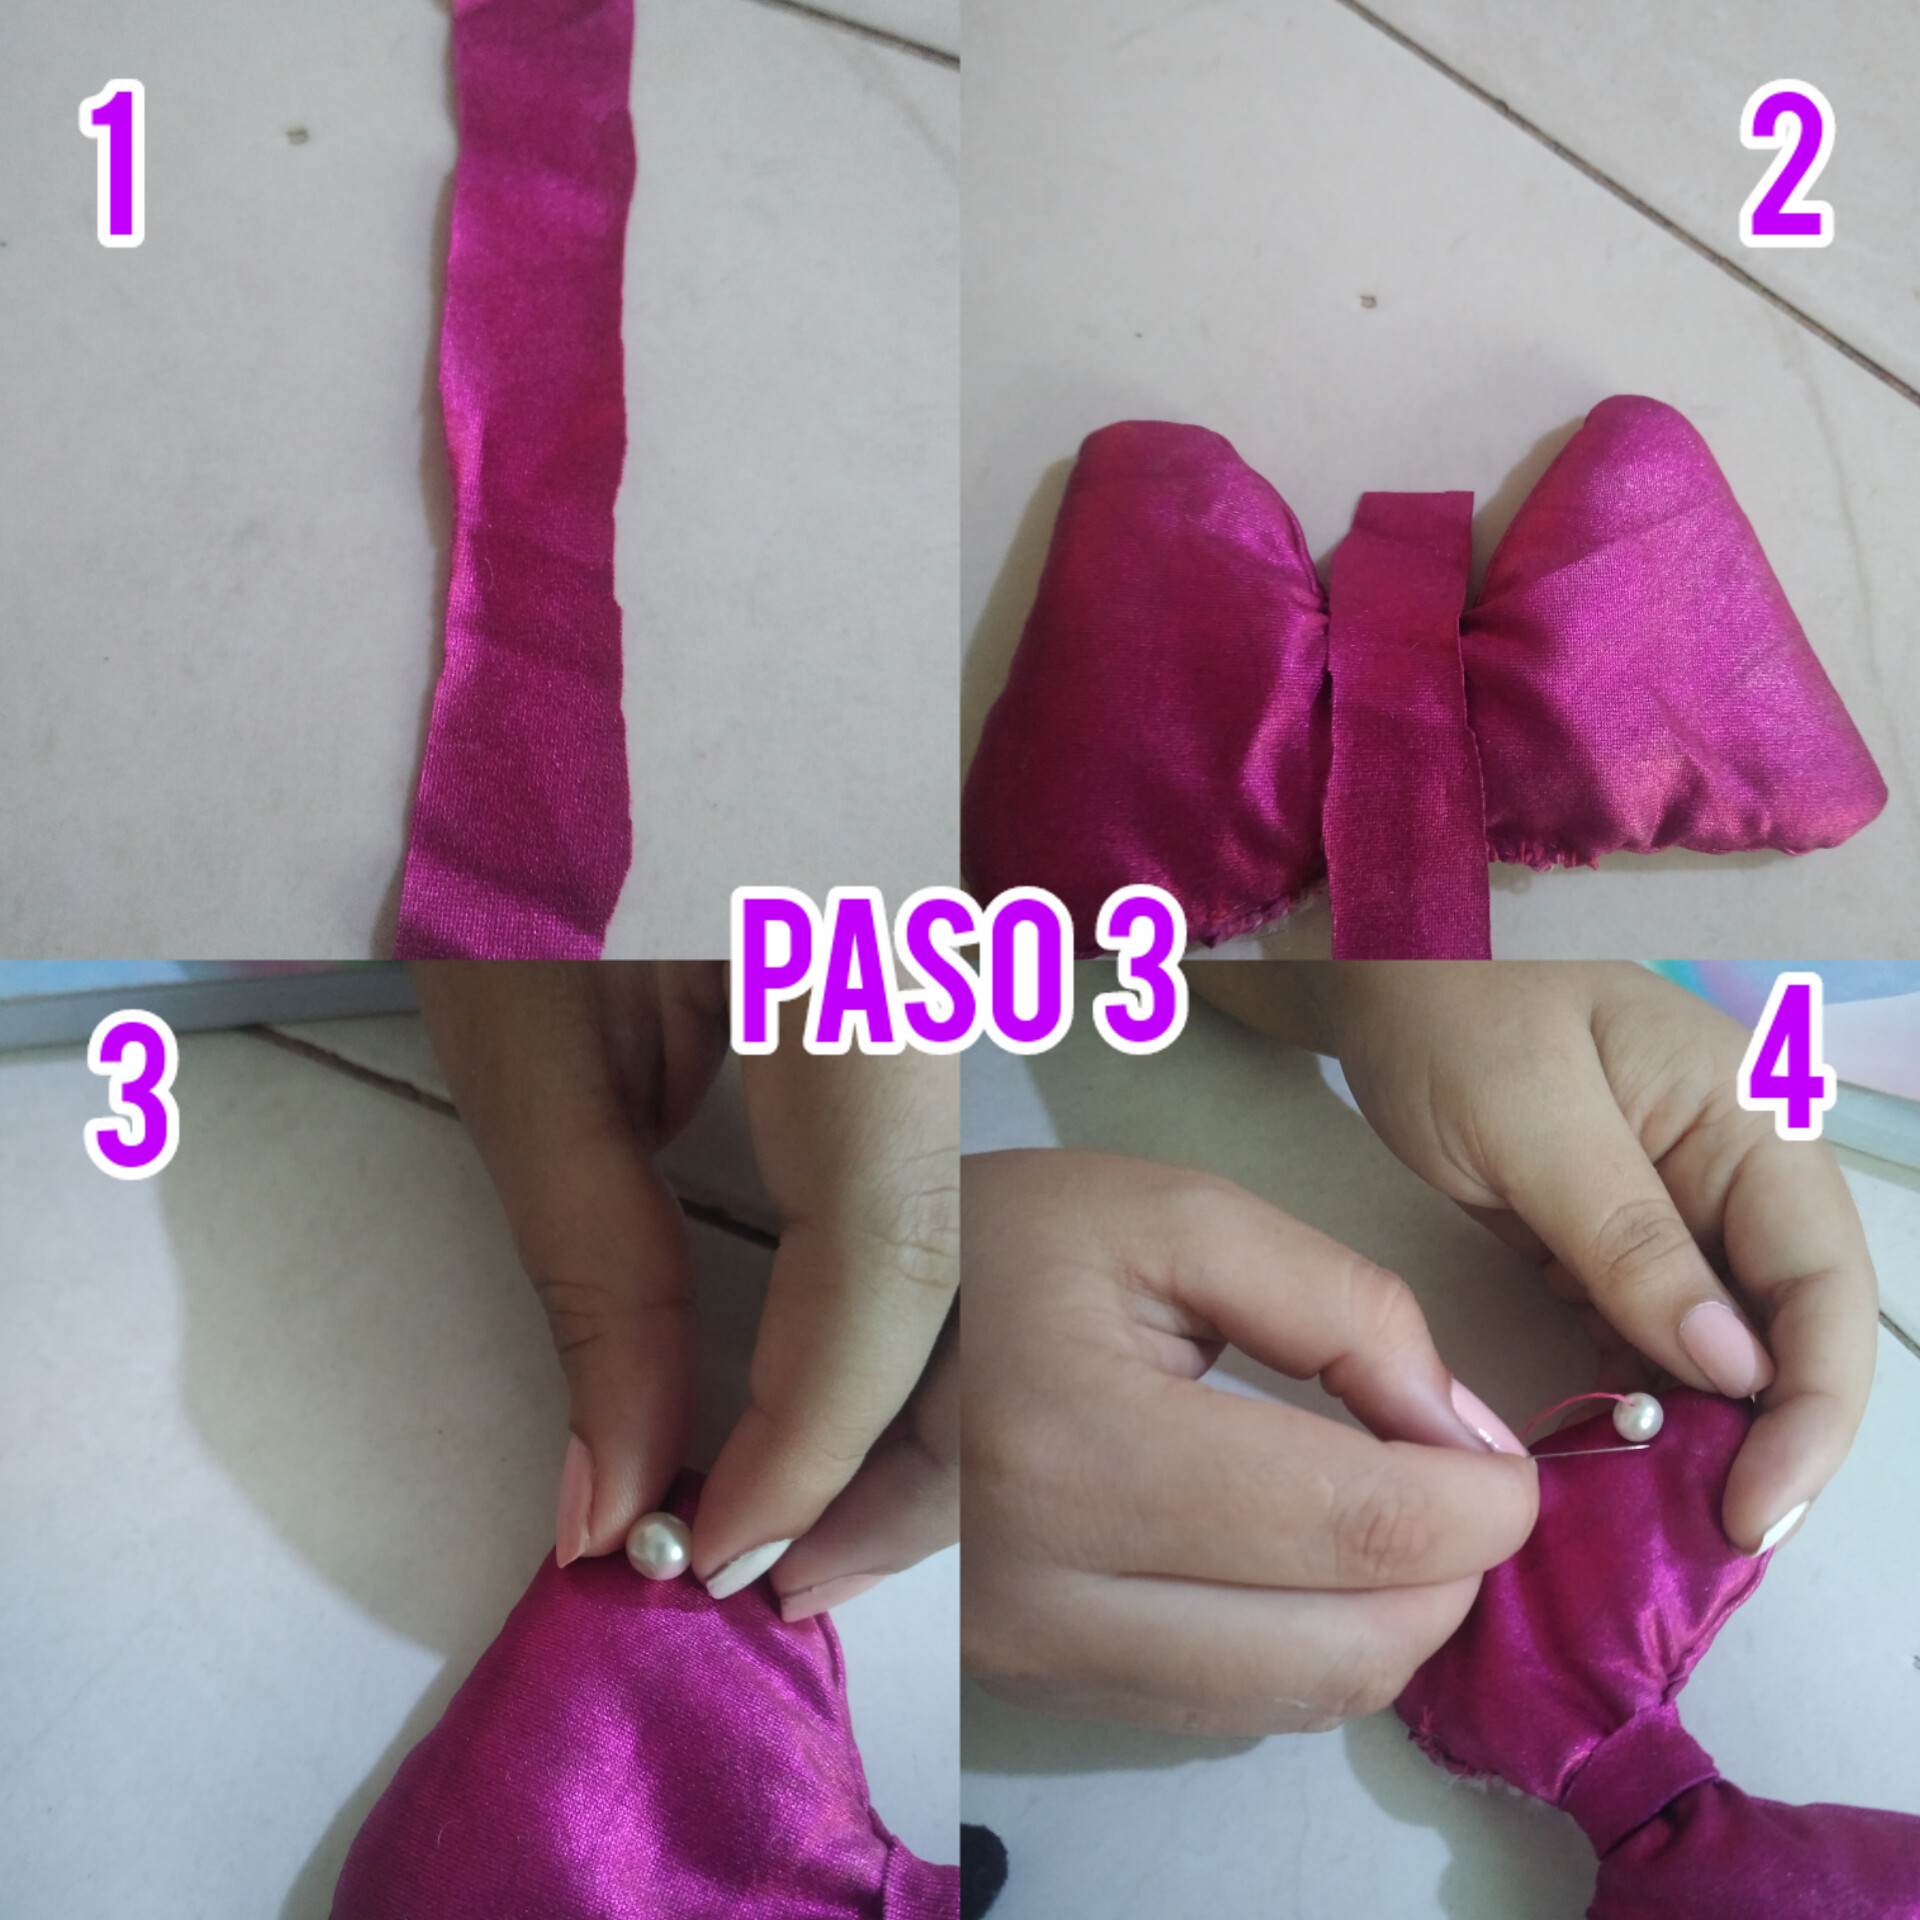
Paso 3: Luego de haber cosido los bordes vamos a coser la tira que va en medio del lazo y es la que dará vida a nuestro lazo, cosemos y luego vamos a coser o pegar las perlas a los lados del lazo, las colocamos de la forma de nuestra preferencia.
Step 3: After sewing the edges we will sew the strip that goes in the middle of the ribbon and is the one that will give life to our ribbon, we sew and then we will sew or glue the pearls to the sides of the ribbon, we place them in the way of our preference.
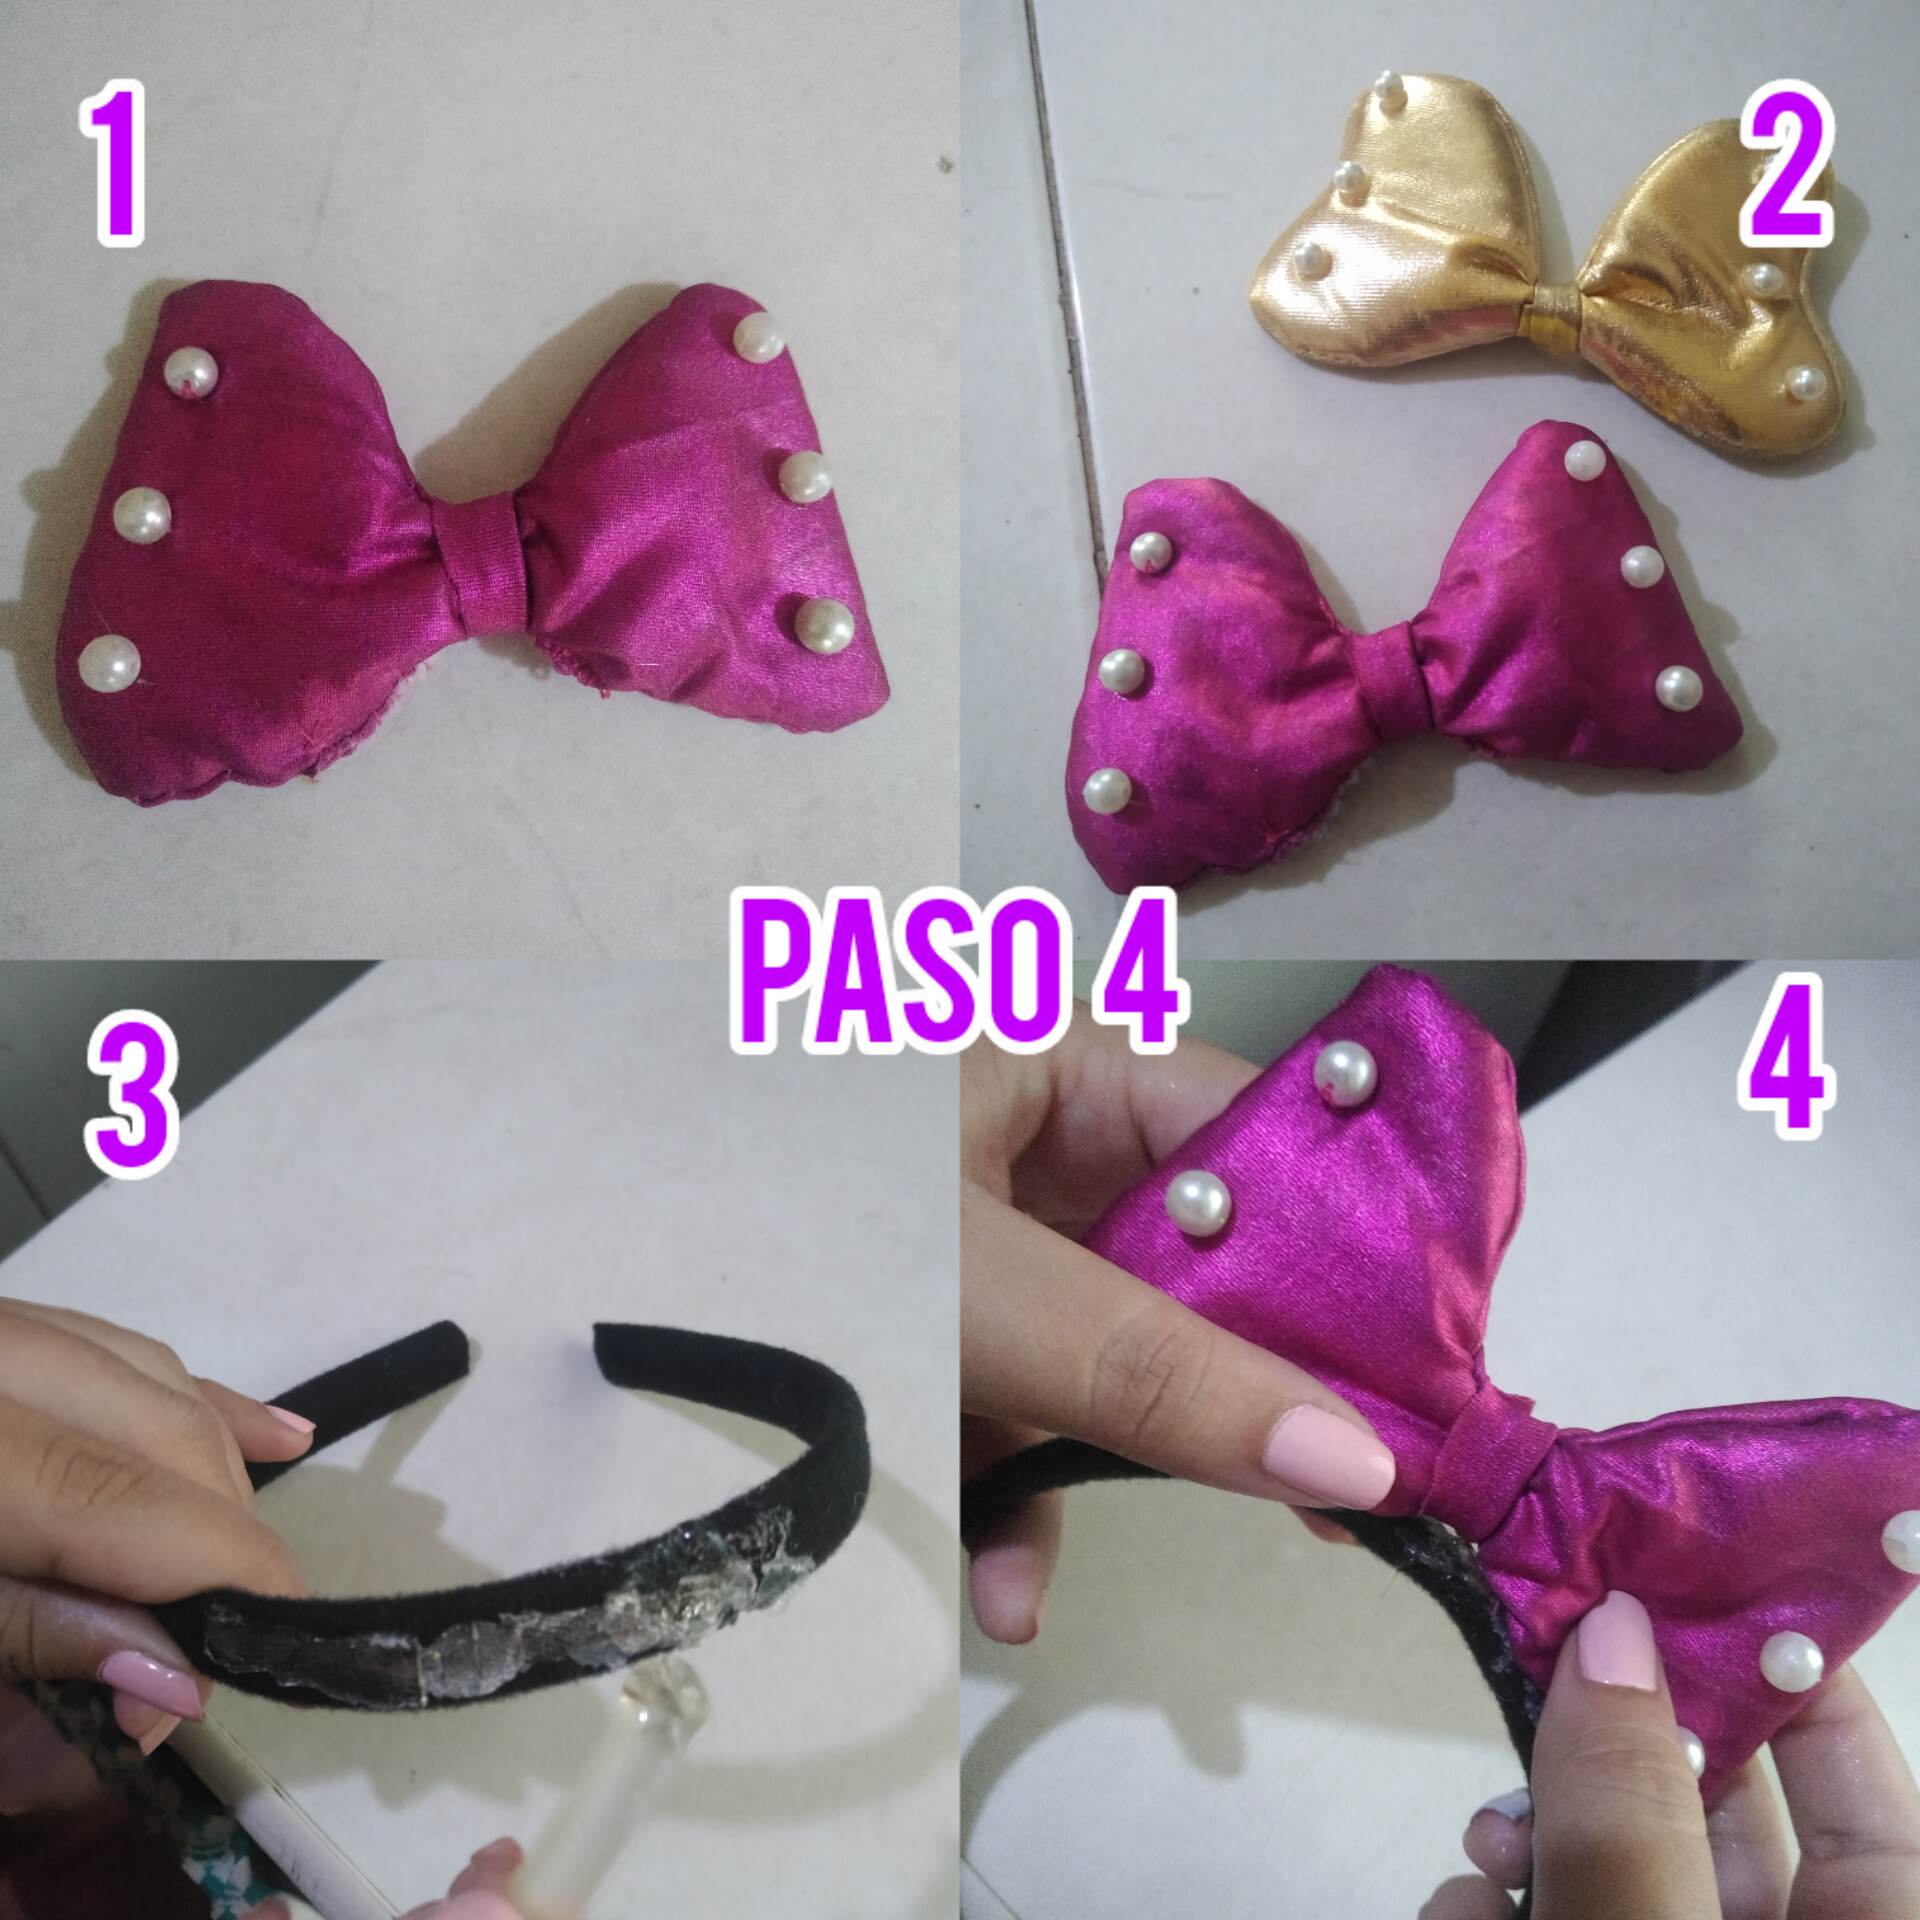
Paso 4: Ya listo nuestro lazo, haremos el mismo procedimiento con la otra tela y lo siguiente que haremos será pegar el lazo al cintillo, de esta manera concluimos la finalización de este bello lazo.
Step 4: Once our ribbon is ready, we will do the same procedure with the other fabric and the next thing we will do is to glue the ribbon to the headband, thus concluding the completion of this beautiful ribbon.
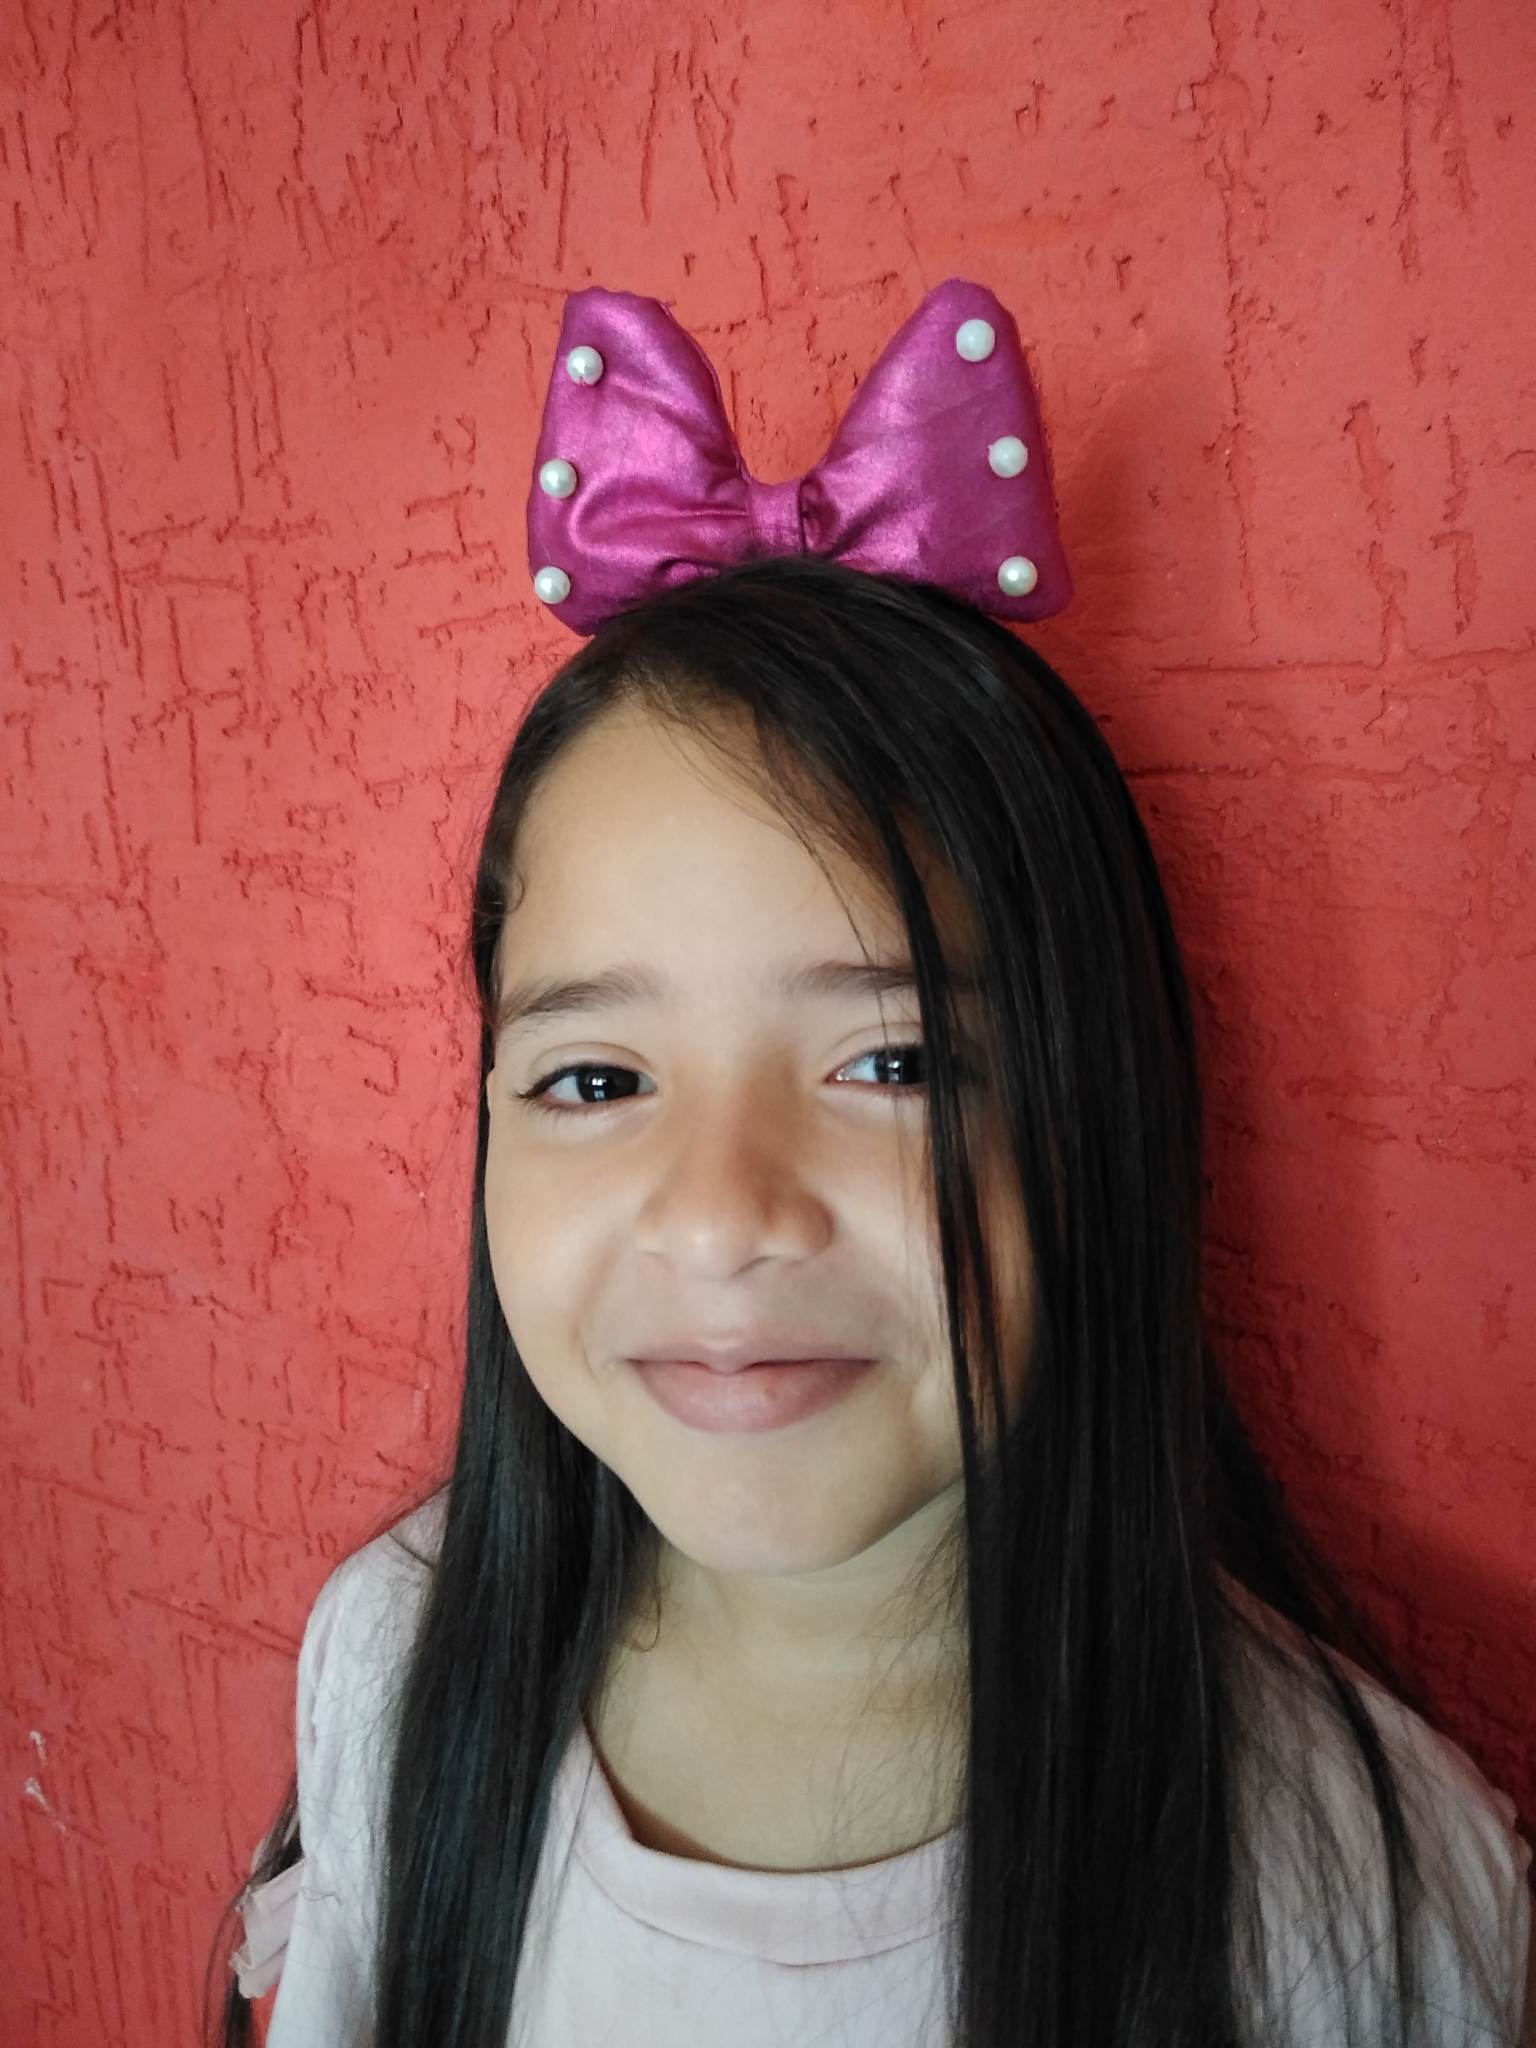
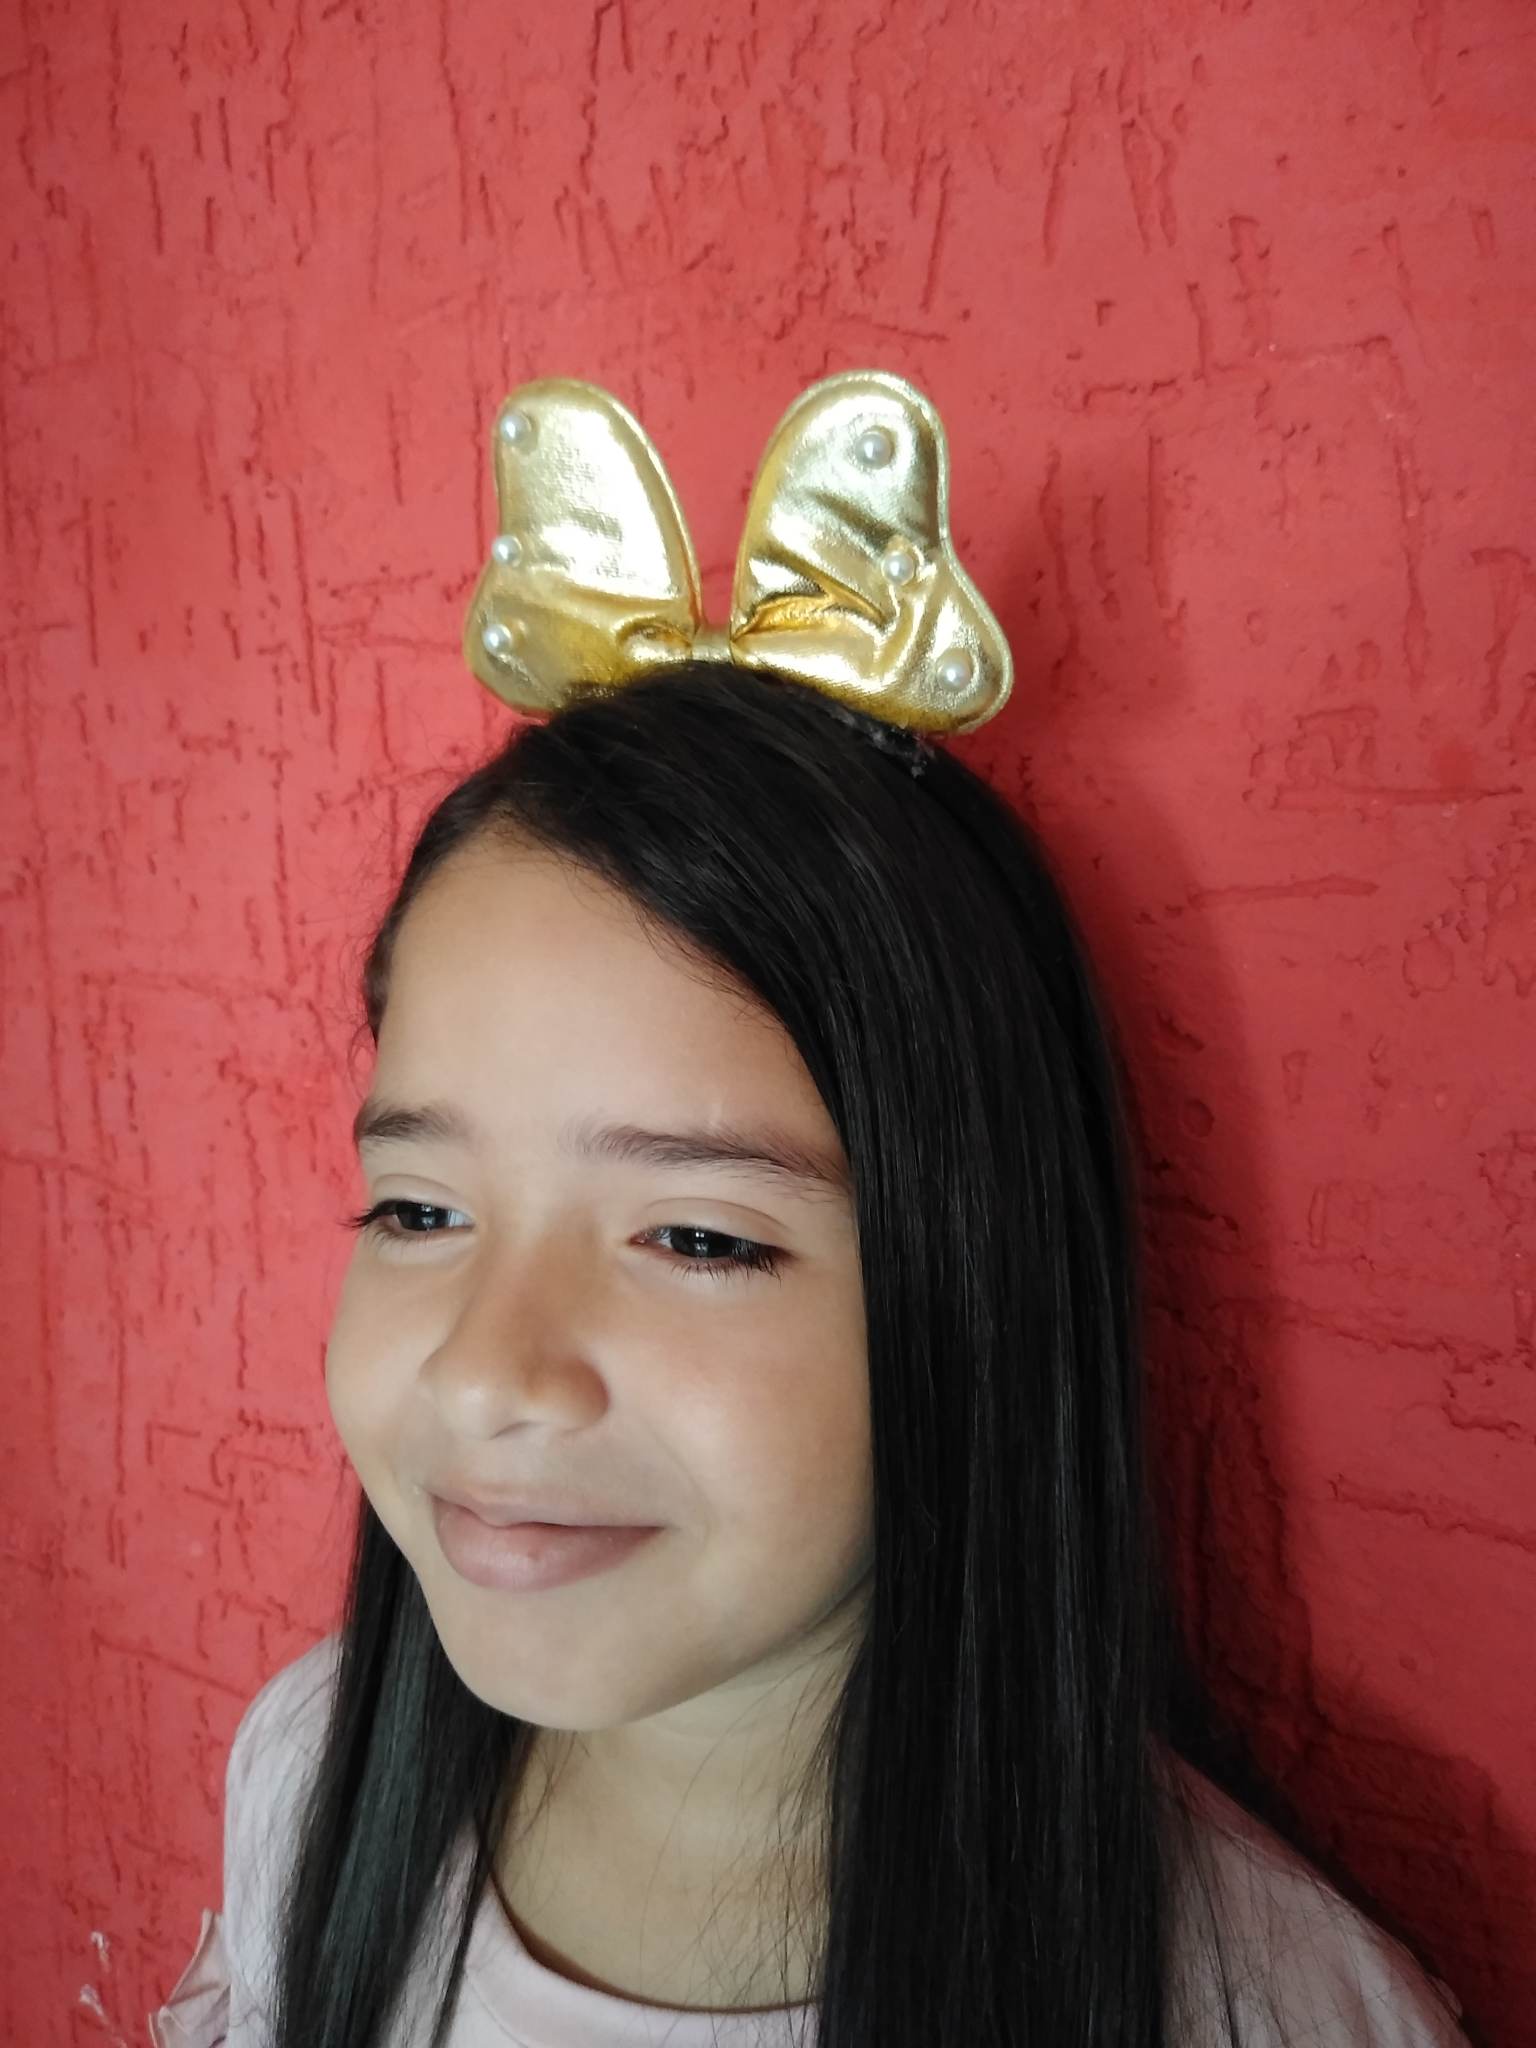
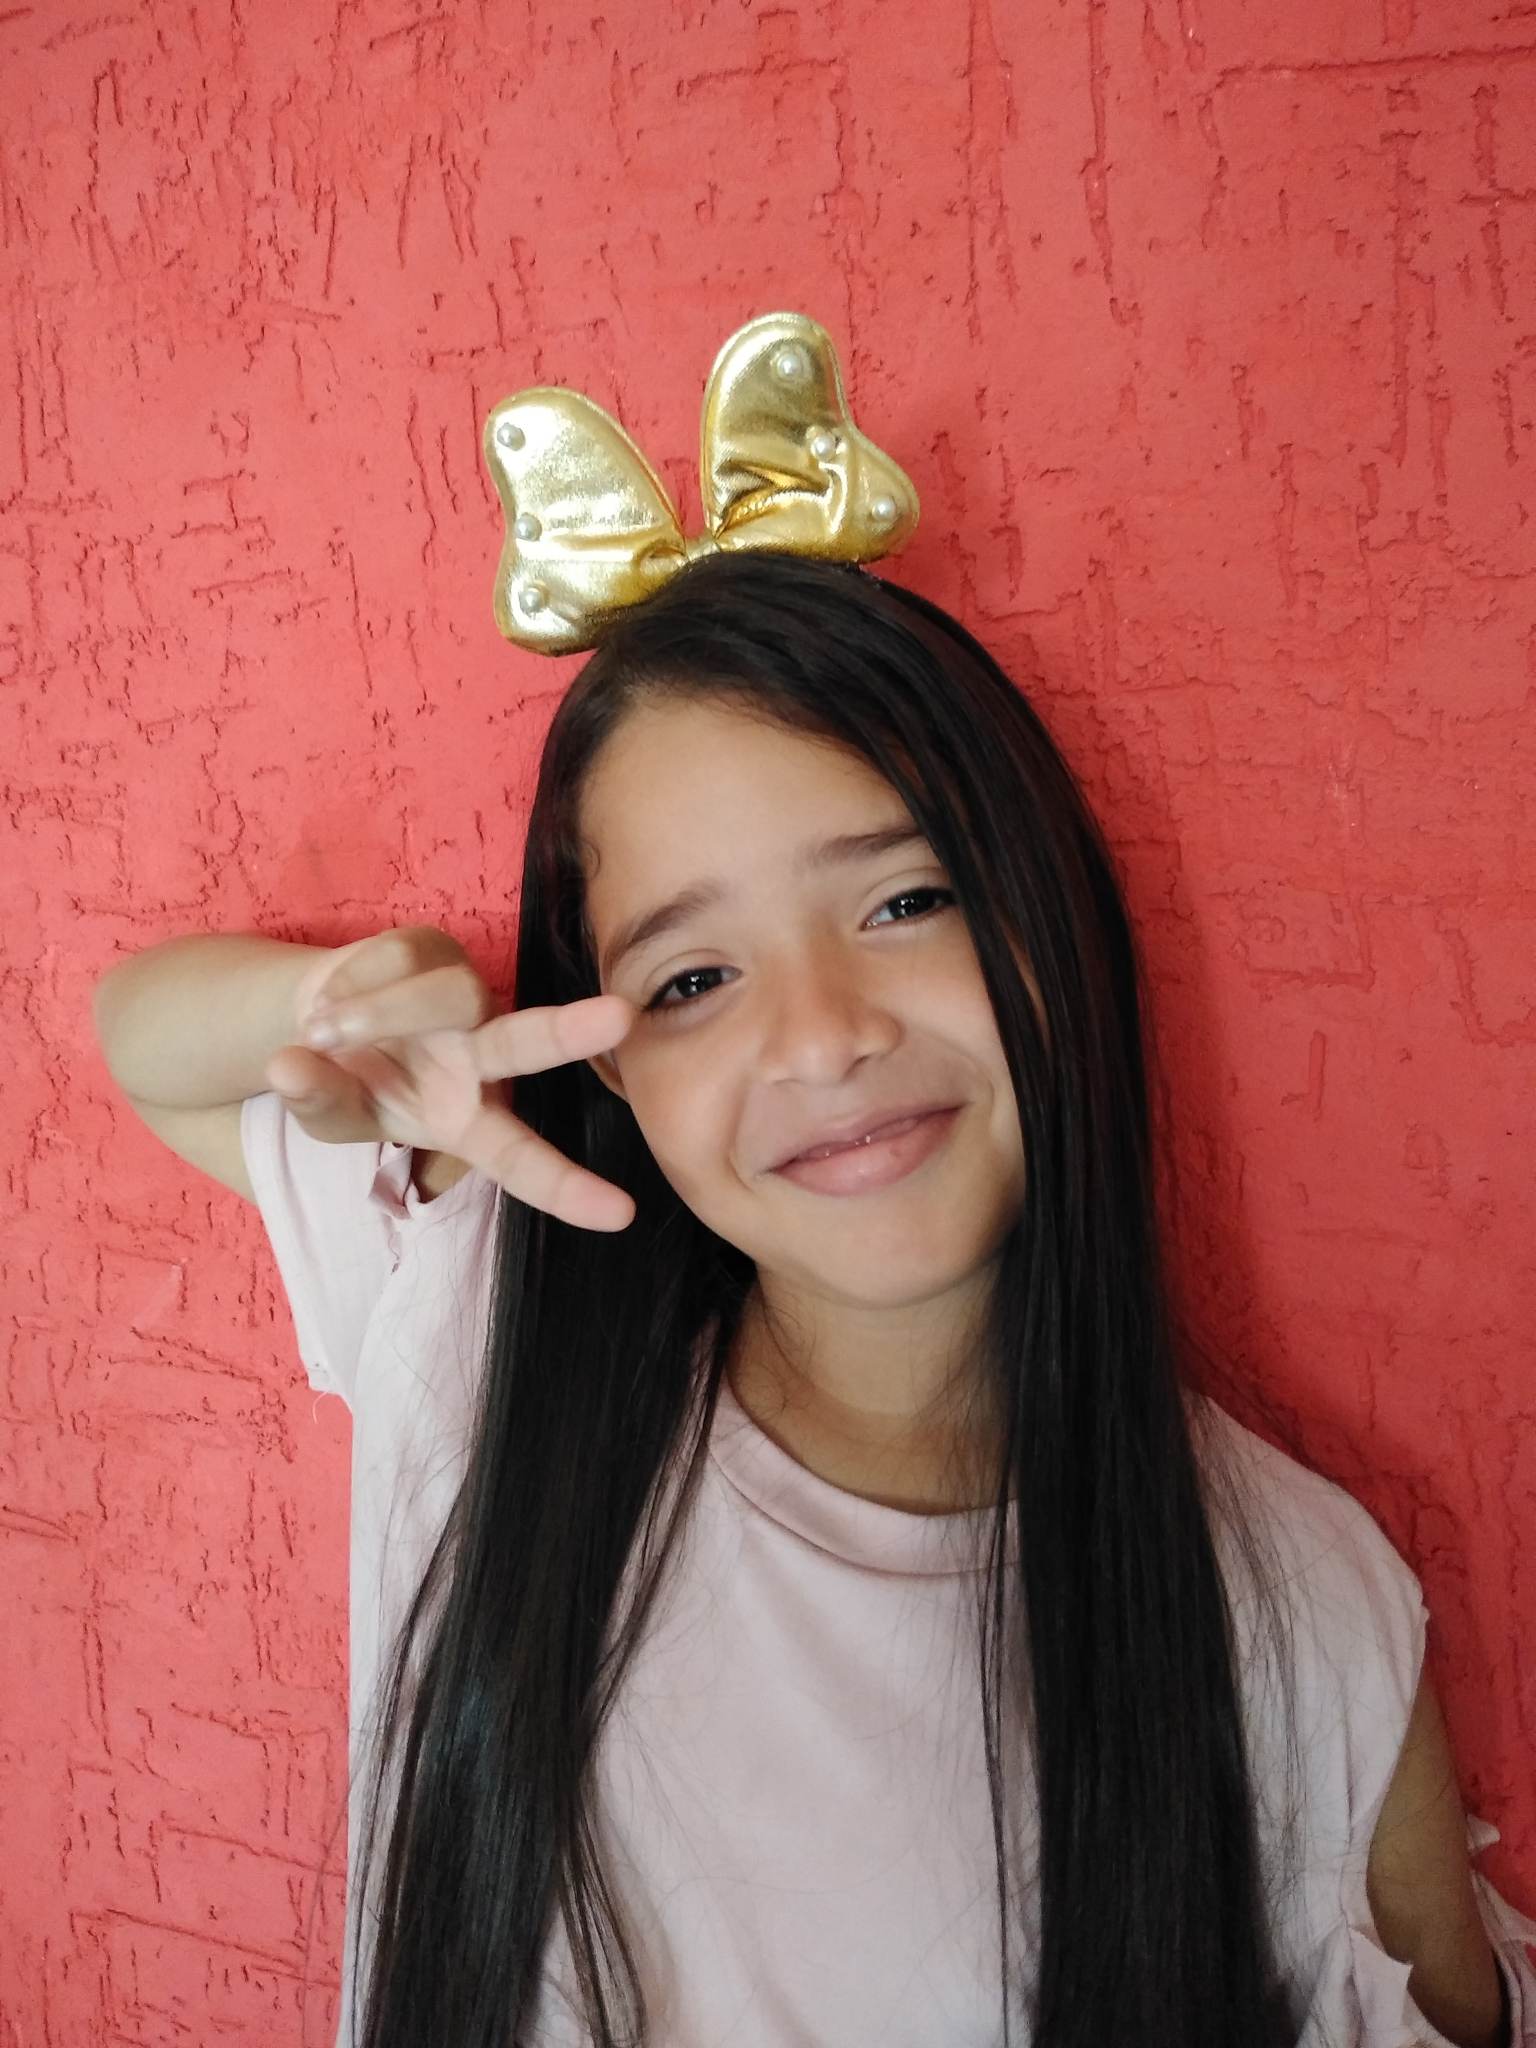
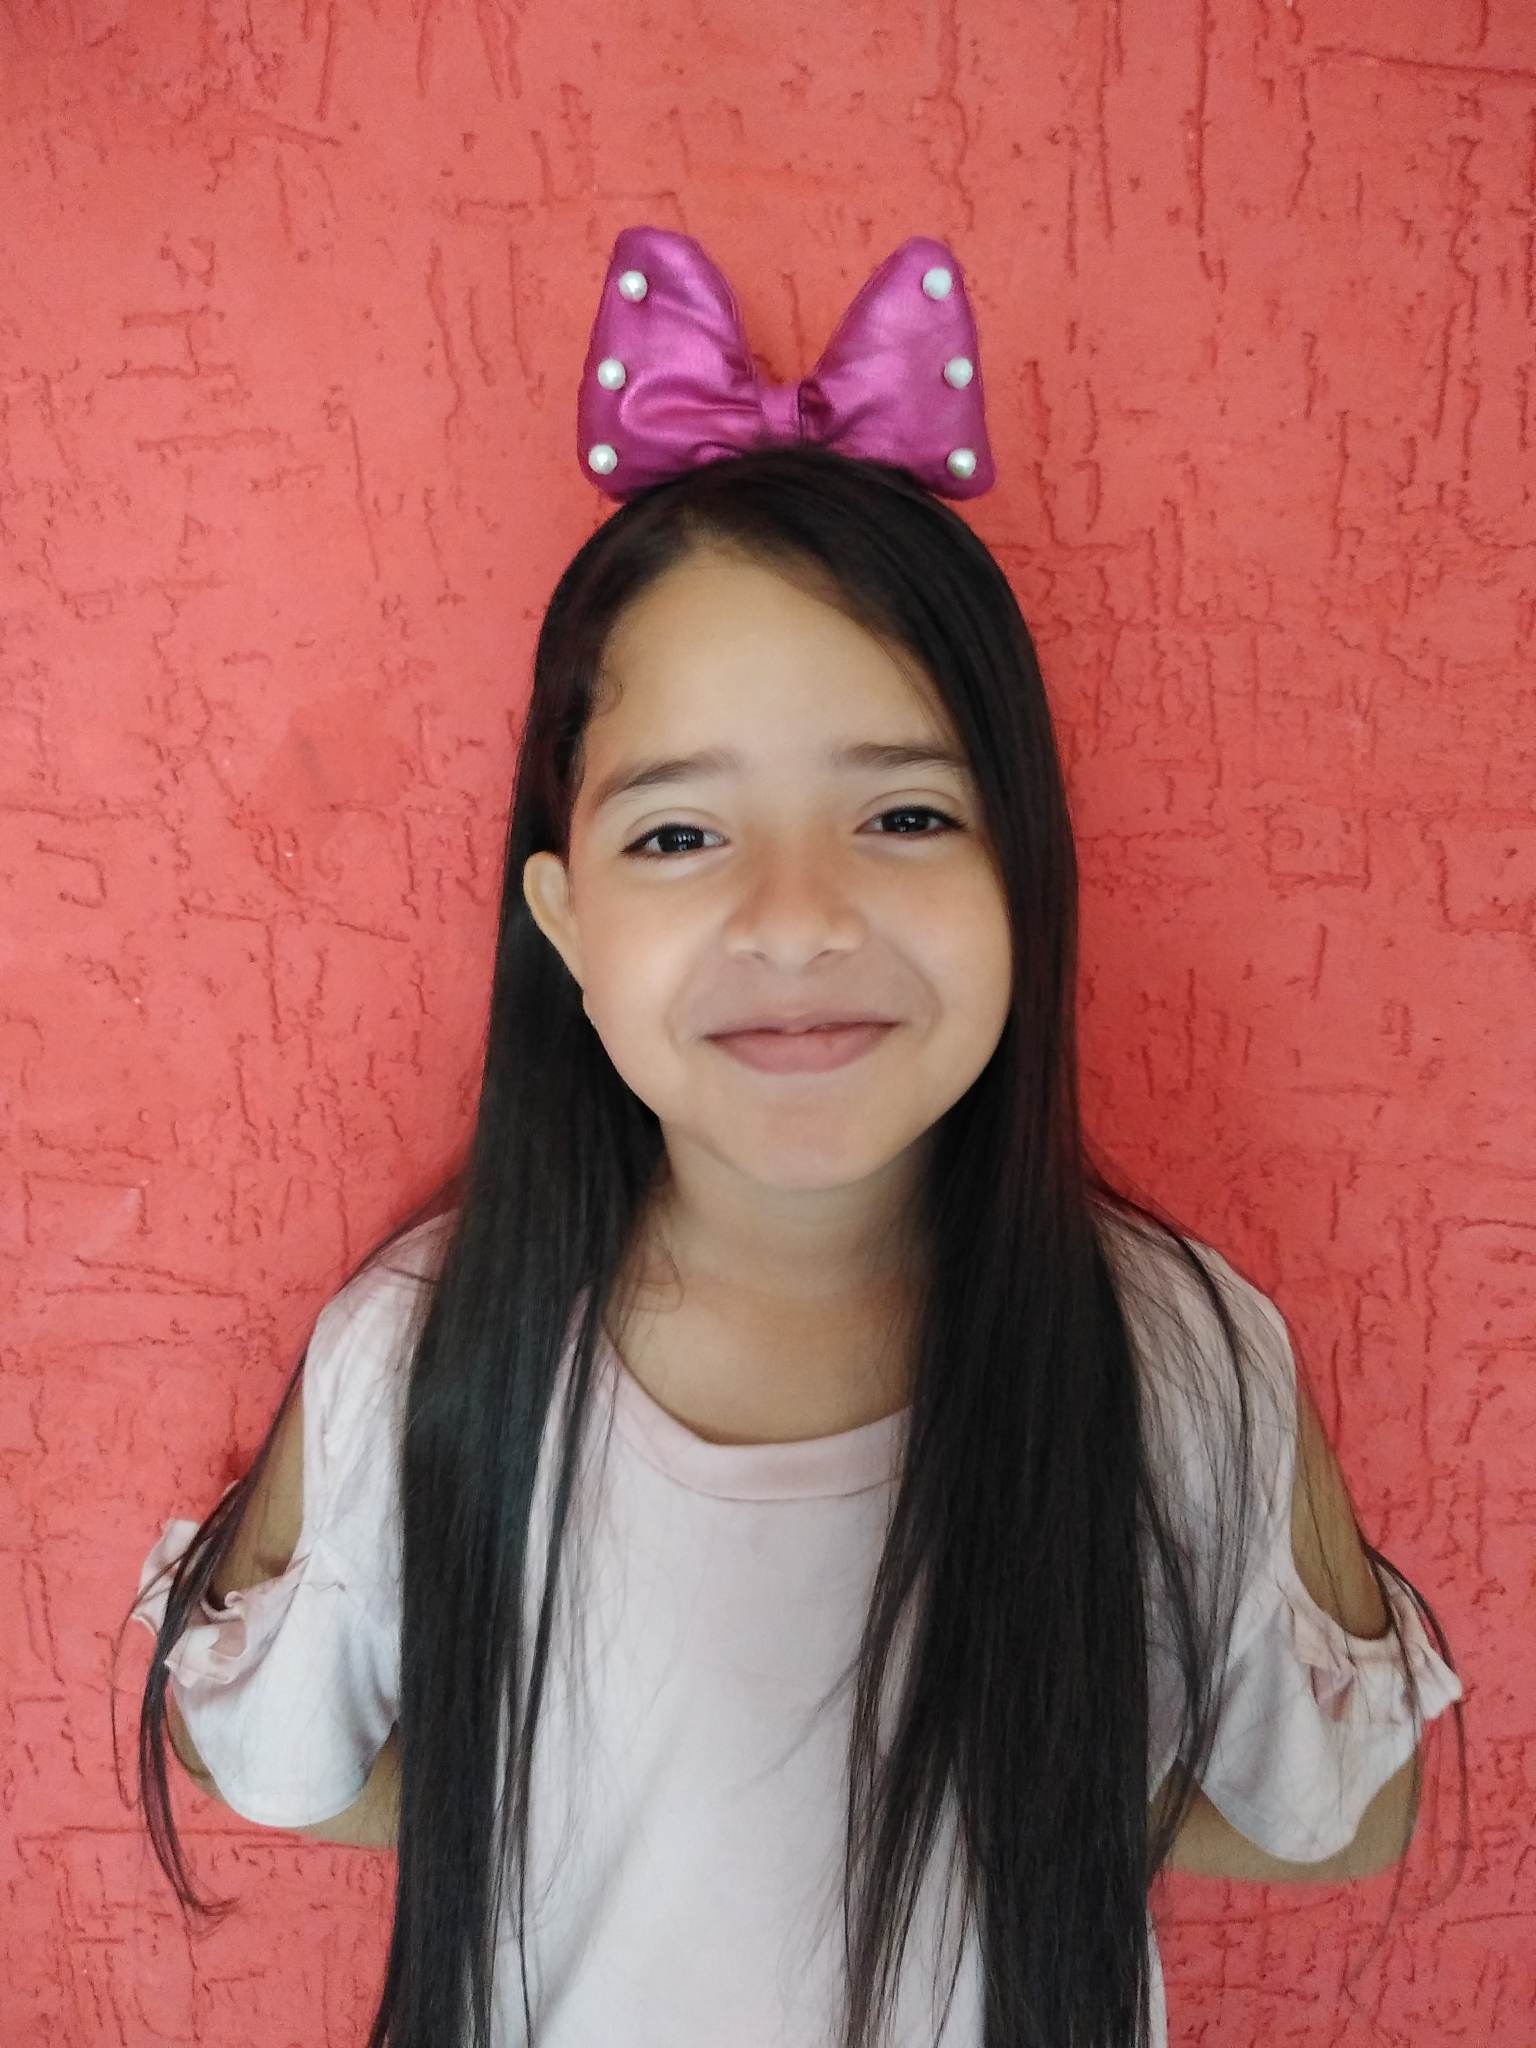
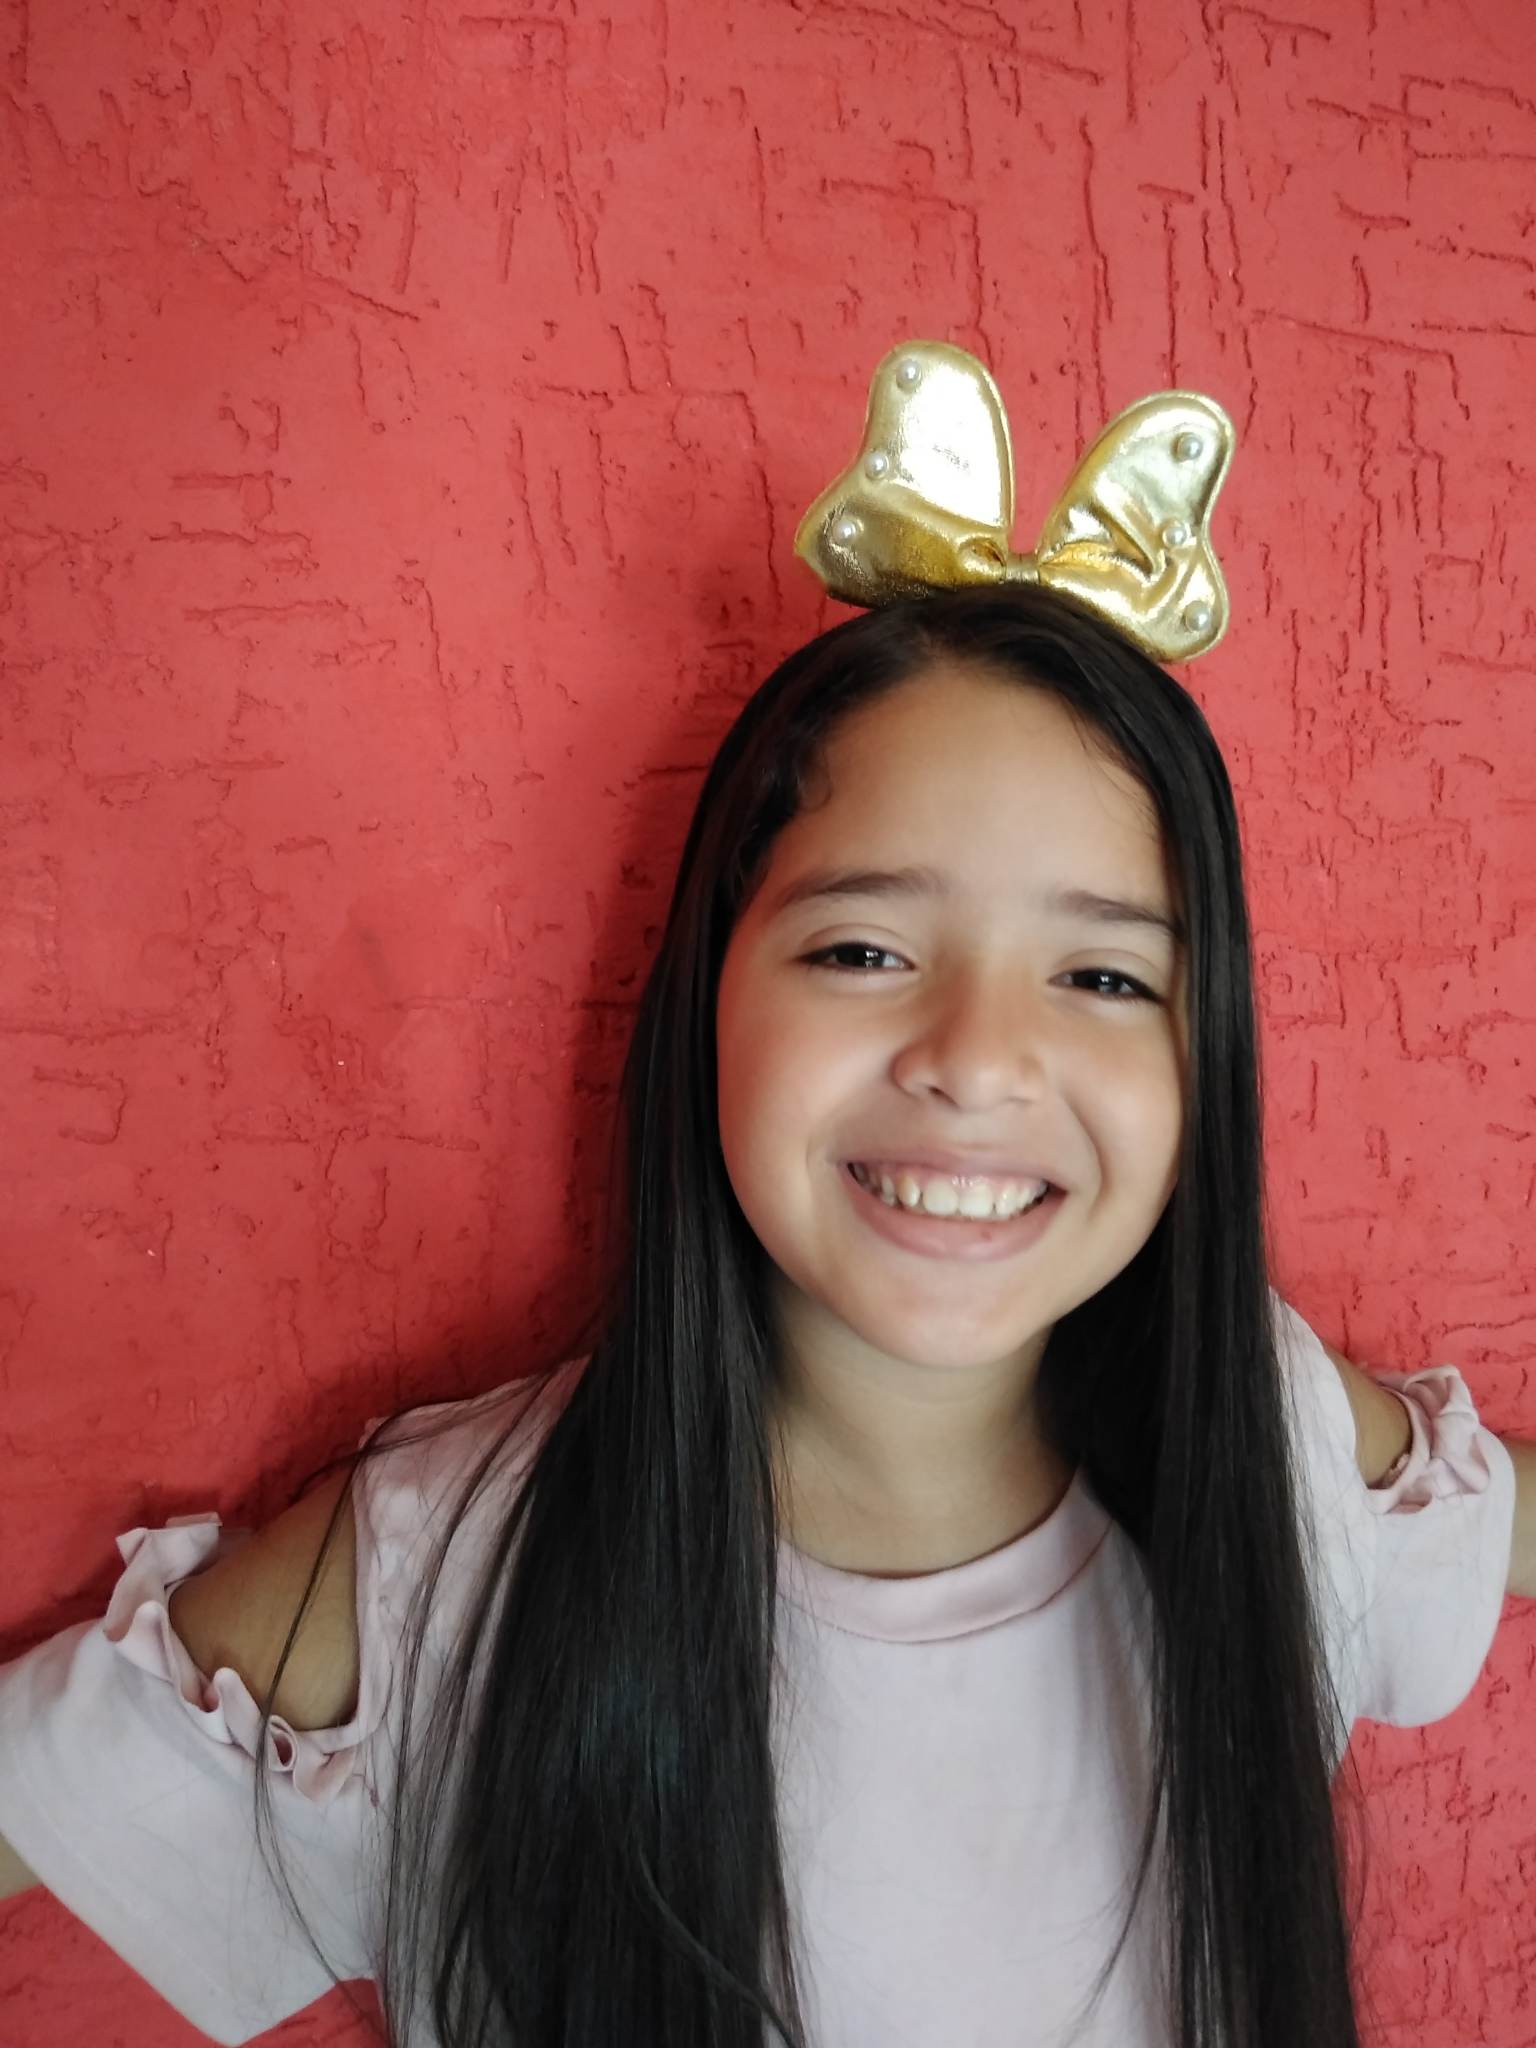
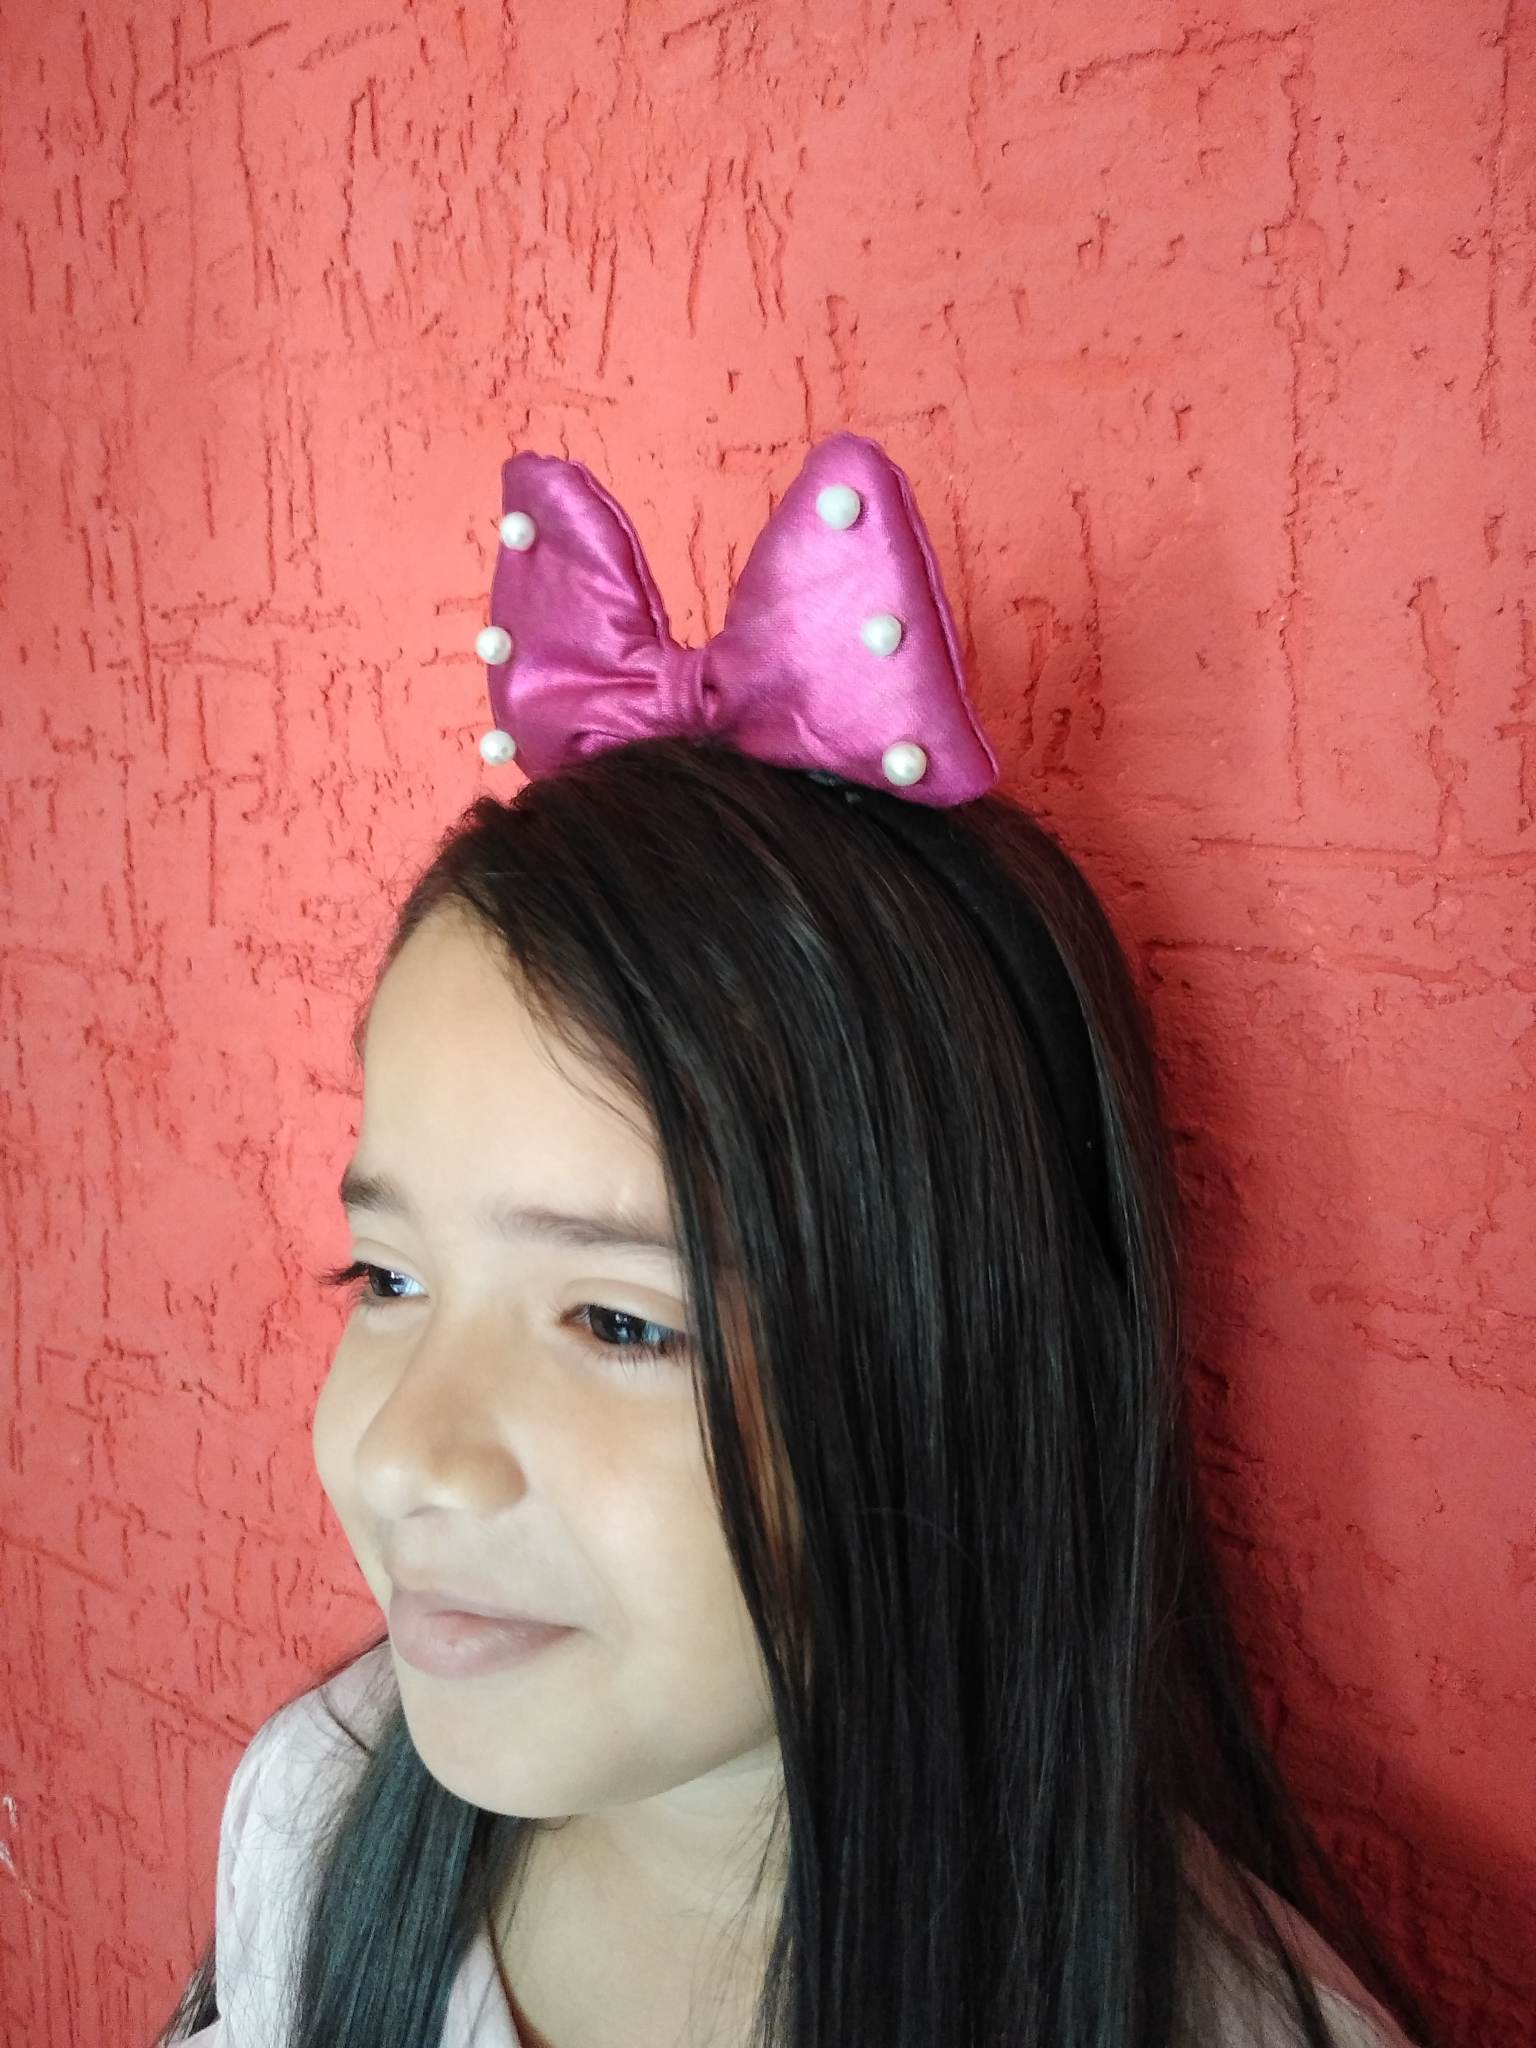
Final Result.
.png)
That look super easy ..I will try too for my younger sister...she is crazy about hair bands
Que bueno amiga, es una gran idea, inténtalo.
Hermosa forma la de esos lazos, tu hermanita quedó hecha toda una Minnie ajajajja super linda.
Gracias amiga jajaj, que bueno que te gustó, tienes razón.