[ESP-ENG] Decorating my phone case - in 2 steps | Decorando el forro de mi teléfono - en 2 pasos
.jpg)
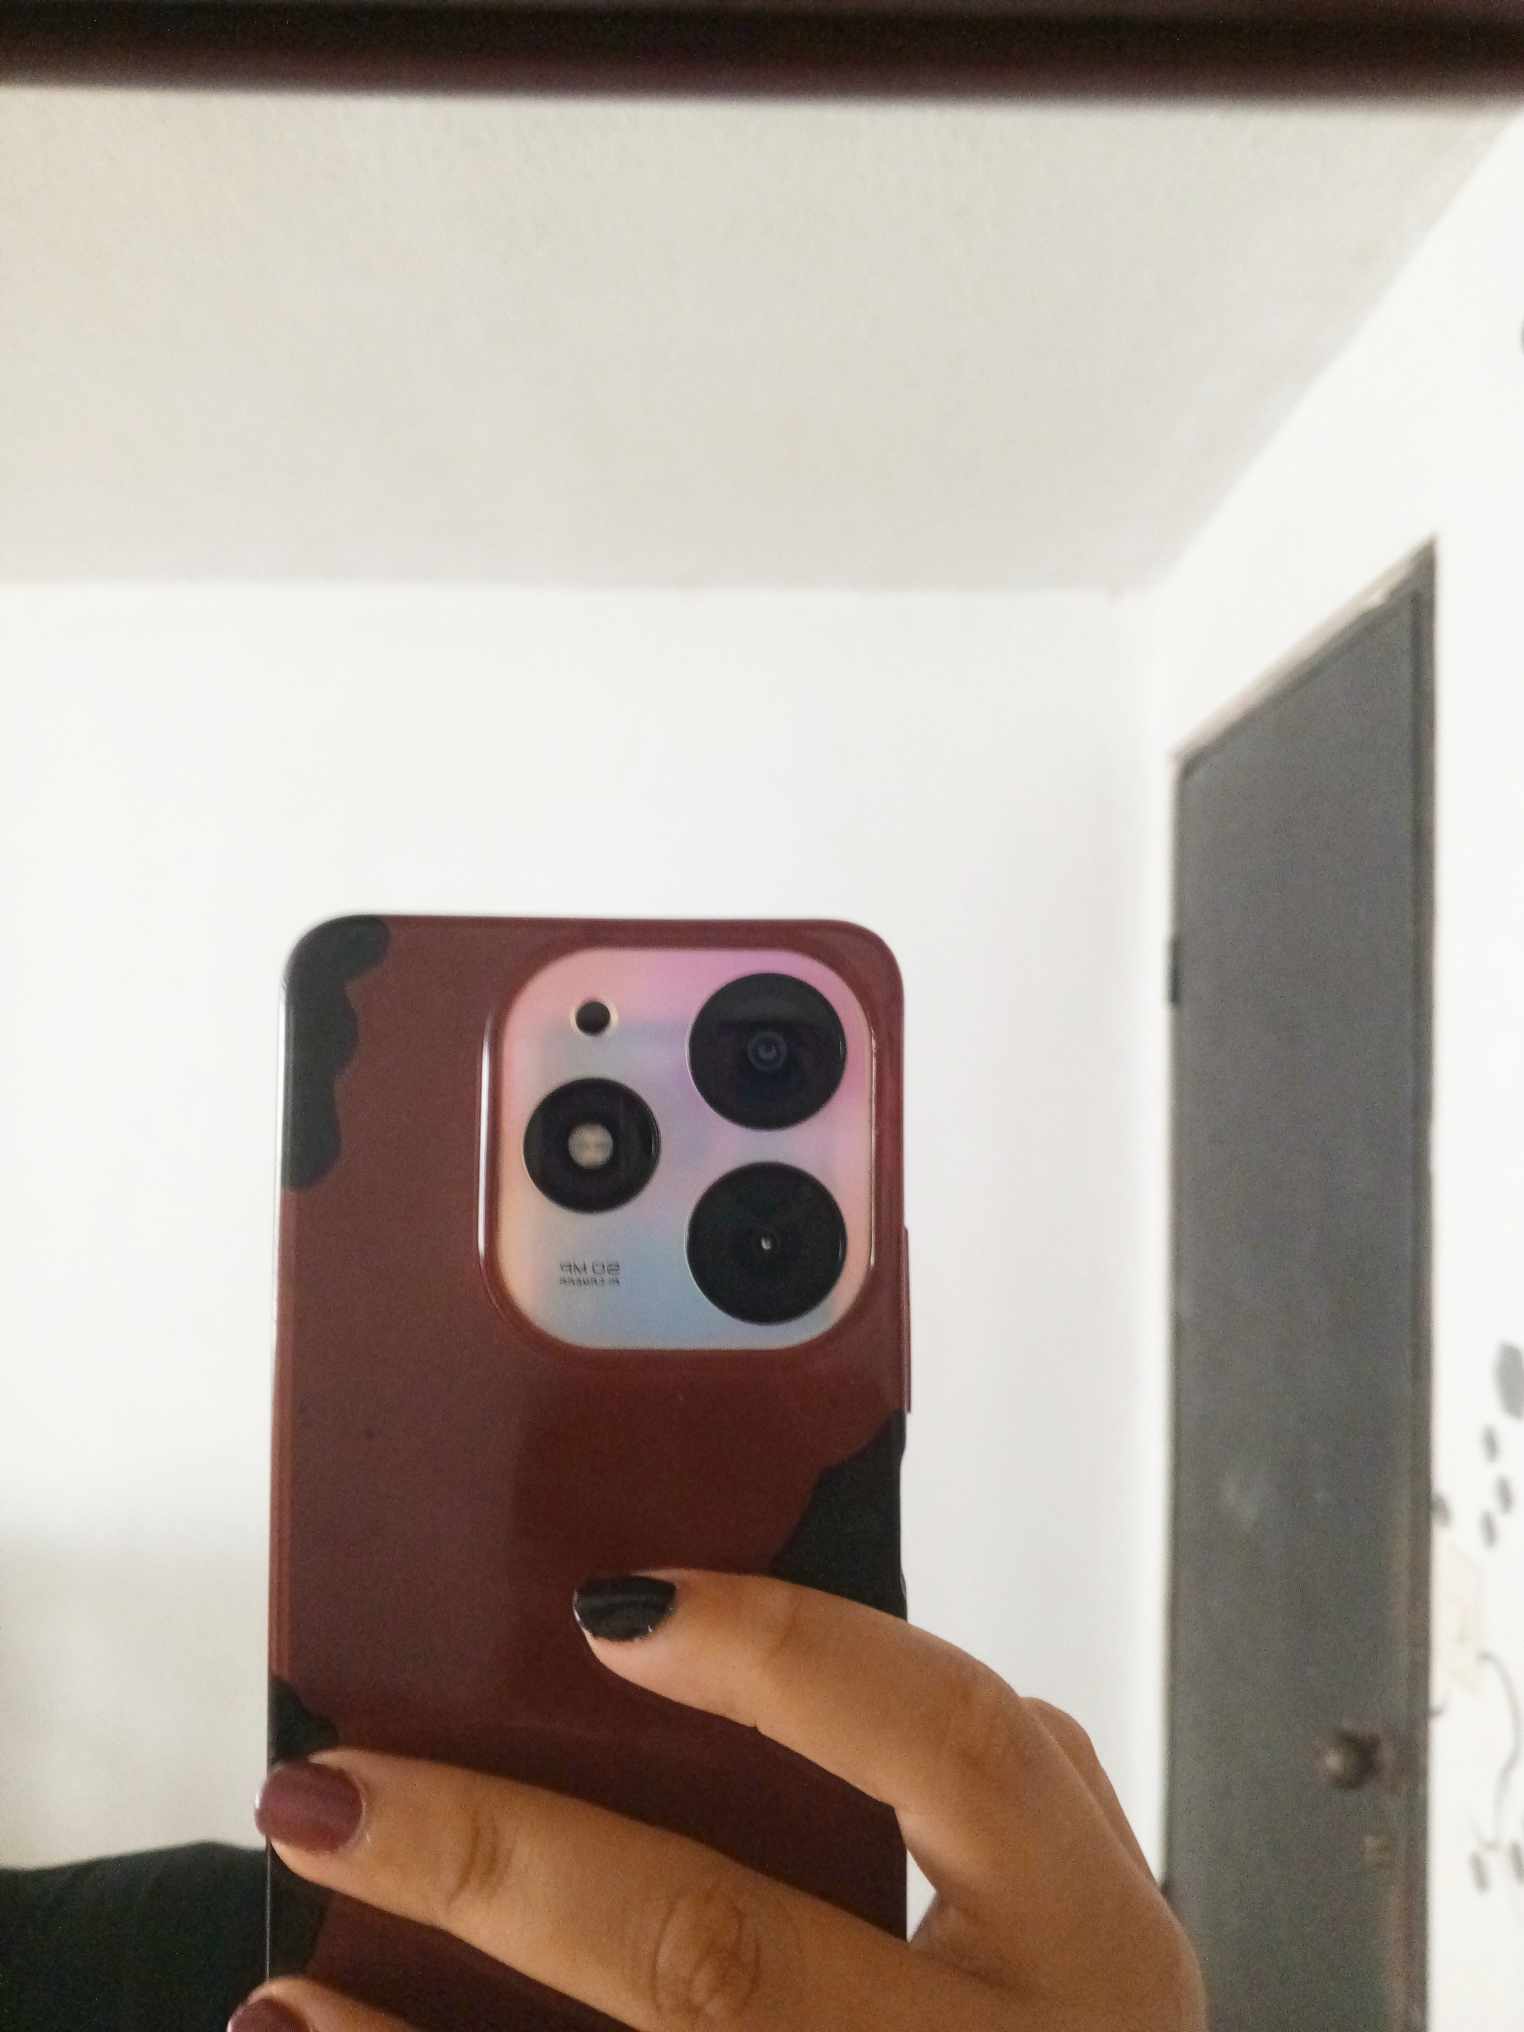
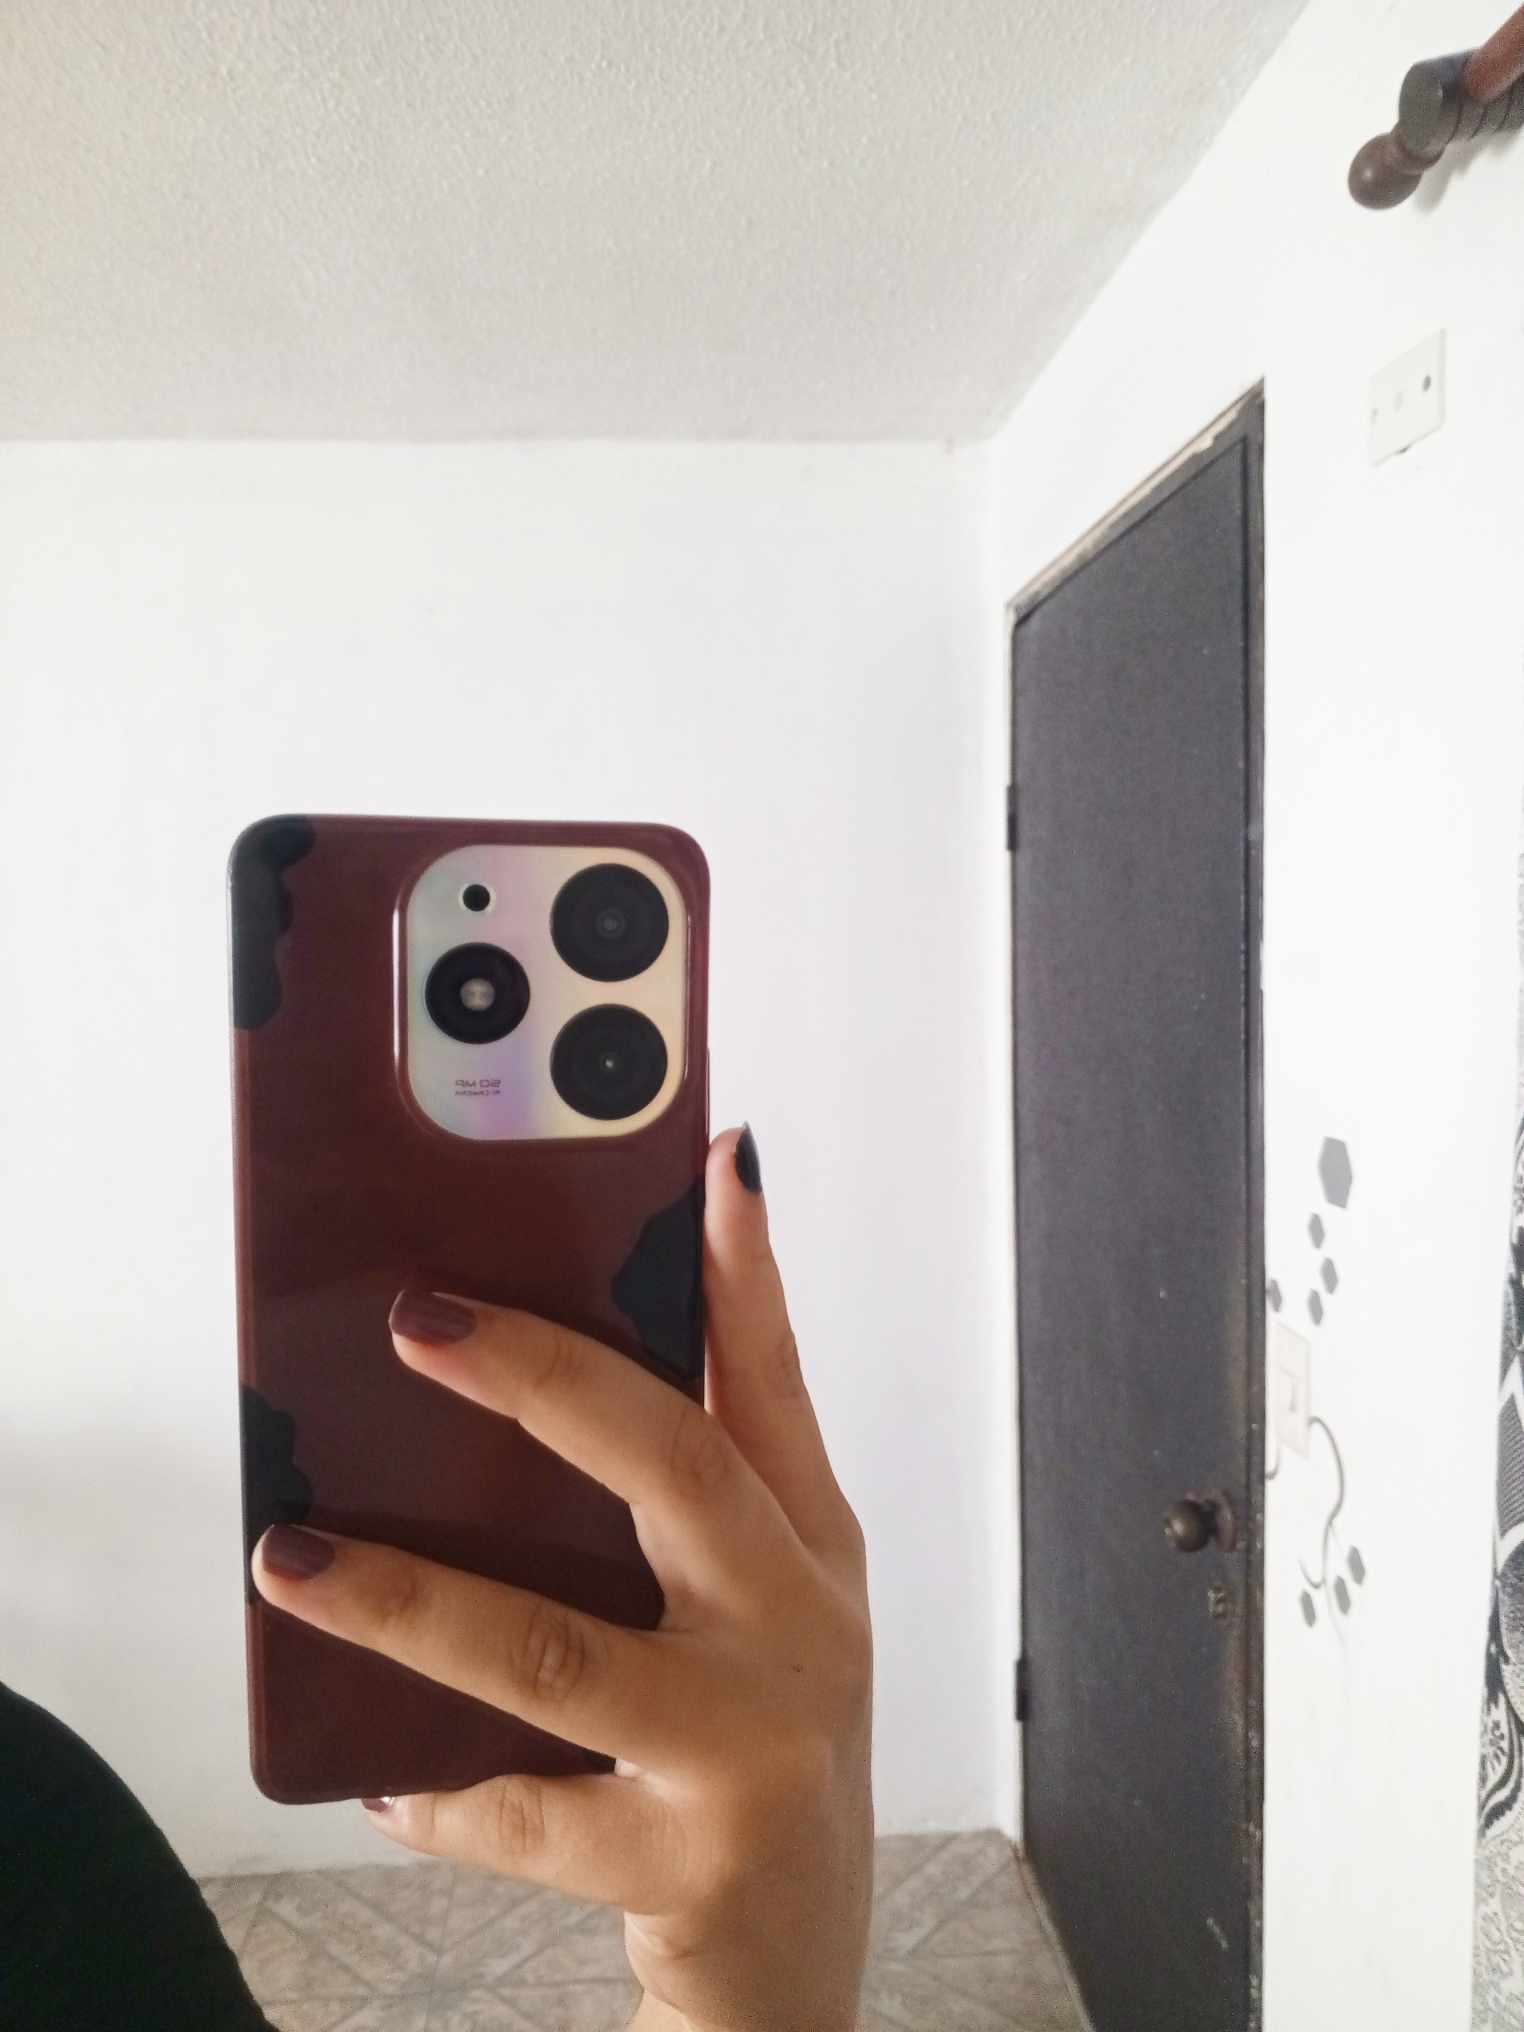
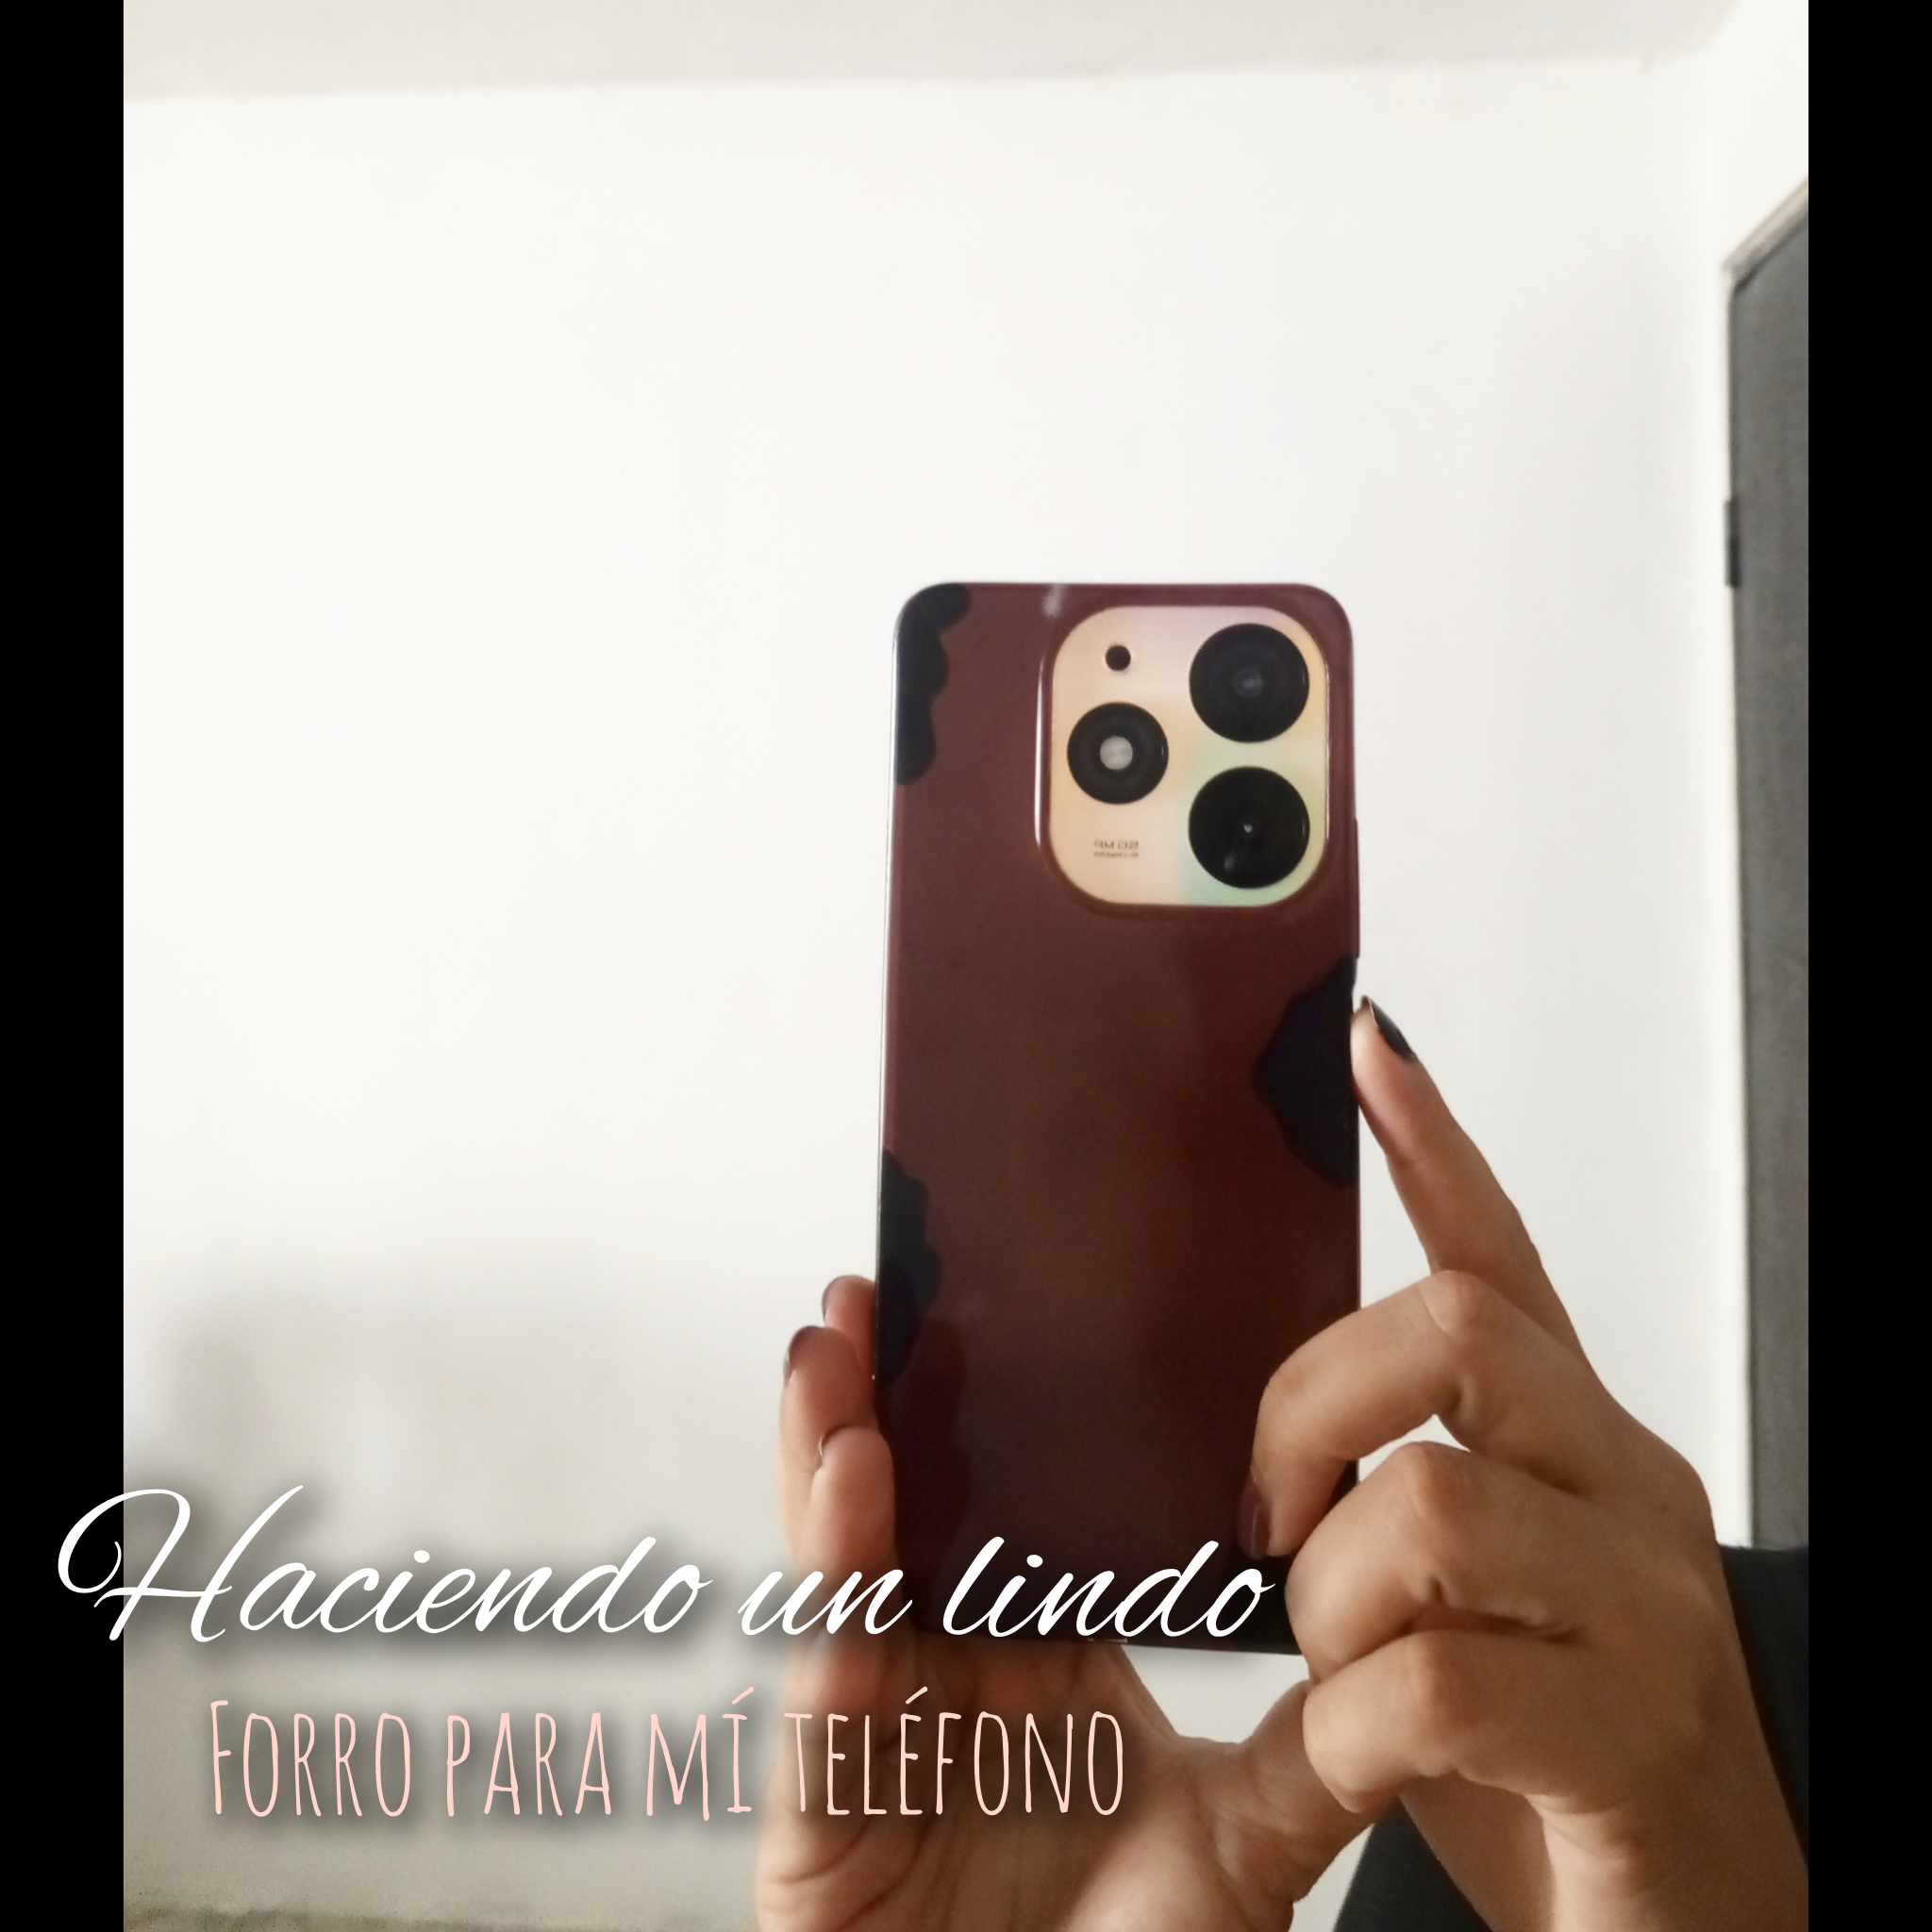
Amigos y amigas de hive, sean bienvenidos a un nuevo post en mi blog, el día de hoy estoy feliz de poder mostrarles algo nuevo e innovador que hice. Les cuento que yo tenía un gorro transparente en mi teléfono el cual se puso muy feo al pasar el tiempo, de transparente pasó a verse como marrón y la verdad se veía súper feo, entonces decidí comprar unas pinturas de uñas para ingeniarmelas ya que no tenía para comprarme un forro, entonces compré las pinturas de los colores más lindos que había, y ya verán lo que procedí a realizar con la pintura de uñas, la verdad es algo impresionante y créanme que ésto nos ayudará a personalizar nuestros forros haciendo lo que querramos.

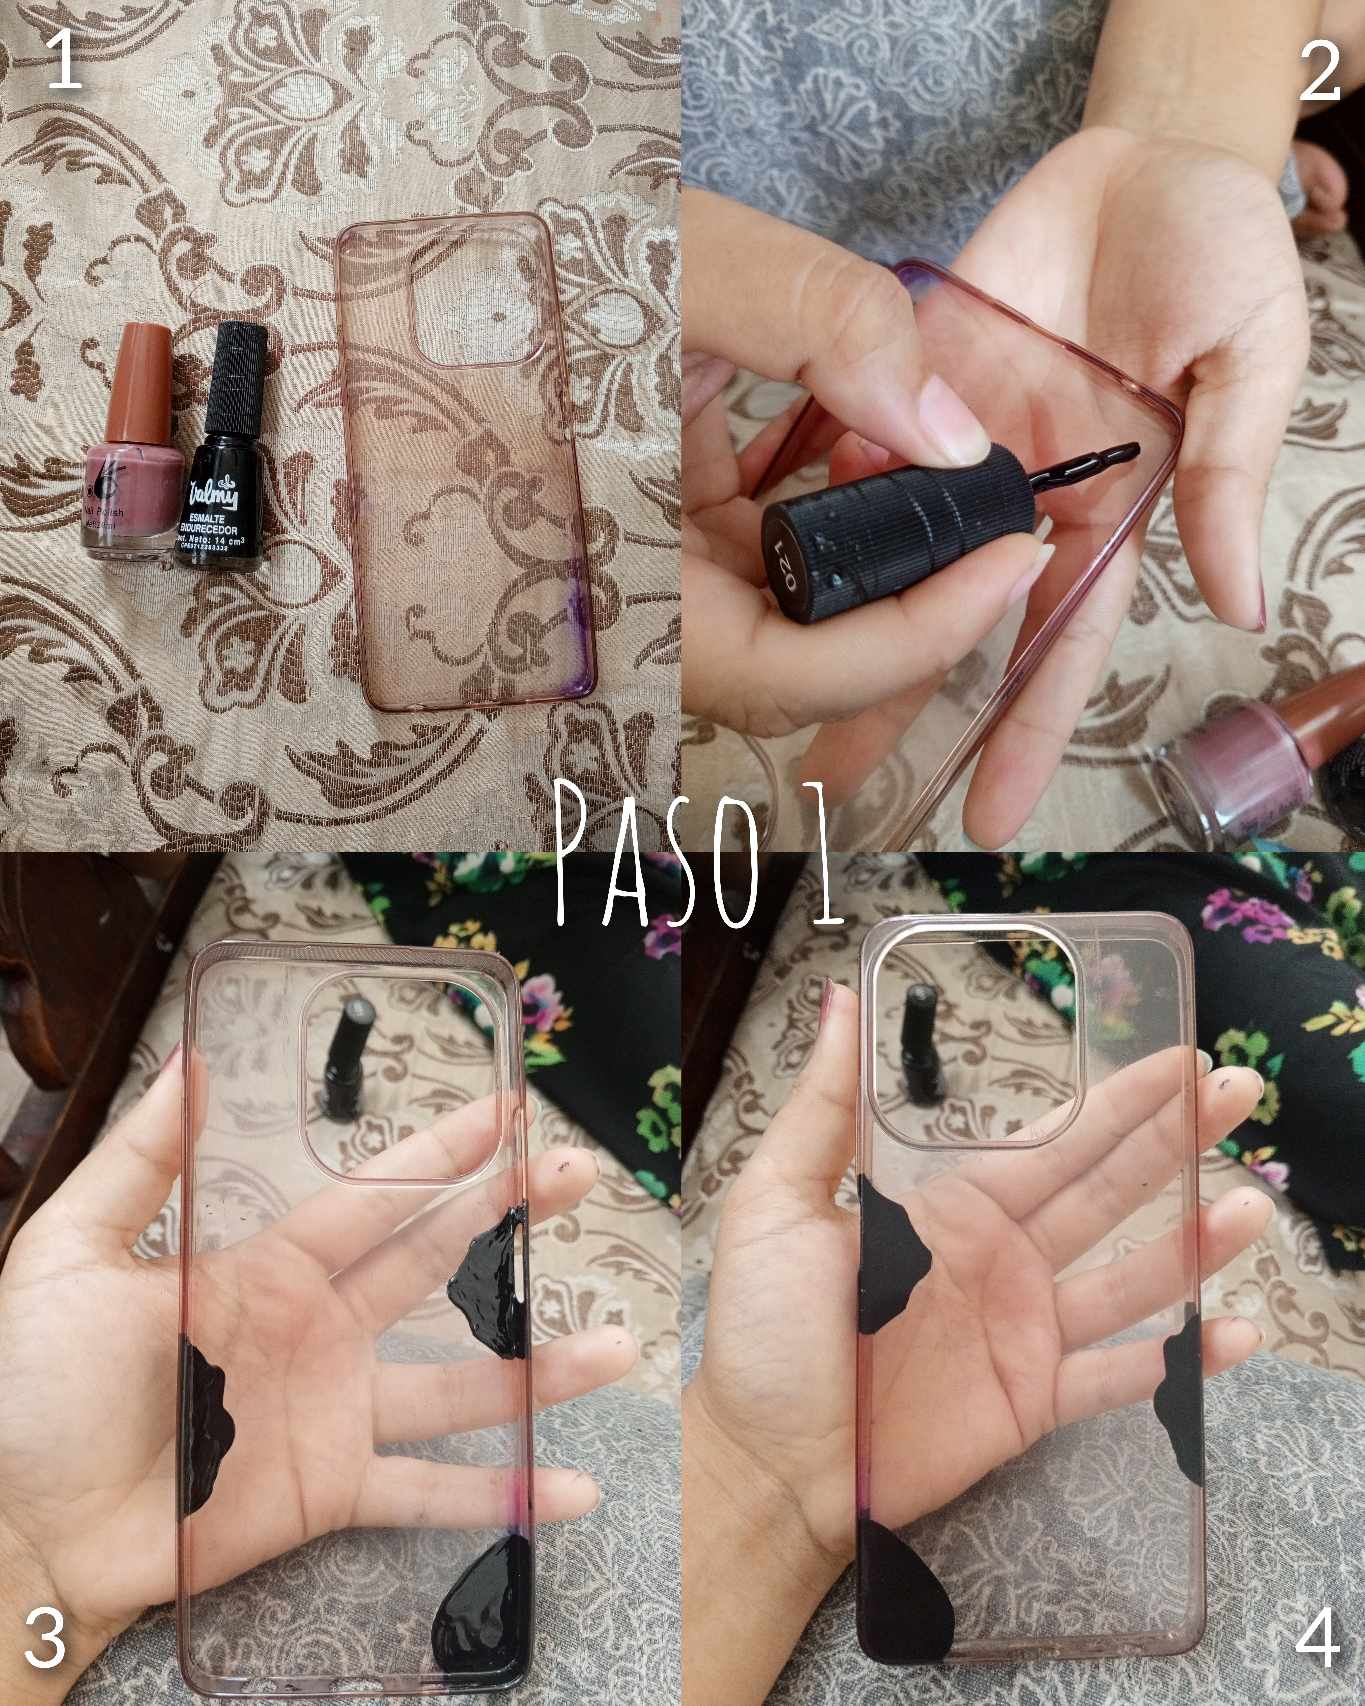
Paso 1: lo primero que haremos será mirar la imagen de los materiales, cómo pueden ver solo tengo mi forro y dos pinturas de uñas, una negra y una color rosa viejo casi tirando a marrón. Lo que haremos primero será organizar el diseño que queremos en nuestra mente para luego ejecutarlo en el forro. Mi idea era hacer manchitas así como las de la vaca con la pintura negra, y con la otra rellenar, entonces procedí a hacerlo, comencé haciendo las manchitas negras en diferentes partes del forro y de la forma de mi preferencia.
Step 1: the first thing we will do is to look at the image of the materials, as you can see I only have my liner and two nail paints, one black and one old pink almost brown. What we will do first is to organize the design we want in our mind and then execute it on the liner. My idea was to make little spots like the cow with the black paint, and with the other one to fill in, so I proceeded to do it, I started making the little black spots in different parts of the liner and in the shape of my preference.
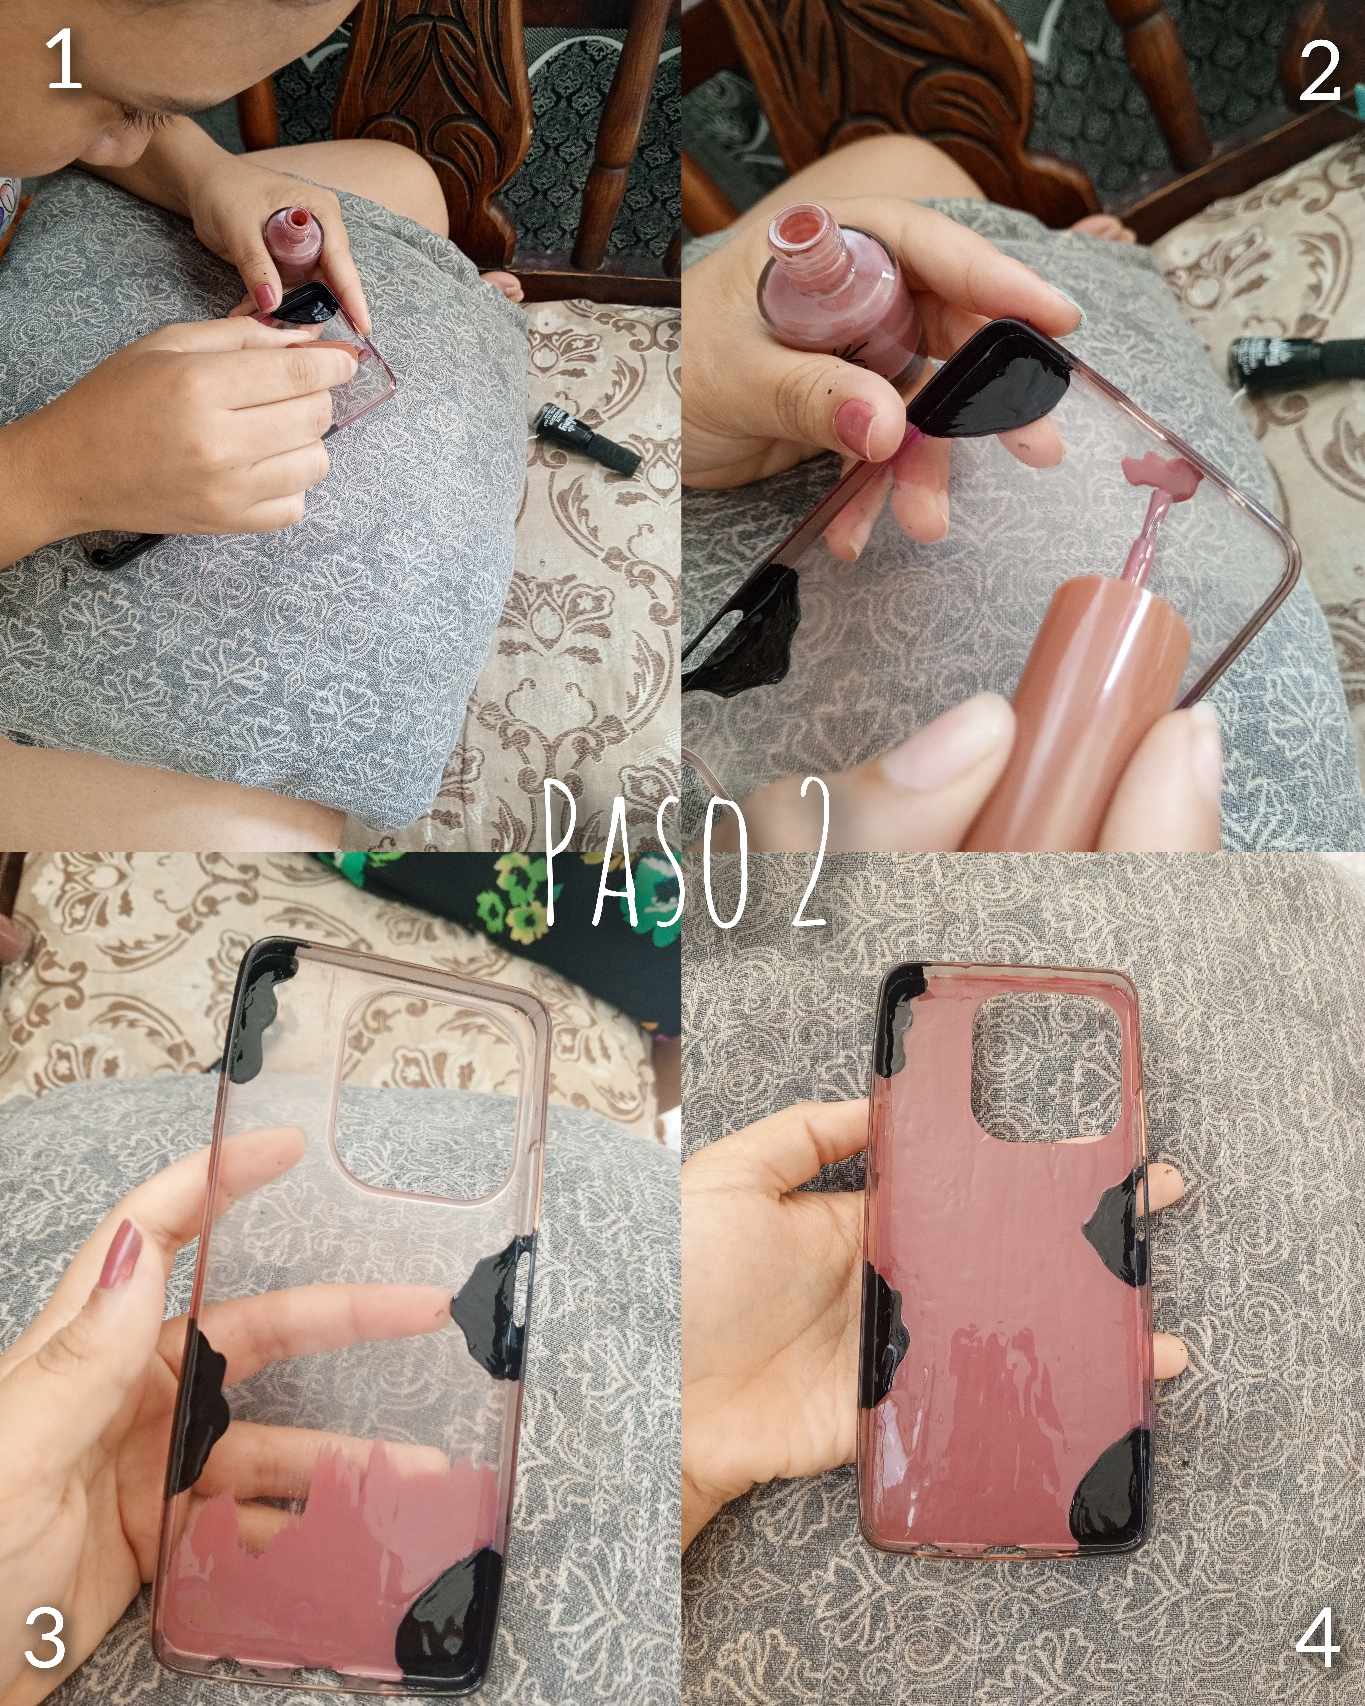
Paso 2: luego de haber hecho las manchas negras tenemos que tener en cuenta que debemos dejar secar al sol, yo lo coloqué en mi ventana, ya que antes de echar la otra pintar primero ésta debe secar para no manchar el forro. Luego de que ya esté seco procederemos a distribuir en lo que queda del forro la pintura rosa vieja, como lo observan en las imágenes, luego de haberlo hecho así lo que haremos ahora será colocar al sol y dejar secar. En tan solo dos sencillos pasos logré un acabado que me encantó y ya verán el resultado final.
Step 2: after having done the black stains we have to take into account that we must let it dry in the sun, I placed it on my window, because before we paint the other one it must dry first so as not to stain the lining. After it is dry we will proceed to distribute the old pink paint on what is left of the lining, as you can see in the images, after having done so what we will do now is to place it in the sun and let it dry. In just two simple steps I achieved a finish that I loved and you will see the final result.