[ESP-ENG ] Handbag for my little sister - Hand sewn, just 2 steps |Bolso de mano para mi hermanita - Cosido a mano, tan solo 2 pasos
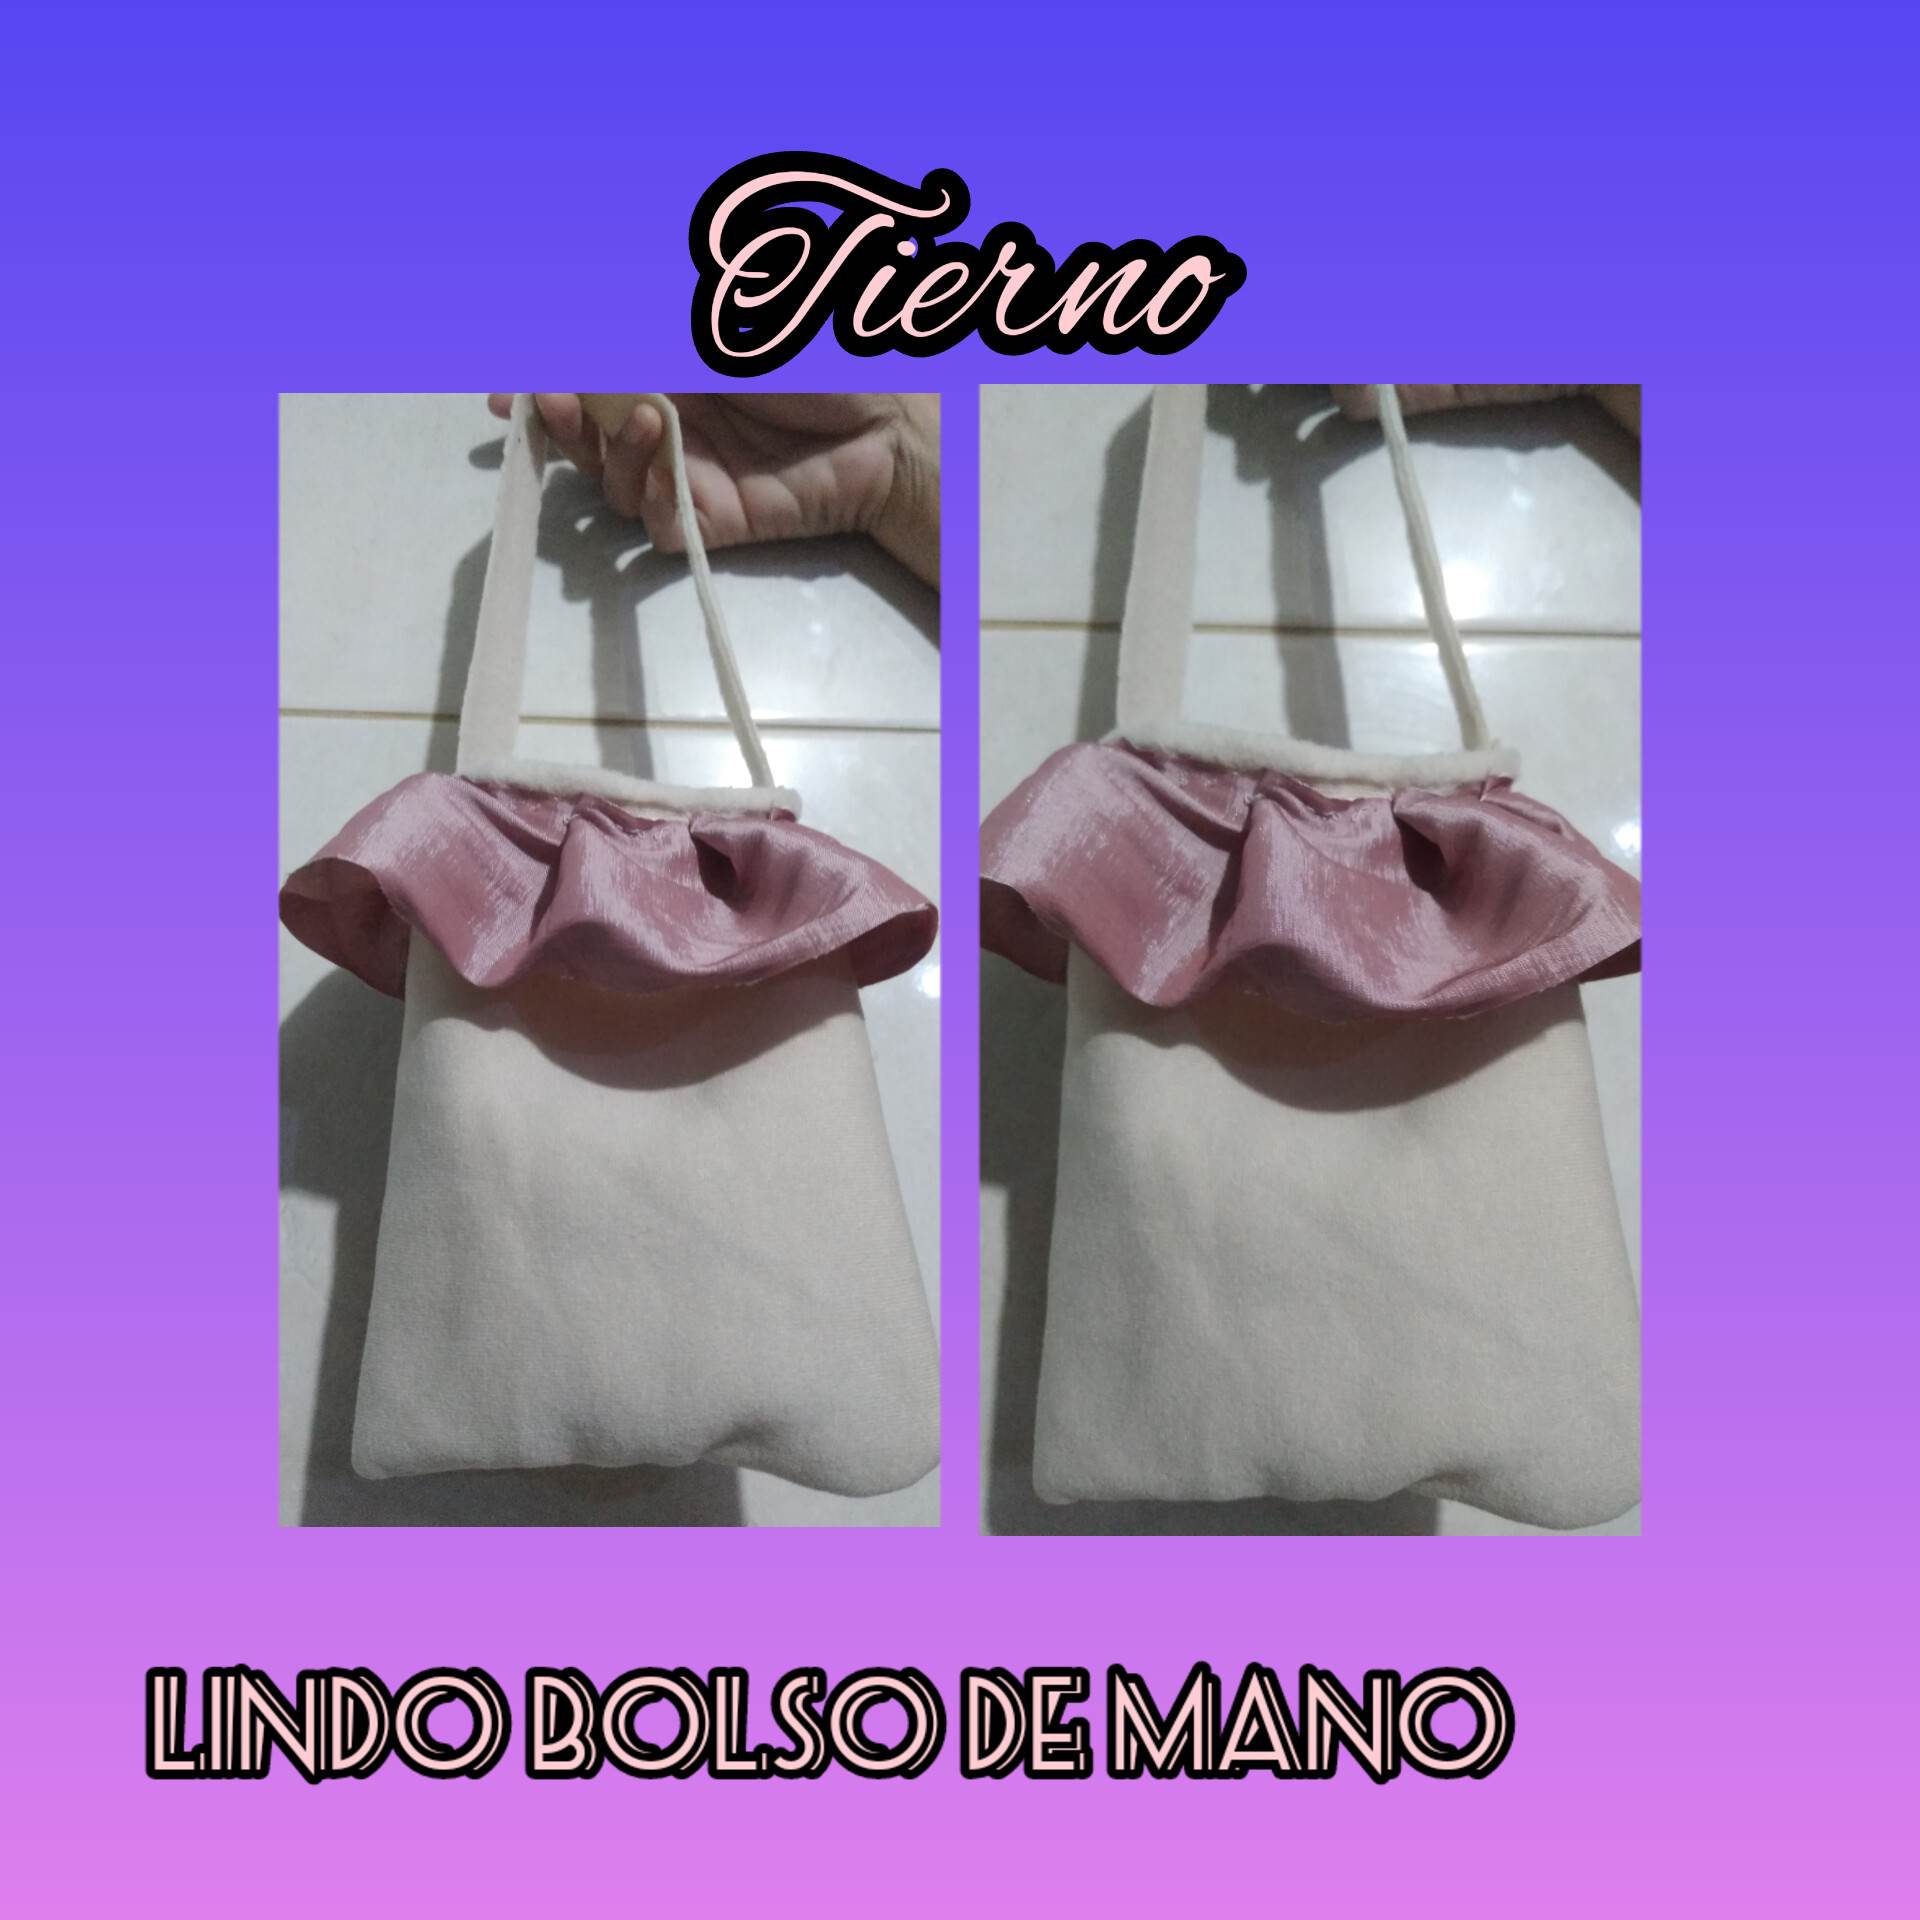
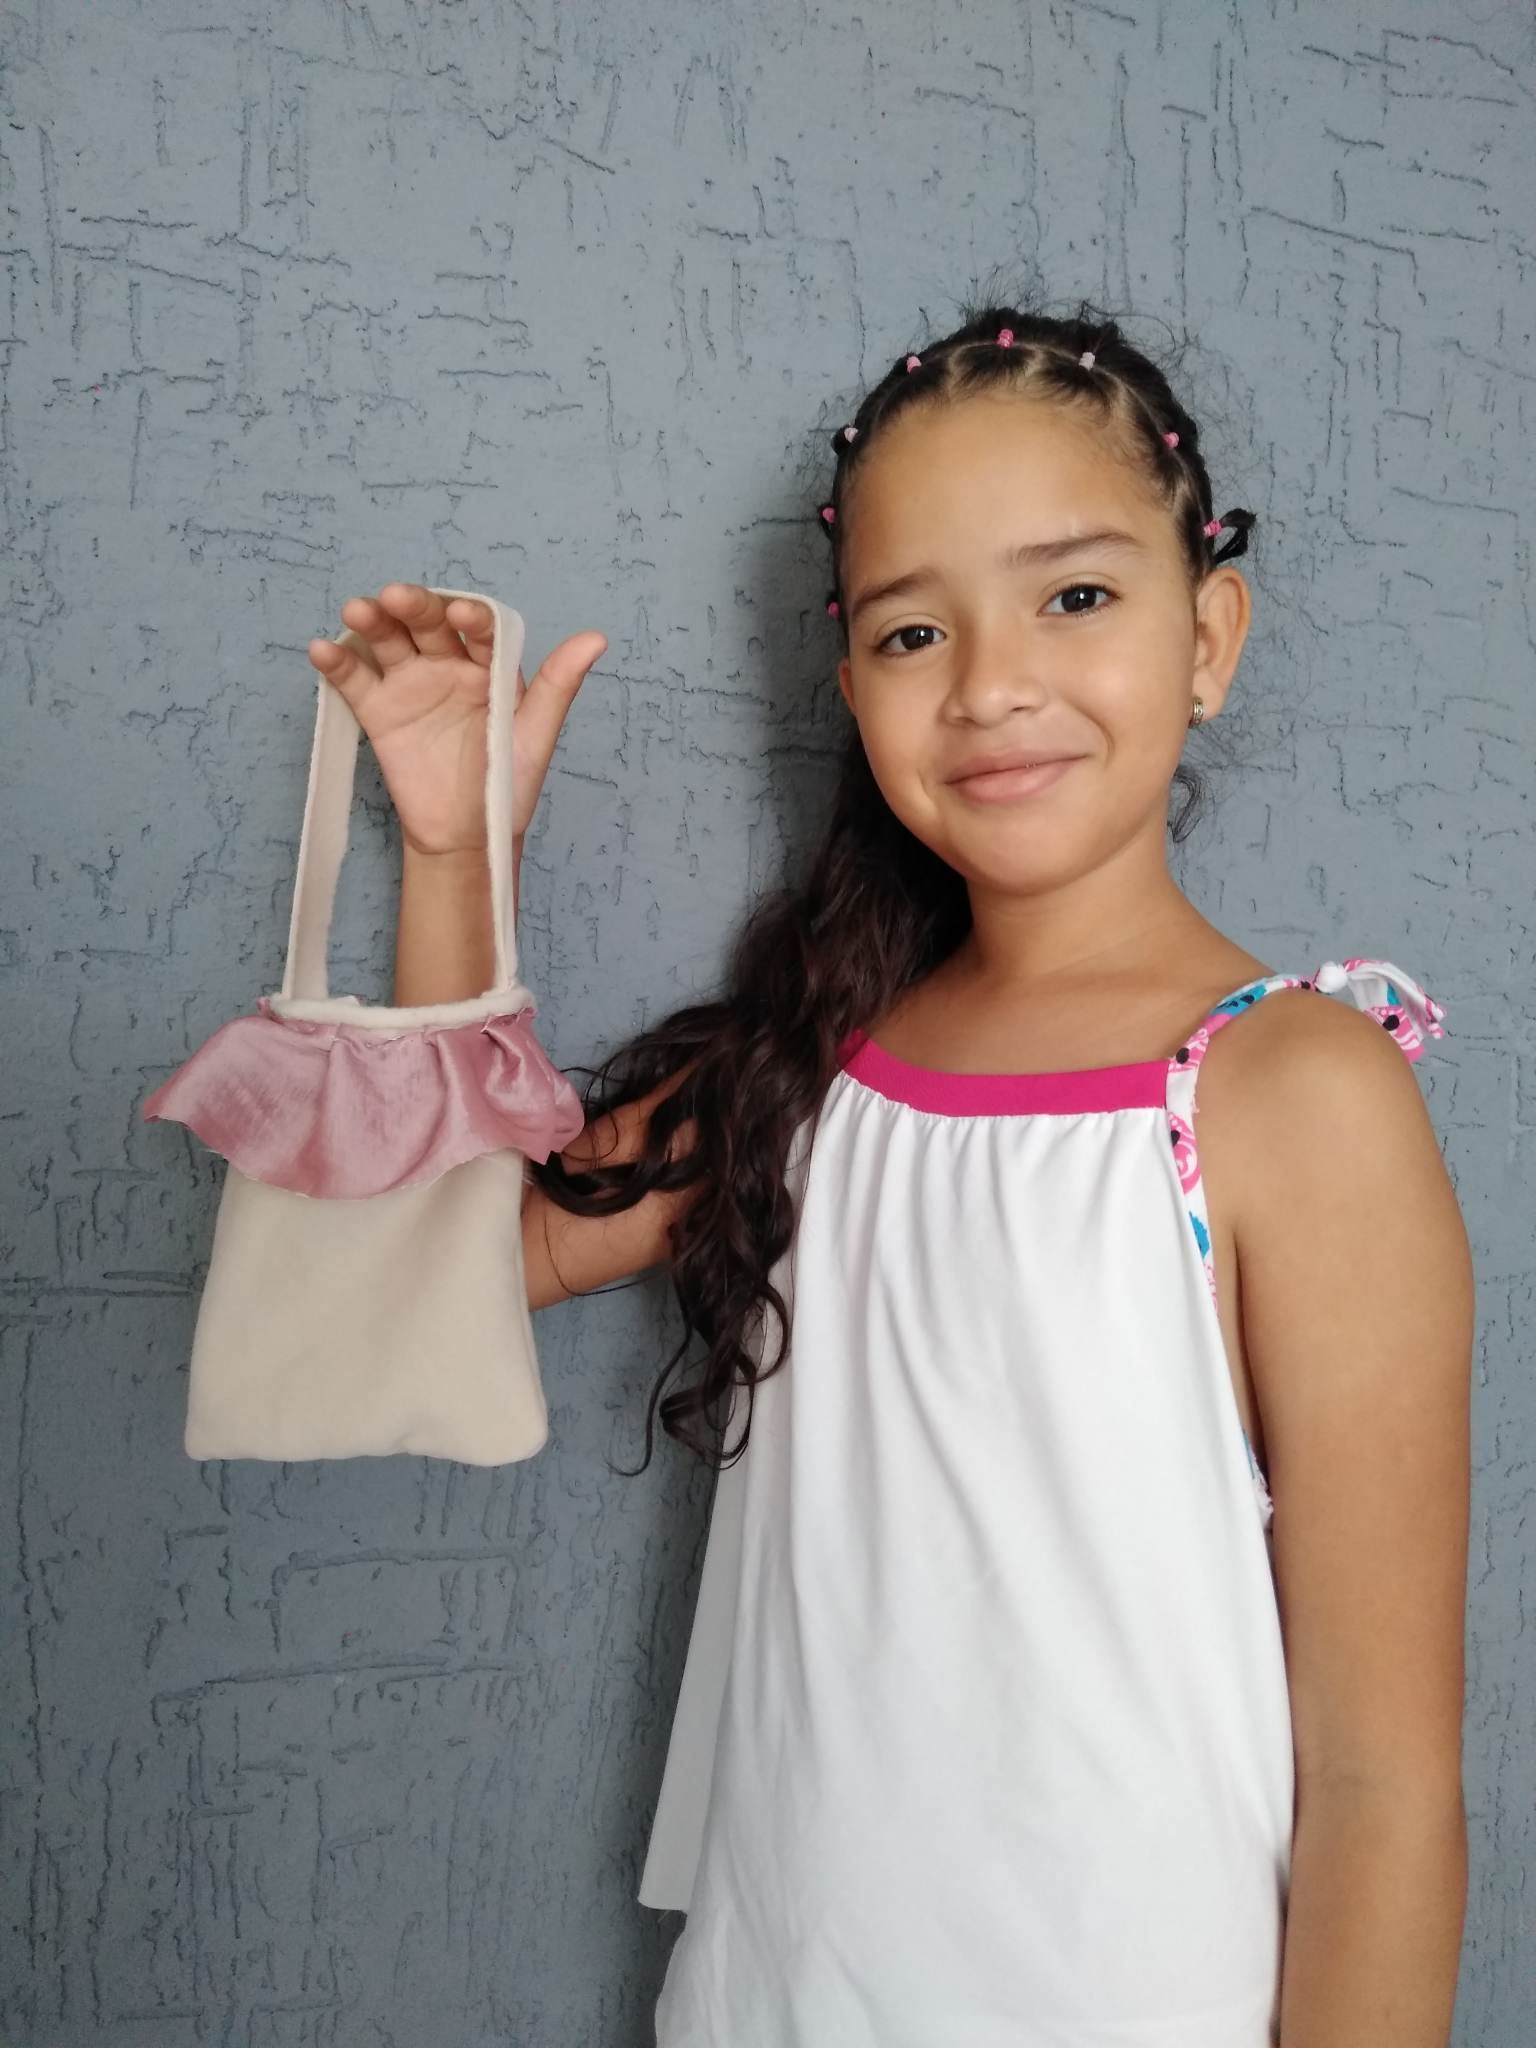
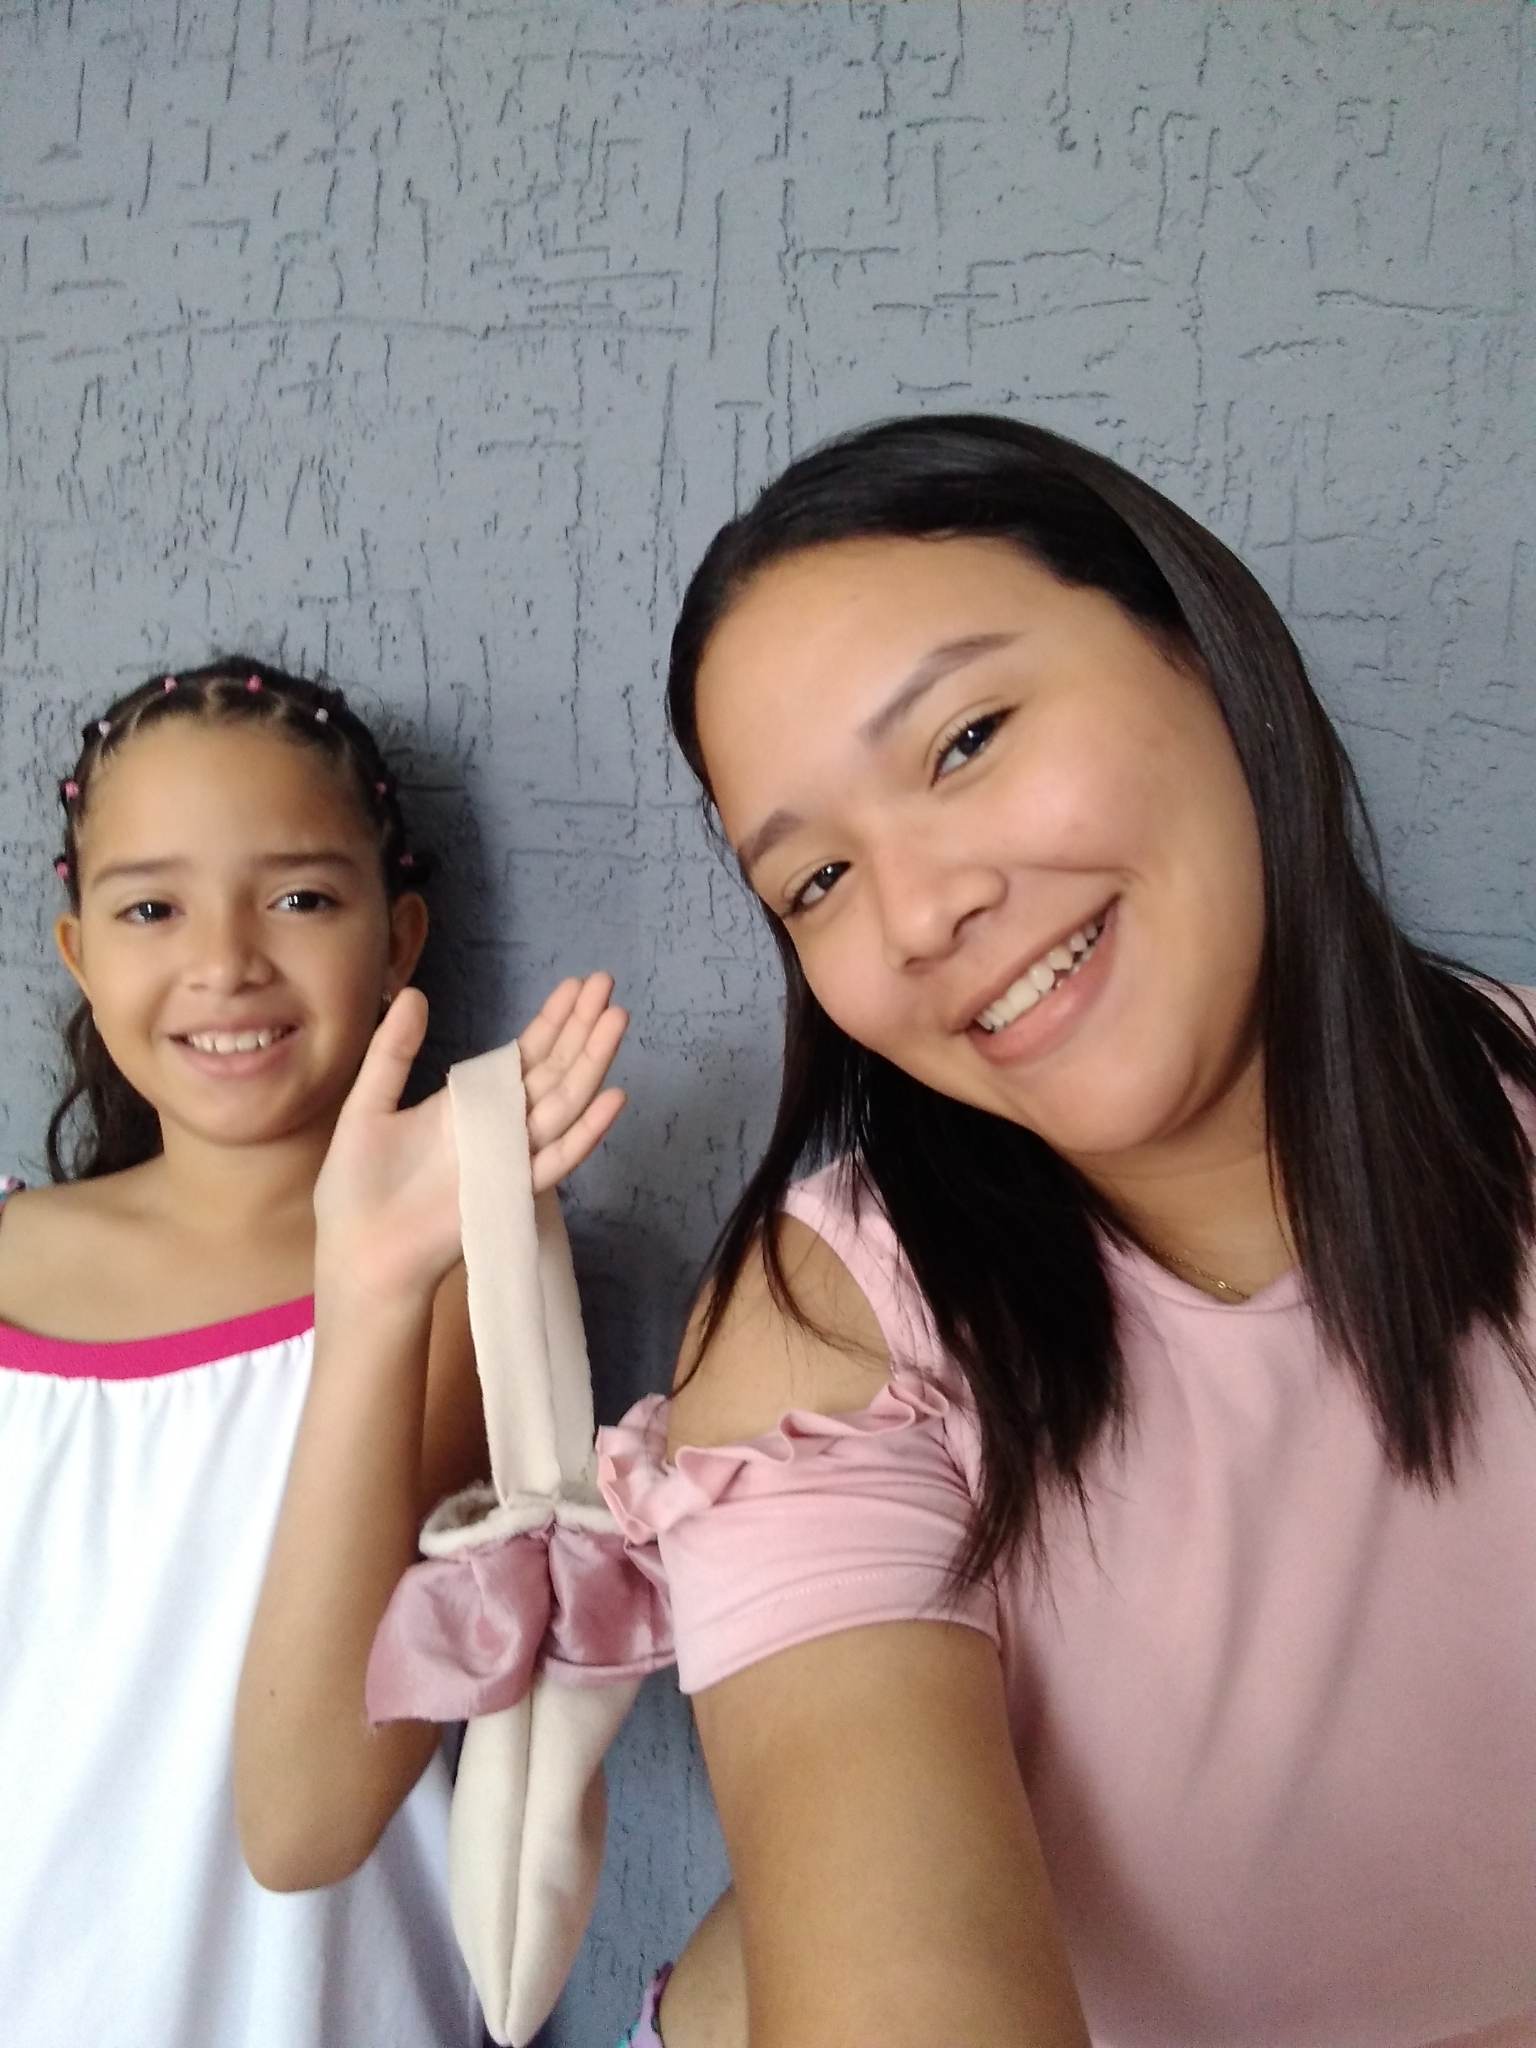
Friends of hive, happy to be able to share again with all of you, welcome to my blog once again. God bless you all and I hope you are having a great week. Today I want to share with you all something very tender and cute that I know you will like, it is a handbag that I made for my little sister, she had been telling me for days that she wanted one to keep her dolls dresses, so I pleased her by making her this cute bag. I really want to share this experience with you so you can also make handbags for the little ones at home, so let's see the step by step.
.jpg)
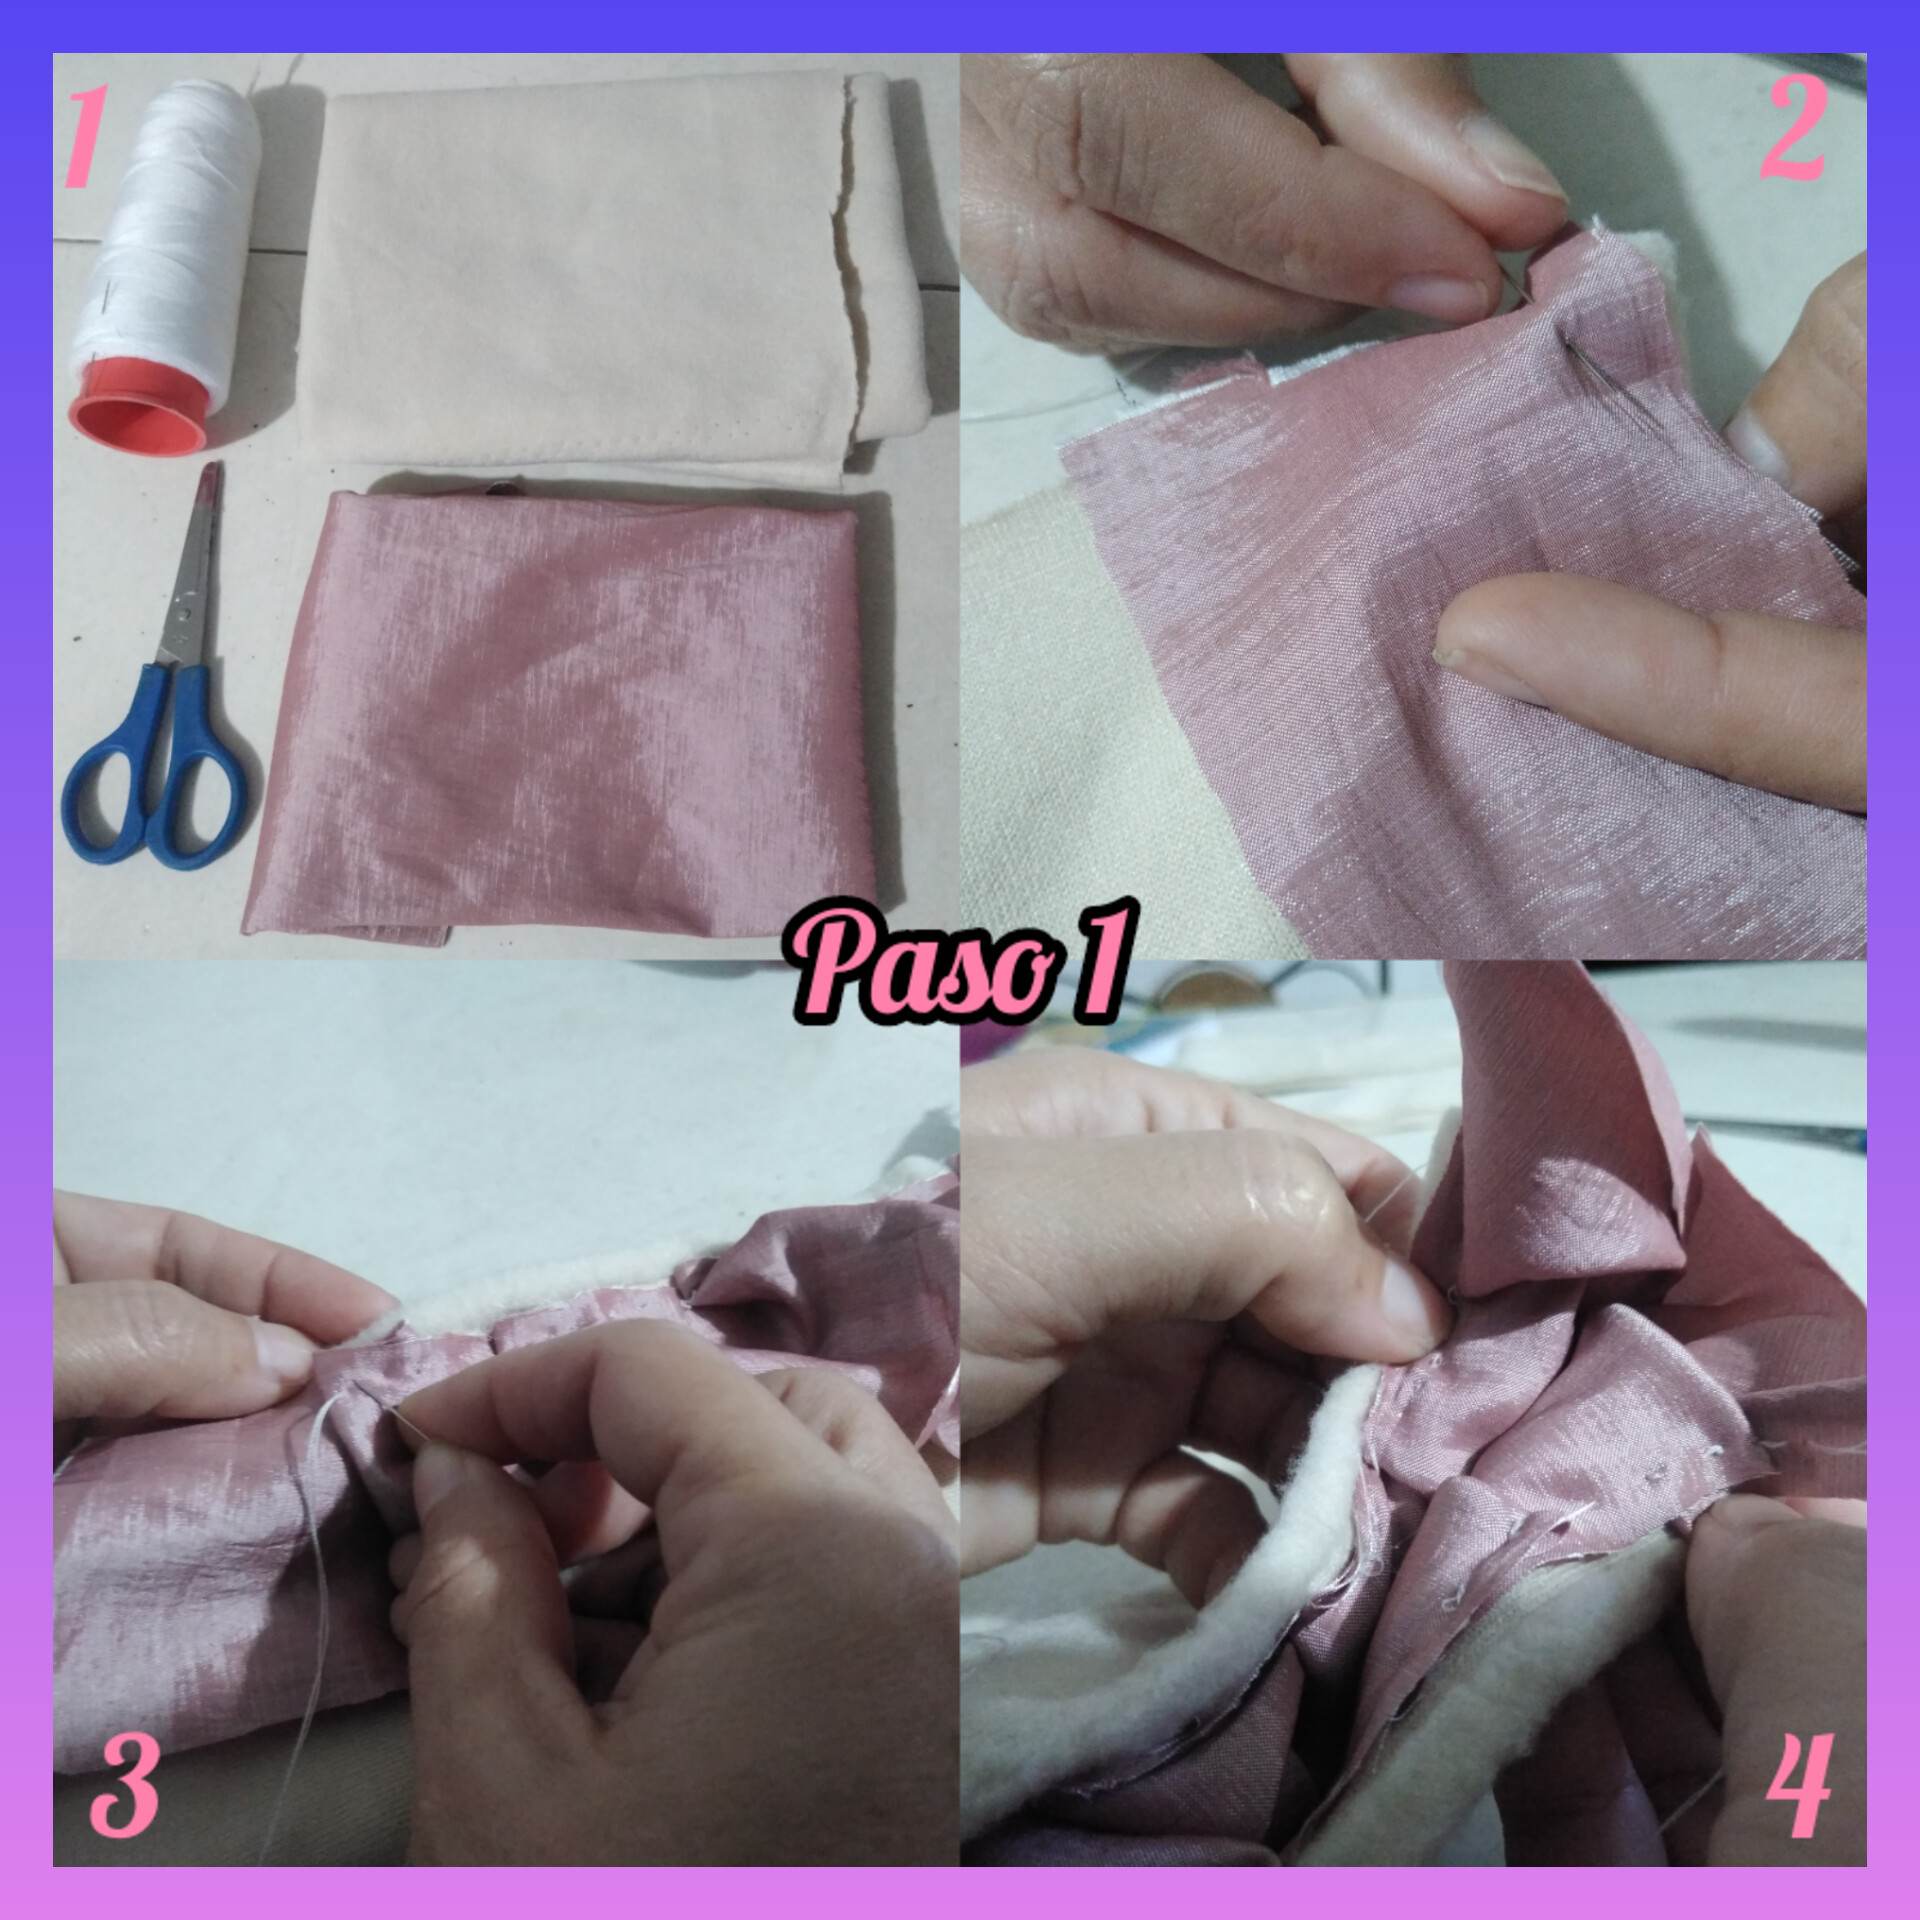
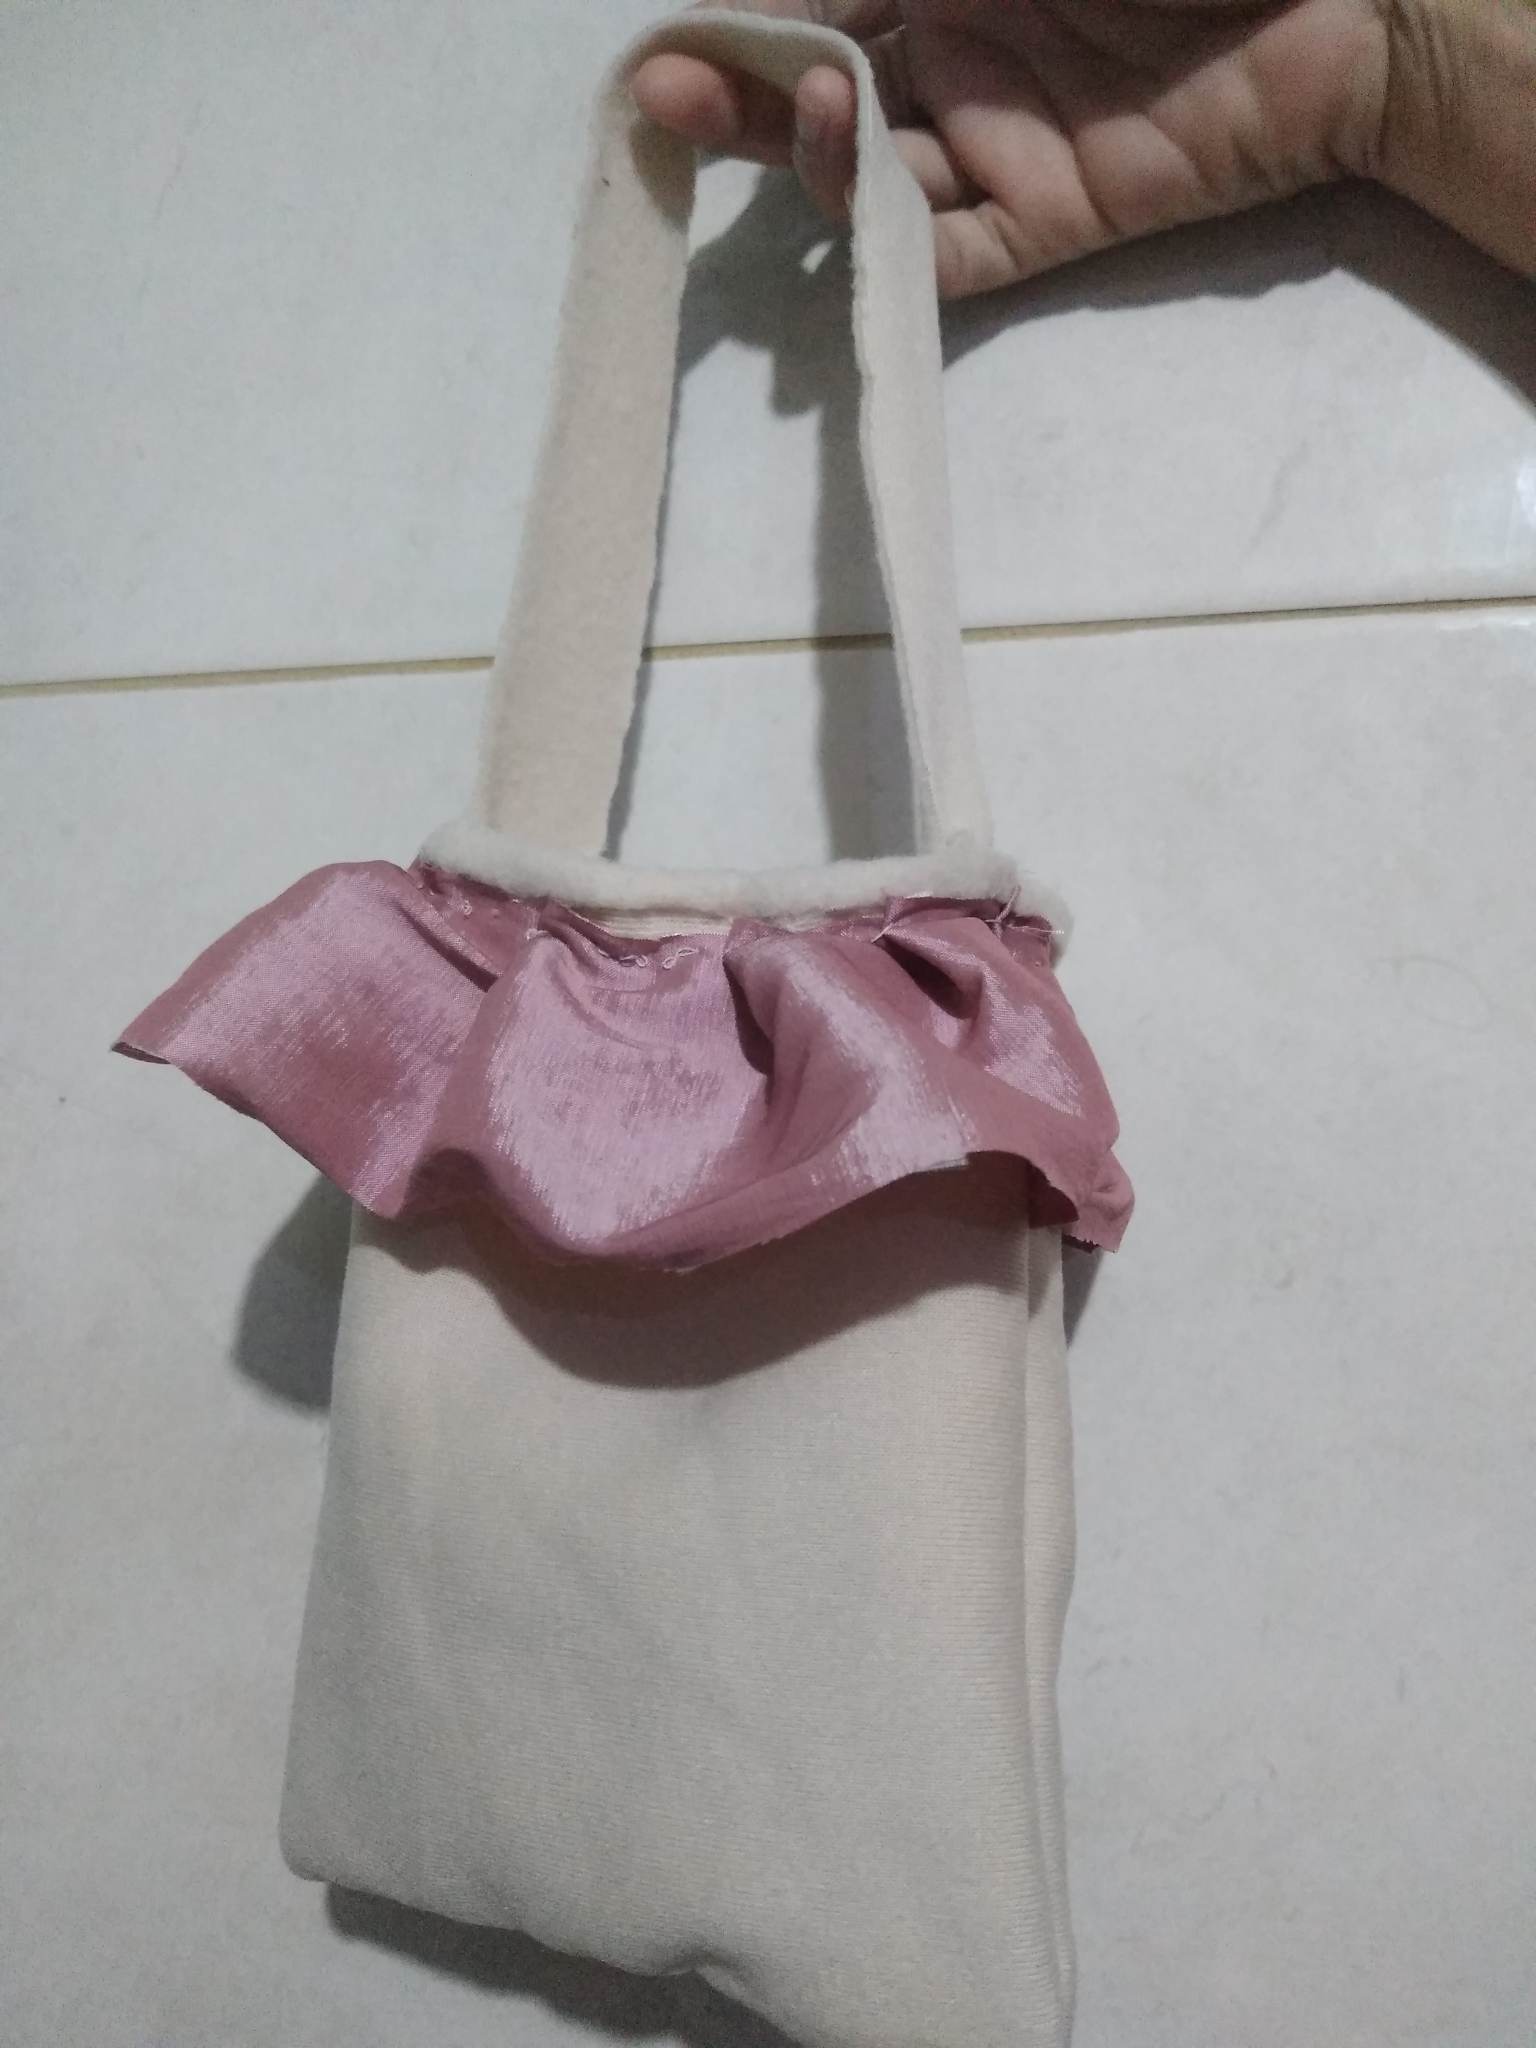
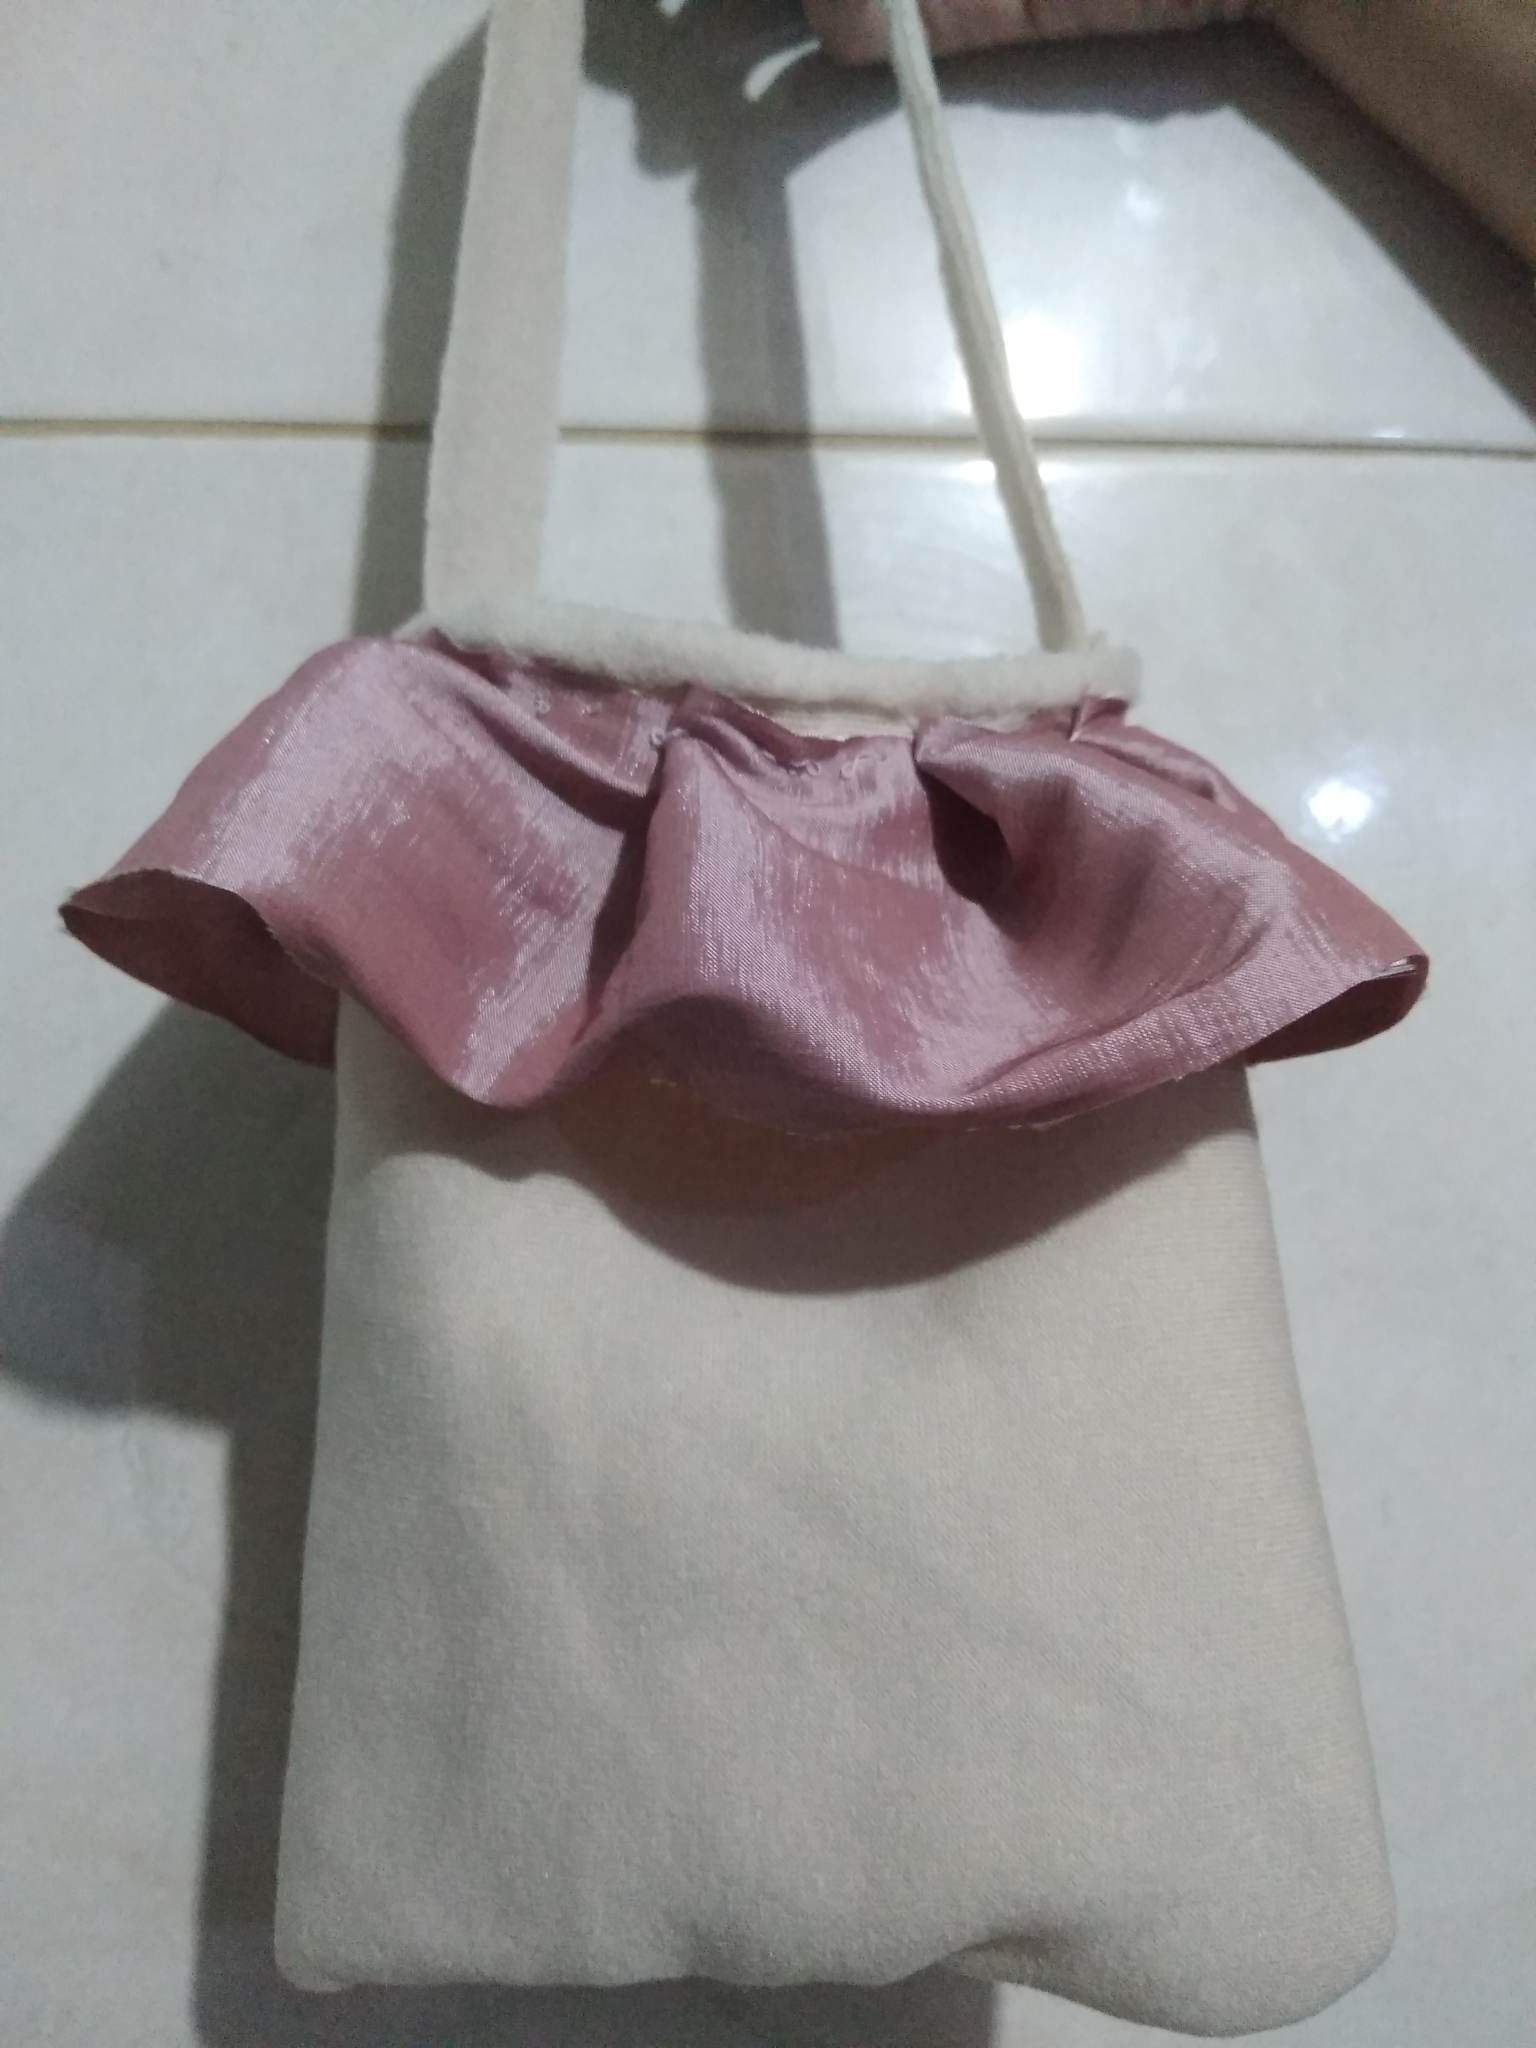
Paso 1: vamos a necesitar dos telas, o por lo menos yo elegí dos telas distintas para poder contrastar los colores y que el bolso se pueda ver mucho más lindo, elegí una tela beige, y una tela rosa vieja, eran retazos de tela que tenía desde hace mucho tiempo ahí guardadas, entonces las seleccioné para hacer éste bolsito ya que la tela beige es tela de mono y es dura, es buena para hacer éste tipo de cosas, y pues la tela color rosa es para dar un toque más femenino, y lo que haré con la tela rosada es muy lindo, haré un arruche en la parte de arriba. Lo primero que haré luego de cortar las piezas que serán: la tira para el bolso, la parte del bolso, y el arruche. Procedí a colocar la tela para el arruche encima de la tela beige, y Procedí a coserla y a hacer el arruche con la mano mientras iba doblando e iba cociendo al mismo tiempo, y va quedando como se los enseño en la imagen. Luego fe haber cosido el arruche nos aseguramos bien de que quede bien cosido ya que es a mano para que no se desprenda.
Step 1: we are going to need two fabrics, or at least I chose two different fabrics to be able to contrast the colors and that the bag can look much nicer, I chose a beige fabric, and an old pink fabric, they were scraps of fabric that I had for a long time there saved, so I selected them to make this bag because the beige fabric is monkey fabric and it is hard, it is good to make this kind of things, and the pink fabric is to give a more feminine touch, and what I will do with the pink fabric is very nice, I will make a ruche on the top. The first thing I will do after cutting the pieces that will be: the strip for the bag, the part of the bag, and the ruche. I proceeded to place the fabric for the ruffle on top of the beige fabric, and I proceeded to sew it and to make the ruffle by hand while I was folding and sewing at the same time, and it will be as I show you in the image. After sewing the ruche we make sure that it is well sewn since it is hand sewn so that it does not come off.
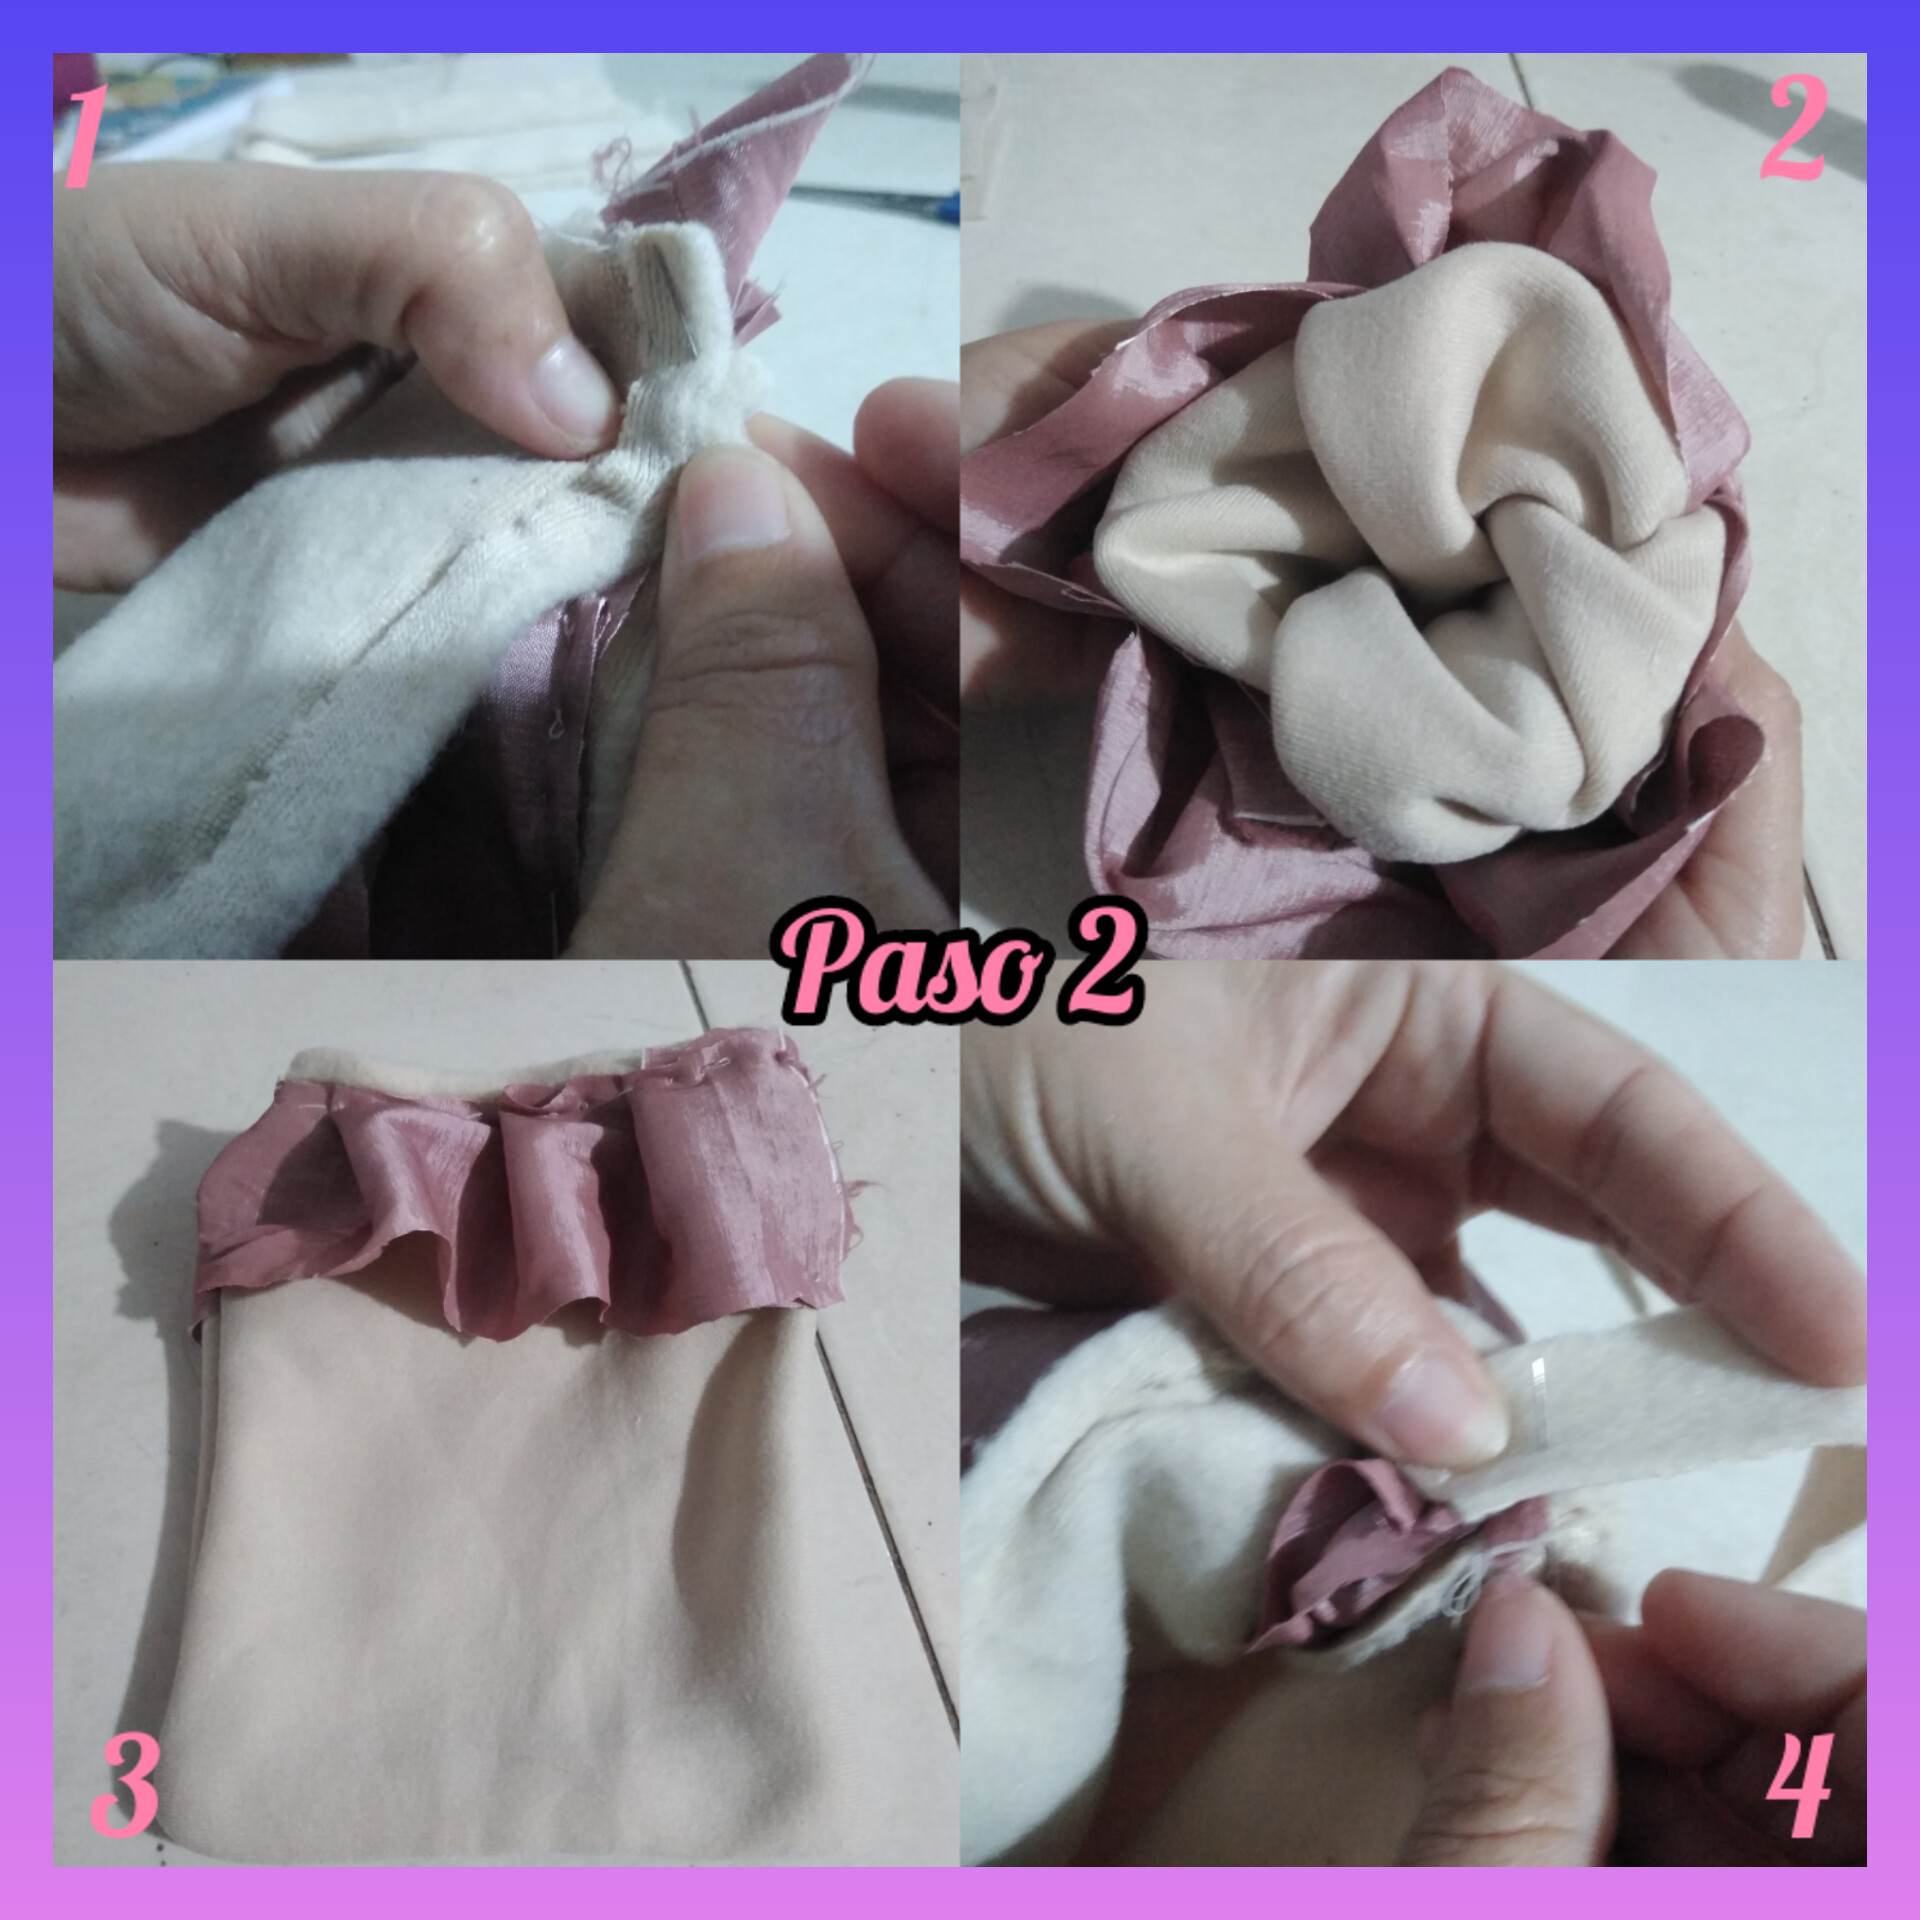
Paso 2: luego de coser el arruche Procederemos a coser lo que serán los bordes o los laterales del bolsito, coseremos los lados que debemos cerrar con la costura, y una vez listos lo que haremos será voltear el bolso para proceder a coser la tira que será la útil para sostener con la mano el vello bolsito de mano. La verdad es súper fácil hacerlo y súper divertido, los invito a que también puedan hacer el suyo para sus niñas. Y así culminó mi creación.
Step 2: after sewing the ruche we will proceed to sew what will be the edges or sides of the bag, we will sew the sides that we must close with the seam, and once ready what we will do is flip the bag to proceed to sew the strip that will be useful to hold with the hand the hairy handbag. The truth is super easy to do and super fun, I invite you to also make your own for your girls. And that's the end of my creation.
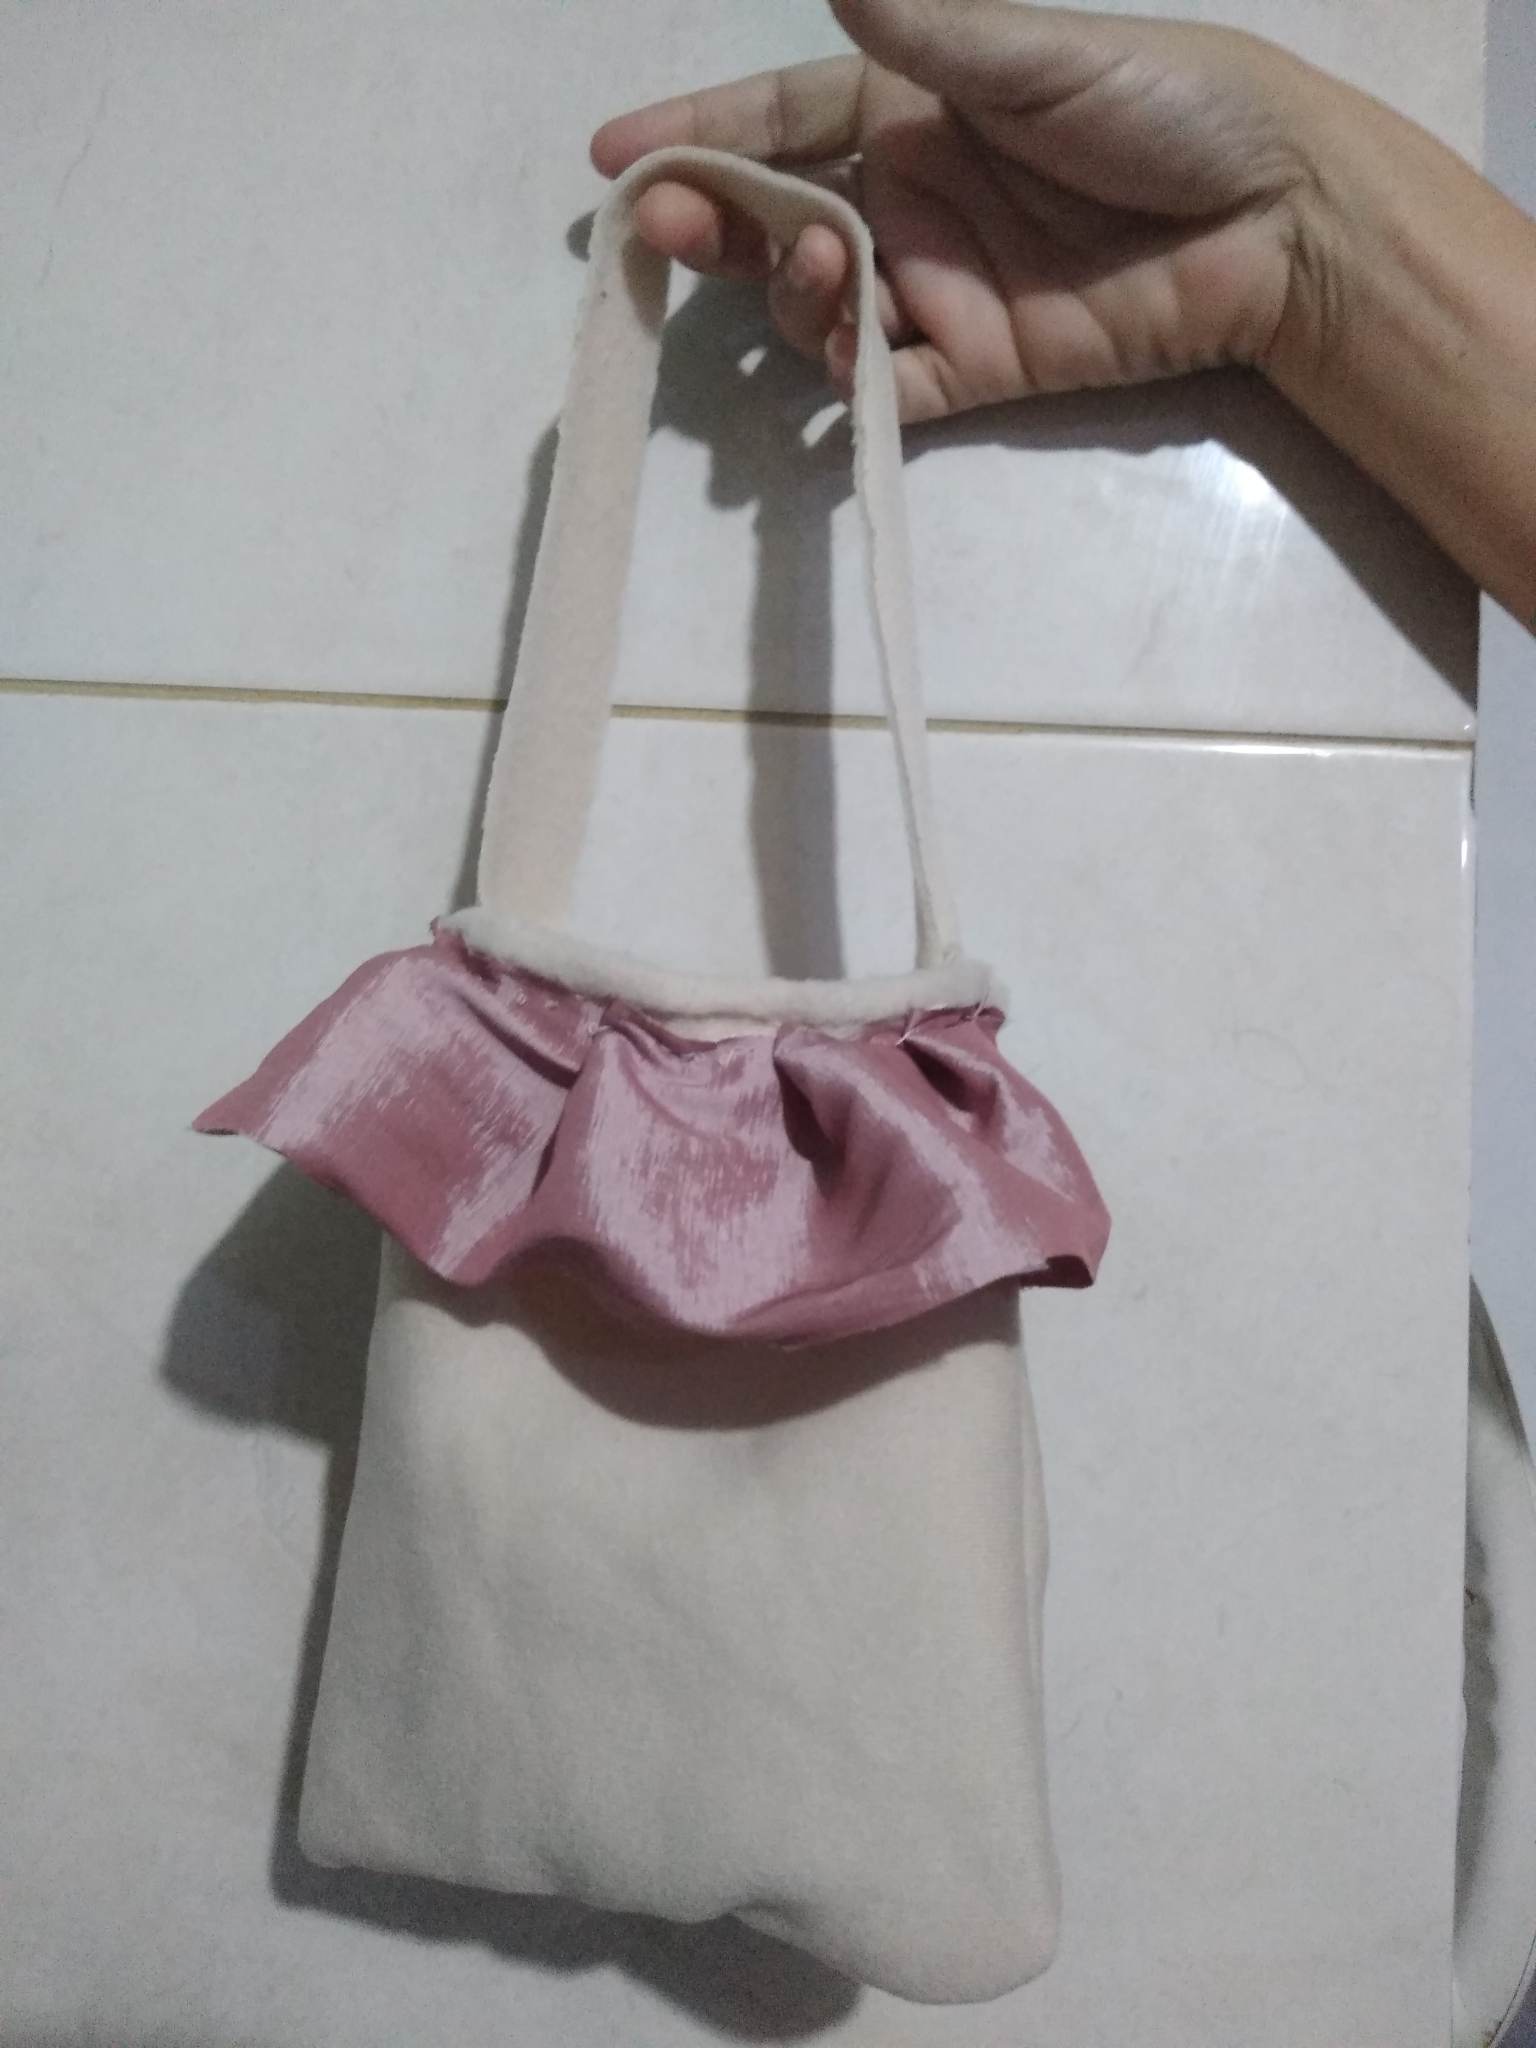
Final Result.


Thank you for sharing this post on HIVE!
Your content got selected by our fellow curator ashikstd & you just received a little thank you upvote from us for your great work! Your post will be featured in one of our recurring compilations which are aiming to offer you a stage to widen your audience within the DIY scene of Hive. Stay creative & HIVE ON!
Please vote for our hive witness <3