[ESP-ENG] Handmade Mini Bra | Mini Brasier hecho a mano
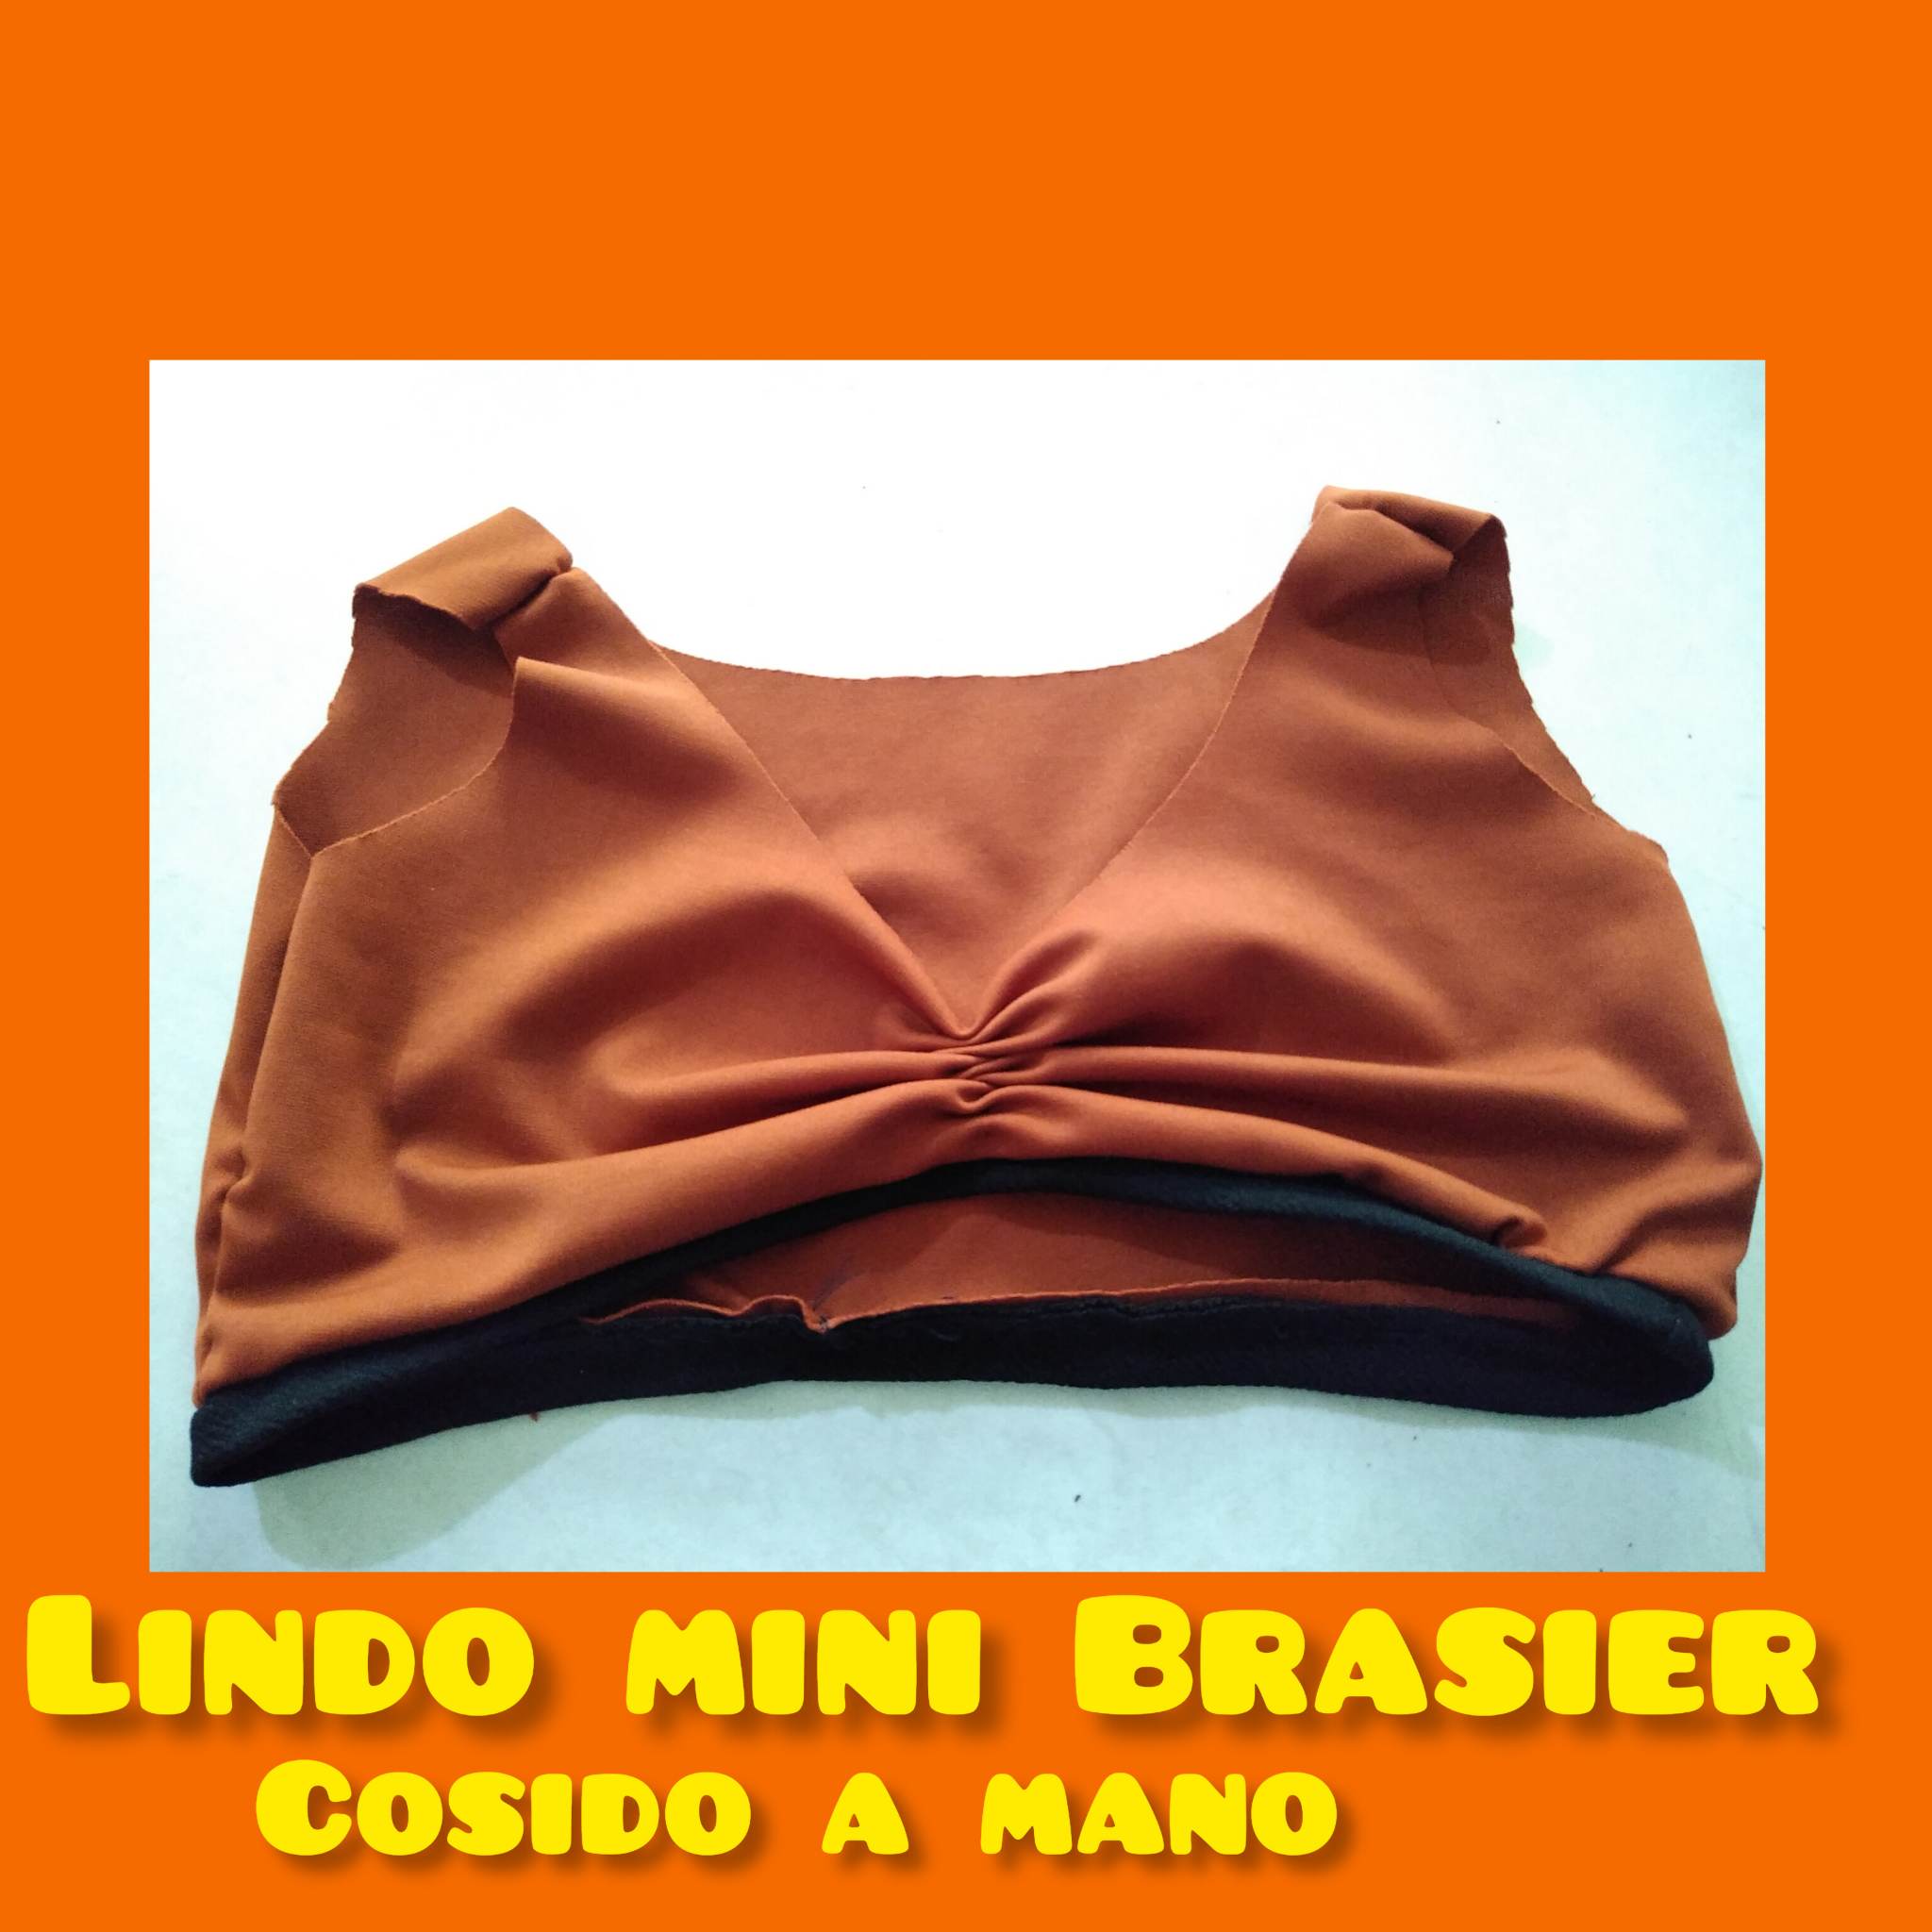
Hello my beautiful hive family, greetings and blessings to each of you, I am happy that you can be part of my blog by reading it so welcome everyone. I want to wish you a happy year full of thousands of blessings and goals to accomplish, may God be in charge of filling your lives, the truth is that a new year 2023 begins full of many expectations and many dreams so let's give it all. Today I want to show you the steps to make a nice bra or mini bra, whatever we want to call it, the truth is that I made it with scraps of fabric and sewed it by hand since my mom's machine is still damaged, so let's see the step by step:
.jpg)
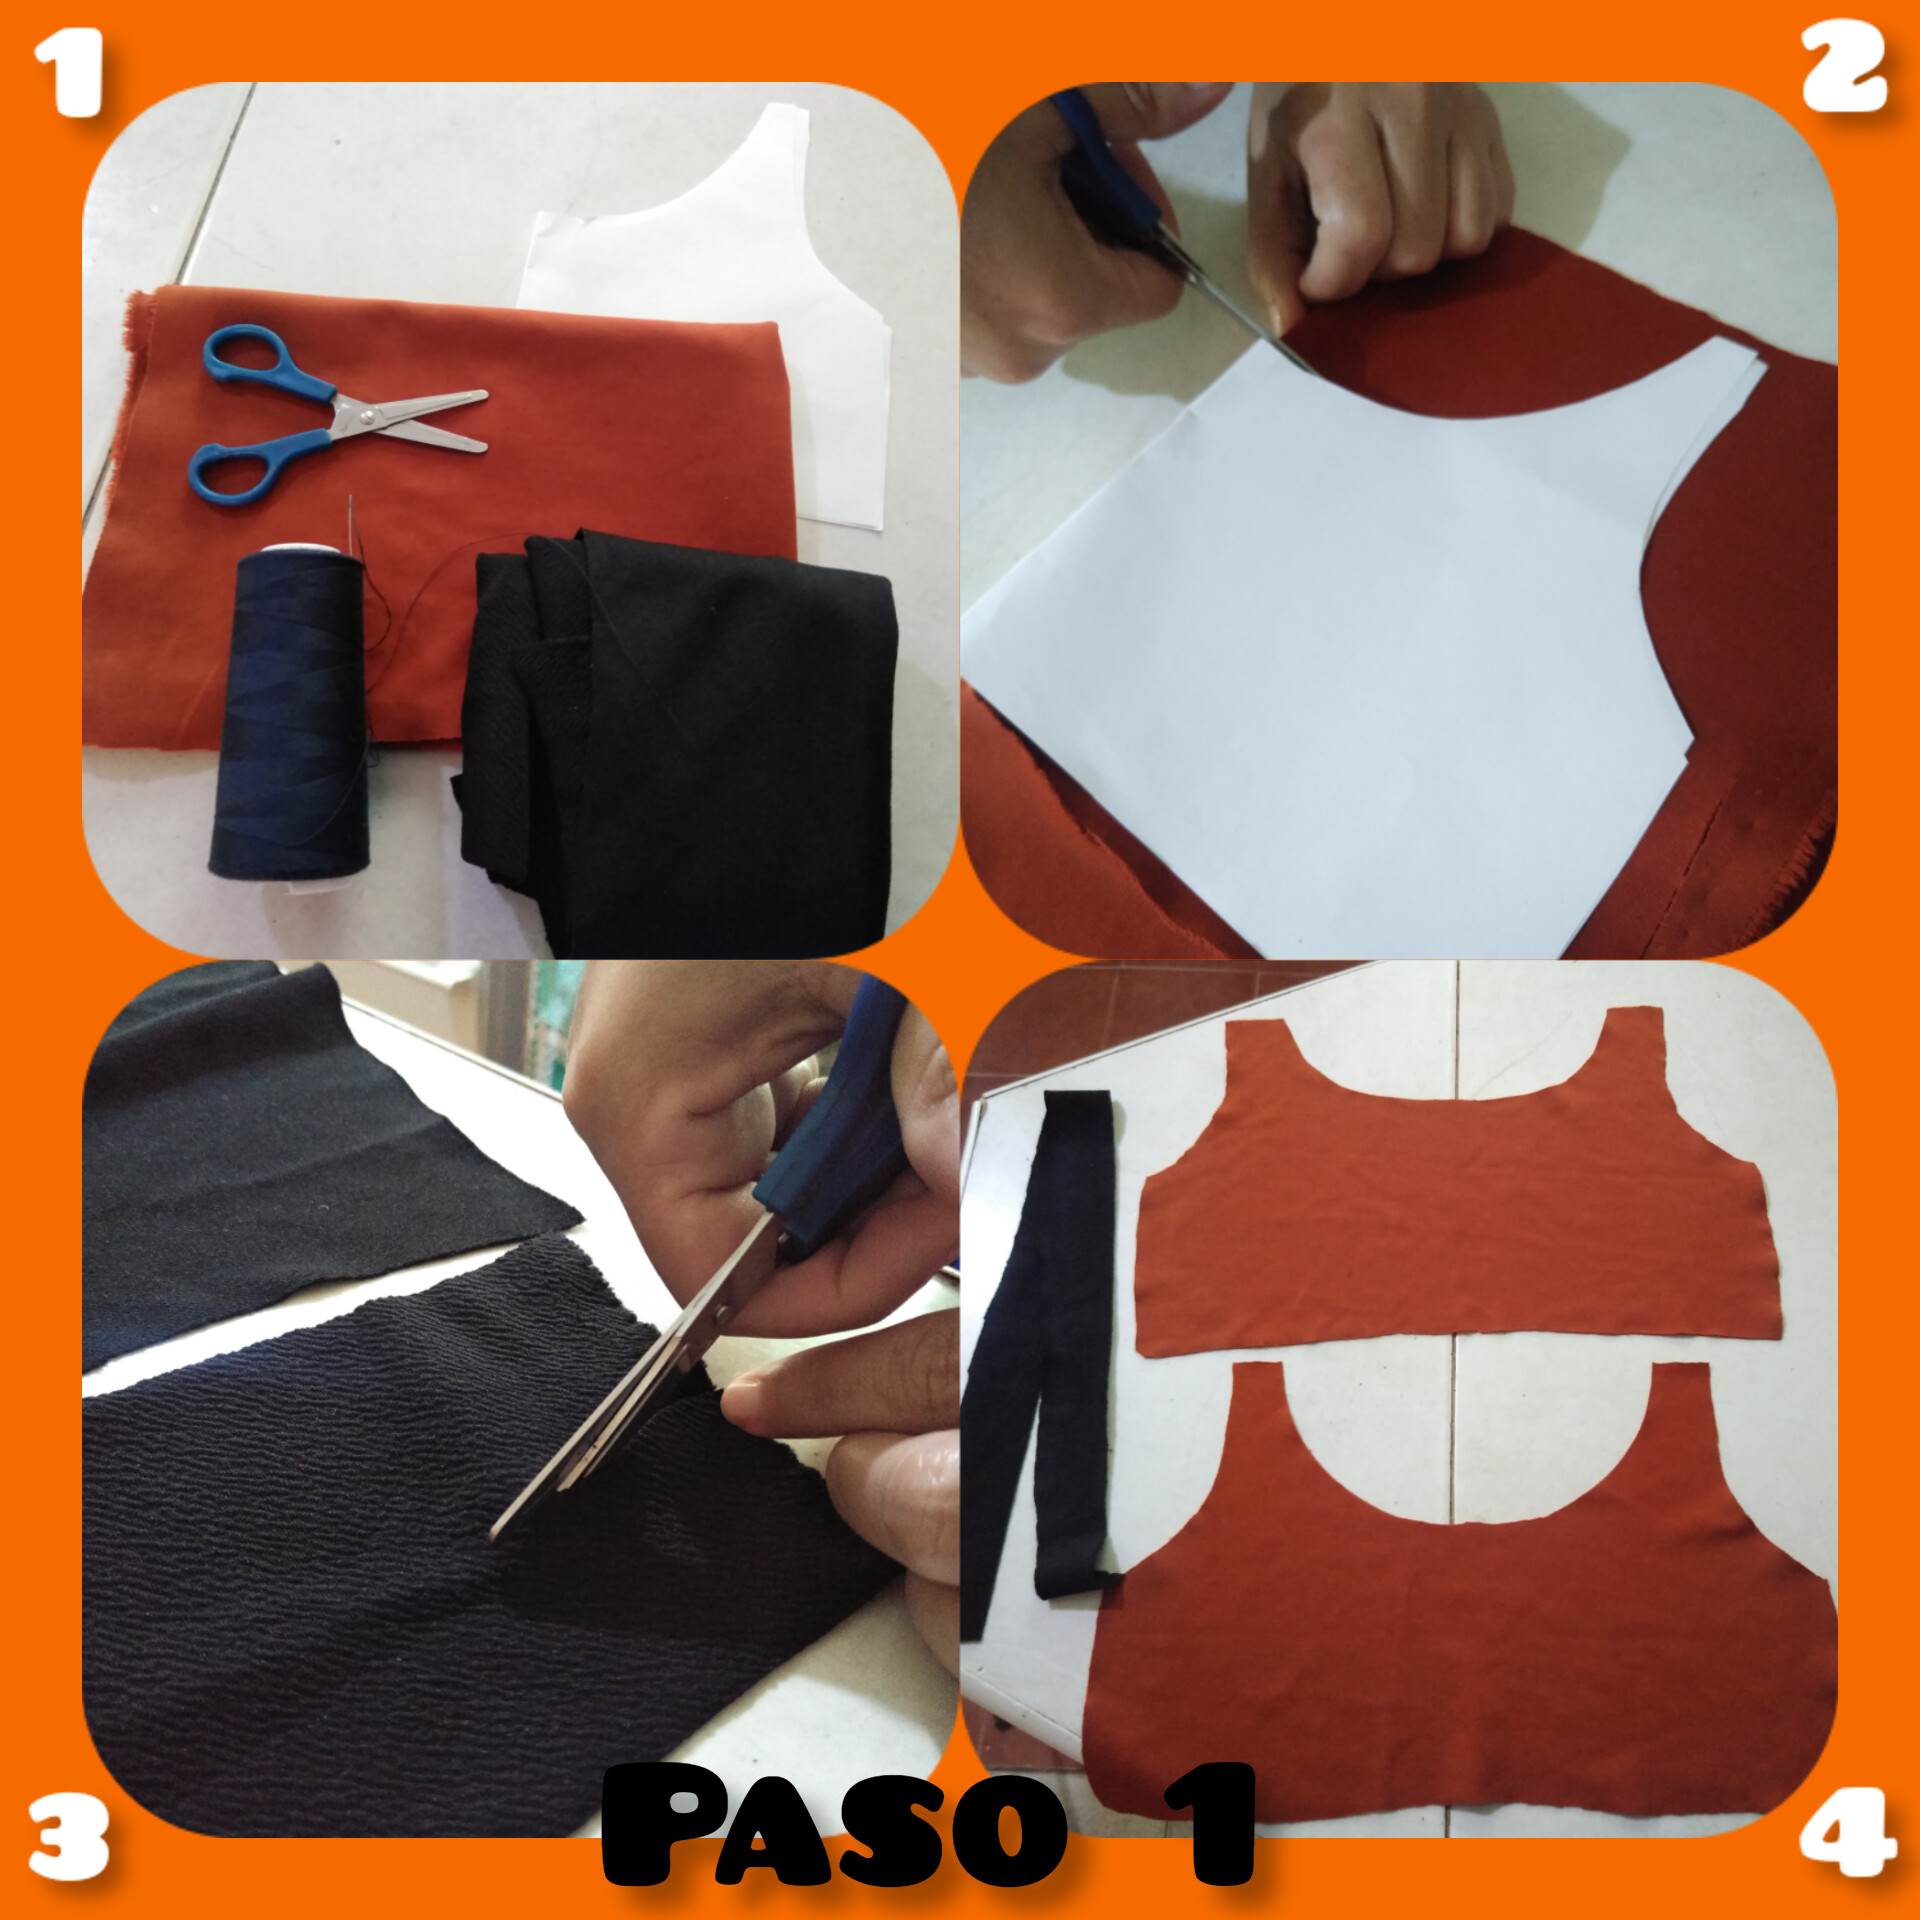
Paso 1: vamos a usar dos telas, la color ladrillo y la color negro, tijera e hilo y aguja de coser. Lo que vamos a necesitar es un patrón de la medida del brasier que nosotras usemos para que se nos haga mucho más fácil, luego de tener ya en patrón Procederemos a colocarlo encima de la tela principal y vamos a cortar nuestras piezas, lo próximo que cortaremos será las tiras negras que irán en la parte del ruedo para darle vista a nuestro mini Brasier. Y así tendremos nuestras piezas cortadas y listas para proceder a coserlas a mano y cuidadosamente.
Step 1: we will use two fabrics, the brick color and the black color, scissors and thread and sewing needle. What we will need is a pattern of the size of the bra that we use to make it much easier, after having the pattern we will proceed to place it on top of the main fabric and we will cut our pieces, the next thing we will cut will be the black strips that will go in the part of the ruffle to give view to our mini bra. And so we will have our pieces cut and ready to proceed to sew them by hand and carefully.
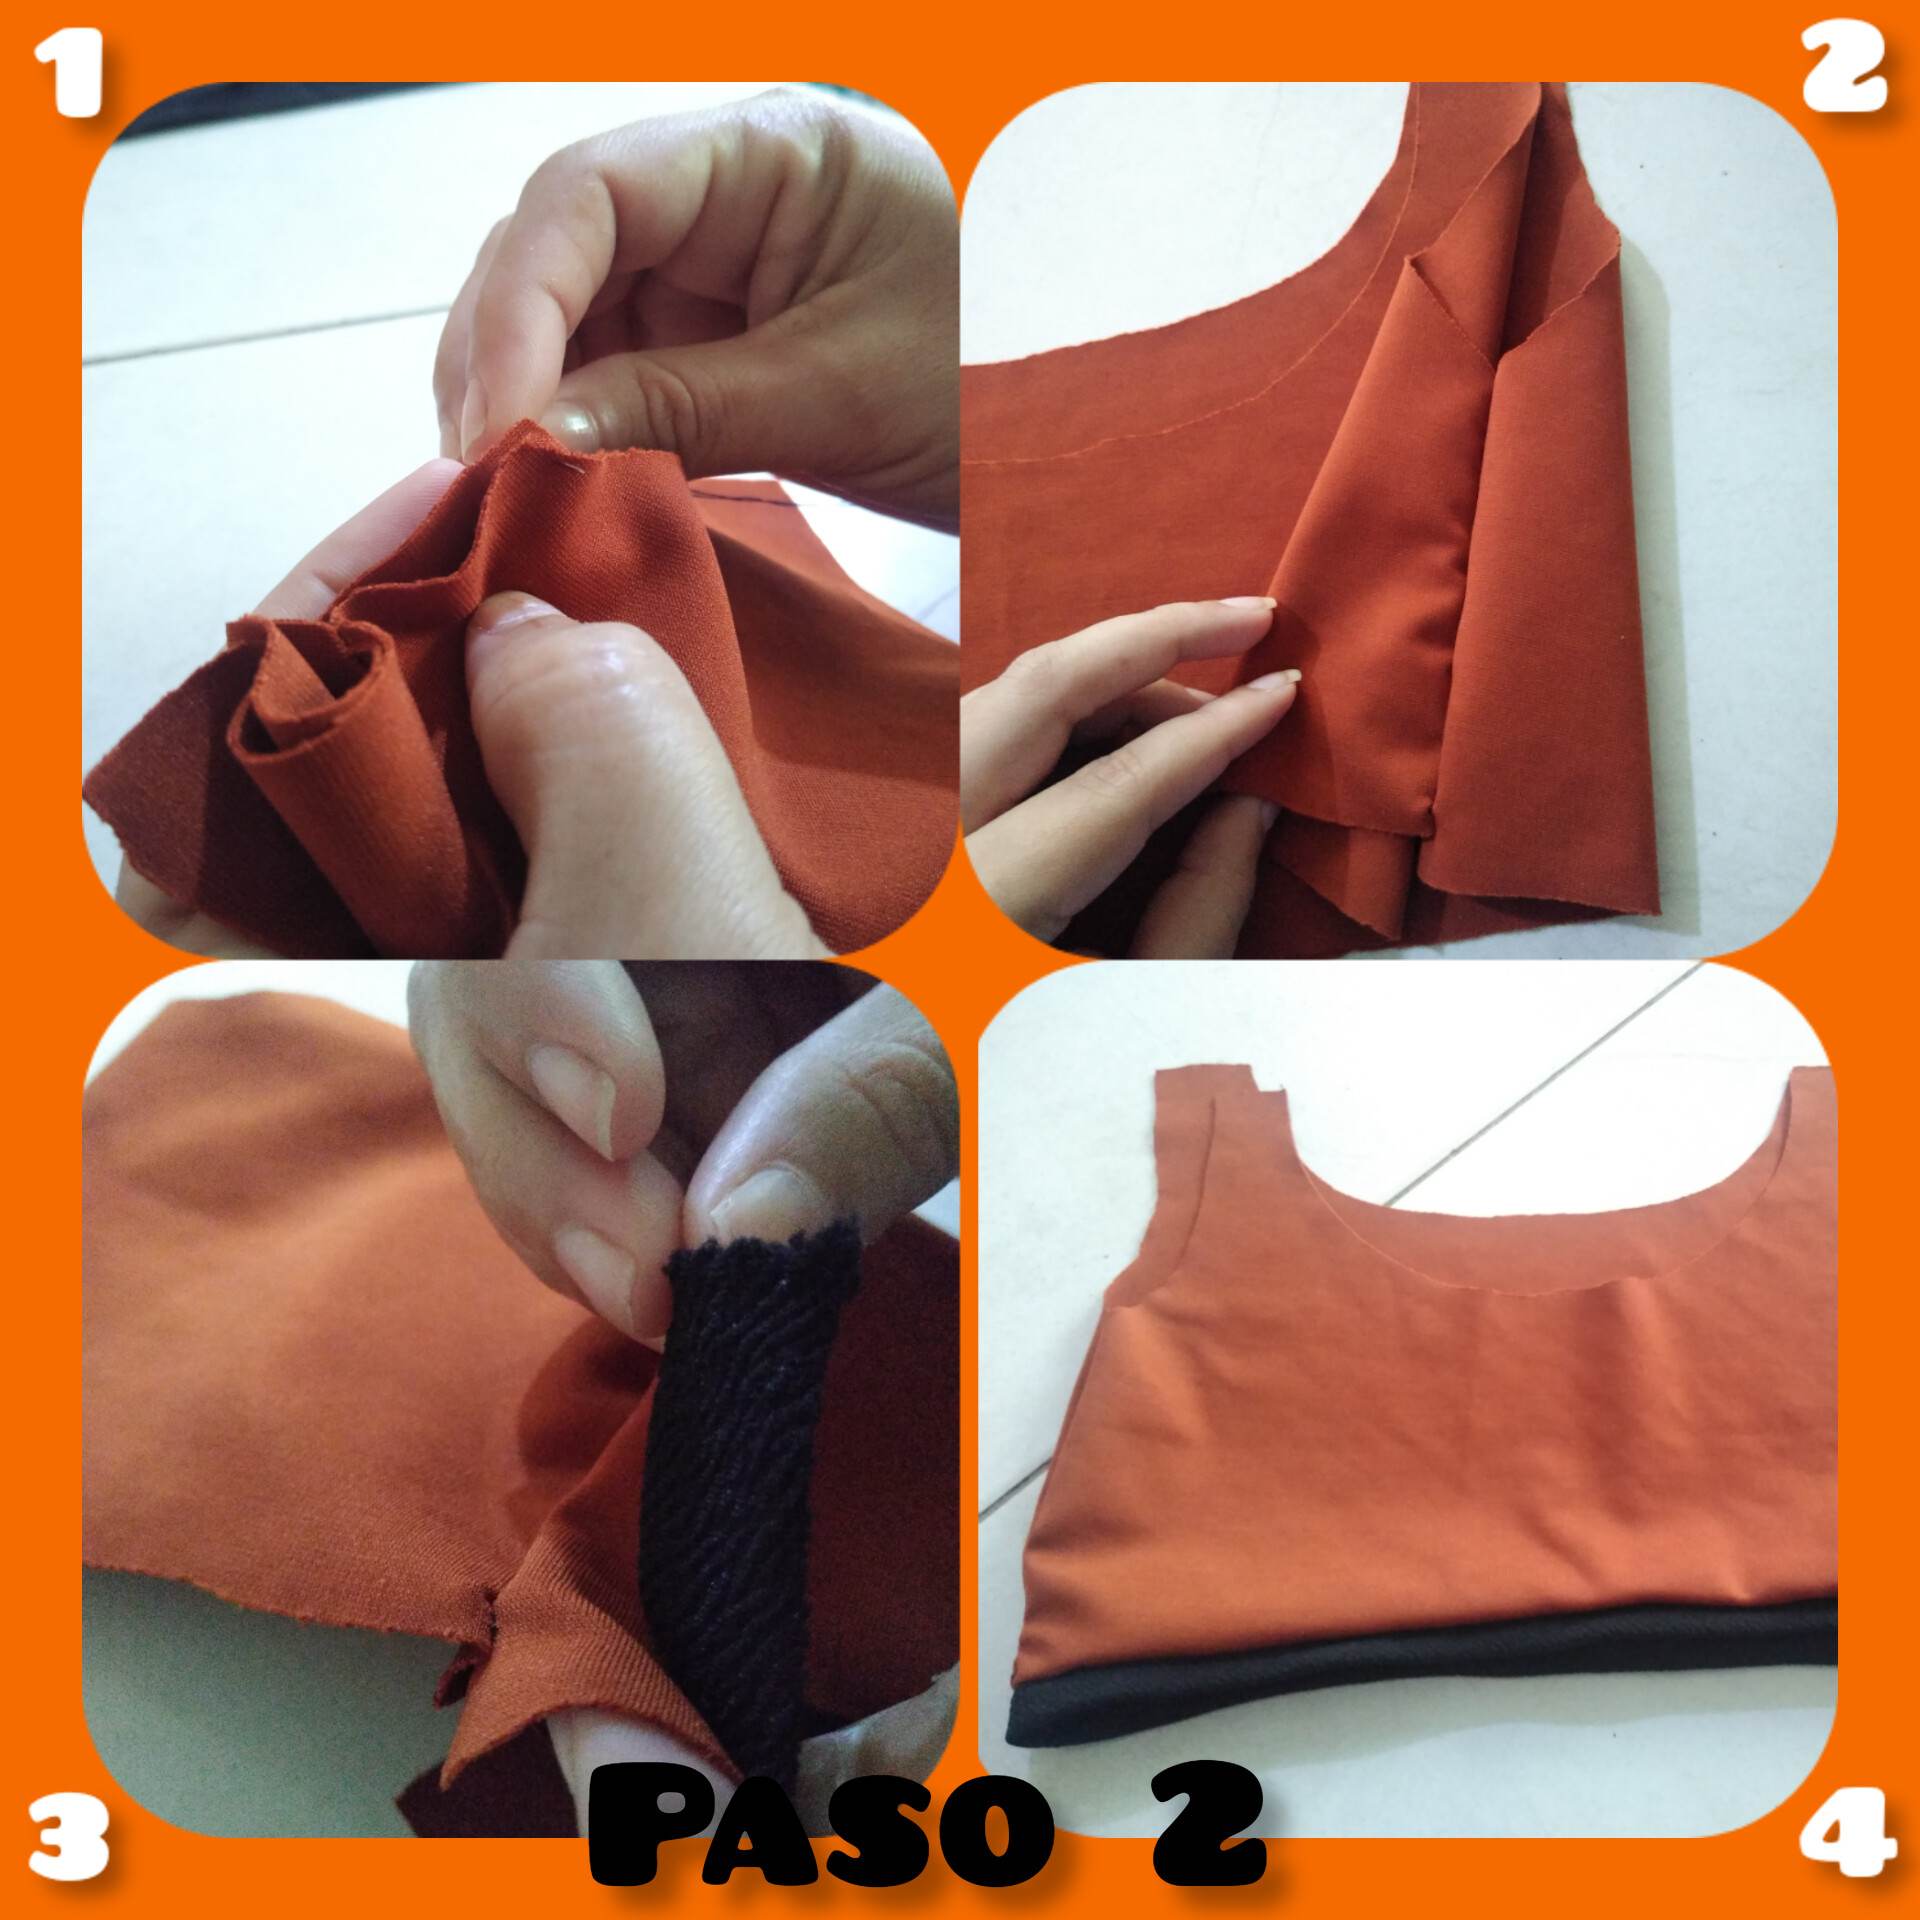
Paso 2: lo primero que haremos será coser los laterales de nuestro sujetador, luego de coser los laterales muy bien para obtener un gran acabado, vamos a coser la tira negra a la parte del ruedo para darle una vista linda y combinar ambos colores, lo cual quedará como en la imagen lo muestra.
Step 2: the first thing we will do is to sew the sides of our bra, after sewing the sides very well to get a great finish, we will sew the black strip to the ruffle part to give it a nice look and combine both colors, which will be as shown in the image.
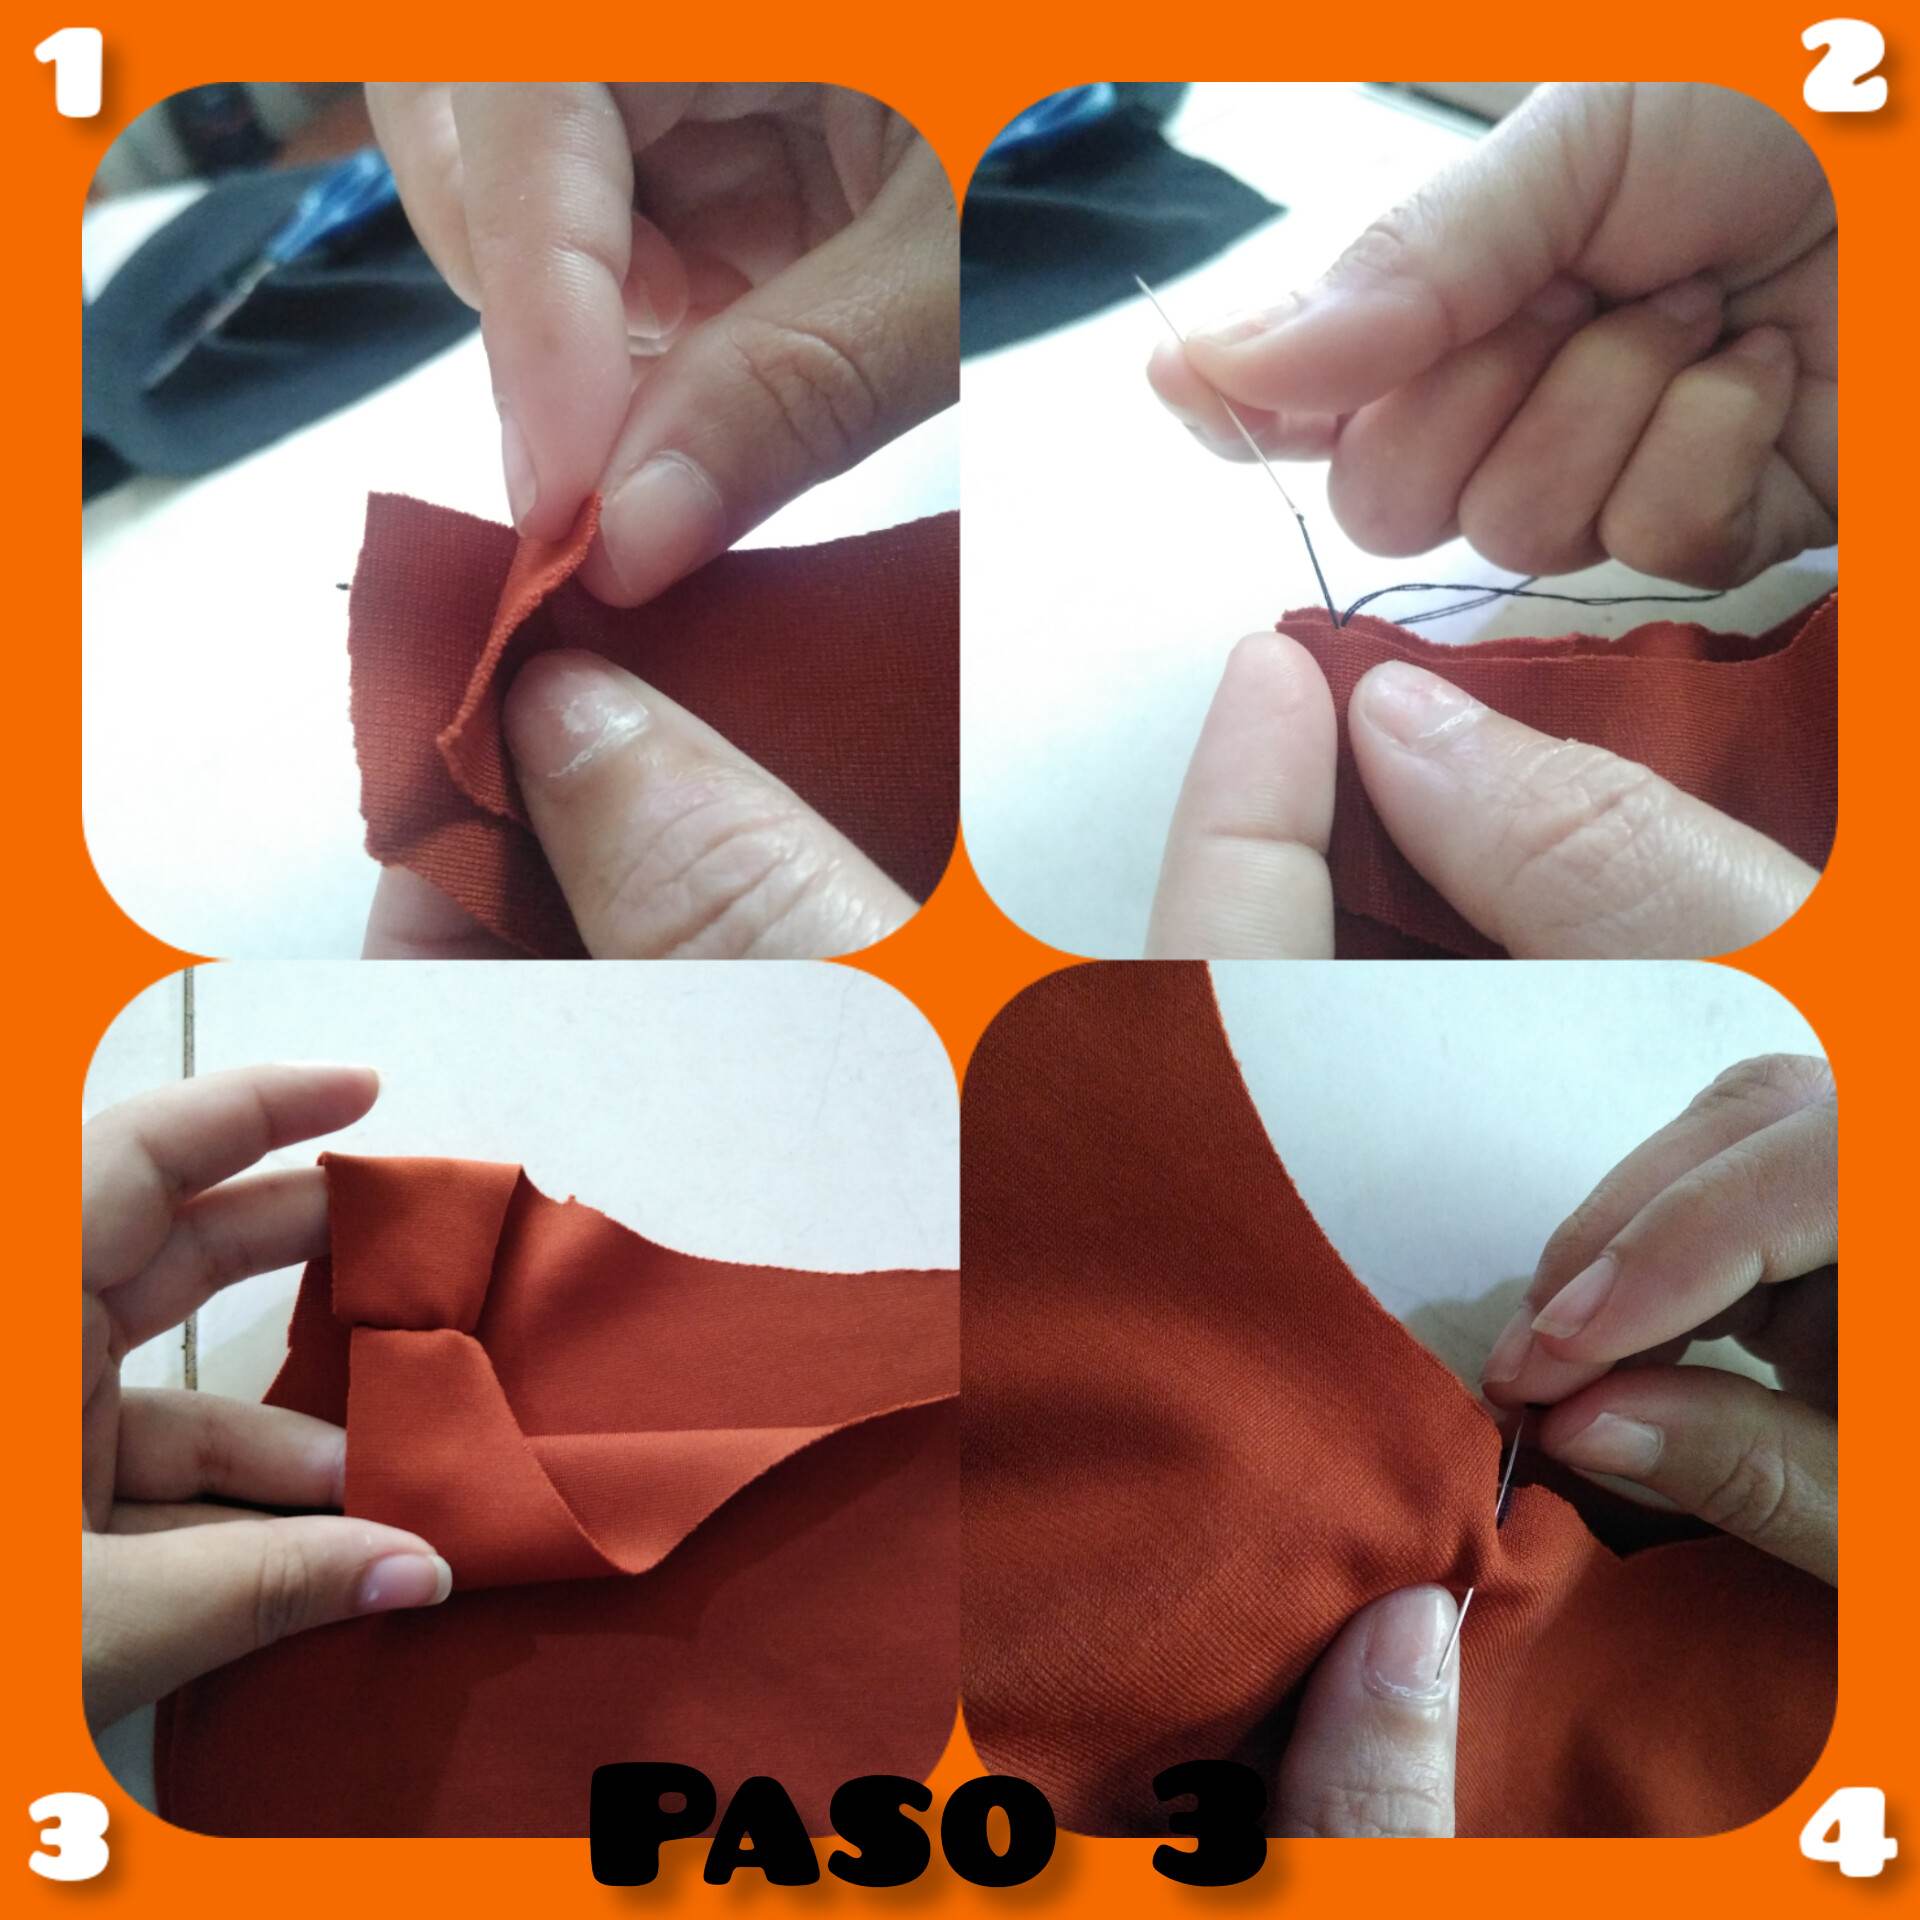
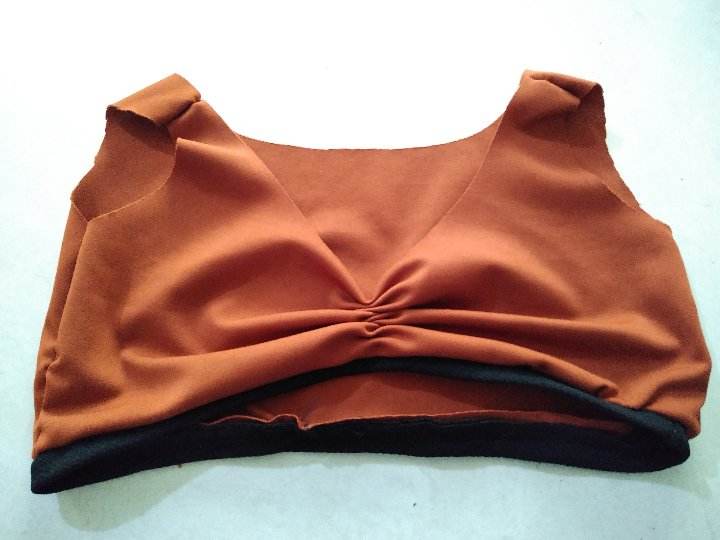
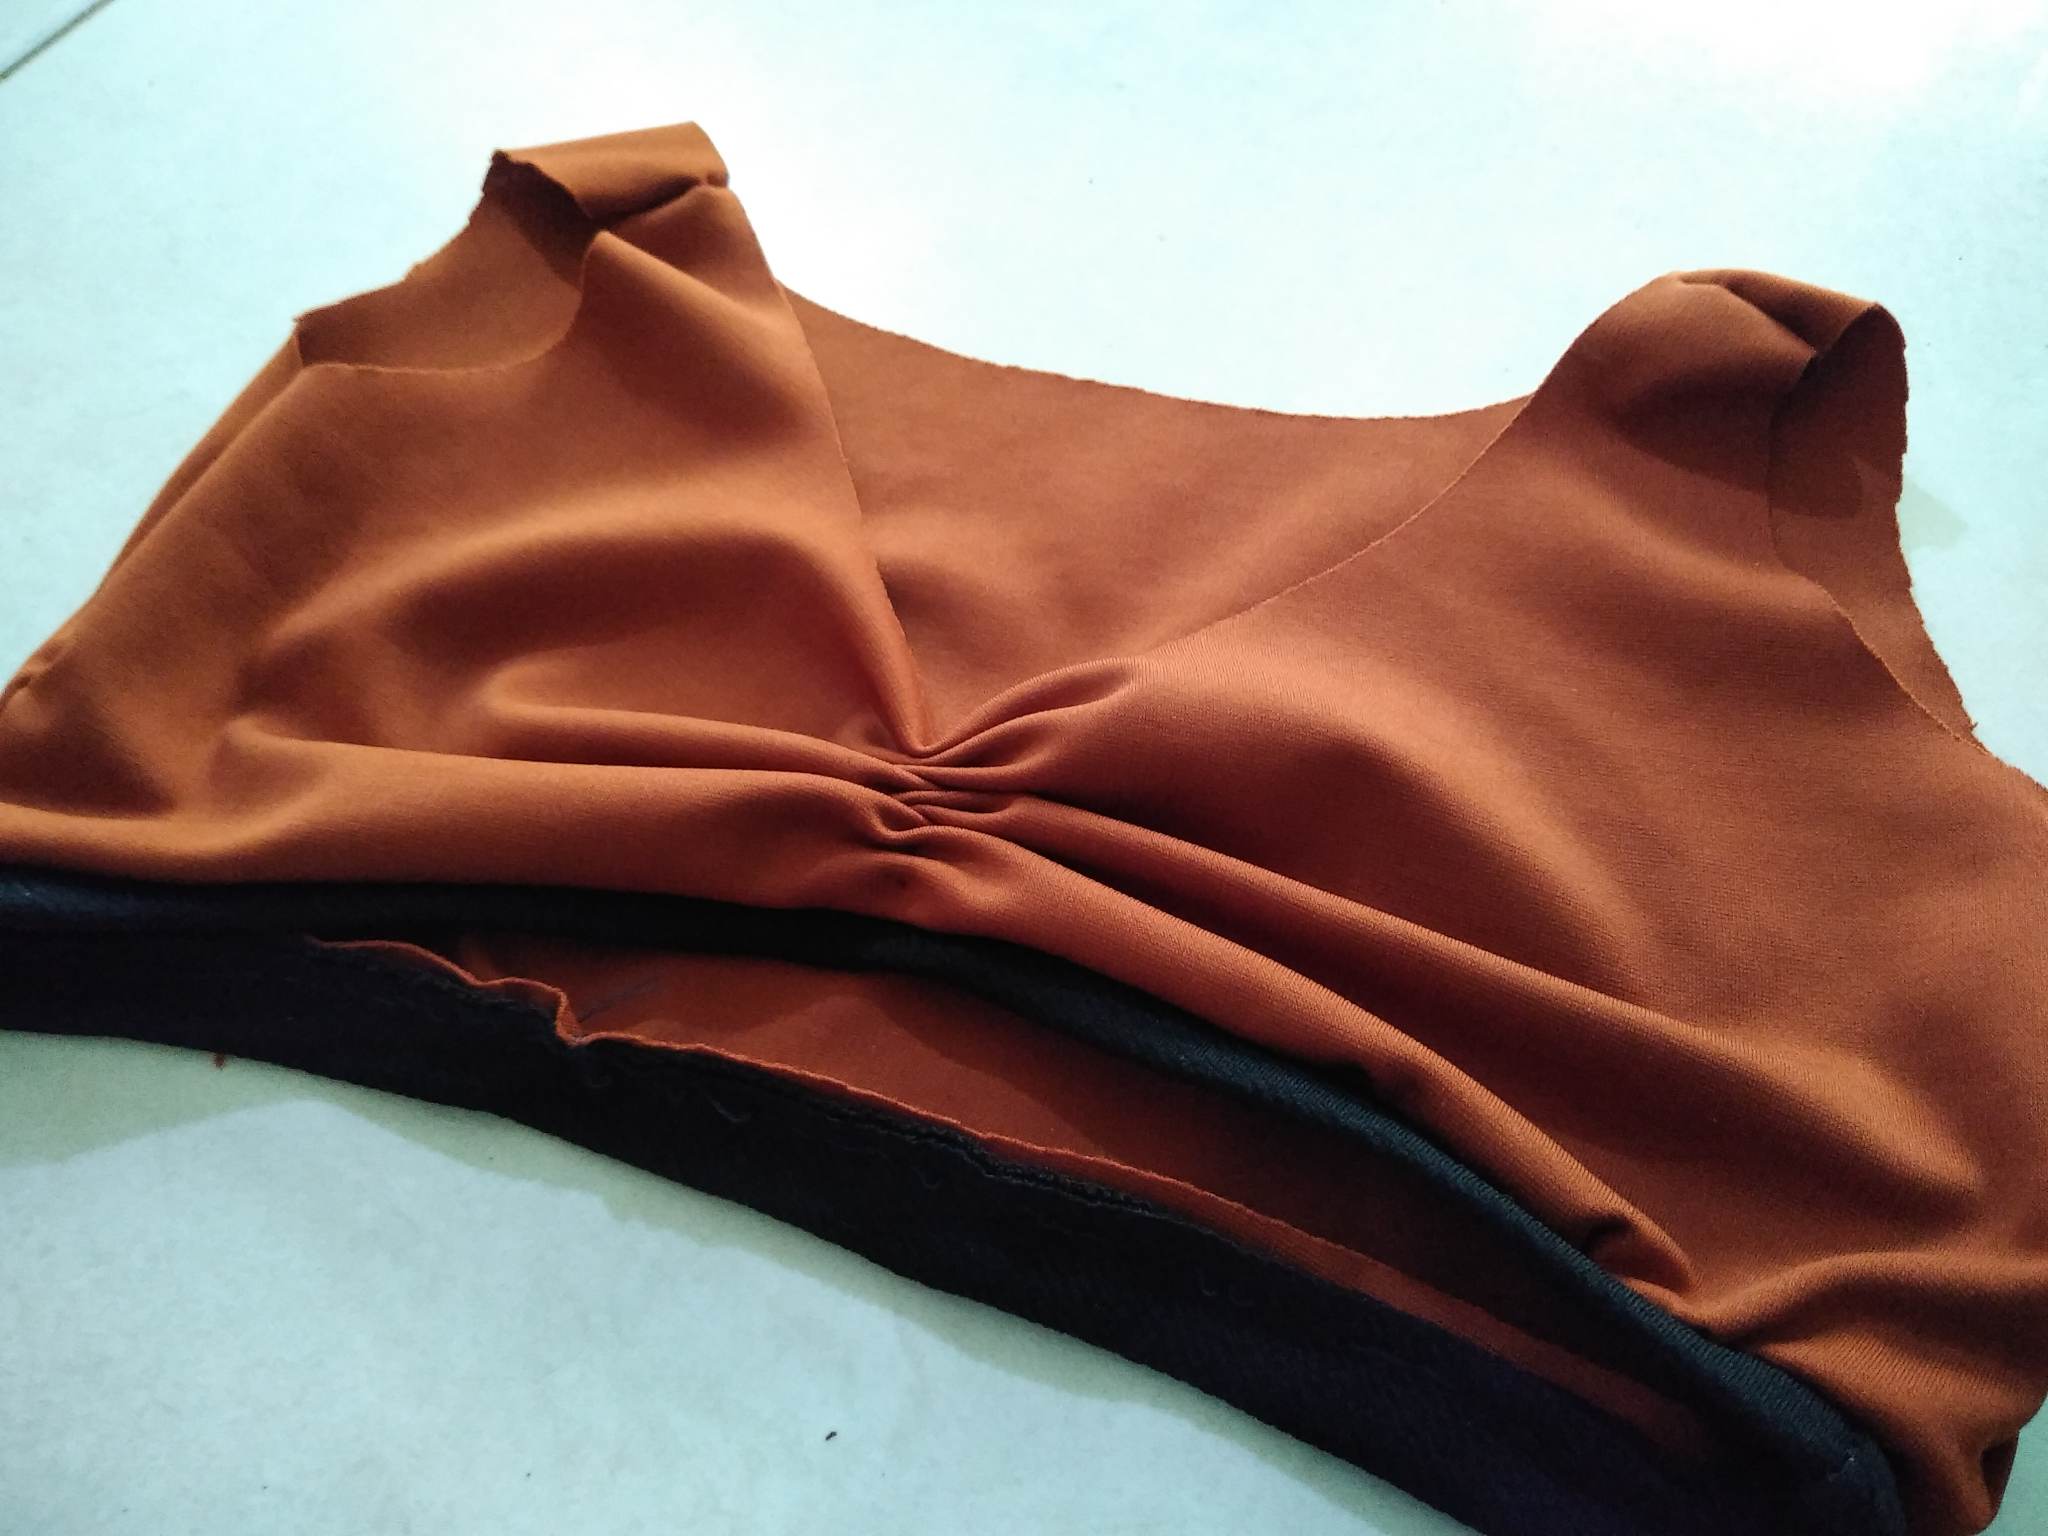
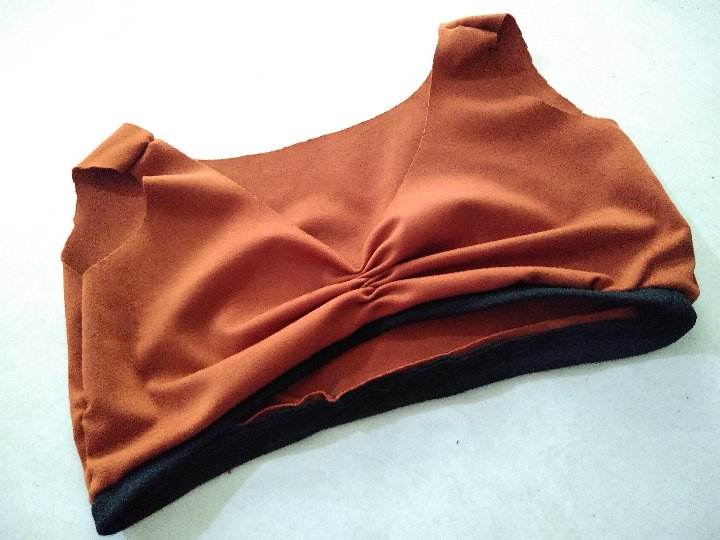
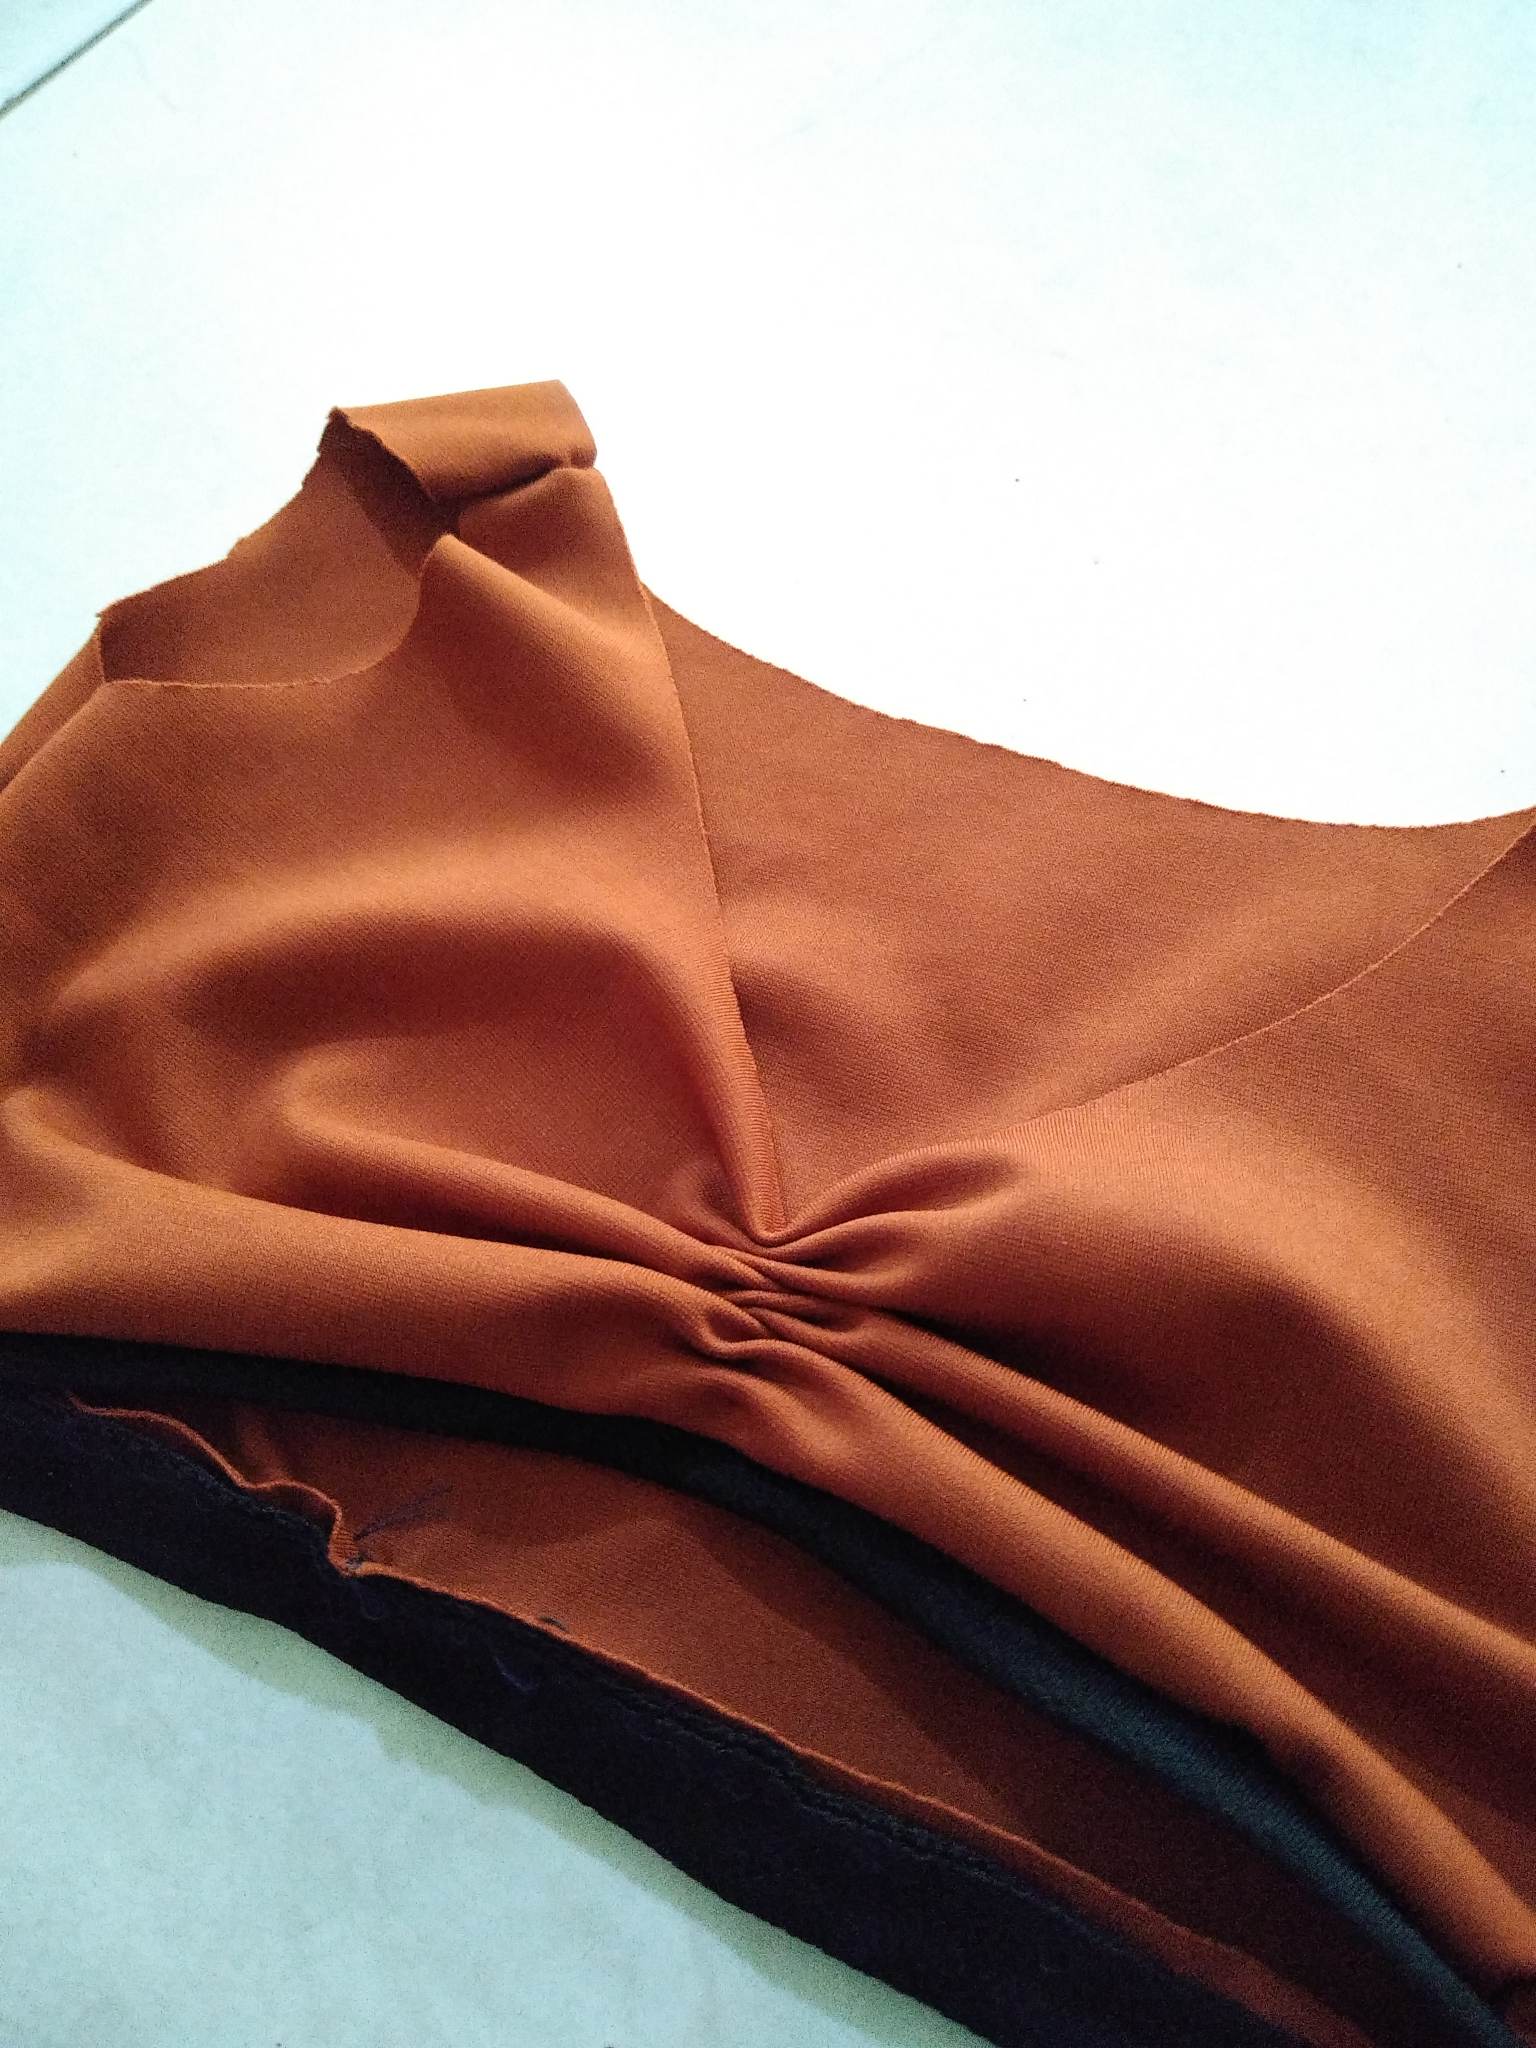
Paso 3: Luego de haber cosido los laterales y el ruedo color negro, vamos a coser hombro con hombro, de manera cuidadosa, procurando obtener un gran acabado. Luego de coser los hombros de nuestro mini Brasier, Procederemos a hacer un pequeño diseño en la parte delantera, lo que haremos será meter la aguja en todo el centro e ir haciéndolo como si estuviéramos cosiendo, lo cual no quedará pequeño si no que será como una especie de arruche para que se vea mucho más lindo y práctico al momento de querer hacer algo distinto al de los demás, de esta manera terminamos nuestro sujetador.
Step 3: After sewing the sides and the black hem, we are going to sew shoulder to shoulder, carefully, trying to get a great finish. After sewing the shoulders of our mini bra, we will proceed to make a small design on the front, what we will do is put the needle in the center and go doing it as if we were sewing, which will not be small but it will be like a kind of ruche to make it look much nicer and practical when you want to do something different from others, thus we finish our bra.
Final Result.

Hola Eribetzi. Que lindo que te quedó este corpiño como le decimos acá. Es una buena forma de incursionar en el mundo de la lencería y ropa interior. Luego verás que hay un montón de opciones y cosas para hacer y aprender. Por el momento, esta prenda te quedó muy linda, me gusta el color de la tela.
Por otro lado, recuerda interactuar con otros miembros de la comunidad con votos y comentarios. Gracias ❤️.
Hola amiga, muy original y creativo esta pieza. Que para las mujeres es ideal en todo momento.
Nice Tutorial. I love the steps you to achieve that simple bra top
Quedo muy lindo el brasier, que tipo de tela es?
Saludos 🤗