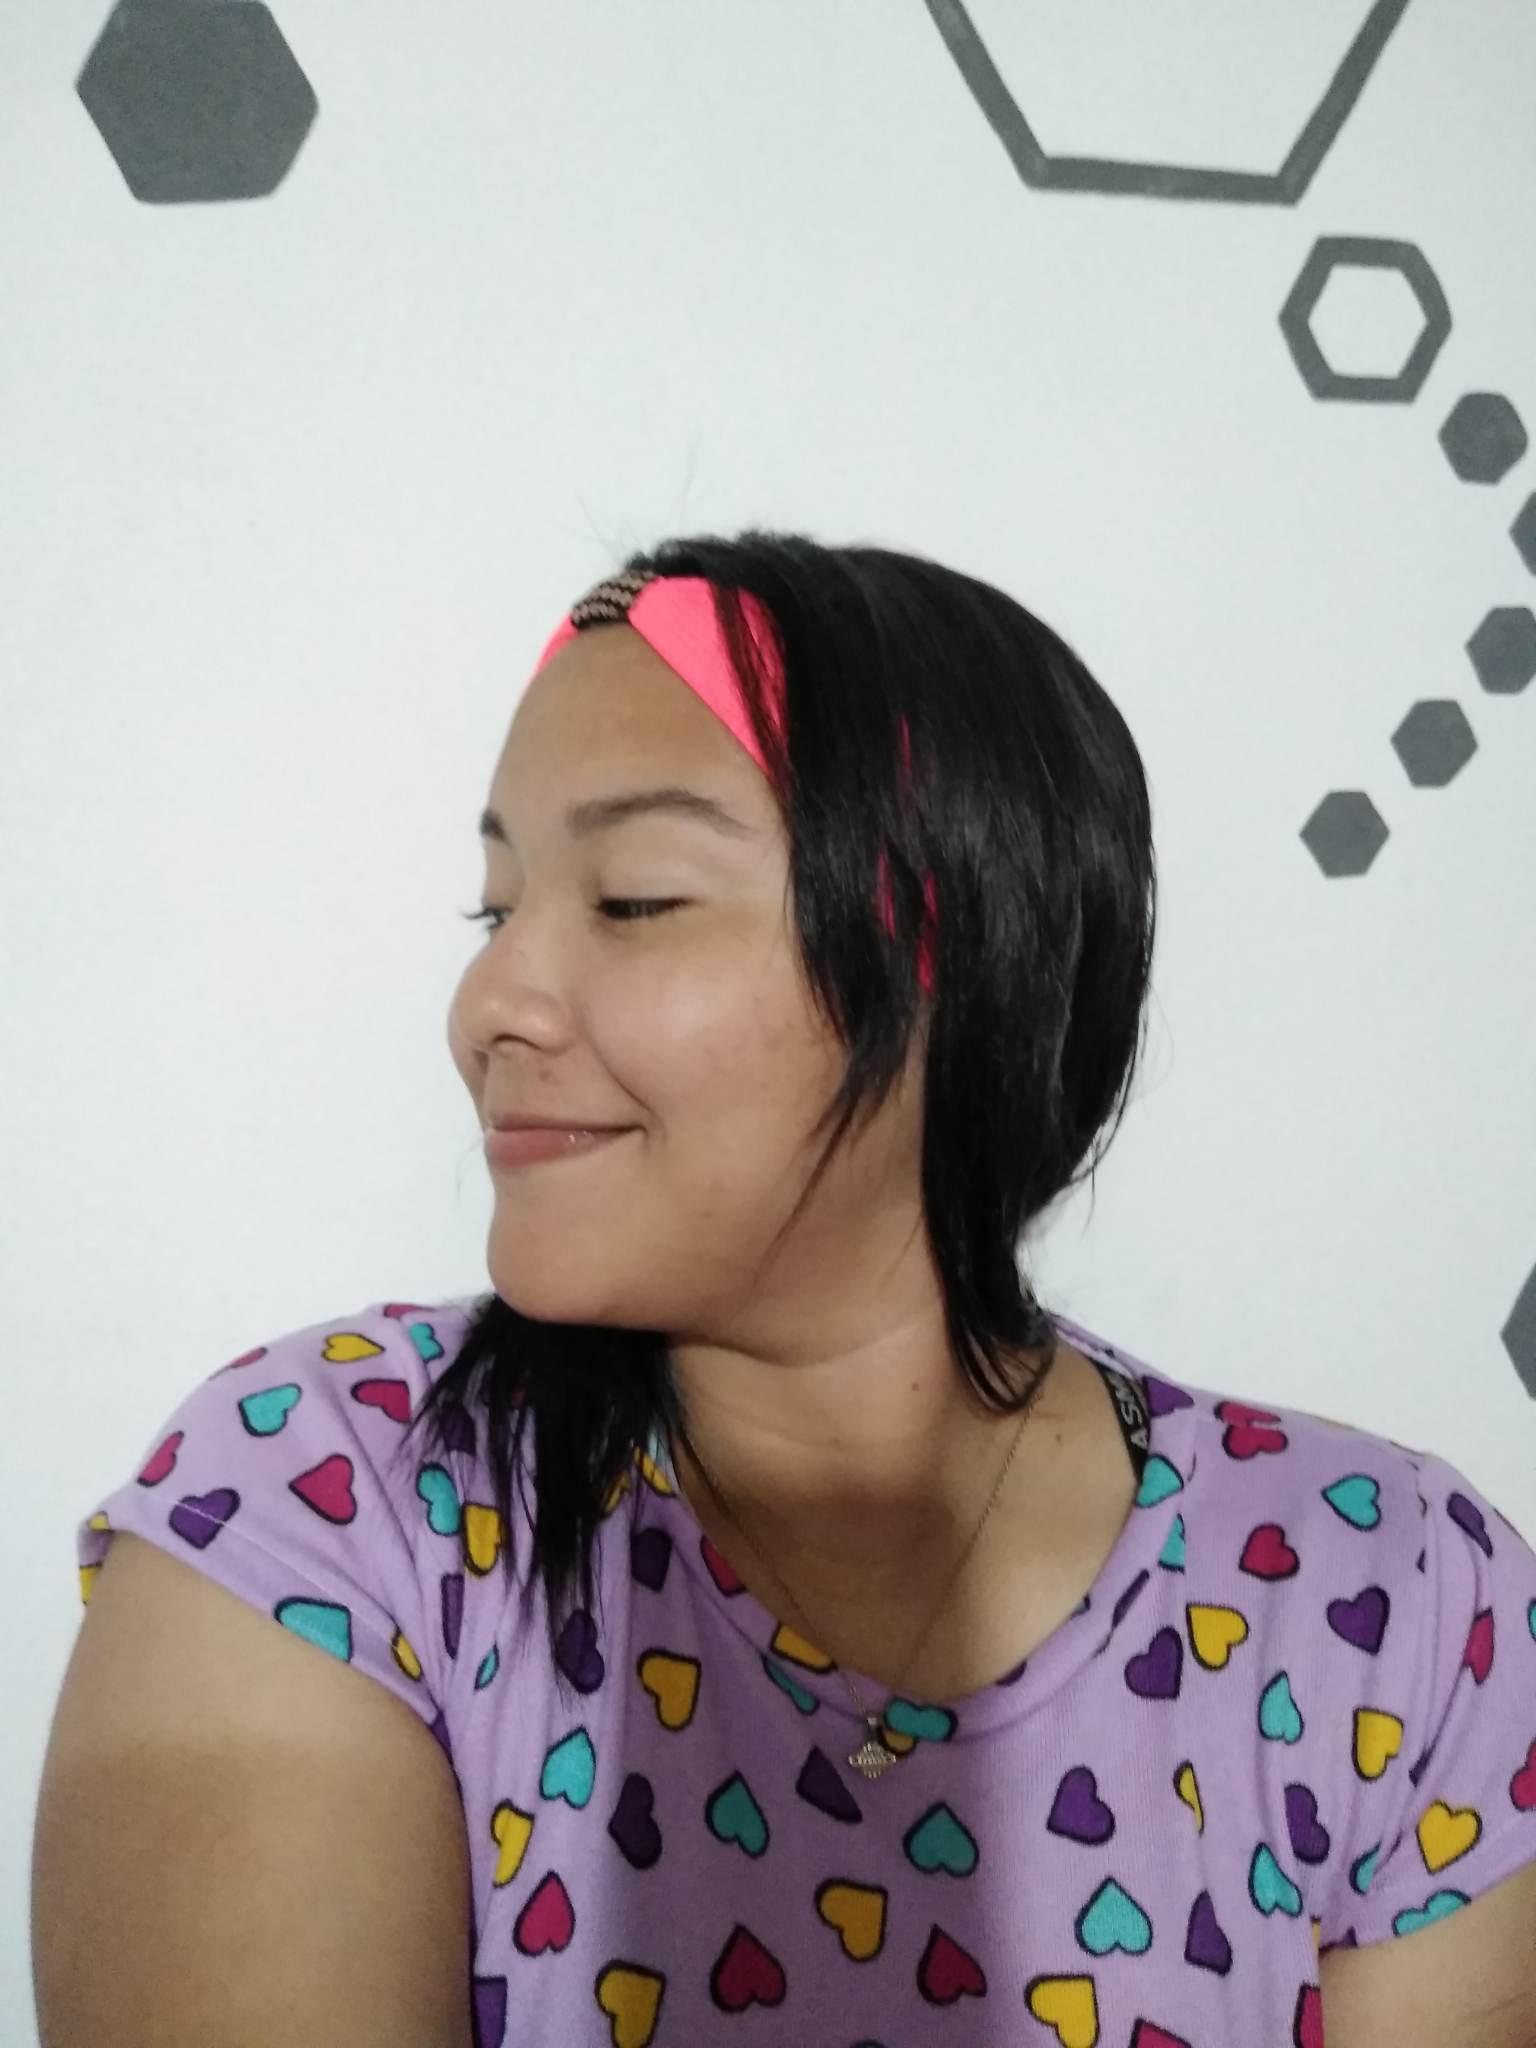
[ESP-ENG] I made a beautiful headband | Hice una hermosa Diadema
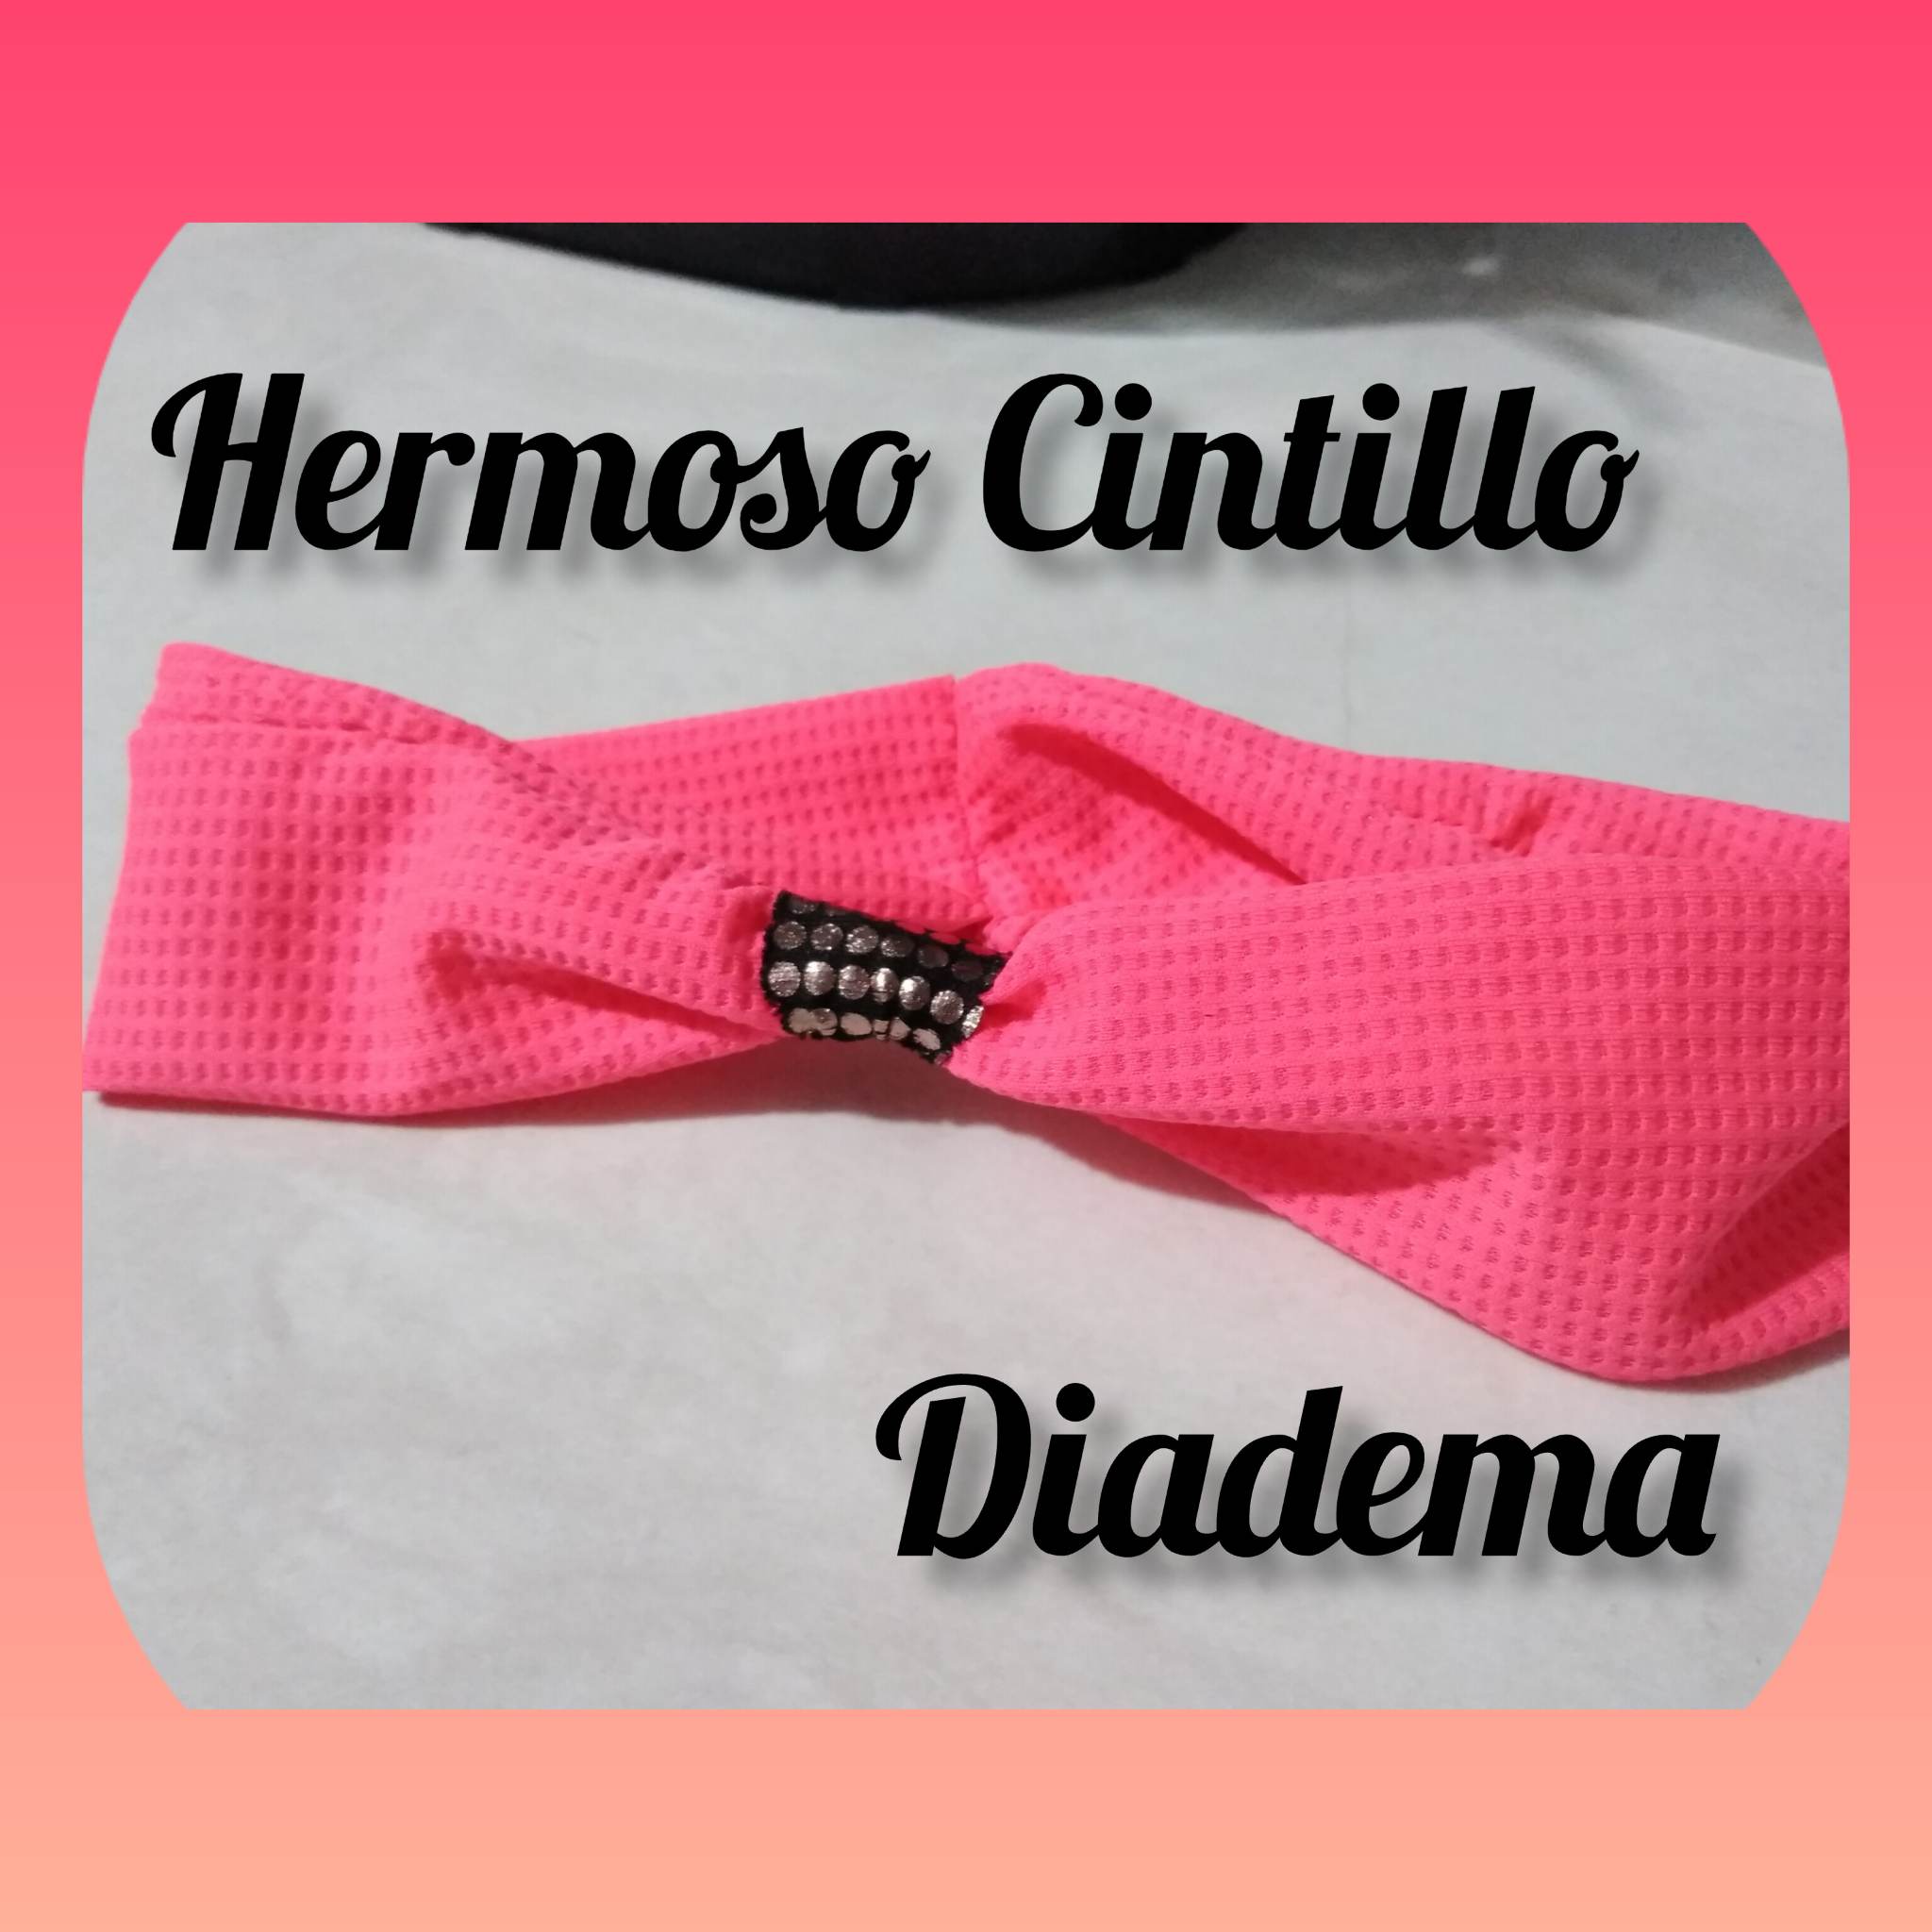
Hello family and dear friends of hive, how happy I am to be back with all of you, I had days without posting because I was super busy but I'm back and with a simple and cute tutorial to teach you how to make a beautiful hand sewn and handmade headband, or you can also call it a headband. I had fun making it because as confessionalists we can give our creations the details we want and make them to our tastes, that's the magic of creating and sewing, so let's see the step by step:
.jpg)
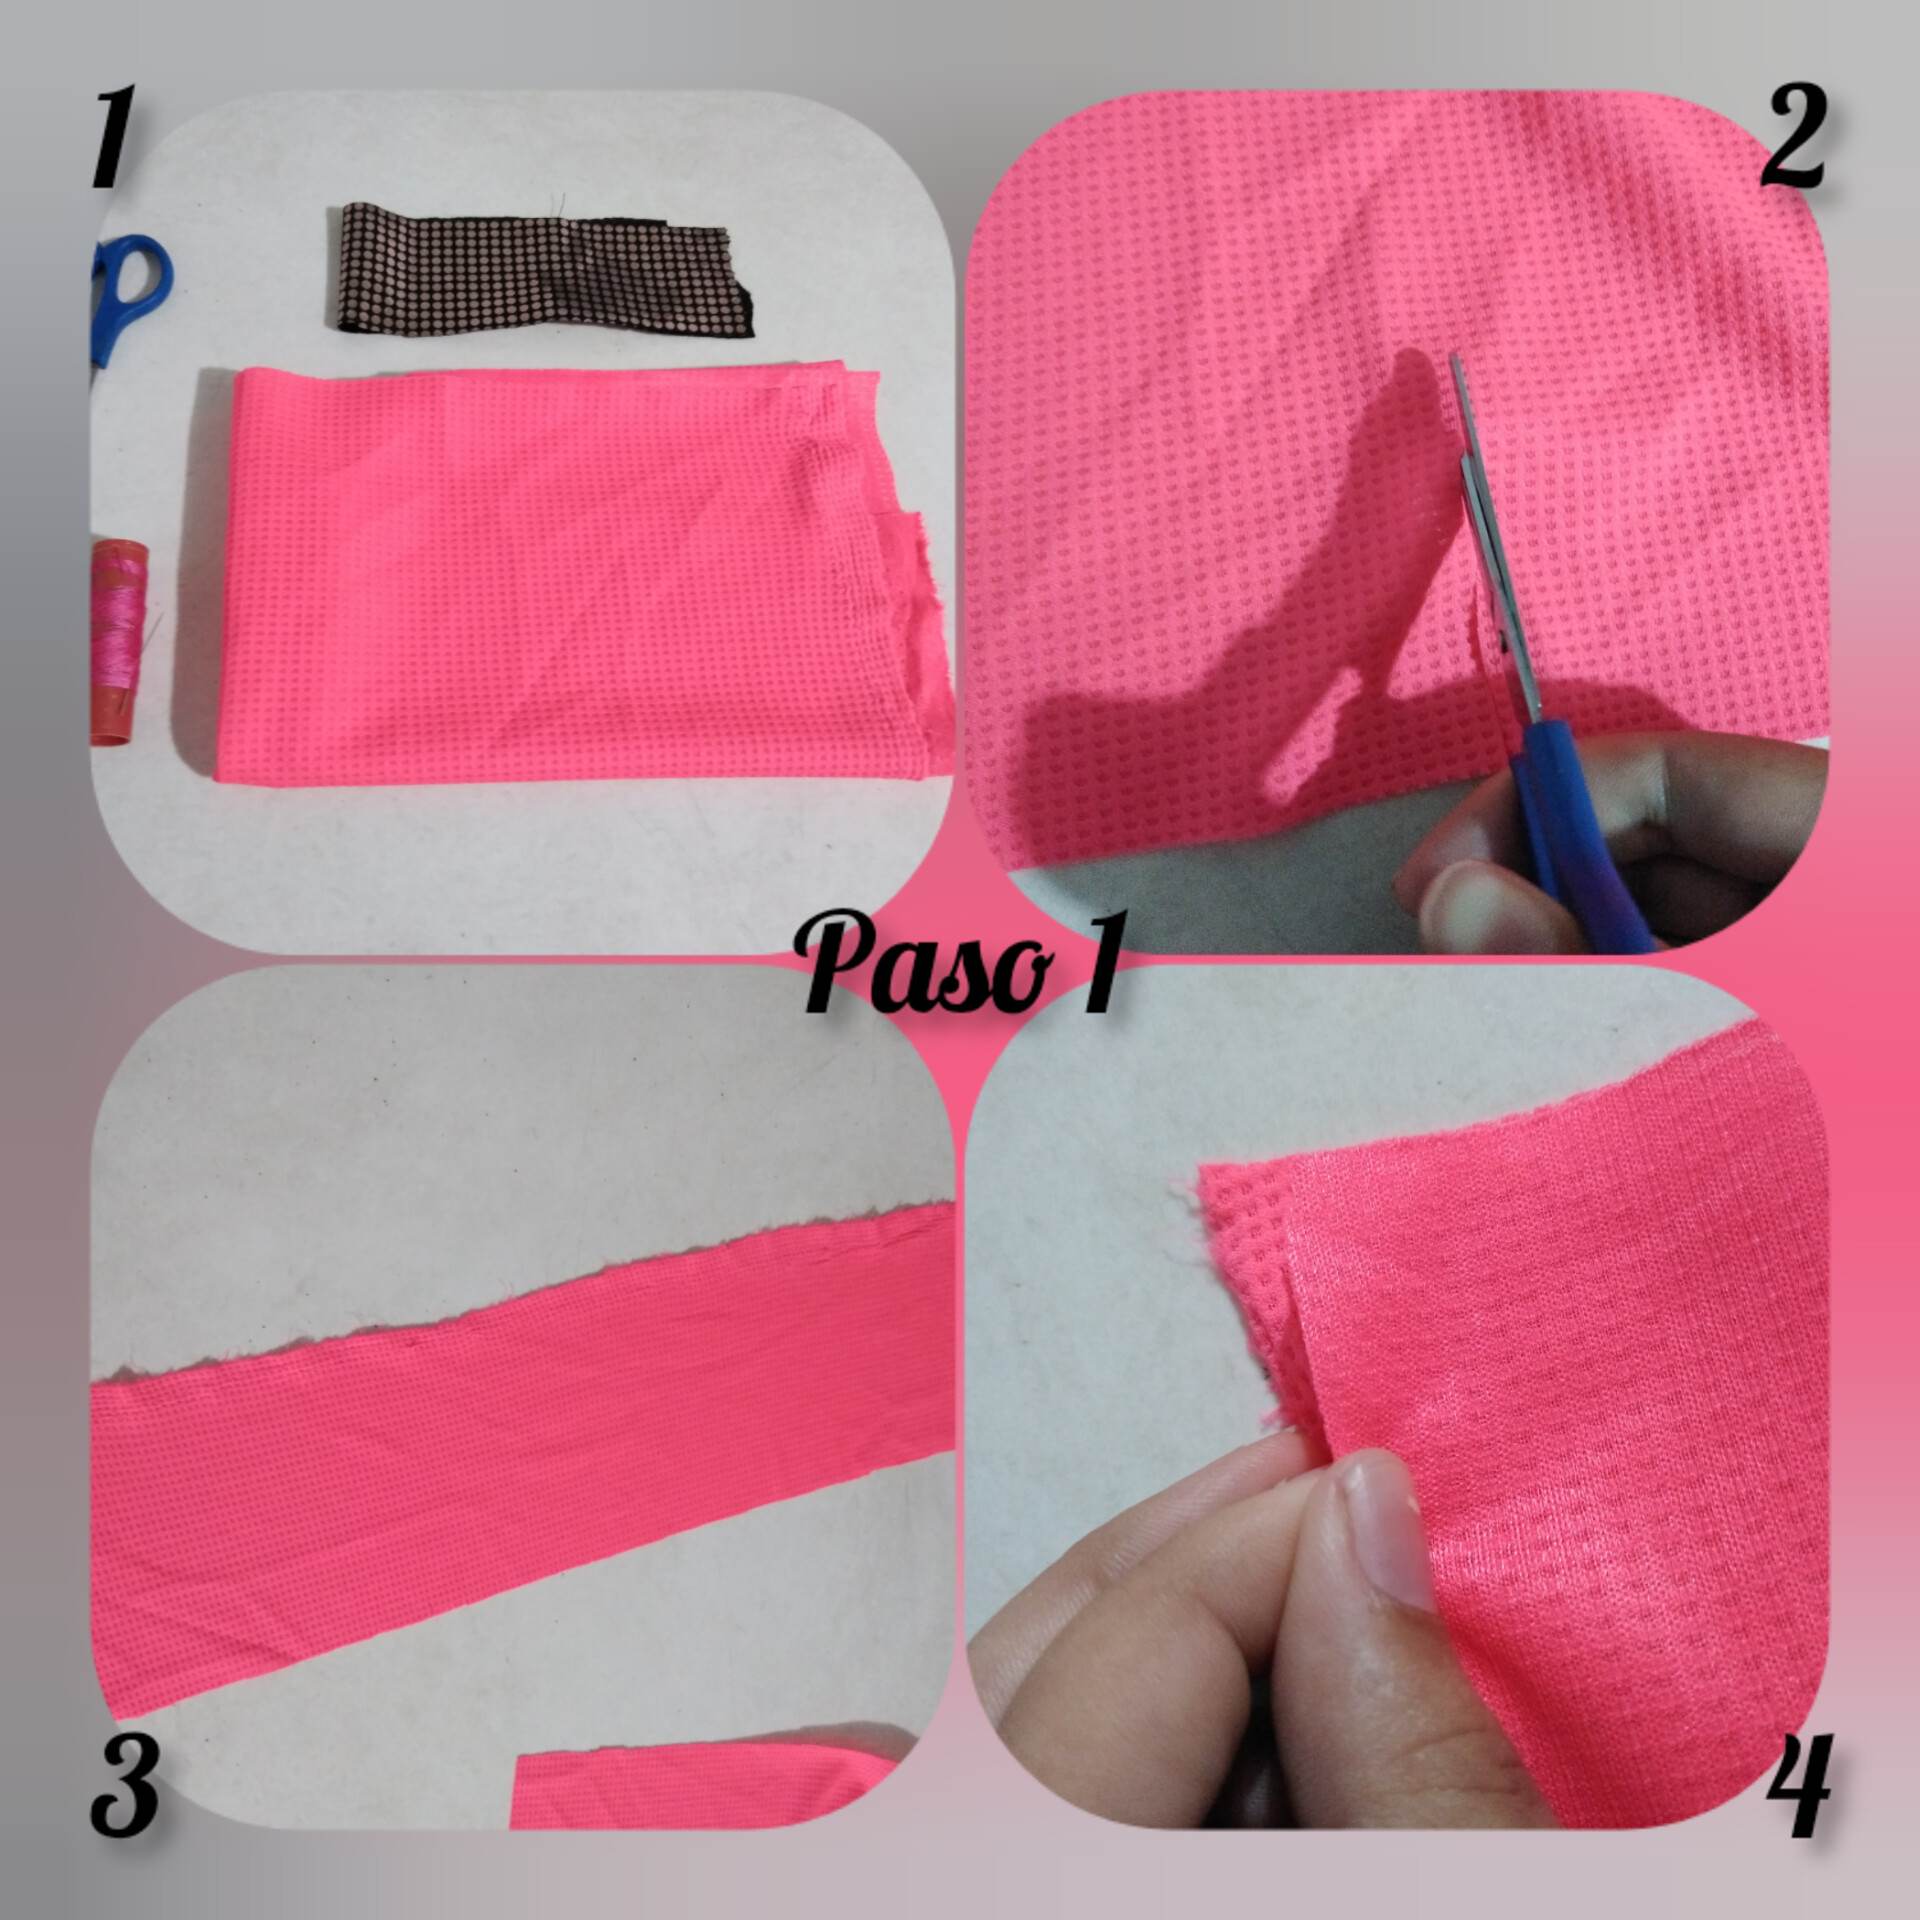
Paso 1: Para realizar nuestra bella diadema vamos a necesitar una tela dura ya que ella tiene forma y así se pueda sostener solita, combinada con otras telas de nuestra preferencia. Lo primero que vamos a hacer será medir nuestra cabeza, la circunferencia, rodeamos con la tela para ver de que tamaño vamos a cortar y luego procederemos a cortar un rectángulo largo y grueso ya que el mismo será doblado. Lo que haremos luego de tenerlo cortado será voltearlo al contrario de la tela, dejando la parte externa hacia dentro ya que coseremos de adentro hacia afuera para luego voltearlo.
Step 1: To make our beautiful headband we are going to need a hard fabric since it has a shape so it can stand alone, combined with other fabrics of our preference. The first thing we are going to do is to measure our head, the circumference, we surround it with the fabric to see what size we are going to cut and then we will proceed to cut a long and thick rectangle since it will be folded. What we will do after having it cut will be to flip it opposite to the fabric, leaving the external part inwards since we will sew from the inside outwards and then flip it over.

Paso 2: lo que haremos ahora será proceder a coser por todo el borde con cuidado la tela, procurando usa un hilo del color de la tela o parecido, coseremos esto para obtener un buen acabado ya que es necesario, el borde es algo sencillo pero con un acabado lindo, ahora pueden ver todo ya cosido y lo que haremos será voltearla cuidadosamente.
Step 2: what we will do now is to proceed to sew all around the edge carefully the fabric, trying to use a thread of the color of the fabric or similar, we will sew this to get a good finish as it is necessary, the edge is something simple but with a nice finish, now you can see everything already sewn and what we will do is to carefully flip it over.
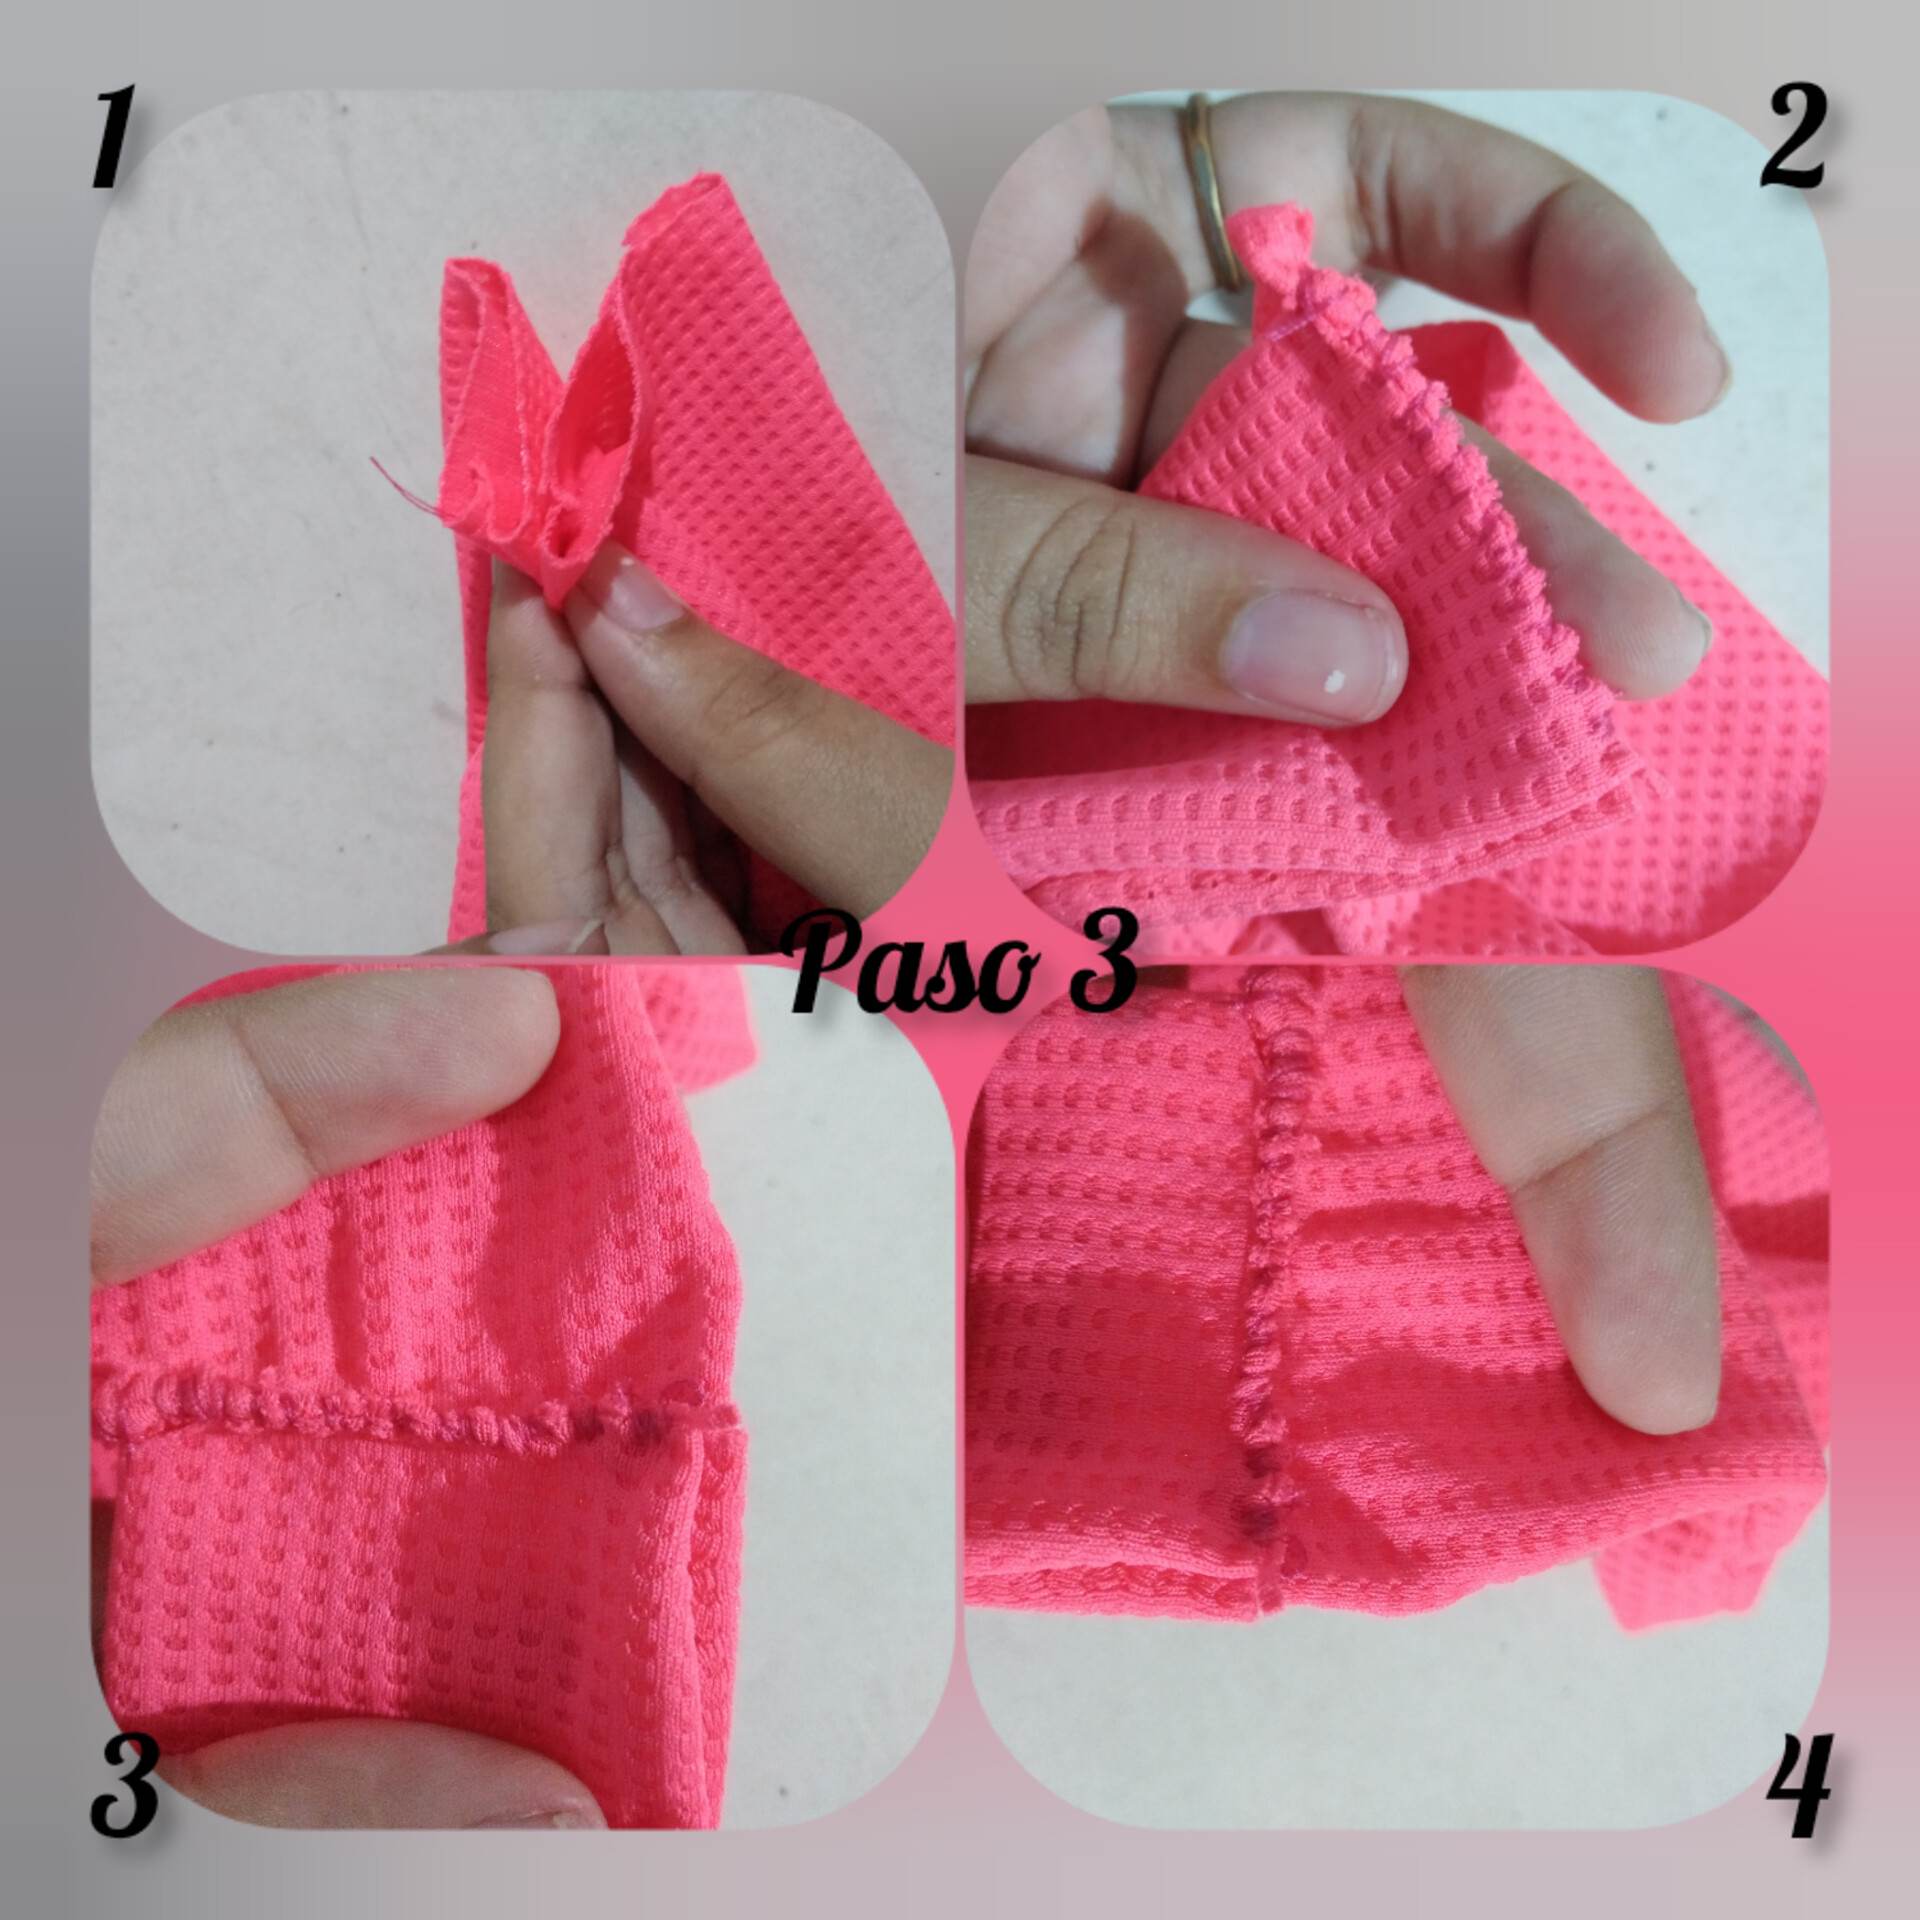
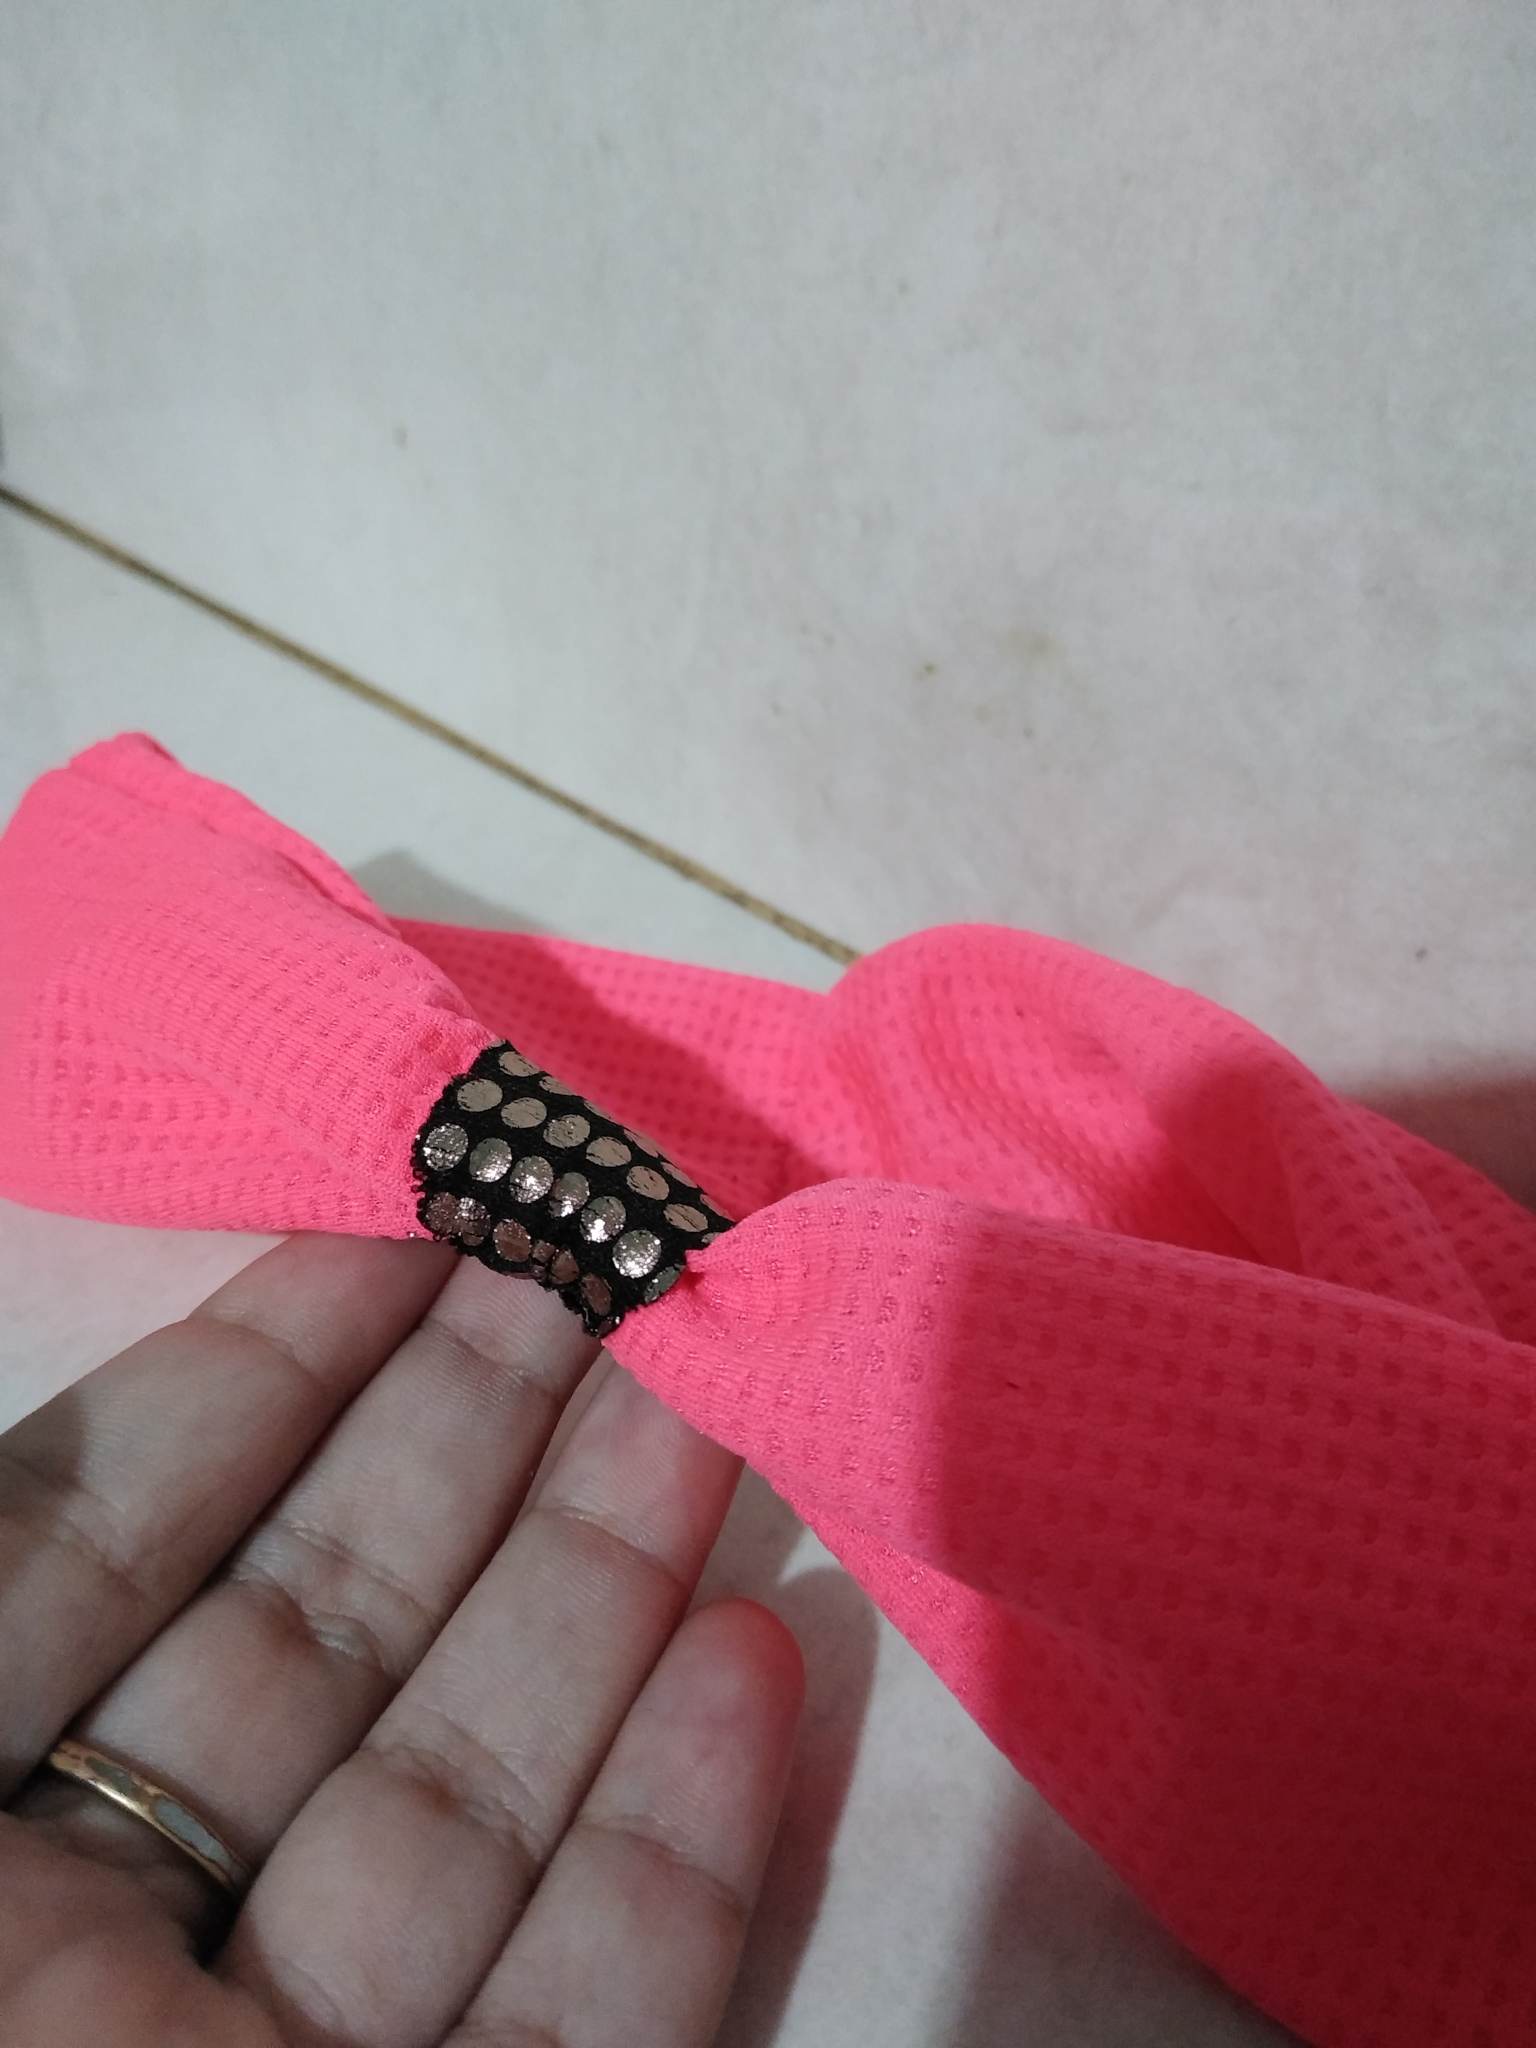
Paso 3: luego de haber volteado la tira que ya cosimos para nuestro cintillo, lo que haremos será coser los dos bordes que quedan sueltos, de la manera en la que aparece en la imagen, lo coseremos ya que esto será necesario para poder culminar esta fase.
Step 3: after turning over the strip that we have already sewn for our headband, we will sew the two edges that are loose, as shown in the image, we will sew it since this will be necessary to finish this phase.
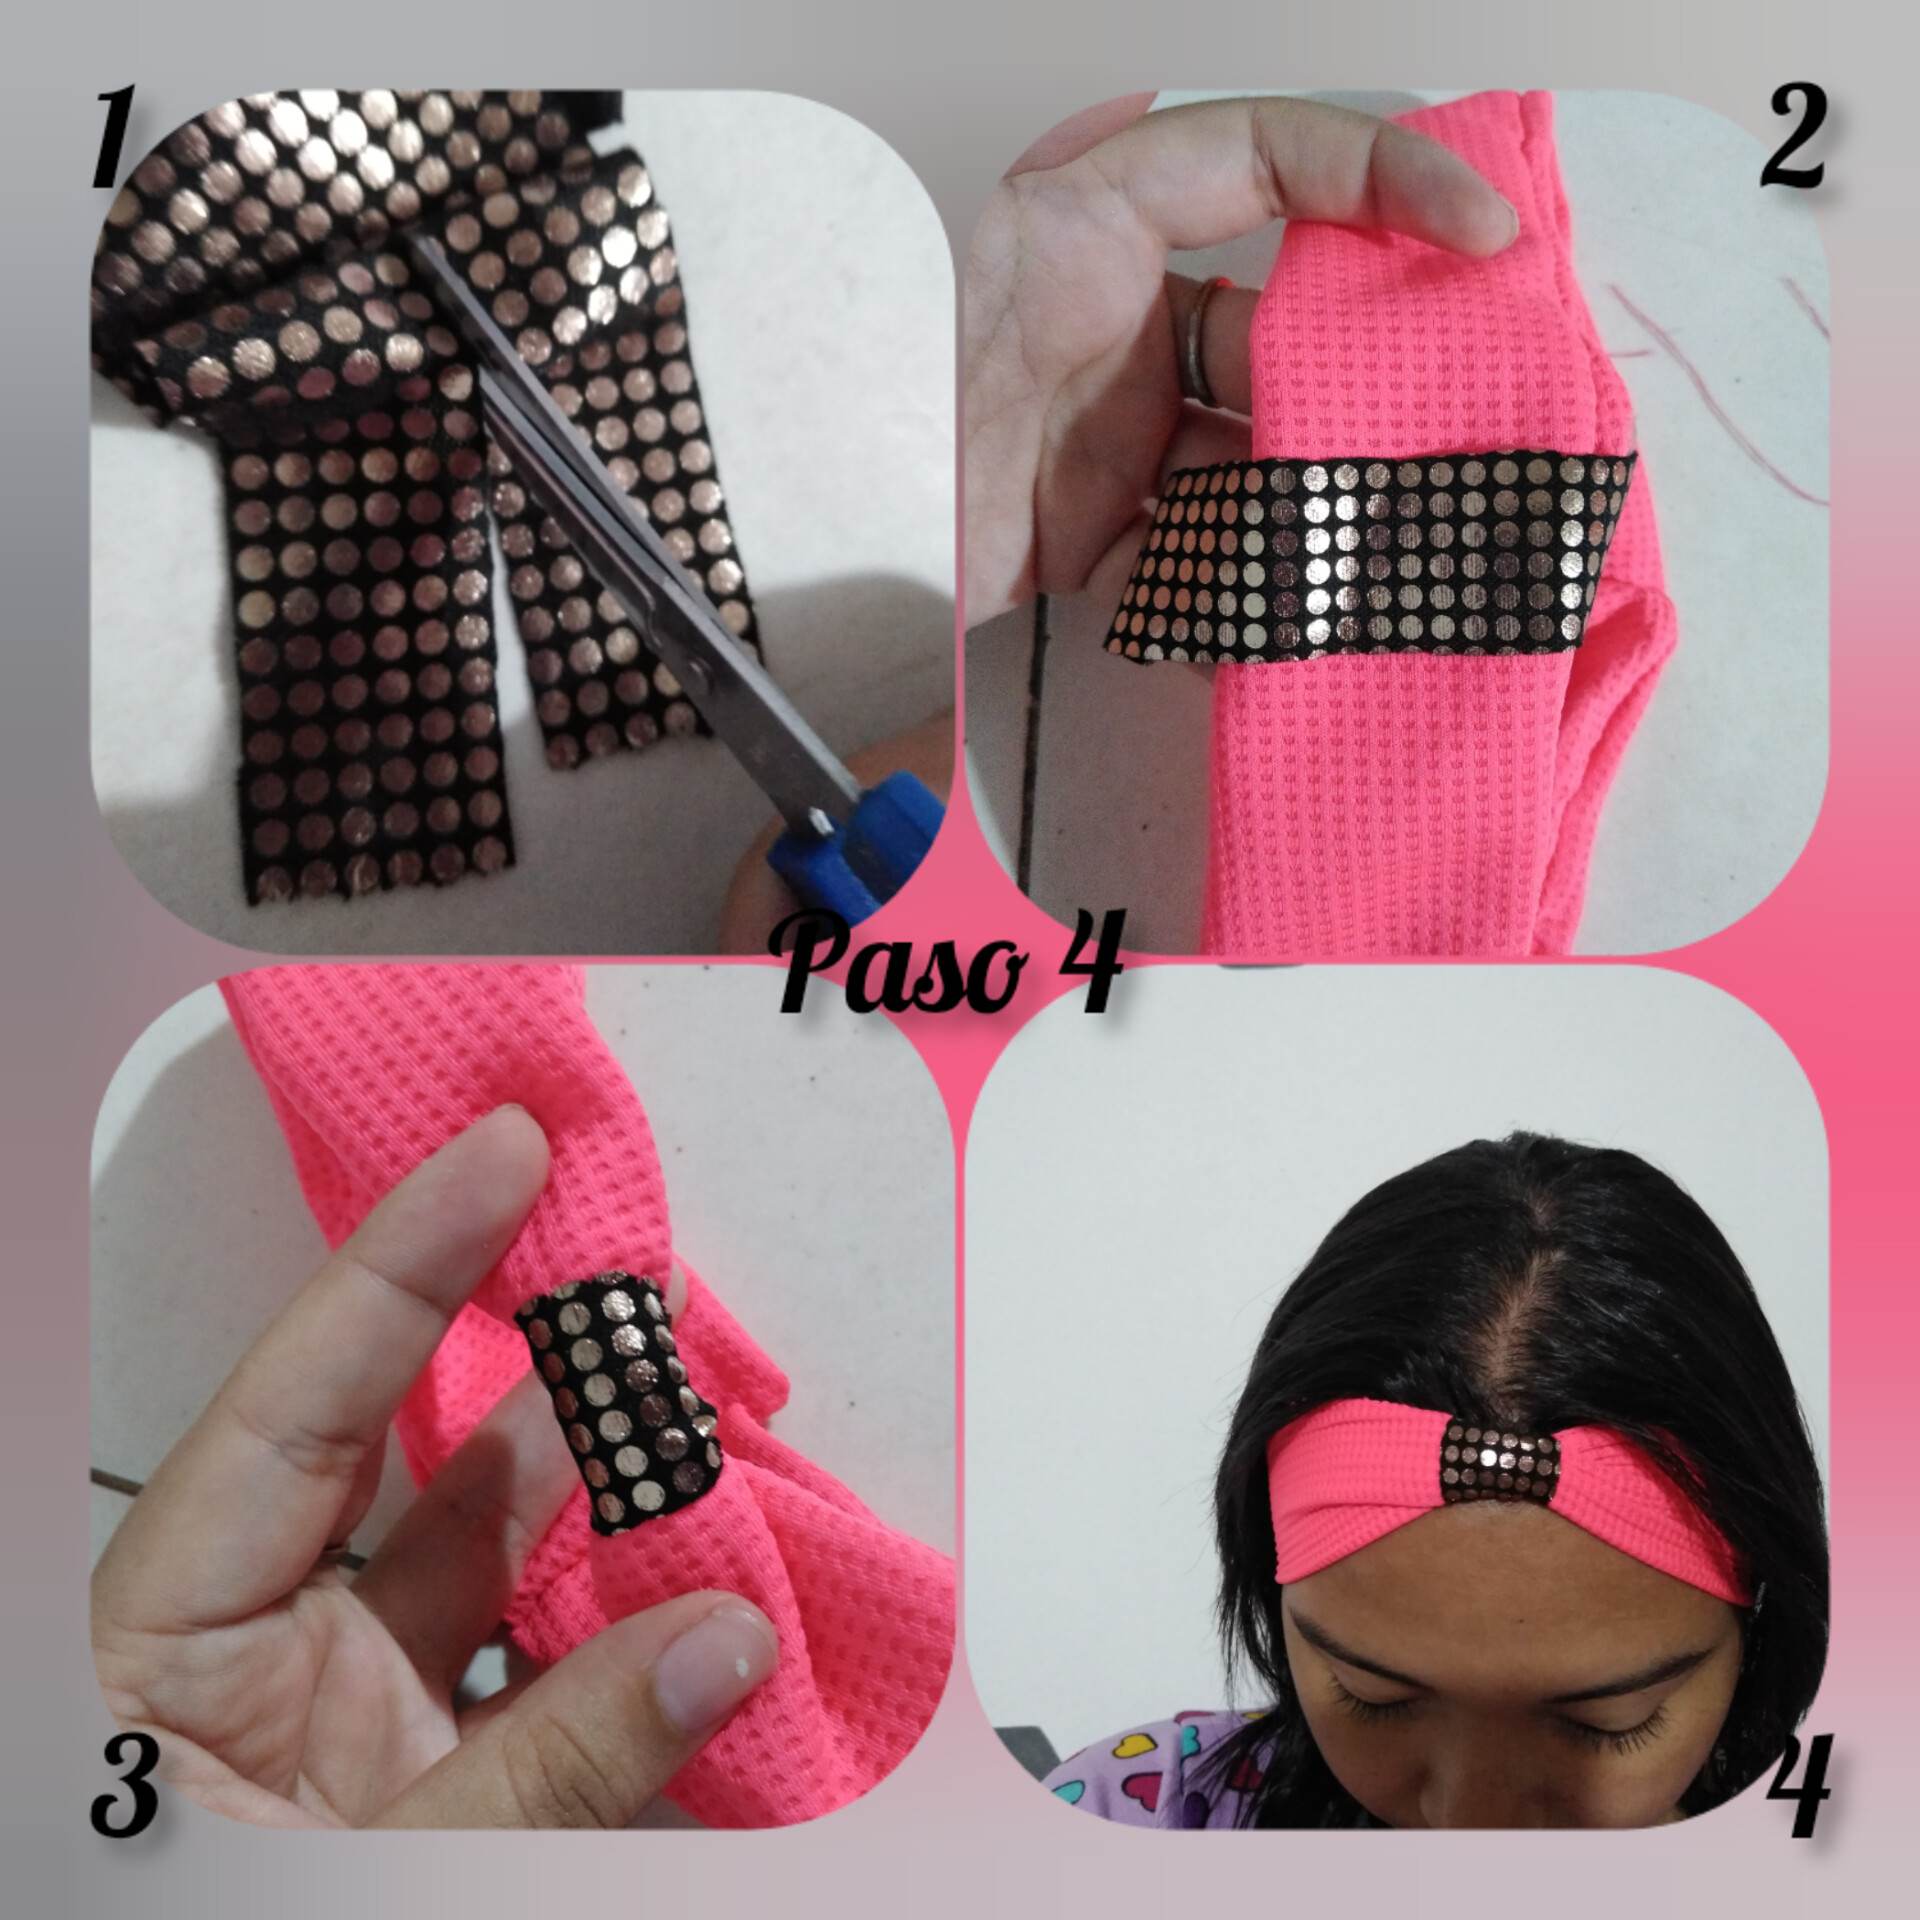
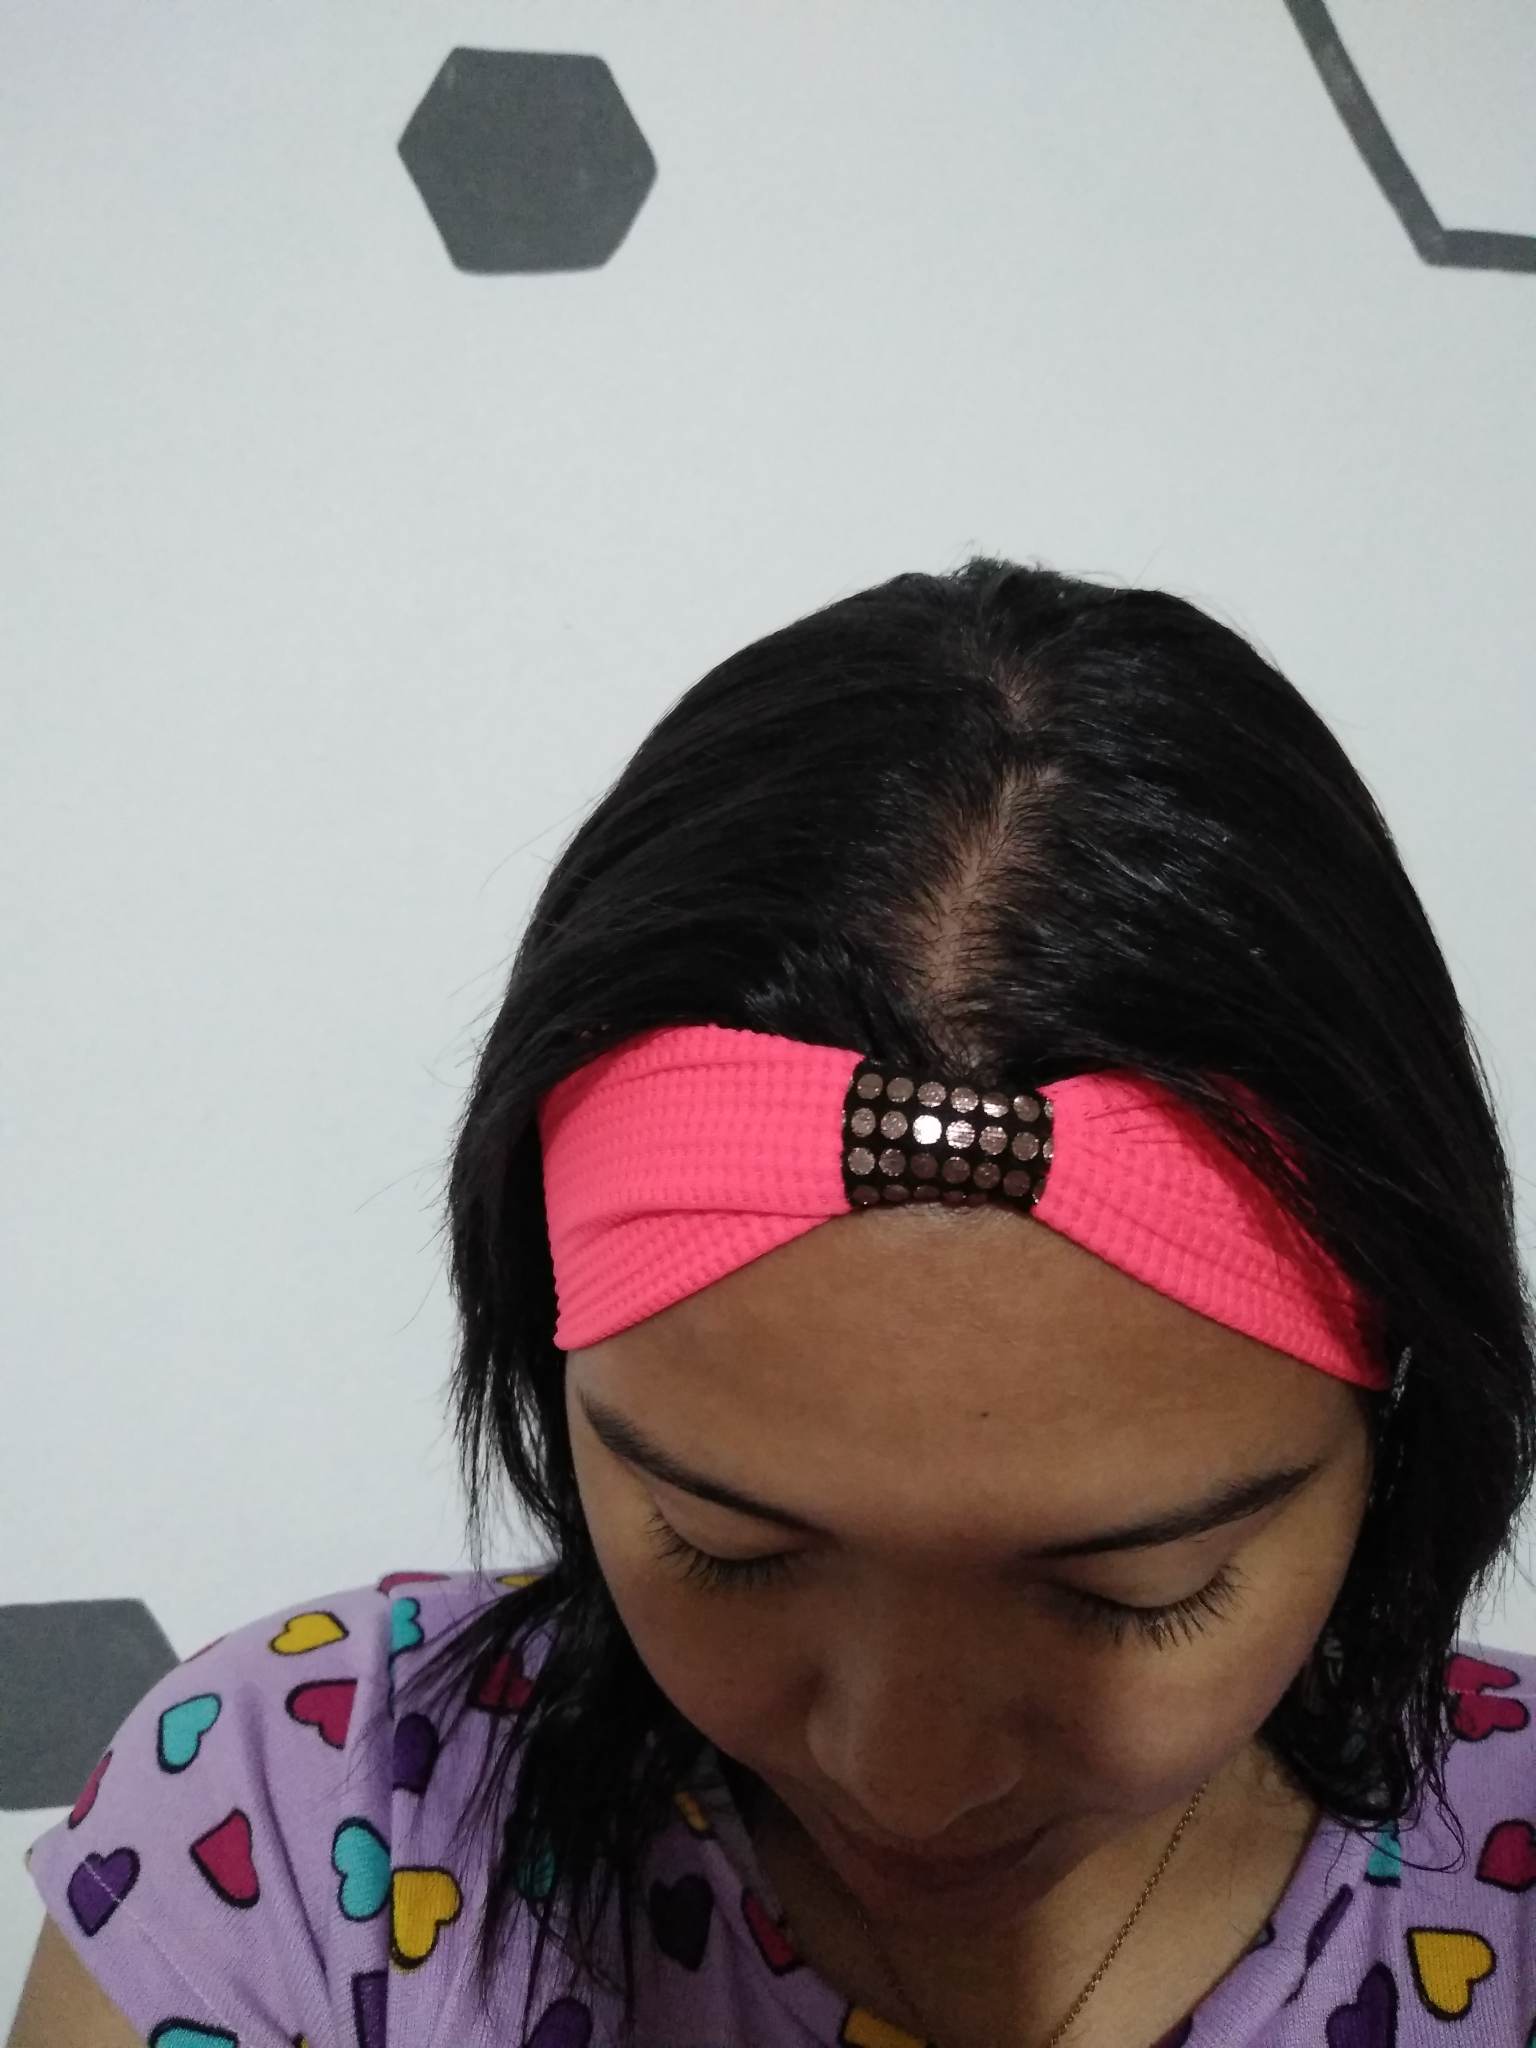
Paso 4: lo que procederemos a hacer será cortar una pequeña tira de esta tira dorada ya que con ella haremos una decoración en todo el frente de nuestro cintillo, la colocaremos así como pueden ver en las imágenes, y coseremos por detrás la unión de esta tira de tela, dará una eleganciay sencillez super linda al cintillo, ustedes la pueden decorar como deseen.
Step 4: what we will proceed to do is to cut a small strip of this golden strip because with it we will make a decoration around the front of our headband, we will place it as you can see in the images, and we will sew the back of this strip of fabric, it will give a super nice elegance and simplicity to the headband, you can decorate it as you wish.
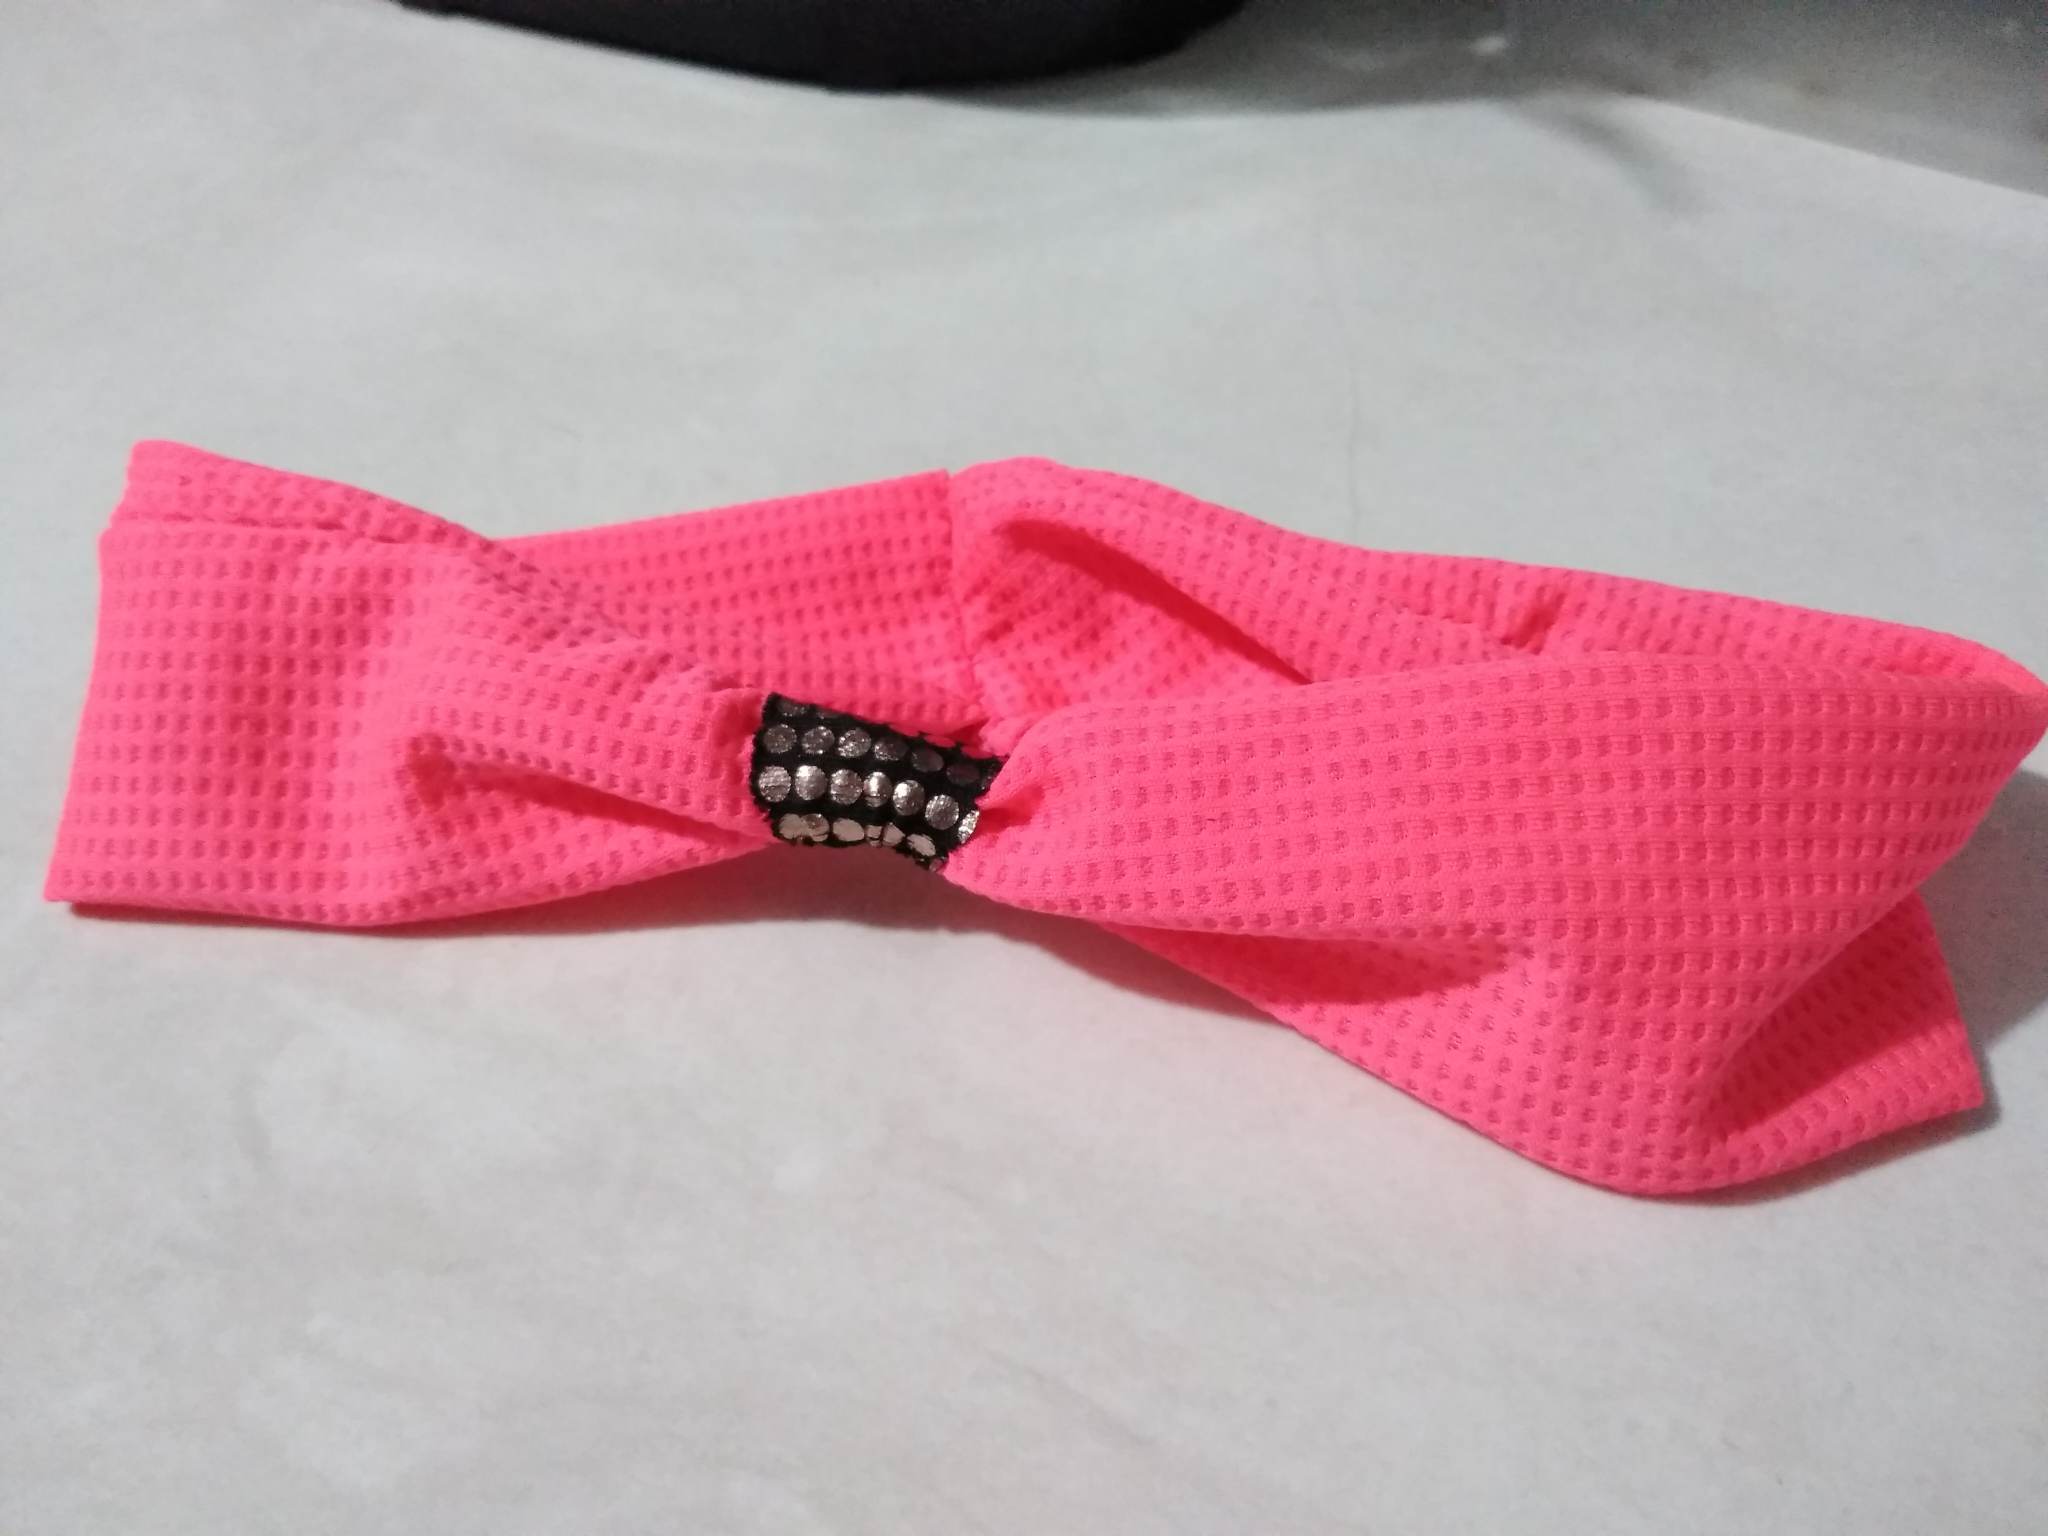
Final Result.


Thank you for sharing this post on HIVE!
Your content got selected by our fellow curator ashikstd & you just received a little thank you upvote from us for your great work! Your post will be featured in one of our recurring compilations which are aiming to offer you a stage to widen your audience within the DIY scene of Hive. Stay creative & HIVE ON!
Please vote for our hive witness <3
The hair band look simple and amazing. This will really make sense if you are using weed cap , you use it to hold it. I love it, keep it up you good work