[ESP-ENG] Small and tender case to keep small and necessary things | Pequeño y Tierno estuche para guardar cosa pequeñas y necesarias
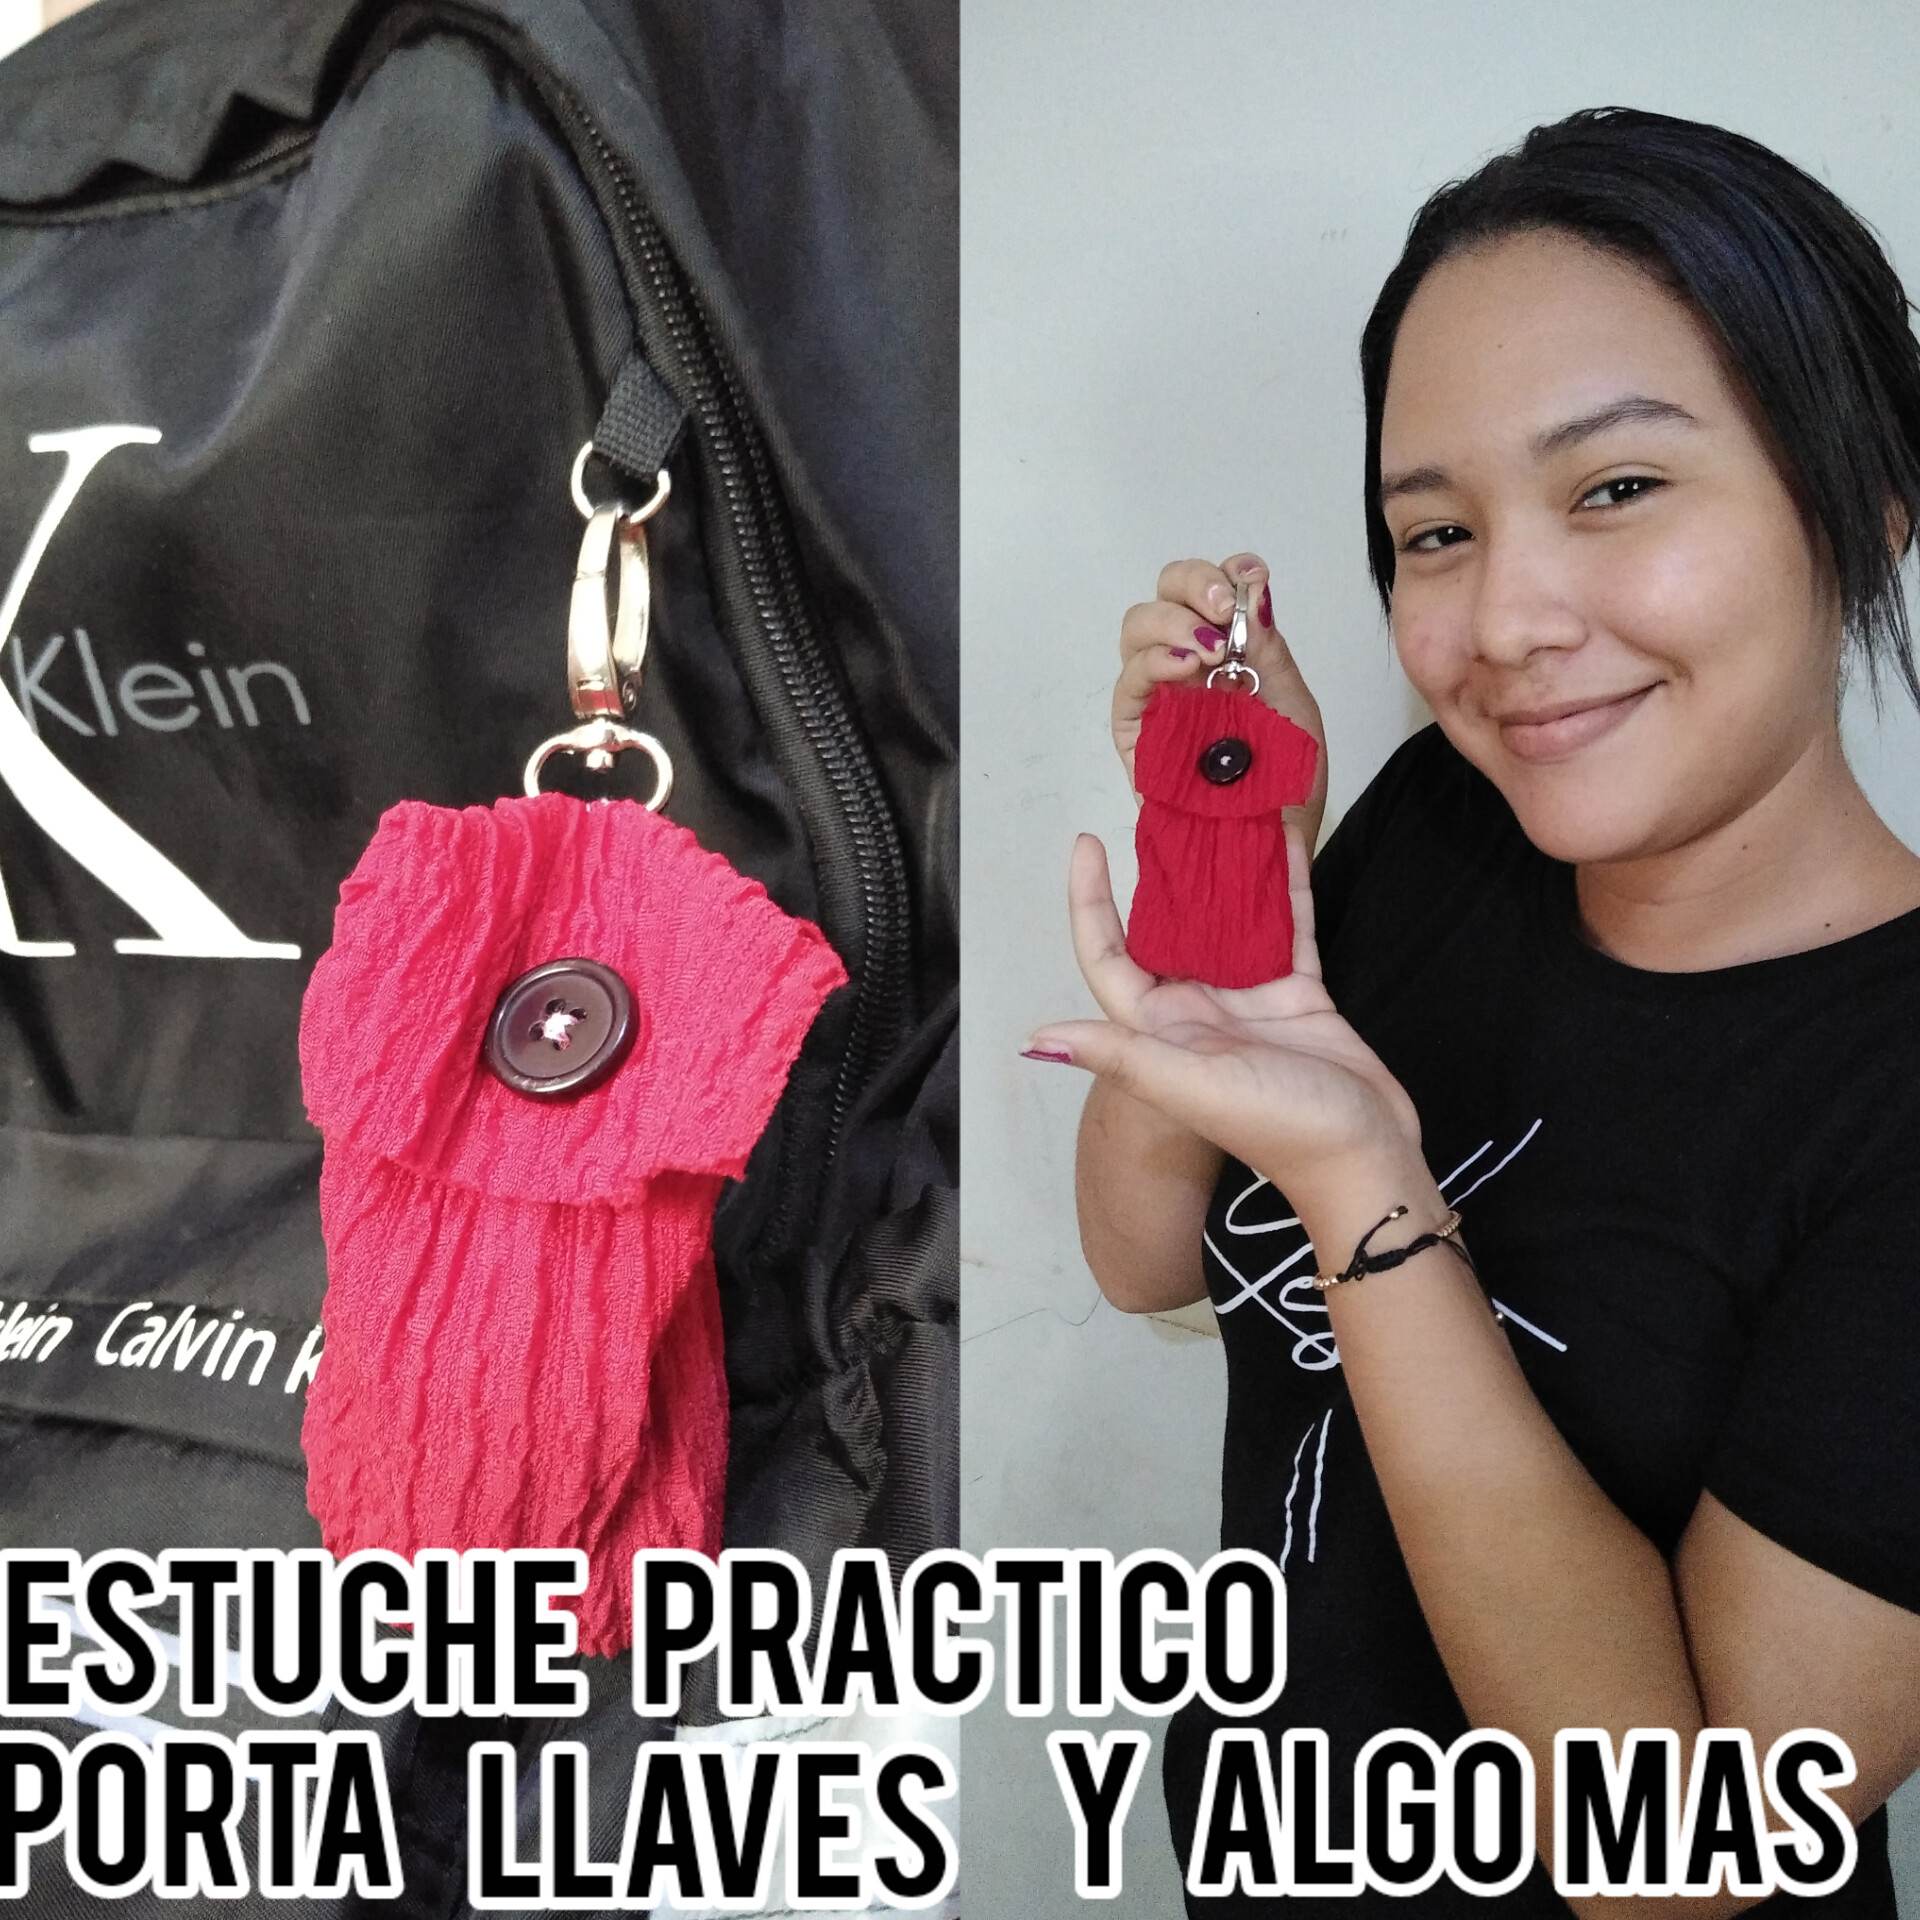
Hello friends of hive, good to be here again with all of you, today I want to show you a new idea, this is a case to put and store small things that are easy to lose, such as keys, bills, tinder, earrings and more. So let's see the step by step:

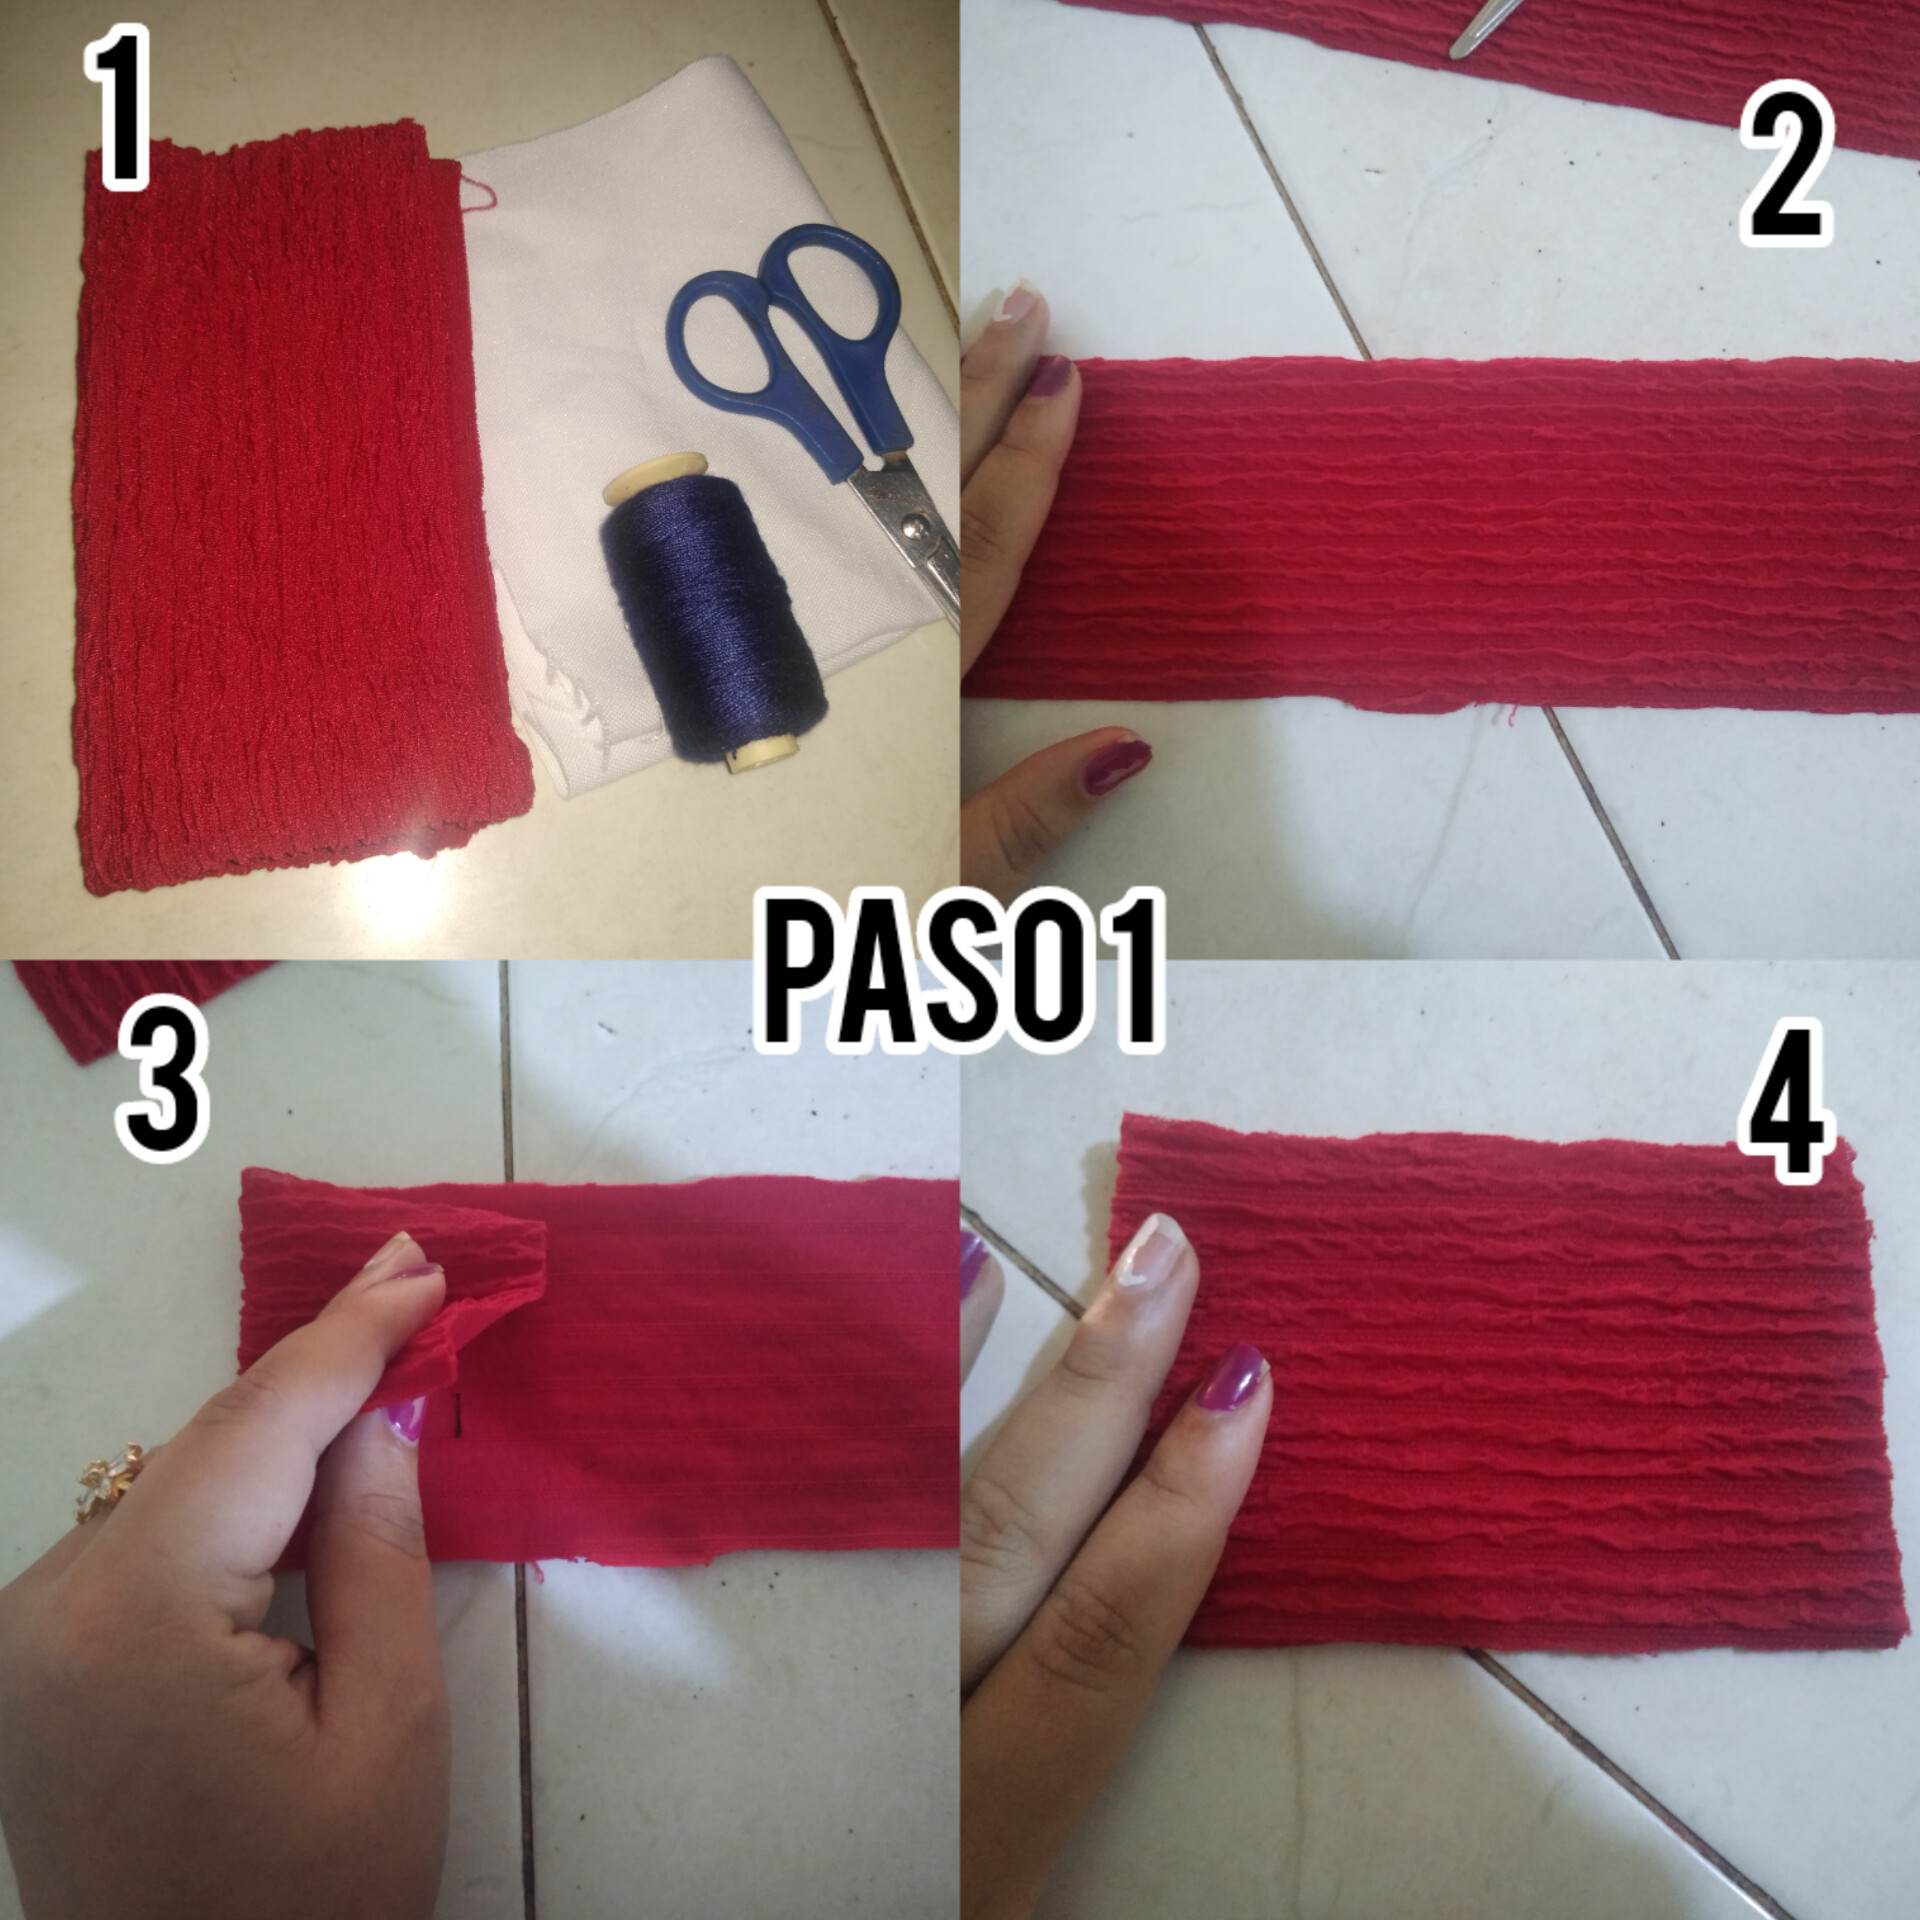
Paso 1: Vamos a necesitar la tela que queramos usar para hacer nuestro estuche, procederemos a cortar luego un rectángulo mas o menos grueso, el cuál será el que usaremos para hacer nuestro estuche. No vamos a cortar a la mitad el rectángulo, si no que lo vamos a dejar así nada más que solo coserlo.
Step 1: We are going to need the fabric we want to use to make our case, then we will proceed to cut a more or less thick rectangle, which will be the one we will use to make our case. We are not going to cut the rectangle in half, we are going to leave it like this, just sew it.
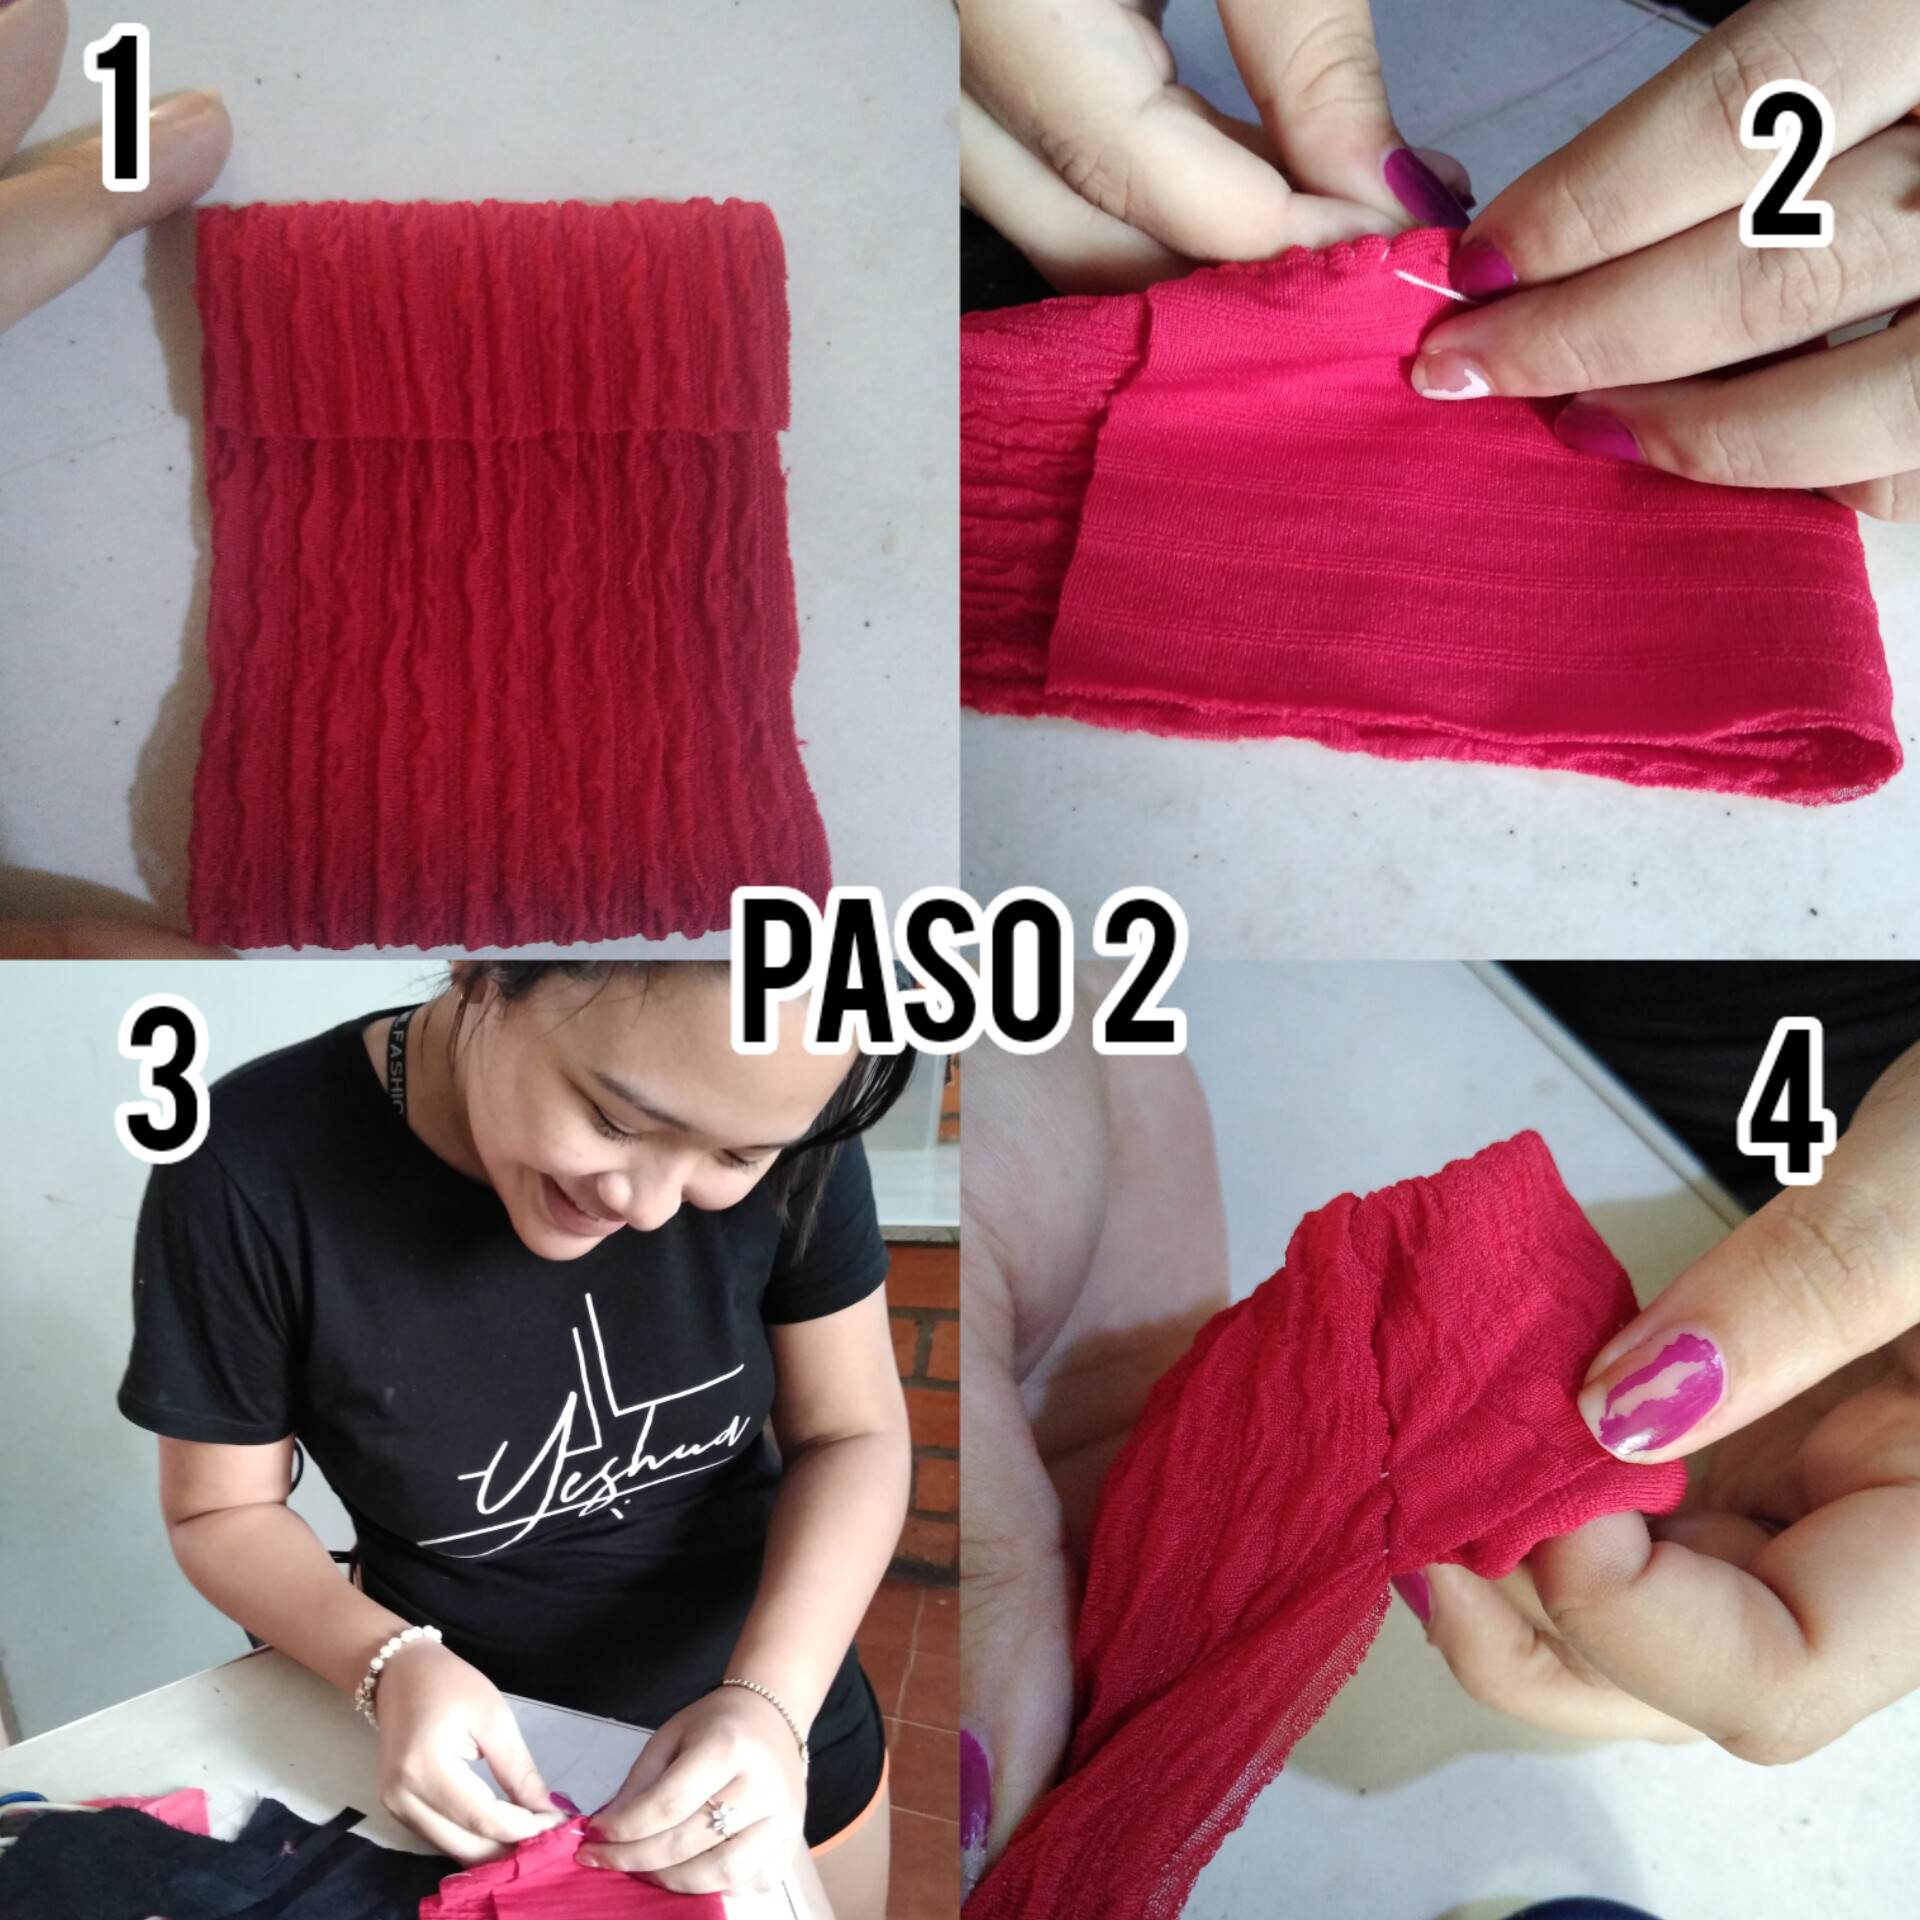
Paso 2: Doblamos a la mitad el rectángulo pero dejaremos una parte mas larga que la otra ya que usaremos la mas larga para hacer el dobles del estuche. Procederemos a coser por dentro toda la costura del borde, y luego de haberla cosido ya, procederemos a doblar el estuche.
Step 2: Fold the rectangle in half but leave one part longer than the other since we will use the longest part to make the folds of the case. We will proceed to sew the inside seam of the edge, and after having sewn it already, we will proceed to fold the case.
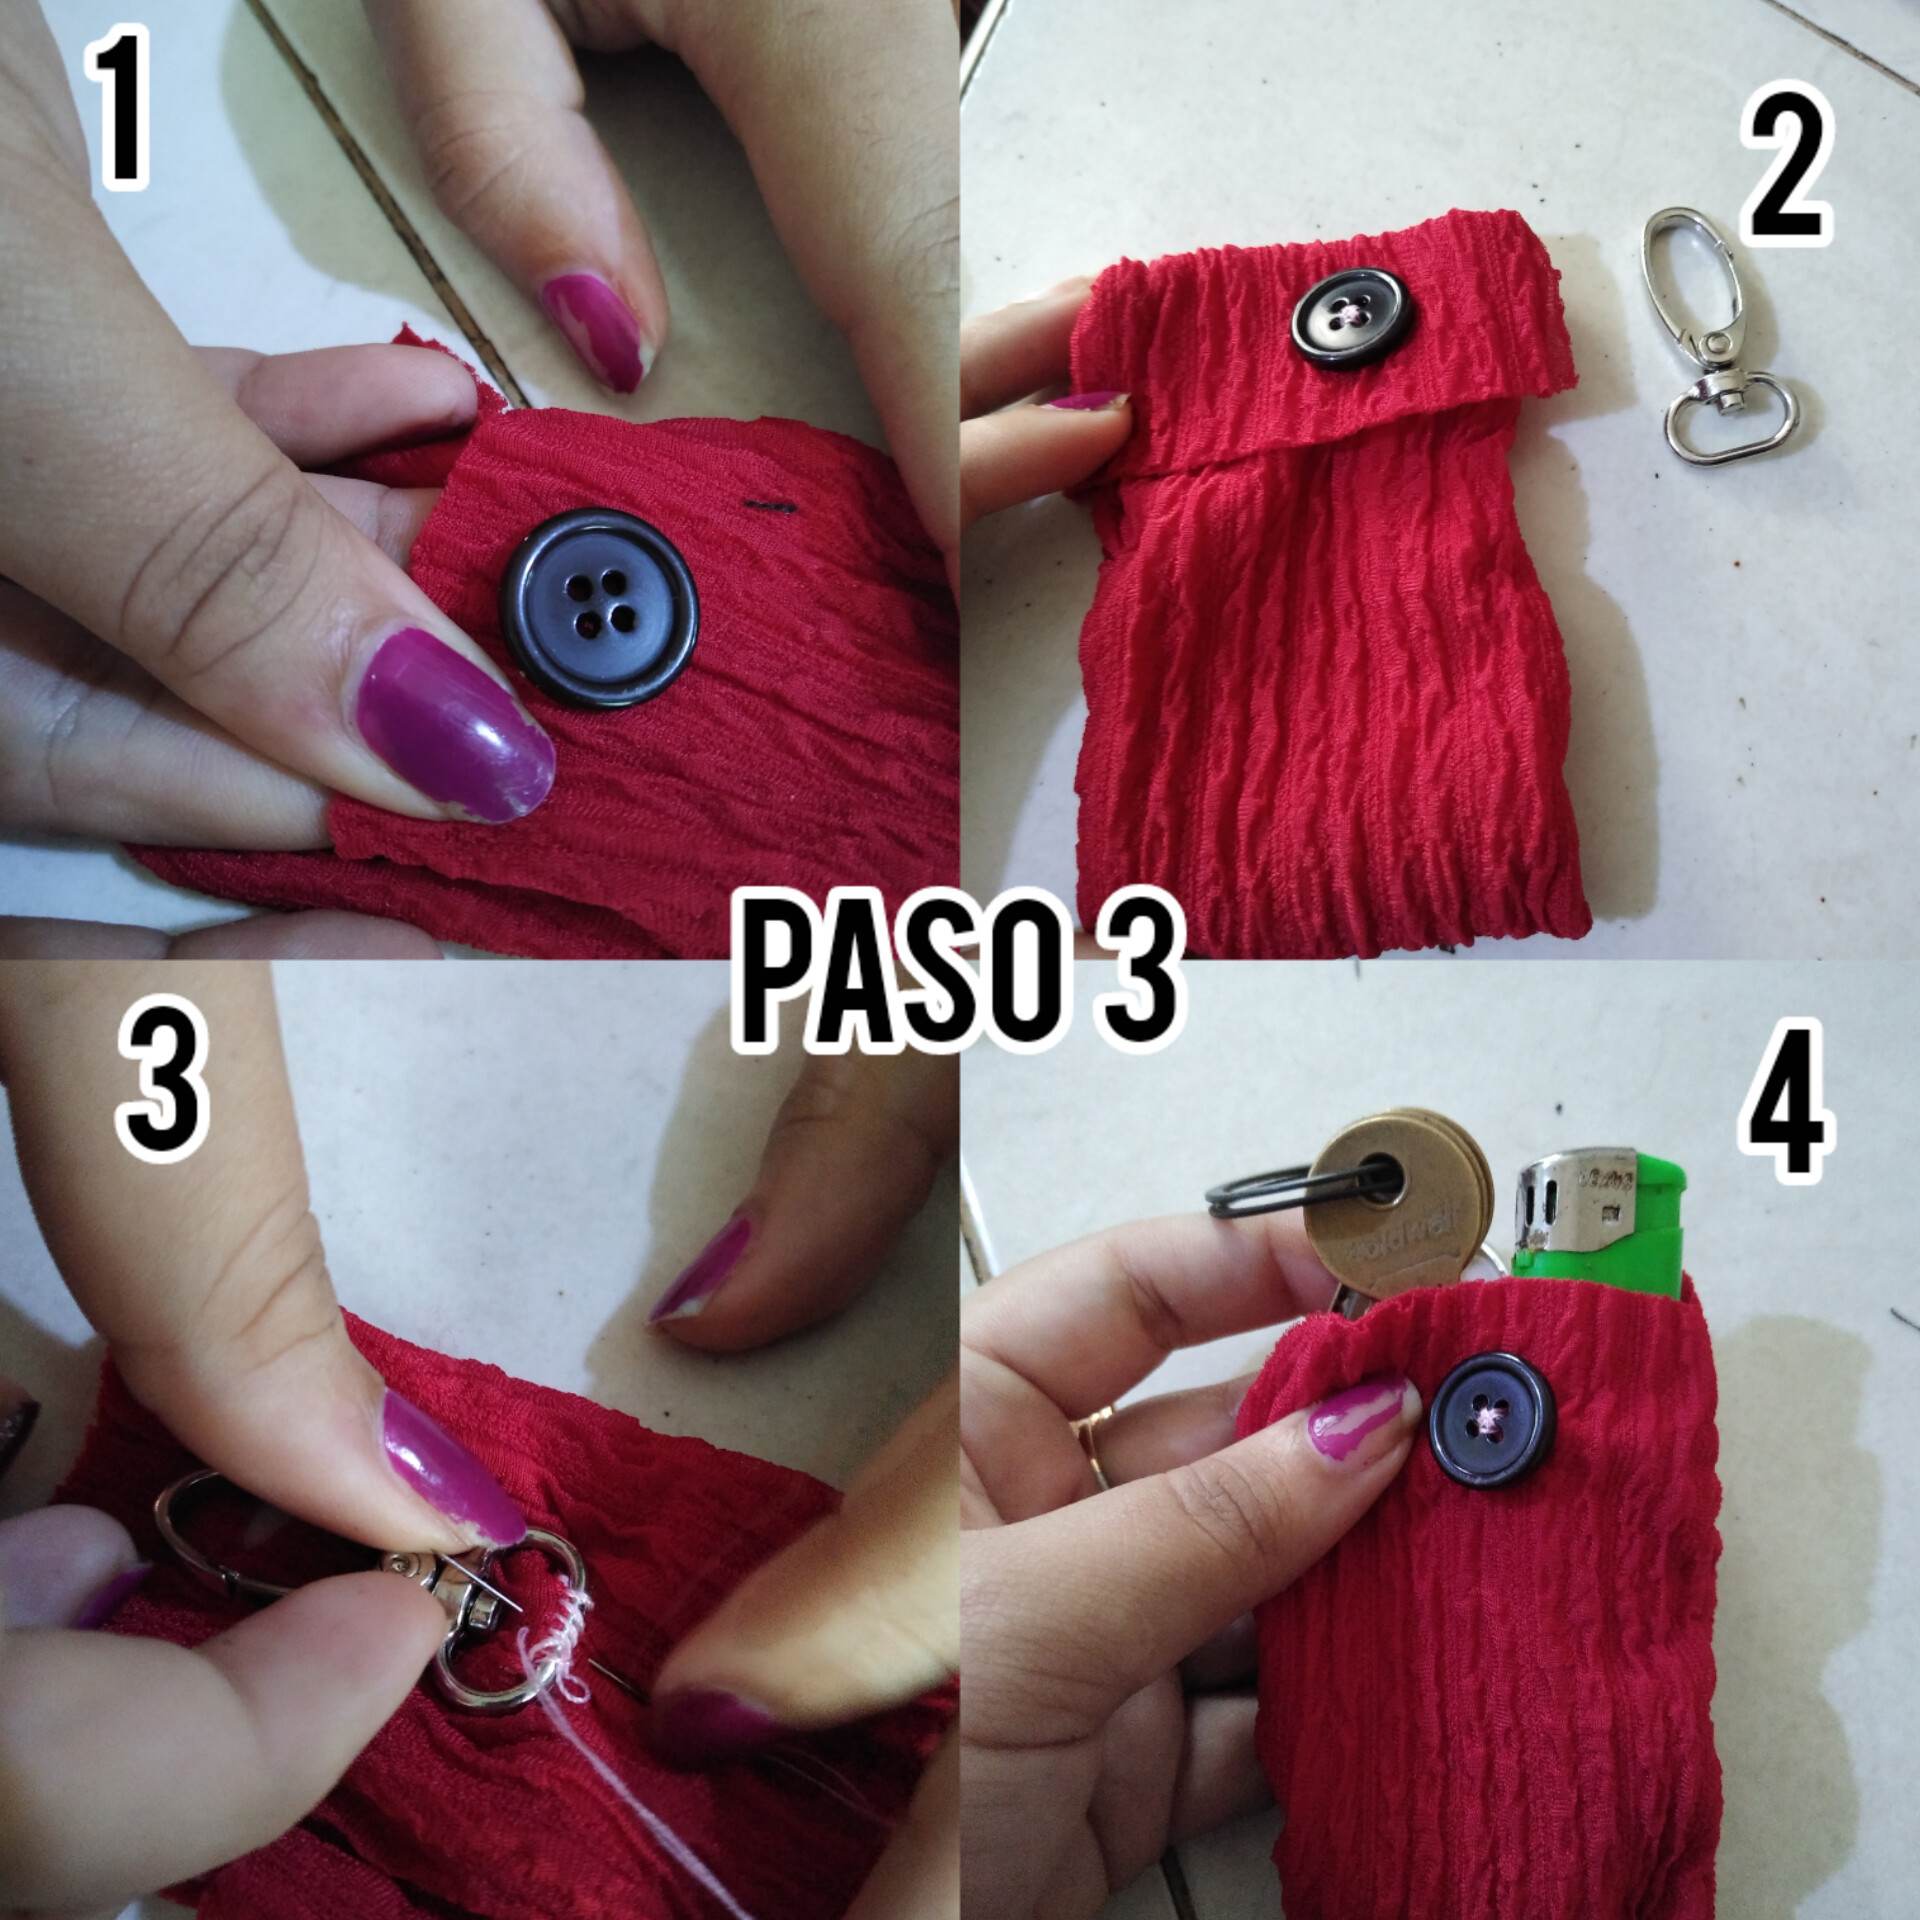
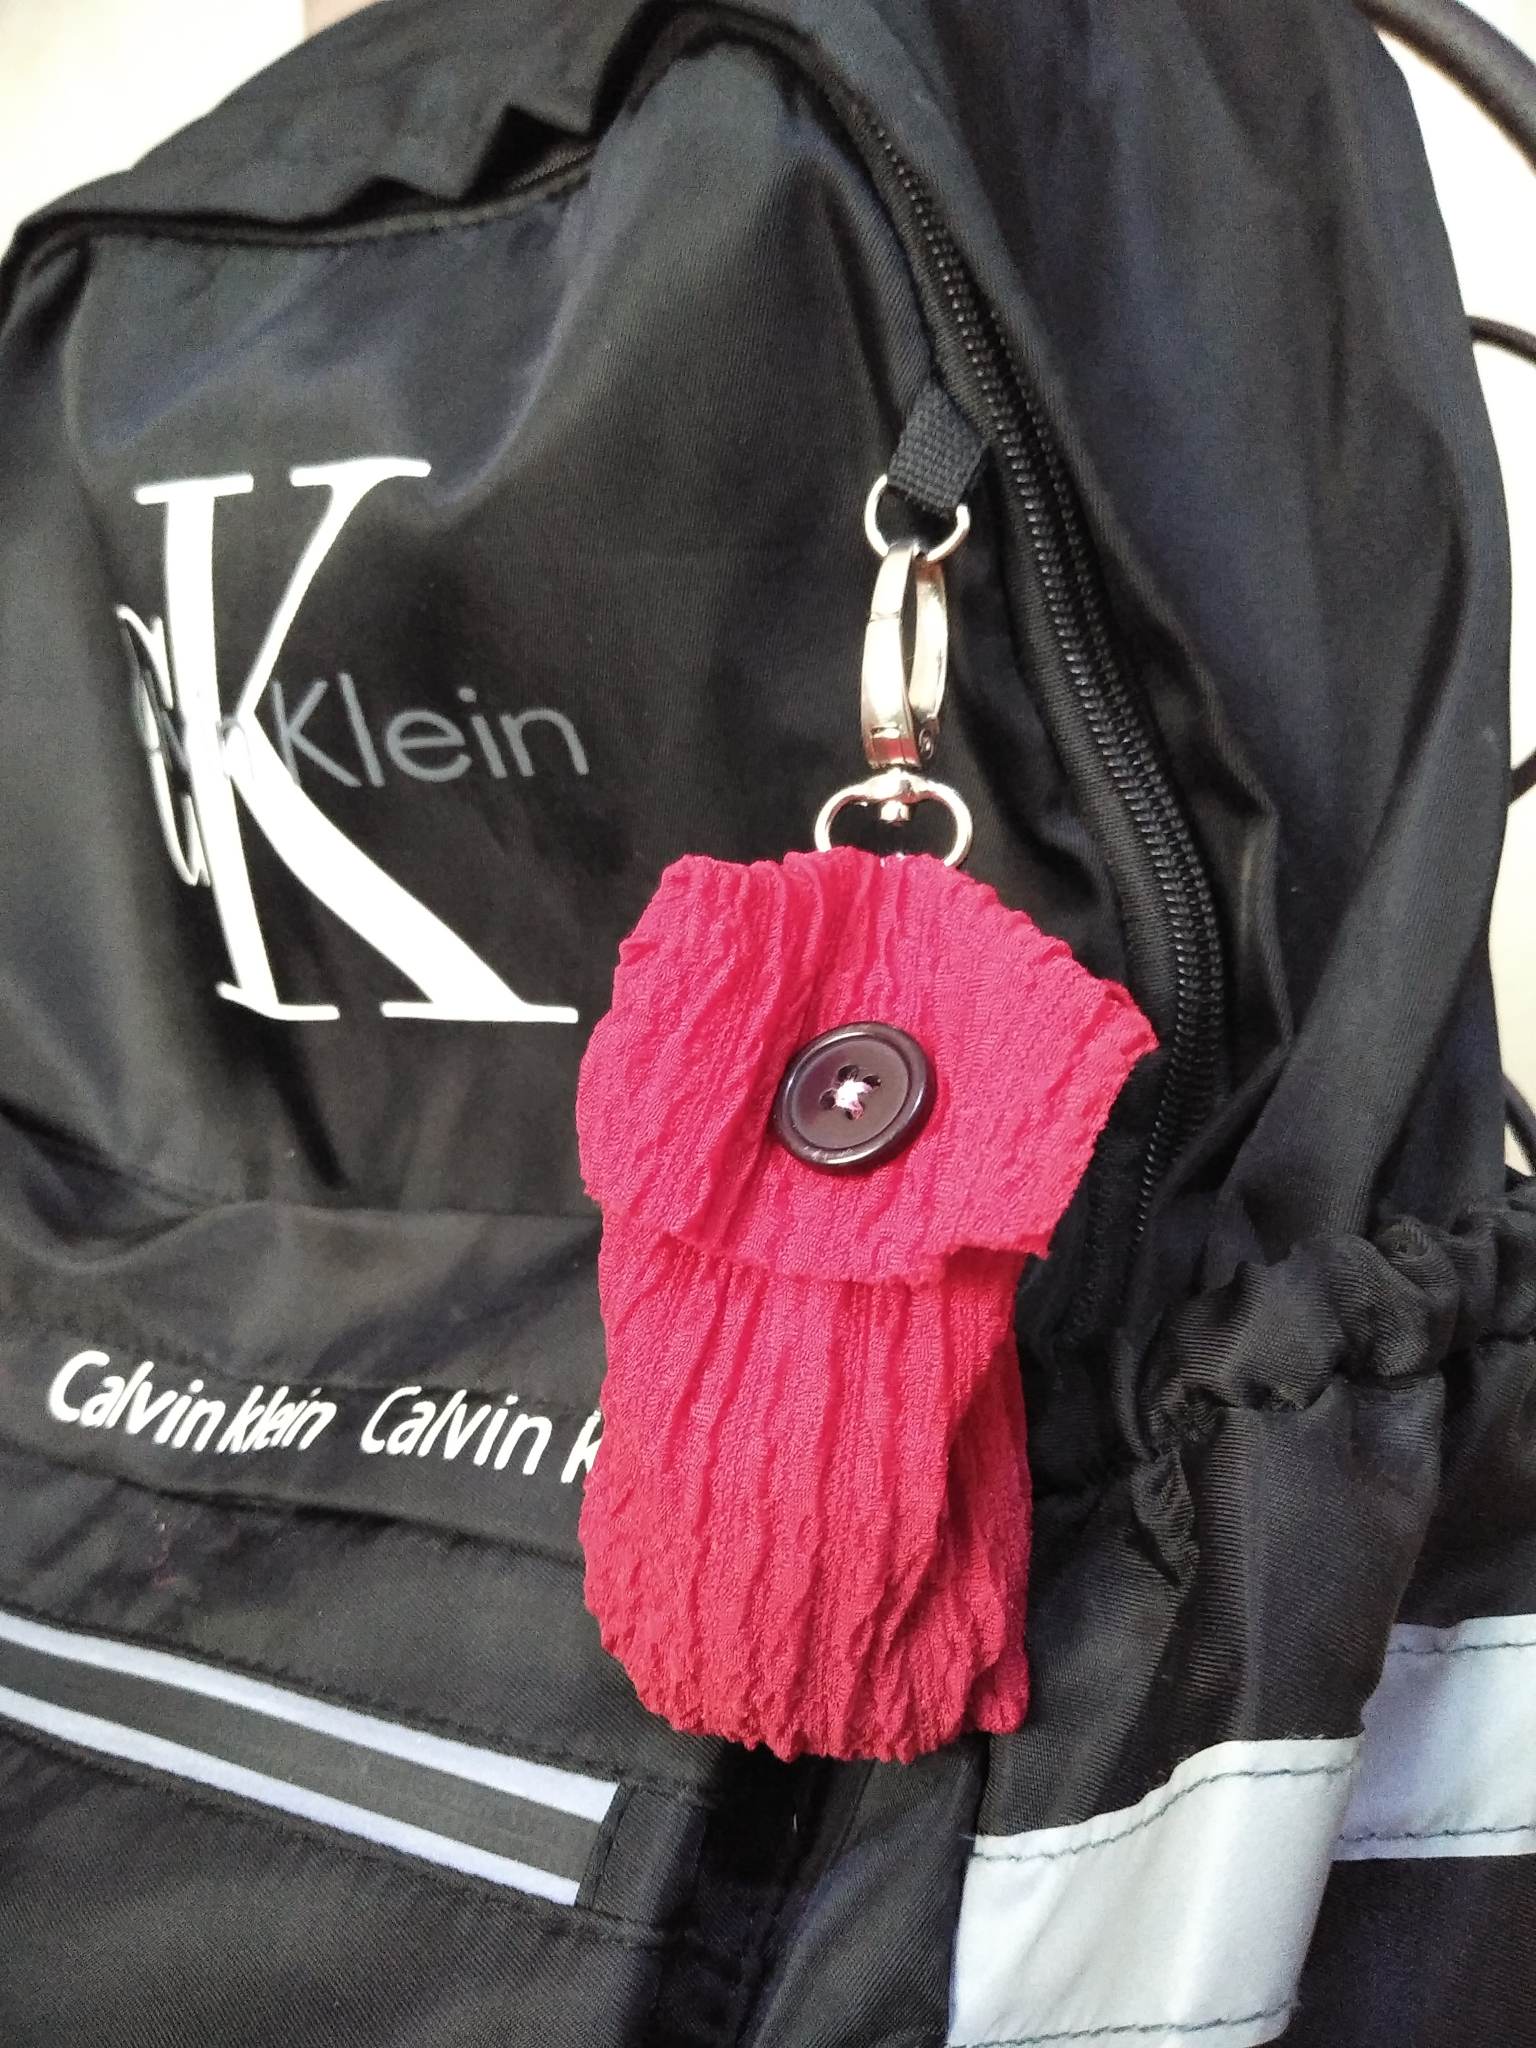
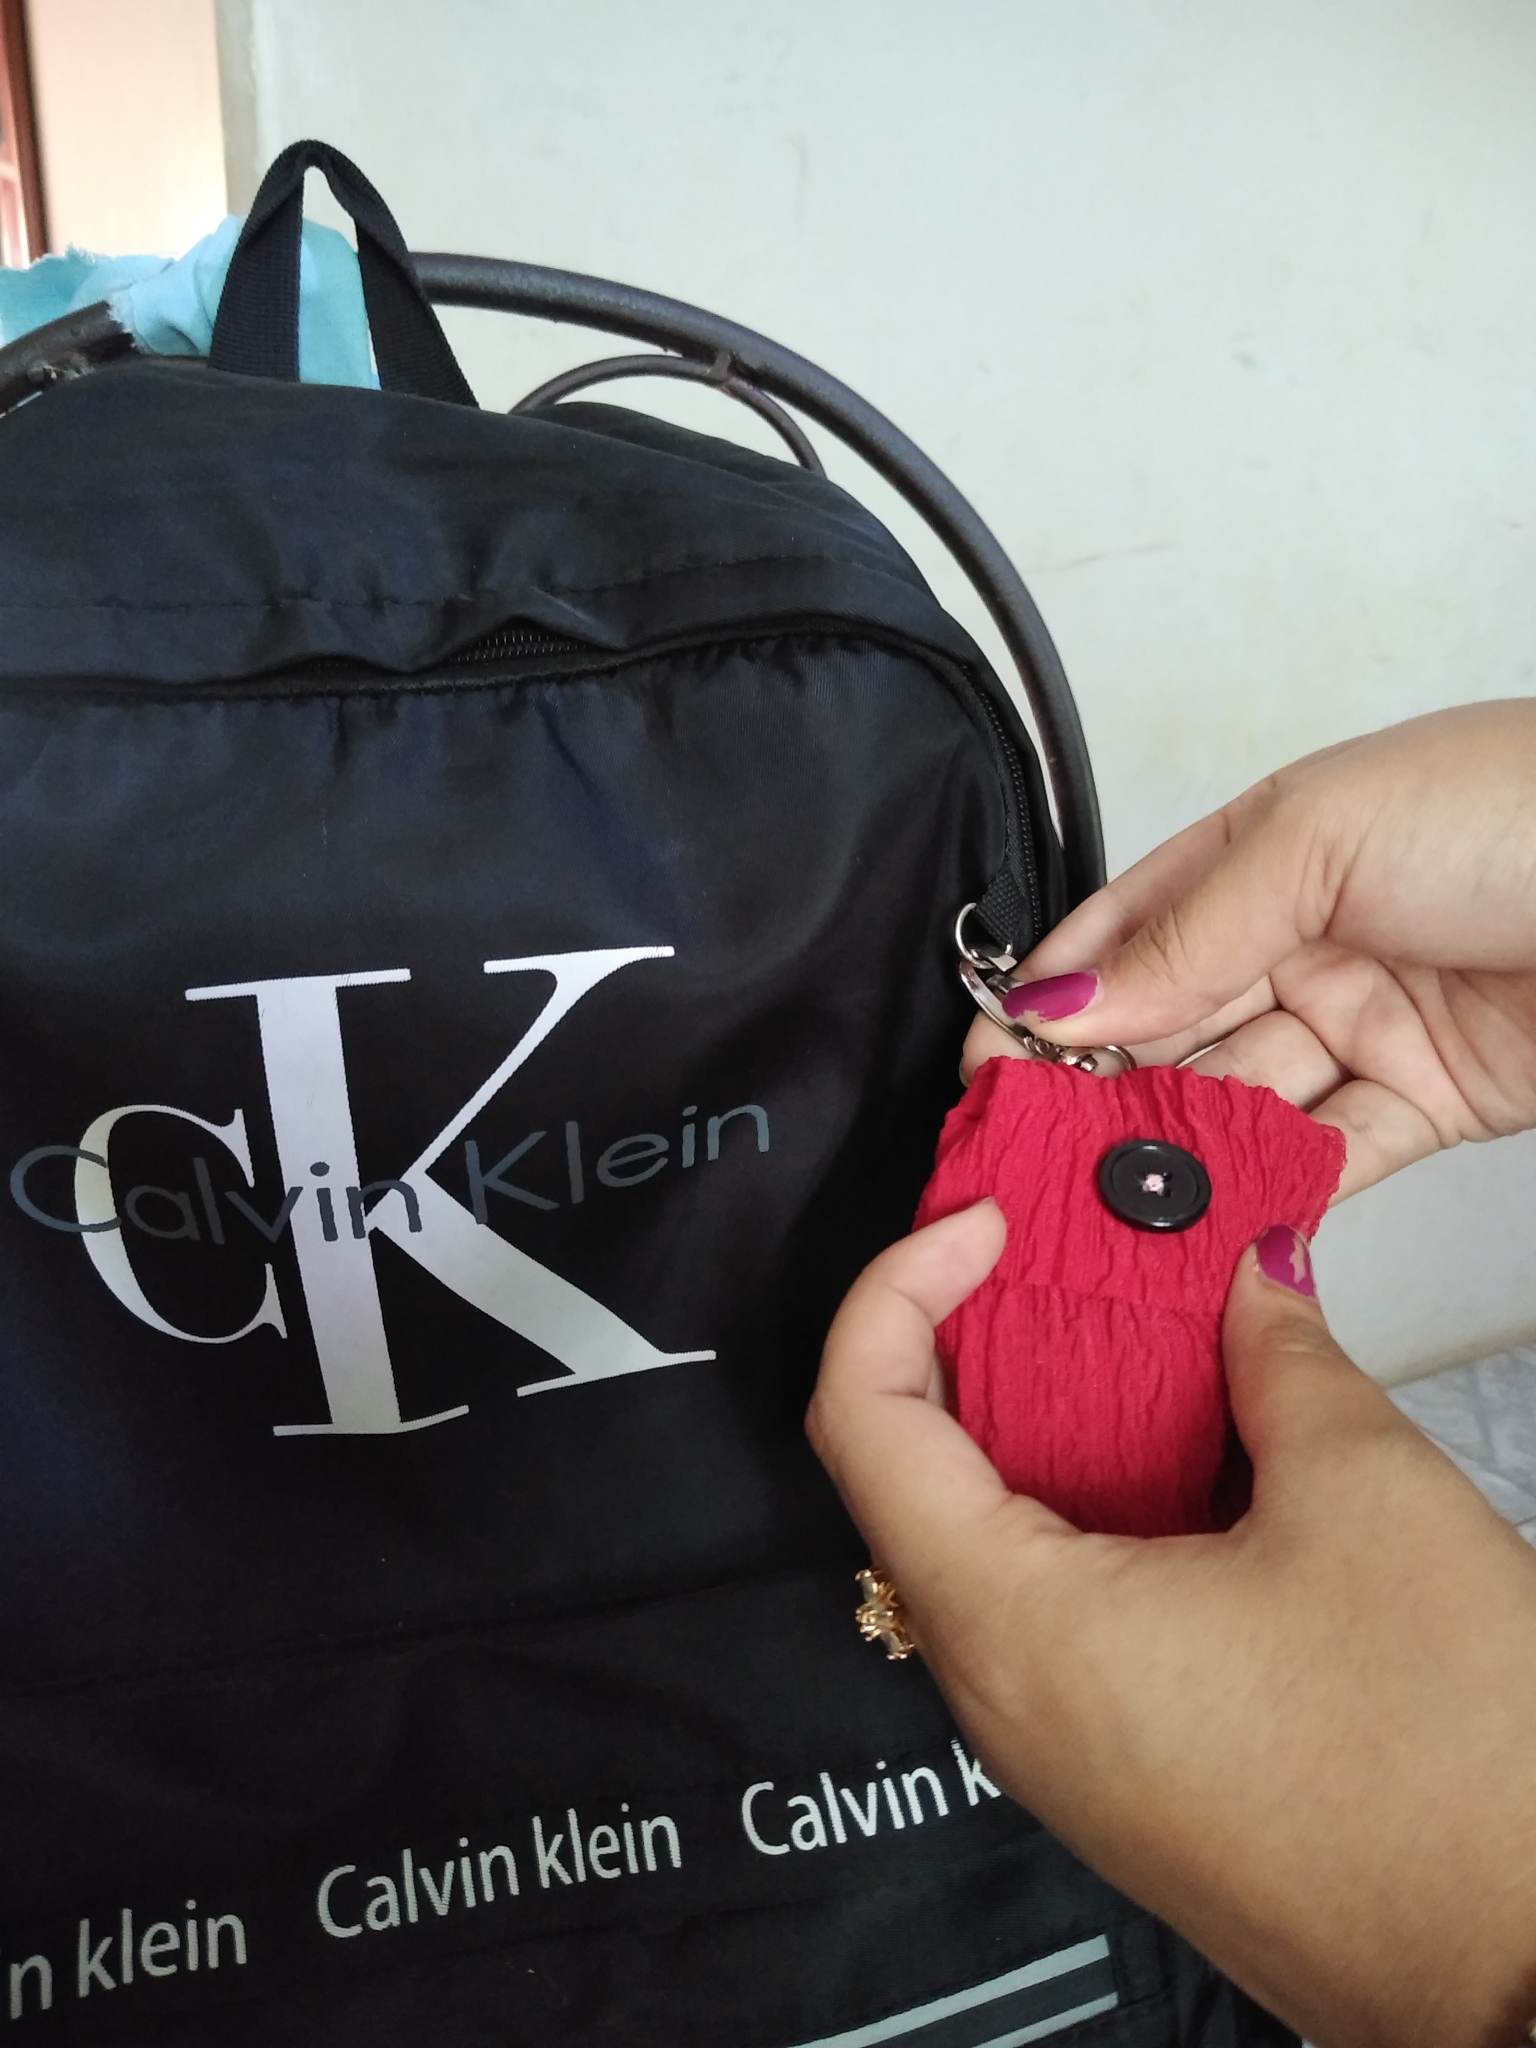
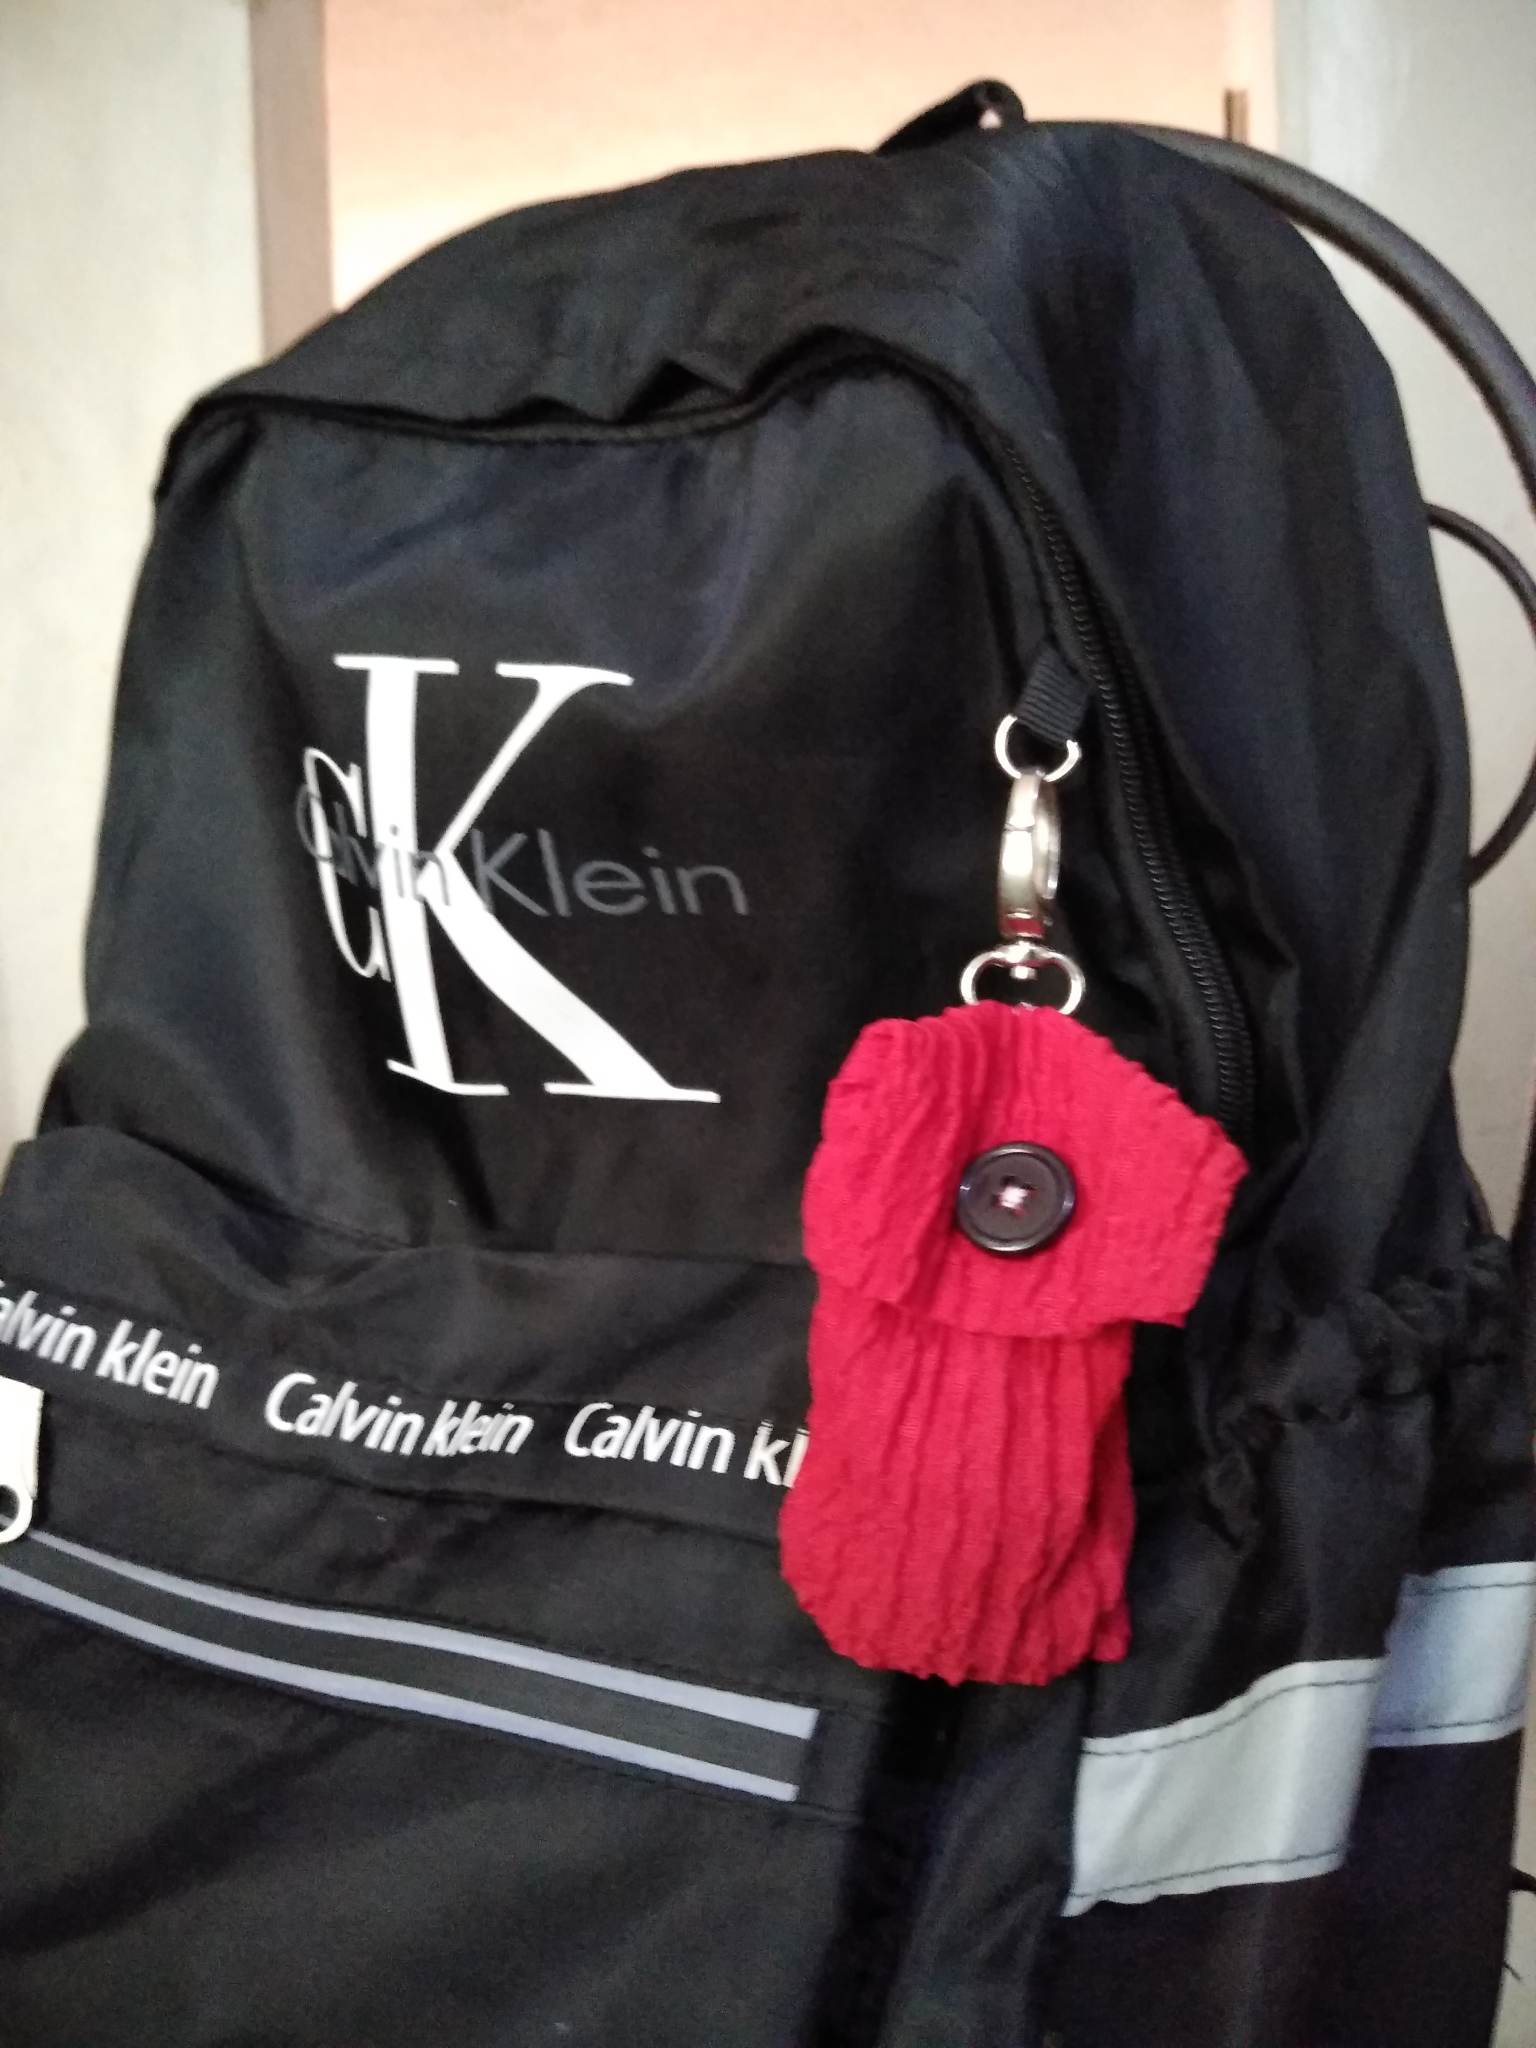
Paso 3: Procederemos ahora a coser el botón que será usado para abrir el estuche, y coseremos cuidadosamente, luego procederemos a coser el gancho que usaremos para guindar nuestro pequeño estuche.
Step 3: We will now proceed to sew the button that will be used to open the case, and we will sew it carefully, then we will proceed to sew the hook that we will use to hang our little case.
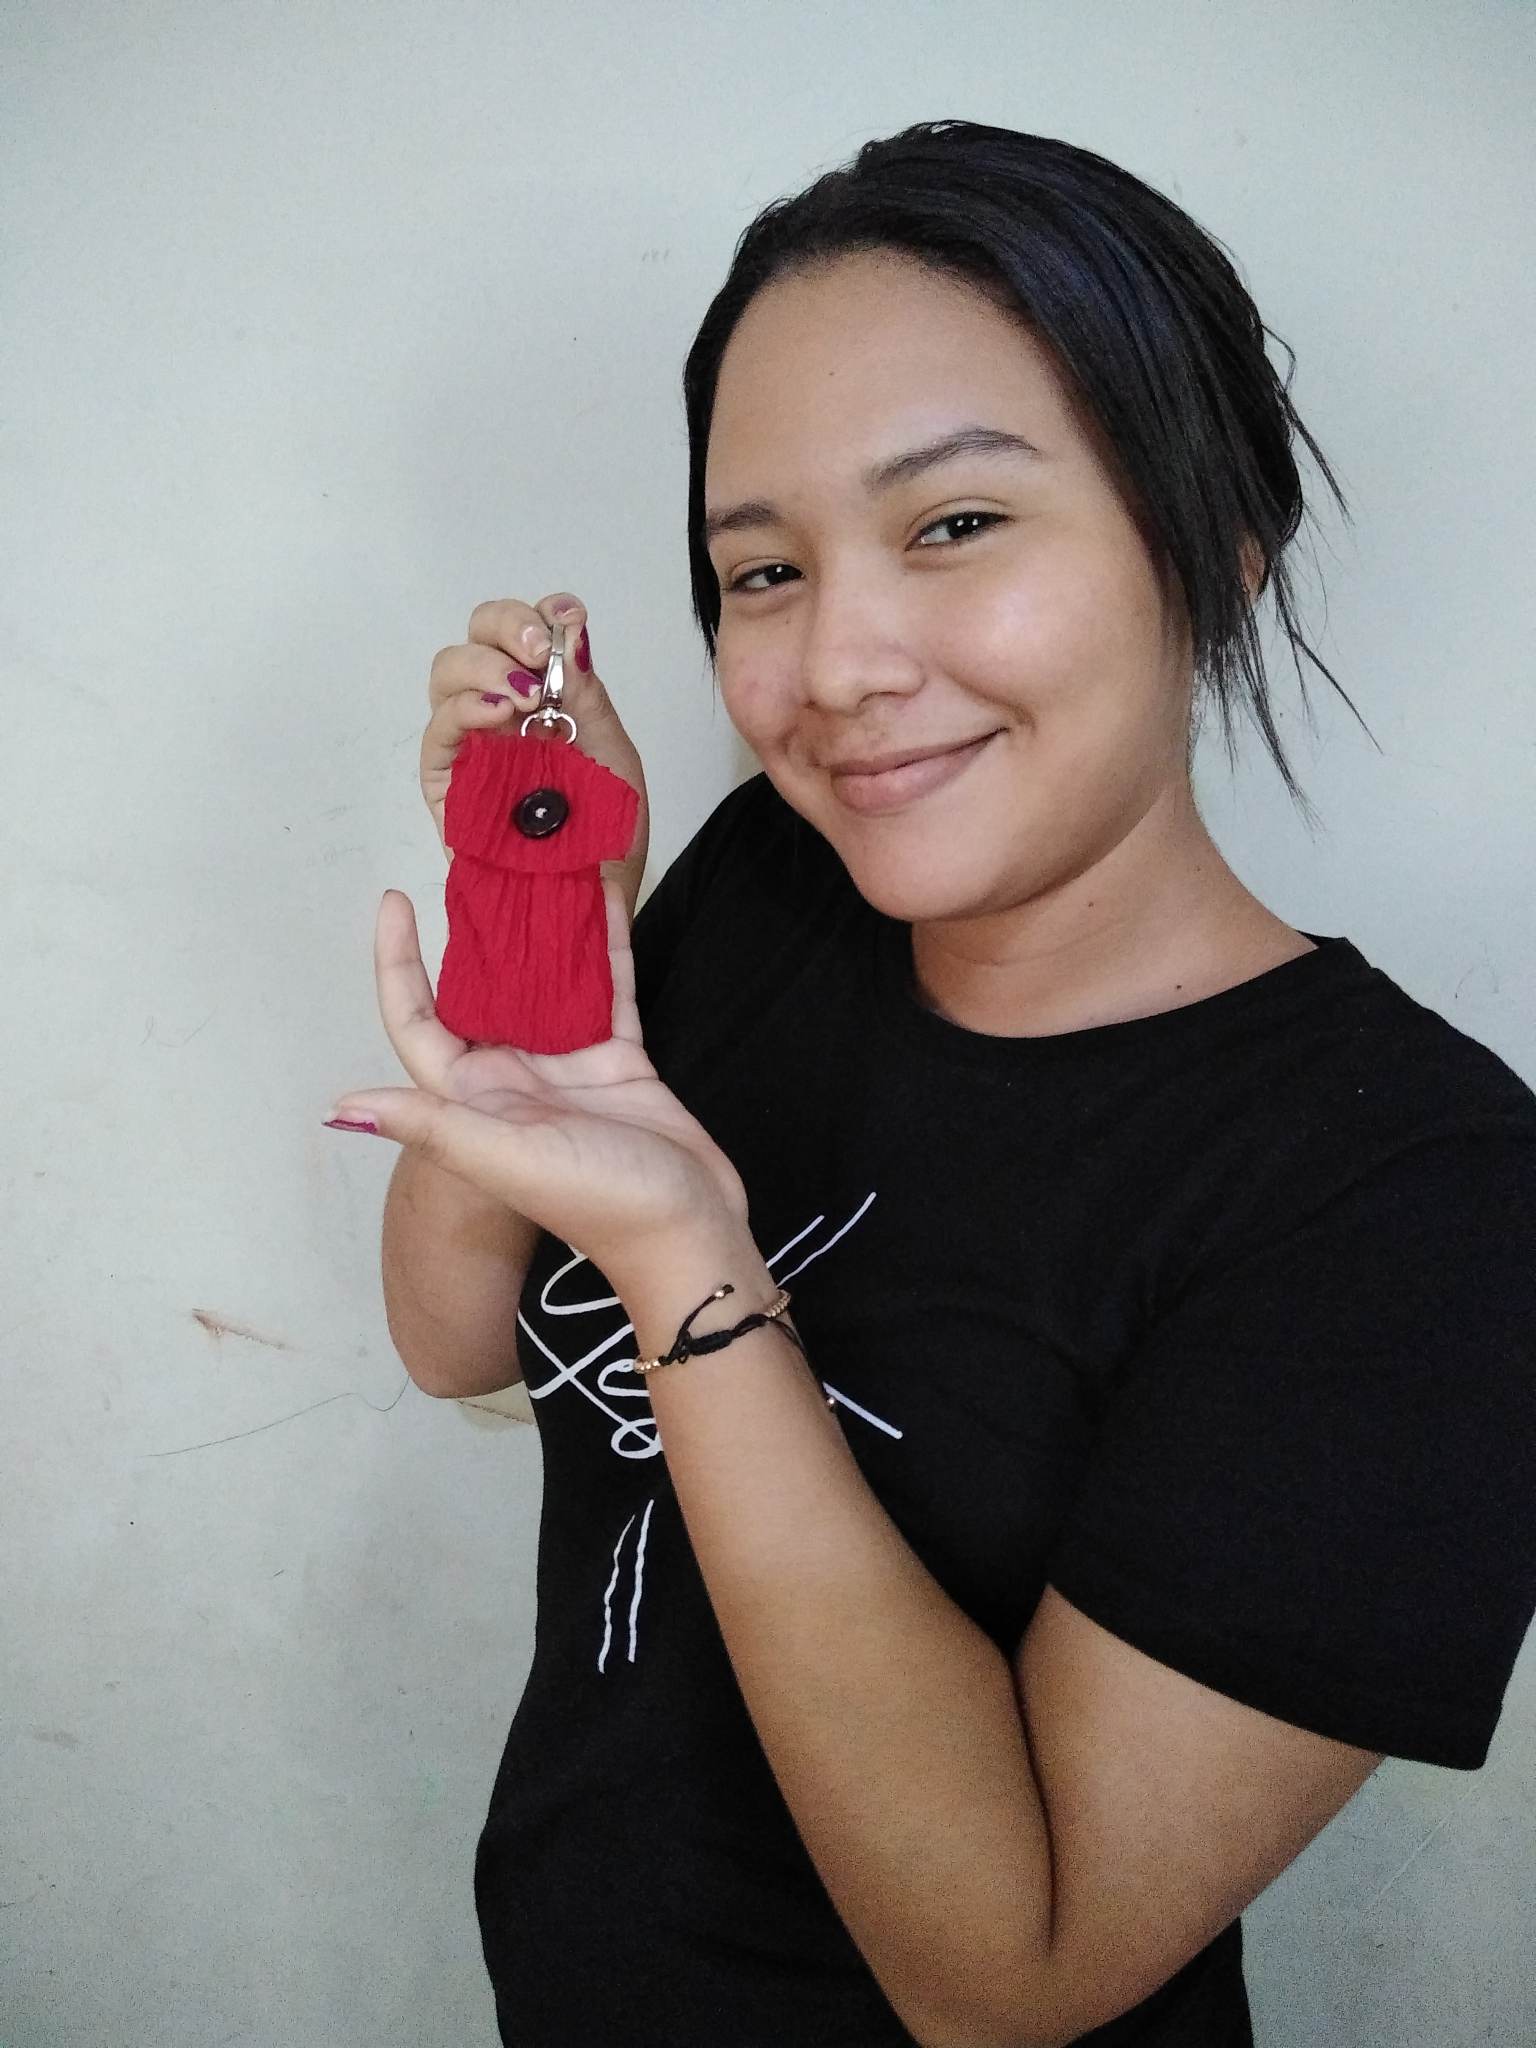
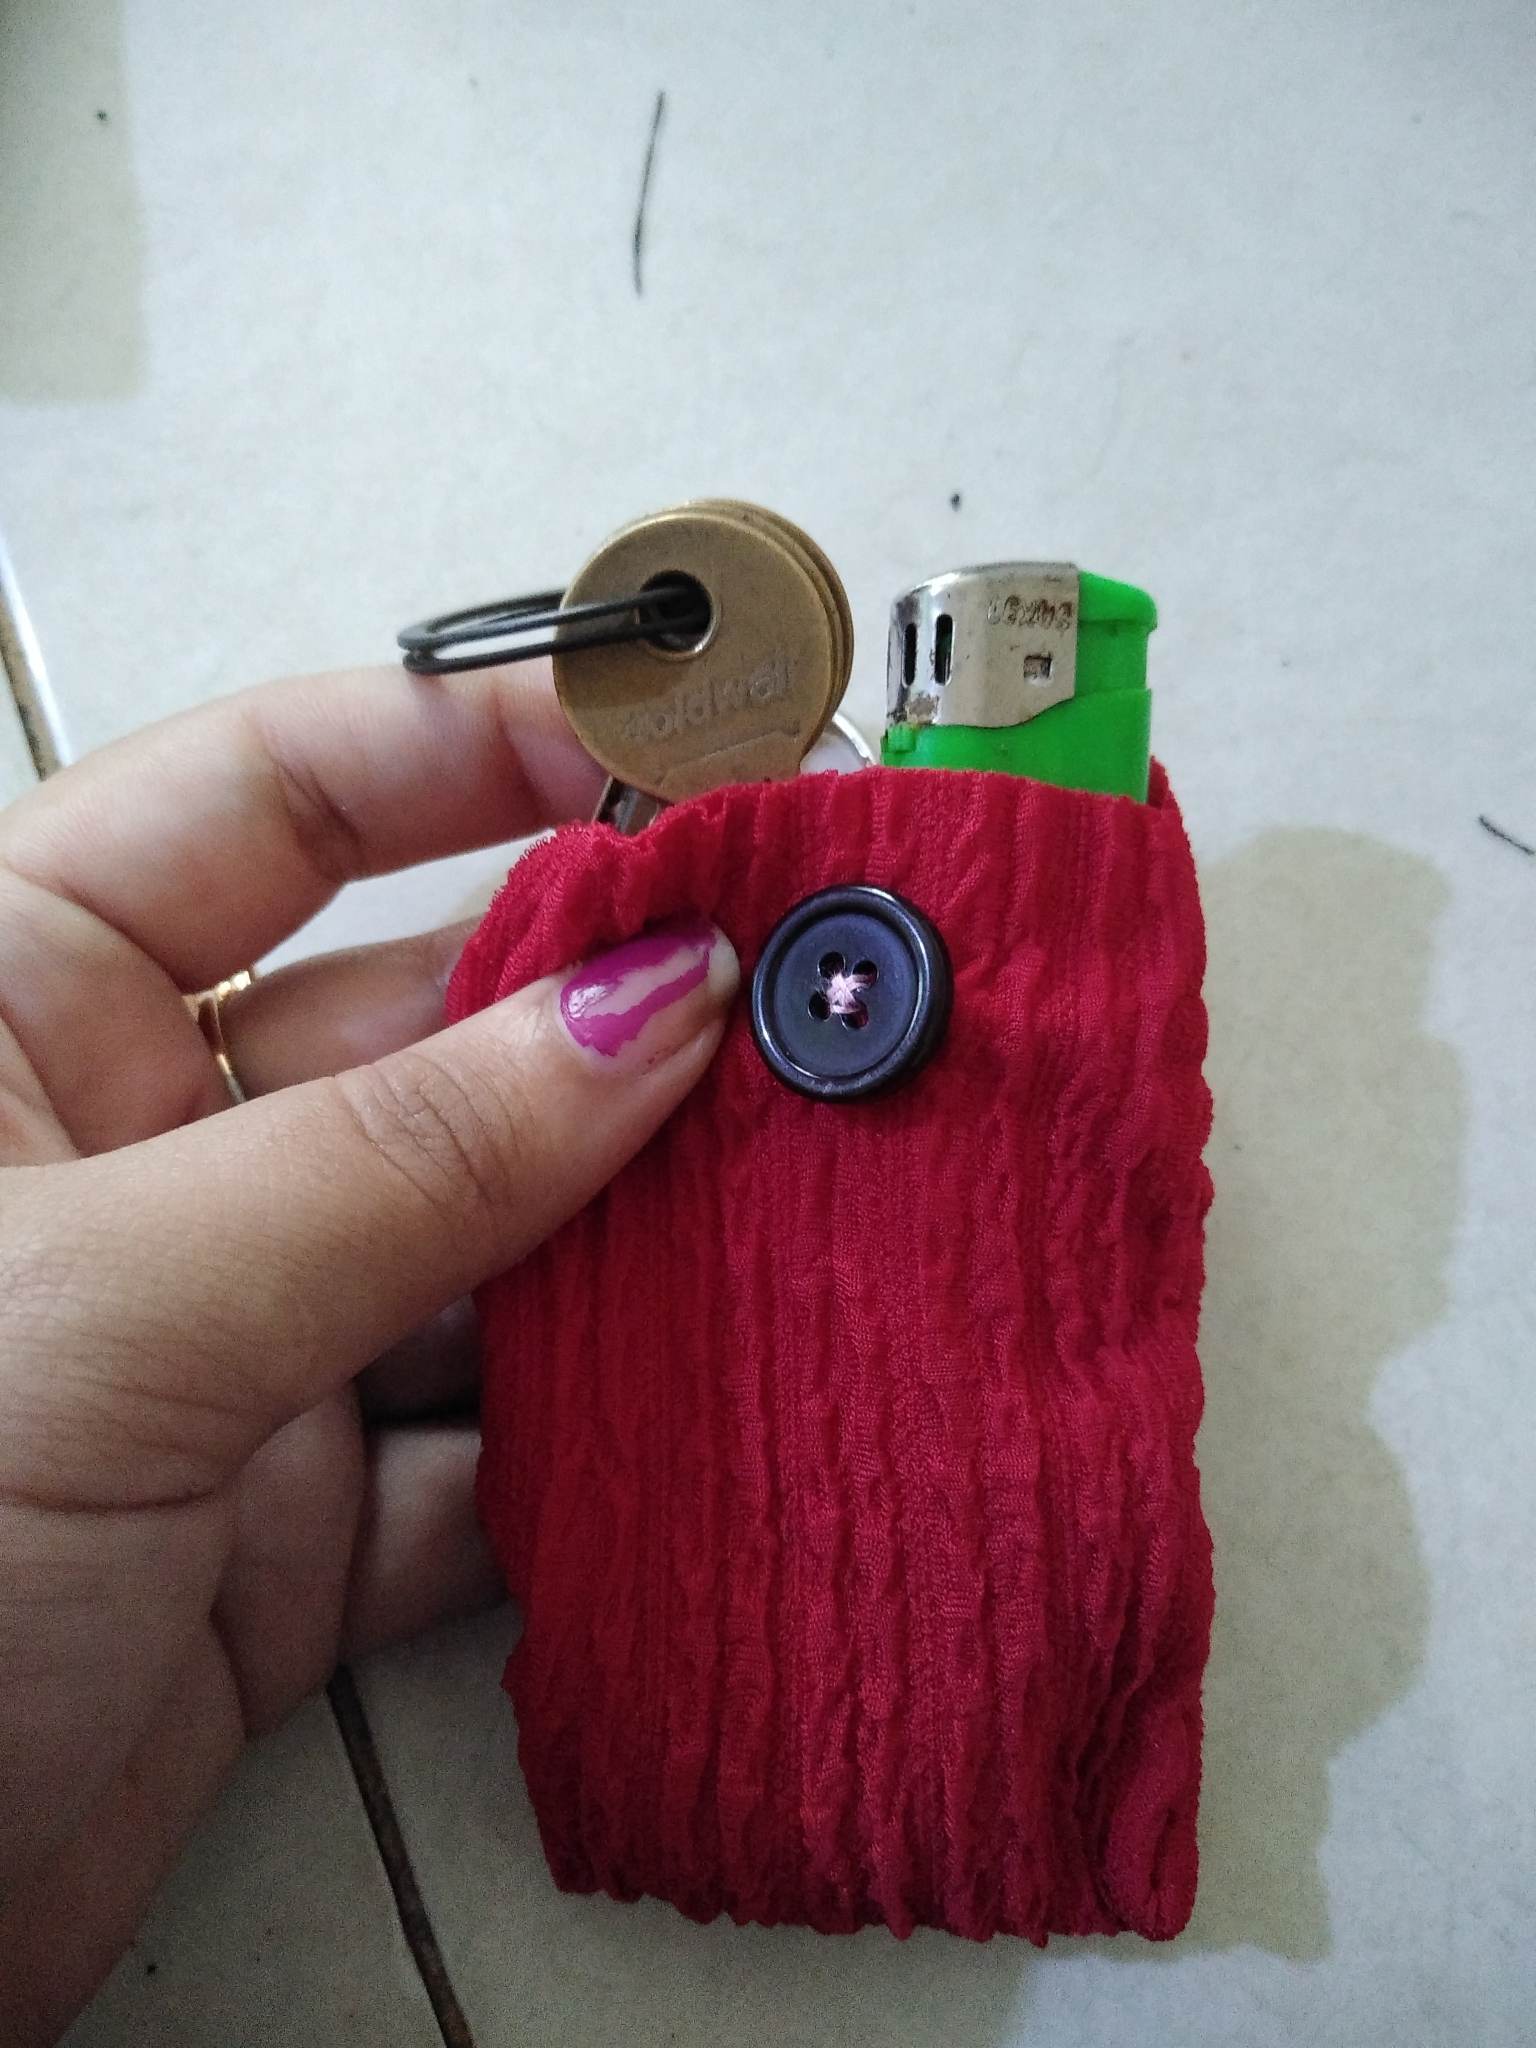
Final Result.

.png)
Thank you for sharing this post on HIVE!
Your content got selected by our fellow curator rezoanulvibes & you just received a little thank you upvote from us for your great work! Your post will be featured in one of our recurring compilations which are aiming to offer you a stage to widen your audience within the DIY scene of Hive. Stay creative & HIVE ON!
Please vote for our hive witness <3