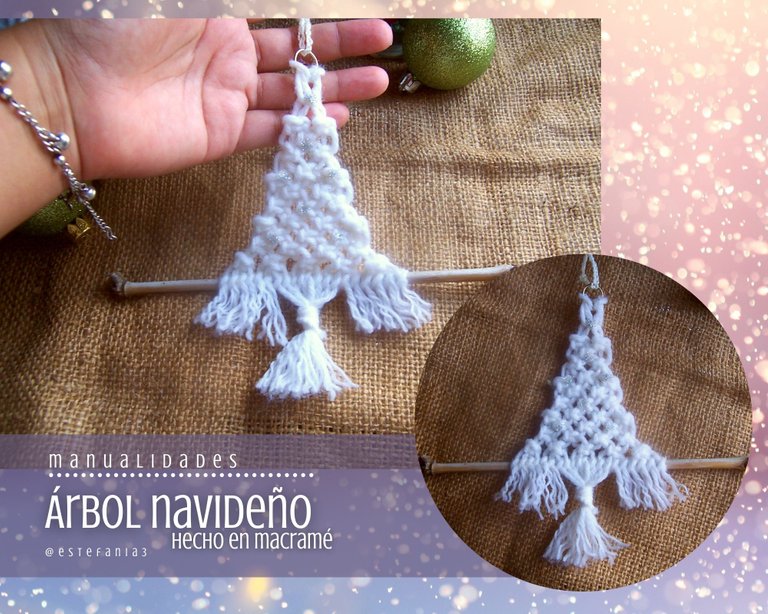
Manualidades: Árbol navideño hecho en macramé || Crafts: Christmas tree made in macramé 🎄♥

¡Hola Chicos!
Haciendo una pequeña pausa en los adornos para mi pequeño árbol de navidad quise hacer una decoración navideña para colgar en alguna pared de casa, pues la navidad tiene que estar en todos lados, no solo en un pequeño rincón de la sala.
El primer arte manual que aprendí fue el tejer pulseras en macramé cuando tenía 8 años. Desde entonces es algo que me encanta hacer para vender, regalar a mis seres queridos o hasta para mí.
Cuando descubrí todas las cosas que se pueden hacer en macramé a demás de unas sencillas pulseras, quedé impresionada y me dije que algún día intentaría hacer algo similar.
Lo triste es que no he tenido la oportunidad de tejer grandes cosas porque para este tipo de decoraciones se necesita un hilo lo suficientemente grueso para darles un tamaño aceptable y al llegarme estos hilos gruesos en casa pensé que al fin podría hacer algo de macramé.
Ok, no es el hilo más grueso del mundo, pero si me permite acercarme aun poco a lo que me gustaría y como primer gran proyecto me animé a tejer este pequeño árbol de navidad, que va acorde con las propuestas que les he estado trayendo estos días.
Les comentó un poco como he tejido este simpático árbol navideño,
¡Acompáñenme!
Hello Guys!
Taking a short break in the decorations for my little Christmas tree, I wanted to make a Christmas decoration to hang on a wall at home, because Christmas has to be everywhere, not just in a small corner of the room.
The first manual art I learned was weaving macramé bracelets when I was 8 years old. Since then it is something that I love to do to sell, to give to my loved ones or even to myself.
When I discovered all the things that can be made in macramé in addition to simple bracelets, I was impressed and told myself that one day I would try to do something similar.
The sad thing is that I have not had the opportunity to weave great things because for this type of decorations you need a thread thick enough to give them an acceptable size and when I got these thick threads at home I thought that at last I could make some macramé.
Ok, it is not the thickest thread in the world, but if it allows me to get even a little closer to what I would like and as the first big project I decided to weave this little Christmas tree, which is in accordance with the proposals that I have been bringing you these days.
He told them a little about how I have woven this nice Christmas tree,
Join me!
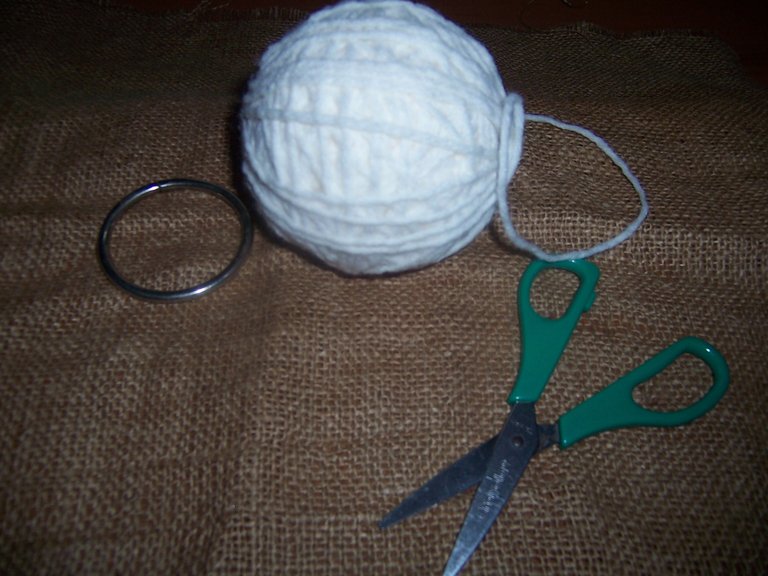
Para esta manualidad vamos a necesitar un aro, puede ser de madera, metal o plástico. En un principio yo he utilizado este de metal, pero luego lo sustituí por uno más pequeño.
También necesitaremos lana o algún hilo grueso, y por supuesto unas tijeras.
For this craft we are going to need a ring, it can be made of wood, metal or plastic. At first I used this metal one, but then I replaced it with a smaller one.
We will also need wool or some thick thread, and of course a pair of scissors.
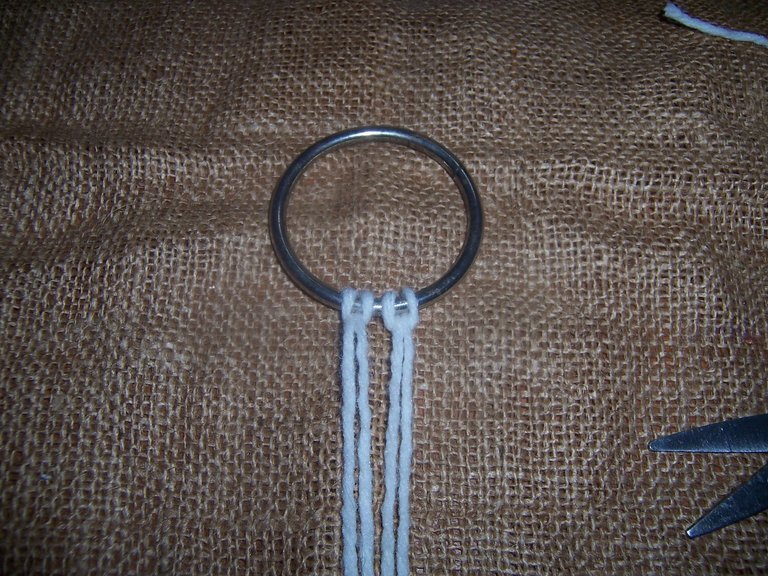
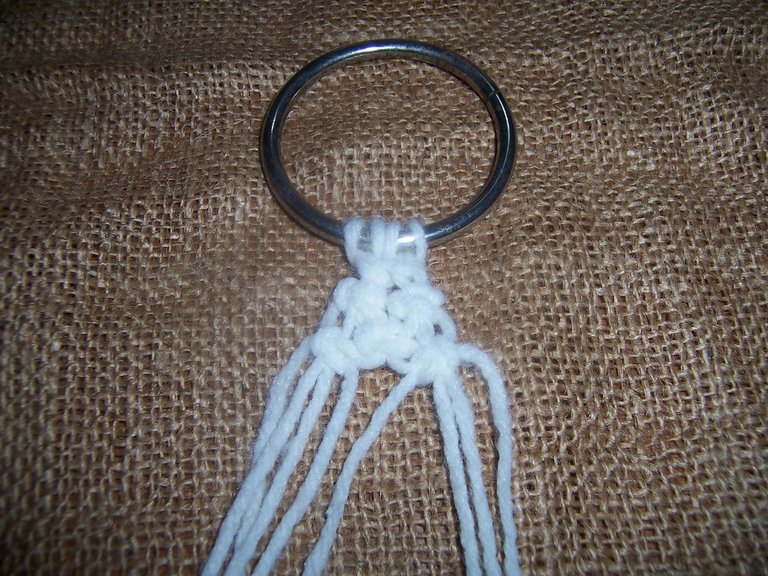
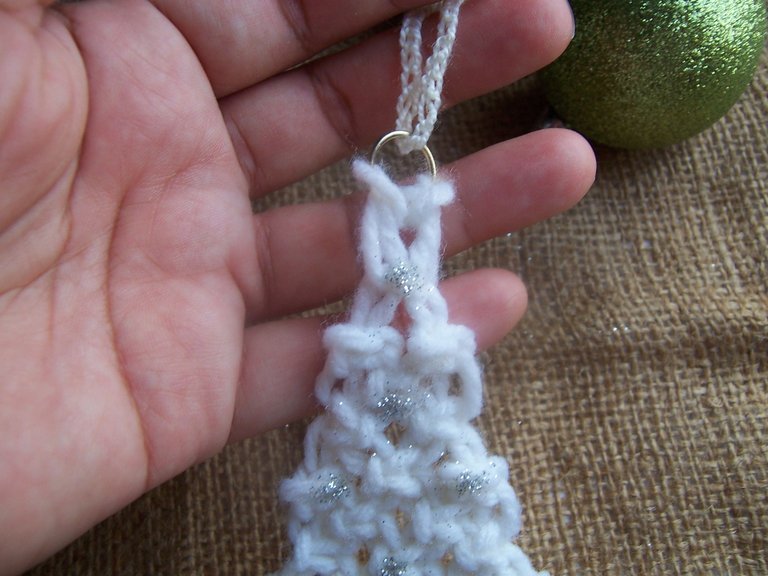
Primero vamos a cortar trozos de hilo de 80 cm, tomamos dos y las doblamos a la mitad, luego vamos a amarrarlas al aro de base tal como se muestra en la primera foto.
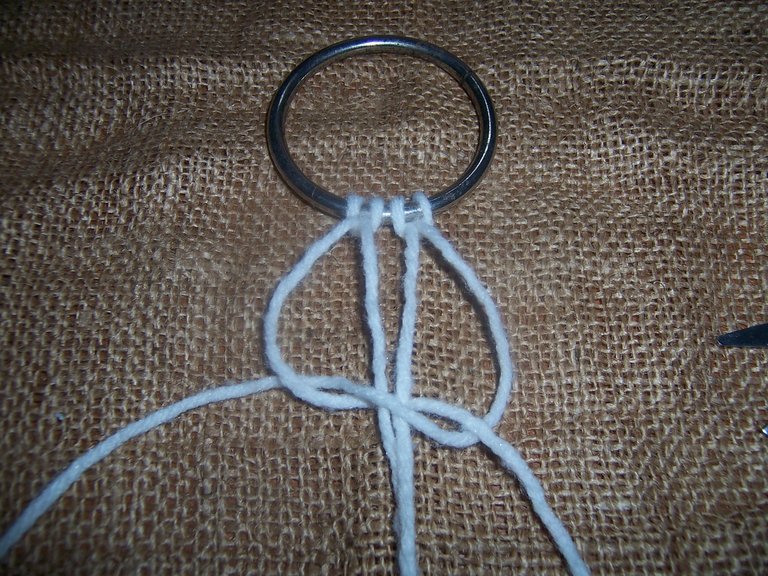
Este árbol lo tejeremos únicamente con nudos básicos macramé, primero hacemos dos nudos para iniciar.
Acá te comparto una imagen para que tengas una idea de como hacer cada nudo:
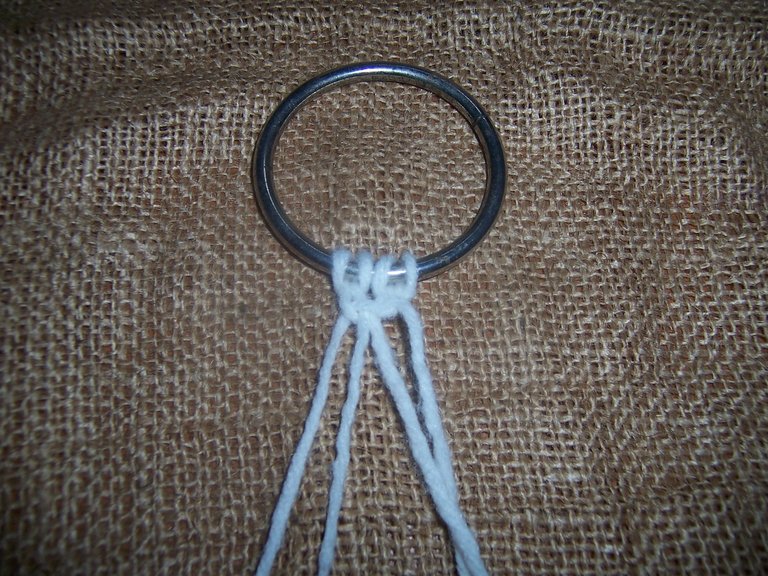
First we are going to cut pieces of thread of 80 cm, we take two and fold them in half, then we are going to tie them to the base ring as shown in the first photo.
We will weave this tree only with basic macramé knots, first we make two knots to start.
Here I share an image so that you have an idea of how to tie each knot:
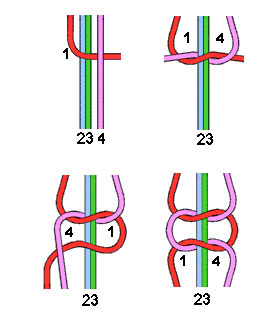
Fuente
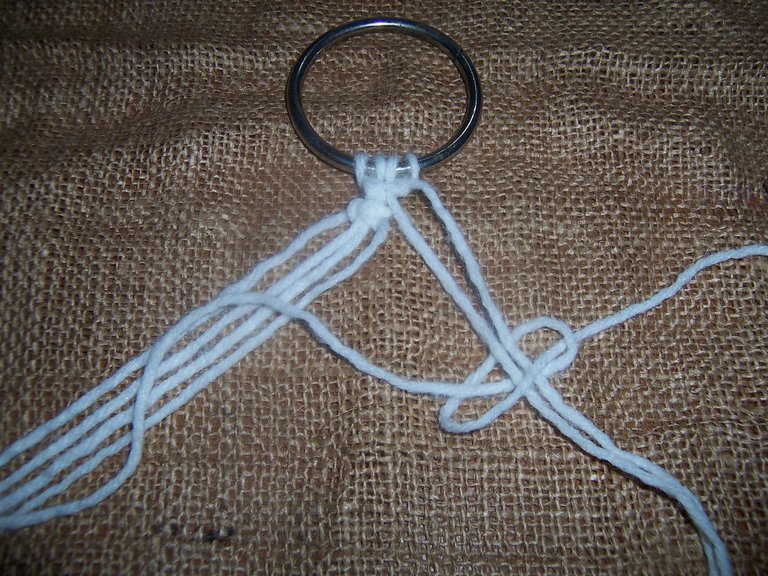
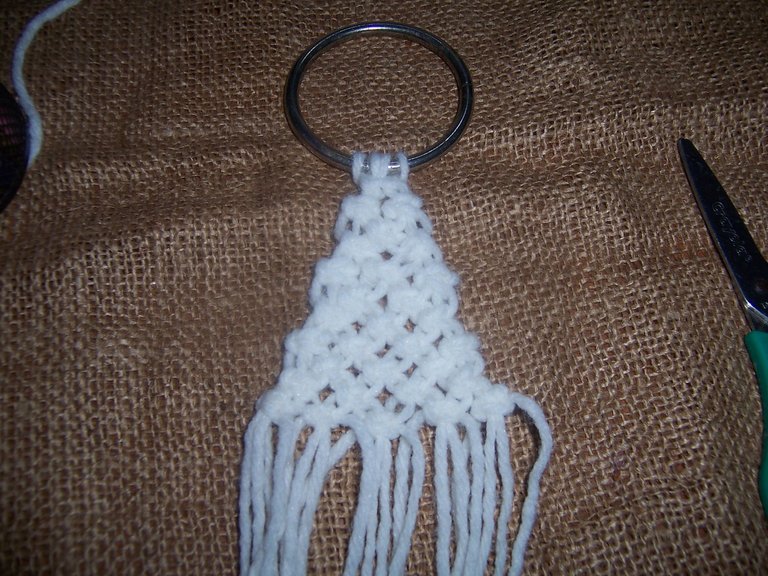
Vamos a ir agregando nuevos trozos de hilo cada dos vueltas, tomamos dos hilos de cada costado y sobre ellos vamos a montar dos puntos en macramé. Luego hacemos una vuelta con los hilos centrales y volvemos a tejer una vuelta con los nuevos hilos.
Se trabaja alternando hilos a modo de zigzag. Luego vamos a agregar dos nuevos trozos de hilo de la misma forma y seguimos la misma secuencia de puntos.
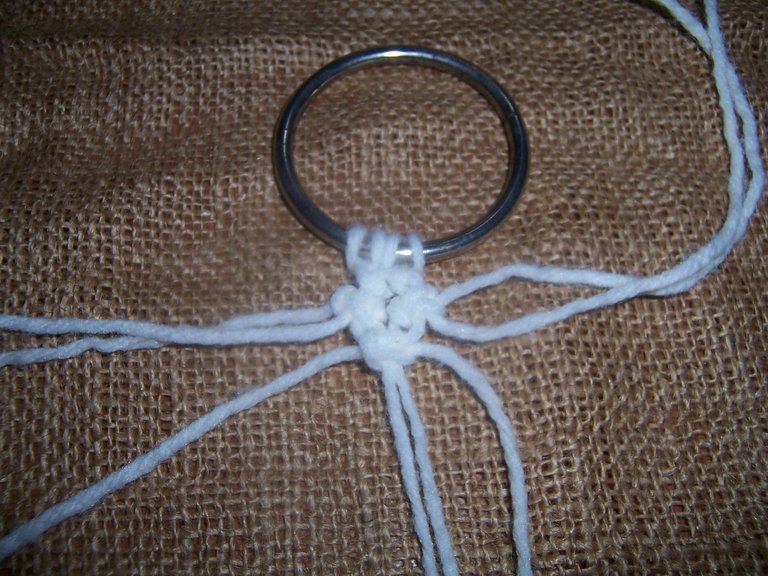
We are going to add new pieces of thread every two rounds, we take two threads from each side and on them we are going to mount two macramé stitches. Then we make a round with the central threads and we knit a round with the new threads again.
It is worked alternating threads in a zigzag fashion. Then we are going to add two new pieces of yarn in the same way and follow the same sequence of stitches.
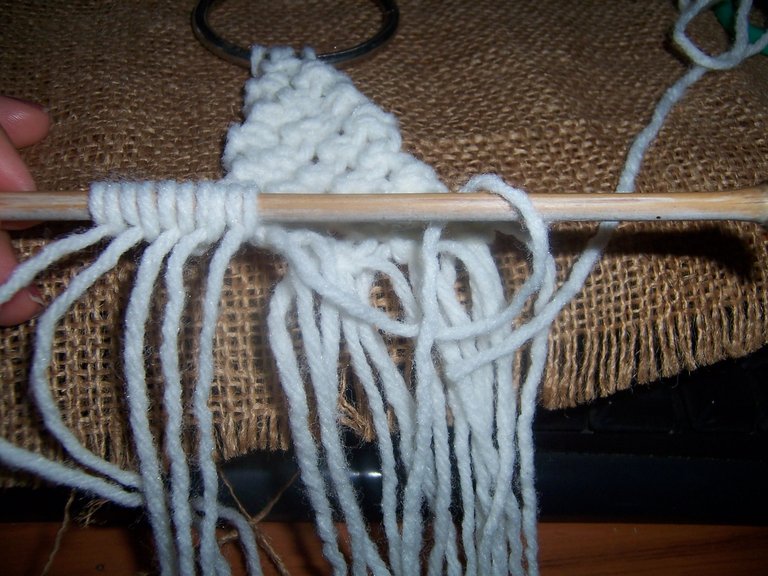
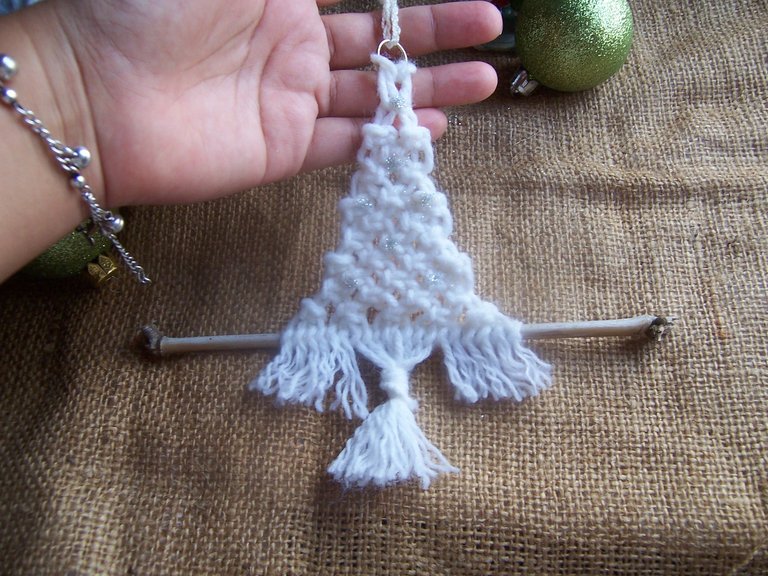
Vas a ir agregando hilos hasta lograr el tamaño ideal, luego es momento de agregar la pequeña rama de base, yo he utilizado una de bambú.
Tomamos cada uno de los hilos y vamos a ir ajustándolos a la rama, tal como lo muestro en la foto. Por cada hilo hacemos dos lazadas, así hasta hacerlo con todos.
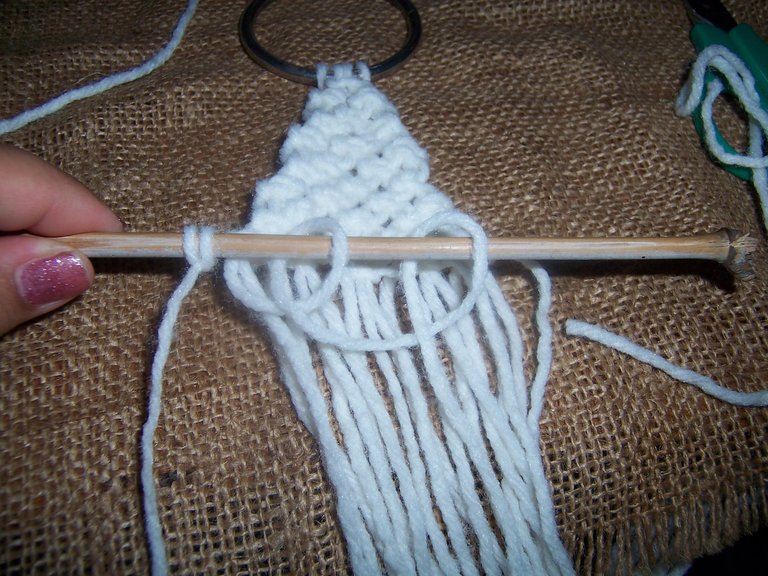
You are going to add threads until you achieve the ideal size, then it is time to add the small base branch, I have used a bamboo one.
We take each of the threads and we are going to adjust them to the branch, as I show in the photo. For each thread we make two loops, like this until we do it with all of them.
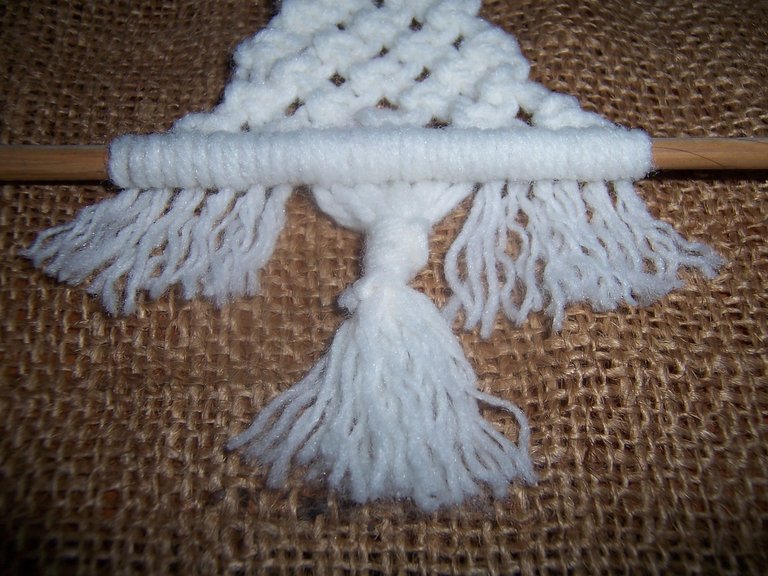
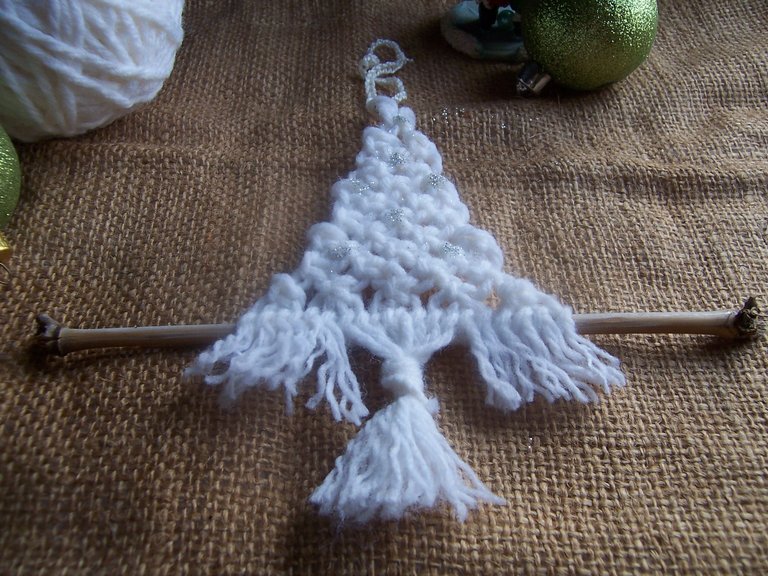
Con los hilos centrales vamos a hacer como especie de tronco del árbol, tomamos un trozo de hilo adicional y hacemos varios nudos en espiral.
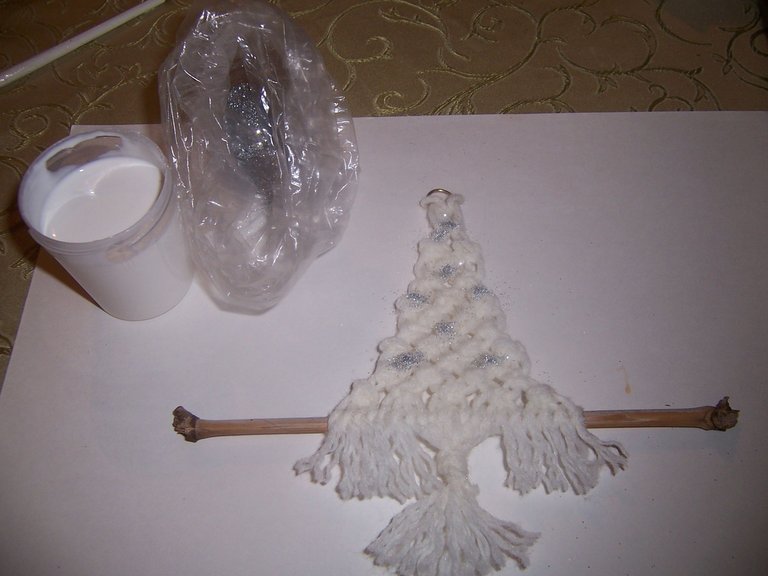
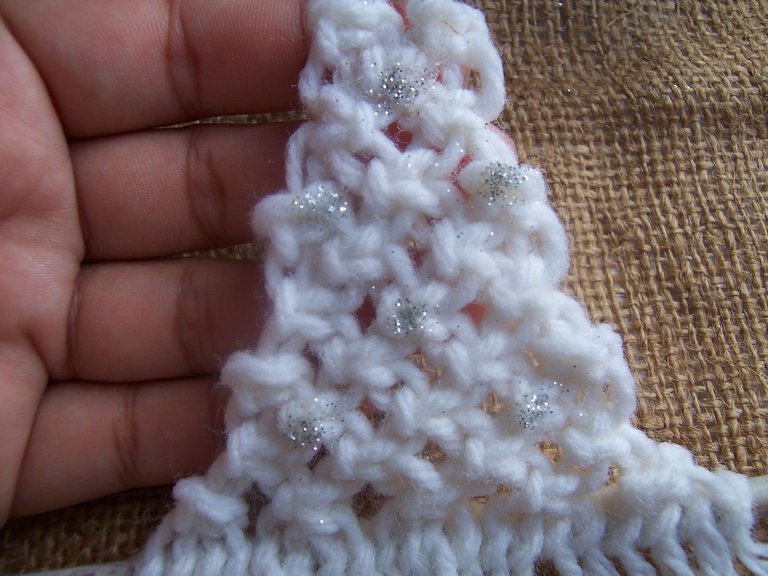
Cortamos el excedente del resto de los hilos y con un peine vamos a separar las hebras. Como toque final he agregado un poco de escarcha plateada, coloqué pegamento en ciertos puntos y luego agregué de a poco la escarcha.
With the central threads we are going to make a kind of tree trunk, we take an additional piece of thread and make several spiral knots.
We cut the excess from the rest of the threads and with a comb we are going to separate the threads. As a final touch I have added a little silver glitter, glued some spots and then added the glitter little by little.
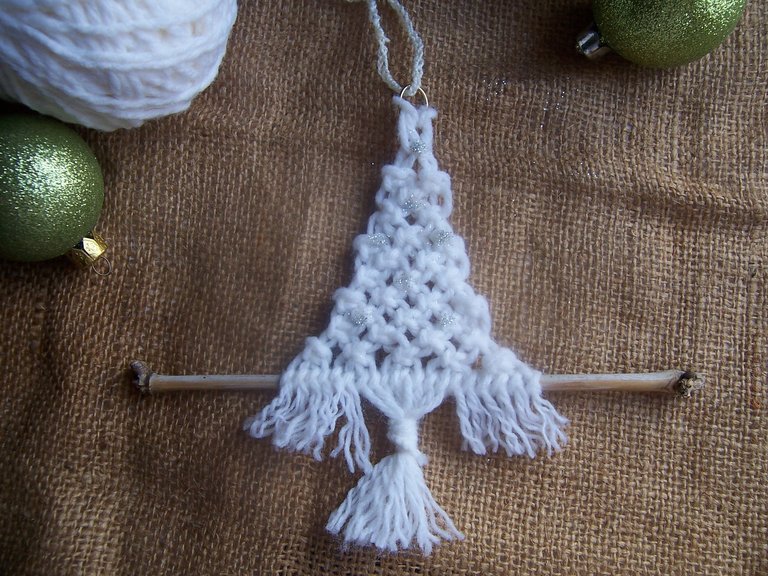

Espero haya sido de tu agrado y provecho.
Un gran abrazo a todos, y nos leemos en un próximo post
• Lakrearte en Hive •
Att: Estefania Garcia ♥

Imágenes y separadores de mi autoría
Portada editada en Canva
Te ha quedado precioso, felicidades @estefania3! 💖
Hola! Muchas gracias 😊♥