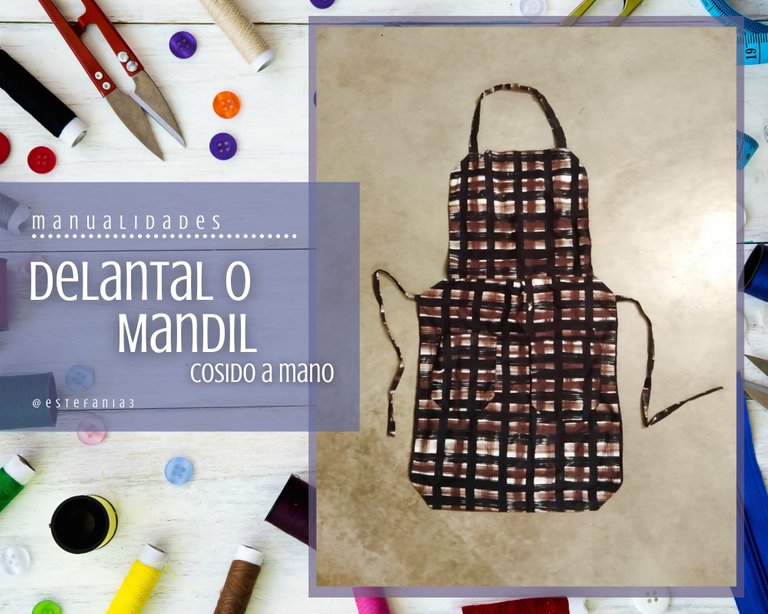
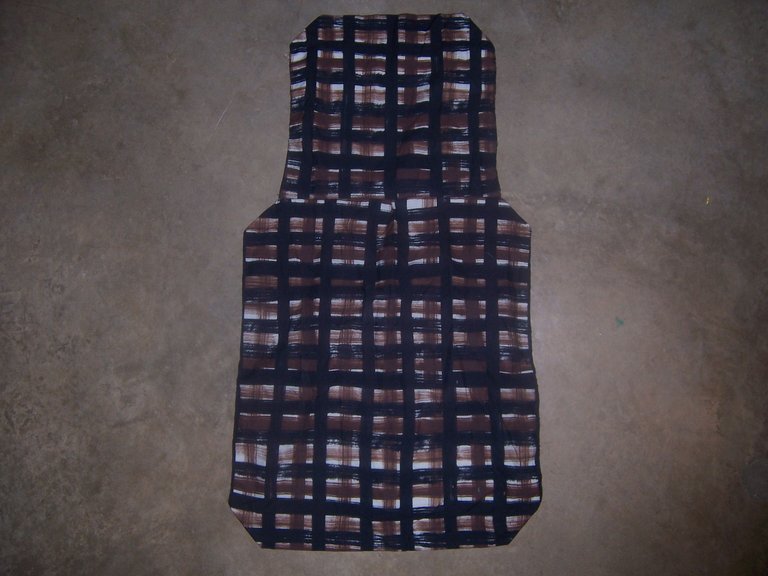
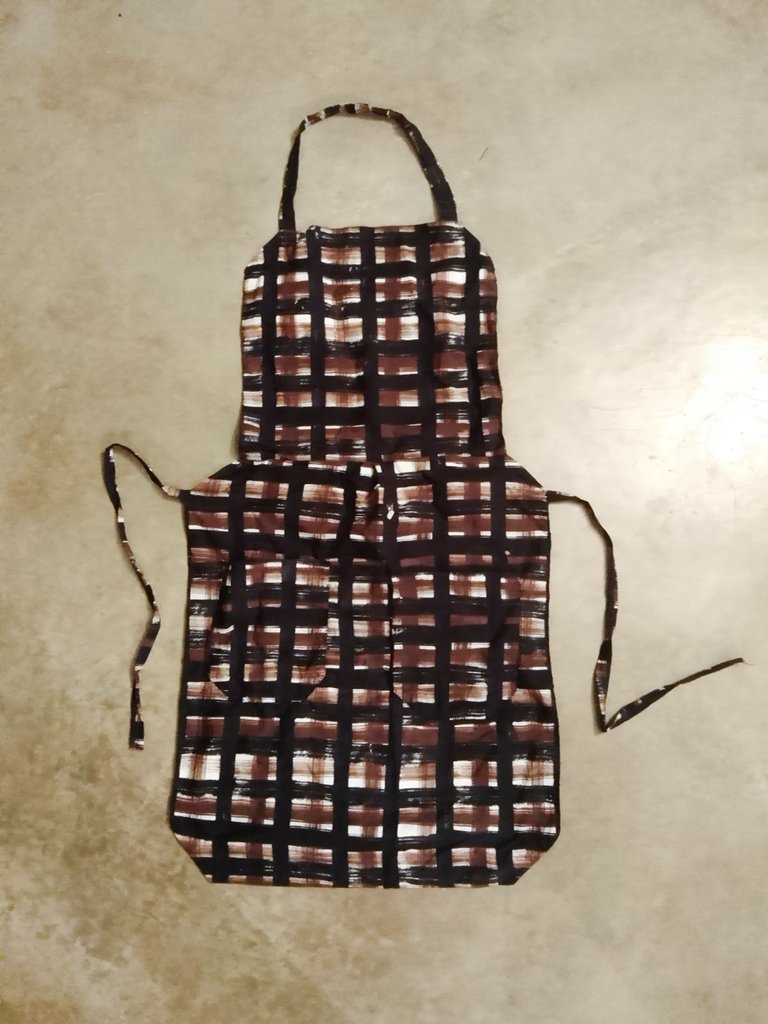
Manualidades: Delantal o Mandil, hecho con tela reciclada y cosido a mano || Crafts: Apron, made with recycled fabric and hand-sewn ♥🧵

¡Hola Chicos!
Actualmente, estoy haciendo un curso de repostería y es imprescindible que contemos con un delantal o mandil para proteger nuestra ropa de cualquier alimento que estemos manipulando.
Yo tenía la idea de hacerme un delantal con la tela de una falda que era de mi mamá que contaba con suficiente tela como para elaborar mi delantal y otros proyectos. Me atemoricé un poco porque no cuento con una máquina de coser, todo el trabajo lo haría a mano.
Se me ocurrió preguntarle a una señora que vive cerca de mi casa y trabaja con costura para ver cuánto me cobraba por hacerme un delantal desde cero. La mano de obra salía en $3 y adicional yo debía comprar la tela. Me pareció un poco costoso, no contaba con el dinero para ese momento y además debía sumar el costo del transporte y el tiempo que debía invertir en buscar la tela.
Cómo era algo urgente que debía tener para mis clases, finalmente me decidí y comencé a coser mi propio delantal.
Yo no soy costurera, pero mi abuela me enseñó varias cosas y yo también me divertía cuando pequeña haciendo cintillo de tela y hasta pequeños peluches y carteras. Esto me daba más o menos la idea de lo que debía hacer y los pasos que debía seguir para lograr crear mi delantal.
Siento que para haberlo hecho a mano quedó bastante bien y cumple su función principal. No debemos limitarnos nunca, sé creativo e ingéniatelas como yo.
Así que no te digo más y te invito a que vayamos al paso a paso para que puedas hacer tu propio mandil o delantal...
¡Acompáñame!
Hello Guys!
Currently, I am doing a pastry course and it is essential that we have an apron or apron to protect our clothes from any food that we are handling.
I had the idea of making an apron with the fabric of a skirt that belonged to my mother, who had enough fabric to make my apron and other projects. I was a bit scared because I don't have a sewing machine, I would do all the work by hand.
It occurred to me to ask a lady who lives near my house and works with sewing to see how much she charged me to make an apron from scratch. The labor cost was $ 3 and additionally I had to buy the fabric. It seemed a bit expensive to me, I did not have the money for that moment and also had to add the cost of transport and the time that I had to invest in looking for the fabric.
As it was an urgent thing to have for my classes, I finally made up my mind and started sewing my own apron.
I am not a seamstress, but my grandmother taught me various things and I also had fun when I was little making cloth headbands and even small stuffed animals and purses. This gave me more or less the idea of what I should do and the steps that I had to follow in order to create my apron.
I feel that for having done it by hand it was quite good and it fulfills its main function. We must never limit ourselves, be creative and engender them like me.
So I won't tell you more and I invite you to go step by step so that you can make your own apron or apron ...
Join me!
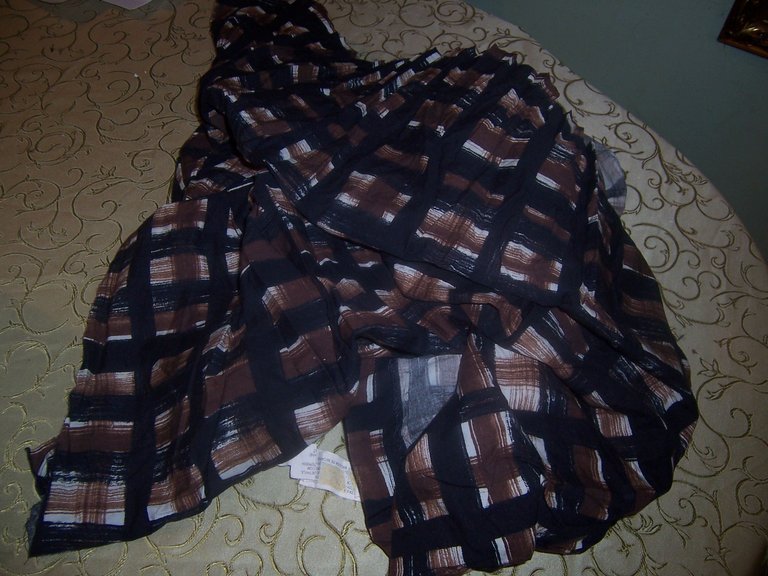
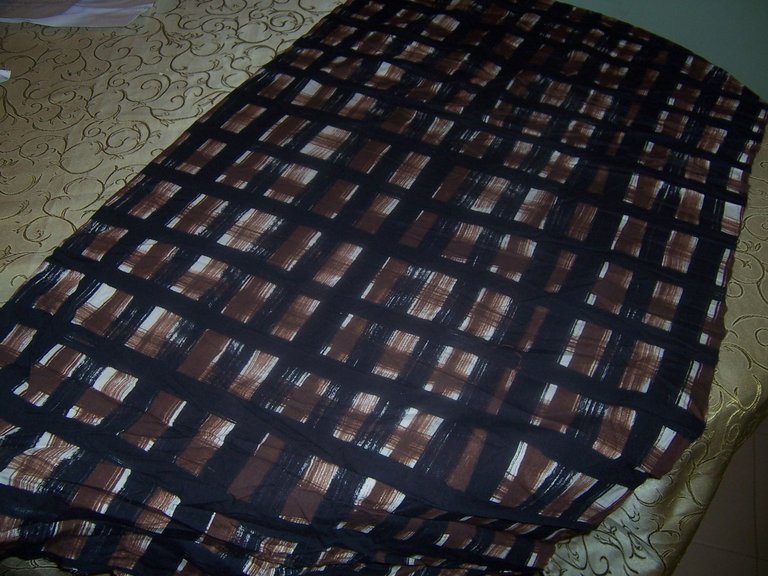
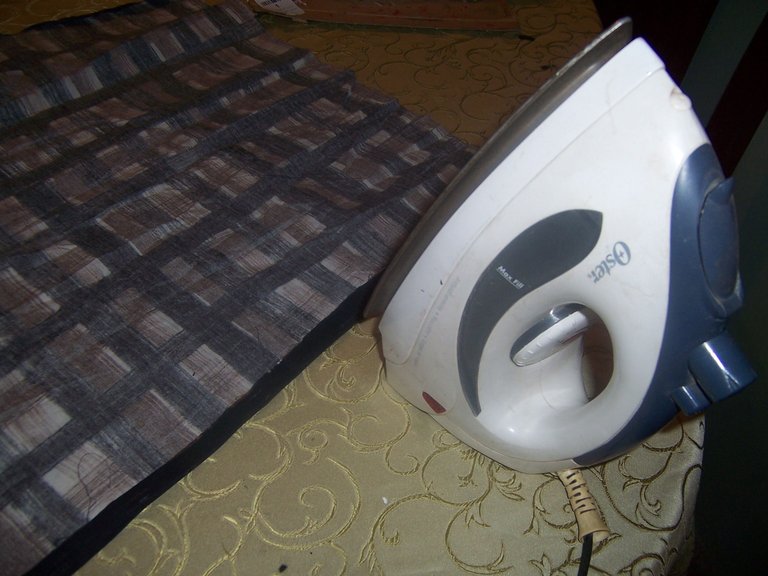
Lo primero que hice fue cortar la falda, quitar todas las costuras para que quedara únicamente la tela. Cómo la falda tenía pliegues, era necesario utilizar una plancha para alisarla.
Coloqué el gran trozo de tela sobre una mesa y fui planchando poco a poco hasta todo quedará perfecto.
The first thing I did was cut the skirt, remove all the seams so that only the fabric remained. As the skirt had pleats, it was necessary to use an iron to smooth it.
I placed the large piece of cloth on a table and was ironing little by little until everything would be perfect.
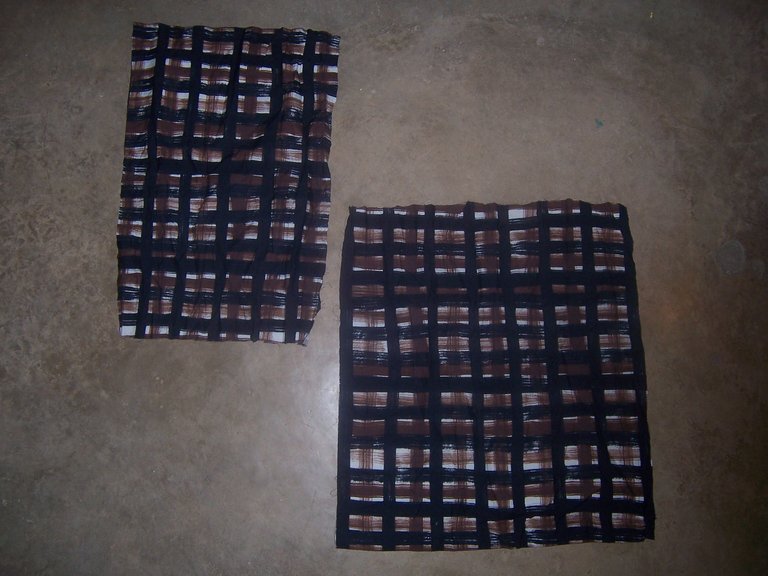
Luego medí mi cintura y corte un trozo de tela que cubriera por completo mi cintura. Para el pecho, corte otro trozo de tela menos ancho. Acomodé los trozos de tela para ver cómo se vería y corte los excedentes.
Then I measured my waist and cut a piece of fabric that completely covered my waist. For the chest, cut another piece of fabric less wide. I arranged the pieces of fabric to see what it would look like and cut off the excess.
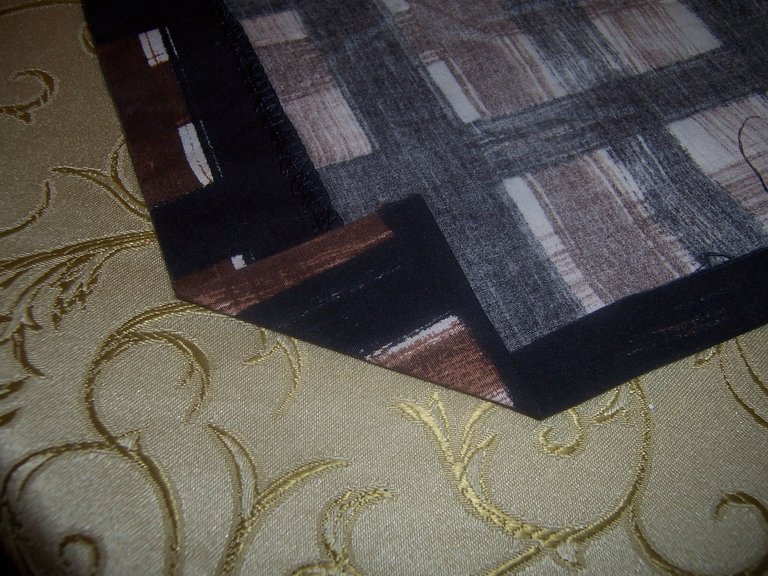
Hice un doblez de aproximadamente un centímetro por los bordes de ambos trozos de tela y fui aplanando con ayuda de la plancha.
Doblé las esquinas hacia el interior del delantal y planché para darle forma.
I made a fold of approximately one centimeter around the edges of both pieces of fabric and I was flattening with the help of the iron.
I folded the corners to the inside of the apron and ironed to shape.

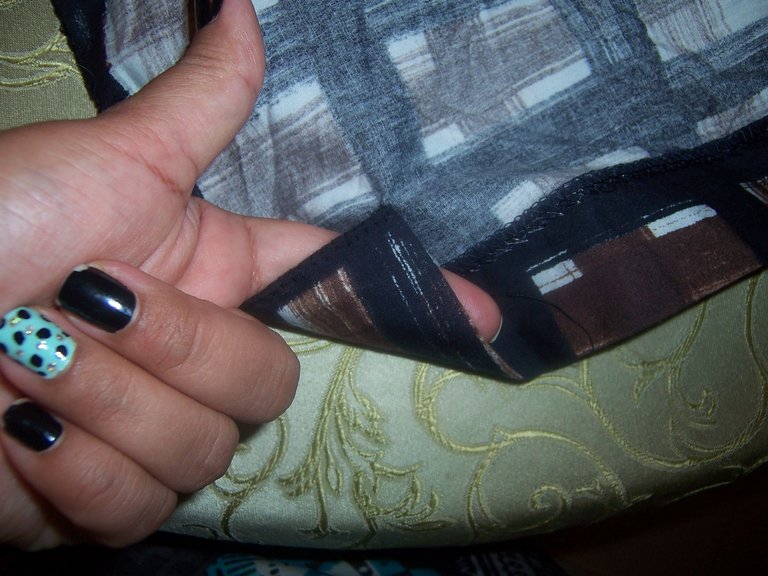
Aseguré todos los dobleces de ambos trozos de tela con una costura sencilla en hilo color negro. Me aseguré de coser muy bien los pequeños triángulos que se formaron al doblar.
Aseguré todos los dobleces de ambos trozos de tela con una costura sencilla en hilo color negro. Me aseguré de coser muy bien los pequeños triángulos que se formaron al doblar.
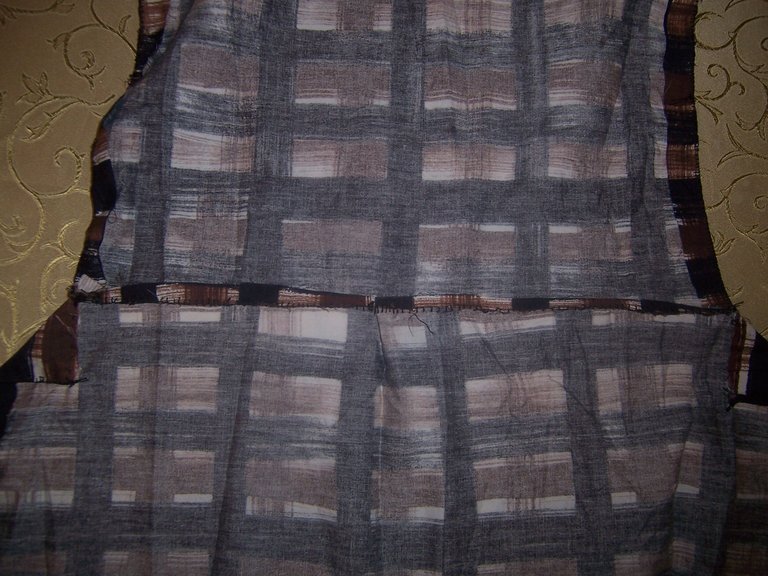
Luego tomé ambos trozos de tela y los uni por uno de sus costados.
Ya en este punto el cuerpo del delantal estaba completamente hecho, ahora solo me restaba hacer las tiras con las que me lo amarraría al cuerpo.
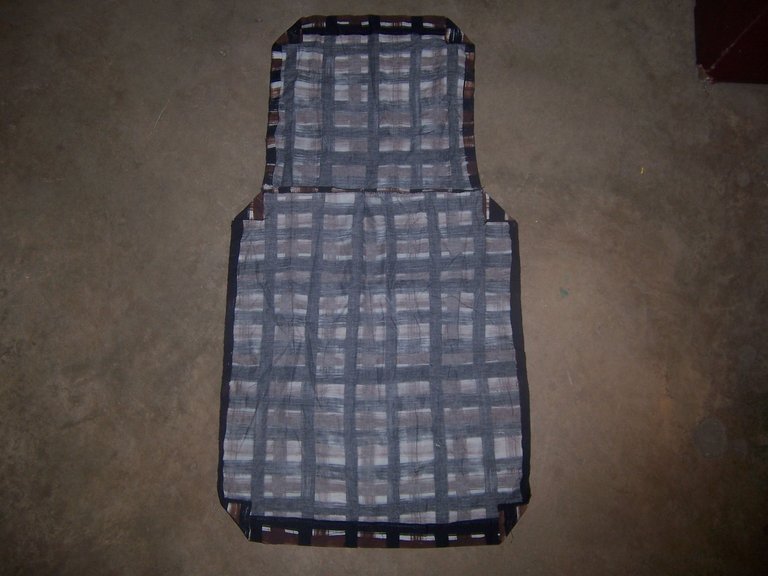
Then I took both pieces of cloth and joined them on one side.
At this point the body of the apron was completely made, now I only had to make the strips with which I would tie it to the body.
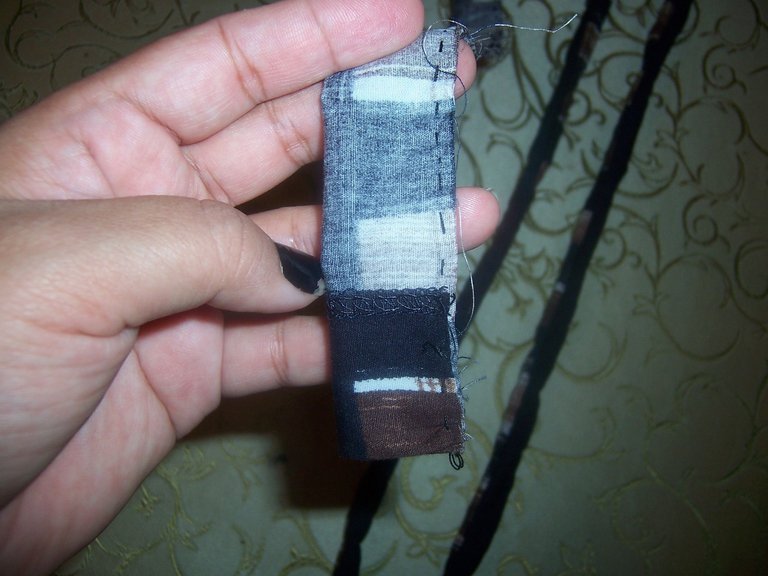
Corte dos trozos de tela largo de unos 30 cm por 5 cm de ancho.
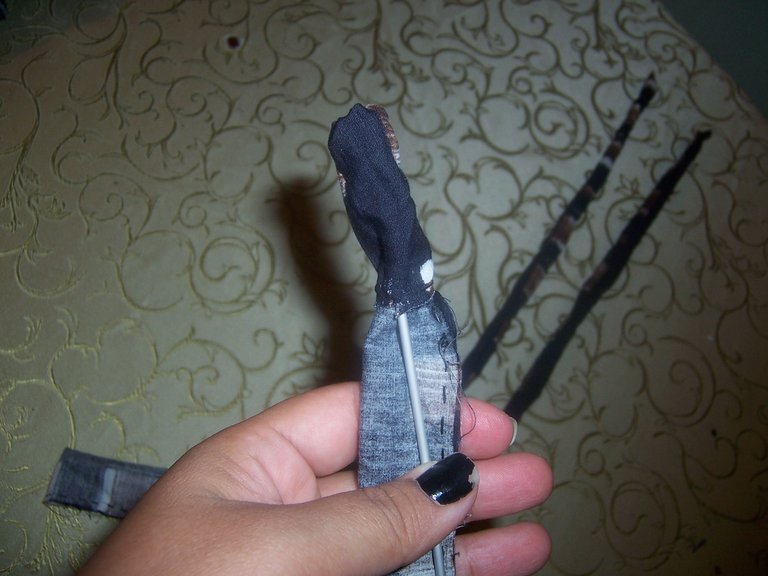
Doble a la mitad la tela y cosí por uno de los costados. Es importante que si la tela tiene un interior y un exterior la doblemos con el lado interior hacia fuera. Luego con una aguja de tejer o algún palillo de metal o madera vamos a voltear la tira de modo que quede la tela con el diseño hacia fuera.
Para la tira que sujeta haría mi cuello utilice un trozo de tela de 30 cm de largo por 7 cm de ancho, no quedaría mayor comodidad en el cuello. Realice el mismo procedimiento que con las dos tiras anteriores.
Cut two long pieces of fabric about 30 cm by 5 cm wide.
Fold the fabric in half and sew on one side. It is important that if the fabric has an interior and an exterior, we fold it with the interior side facing out. Then with a knitting needle or a metal or wooden toothpick we are going to turn the strip so that the fabric is with the design facing out.
For the strip that holds my neck, use a piece of fabric 30 cm long by 7 cm wide, it would not be more comfortable on the neck. Perform the same procedure as with the previous two strips.

Luego con pequeñas puntadas uni estás tiras al delantal las dos tiras más finas a la altura dela cintura y la otra en las dos esquinas de la parte superior del pecho.
Ya el delantal está listo para ser utilizado. Espero haya sido de provecho esta publicación y que como yo puedas hacer tu propio delantal en casa. 😊
Then with small uni stitches you are pulling the two thinnest strips at the waist and the other at the two corners of the upper chest to the apron.
Now the apron is ready to be used. I hope this publication has been helpful and that, like me, you can make your own apron at home. 😊

Espero haya sido de tu agrado y provecho.
Un gran abrazo a todos, y nos leemos en un próximo post
• Lakrearte en Hive •
Att: Estefania Garcia ♥

Imágenes y separadores de mi autoría
Portada editada en Canva