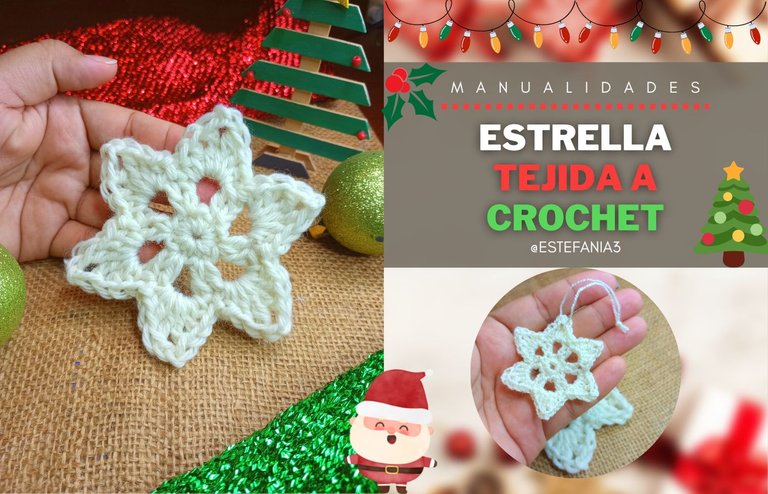
Manualidades: Estrella tejida a Crochet || Crafts: Crochet star

¡Hola Chicos!
Las estrellas forman parte fundamental de la navidad. Están en los paisajes navideños, decorando siempre la copa de nuestros arbolitos, en los nacimientos siempre se encuentran sobre el niño Jesús y sus papás.
Es por ello que pensé en traerles varias versiones de estrellas, para que puedan decorar y llenar de ese brillo especial cualquier rincón de su hogar. Hoy le traigo la primera de ellas, bastante sencilla de hacer y que si jugamos con el grosor del hilo, podremos hacerlas más grandes o más pequeñas, según sean tus gustos y necesidades.
Yo, aunque sé tejer desde hace muchos años, aún no tengo mucha destreza a la hora de crear patrones y el modelo de esta estrella lo he sacado de idea de Pinterest, haciéndole unos pequeños cambios. Me pareció bien lindo y al irlo tejiendo me di cuenta de que es algo bien sencillo de hacer y quise compartir con ustedes mi versión de la explicación, ya que muchos no cuentan con la habilidad de poder leer estos patrones.
Así que no se diga más y vayamos con este sencillo y rápido paso a paso para que puedas tejer todas las estrellas que gustes. ♥
Hello Guys!
The stars are a fundamental part of Christmas. They are in the Christmas landscapes, always decorating the top of our little trees, in the nativity scenes they are always on the baby Jesus and his parents.
That is why I thought of bringing you several versions of stars, so that you can decorate and fill any corner of your home with that special shine. Today I bring you the first one, quite simple to do and if we play with the thickness of the thread, we can make them bigger or smaller, depending on your tastes and needs.
Although I have been able to knit for many years, I still do not have much skill when it comes to creating patterns and I have taken the model of this star from idea on Pinterest, making some little changes. I thought it was very cute and as I knitted it I realized that it is something very easy to do and I wanted to share with you my version of the explanation, since many do not have the ability to read these patterns.
So say no more and let's go with this simple and quick step by step so you can weave all the stars you like. ♥

Para comenzar con esta estrella debemos hacer un anillo mágico y sobre el tejer una cadeneta. Otra manera de iniciar los tejidos en redondo es tejer varias cadenas y unirlas, pero me parece que esta es la más práctica porque podemos ajustar muy bien el centro, y así no quedará un orificio tan grande.
To start with this star we must make a magic ring and weave a chain over it. Another way to start knitting in the round is to knit several chains and join them, but it seems to me that this is the most practical because we can adjust the center very well, and thus there will not be such a large hole.
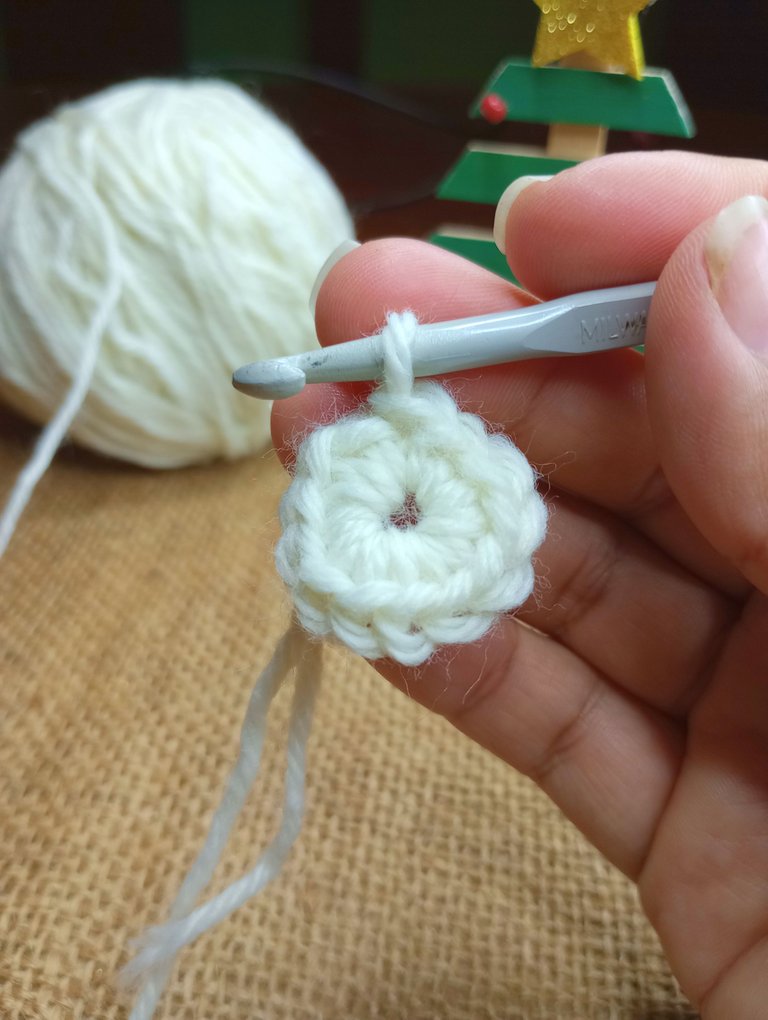
Luego tejeremos 11 puntos bajos rodeando el anillo mágico y para finalizar la vuelta tejeremos un nudo deslizado sobre la cadeneta que hicimos al inicio.
Then we will knit 11 low points surrounding the magic ring and to finish the round we will knit a slip knot over the chain that we made at the beginning.
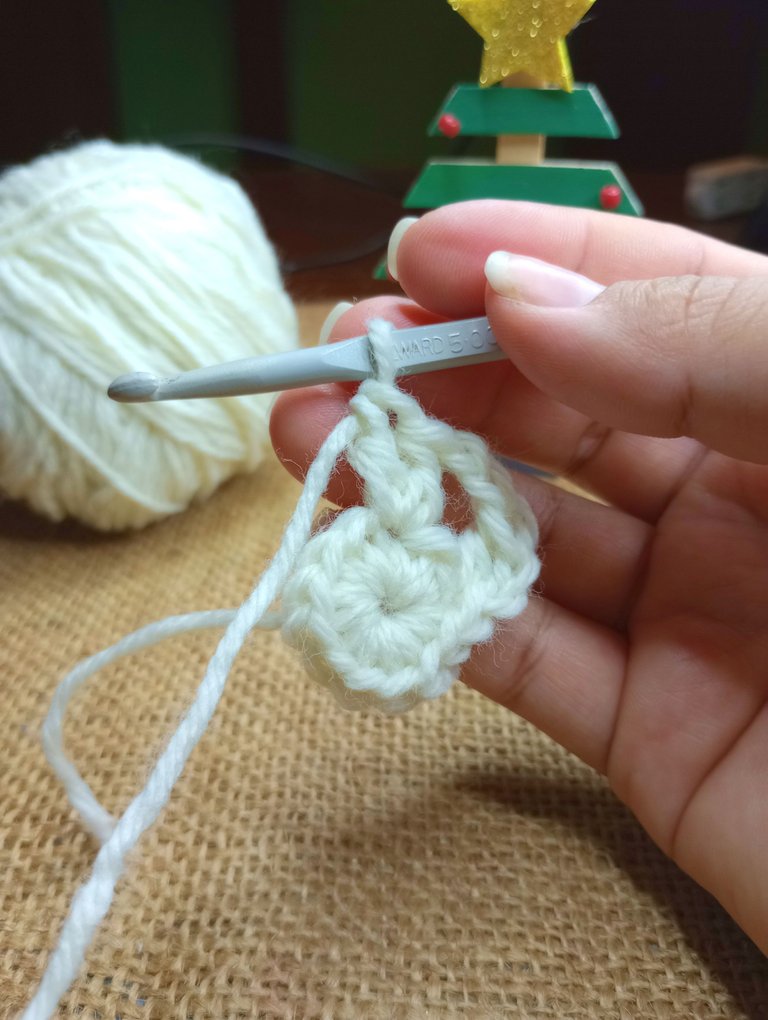
Para la segunda vuelta tejeremos varios grupos de puntos altos de la siguiente forma:
Tejemos dos cadenas para comenzar y sobre el mismo punto de inicio tejemos un punto alto.
Luego tejemos dos cadenas, dejamos un punto de separación y tejemos en el siguiente dos puntos altos más.
Así iremos repitiendo la secuencia hasta lograr un total de 6 pares de puntos altos.
Finalizamos la vuelta tejiendo un nudo deslizado sobre la segunda cadeneta que tejimos al inicio de la misma.
For the second row we will knit several groups of double crochets as follows:
We knit two chains to start and over the same starting point we knit a double crochet.
Then we knit two chains, leave a separation stitch and knit two more double crochets in the next one.
Thus we will repeat the sequence until we achieve a total of 6 pairs of double crochet.
We finish the round by knitting a slip knot over the second chain that we knitted at the beginning of it.
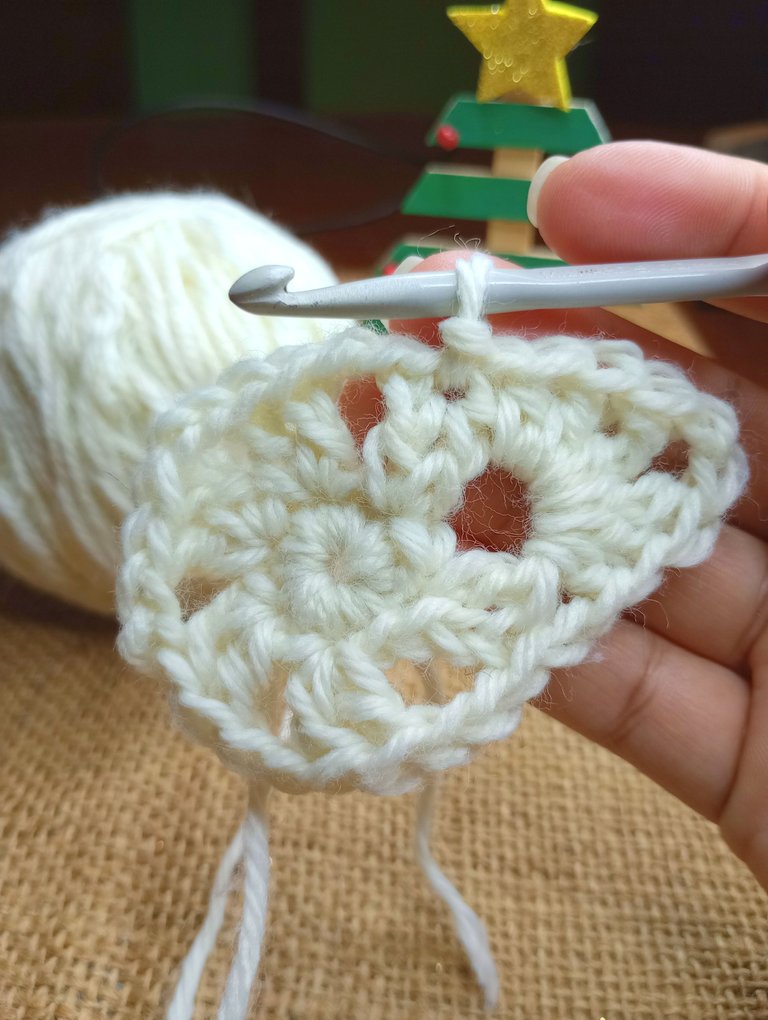
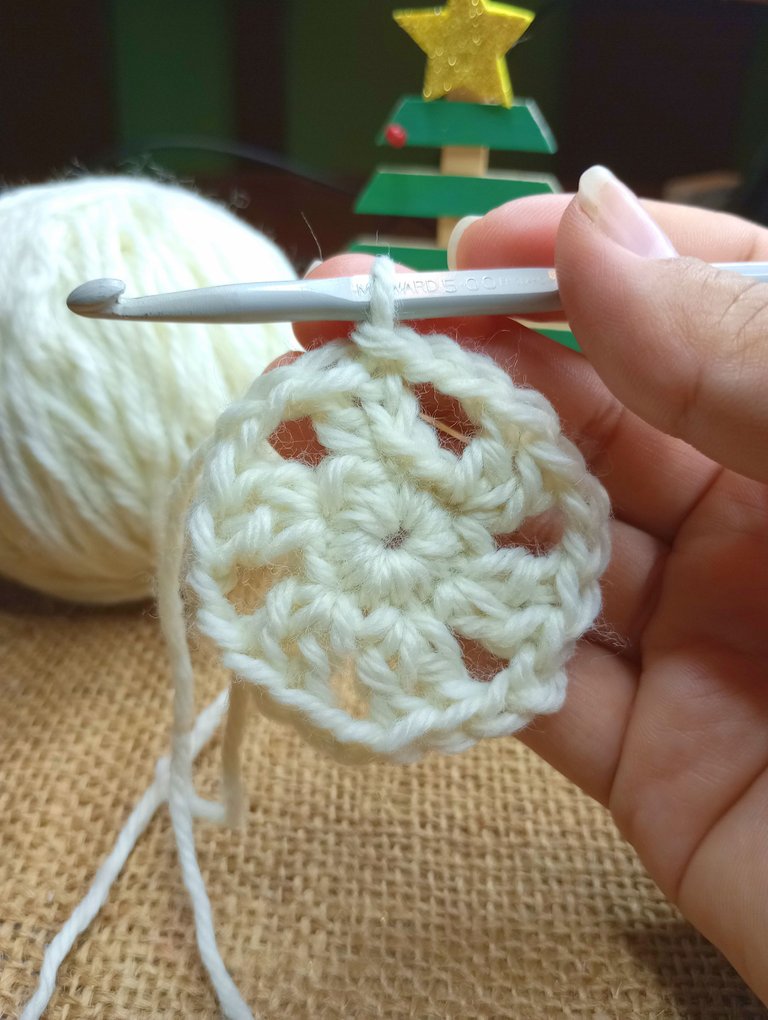
Para la tercera y última vuelta vamos a comenzar con un nudo deslizado para ubicarnos en el centro de los dos puntos altos de la vuelta anterior.
Tejemos una cadena y en el espacio que quedó entre los pares de puntos altos vamos a tejer: Una cadena, medio punto alto, un punto alto, un punto alto doble, dos cadenas y ahora la secuencia de regreso que sería un punto alto doble, un punto alto, medio punto alto, una cadeneta y para finalizar un nudo deslizado en el medio del siguiente par de puntos altos.
Así repetiremos esta secuencia hasta completar la vuelta con un nudo deslizado.
For the third and last round we are going to start with a slip knot to locate ourselves in the center of the two high points of the previous round.
We knit a chain and in the space that was left between the pairs of treble crochets we are going to knit: A chain, half a treble crochet, a treble crochet, a double treble crochet, two chains and now the return sequence that would be a double treble crochet, a double crochet, half a double crochet, a chain and to finish a slip knot in the middle of the next pair of double crochets.
Thus we will repeat this sequence until completing the turn with a slip knot.
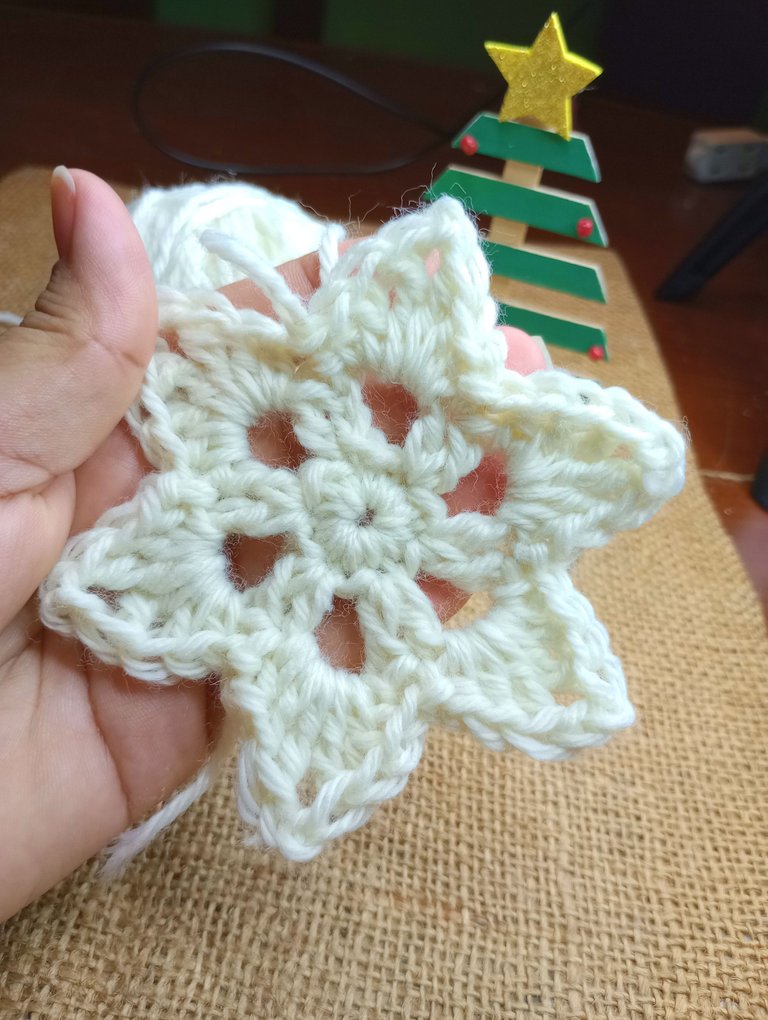
En el patrón original nos muestra que la secuencia serían una cadena, medio punto alto y dos puntos altos luego, pero me pareció mejor ir haciendo el tejido ascendente y es por ello que reemplacé el ultimo punto alto por un punto alto doble.
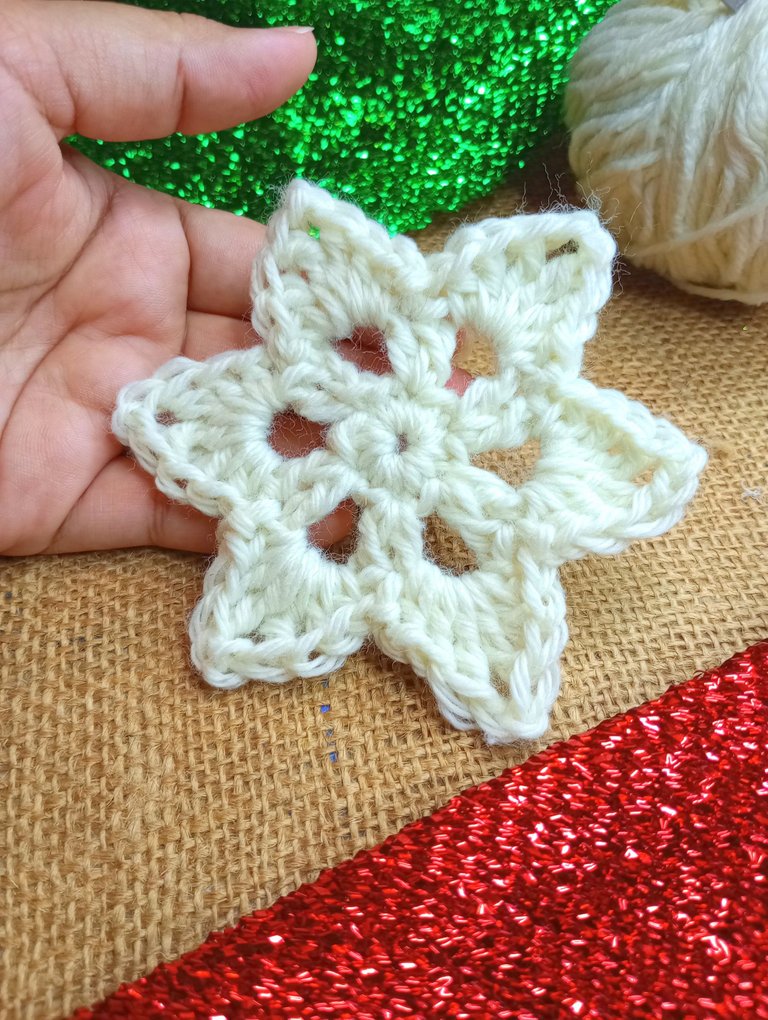
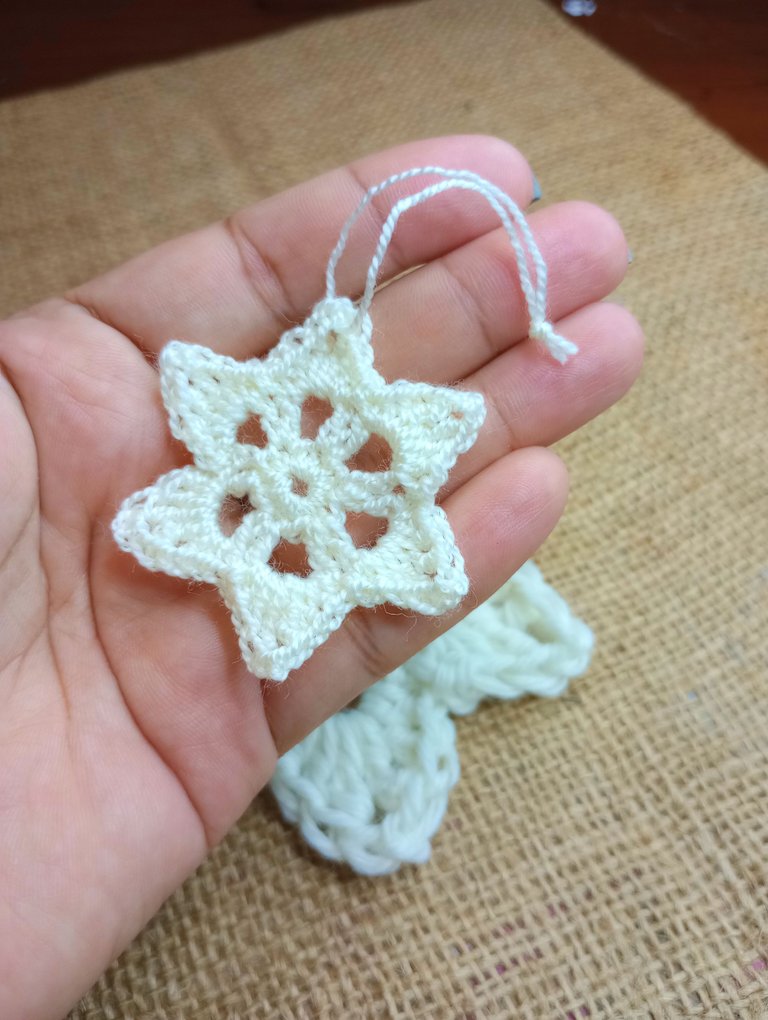
Para finalizar la estrella ubicamos el extremo del hilo en la parte de atrás y hacemos un nudo. Cortamos los excedentes y así tendremos lista nuestra estrella.
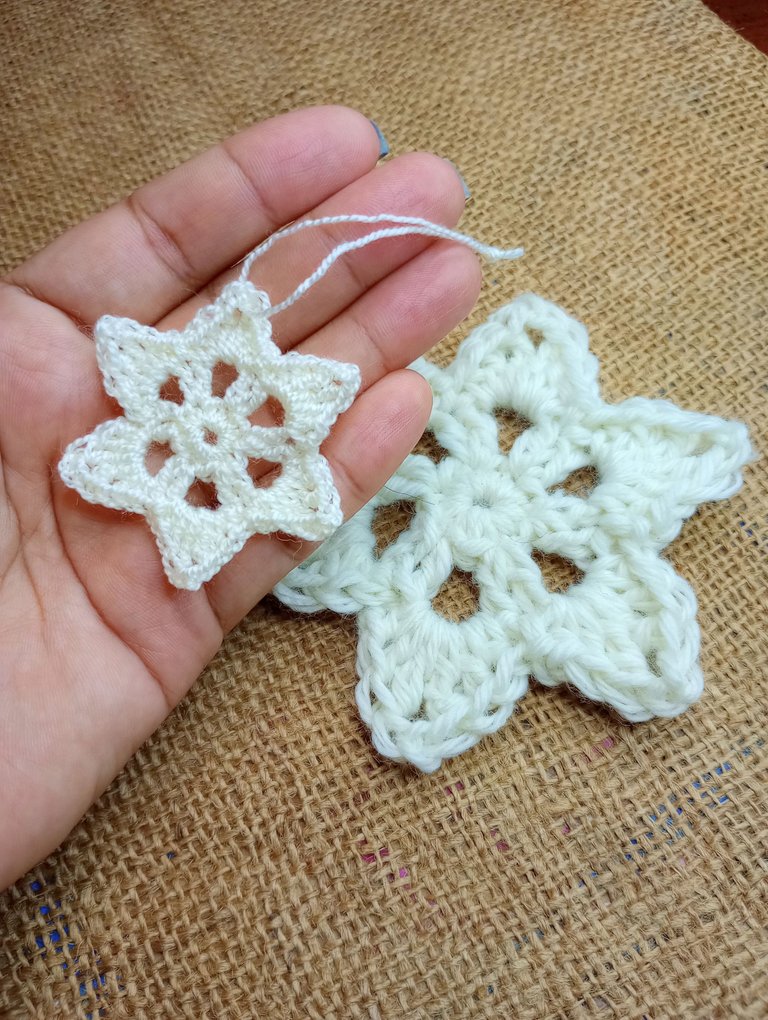
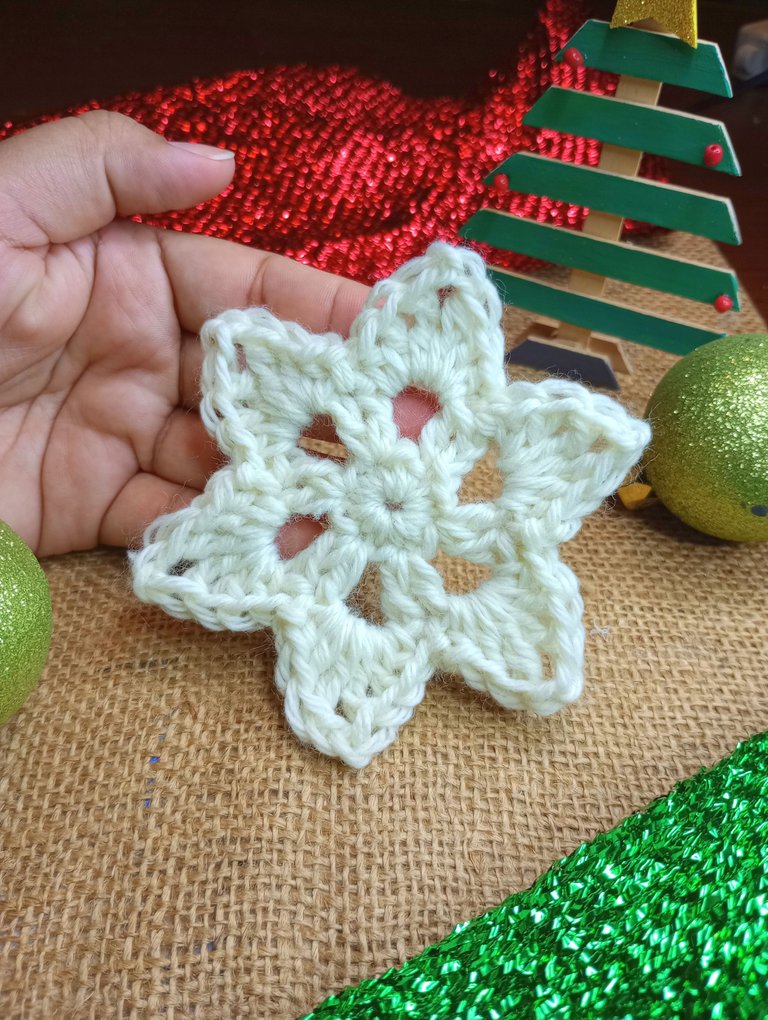
Acá les comparto una pequeña muestra en la que he tejido la misma estrella pero con un hilo muchisimo más fino.
La diferencia de tamaños es enorme. Así que bueno chicos espero les haya gustado la propuesta y llenen su casa de estrellas.
Pronto les compartiré otra versión para que cuenten con varias opciones. ♥
Nos vemos en una próxima manualidad. 😊
In the original pattern, it shows us that the sequence would be a chain, half a double crochet and then two double crochets, but it seemed better to go knitting up and that is why I replaced the last double crochet with a double double crochet.
To finish the star we place the end of the thread at the back and tie a knot. We cut the surplus and thus we will have our star ready.
Here I share a small sample in which I have woven the same star but with a much finer thread.
The size difference is huge. So well guys I hope you liked the proposal and fill your house with stars.
Soon I will share another version so that you have several options. ♥
See you in a next craft. 😊

Espero haya sido de tu agrado y provecho.
Un gran abrazo a todos, y nos leemos en un próximo post
• Lakrearte en Hive •
Att: Estefania Garcia ♥

Imágenes y separadores de mi autoría
Portada editada en Canva
Fotografías tomadas con un Moto G31
Texto traducido en Google ImTranslate v.14.27
Thank you for sharing this post on HIVE!
Your content got selected by our fellow curator semarekha & you just received a little thank you upvote from us for your great work! Your post will be featured in one of our recurring compilations which are aiming to offer you a stage to widen your audience within the DIY scene of Hive. Next time make sure to post / cross-post your creation within the DIYHub community on HIVE and you will receive a higher upvote ;) Stay creative & HIVE ON!
Please vote for our hive witness <3
It’s such a beautiful star. I fell in love with the treble stitch years ago. I’ve made a few things using that stitch and have always loved the outcome.
Thanks for sharing this with us ~
Yes. is that when you get hooked on a type of fabric you want to apply it to everything. I understand that feeling. I'm glad you liked the star. Thank you very much for the support ♥
You’re welcome ;)
Hola @estefania3, te quedó muy hermosa la estrella, es un proyecto ideal para esta temporada ,se puede usar en el árbol y en las decoraciones de puertas y ventanas.
Saludos!
Hola! Sii. Así las imagino yo, toda la casa llena con estas listas estrellas grandes y chiquitas. Se verían geniale! Muchas gracias por tu comentario amiga saludos 😊❤️
Que bonitas. Ideales para el árbol de navidad o cualquier otra ornamentación.
Gracias por compartir todos los detalles.
Bendiciones
Leo y leo las publicaciones de crochet y no logro comprender los pasos ajajaja, esto es un arte realmente que requiere de mucha práctica, te quedó hermoso tu proyecto amiga.