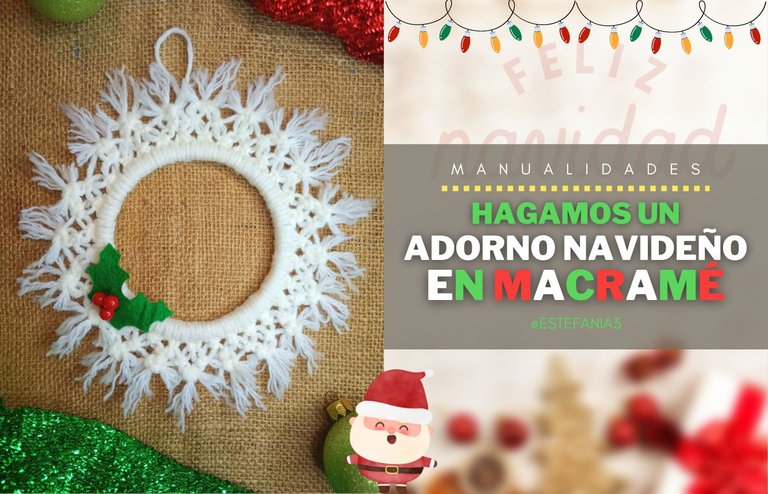
Manualidades: Hagamos un Adorno Navideño en Macramé || Crafts: Let's make a Macrame Christmas Ornament ♥🎄

¡Hola Chicos!
Está por comenzar la época más bonita y alegre del año, la navidad, y desde hace un tiempo me gusta hacer decoraciones para decorar mi hogar.
Pero este año tendrán un objetivo distinto, pues quiero que formen parte de mi emprendimiento.
Tengo mucho material acumulado, así que poco a poco pienso ir creando piezas con motivo navideño y por supuesto, se las estaré compartiendo a ustedes a través de mi blog.
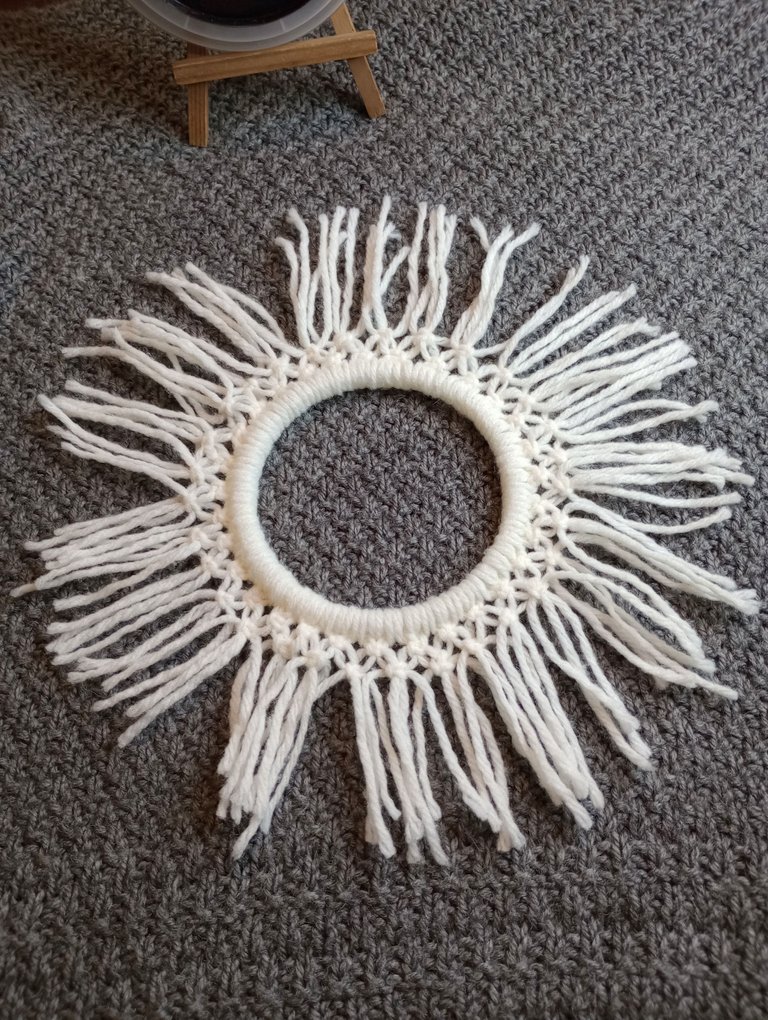
Esta es la primera decoración, se trata de una pequeña guirnalda tejida con la técnica de macramé, que asemeja un copo de nieve y que está decorado con las típicas hojitas verdes con sus frutos rojos (no tengo idea de como se llaman 😅).
Como todos los proyectos que les comparto, este se hace súper fácil y ahora vayamos con el paso a paso para que puedan decorar su casa con este lindo adorno navideño. ♥
Hey guys!
The most beautiful and joyful time of the year is about to begin, Christmas, and for some time I have liked to make decorations to decorate my home.
But this year they will have a different objective, because I want them to be part of my enterprise.
I have a lot of material accumulated, so little by little I plan to create pieces for Christmas and of course, I will be sharing them with you through my blog.
This is the first decoration, it is a small garland woven with the macramé technique, which resembles a snowflake and is decorated with the typical green leaves with their red berries (I have no idea what they are called 😅).
Like all the projects that I share with you, this one is super easy and now let's go step by step so that you can decorate your house with this beautiful Christmas ornament. ♥
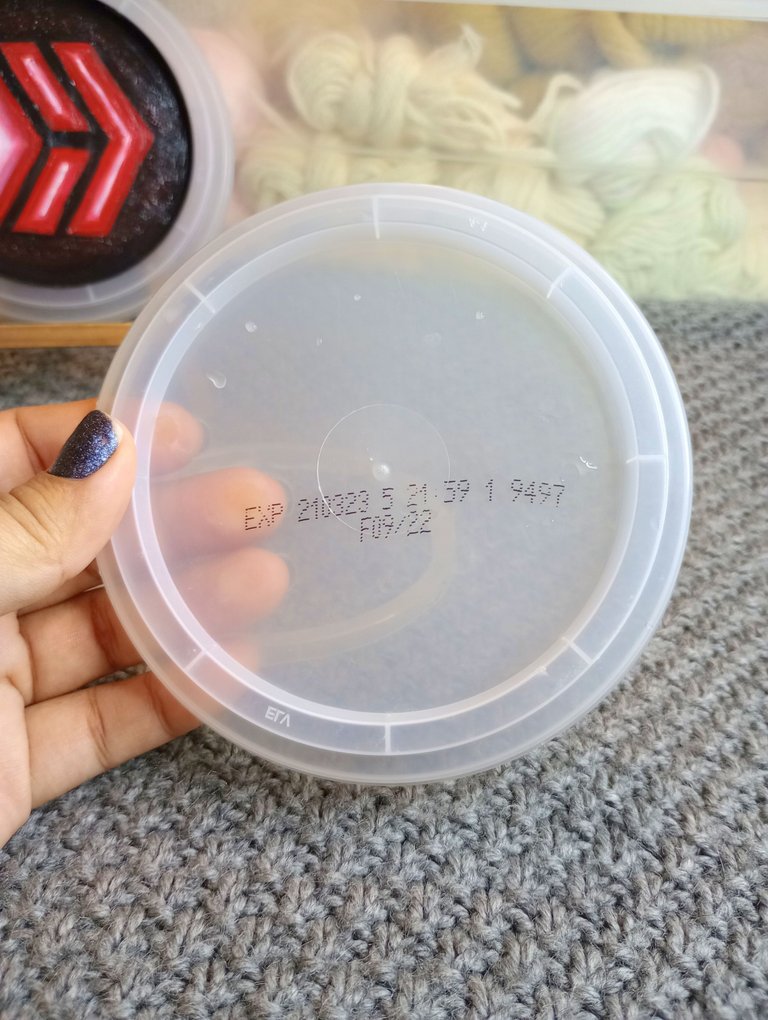
Para la base del adorno necesitamos un aro, preferiblemente de un material liviano.
Yo utilicé la tapa de un envase de mantequilla que está hecha de plástico. Con una tijera corté el borde y con un cuchillo caliente y mucha paciencia, fui quemando todo el borde del interior para retirar el plástico central.
Así me quedó este aro de plástico.

For the base of the ornament we need a hoop, preferably made of a light material.
I used the lid of a butter container that is made of plastic. With scissors I cut the edge and with a hot knife and a lot of patience, I burned the entire edge of the interior to remove the central plastic.
This is how I got this plastic ring.
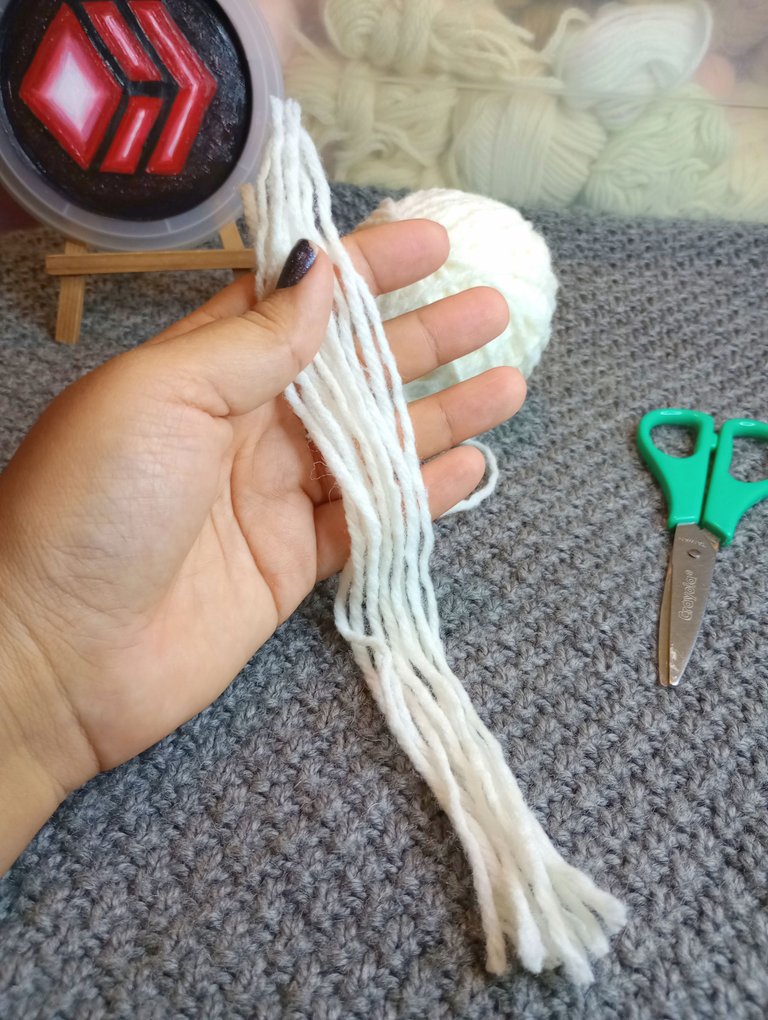
Necesitaremos un hilo de muchas hebras para esta manualidad. Yo utilicé la lana más gruesa que tenía que ser de color blanco hueso.
Corté varias tiras de 25 centímetros de largo. Con estas iré forrando todo el aro de plástico.
We will need a multi-strand yarn for this craft. I used the thickest yarn that had to be off-white.
I cut several strips 25 centimeters long. With these I will cover the entire plastic ring.
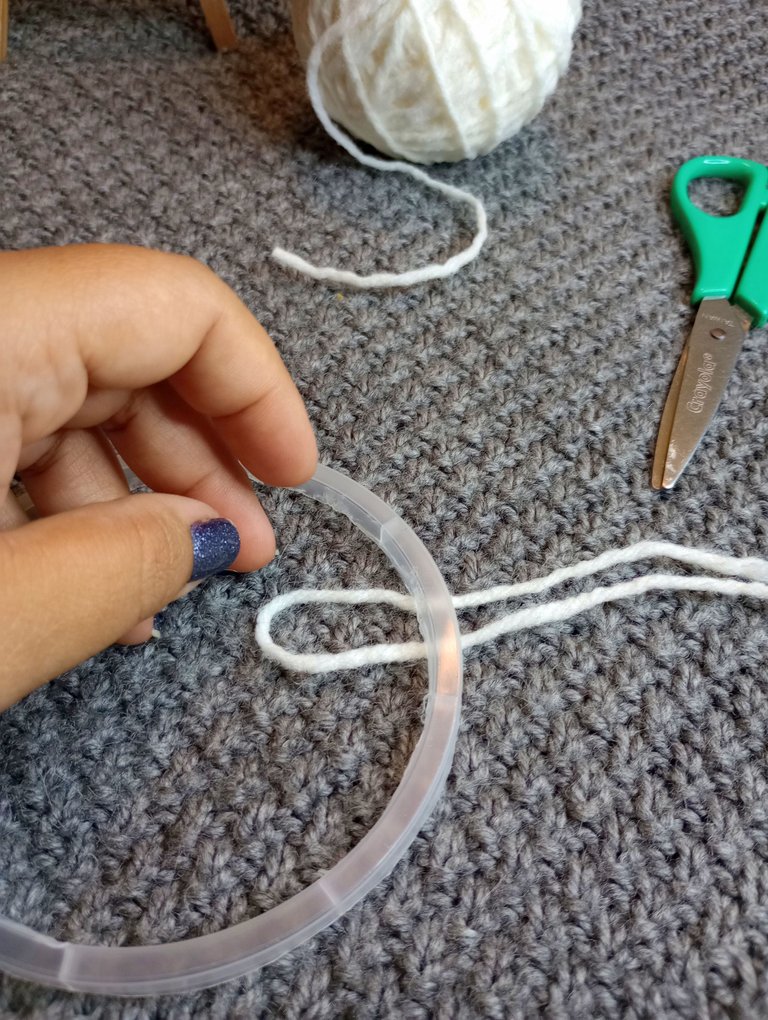
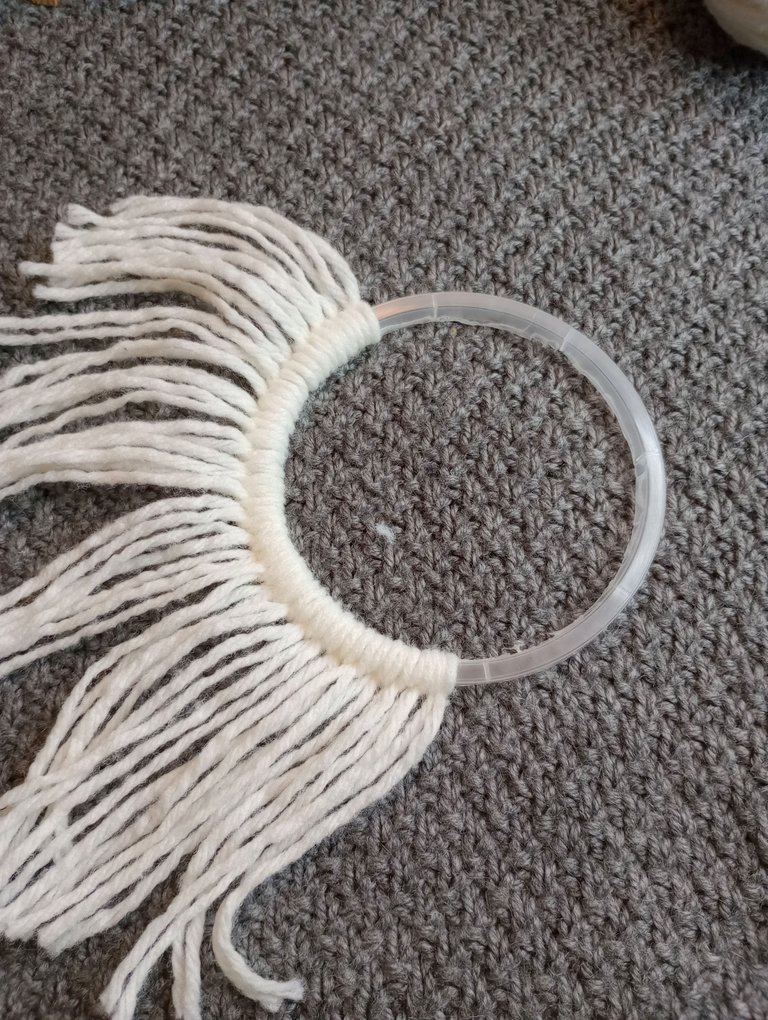
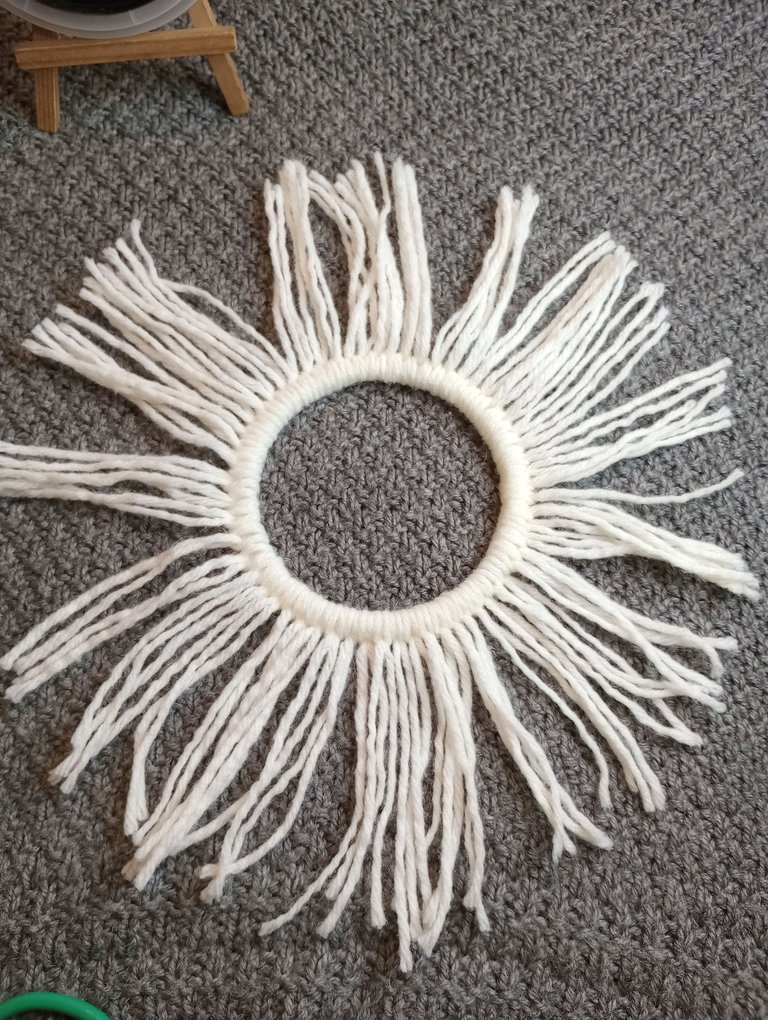
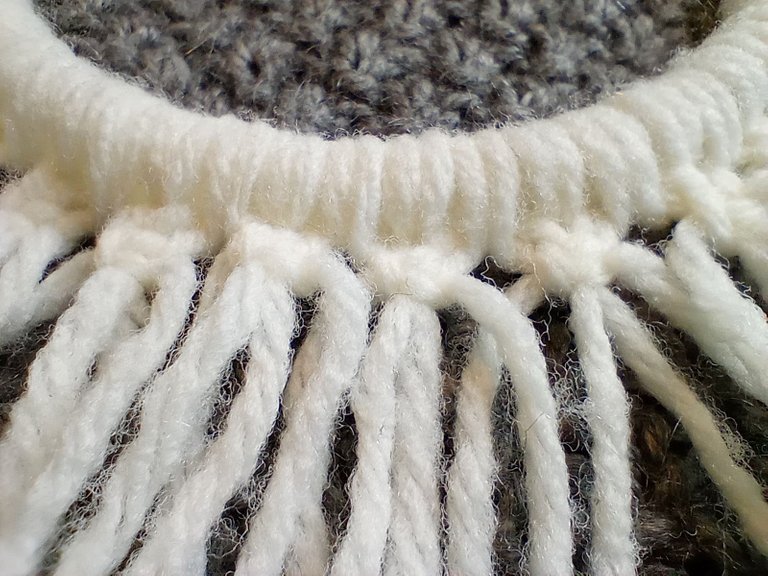
Tomamos cada uno de los hilos y los amarramos al aro como se muestra en las imágenes.
Yo utilicé unas 30 tiras aproximadamente, todo dependerá del grosor del hilo y el diámetro del aro que utilices, lo importante es que sean números pares.
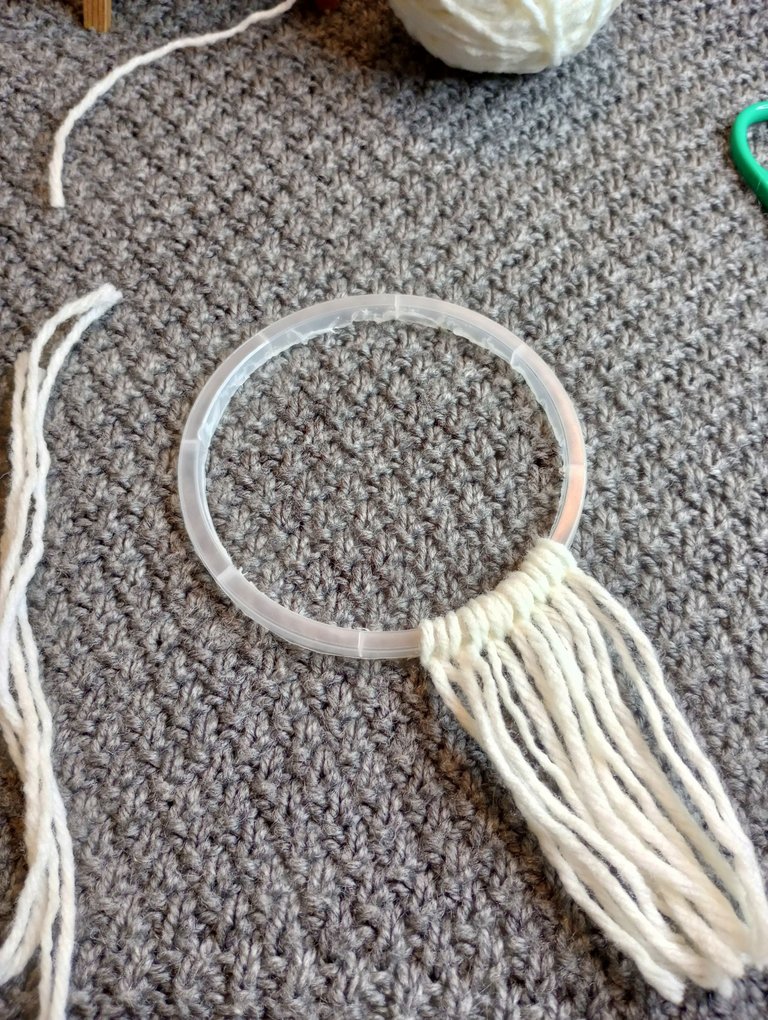
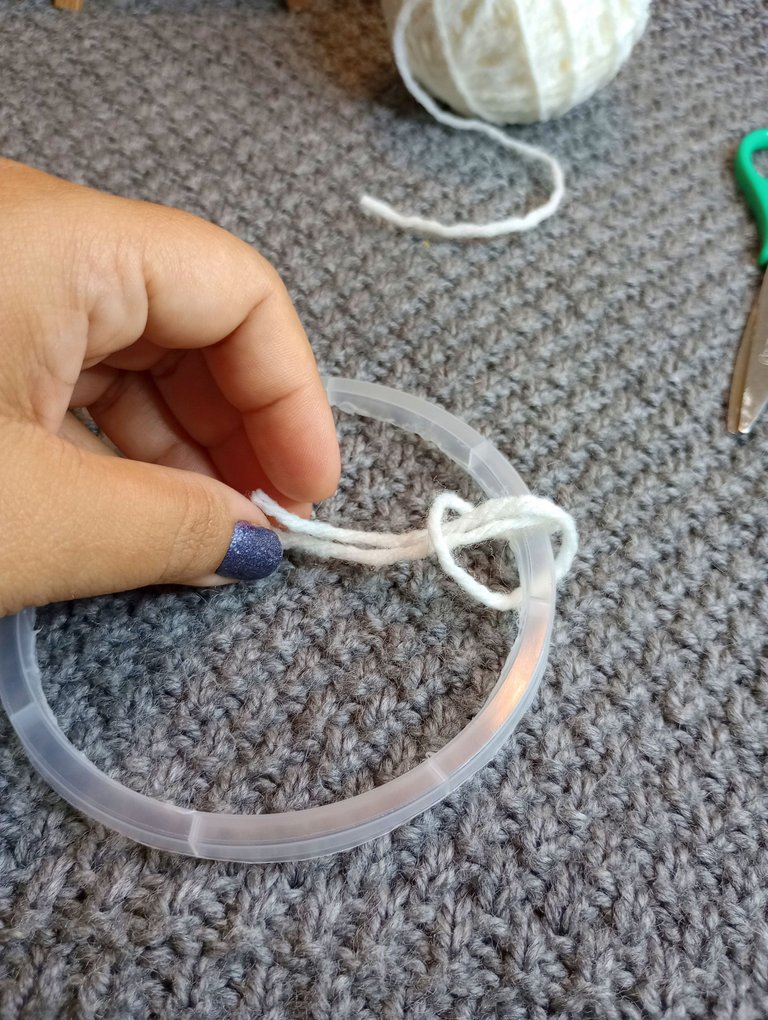
We take each of the threads and tie them to the ring as shown in the images.
I used 30 strips, everything will depend on the thickness of the thread and the diameter of the ring you use, the important thing is that they are even numbers.
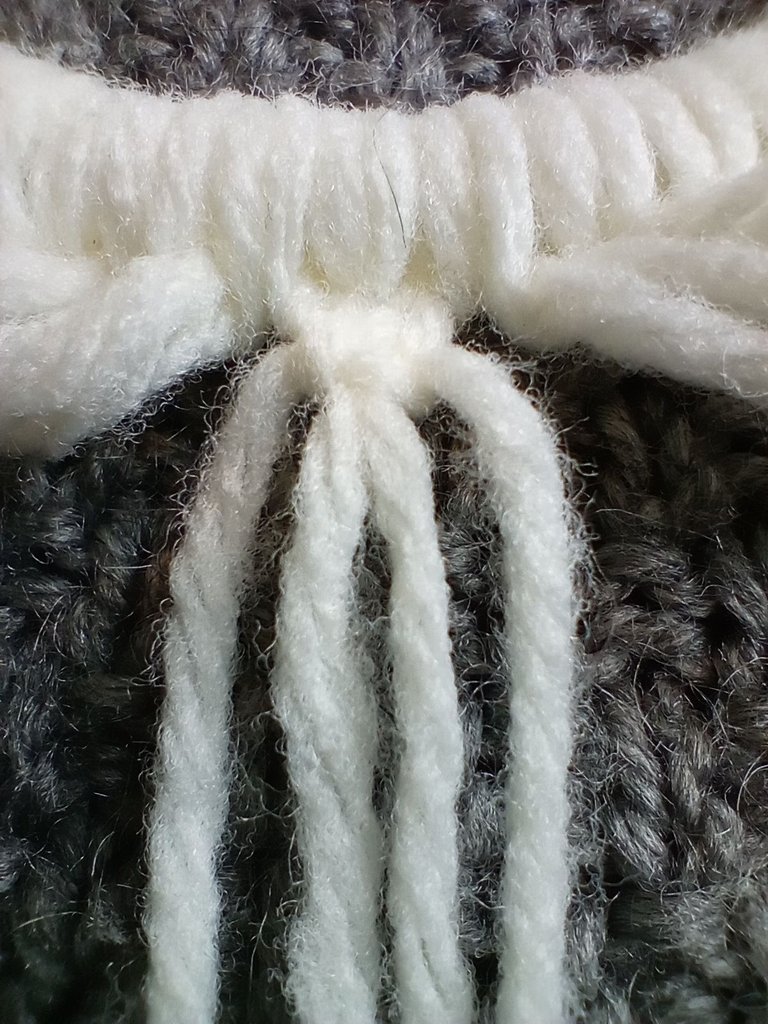
Tomamos 4 tiras y vamos a tejer en ellas dos nudos macramé. Haremos lo mismo con el resto de las tiras.
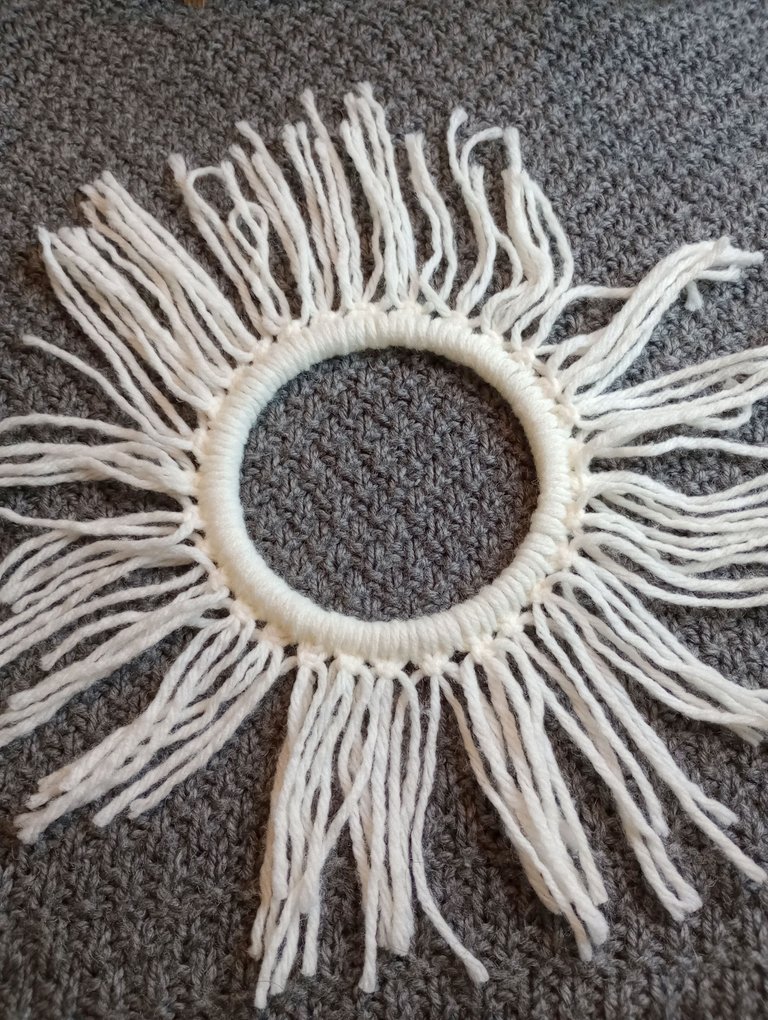
We take 4 strips and we are going to weave two macramé knots in them. We will do the same with the rest of the strips.
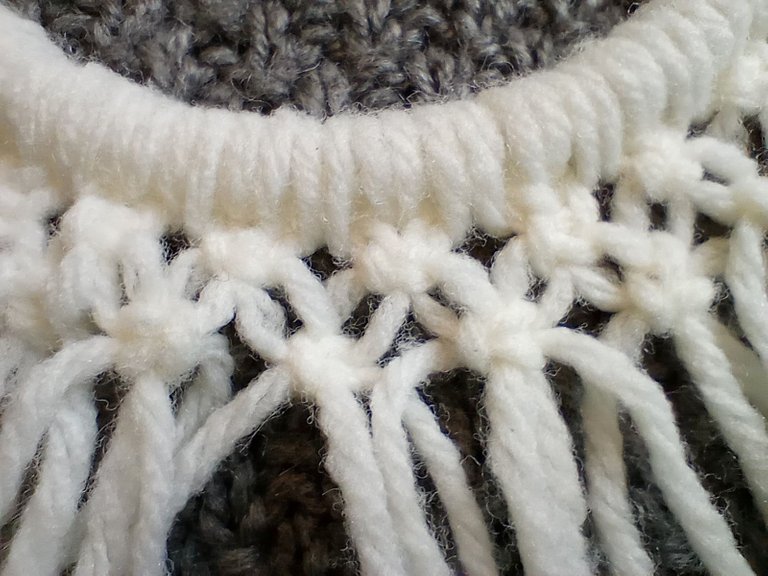
Para la siguiente fila tomamos dos tiras de un grupo y dos tiras del grupo de al lado, tejemos entonces dos nudos macramé. Así para crear una malla y que todos los grupos de tiras queden unidos.
For the next row we take two strips from one group and two strips from the next group, then weave two macramé knots. Thus to create a mesh and that all the groups of strips are united.
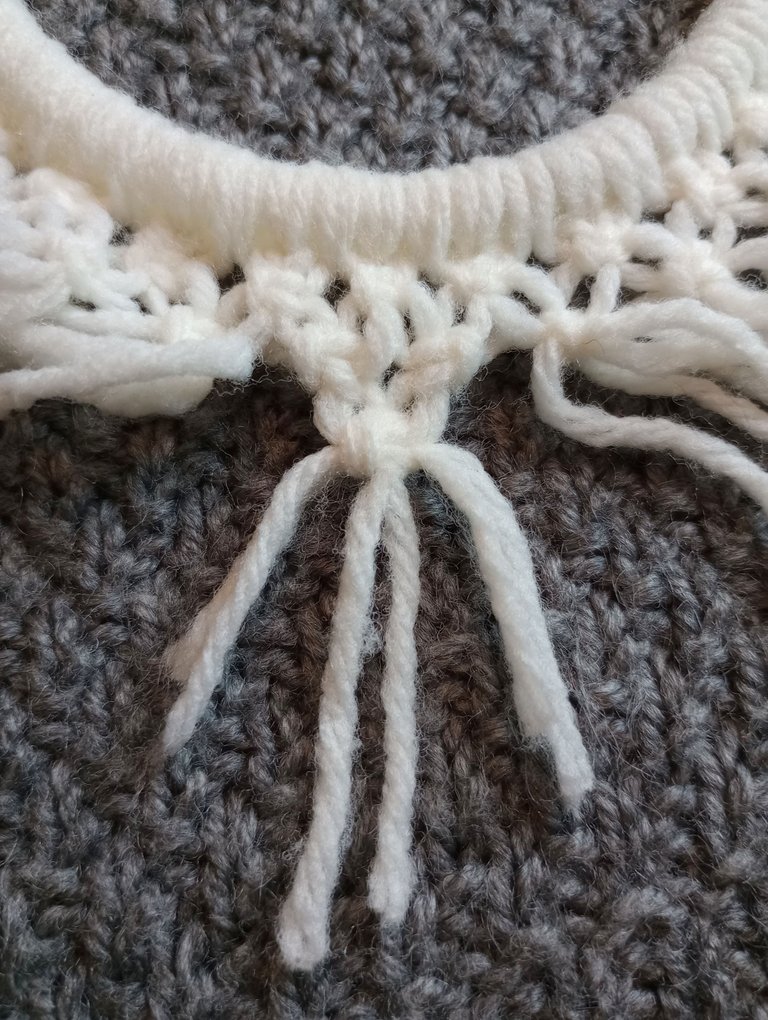
Ahora hacemos grupos de 6 tiras y tejemos dos puntos macramé, tomando dos tiras para cada lado y dos centrales.
Now we make groups of 6 strips and weave two macramé stitches, taking two strips for each side and two central ones.
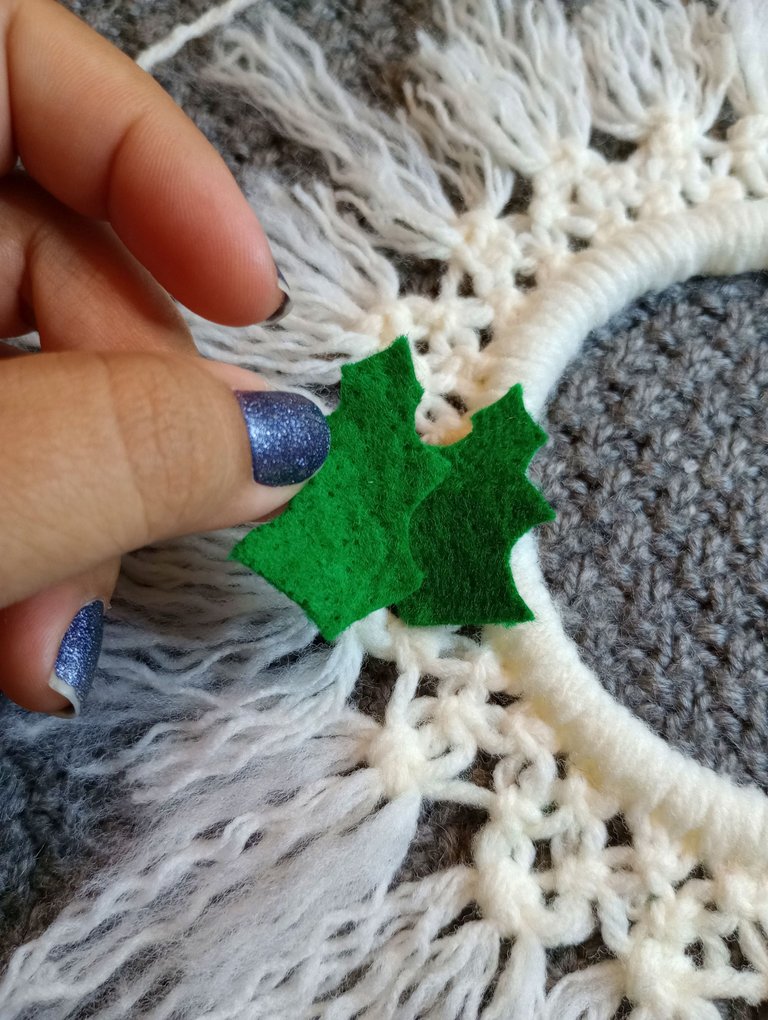
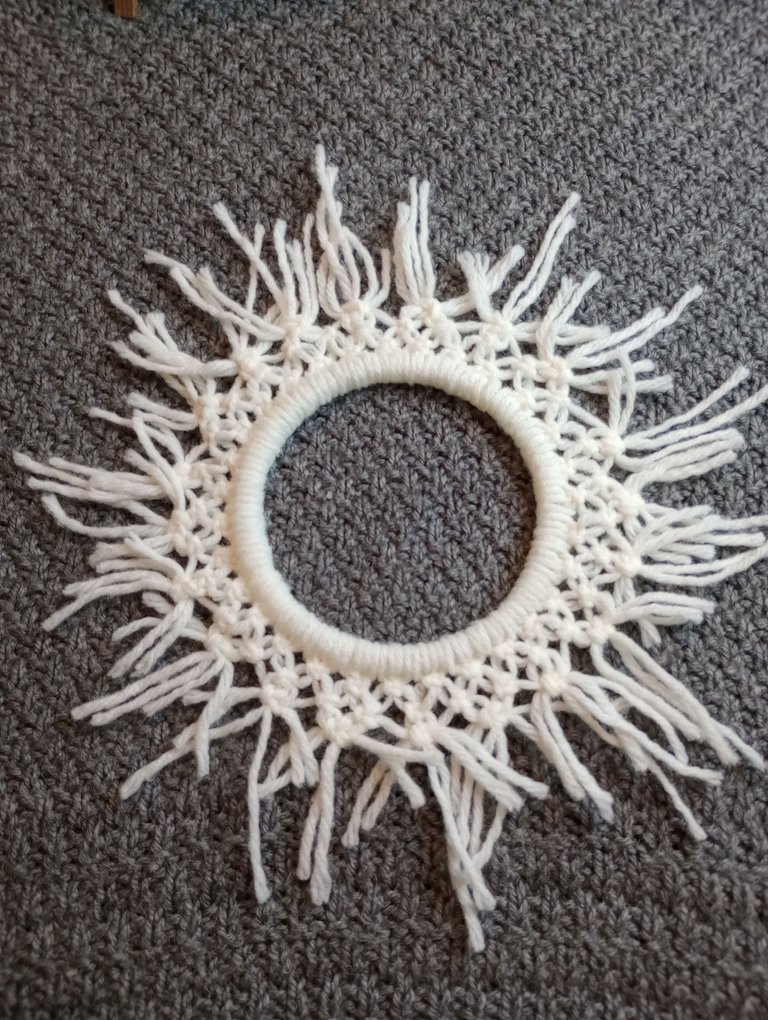
Luego con ayuda de un peine vamos a separar las hebras de cada una de las tiras y las vamos a cortar para formar picos.
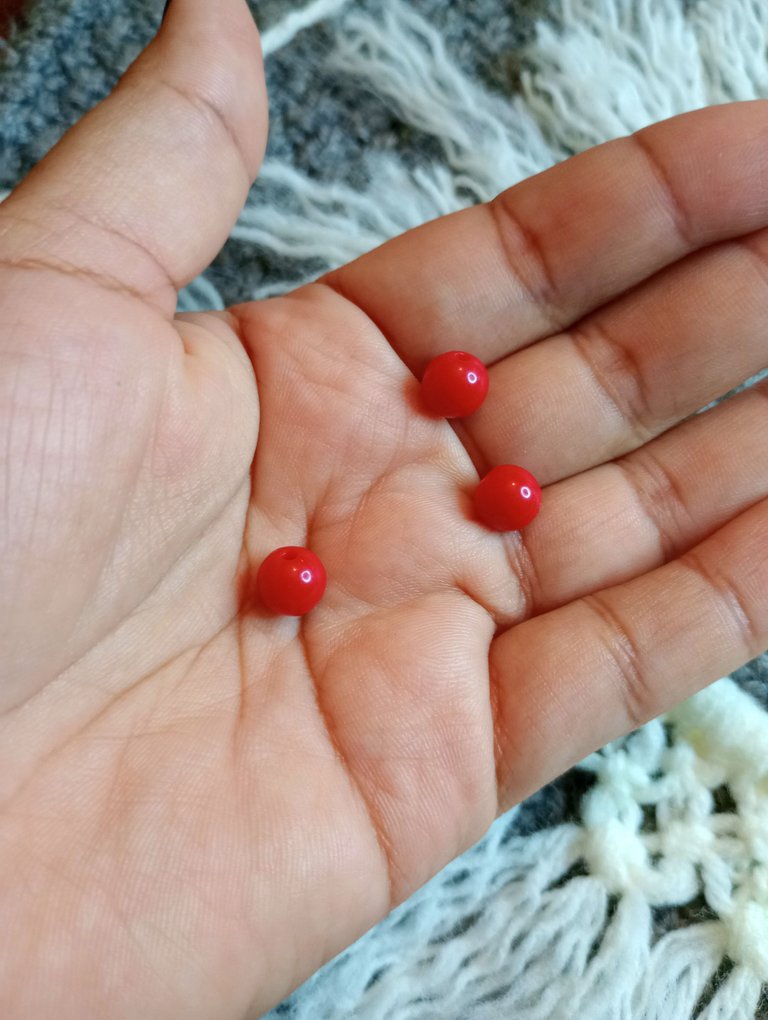
También agregaremos dos pequeñas hojas hechas en fieltro de color verde, y dos abalorios de plástico de color rojo para simular los frutos rojos.
Then with the help of a comb we are going to separate the strands of each of the strips and we are going to cut them to form peaks.
We will also add two small leaves made of green felt, and two red plastic beads to simulate the red fruits.
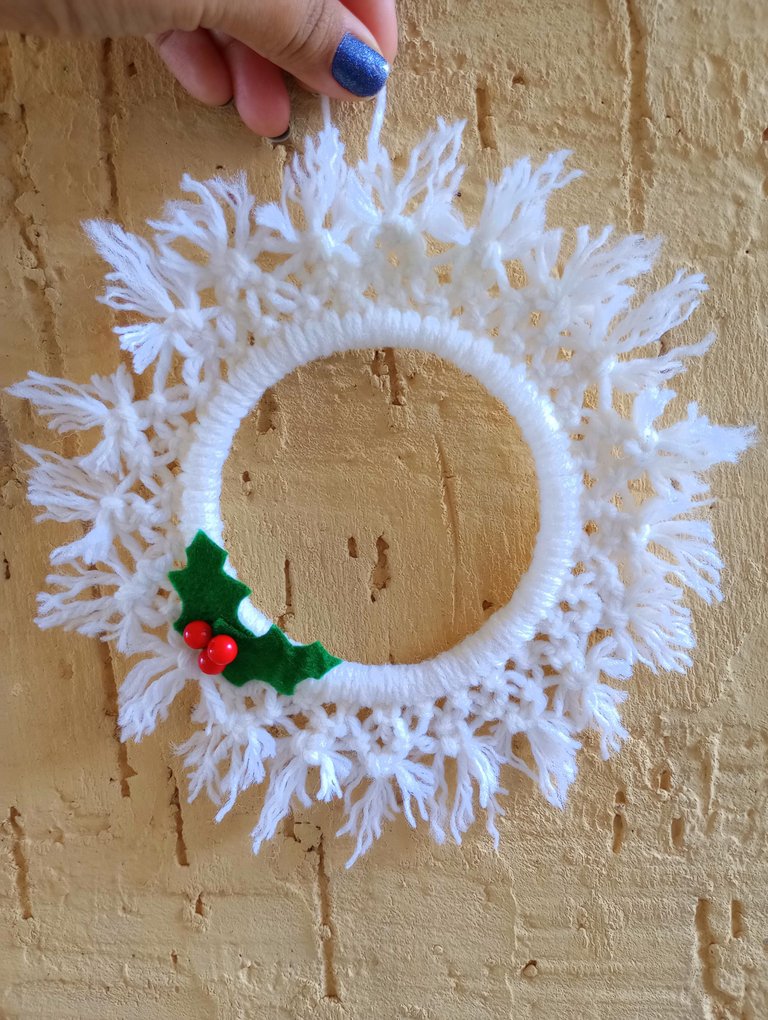
Estos últimos adornos se los pegamos con un punto de silicón. También agregué un trozo de hilo el cual pegué en la parte de atrás para poder guindar el adorno.
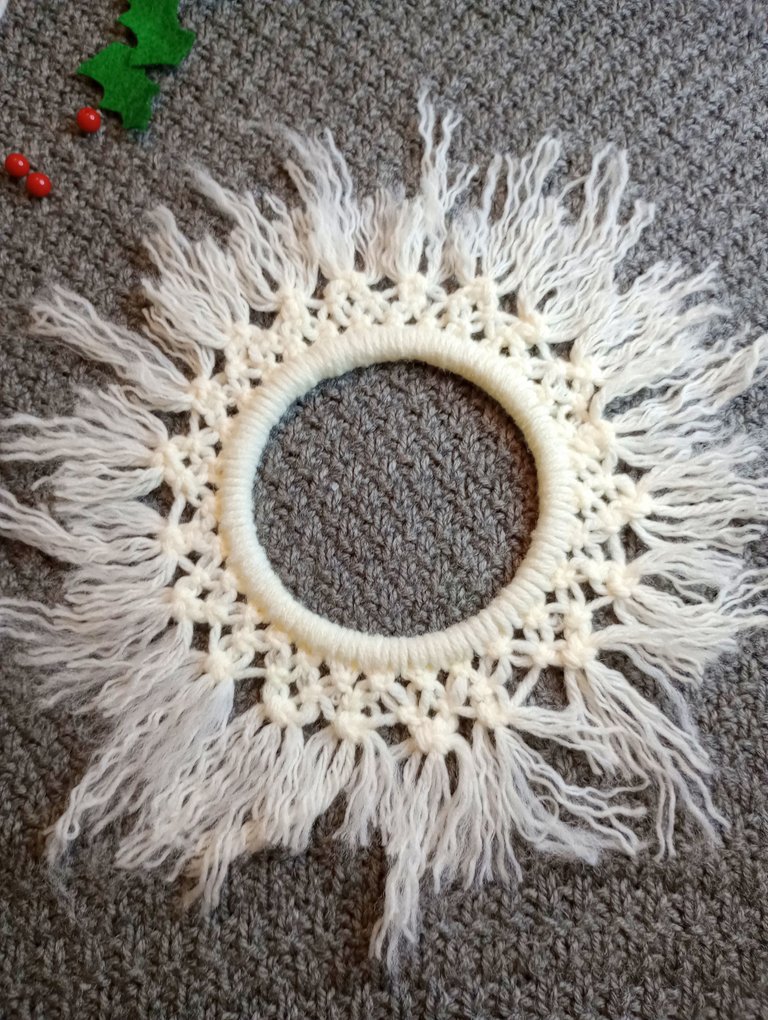
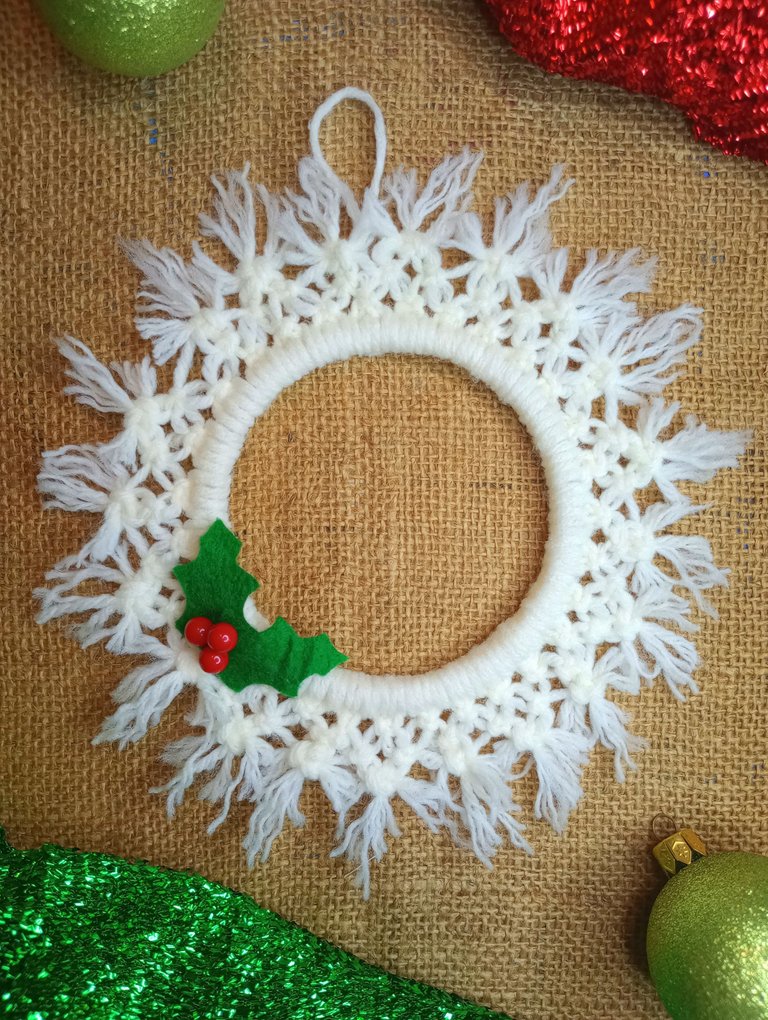
Ahora sí, está listo nuestro primer adorno navideño, con el que podemos decorar cualquier rincón de nuestro hogar.
Espero les haya gustado la propuesta, y estén atentos porque en los próximos días les estaré compartiendo otros proyectos, para que juntos llenemos nuestro hogar de mucho color y espíritu navideño. ♥
These last decorations are glued with a silicone point. I also added a piece of string which I glued to the back to hang the ornament.
Now yes, our first Christmas decoration is ready, with which we can decorate any corner of our home.
I hope you liked the proposal, and stay tuned because in the next few days I will be sharing other projects, so that together we can fill our home with a lot of color and Christmas spirit. ♥

Espero haya sido de tu agrado y provecho.
Un gran abrazo a todos, y nos leemos en un próximo post
• Lakrearte en Hive •
Att: Estefania Garcia ♥

Imágenes y separadores de mi autoría
Portada editada en Canva
Fotografías tomadas con un Moto G31
Texto traducido en Google ImTranslate v.14.19
Muy lindo este adorno navideño.
Ya se siente el ambiente por aquí...seguro que tendrás muchos pedidos de este adorno, está precioso.
Muchas gracias por tus buenos deseos. La verdad es que si espero poder llenar muchas casitas de navidad ✨🙏 ❤️
Congratulations @estefania3! You have completed the following achievement on the Hive blockchain and have been rewarded with new badge(s):
Your next payout target is 8000 HP.
The unit is Hive Power equivalent because post and comment rewards can be split into HP and HBD
You can view your badges on your board and compare yourself to others in the Ranking
If you no longer want to receive notifications, reply to this comment with the word
STOPTo support your work, I also upvoted your post!
Check out the last post from @hivebuzz:
Support the HiveBuzz project. Vote for our proposal!
¡Felicidades! Esta publicación obtuvo upvote y fue compartido por @la-colmena, un proyecto de Curación Manual para la comunidad hispana de Hive que cuenta con el respaldo de @curie.
Si te gusta el trabajo que hacemos, te invitamos a darle tu voto a este comentario y a votar como testigo por La Colmena.
Si quieres saber más sobre nuestro proyecto, te invitamos a acompañarnos en nuestro servidor de Discord.
Muchas gracias por el apoyo a mi publicación 😊✨❤️
Buen tutorial, gracias por compartirlo
De nada. Me alegra que te haya gustado 😊✨
Esta es una verdadera belleza amiga @estefania3. Que adorno tan hermoso, delicado y bien hecho, le veo tantos usos, para el árbol de navidad, o para cualquier rinconcito de nuestros hogares. Mil éxitos y que te lluevan los pedidos.✨
Sii. Lo bueno es que es súper práctico y se puede usar para muchas cosas. Me alegra que te haya gustado. Te mando un abrazo 😊✨🤗
Me encantó este adorno amiga, buen trabajo!! Gracias por compartirnos el paso a paso!!
Muchas gracias! Me alegra que te haya gustado la propuesta. Te mando un abrazo 😊❤️✨
Hermoso, gracias por compartir, saludos!
Muchas gracias 😊❤️ me alegra mucho que te gustara la propuesta. ✨
quedo hermoso, me pregunto si se podría hacer de varios colores, como quedaría
Sii. Podrías intentar hacerlo con cualquier color navideño cómo verde, blanco y rojo, o si ya quisieras algo atemporal, en cualquier tono lucirá genial 😊
Muchas gracias por pasarte ✨❤️
si yo lo hago creo que me saldría un mutante jaja.,. Pero haré el intento a ver, es un gran desafío!
Jajaja no digas así. Se que te quedará genial! 😊❤️