Manualidades: Hagamos unos Lindo Posavasos en Crochet || Crafts: Let's Make Cute Crochet Coasters

¡Hola Chicos!
Iniciamos una nueva semana cargados de energía y buenos ánimos. Hoy, quiero compartir con ustedes un proyecto que disfruté mucho hacer.
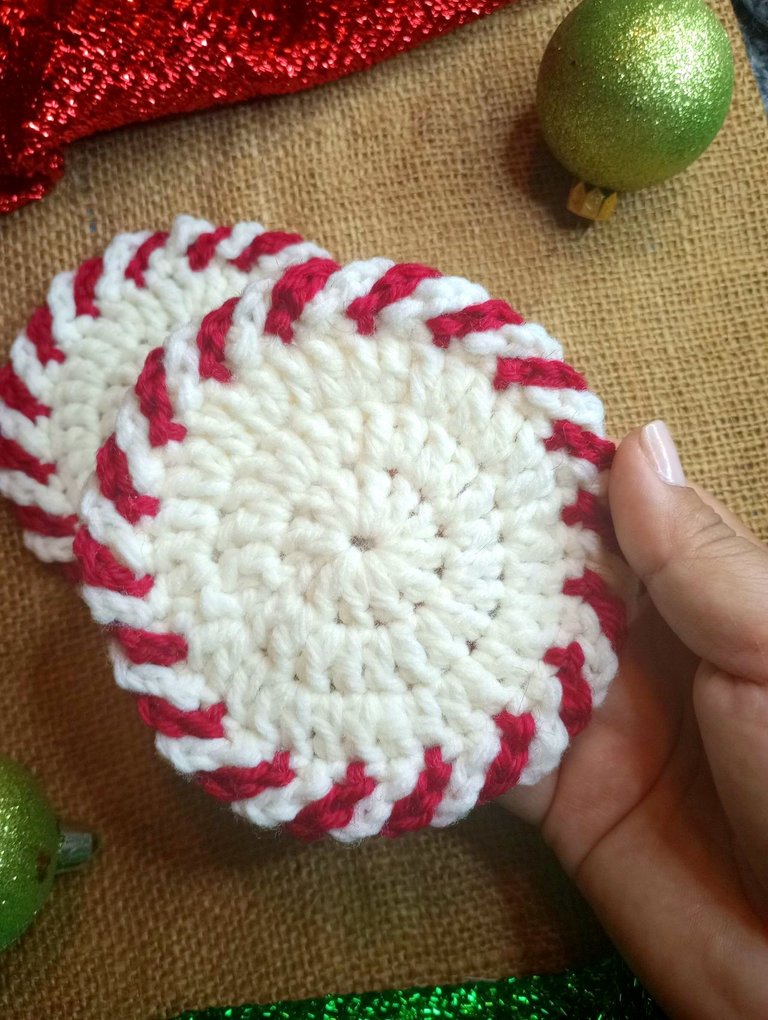
Se trata de unos posavasos en forma de caramelo de menta, tan típico de la época navideña.
Recuerdo que hace muchos años había llegado una tía de viaje a casa de mi abuela, y ella siempre traía muchos dulces a todos sus sobrinos.
Entre ellos nos trajo estos caramelos y al probarlos para mí fue un shock 😂 porque lo que menos me imaginaba era que sabían a menta.
Quedé como 😦 y bueno, después descubrí que los bastoncitos de caramelo también sabían a menta. Jajajaja 😂
Fueron dos grandes choques en mi infancia porque aunque me gustaban muchos los caramelos de menta, esperaba un sabor dulce fuera de lo común.
No sé si seré la única a la que esto le haya sorprendido tanto, pero son cosas que definitivamente marcaron mi infancia.
Ahora cada vez que llega navidad y veo alguna decoración alusiva a estos caramelos, recuerdo aquel día con mucho cariño.
Este año estoy haciendo varias decoraciones navideñas, que por supuesto sirvan para decorar y algunas que también tengan una finalidad mucho más allá de verse lindas.
Hace algunos días había visto un post en esta comunidad sobre hacer artículos para nuestra cocina, pero entre tantas cosas no había tenido tiempo para hacerlo.
Igual utilicé esa iniciativa como inspiración, pues de idea se me había ocurrido hacer unos posavasos inspirados en estos lindos caramelos de menta.
Aunque esta vez, mi idea principal no es decorar mi casa, sino más bien venderlos y llenar de color el hogar de alguien más.
Así que bueno, basta de charla y mejor les cuento el paso a paso para que puedan hacerlos ustedes también.
Hey guys!
We start a new week full of energy and good spirits. Today, I want to share with you a project that I really enjoyed doing.
These are coasters in the shape of mint candy, so typical of the Christmas season.
I remember that many years ago an aunt had come on a trip to my grandmother's house, and she always brought lots of sweets to all her nephews.
Among them, she brought us these candies and when I tasted them it was a shock 😂 because the least I imagined was that they tasted like mint.
I was like 😦 and well, later I discovered that the candy canes also taste like mint. Hahahaha 😂
They were two big shocks in my childhood because although I liked mint candies a lot, I expected a sweet taste out of the ordinary.
I don't know if I'll be the only one who has been so surprised by this, but they are things that definitely marked my childhood.
Now every time Christmas arrives and I see some decoration alluding to these candies, I remember that day with great affection.
This year I am making several Christmas decorations, which of course serve to decorate and some that also have a purpose far beyond looking cute.
A few days ago I had seen a post in this community about making items for our kitchen, but among so many things I hadn't had time to do it.
I still used that initiative as inspiration, because the idea had occurred to me to make some coasters inspired by these cute mint candies.
Although this time, my main idea is not to decorate my house, but rather to sell them and fill someone else's home with color.
So good, enough talk and I better tell you the step by step so you can do them too.
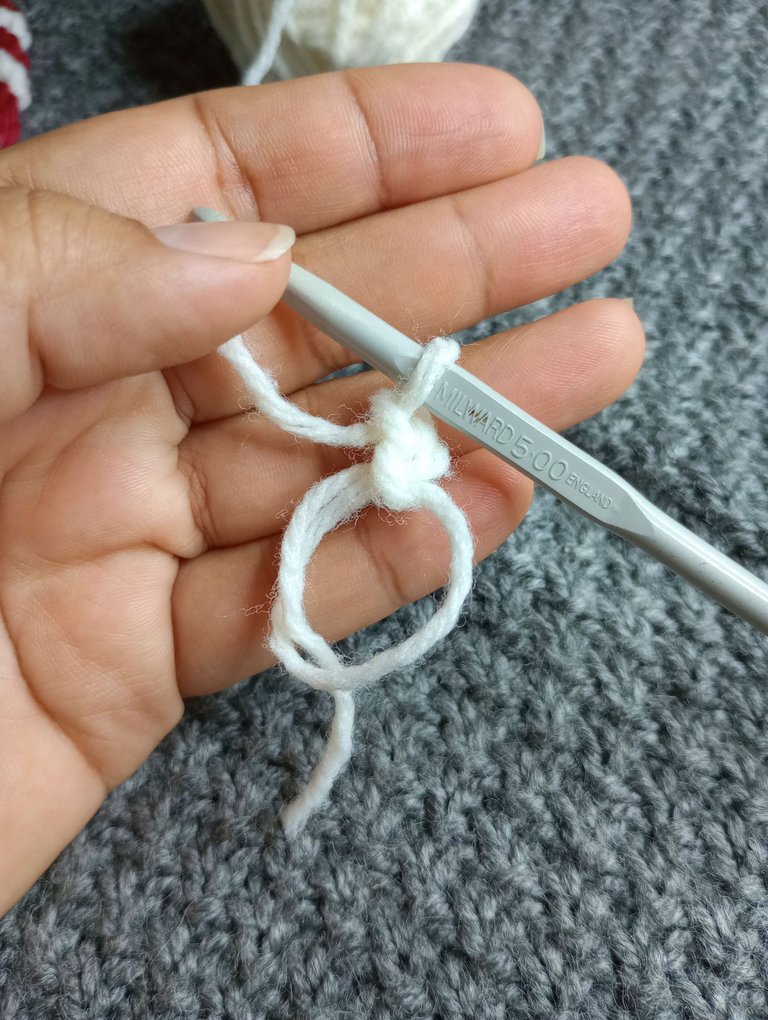
Para esta manualidad yo utilicé una lana gruesa y una aguja de 5 milímetros.
Comencé haciendo un anillo mágico, luego dos cadenetas para elevar la vuelta y 11 puntos altos. Con esto estaremos creando un círculo tejido.
Para finalizar esta y el resto de las vueltas, hacemos un nudo deslizado.
For this craft I used thick wool and a 5mm needle.
I started by making a magic ring, then chain two to raise the round and 11 double crochet. With this we will be creating a woven circle.
To finish this and the rest of the turns, we make a slip knot.
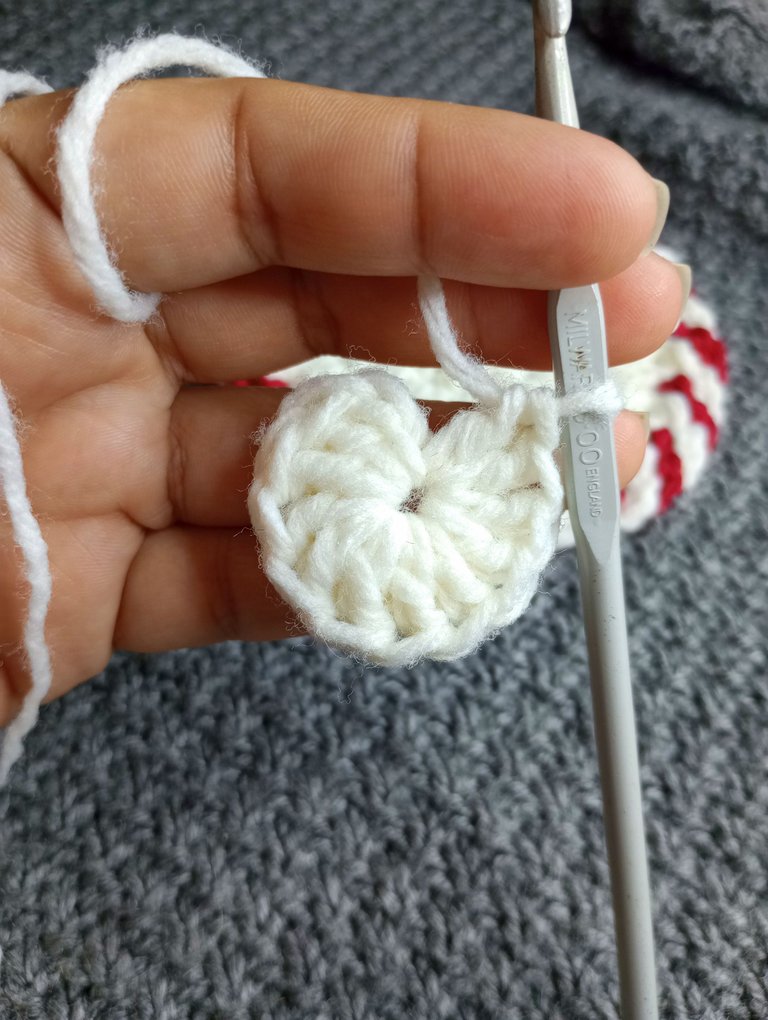
Para la segunda vuelta tejemos nuevamente dos cadenetas y en cada punto vamos a tejer un aumento, es decir, que sobre cada punto tejeremos dos puntos altos para un total de 23 puntos altos más las dos cadenetas del inicio que cuentan como uno.
For the second round we will crochet two chains again and in each stitch we will crochet an increase, that is, on each stitch we will crochet two double crochets for a total of 23 double crochets plus the two chains from the beginning that count as one.
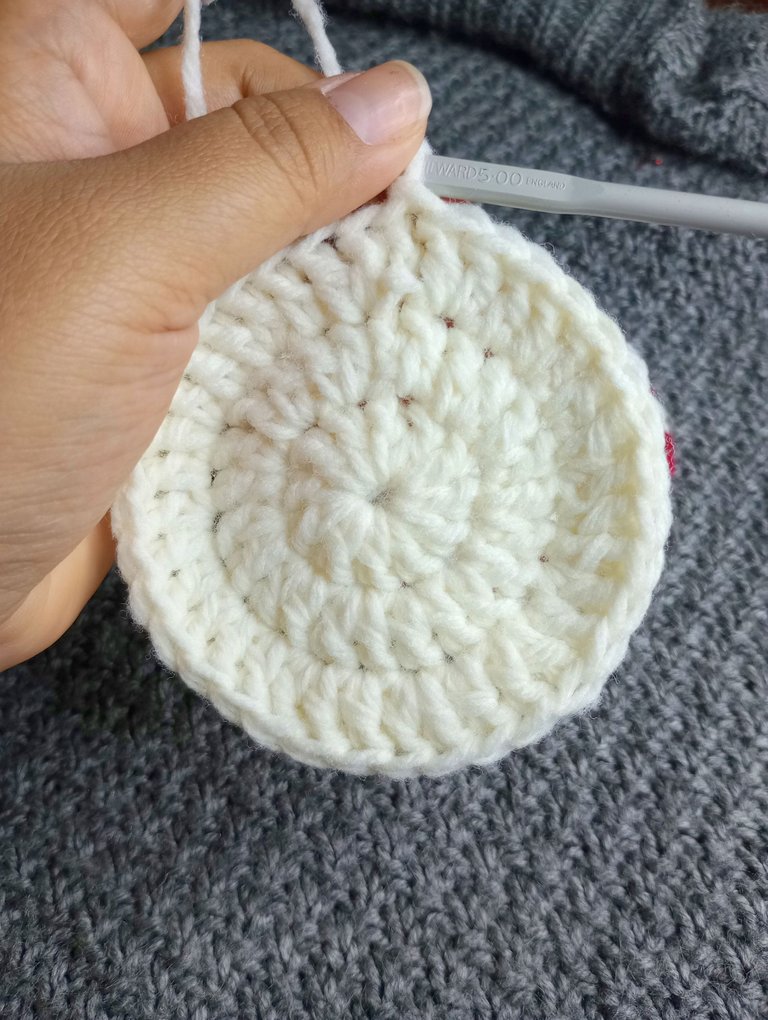
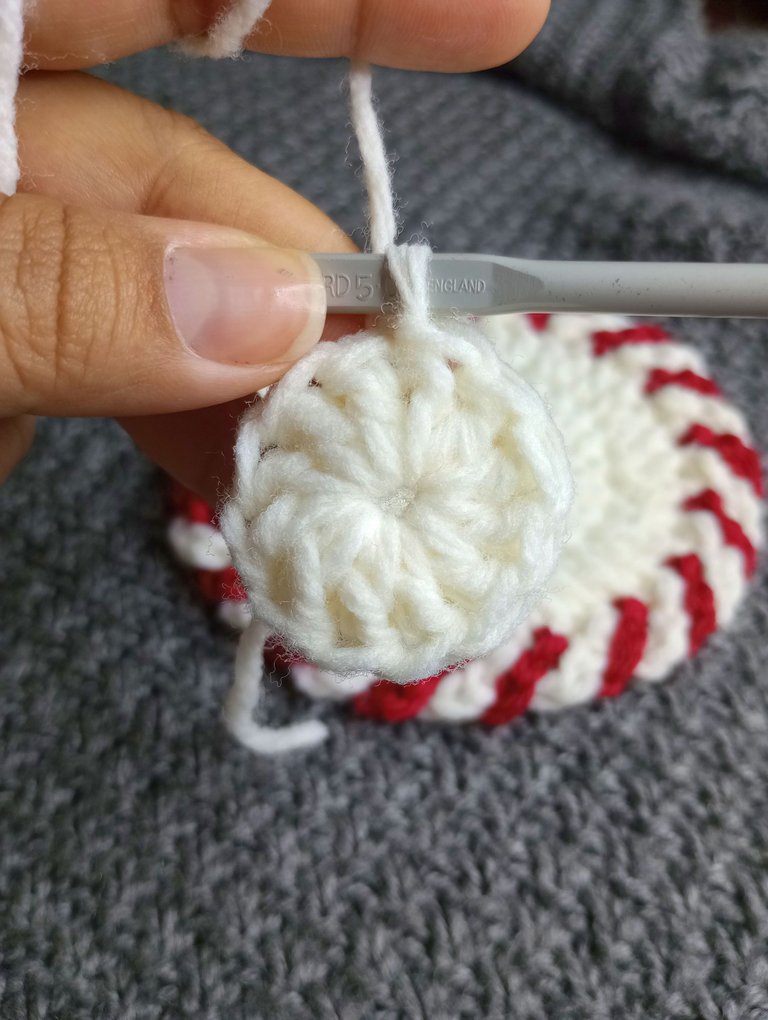
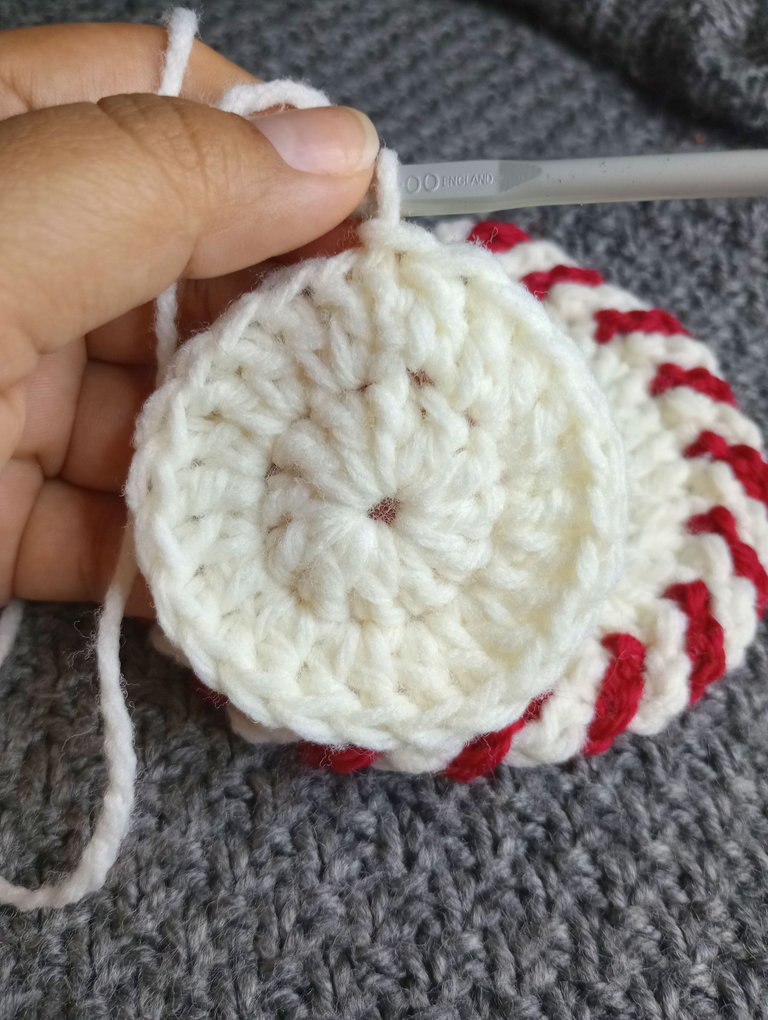
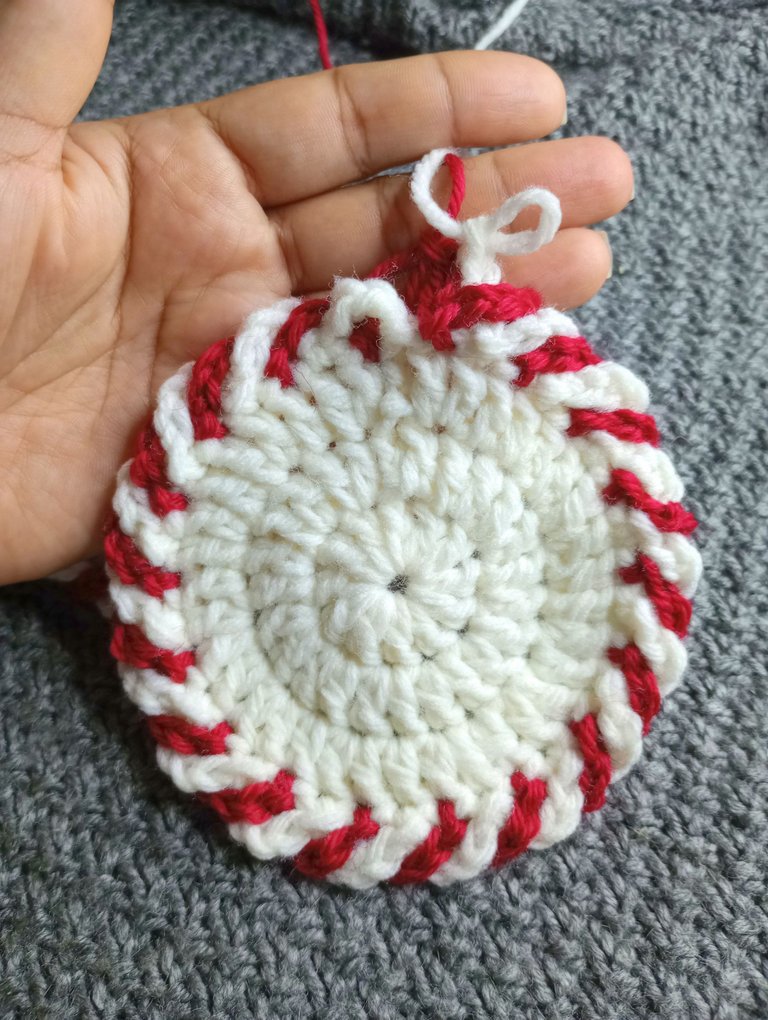
Tejeremos la tercera vuelta iniciando con las dos cadenetas y esta vez haremos un punto alto y en el siguiente haremos un aumento. Continuamos esta secuencia hasta obtener 35 puntos más las dos cadenetas del inicio.
Ya en este punto el tamaño del posavasos está perfecto, aunque todo dependerá del grosor del hilo y la aguja que utilices.
Te recomiendo que vayas midiendo utilizando un vaso o taza como referencia.
We will knit the third round starting with the two chains and this time we will make a double crochet and in the next we will make an increase. We continue this sequence until we get 35 stitches plus the two chains from the beginning.
At this point, the size of the coaster is perfect, although everything will depend on the thickness of the thread and the needle you use.
I recommend that you measure using a glass or cup as a reference.
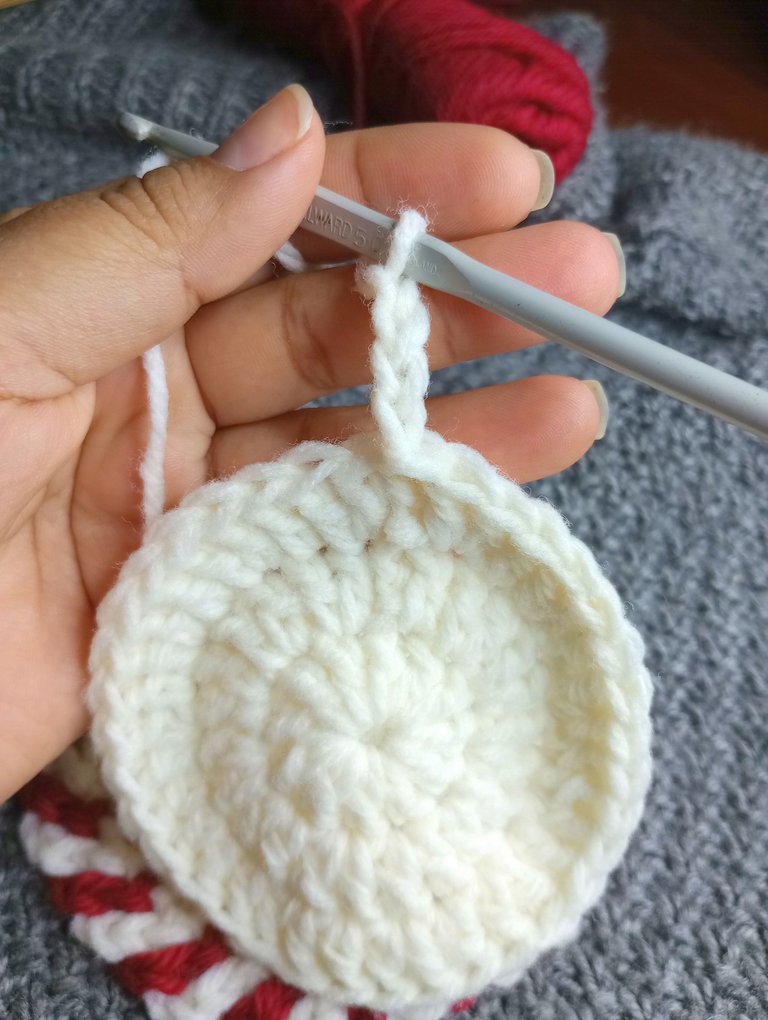
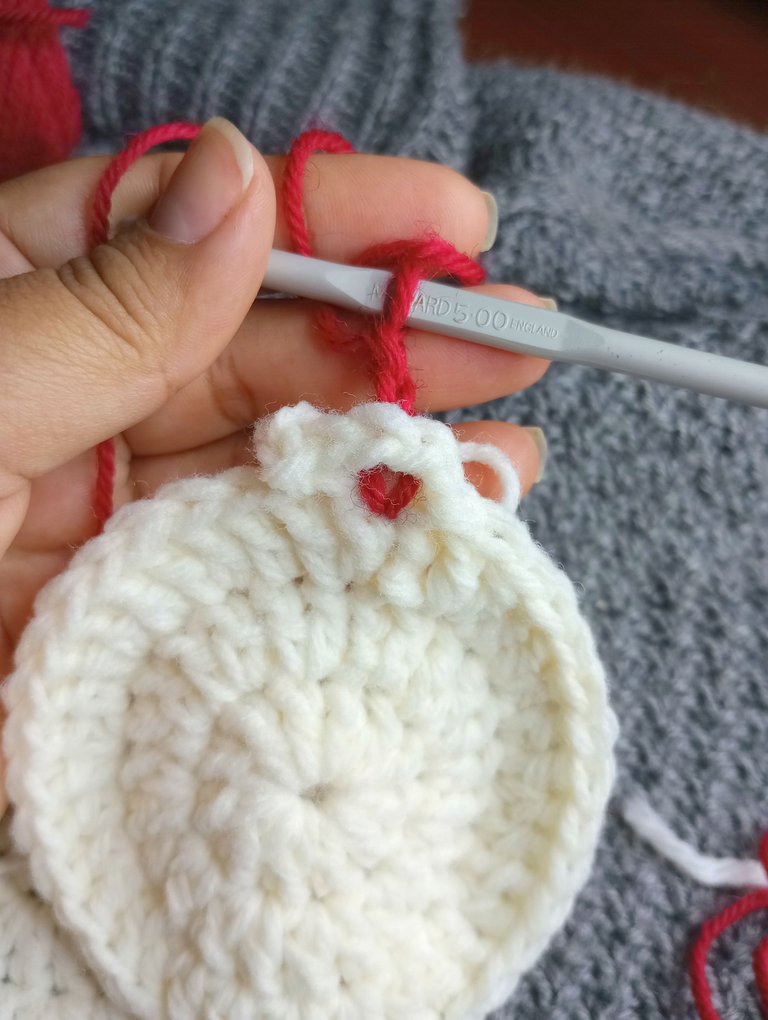
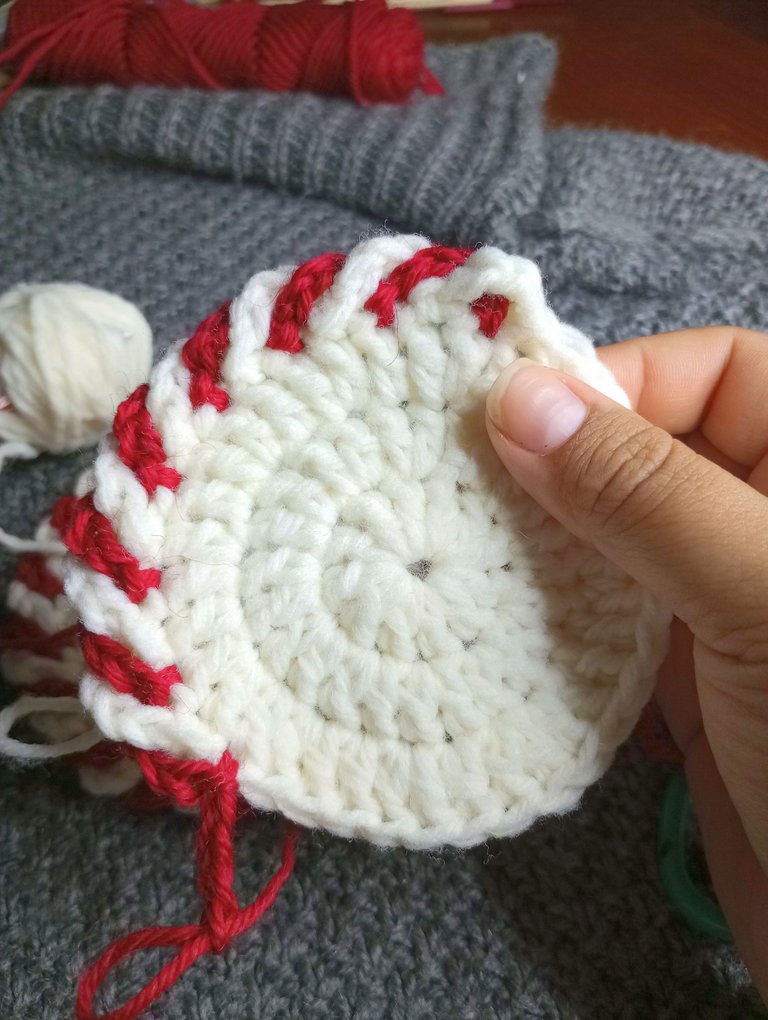
Ahora viene la parte divertida, hacer esos arcos en todo el borde.
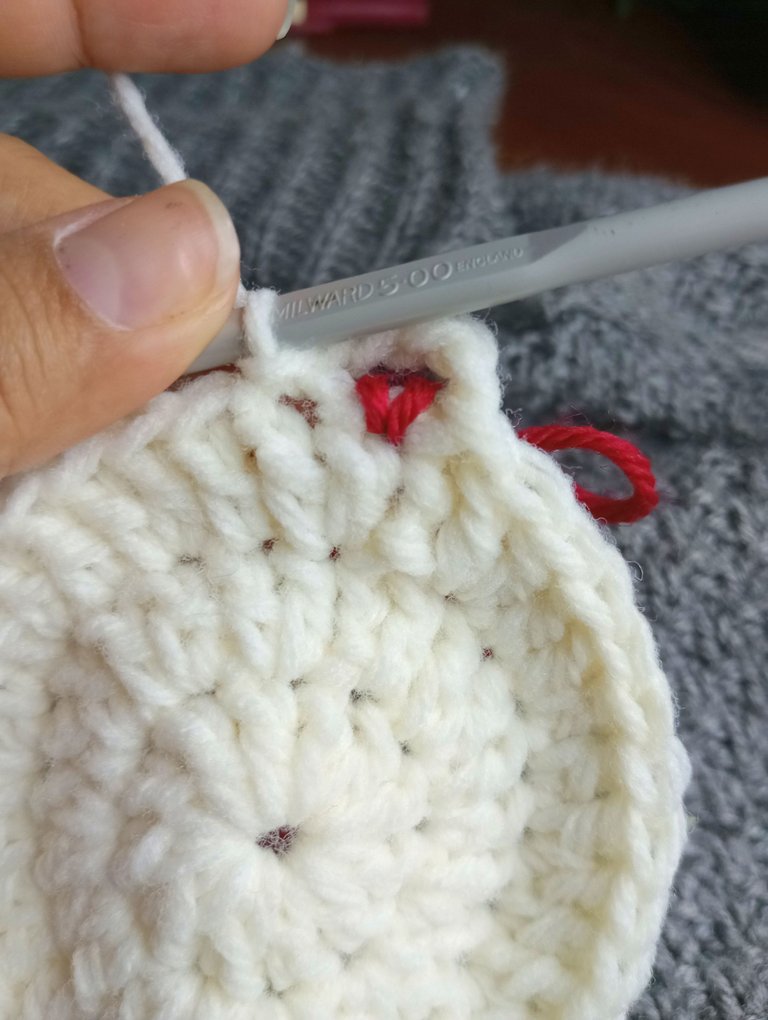
Para ello vamos a comenzar la vuelta tejiendo 4 cadenetas, dejamos de lado el hilo de color blanco, teniendo cuidado que no se deshagan las cadenetas, y ahora vamos a introducir en el siguiente punto el hilo rojo, haciendo 4 cadenetas más.
La idea es ir intercalando ambos colores por todo el borde.
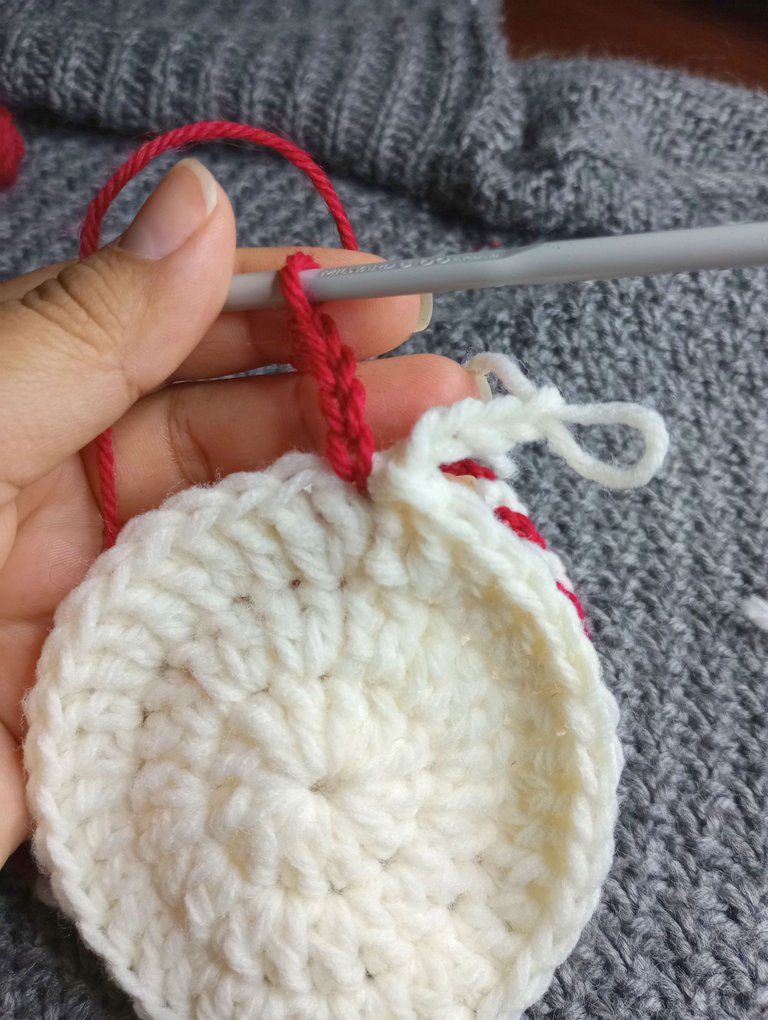
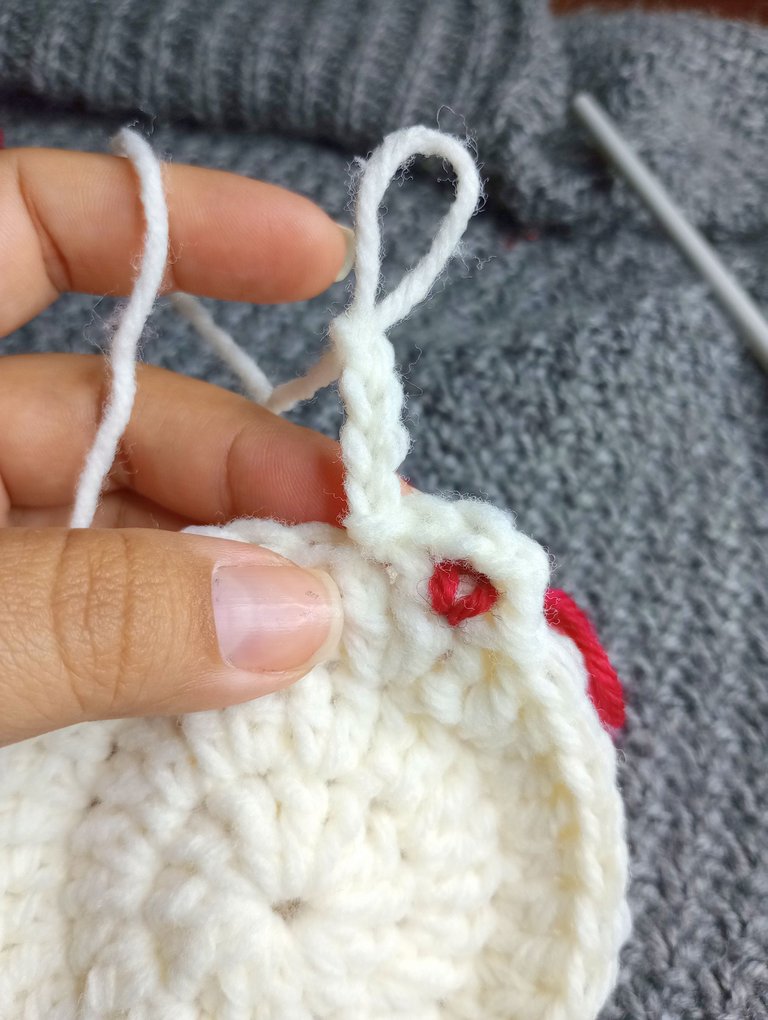
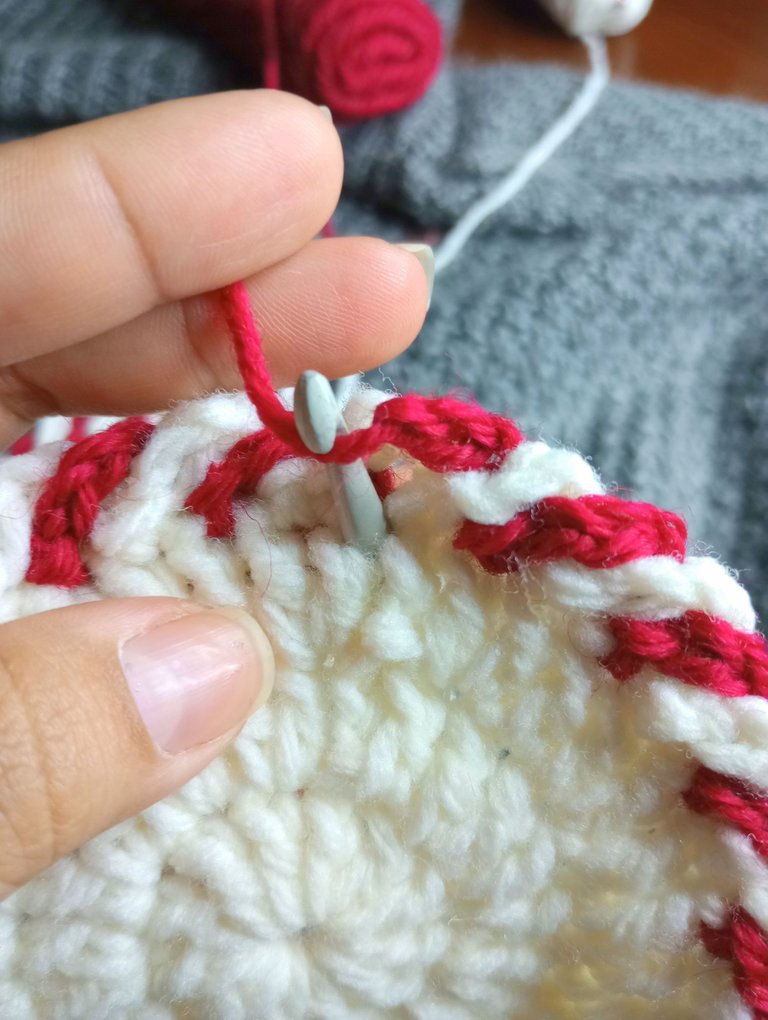
Colocamos hacia atrás el hilo rojo y pasamos por encima las cadenetas de color blanco, introducimos la aguja en el hilo y tejemos en el siguiente espacio un punto deslizado.
Luego tejemos nuevamente las 4 cadenetas y colocamos para atrás el hilo blanco, así hacemos espacio al hilo rojo, dónde introduciremos la aguja y repetiremos el proceso, haciendo un punto deslizado, las 4 cadenetas y cambiando nuevamente al otro color.
Al principio suena un poco complicado, pero una vez que agarres la práctica te aseguro que querrás utilizar esta técnica en todo.
Now comes the fun part, making those arches all the way around the rim.
To do this we are going to start the round by weaving 4 chains, we leave aside the white thread, taking care that the chains are not undone, and now we are going to introduce the red thread in the next stitch, making 4 more chains.
The idea is to intersperse both colors around the edge.
We place the red thread behind and pass over the white chains, insert the needle into the thread and knit a slip stitch in the next space.
Then we weave the 4 chains again and place the white thread behind, thus making space for the red thread, where we will insert the needle and repeat the process, making a slip stitch, the 4 chains and changing again to the other
color.
At first it sounds a bit complicated, but once you get the hang of it I assure you that you will want to use this technique in everything.
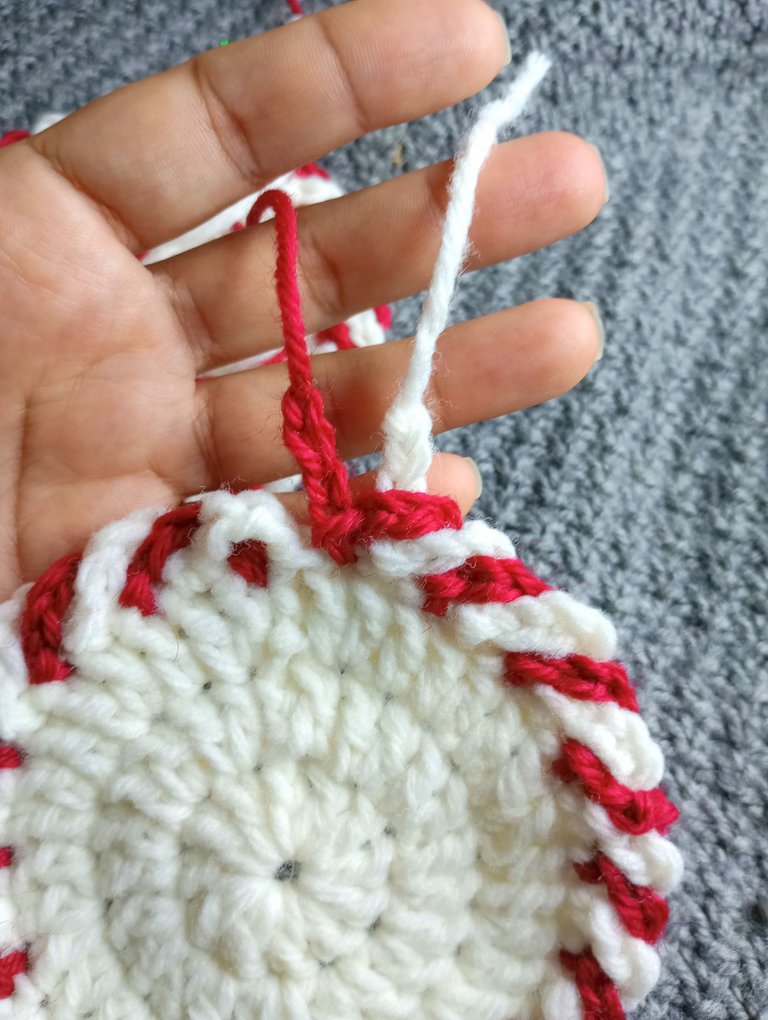
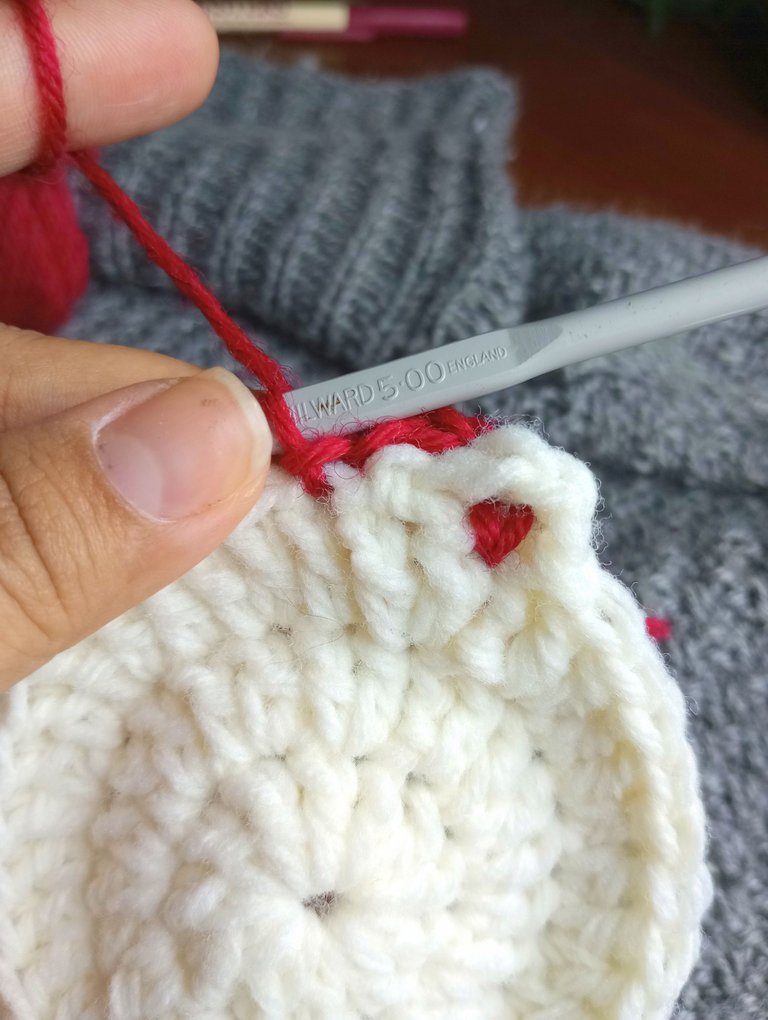
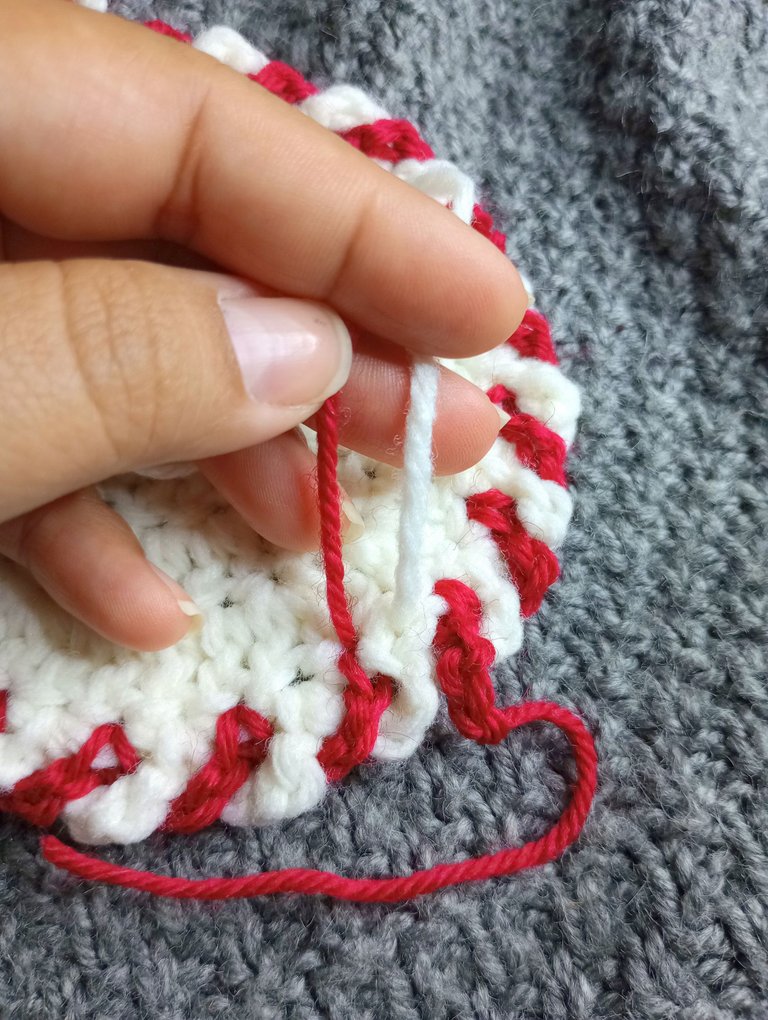
Así vamos tejiendo hasta llegar al punto final. Cortaremos ambos hilos, dejando un excedente de unos 8 centímetros.
Luego vamos a finalizar cada color introduciendo el hilo correspondiente en el inicio de cada uno.
Introducimos la aguja desde atrás y jalamos el hilo.
This is how we weave until we reach the end point. We will cut both threads, leaving a surplus of about 8 centimeters.
Then we are going to finish each color by inserting the corresponding thread at the beginning of each one.
We introduce the needle from behind and pull the thread.
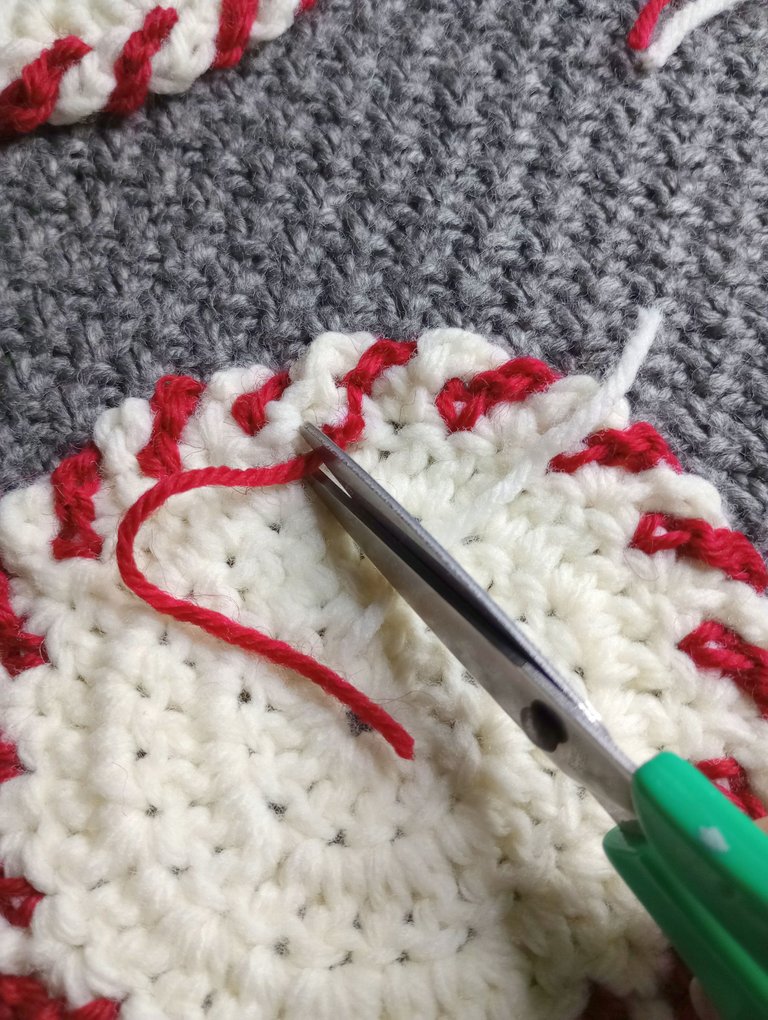
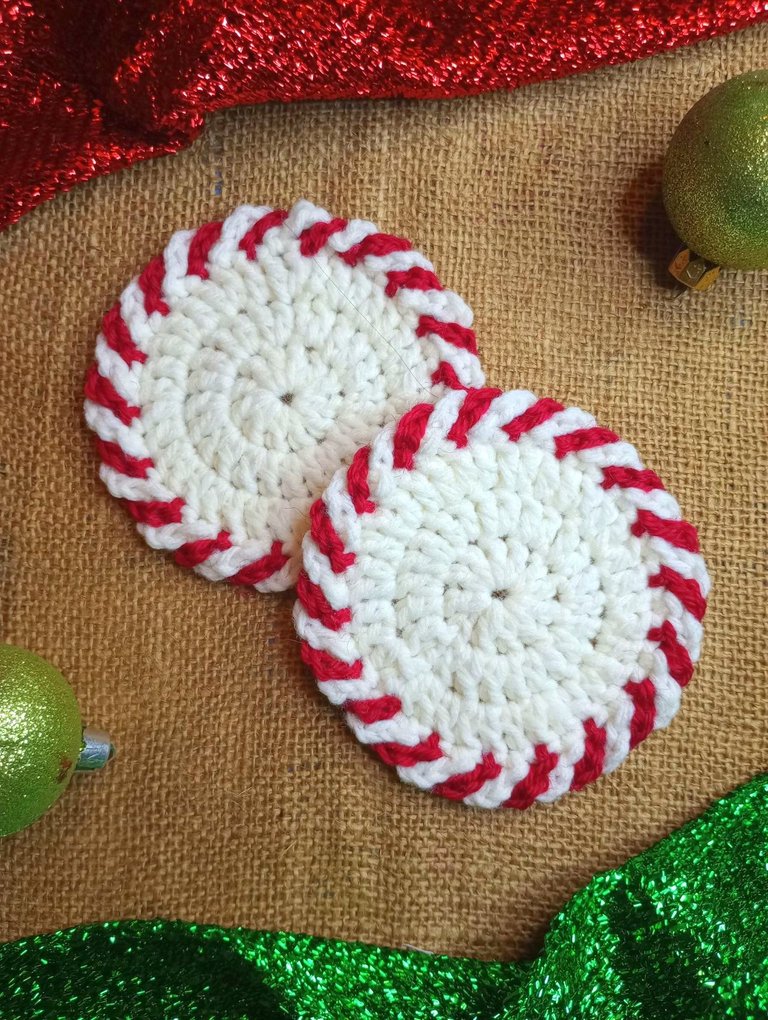
Luego, damos la vuelta al tejido y hacemos unos nudos para asegurarlo.
Cortamos el excedente y así finalizamos la realización de estos posavasos.
Then, we turn the fabric over and tie a few knots to secure it.
We cut the excess and thus we finished the realization of these coasters.
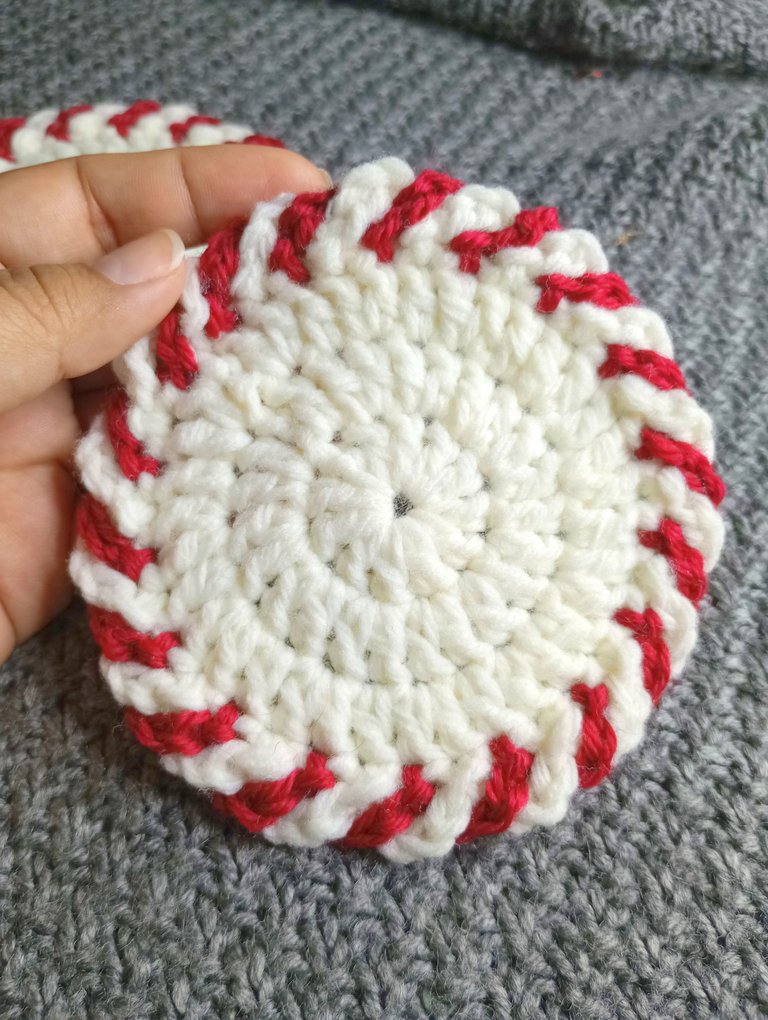
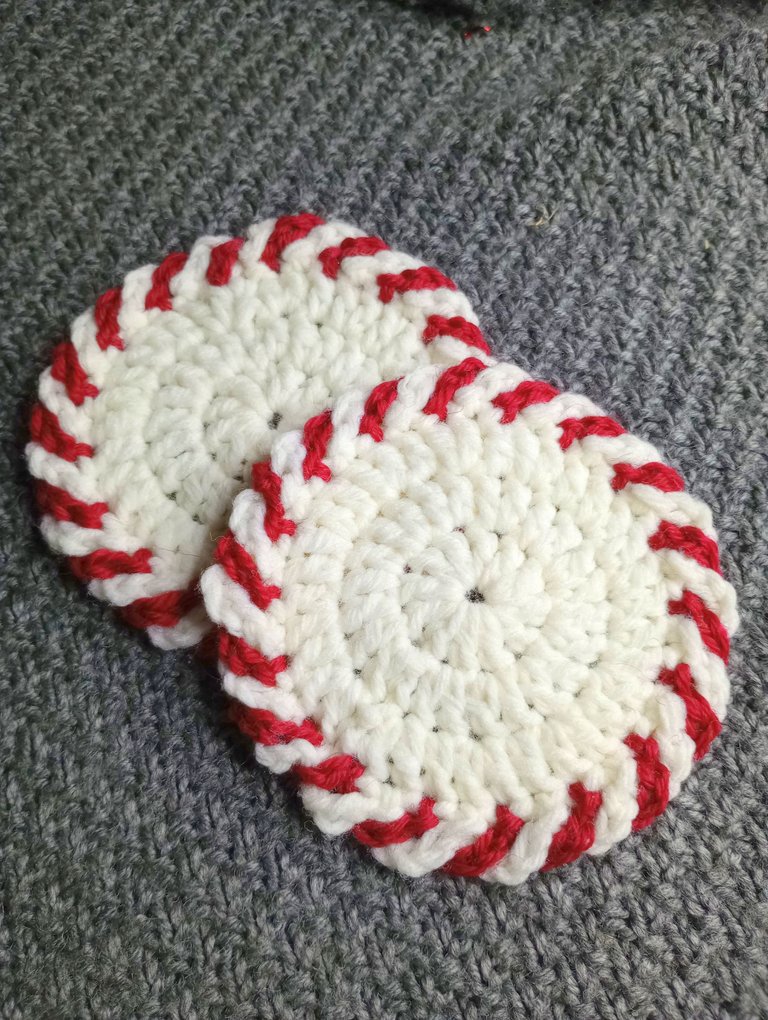
Puedes hacer tantos como quieras (y como el material te lo permita 🤭).
Yo los adoré y estoy loca por dejarlos para mí, pero debo estar firme con mis objetivos jajaja.
Espero les hayan gustado y los hagan en casa. Nos vemos en una próxima manualidad. ✨😊
You can make as many as you want (and as the material allows it 🤭).
I loved them and I'm crazy to leave them for myself, but I have to be firm with my goals hahaha.
I hope you liked them and make them at home. See you in an upcoming craft. ✨😊

Espero haya sido de tu agrado y provecho.
Un gran abrazo a todos, y nos leemos en un próximo post
• Lakrearte en Hive •
Att: Estefania Garcia ♥

Imágenes y separadores de mi autoría
Portada editada en Canva
Fotografías tomadas con un Moto G31
Texto traducido en Google ImTranslate v.14.27
Estos posavasos han quedado muy lindos, hace un tiempo realizé unos parecidos y me encantó el resultado ya que son muy sencillos de elaborar.
Gracias por compartir este proyecto con nosotros, saludos.
Exacto son sencillos de hacer pero al mismo tiempo lucen bien lindos y dan un gran detalle. Tenemos los mismos gustos entonces 😊 que chévere! ✨
Gracias a ti por visitar mi blog 🤗 te mando un abrazo ❤️
Que hermosos portavasos 😍. Felicidades por tan lindo trabajo
Muchas gracias 😊 me alegra que te hayan gustado ✨❤️ te mando un abrazo
Me encantaría tener de estos posavasos en todos los colores, oye para mí también fue sorpresa conocer el sabor de los bastones de caramelo ajajaj, encantada con tu post.
Verdad que quedan lindos? 🥺 jaja chama para mí marco un antes y un dsps, fue bien chimbo caer en la realidad jajaja por lo menos se que no fui a la única que le pasó. Gracias por pasarte a mi blog. Eres bienvenida cuando gustes ✨❤️😊
Quedaron muy bonitos! te felicito por tu creatividad. 😍😍 Me gustó ese dato sobre los dulces de menta, ya que yo nunca los probé y me imaginaba otra cosa 😁
Creo que todos nos imaginabamos algo diferente con esos caramelos jajaja muchas gracias! Me alegra que te hayan gustado 😊✨❤️
Lovely and christmassy! But the color change in the border seems difficult for me. I'm happy you made it as if its very easy
Hey, it's not complicated at all. It's just a matter of working a color on one stitch and then changing the color on the next stitch, placing it backwards and then riding it over the other stitches to change it. Put it into practice and you will see that it was not such a difficult thing to do. I'm glad you liked the craft. Sending you a hug 🤗❤️✨
thanks. I find osme things complcated but I might try it once to see if it really is complicated to do for me