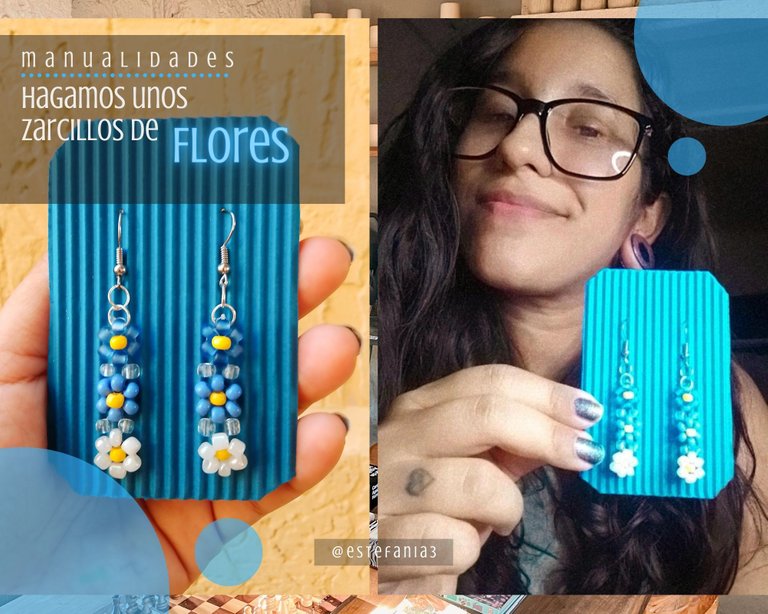
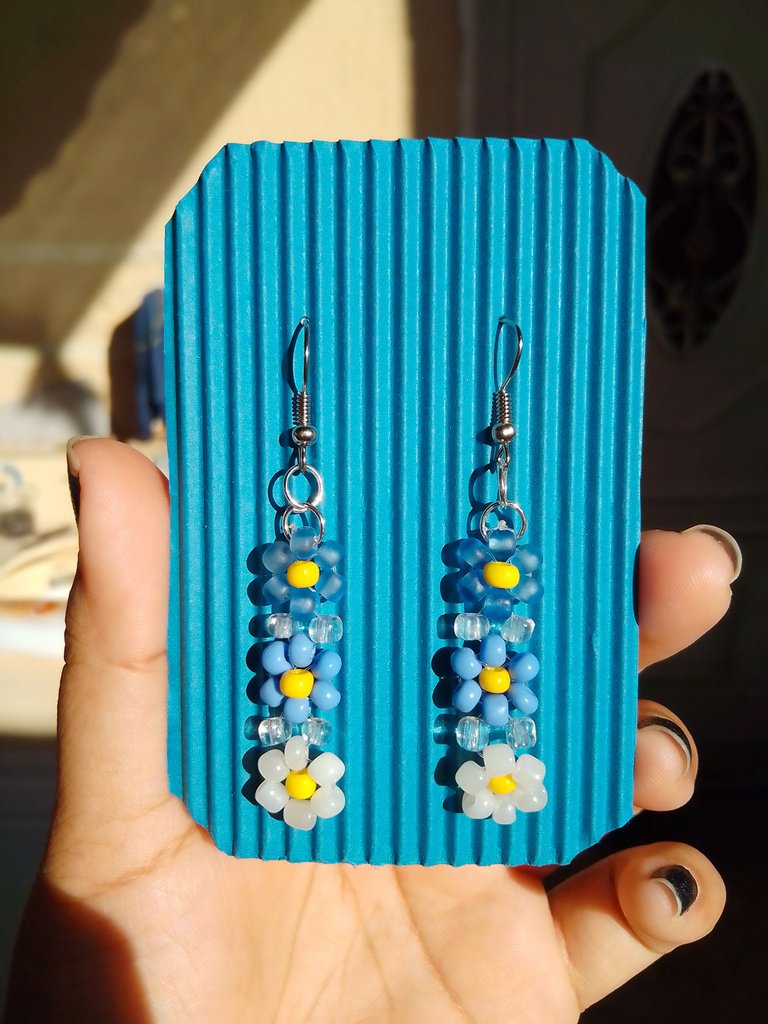
Manualidades: Hagamos unos zarcillos de flores || Crafts: Let's make some flower tendrils 🌸♥

¡Hola Chicos!
Como les he comentado en días anteriores, he estado haciendo nuevas piezas para mi venta de artesanías. Es a lo que me he dedicado de lleno a diario. He dejado los pinceles a un lado para poder hacer suficientes piezas para ofrecer.
Hoy quisiera compartir con ustedes el tutorial de estos lindos zarcillos. La idea salió cuando hacía una pulsera y mi esposo se acercó a mi mesa de trabajo. Me dijo: "Están bonitas esas flores, como para unos zarcillos". Y pues, me puse manos a la obra y he creado estas lindas piezas.
Créanme que si pudiera usarlos los dejaría para mí, pero por mis expansiones esto no es posible 😅. Igual no me dejan de parecer lindos y lo que considero mejor es que se pueden hacer grandes cantidades en poco tiempo.
Se utilizan muy pocos materiales y para quienes no cuentan con mucho es una excelente opción para comenzar.
Pero no les digo más, mejor vayamos con los materiales y el paso a paso.
¡Acompáñenme!
Hey guys!
As I have told you in previous days, I have been making new pieces for my craft sale. It is what I have devoted myself to daily. I've put the brushes aside so I can make enough pieces to offer.
Today I would like to share with you the tutorial of these cute earrings. The idea came up when I was making a bracelet and my husband came over to my work table. He told me: 'Those flowers are pretty, like for tendrils.' And so, I got down to work and created these beautiful pieces.
Believe me that if I could use them I would leave them to myself, but due to my expansions this is not possible 😅. They still look cute to me and what I consider best is that you can make large quantities in a short time.
Very few materials are used and for those who do not have much it is an excellent option to start.
But I won't tell you more, let's go with the materials and the step by step.
Join me!
- Abalorios de colores
- Nylon
- Argollas plateadas
- Un par de anzuelos para zarcillos
- Color beads
- Nylon
- Silver hoops
- A pair of earring hooks
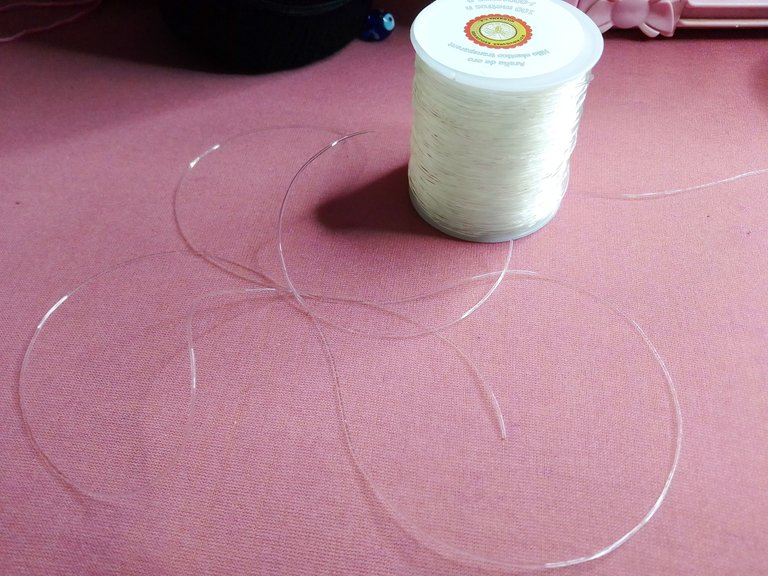
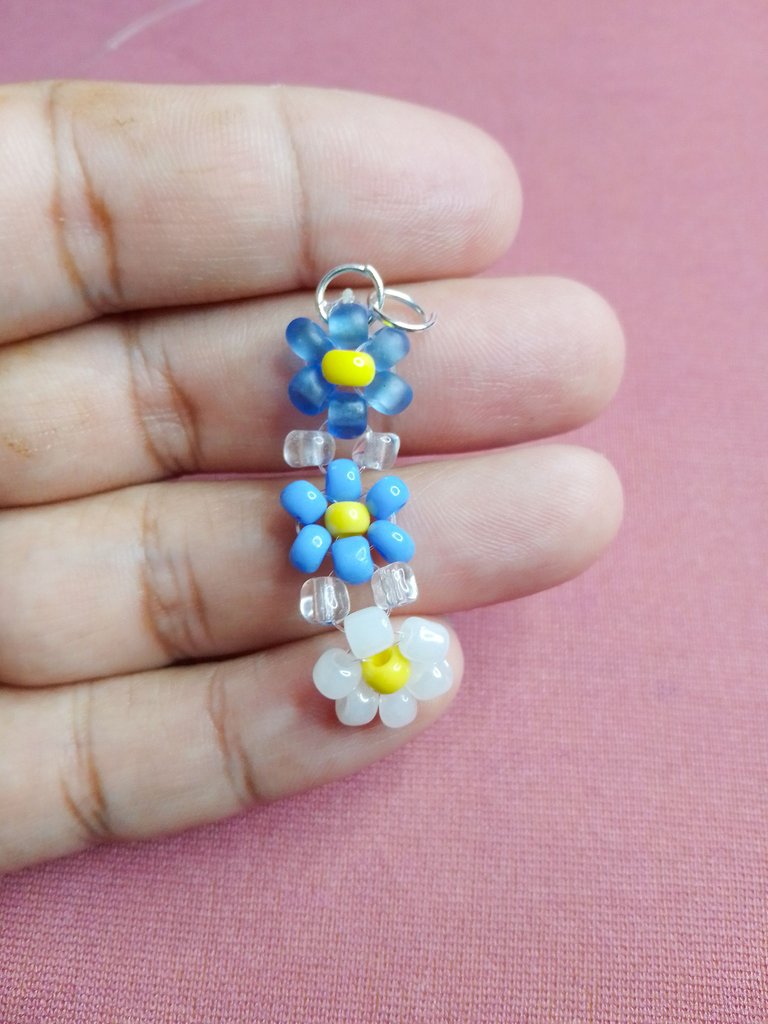
Primero cortaremos unos 20 centímetros de nylon transparente y seleccionamos los abalorios que vamos a usar.
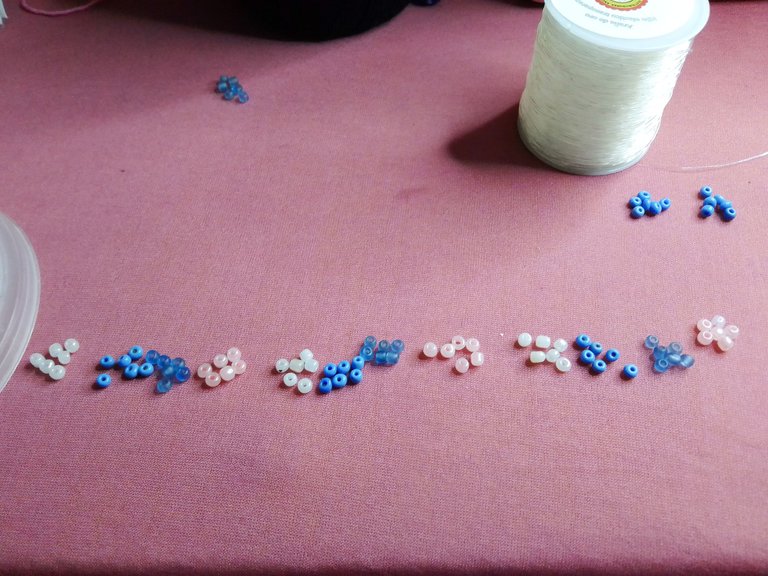
Por cada flor debemos contar con 6 más el amarillo del centro.
First we will cut about 20 centimeters of transparent nylon and select the beads that we are going to use.
For each flower we must have 6 plus the yellow in the center.
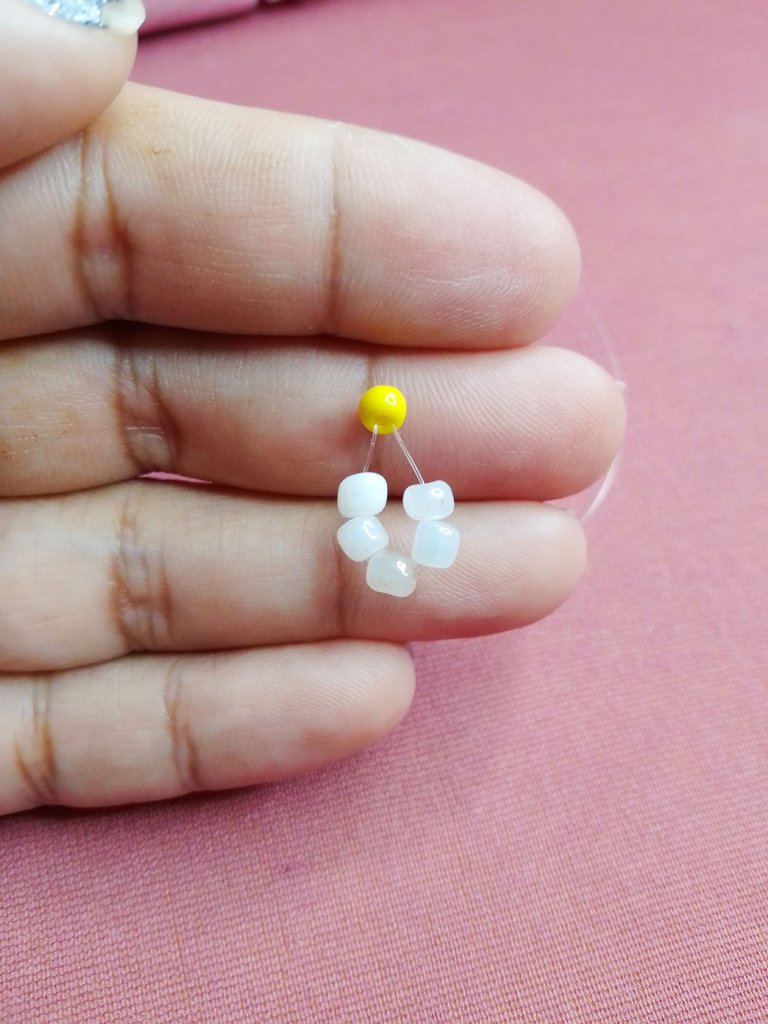
Introducimos en él 5 abalorios, en mi caso son de color blanco perla. Tomamos los extremos e introducimos un abalorio de color amarillo para el centro de la flor.
Hacemos un pequeño giro hacia abajo y colocamos los hilos a ambos lados del abalorio blanco del centro, en el sentido que traían anteriormente.
Introducimos cada lado en las dos cuentas restantes, de abajo hacia arriba, tal y como se muestra en la tercera imagen.
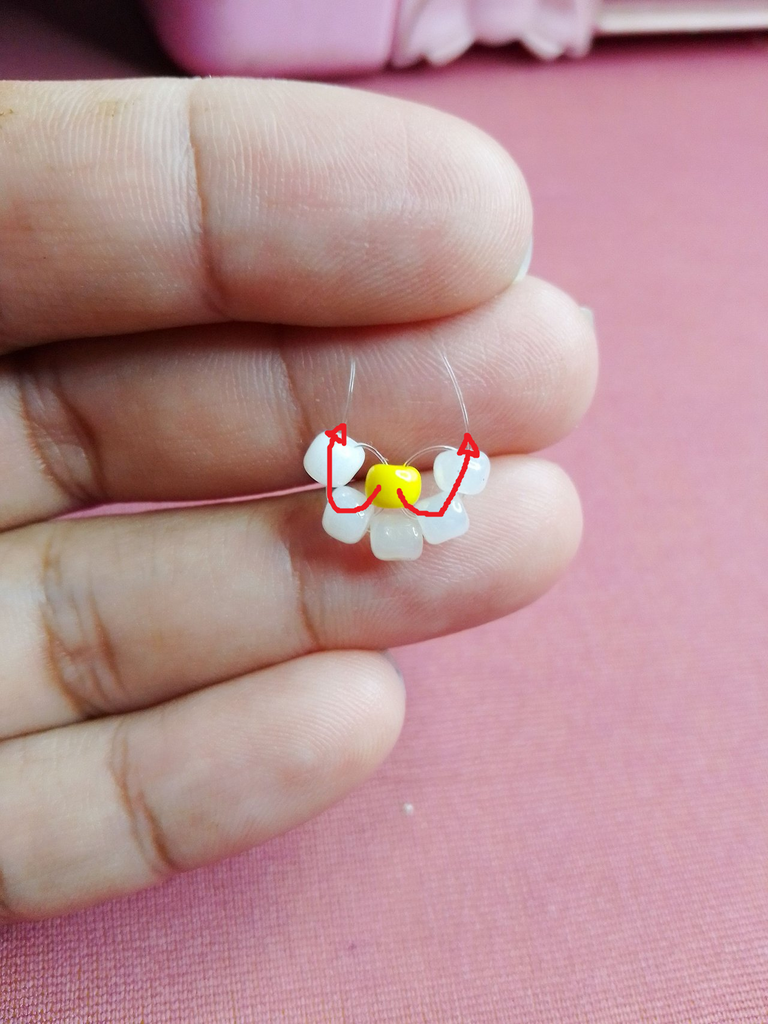
We introduce 5 beads into it, in my case they are pearl white. We take the ends and introduce a yellow bead for the center of the flower.
We make a small turn downwards and place the threads on both sides of the white bead in the center, in the direction they were previously.
We introduce each side in the two remaining beads, from the bottom up, as shown in the third image.

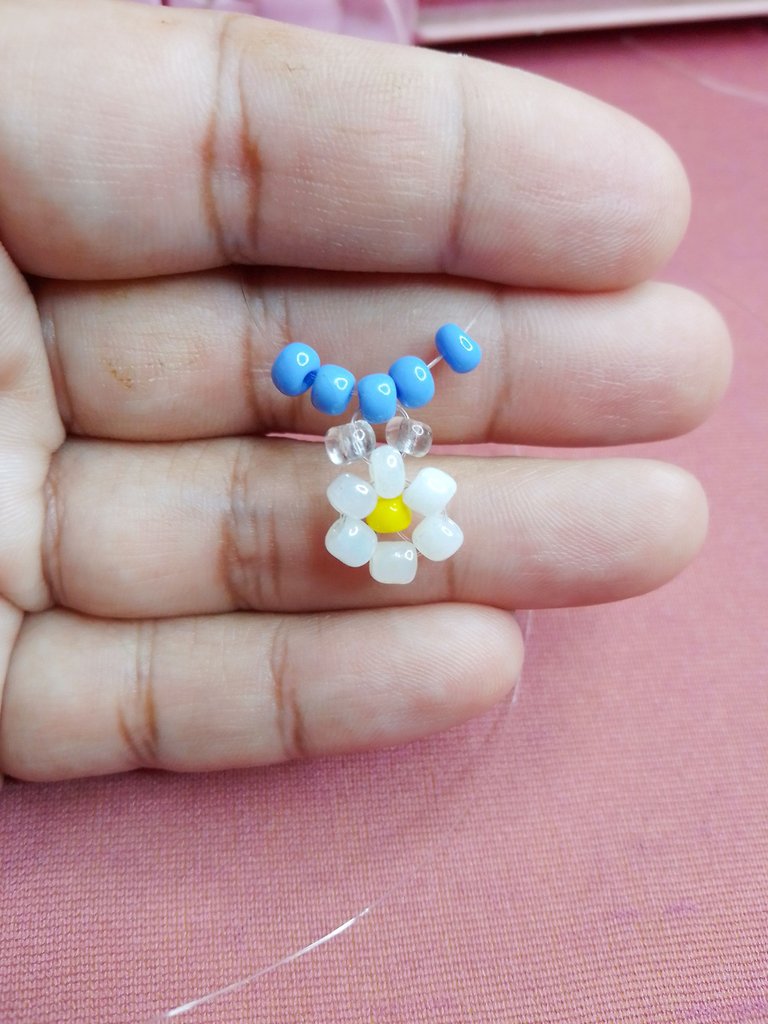
Agregamos un último abalorio blanco, introduciendo ambos extremos en sentido contrario al otro, así quedará un hilo de cada lado.
La separación entre cada flor la hice agregando dos cuentas transparentes, como se muestra en la imagen.
Para la nueva flor introducimos un abalorio del nuevo color, cruzando ambos extremos de nylon en su interior, agregamos dos abalorios de cada lado y luego introducimos ambos hilos en el interior de uno de color amarillo.
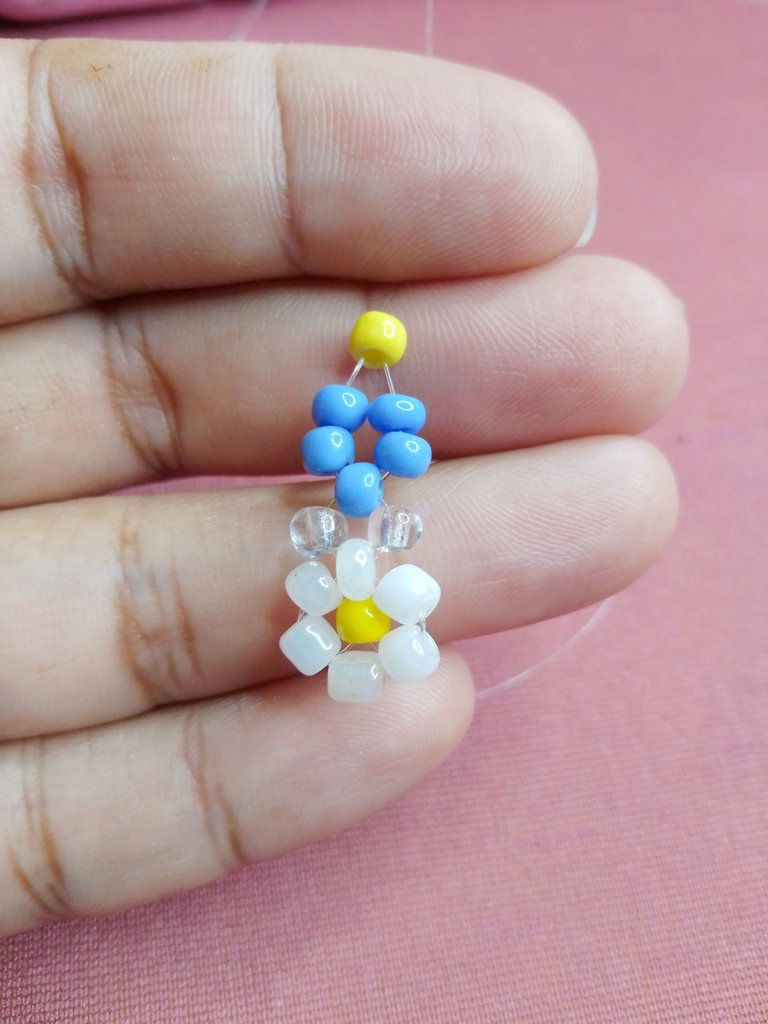
Para finalizar repetimos el proceso como en la primera flor.
We add a last white bead, introducing both ends in the opposite direction to the other, so there will be a thread on each side.
I made the separation between each flower by adding two transparent beads, as shown in the image.
For the new flower we introduce a bead of the new color, crossing both nylon ends inside it, we add two beads on each side and then we introduce both threads inside a yellow one.
To finish we repeat the process as in the first flower.
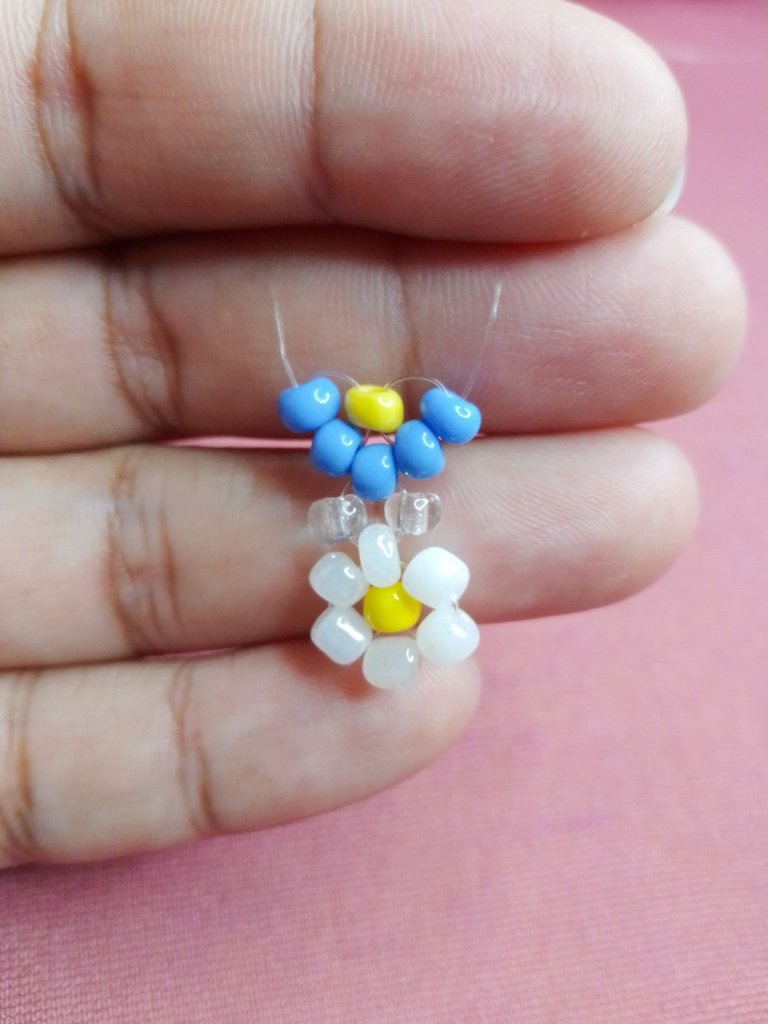
Repetimos este proceso de acuerdo a la cantidad de flores que queramos en nuestros zarcillos. Al finalizar hacemos un nudo y quemamos los extremos para asegurarlos.
Colocamos una de las argollas plateadas dentro del abalorio de la flor y otra dentro de esta que será la que ira sujetada al anzuelo.
We repeat this process according to the number of flowers we want in our tendrils. At the end we make a knot and burn the ends to secure them.
We place one of the silver rings inside the trinket of the flower and another one inside this one that will be the one that will be attached to the hook.
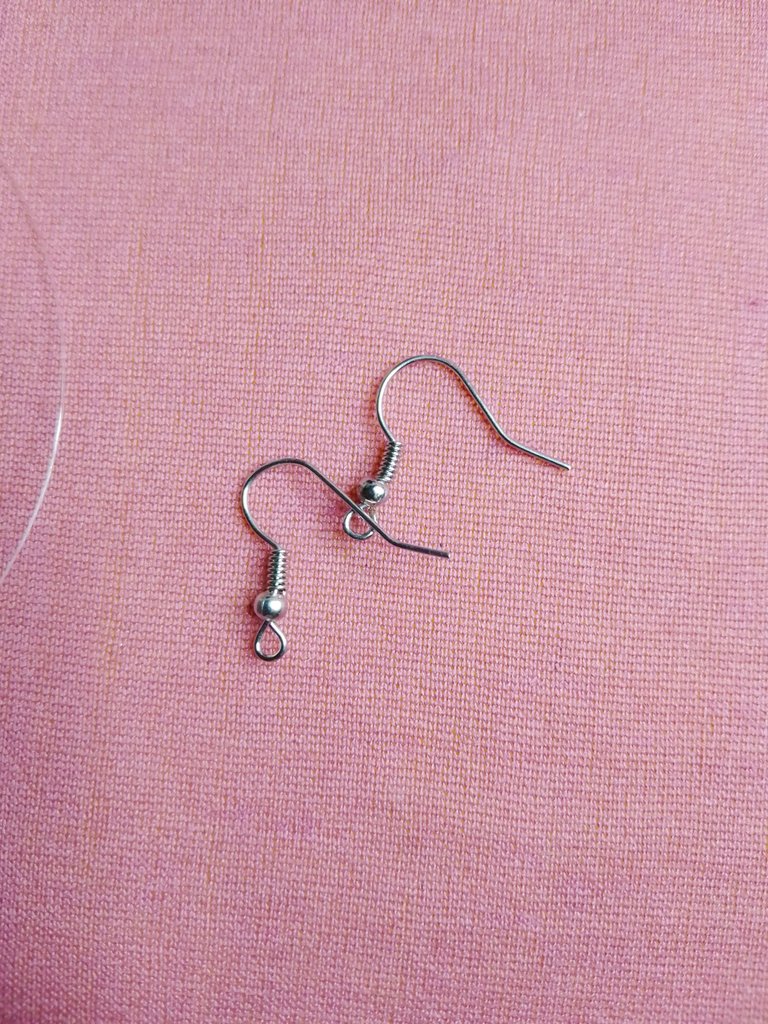
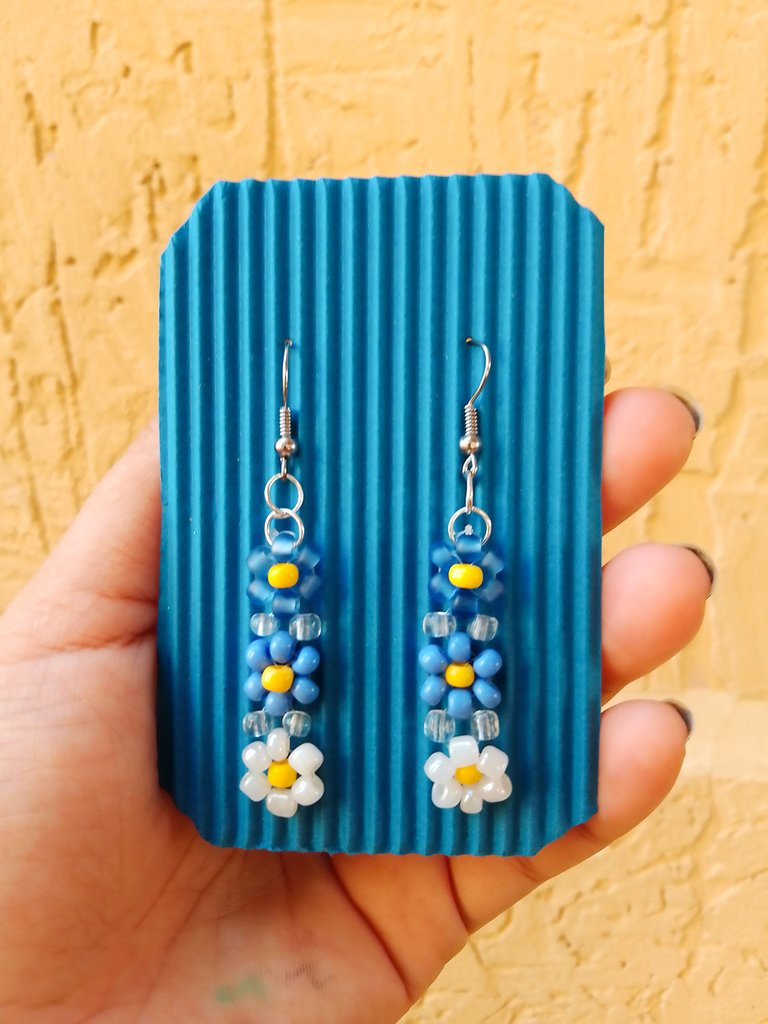
Para finalizar tomamos ambos anzuelos para zarcillos y los colocamos dentro de la argolla plateada. Ajustamos y ya tendremos listos nuestros zarcillos de flores. ♥
Dime, ¿qué te ha parecido la propuesta?
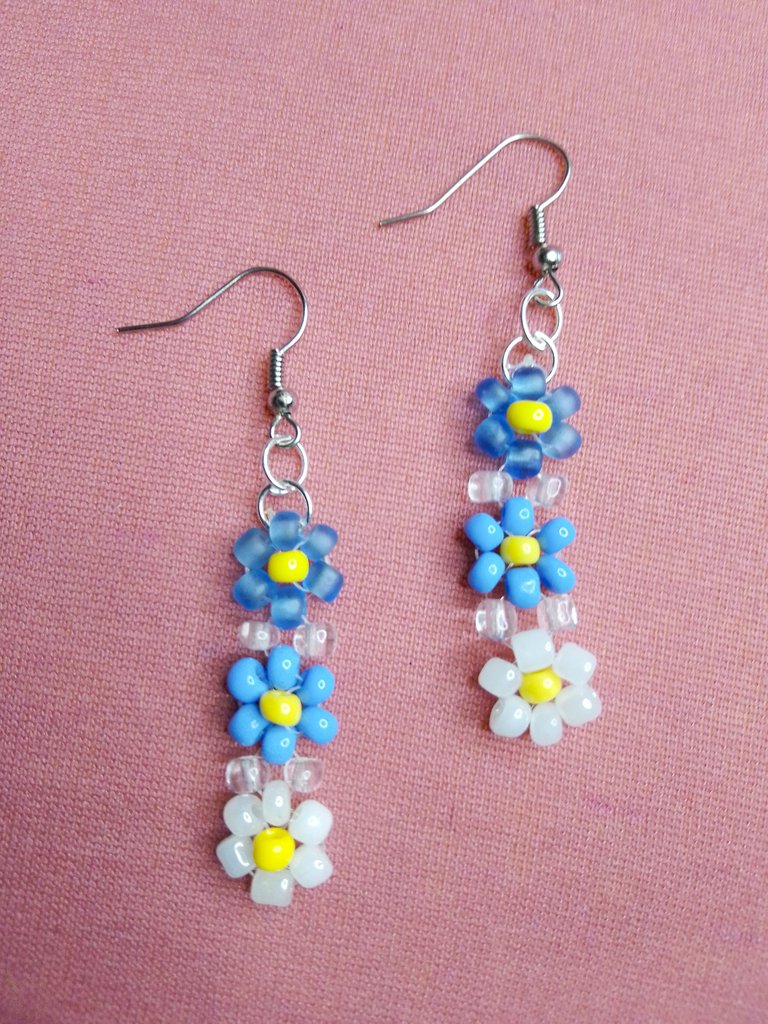
To finish we take both hooks for tendrils and place them inside the silver ring. We adjust and we will have our flower tendrils ready. ♥
Tell me, what did you think of the proposal?

Espero haya sido de tu agrado y provecho.
Un gran abrazo a todos, y nos leemos en un próximo post
• Lakrearte en Hive •
Att: Estefania Garcia ♥

Imágenes y separadores de mi autoría
Portada editada en Canva
Fotografías tomadas con un Moto E7i power
Texto traducido en Google ImTranslate v.14.19
Thank you for sharing this amazing post on HIVE!
Your content got selected by our fellow curator @rezoanulvibes & you just received a little thank you via an upvote from our non-profit curation initiative!
You will be featured in one of our recurring curation compilations and on our pinterest boards! Both are aiming to offer you a stage to widen your audience within and outside of the DIY scene of hive.
Join the official DIYHub community on HIVE and show us more of your amazing work and feel free to connect with us and other DIYers via our discord server: https://discord.gg/mY5uCfQ !
If you want to support our goal to motivate other DIY/art/music/homesteading/... creators just delegate to us and earn 100% of your curation rewards!
Stay creative & hive on!
Te quedaron muy bonitos @estefania3. Me gustó mucho la combinación de colores. Gracia por compartir tu técnica. Saludos 🌻💐🌈🧚🐦😊💕😘🤗