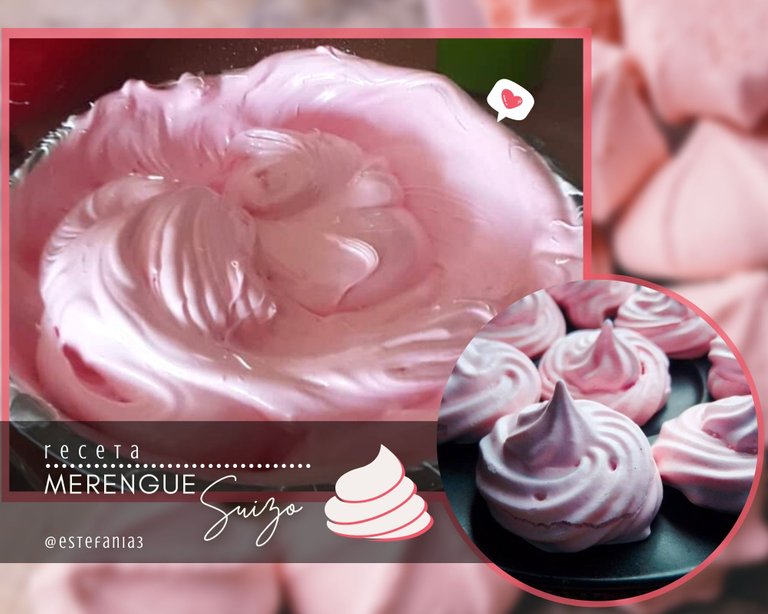
Receta: Merengue Suizo || Recipe: Swiss Meringue ♥🍰

¡Hola Chicos!
Sé hornear muy bien mis pasteles, pero el único detalle es que no sabía, hasta ahora, como podía decorarlos. Los merengues son mi debilidad.
Recuerdo que cuando mi hijo cumplió 2 años yo le hice su pastel y para decorarlo intenté hacer un merengue básico. En aquel entonces no tenía internet para investigar alguna receta ni tampoco contaba con alguien que me explicara como debía hacerlo. Tenías escasos recuerdos de una tía que me explicó cómo hacerlo, sin embargo, no recordaba muy bien. Sabía que se debían batir claras de huevo con azúcar aunque no sabía cómo.
Entonces lo que hice fue derretir el azúcar en una olla y le agregué un poquito de agua 🤦🏽♀️. Cuando intenté batir las claras a punto de nieve junto al almíbar todo fue un desastre porque el merengue levanto y al rato estaba botando agua jajaja. Son cosas que nos pasan a todos los principiantes. 😅
Desde entonces no había intentado hacer más merengues. Además, no contaba con una batidora, pero como les conté en mi post anterior compré una hermosa batidora de mano y ya puedo hacer diferentes merengues y probar nuevas recetas.
En nuestra última clase de repostería nos enseñaron hacer dos tipos de merengue el merengue francés y el merengue suizo qué es el que hoy voy a compartir con ustedes.
Las fotos que les voy a mostrar a continuación son tomadas por mí en la clase y por supuesto todo con el consentimiento de la profesora para documentar todo el proceso.
Cómo les he comentado en ocasiones anteriores comparto estas recetas para reforzar mis conocimientos adquiridos y al mismo tiempo compartirlos con ustedes para que también los pueden realizar en casa. Así la información es de provecho para ti y para mí. 😊
Lo que más me gusta de este merengue es que está levemente cocinado lo que permite que dure un poco más que el francés.
En la clase estuvimos aplicando diversas técnicas para decorar. Esto es algo que me dejó bastante entusiasmada y con ganas de hacer un pastel para decorarlo y saber que tal me quedara esta vez.
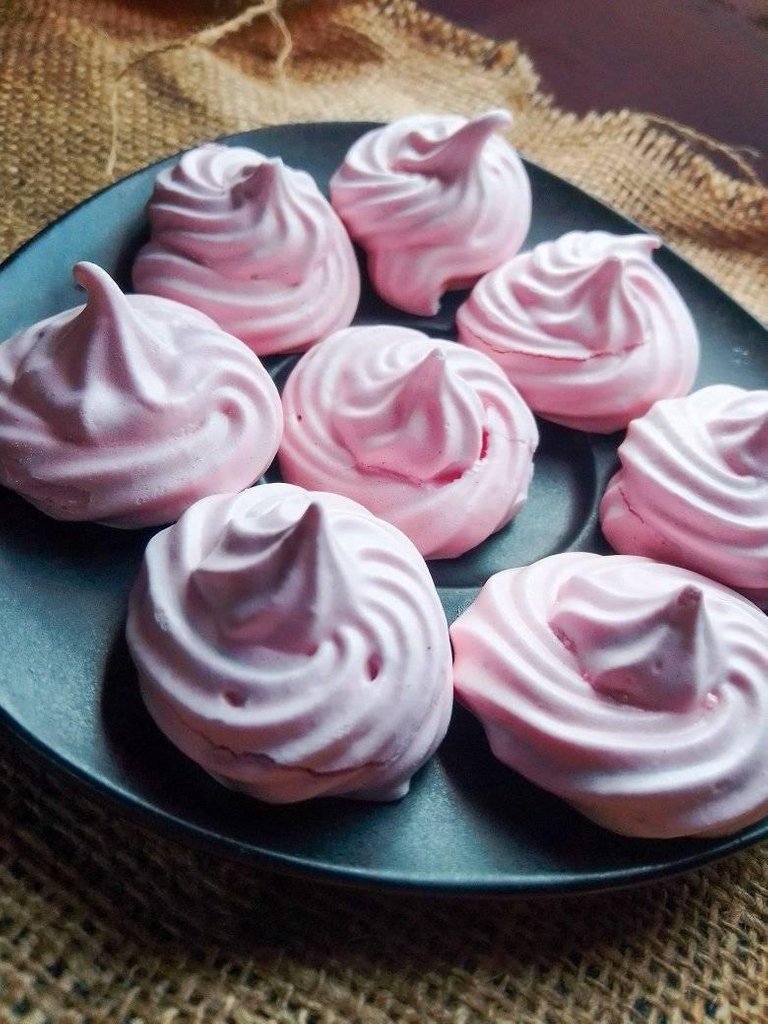
Al final de la clase cada una se llevó su porción, con mi parte horneé unos pequeños suspiros para practicar la técnica y disfrutar al máximo este delicioso merengue.
Pero no les cuento más mejor vayamos a la preparación del merengue suizo para que puedan hacerlo en casa.
¡Comencemos!
Hello Guys!
I know how to bake my cakes very well, but the only detail is that I did not know, until now, how I could decorate them. Meringues are my weakness.
I remember that when my son was 2 years old I made him his cake and to decorate it I tried to make a basic meringue. At that time I did not have the internet to research a recipe nor did I have someone to explain how I should do it. You had little recollection of an aunt who explained to me how to do it, however, she did not remember very well. She knew that egg whites should be whipped with sugar, although she did not know how.
So what I did was melt the sugar in a pot and I added a little water to it 🤦🏽♀️. When I tried to beat the whites to the point of snow together with the syrup, everything was a disaster because the meringue rose and after a while it was pouring water hahaha. These are things that happen to all beginners. 😅
Since then he had not tried to make more meringues. Also, I did not have a mixer, but as I told you in my previous post I bought a beautiful hand mixer and I can now make different meringues and try new recipes.
In our last pastry class they taught us to make two types of meringue: French meringue and Swiss meringue, which is the one that I am going to share with you today.
The photos that I am going to show you below are taken by me in class and of course all with the consent of the teacher to document the entire process.
As I have told you on previous occasions, I share these recipes to reinforce my acquired knowledge and at the same time share them with you so that you can also make them at home. So the information is of benefit to you and me. 😊
What I like the most about this meringue is that it is lightly cooked which allows it to last a little longer than the French one.
In class we were applying various techniques to decorate. This is something that left me quite excited and wanting to make a cake to decorate it and know how it will stay this time.
At the end of the class, each one took their portion, with my part I baked a few little sighs to practice the technique and enjoy this delicious meringue to the fullest.
But I won't tell you more, let's go to the preparation of the Swiss meringue so that you can make it at home.
Let's get started!
- 1 taza de claras de huevo
- 2 tazas de azúcar
- Colorante para alimentos
- 1 cup egg whites
- 2 cups of sugar
- Food coloring
Lo primero que tenemos que hacer es separar las claras de las yemas de huevo y colocarlas en una taza medidora.
Para esta receta no es necesario tener una medida exacta, siempre y cuando utilices la misma taza medidora para hacer las porciones.
Vamos a usar únicamente las claras de huevo, las yemas se reservan para usarlas en otra preparación.
The first thing we have to do is separate the whites from the egg yolks and place them in a measuring cup.
For this recipe it is not necessary to have an exact measurement, as long as you use the same measuring cup to make the portions.
We are going to use only the egg whites, the yolks are reserved for use in another preparation.
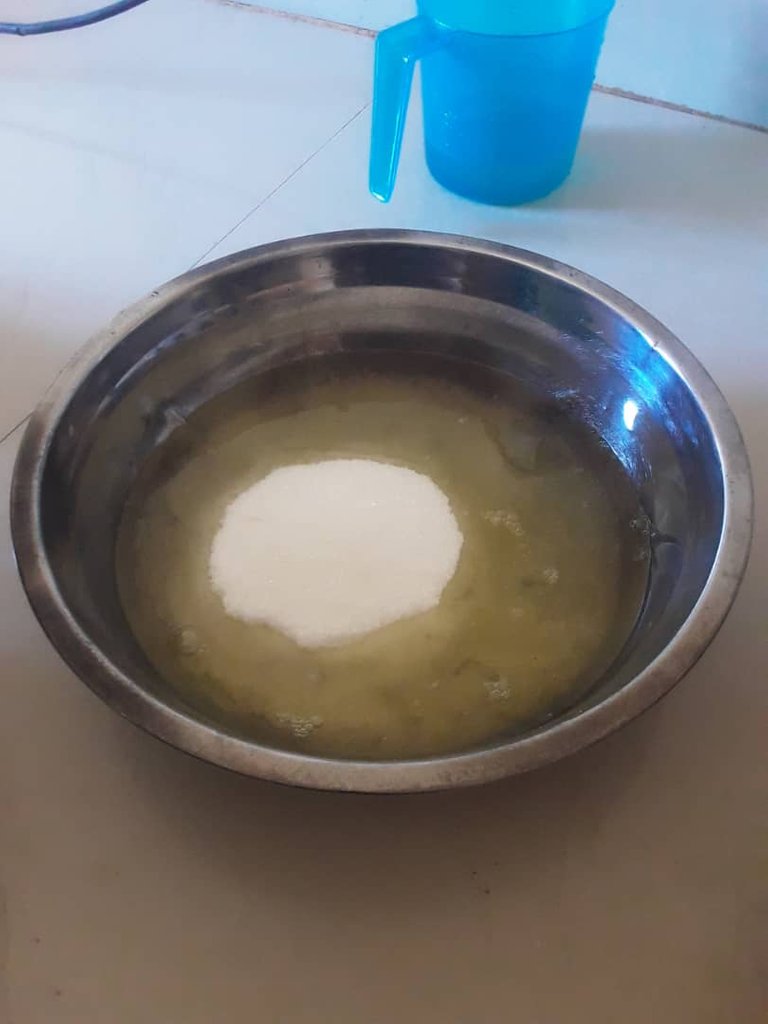
Ya cuando tengamos las claras las colocamos en un bowl, preferiblemente de metal o en una olla, ya que la cocinaremos a baño de María. Agregamos las dos tazas de azúcar y mezclamos con una paleta de madera.
When we have the whites, we place them in a preferably metal bowl or in a pot, since we will cook it in a double boiler. Add the two cups of sugar and mix with a wooden paddle.
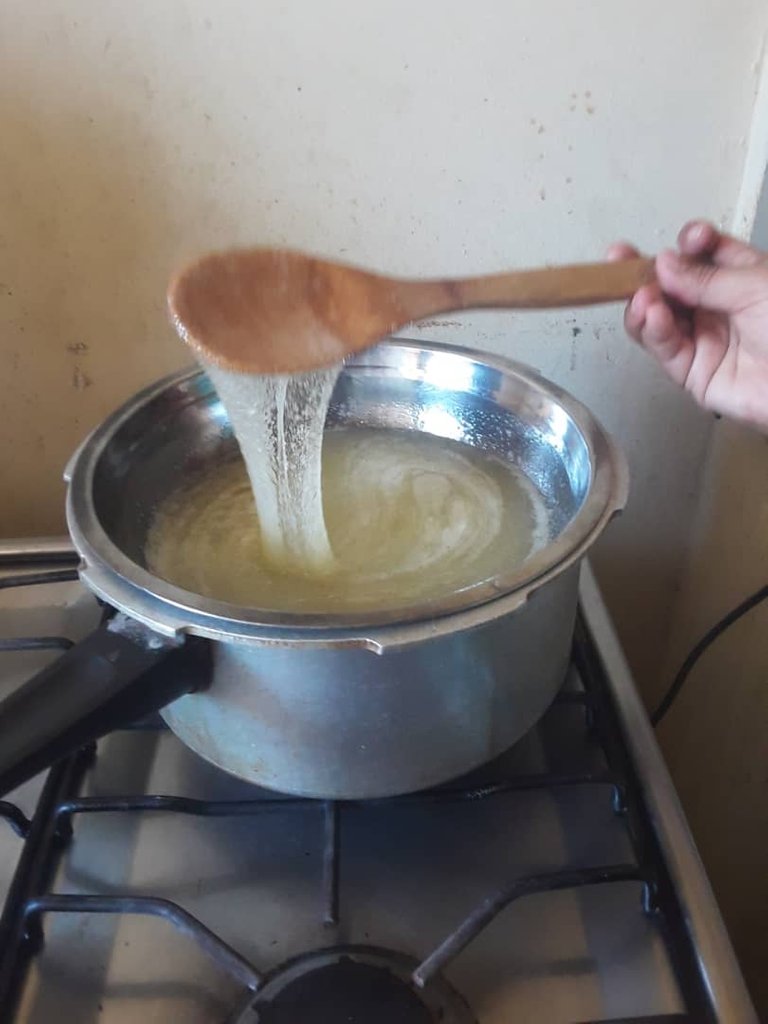
Vamos a colocar un poco de agua en una olla que debe ser un poco más pequeña que nuestro bowl de metal, esto para evitar que salpique agua si llegase a hervir.
Debemos mantener el fuego a temperatura media baja porque puede pasar que el huevo se comience a cocinar y no queremos esto. Solo debemos entibiar un poco para derretir azúcar en las claras.
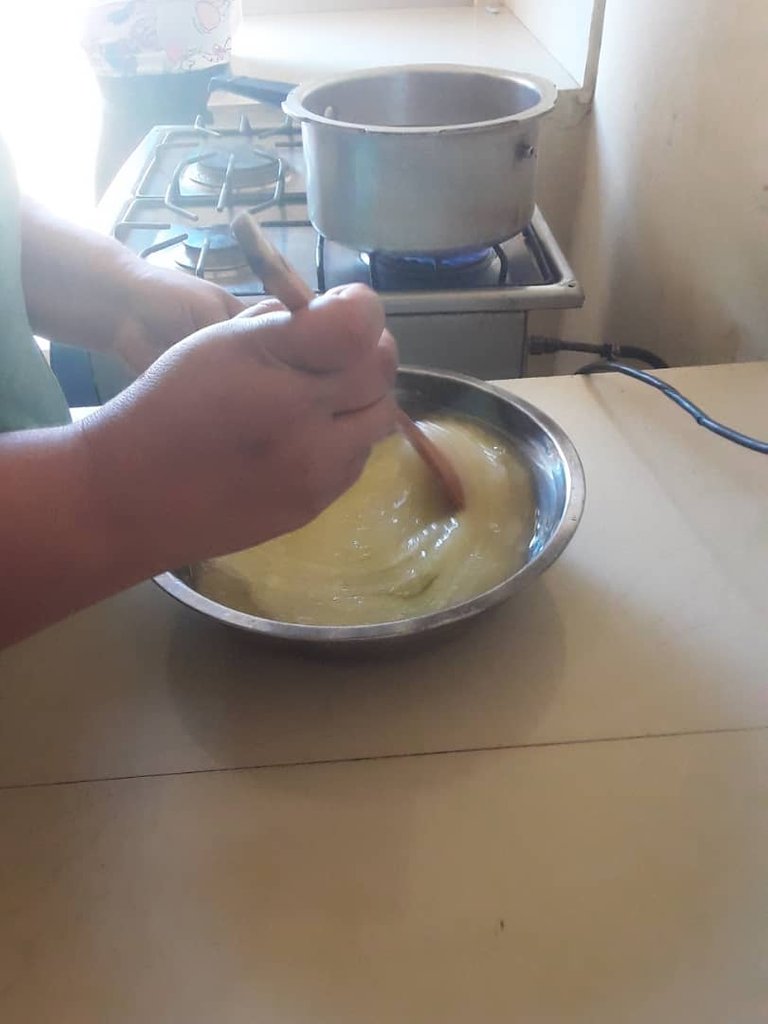
Colocamos el bowl sobre la olla y vamos batiendo con la paleta de madera, siempre atentos de que no se comiencen a cocinar las claras. Batimos constantemente hasta que desaparezcan todos los grumos de azúcar es decir que el azúcar esté completamente disuelta.
- La mezcla debe estar tibia no debe quemarte los dedos y se debe sentir suave sin ningún grano de azúcar
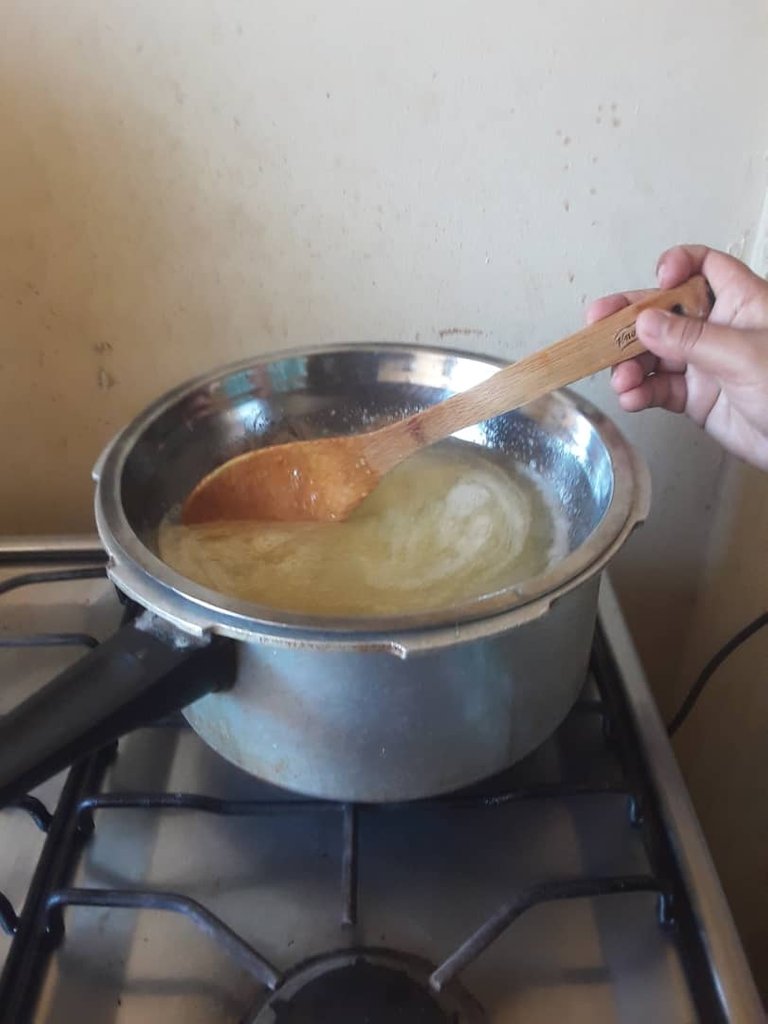
We are going to place a little water in a pot that should be a little smaller than our metal bowl, this to prevent water from splashing if it boils.
We must keep the fire at medium low temperature because it can happen that the egg begins to cook and we do not want this. We only have to warm a little to melt sugar in the egg whites.
We place the bowl on the pot and we are beating with the wooden paddle, always careful that the egg whites do not start to cook. We beat constantly until all the lumps of sugar disappear, that is, the sugar is completely dissolved.
- The mixture should be warm, it should not burn your fingers and it should feel smooth without any grain of sugar
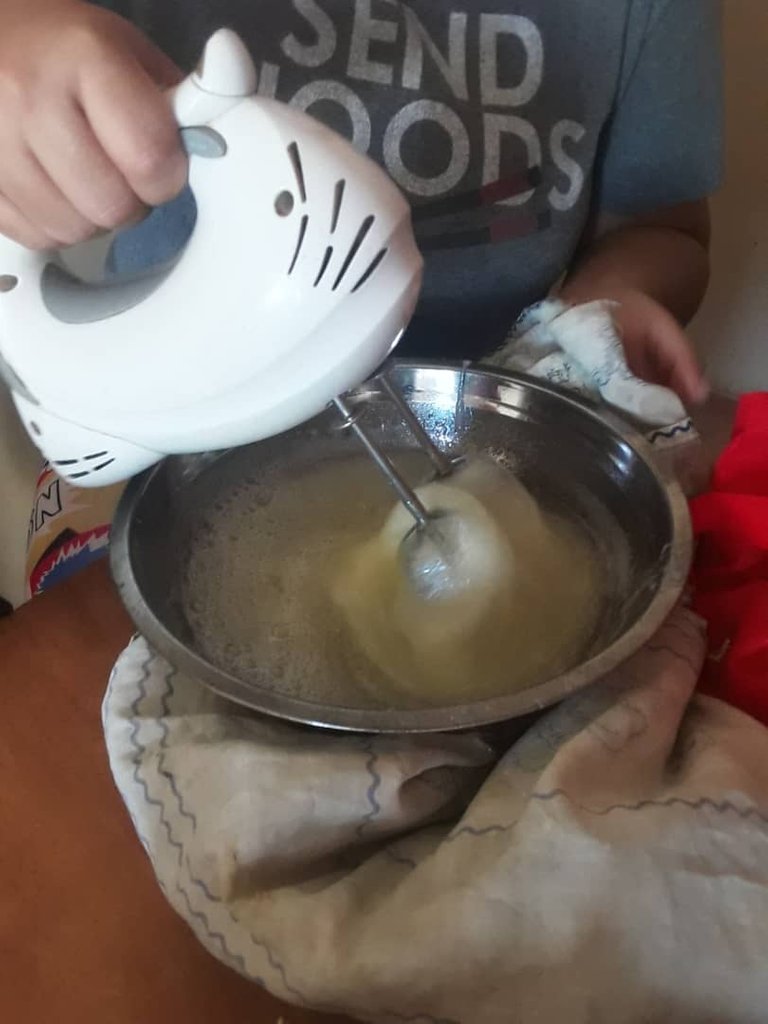
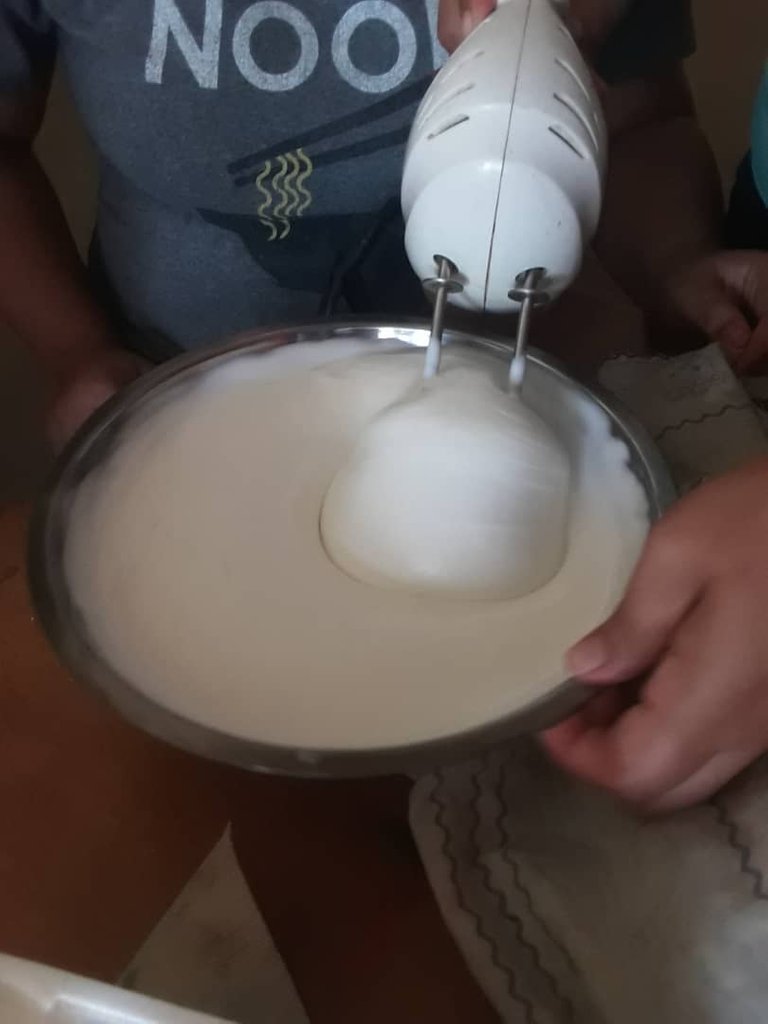
Retiramos del fuego y comenzamos a batir con la batidora. Este proceso puede durar de 15 a 20 minutos batiendo constantemente, primero las claras se van a ir enfriando y luego es que van a comenzar a levantar y convertirse en merengue.
Para saber que está completamente listo debemos apagar la batidora y levantarla. Si la preparación hace picos y no se cae es que está lista.
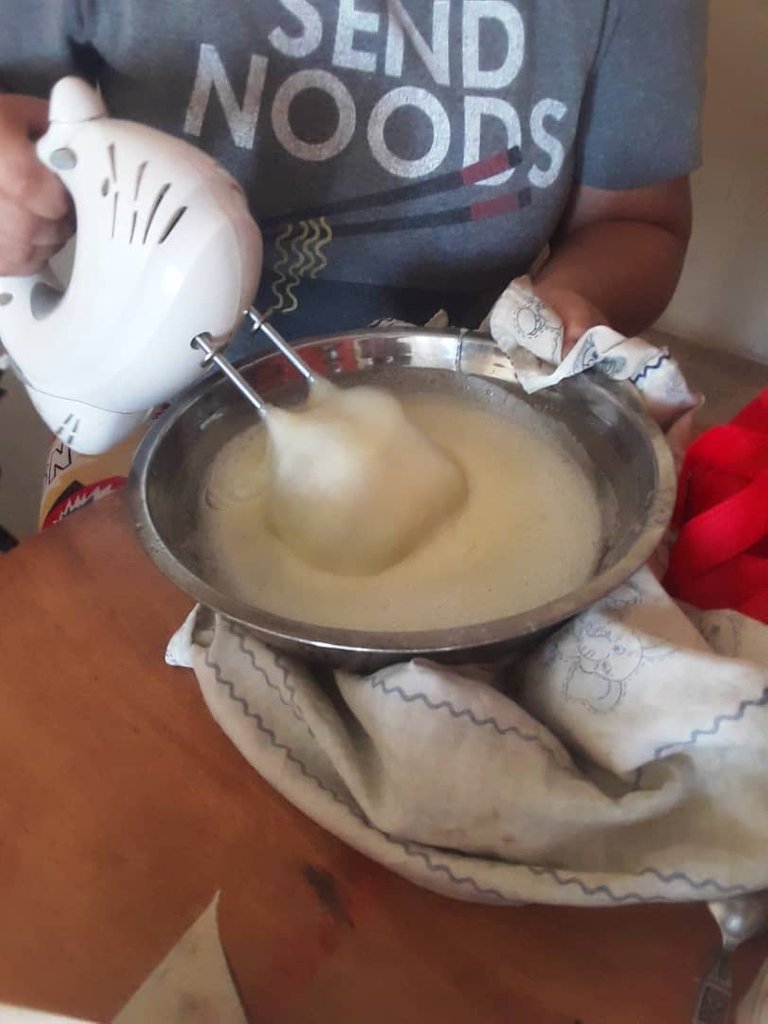
We remove from the heat and begin to beat with the mixer. This process can last from 15 to 20 minutes, beating constantly, first the whites will cool down and then they will begin to rise and become meringue.
To know that it is completely ready, we must turn off the mixer and lift it. If the preparation peaks and does not fall, it is ready.
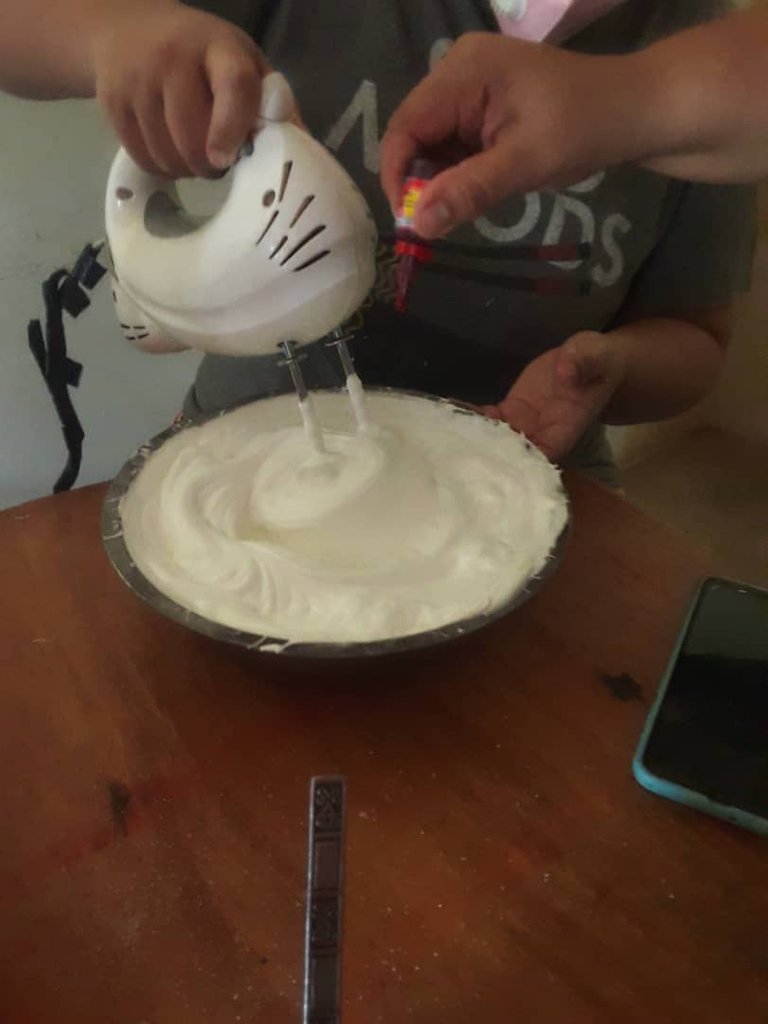
Este merengue pudes colorearlo del color que tú prefieras, pero es importante que lo hagas una vez el merengue esté listo porque si agregas el colorante antes el merengue no va a levantar.
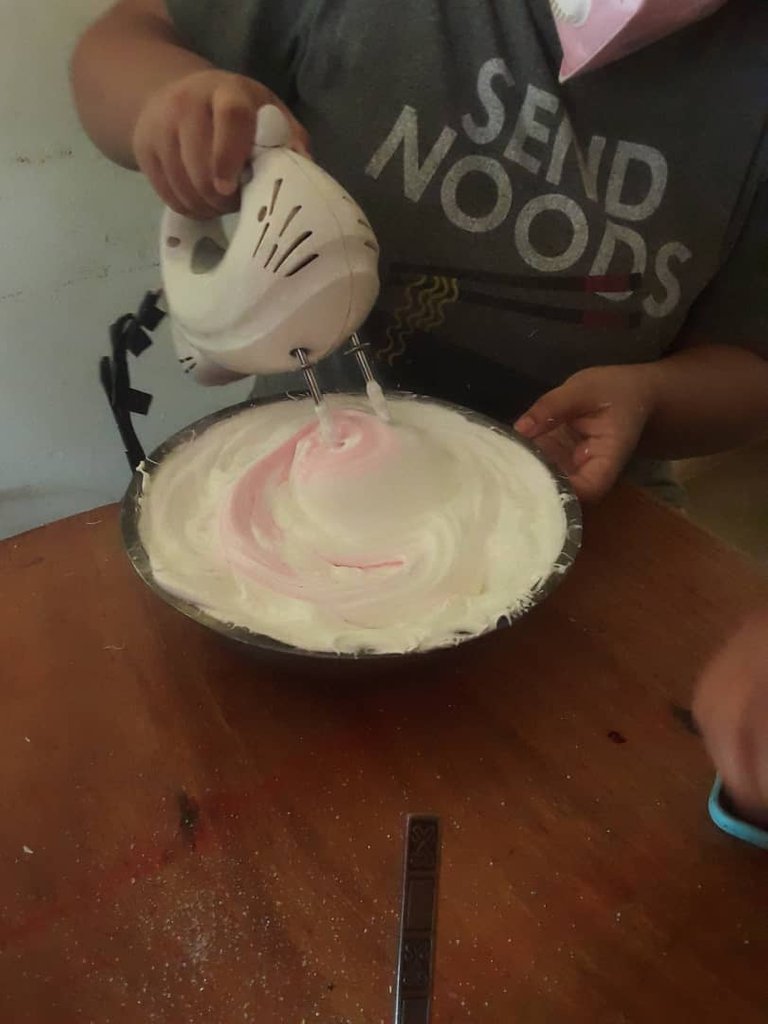
This meringue can be colored in the color you prefer, but it is important that you do it once the meringue is ready because if you add the coloring before the meringue will not lift.
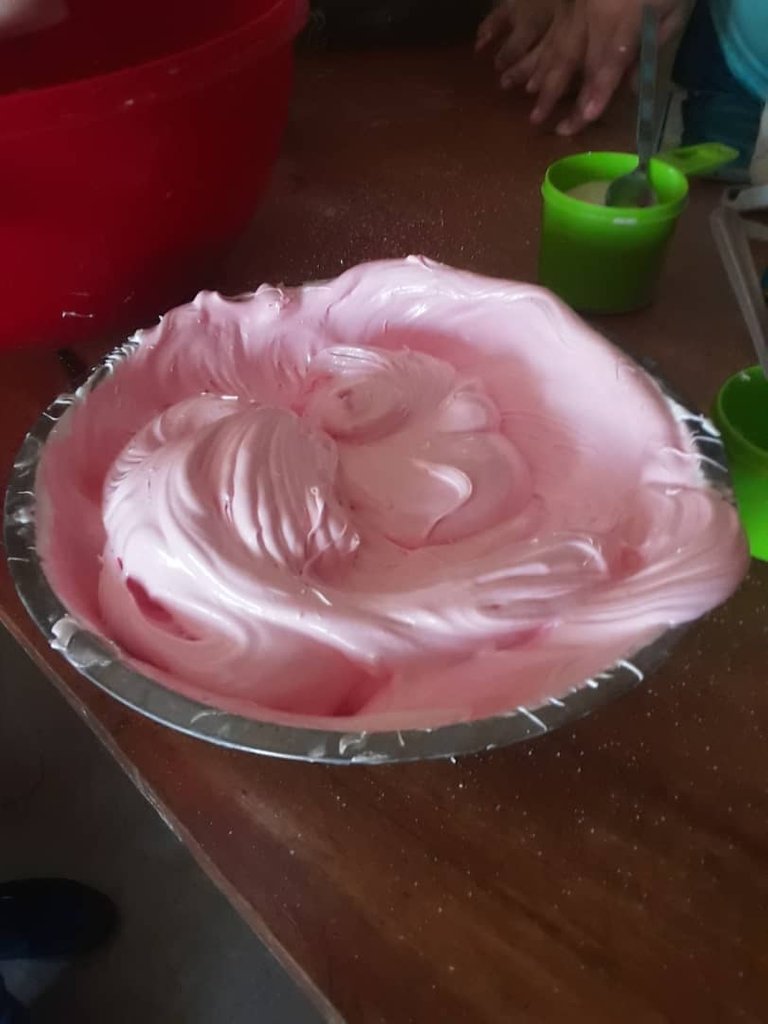
Y así quedó nuestro merengue terminado, con el puedes hacer como te dije al principio suspiros o decorar pasteles tu gusto. Hay un sinfín de posibilidades solo es cuestión que dejes llevarte por la creatividad.
Es importante que cuentes con la manga pastelera y con las boquillas para hacer los diseños sobre los pasteles.
En otro post ya cuando sepa un poco más de la decoración les mostraré por supuesto las diferentes boquillas que existen y qué formas nos dan cada una.
Espero que esta publicación les haya sido de provecho y puedan hacerlo en casa. 😊
And this is how our meringue was finished, with it you can do as I told you at the beginning sighs or decorate cakes as you like. There are endless possibilities, it is only a matter of letting yourself be carried away by creativity.
It is important that you have the pastry bag and the nozzles to make the designs on the cakes.
In another post, when I know a little more about decoration, I will of course show you the different nozzles that exist and what shapes each one gives us.
I hope this publication has been of benefit to you and you can do it at home. 😊

Espero haya sido de tu agrado y provecho.
Un gran abrazo a todos, y nos leemos en un próximo post
• Lakrearte en Hive •
Att: Estefania Garcia ♥

Imágenes y separadores de mi autoría
Portada editada en Canva