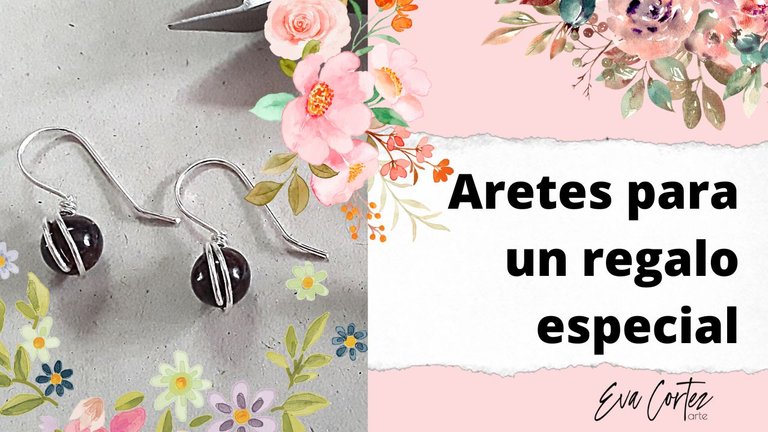
DIY Agate earrings and silver wire, a special gift // DIY Aretes de ágatas y alambre de plata, un regalo especial [ENG-ESP]
ENGLISH
When I want to give a gift, I prefer it to be handmade. This preference is not only due to an economic issue but rather, because a handmade gift is even more special.
A handmade gift is imbued with the intention of the person who makes it. It is a piece made with love, especially dedicated to a particular person. Personally, making a handmade piece becomes a kind of creative ceremony, where I make each cut, threading, folding, from the enjoyment of the execution of the technique, to see how the piece takes shape. If it is for a special person or an order for a particular celebration, I go through each step thinking of my good wishes for the person who will receive it, in his smile when receiving the gift and wearing it later.
A handmade gift is a piece of the artist's soul, a piece of his life, of his time, of his mind and heart put into each movement of creation.
Today I share with you the step by step of these earrings that I made for a gift in December. They are made of silver and agates, because the idea is to make a gift that lasts over time. Below I describe the step by step so that, if you like, you can replicate them too.
This is the list of materials:
- Approximately 24 cm of 20 gauge silver wire (or any other type of wire for costume jewelry).
- 2 round agate stones, (can be spherical beads of any other material).
- Tweezers: cutting, round tip, flat tip, tweezers.
- Pencil or thin cylindrical rod.
The process:
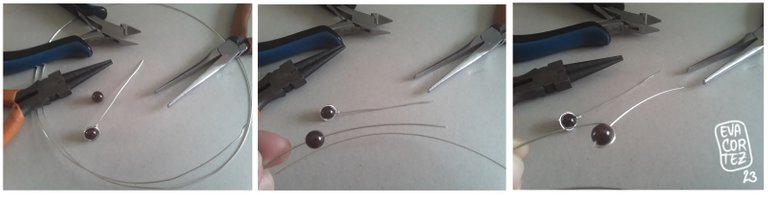
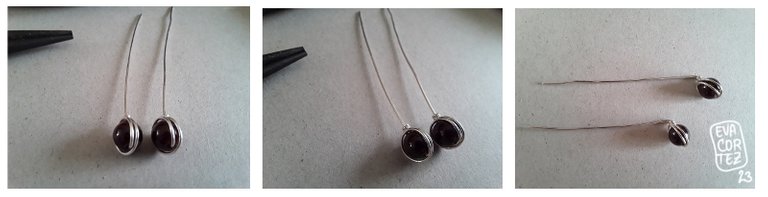
In the first image I show you one of the earrings already made. In the following images you can see how I repeat the process with the other earring.
Take 12 cm of silver wire. Pass the wire through the hole in the stone (agate). Wrap one end of the wire around the stone, as you see in the picture.
ESPAÑOL
Cuando quiero dar un regalo, prefiero que este sea realizado a mano. Esta preferencia no se debe sólo a un tema económico sino más bien, porque un regalo hecho a mano es aún más especial.
Un regalo hecho a mano, tiene impregnada la intención de quien lo realiza. Es una pieza hecha con cariño, dedicada especialmente a una persona en particular. En lo personal, realizar una pieza a mano se convierte en una especie de ceremonia creativa; en donde voy realizando cada corte, entorchado, doblez, desde el disfrute de la ejecución de la técnica, hasta ver cómo surge la pieza que va tomando forma. Si es para un ser especial o un encargo para una celebración en particular, voy ejecutando cada paso pensando en mis buenos deseos para la persona que lo recibirá, en su sonrisa al recibir el regalo y al lucirlo luego.
Un regalo hecho a mano, es un pedazo del alma del artista, un pedazo de su vida, de su tiempo, de su mente y corazón puesto en cada movimiento de creación.
Hoy te comparto el paso a paso de estos aretes que realicé para un regalo en el mes de diciembre. Están hechos de plata y ágatas, pues la idea es hacer un regalo que perdure en el tiempo. A continuación te describo el paso a paso para que, si es tu gusto, puedas replicarlos también.
Este es el listado de materiales:
- 24 cm de alambre de plata calibre nro 20 aproximadamente (o cualquier otro tipo de alambre para bisutería).
- 2 piedras ágatas redondas, (pueden ser cuentas esféricas de cualquier otro material).
- Pinzas: de corte, punta redonda, punta plana, de ajuste.
- Lápiz o barra cilíndrica delgada.
El proceso:
En la primera imagen te muestro uno de los aretes ya adelantado. En las siguientes imágenes puedes ver cómo repito el proceso con el otro arete.
Toma 12 cm de alambre de plata. Pasa el alambre por el agujero de la piedra (ágata). Enrolla un extremo del alambre alrededor de la piedra, tal como vez en la imagen.
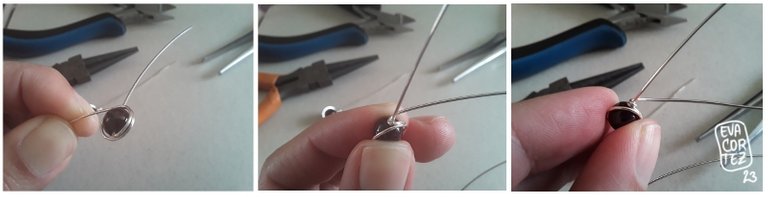
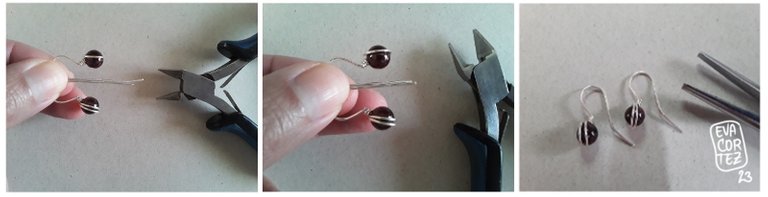
Twist or tighten the wire, tying it around the extended wire. You can give it 2 turns or 3.
Dale 2 vueltas a la piedra con el alambre. (Puedes darle 3 vueltas si lo prefieres).
Entorcha o ajusta el alambre, amarrándolo alrededor del alambre que está extendido. Puedes darle 2 vueltas o 3.
Cut with the cutting pick or clamp and adjust with a clamp.
Corta con la piqueta o pinza de corte y ajusta con una pinza.
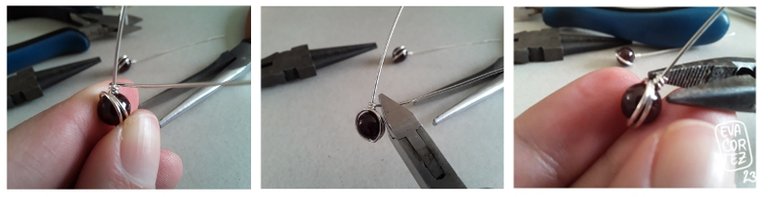
Bend the wire in front of the stone, so that it is almost diagonal.
Aquí tienes casi listos tus aretes :)
Dobla el alambre hacia delante de la piedra, de manera que quede en posición casi diagonal.
Tomas el lápiz o la barra cilíndrica para crear el arco del arete. Vas a pasar el alambre por encima del lápiz o barra hasta formar un arco.
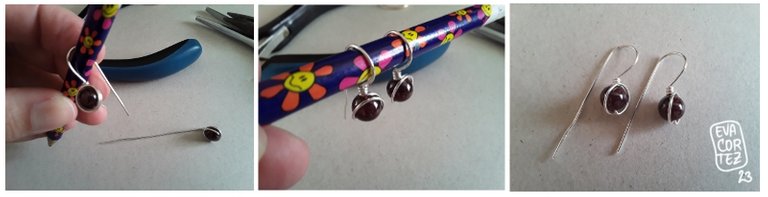
With the flat pliers we bend the end of the wire of both earrings.
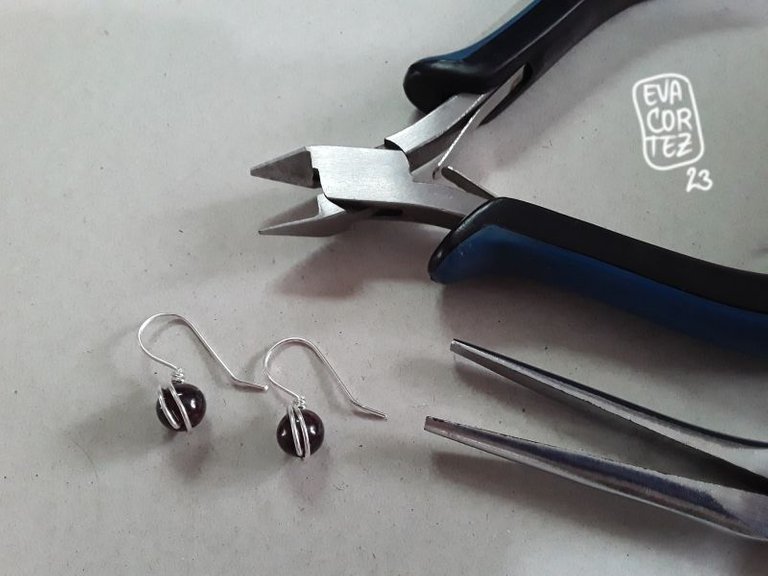
And now we have ready some nice earrings to give as a gift.
Emparejamos el largo de los alambres de ambos aretes.
Con la pinza plana doblamos el extremo del alambre de ambos aretes.
Y ya tenemos listos unos aretes lindos para regalar.
See you in a future post.
Hasta una próxima publicación.