Easy and Cute Chick Lipgloss Holder Tutorial


Hey guys!
Hello friends how are you all I hope you all are fine I am also fine. So yesterday I watched a video on YouTube in which she was making a lip gloss holder I liked it a lot after watching it so I thought I should also make it for myself. In that video the girl was making a bunny and bear holder. But I wanted to make a chick one so then I made a chick one and it turned out very very cute. It is very easy to make that is why I thought I should share its tutorial with you all so that if you want to make it you can easily make it. So now let's start making it.

Material's needed
To make this chick lip gloss holder the things needed are these. White color yarn
Yellow color yarn
Orange color yarn
Black color thread
Blush
Brush
Needle
Scissors
2.5mm hook
So to make this lip gloss holder only these things are needed.


Making the chick
First let's make the chick. To make it I took yellow color yarn then made a magic ring then in this magic ring make 6 single stitches. Now close the magic ring and in row 2 do increases in the whole row. In row 3 do 1 single stitch and 1 increase. In row 4 do 2 single stitches and 1 increase in the whole row. Now from row 5 to row 8 do only single stitches. And in row 9 do 2 single stitches and 1 decrease in the whole row. After this cut the yarn and our chick head will be ready.


Chick's face and wings
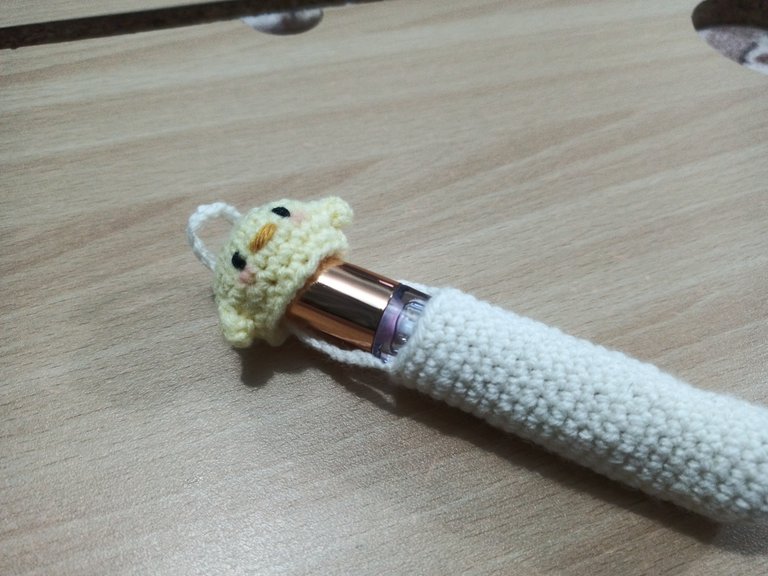
Now let's make the chick face and wings. To make the face I made the mouth with orange color yarn then made the eyes with black color thread. Then applied a little blush under the eyes because of which it was looking even more cute. Now let's make the chick wings. To make the wings insert the hook in row 8 then make 3 chains. Then skip the first chain and make a single stitch in the second chain. Make a half double crochet in the 3rd chain and then slip stitch it in row 7. Now make both side wings in the same way.



Making the holder
Now let's make the white holder. To make it I took white color yarn then made a magic ring. After making the magic ring I made 6 single stitches in it and closed the magic ring. In row 2 I did increases in the whole row. In row 3 do 1 single stitch then 1 increase in the whole row. Now from row 4 to row 25 do single stitches in the whole rows. Now in row 25 I made 40 chains for the handle you can do less or more. After making 40 chains I inserted it in the chick with the help of a needle and then secured it nicely on the other side of the holder.


Final result
So in this way my cute lip gloss holder is ready which I liked very very much if you also liked it then please tell me in the comments I will be very happy to see it. And if you want to make this holder for lipstick then you can finish this white holder at row 17 or you can make it less or more according to your lipstick size. So this was my post for today. Thank you very very much for supporting me. Bye bye!
That’s all for today. I will be back soon with something new to share. Until then stay happy and keep supporting.

Sending you Ecency curation votes.😉

Your croteching is excellent
Thank you so much 😊