PUNISHER KEYCHAIN MADE FROM RECYCLING - LLAVERO DE PUNISHER HECHO DE RECICLAJE [ENG-ESP]
Hello friends, I hope you are very well, today I want to show you how I made a small keychain for the PUNISHER character, from Marvel Comics. I made a miniature airsoft style helmet but then I added other details to make it look like a gas mask, I really like doing this kind of work because it represents a great challenge, I hope you like how it turned out.
Hola amigos, espero que se encuentren muy bien, hoy quiero mostrarles como realicé un pequeño llavero con motivo del personaje del PUNISHER, de Marvel Comics. Hice un casco estilo airsoft en miniatura pero luego le agregué otros detalles para que luciera como una mascara de gas, me gusta mucho hacer esta clase de trabajos porque representa un gran desafío, espero que les guste como quedó.

 |  | |
|---|---|---|
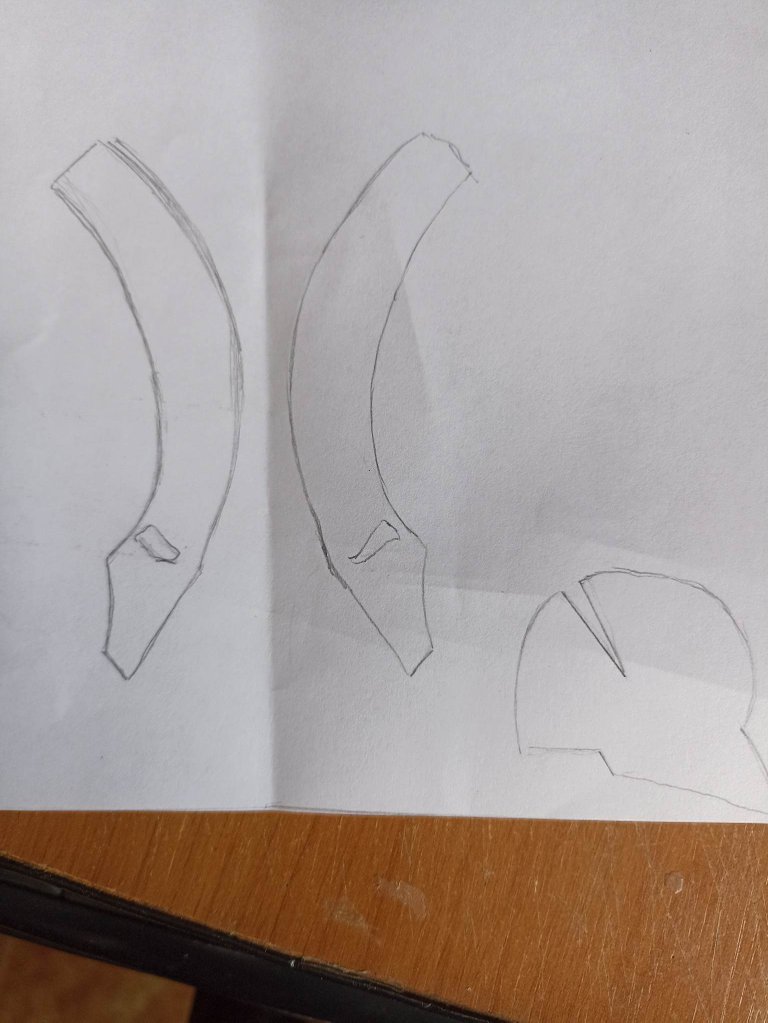 | 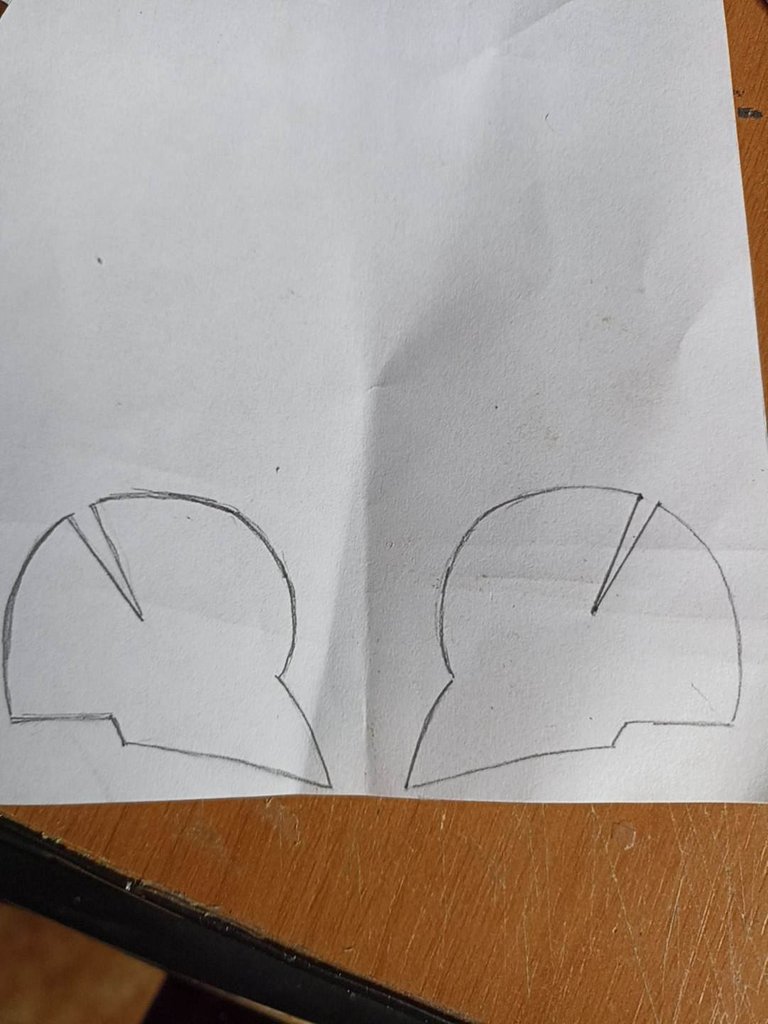 |
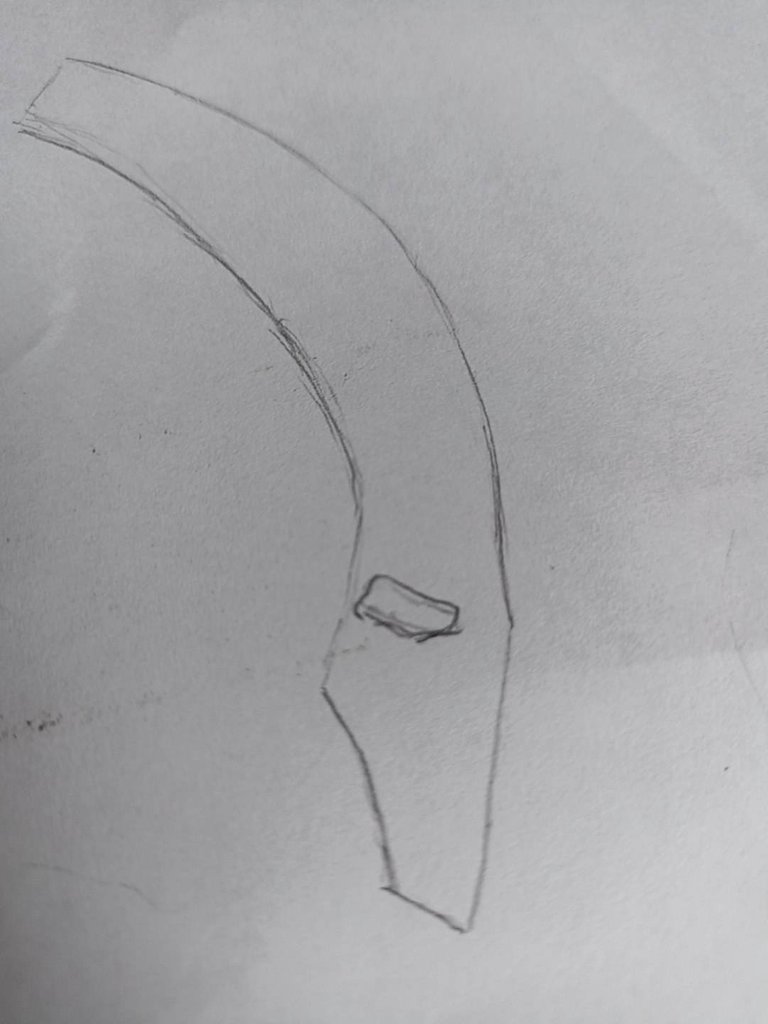
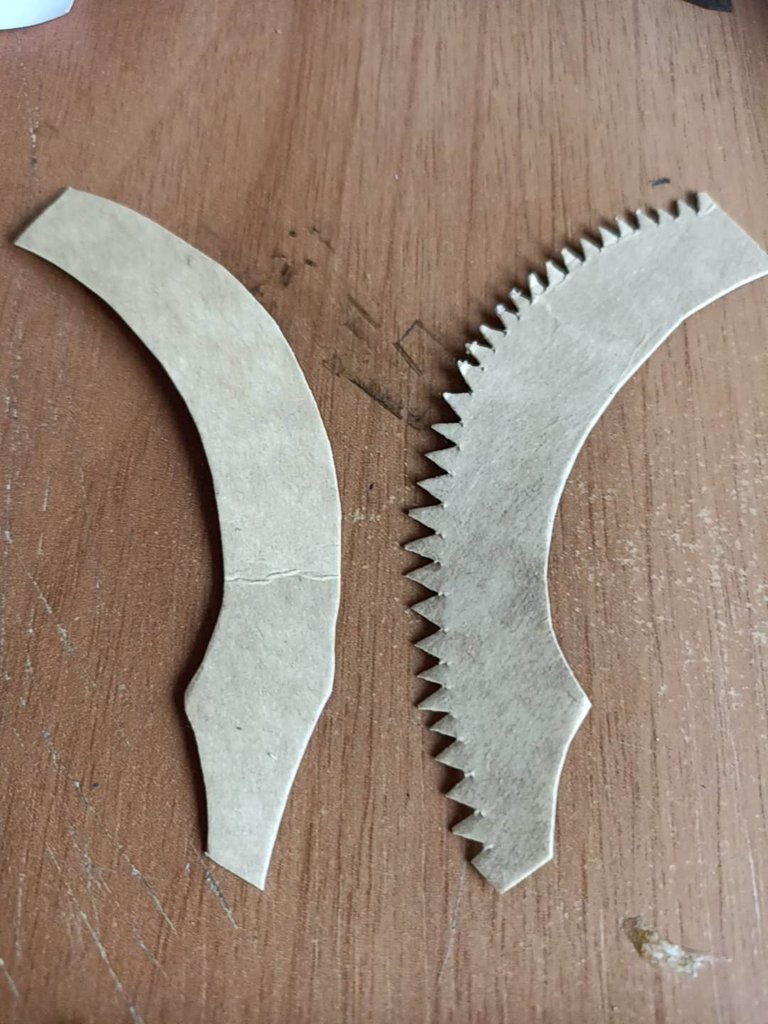
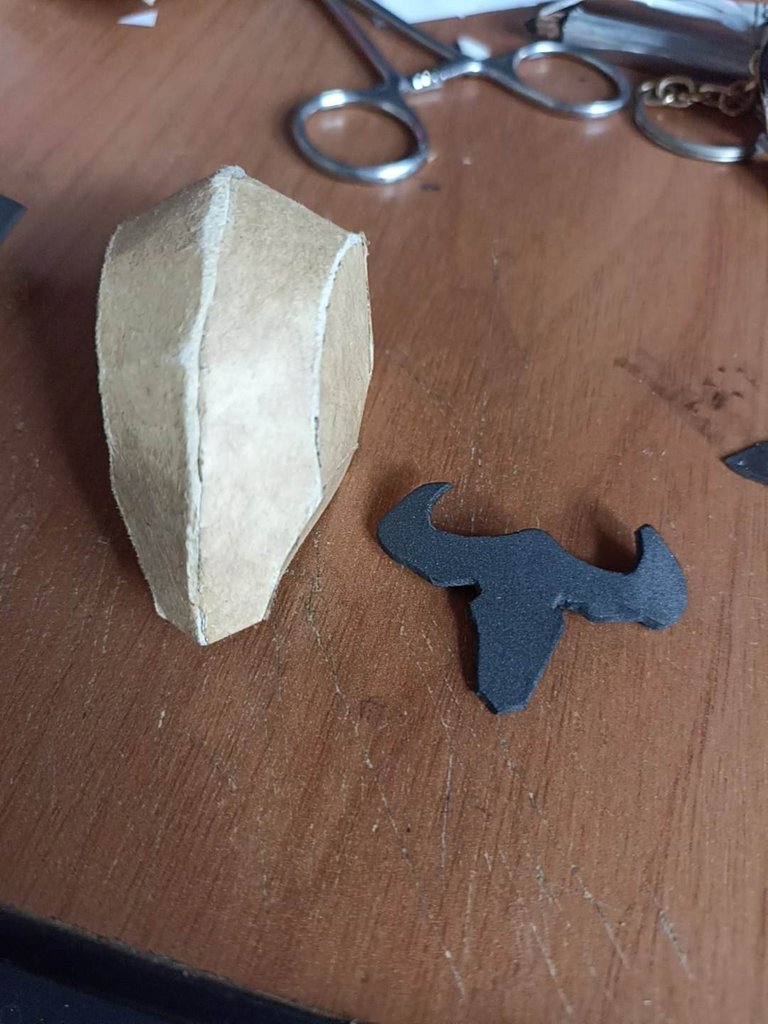
First I made a template to make the helmet, I made it with a few pieces to make it easier to do, it consists of 4 pieces in total, 2 side pieces and 2 upper pieces. I draw them on paper and then cut them out on cereal cardboard, which is very useful for these jobs.
Primero hice una plantilla para hacer el casco, lo hice de pocas piezas para que sea más fácil de realizar, consta en total de 4 piezas, 2 piezas laterales y 2 piezas superiores. Las dibujo en papel y luego recorto sobre cartón de cereal, que es muy útil para estos trabajos.
 |  |  |
|---|---|---|
 |  | 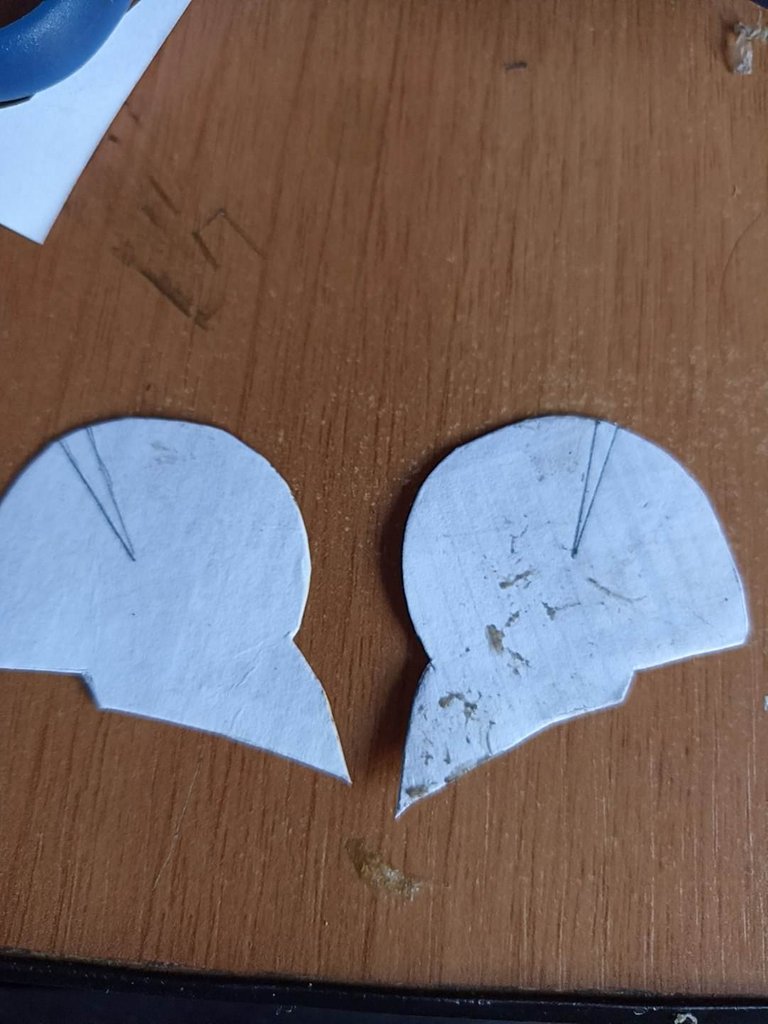 |
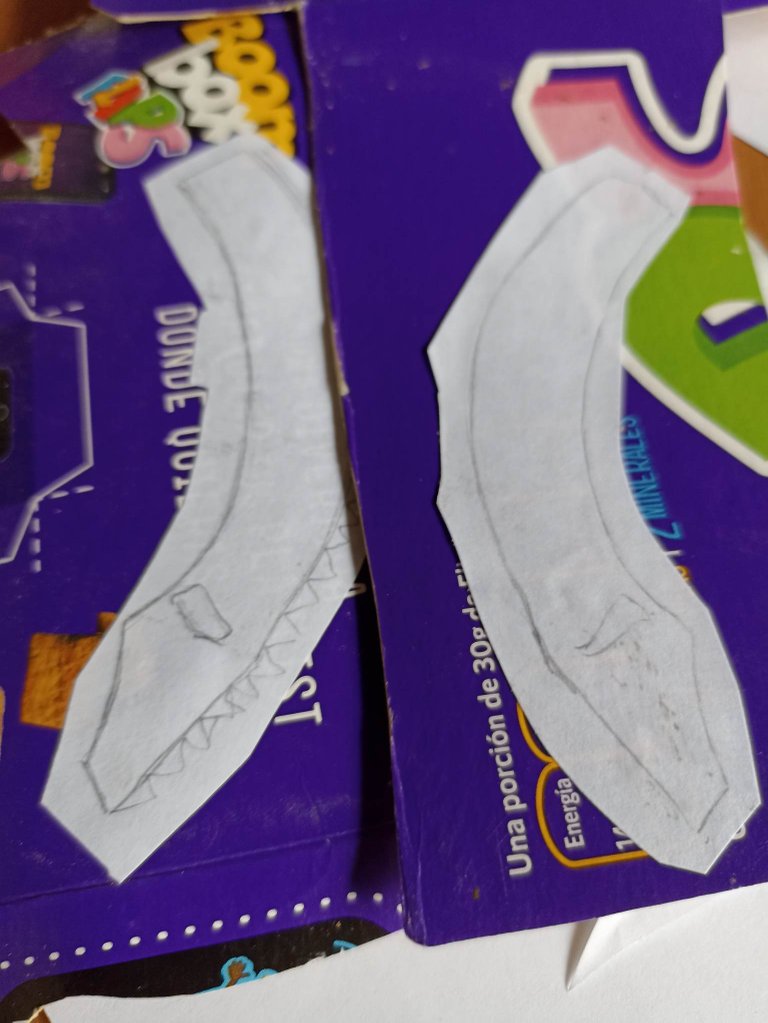
Then the next step is to glue all the pieces on the cardboard, as I mentioned before, I used cereal cardboard, which is more resistant and very malleable to do small jobs. I glued the top pieces first. where the eyes go and I cut them out, in one of them I made cutouts to leave some eyelashes that would serve as a bridge to be able to join both pieces with glue. Then I cut out the side pieces little by little.
Luego el siguiente paso es pegar todas las piezas sobre el cartón, como mencioné antes, yo utilicé un cartón de cereal, que es más resistente y muy maleable para hacer trabajos pequeños. Pegué primero las piezas superiores. donde van los ojos y las recorté, en una de ellas hice recortes para dejar algunas pestañas que me sirvieran como puente para poder unir ambas piezas con pegamento. Luego corté las piezas laterales poco a poco.
 |  |  |
|---|---|---|
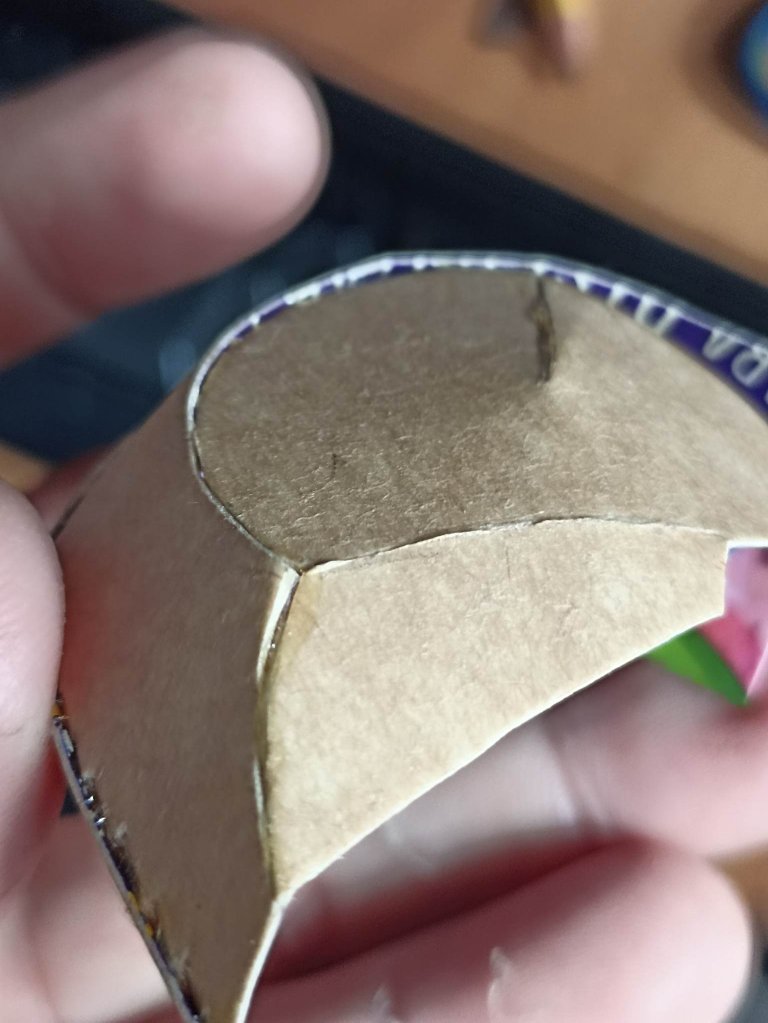 | 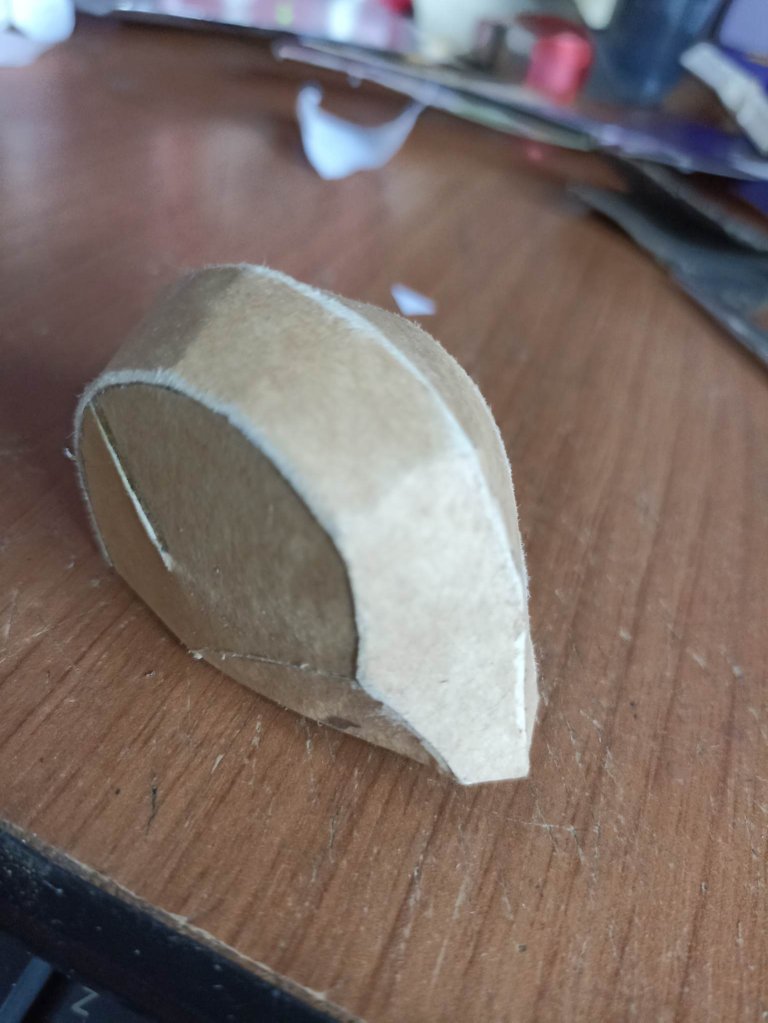 | 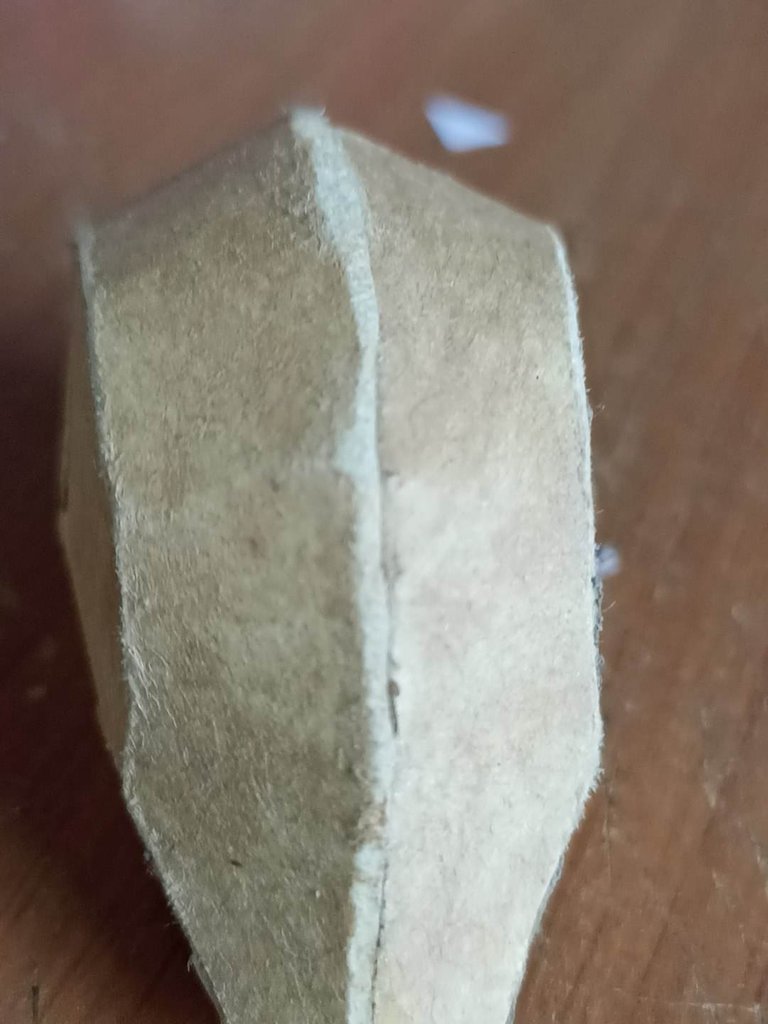 |
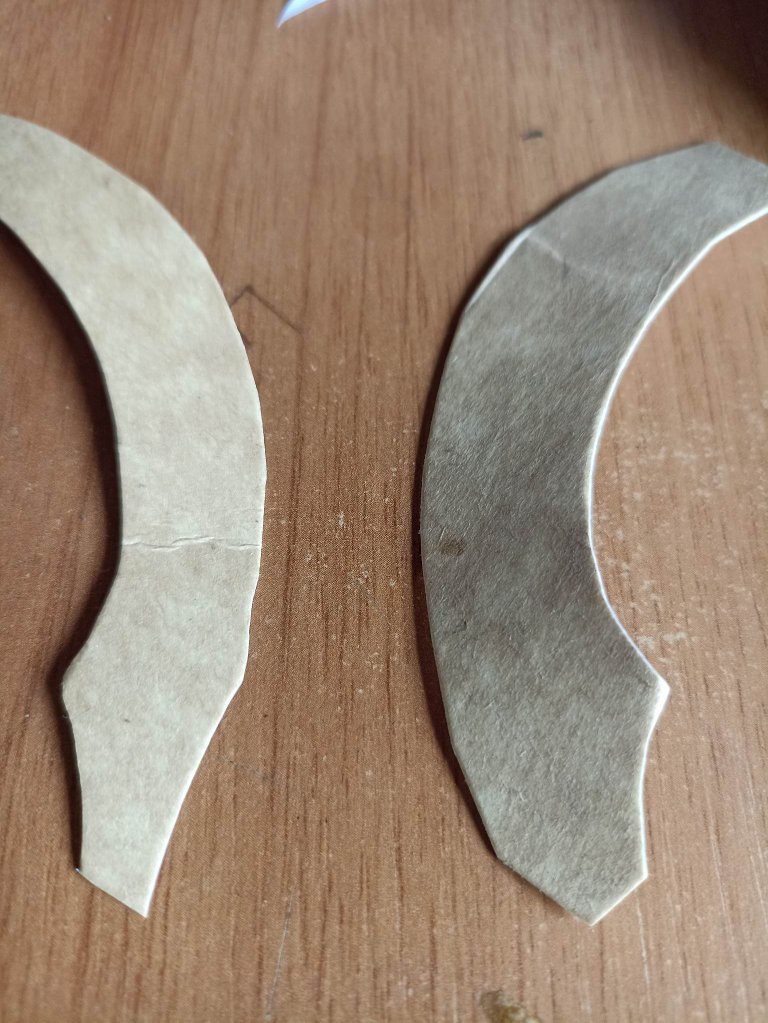
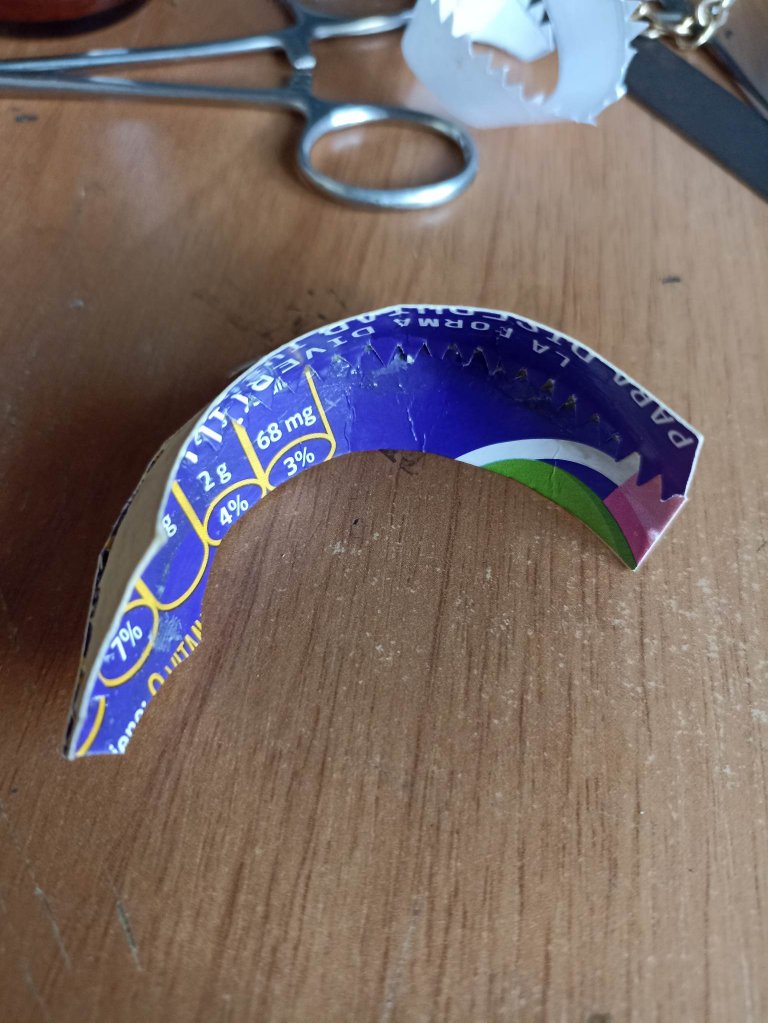
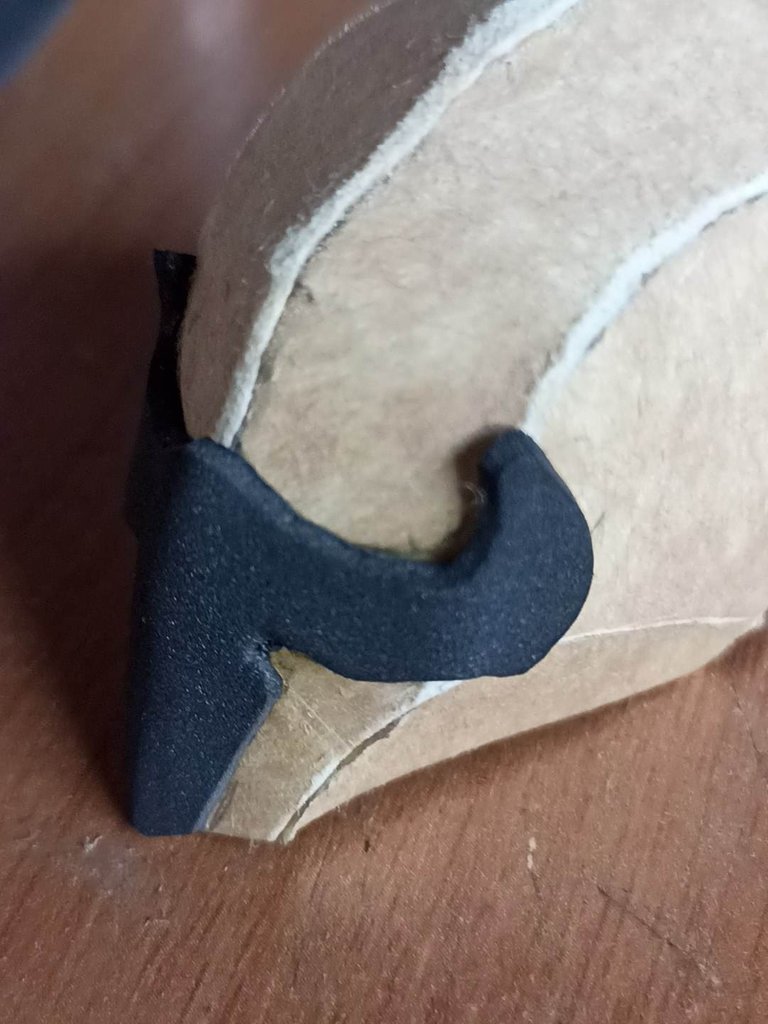
Now is the time to assemble the helmet, starting first with the upper pieces, I put glue on the eyelashes that I cut out and also on the other piece, I let it dry for a few minutes and then little by little I join them until I have the shape of an arch . Next I start with the lateral parts, these pieces have a cut in a central radius, this cut is to shape the helmet in that area, once that cut is made I also begin to join them in the corresponding place. Finally, with sandpaper I am removing the resulting edges in the folds where each piece is joined, this is to give it a better finish after painting.
Ahora es el momento de armar el casco, comenzando primero por las piezas superiores, coloco pegamento en las pestañas que recorté y también en la otra pieza, dejo secar por unos minutos y luego poco a poco las voy uniendo hasta tener la forma de un arco. Seguidamente comienzo con las partes laterales, estas piezas tiene un corte en un radio central, este corte es para darle forma al casco en esa zona, una vez realizado ese corte comienzo también a unirlas en el lugar que les corresponde. Por último con una lija voy quitando los bordes resultantes en los pliegues donde están unidas cada pieza, esto es para darle un mejor acabado luego de pintar.
 |  |  |
|---|---|---|
 | 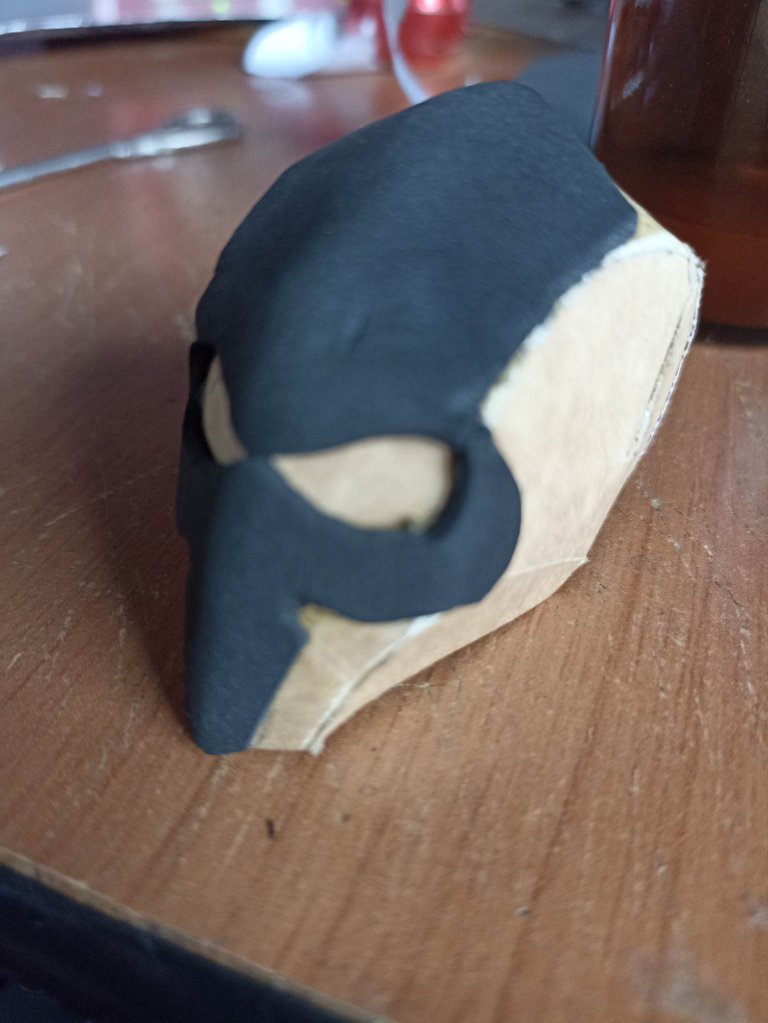 |  |
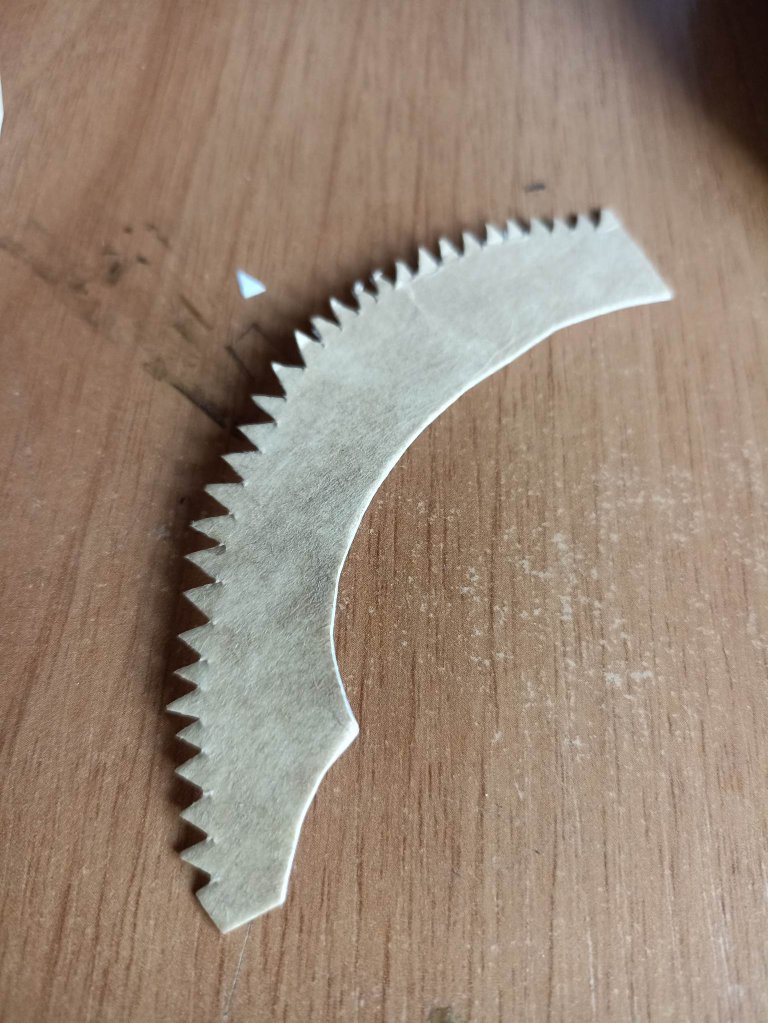
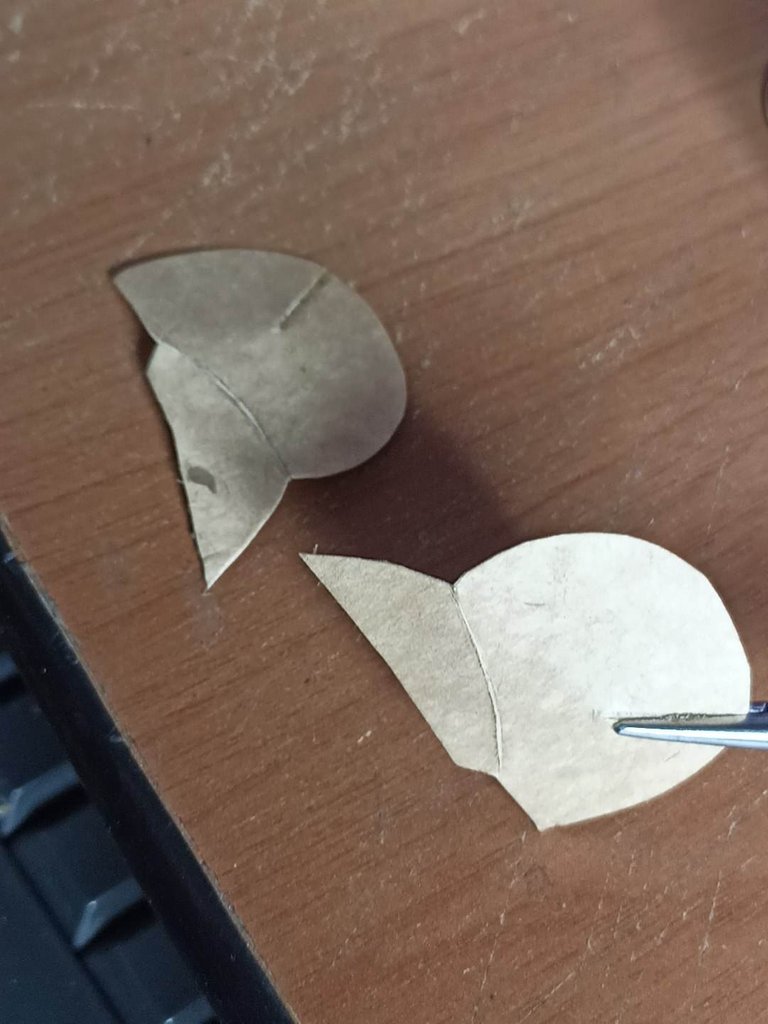
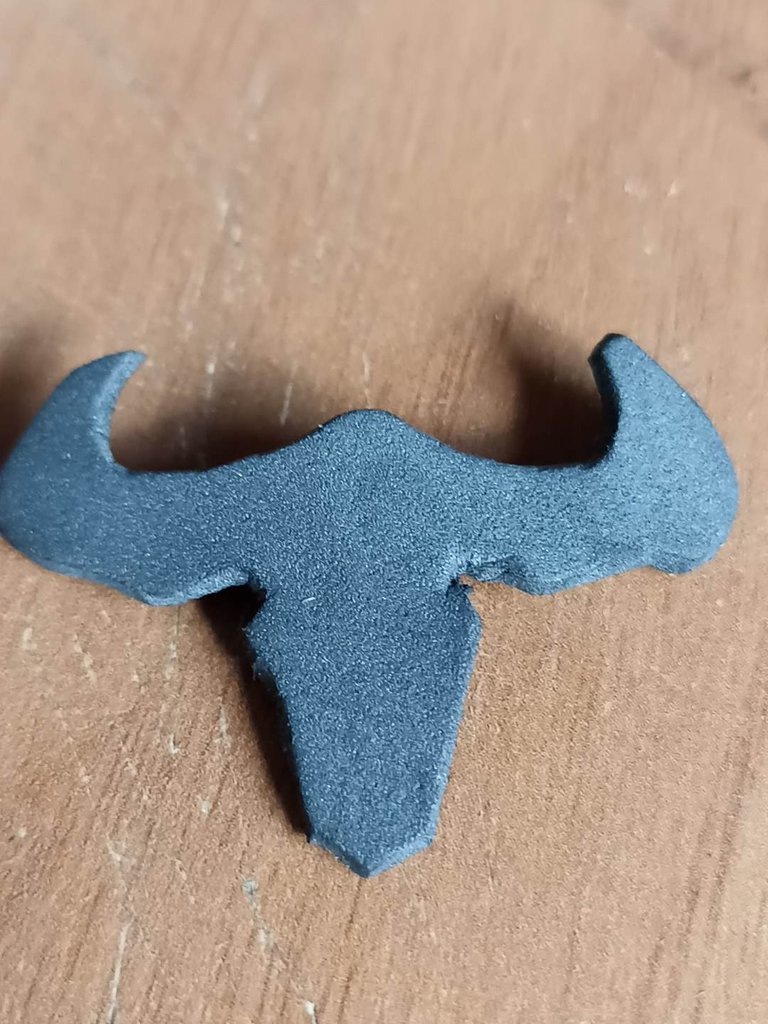
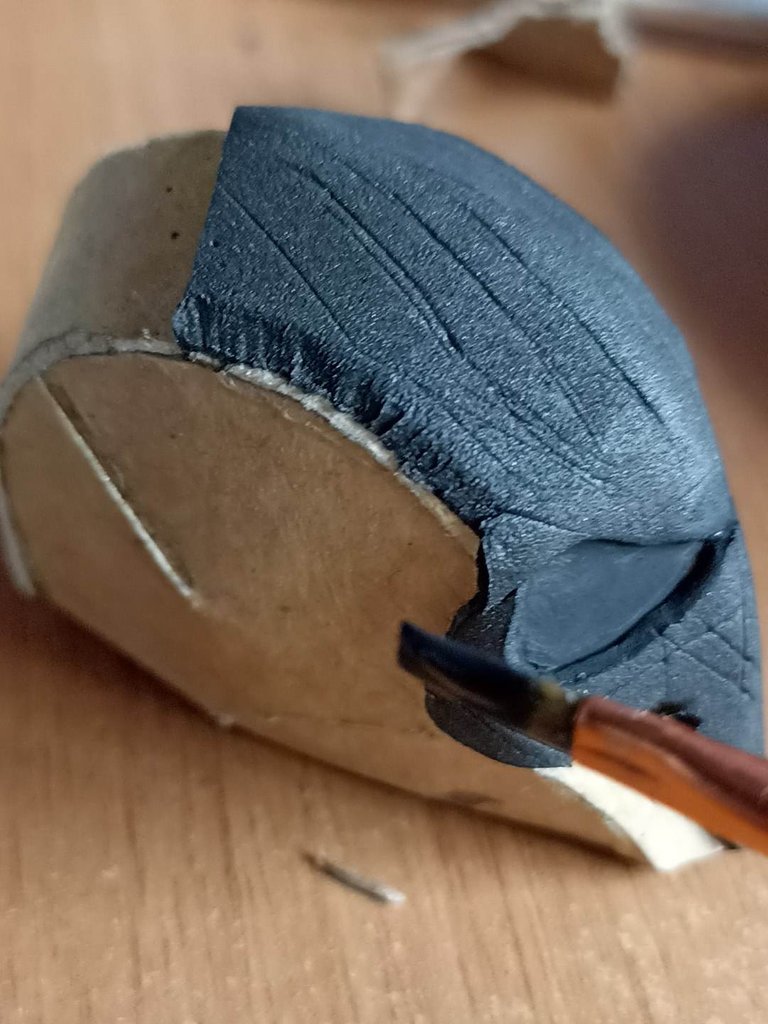
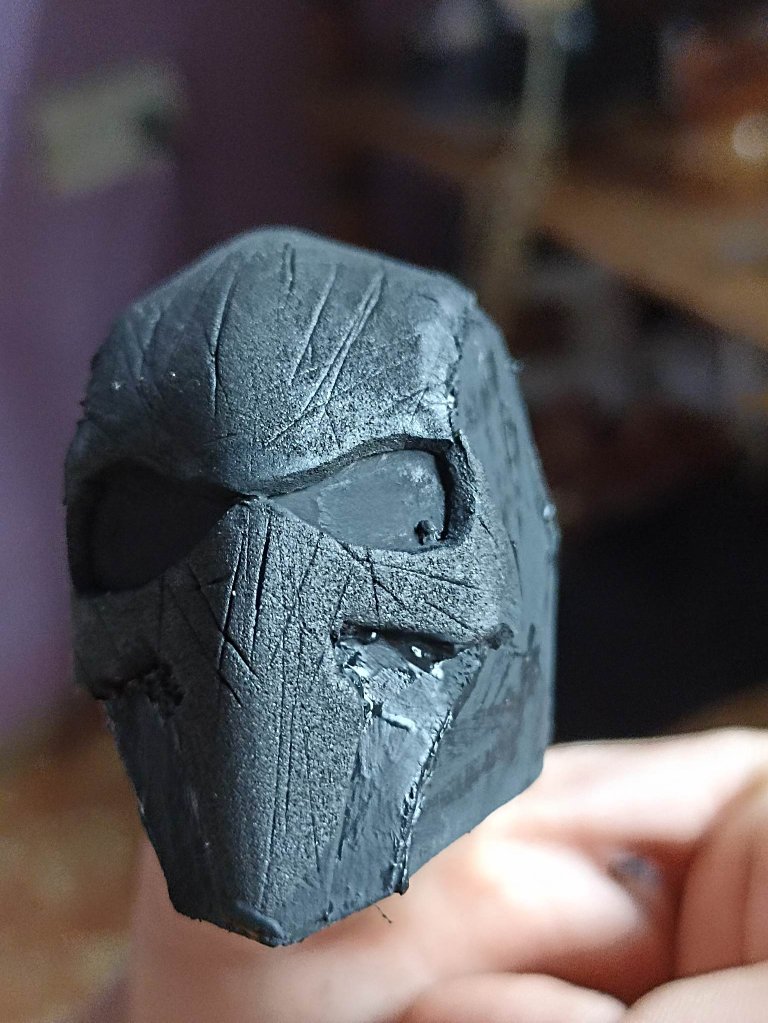
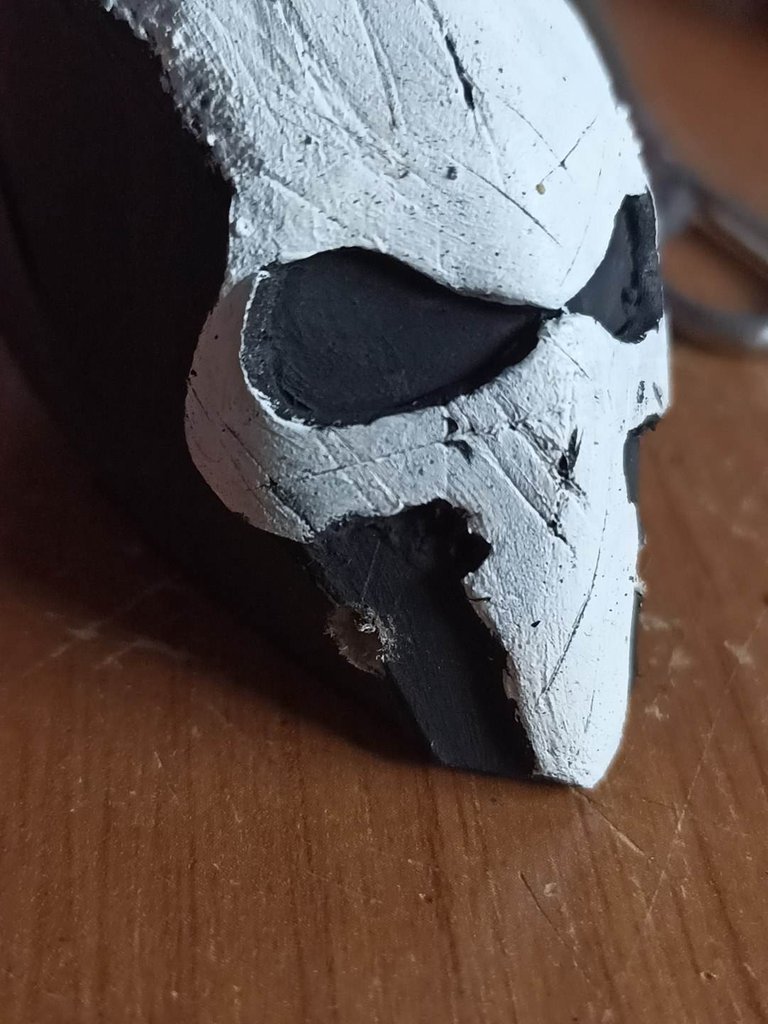
I take a piece of foami rubber and with it I'm going to mold the punisher's skull, first I make the bottom part, I mold it and then I cut it out and using the same glue I cover the arton with the foami. Then I make the upper part to shape the eyes and cut it about halfway, then I join it together with the previous part until I obtain the shape of the human skeleton. Finally, with a blade I make cuts in the foam to give it the appearance of battles after I have to paint.
Tomo un pedazo de goma foami y con ella voy a moldear calavera de punisher, primero hago la parte de abajo, la moldeo y luego la recorto y utilizando el mismo pegamento voy recubriendo elc artón con el foami. Despues hago la parte superior para derle forma a los ojos y lo cortto como hasta la mitad, después la voy uniendo junto a la parte anterior hasta obtener la forma del esqueleto humano. Por último, con una hojilla hago cortes en el foami para drle apariencia de batallas luego que me toque pintar.
 |  |  |
|---|---|---|
 | 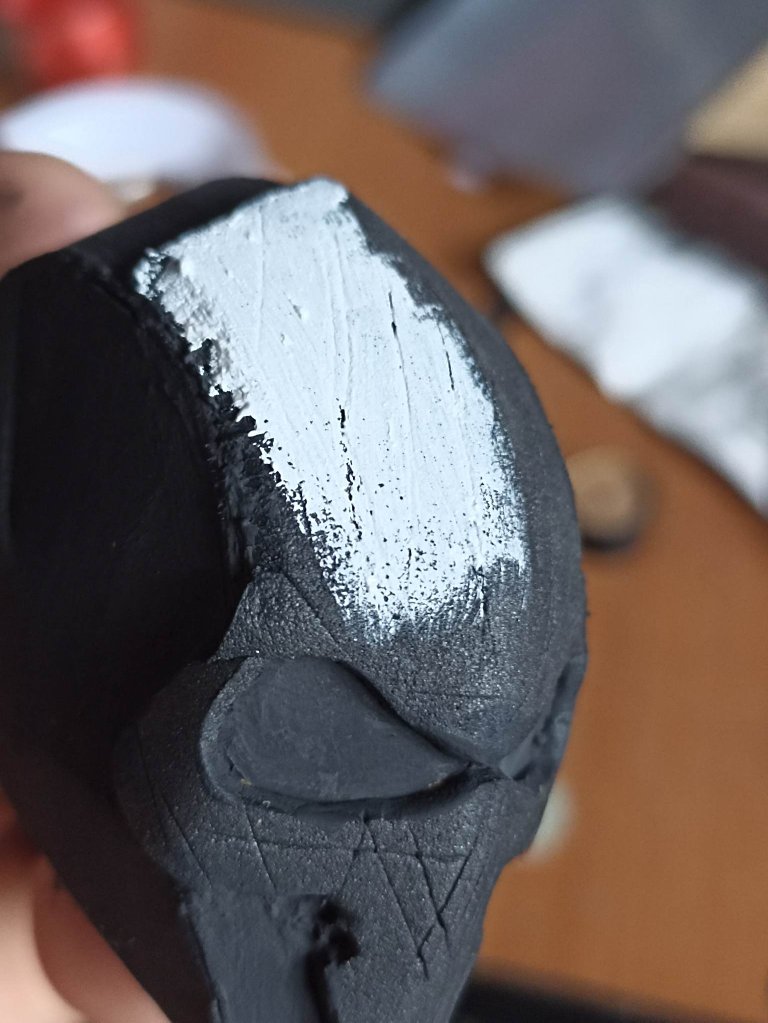 | 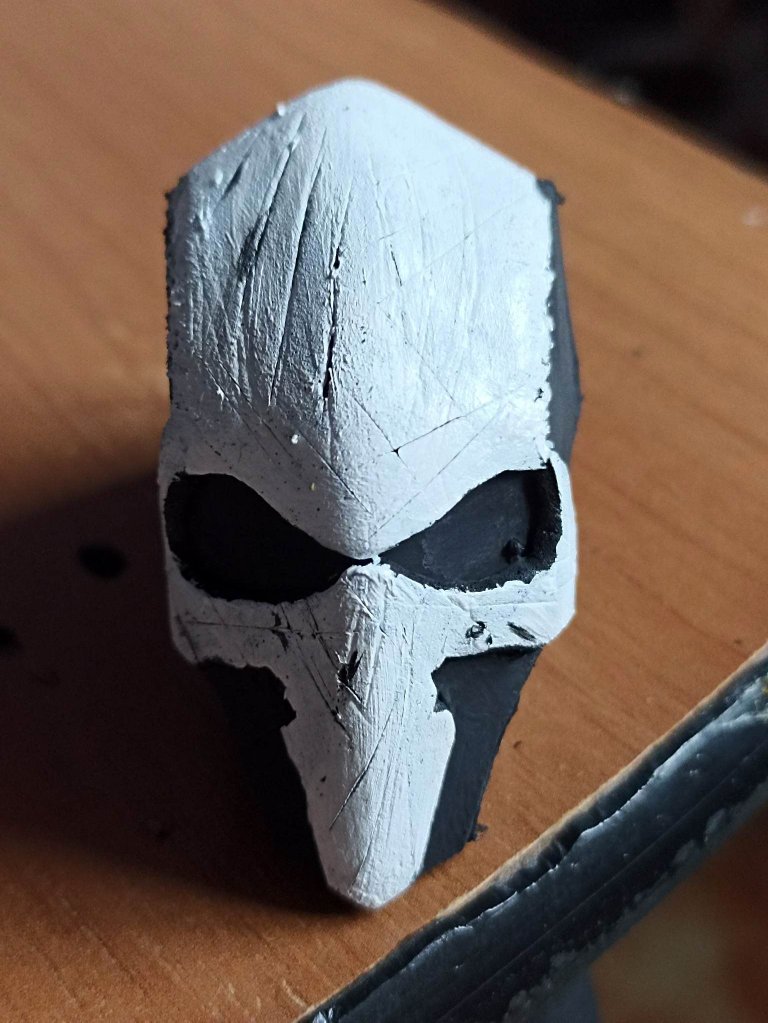 |
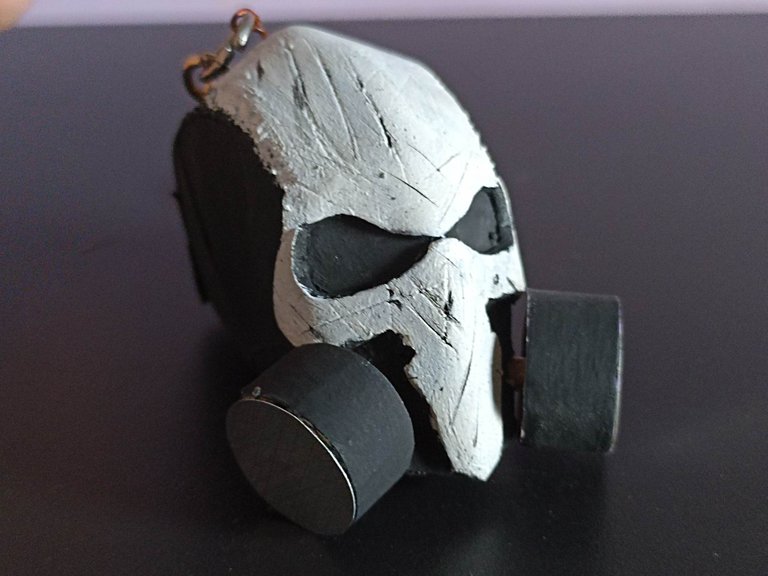
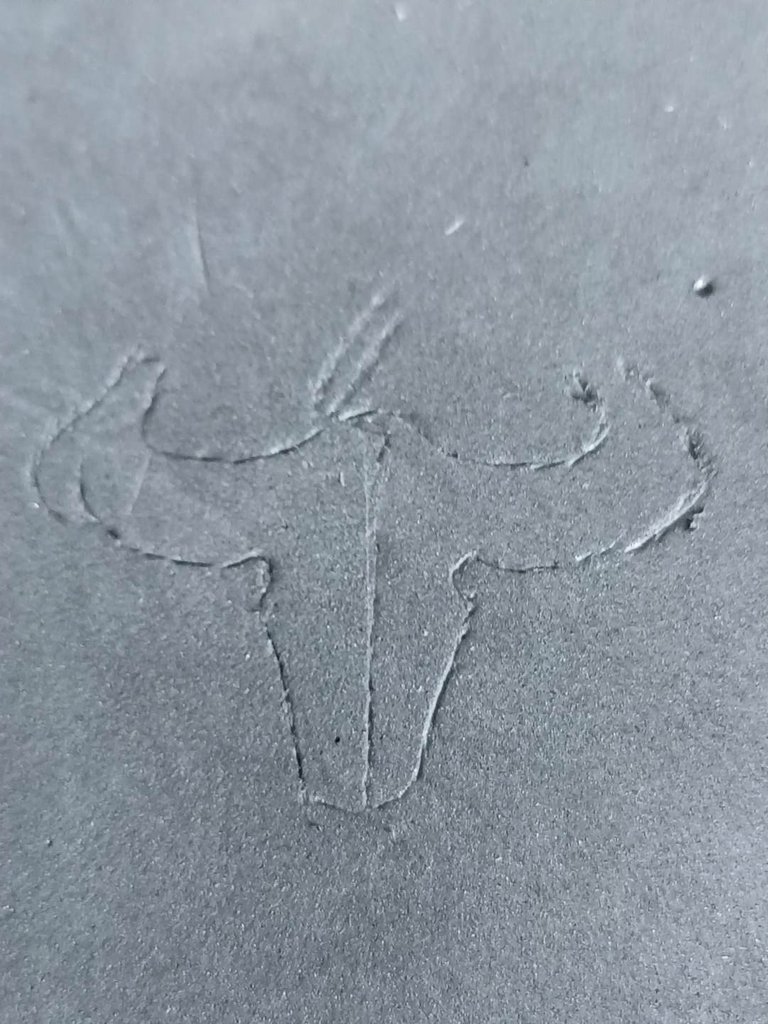
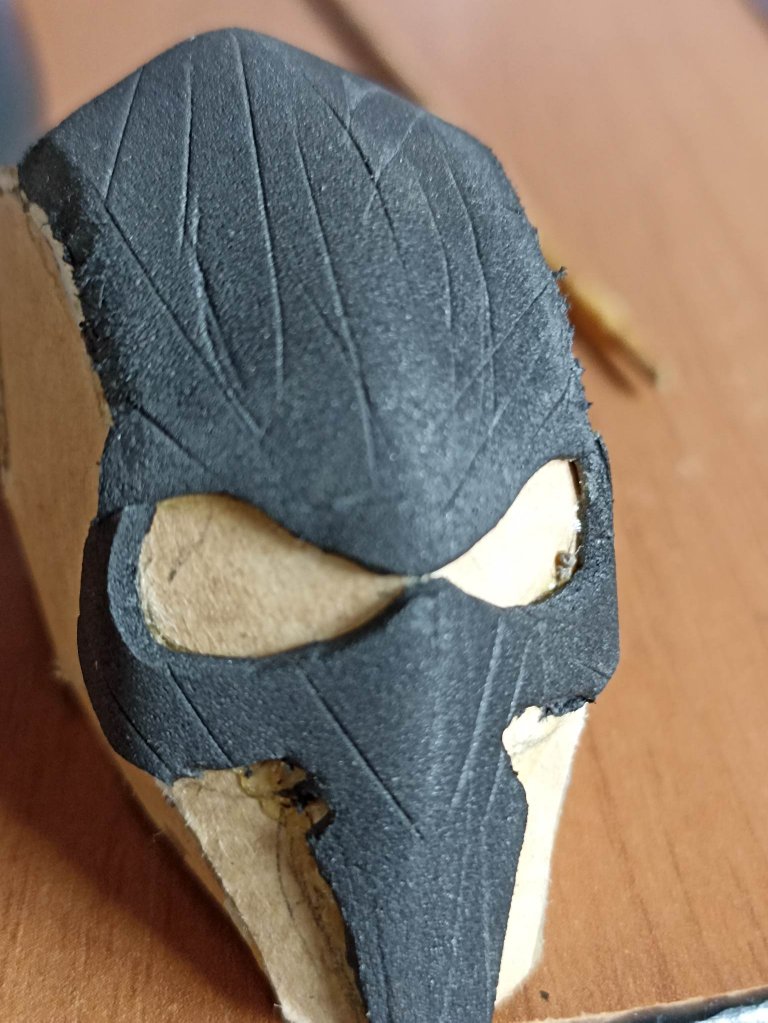
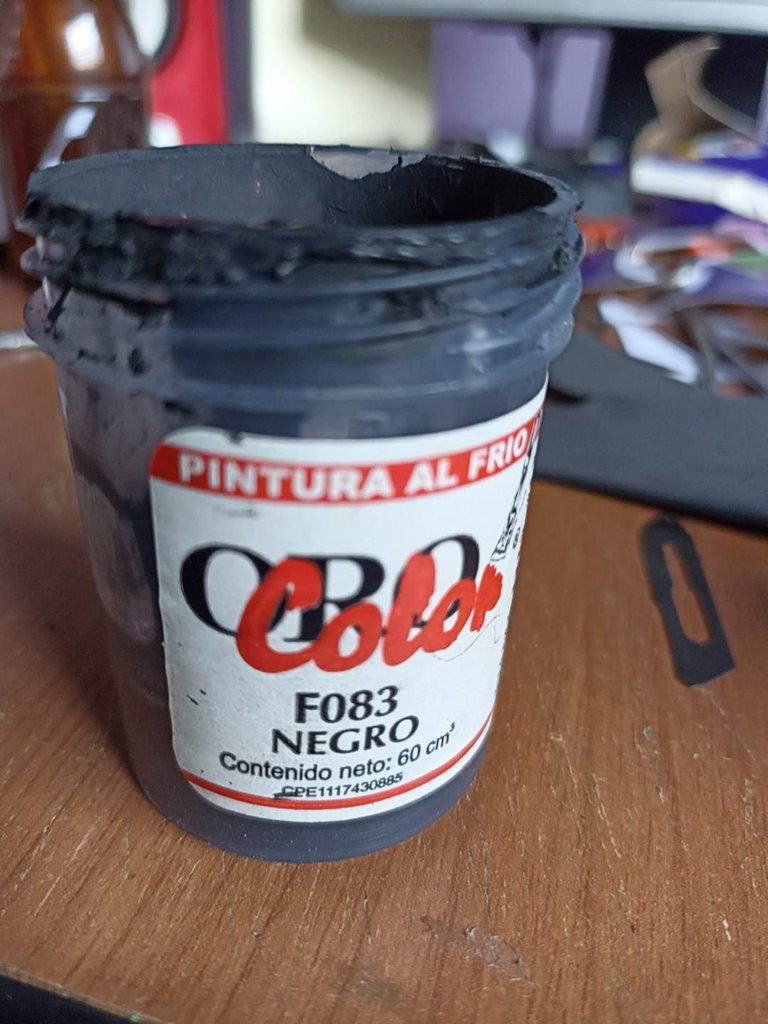
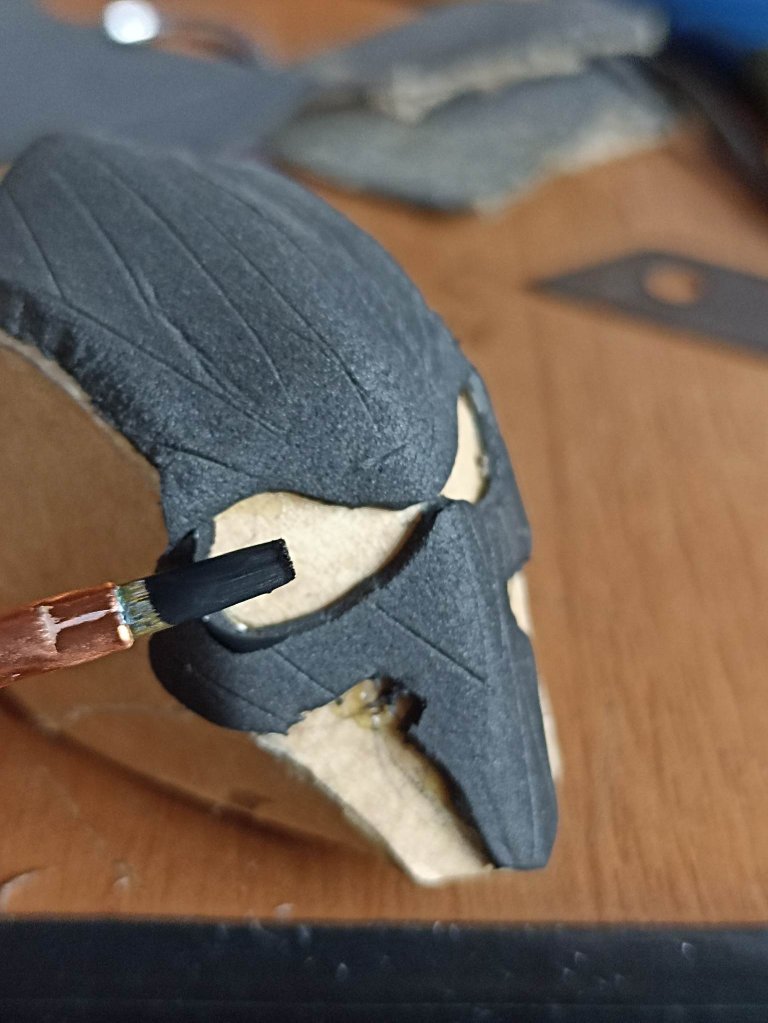
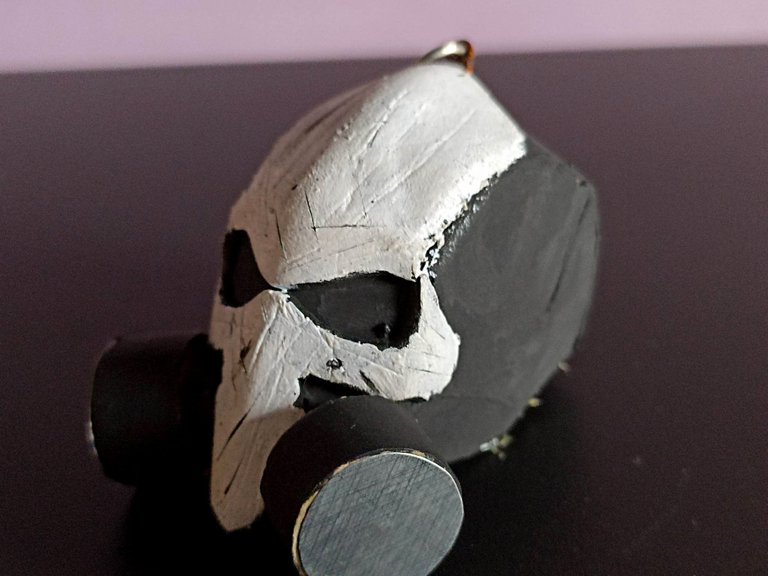
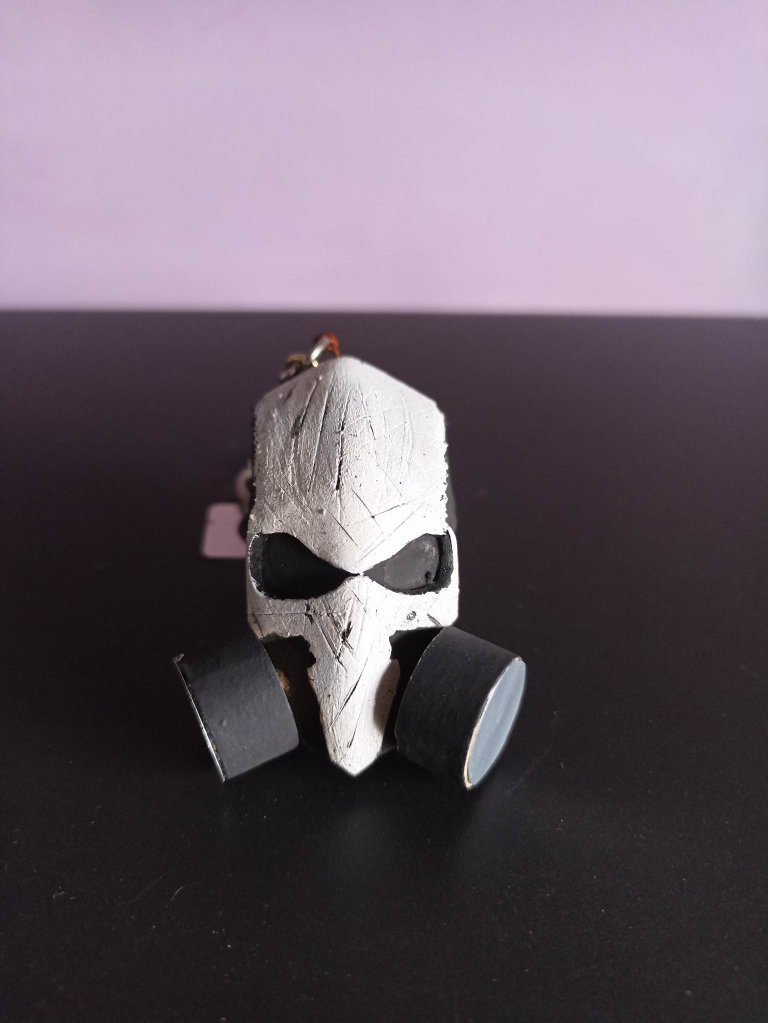
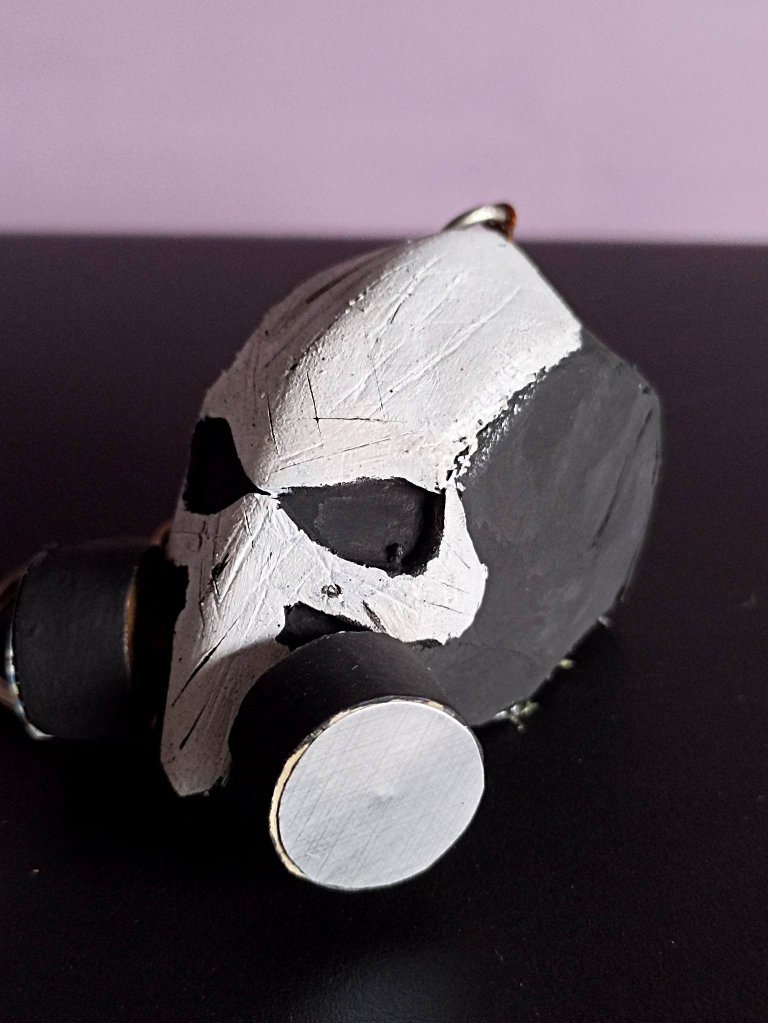
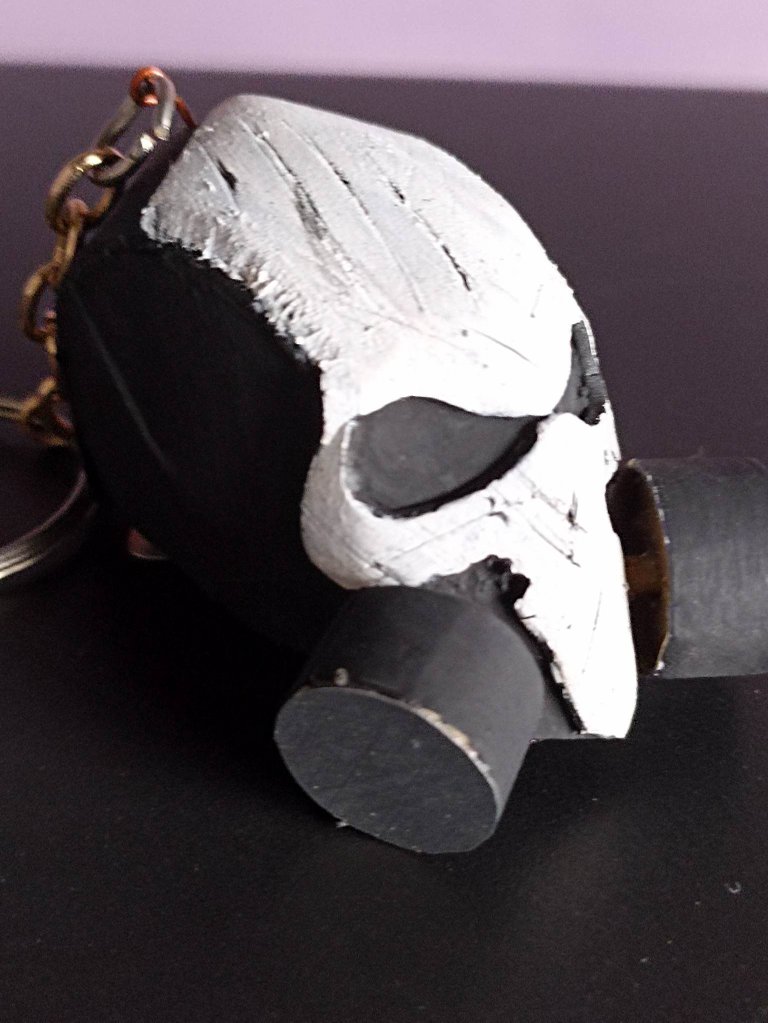
The next step is very important since it is the decoration with paint, I start by applying several layers of black paint, it can be acrylic, with several layers we make sure that the cardboard is hardened. And then we painted the Punisher skull symbol with white, at the end you can see the details that I did with the needle, so the helmet has that deteriorated look.
El siguiente paso es muy importante ya que es la decoración con pintura, comienzo aplicando varias capas de pintura de color negro, puede ser acrílica, con varias capas nos aseguramos que el cartón quede endurecido. Y después pintamos el símbolo de la calavera de Punisher con blanco, al finalizar se puede observar los detalles que hice con la aguja, por lo que el casco tiene ese aspecto de deterioro.
 |  |  |
|---|---|---|
 | 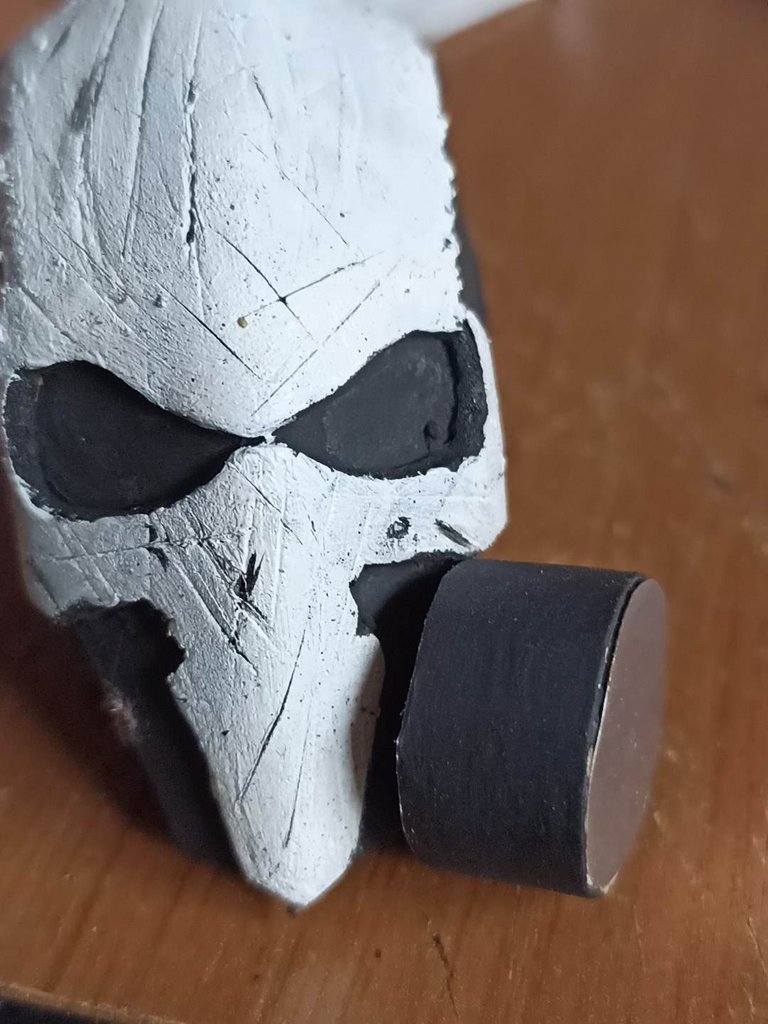 | 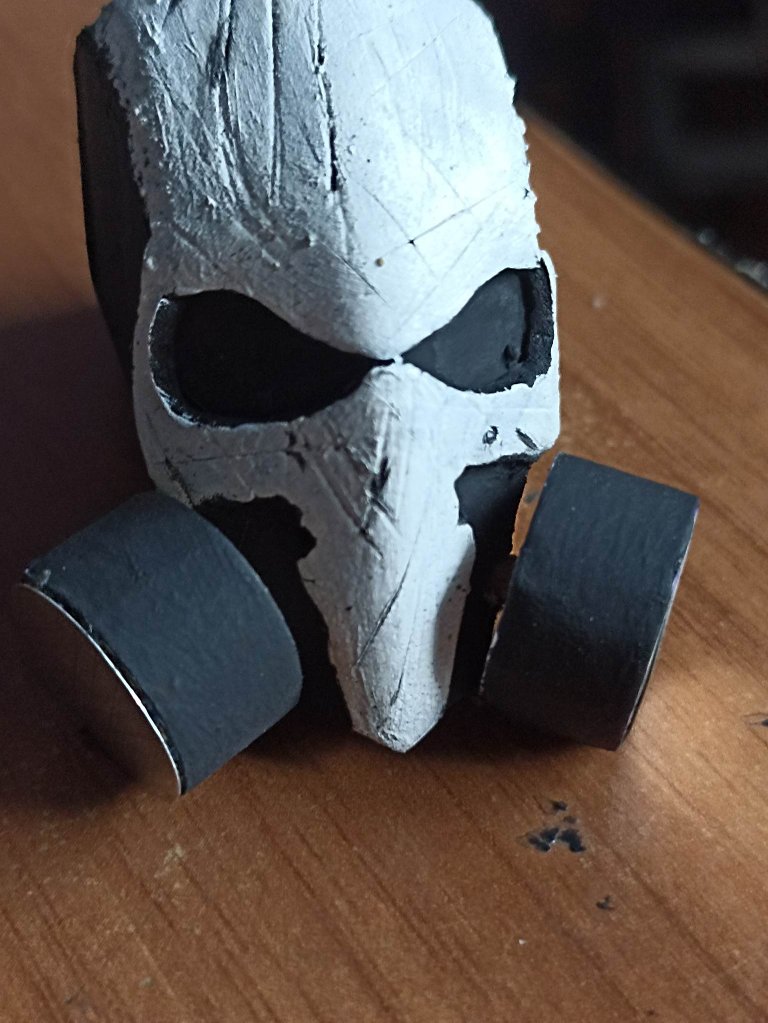 |
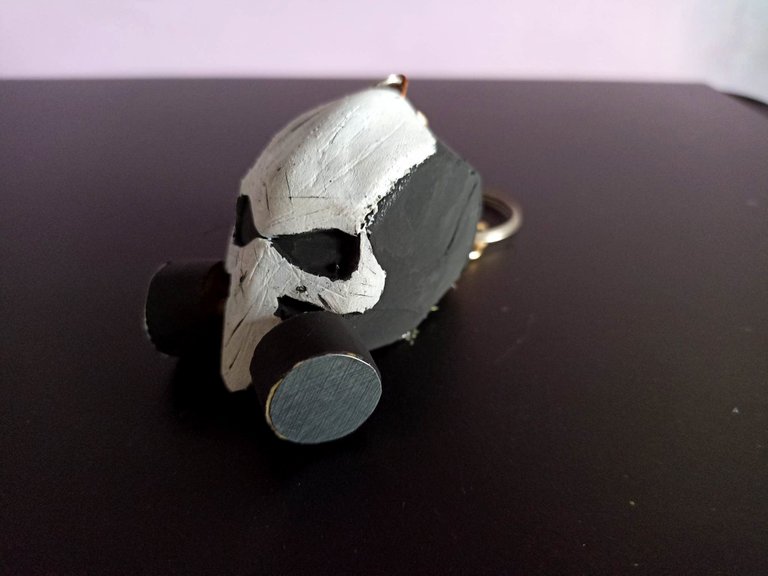
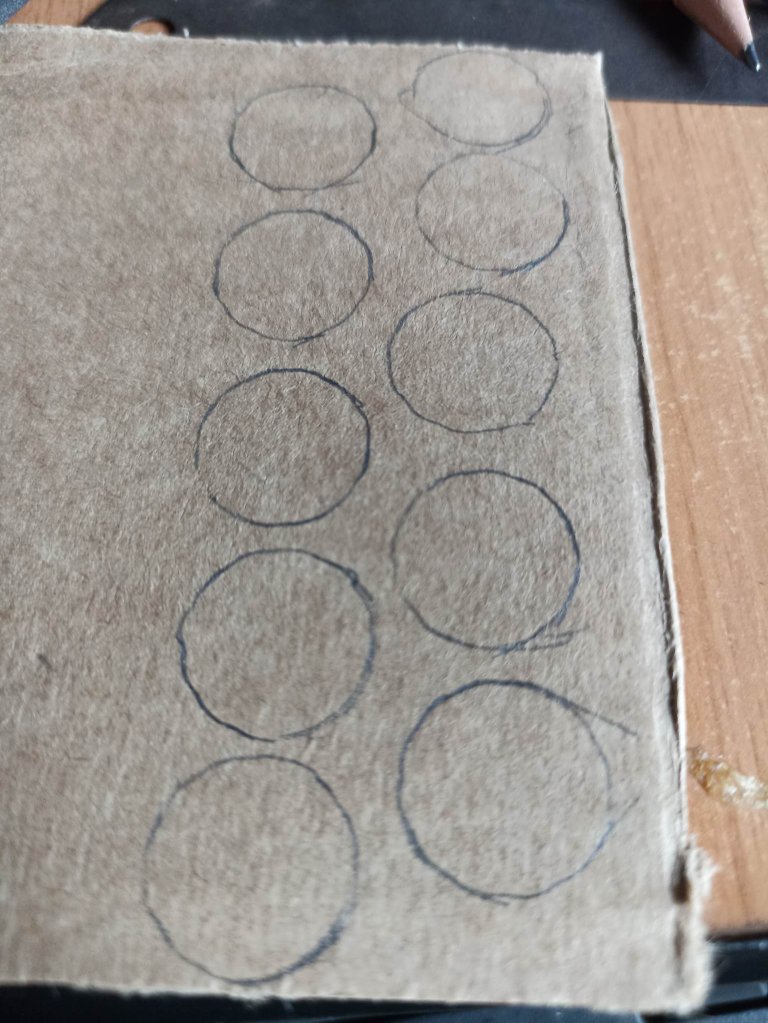
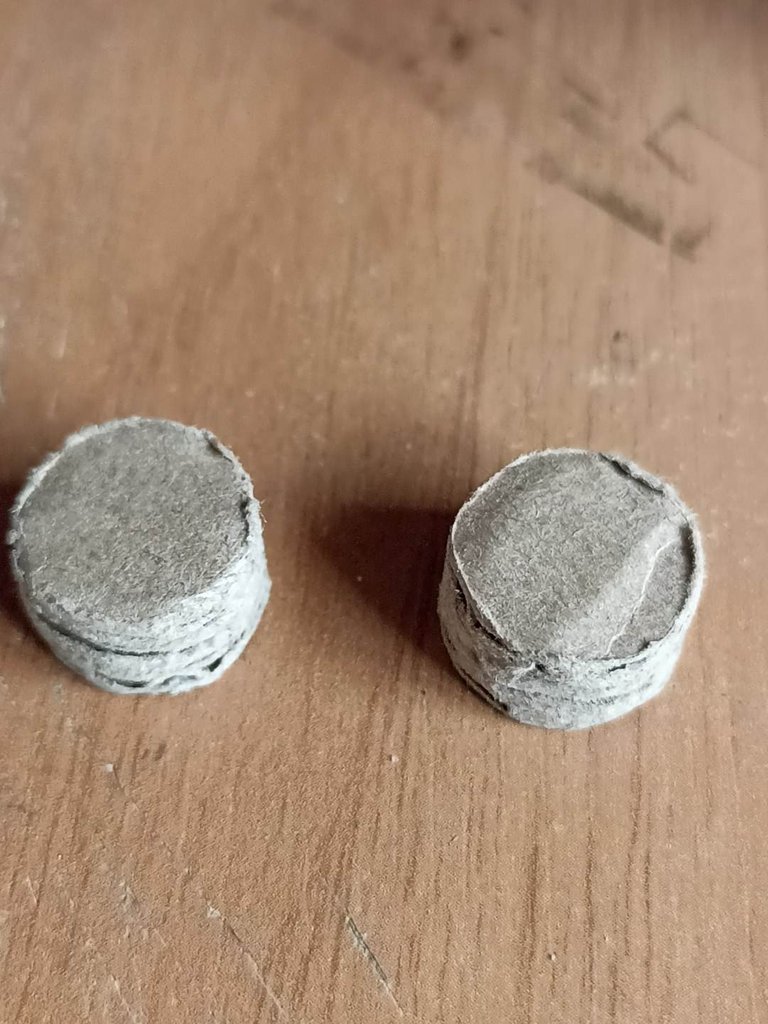
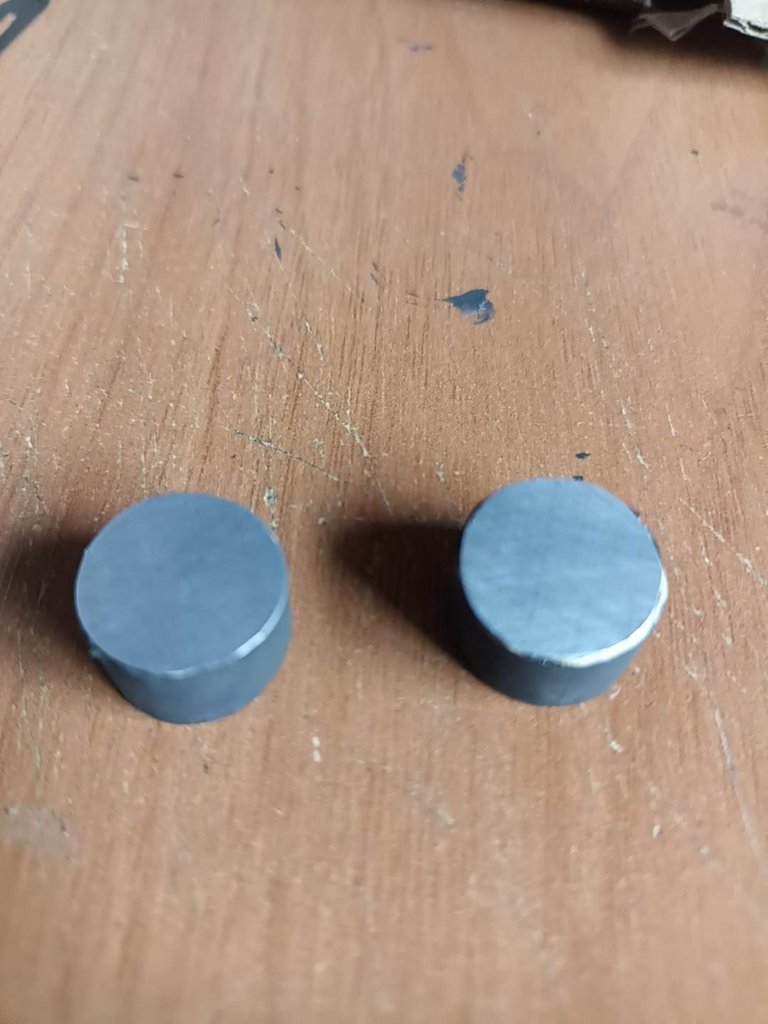
To finish with the gas mask accessories I put the air filters on it, I made these using cardboard, I cut several cardboard wheels and then joined them together using glue. Then I wrapped them with the cereal cardboard and painted them black, on the front I put two aluminum circles to decorate. Then I made two holes in the mask that were used to join the filters, which had the small wood chips that are inserted into those holes, I put hot silicone on the inside of the helmet that hardens when it cools down and keeps the filters firm . To finish the job I put the chain that all the key rings have on the top, and so everything was ready and finished.
Para finalizar con los accesorios de la máscara de gas le puse los filtros de aire, estos los hice utilizando cartón, corté varias ruedas de cartón y luego las uni unas con otras usando pegamento. Despues las envolví con el cartón del cereal y las pintpe de color negro, en la parte frontal le puse dos círculos de aluminio para decorar. Despues a la máscara le hice dos agujeros que sirvieran para unir los filtros, los cuales llevaban los pequeñas astillas de madera que van introducidas en esos agujeros, por la parte interior del casco le puse silicón caliente que al enfriarse se endurece y mantiene firme los filtros. Para terminar el trabajo puse en la parte superior la cadena que tienen todos los llaveros, y así quedó todo listo y finalizado.
Contrary to all the keychains I've made before, I made this one for myself, since it's always other people who ask me for keychains of anything, so since the Punisher is one of those characters that I like the most, I did it in his honor, he's like Batman but more violent, I think he looks more like a DC comics character hehehe. I've always wanted to make a scale action figure, maybe soon I'll be encouraged to do it, I'll just need more materials. I hope you liked this little Punisher gas mask, I say goodbye to everyone until a new opportunity to share, see you soon.
Al contrario de todos los llaveros que he hecho antes, este lo hice para mi, ya que siempre son otras personas las que me piden llaveros de cualquier cosa, así que como Punisher es uno de esos personajes que más me gustan, lo hice en su honor, es como Batman pero más violento, creo que parece más un personaje de DC comics jejeje. Siempre he querido hacer una figura de acción a escala, tal vez pronto me anime a hacerla, solo necesitaré mas materiales. Espero que les haya gustado esta pequeña máscara de gas del Punisher, me despido de todos hasta una nueva oportunidad para compartir, hasta pronto.
Muchas gracias amigos 🤘🤘
Una maravilla de trabajo amigo, parece de hueso, es perfecto. Abrazos @fixie 💕
!DIY
Tenía ganas de hacerlo de madera pero aún me falta aprender a tallar muy bien 😁
Excellent work. Good reuse of materials for recycling. Keep creating good content. Congratulations... // Excelente trabajo. Buenas reutilizacion de materiales para reciclar. Siga creando buen contenido. Felicidades...
Very grateful for your support friends
https://leofinance.io/threads/dayadam/re-leothreads-h1rl4vnk
The rewards earned on this comment will go directly to the people ( dayadam ) sharing the post on LeoThreads,LikeTu,dBuzz.
Que buen trabajo ...me encanta la forma en que creas tus proyectos que comienzan desde un molde en papel hasta que quedan figuras en 3D impresionantes...te felicito!
!discovery 40
!VSC
@chacald.dcymt has sent VSC to @fixie
This post was rewarded with 0.1 VSC to support your work.
Join our photography communityVisual Shots
Check here to view or trade VSC Tokens
Be part of our Curation Trail
@chacald.dcymt ha enviado VSC a @fixie
Éste post fue recompensado con 0.1 VSC para apoyar tu trabajo.
Únete a nuestra comunidad de fotografía Visual Shots
Consulte aquí para ver o intercambiar VSC Tokens
Se parte de nuestro Trail de Curación
Gracias querida @chacald.dcymt me gusta mucho las miniaturas porque hay que esforzarse mucho en los detalles
This post was shared and voted inside the discord by the curators team of discovery-it
Join our Community and follow our Curation Trail
Discovery-it is also a Witness, vote for us here
Delegate to us for passive income. Check our 80% fee-back Program
Thanks for The support to my artwork
Leí que hace poco el actor que hacía este papel murió. Es un justo homenaje, le ha quedado genial. Mucha suerte, amigo.