Witches finger cookies - FOR HALLOWEEN / Galletas dedos de brujas - PARA HALLOWEEN


E N G L I S H
E N G L I S H
Happy day community!
I know that Halloween is over :( But, this holiday has left us with very good feelings. We come from some slow years, where the festivities had to be put on pause and along with them many other things.
Well, I noticed that in the kitchen this pause boosted creativity to a million. You can notice it with the following cookies that my sister prepared for sale during Halloween and believe me, they sold like hotcakes and at a very affordable price: three cookies for 10 Bs, approximately 0.2777 USD.
If you want to make them for an "octavita" as we usually call here (an extra day to celebrate) here is the recipe. I hope you enjoy it very much.
- Flour 275 grams
- Sugar 85 grams
- Butter 225 grams
- Egg (egg white only)
- Salt
- Vanilla 1 tablespoon
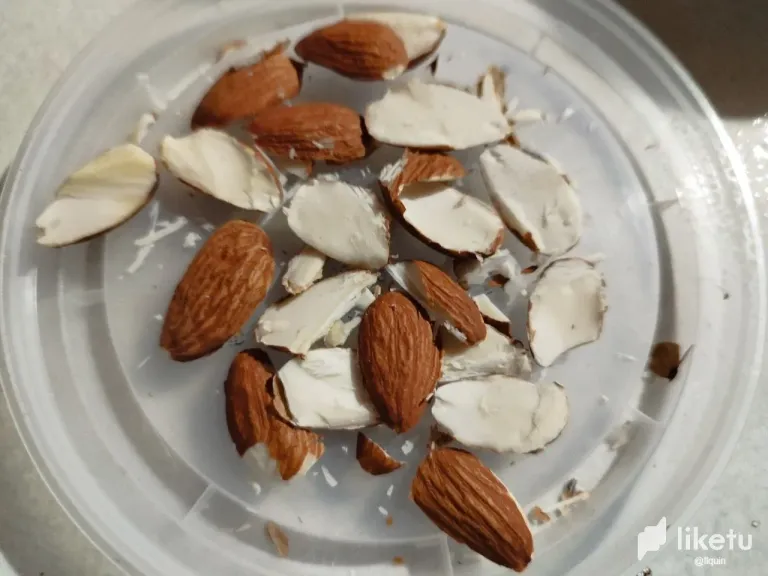
- Almonds (quantity needed)
Beat the butter at room temperature with the sugar, until both are properly integrated.
Once the butter and sugar are well combined, add a tablespoon of vanilla.
Continue until the mixture looks a little fluffier, no lumps are visible and the whole mixture is homogeneous.
Now, let's add the flour. Since it is powdered, you take the opportunity to mix the flour with a little salt. Stir well and then add the flour to the butter and sugar mixture. This combination, you do it little by little. Continue mixing until all the ingredients are well combined.
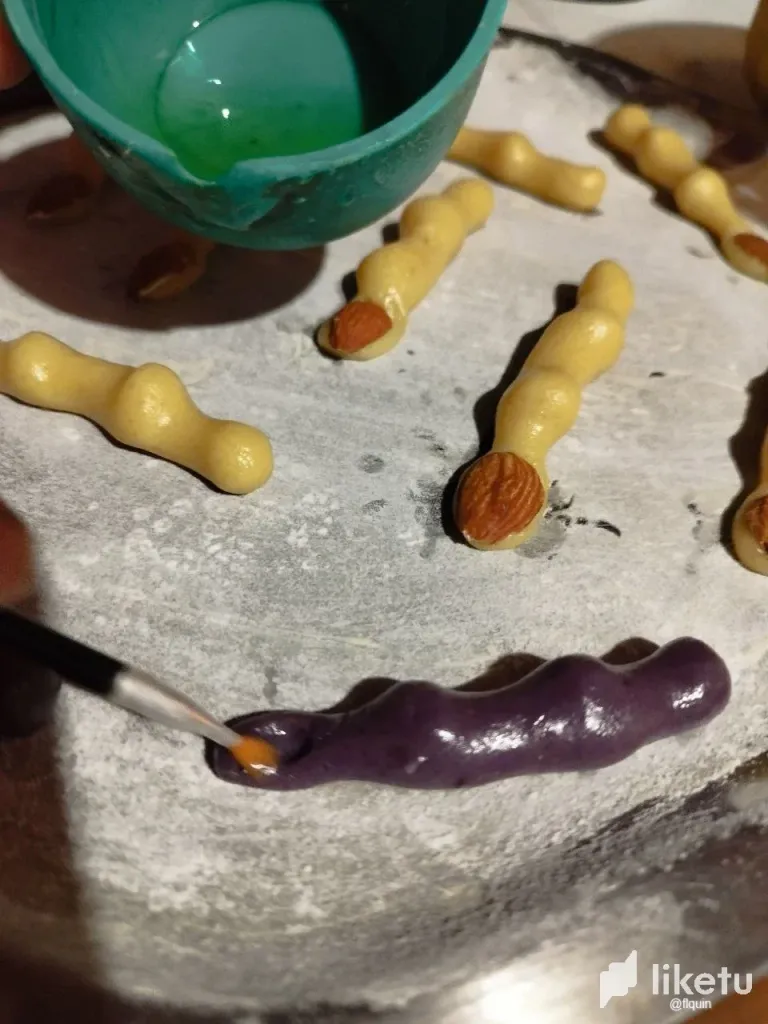
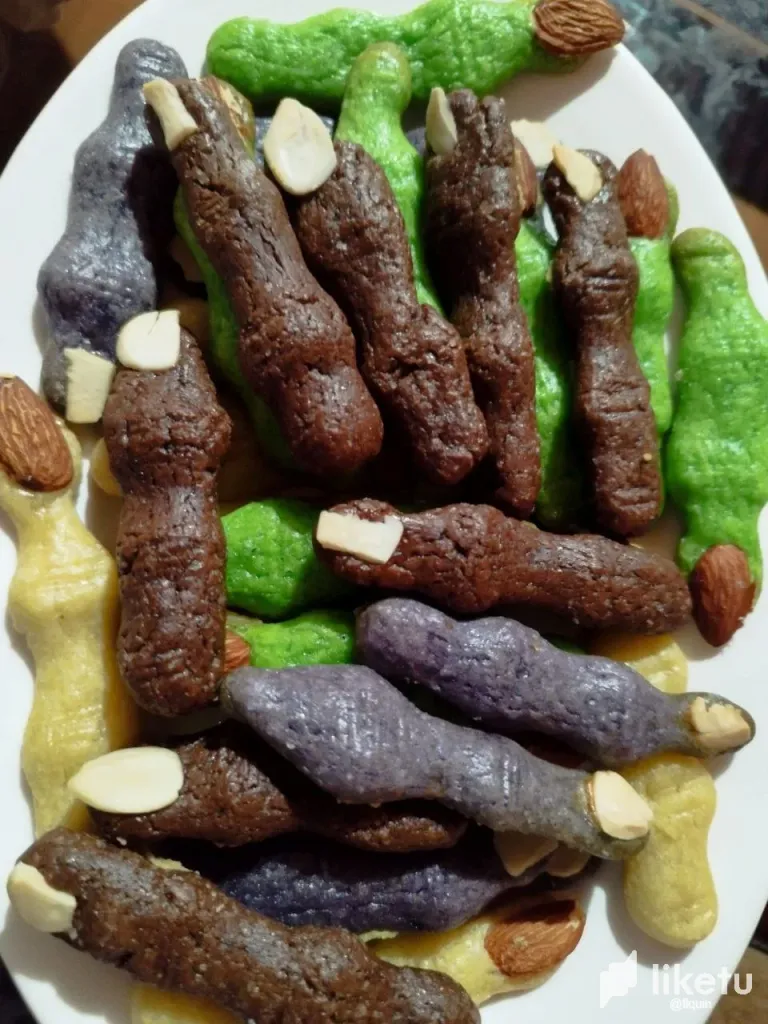
When the mixing is done correctly, you can let the flour taste as you like, if you want your cookies, chocolate, lemon, orange... At this point, you divide the dough into the portions of cookie flavors you want and each mixture, you prepare it to your liking. For example, if you want chocolate, you can add cocoa powder to the mixture, to the lemon or orange ones you add grated zest of the fruit. Of course, you can add edible coloring (if necessary) to give your fingers a touch of ambiance.
Once the dough is ready, with the color and flavor to our taste, we proceed to place the mixture in the refrigerator to rest.
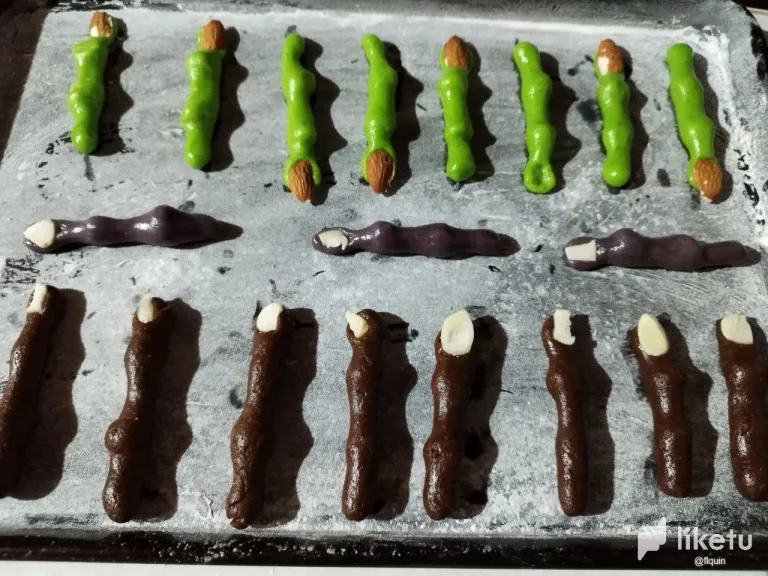
At this point, we are going to make the witch fingers models. Here, you can go arranging the amount of mixture to make each finger, if you want big, deformed... But, if you want a guide, you can take potions of the dough between 10 grams and 15 grams, so that they are fingers of the same length of our hand.
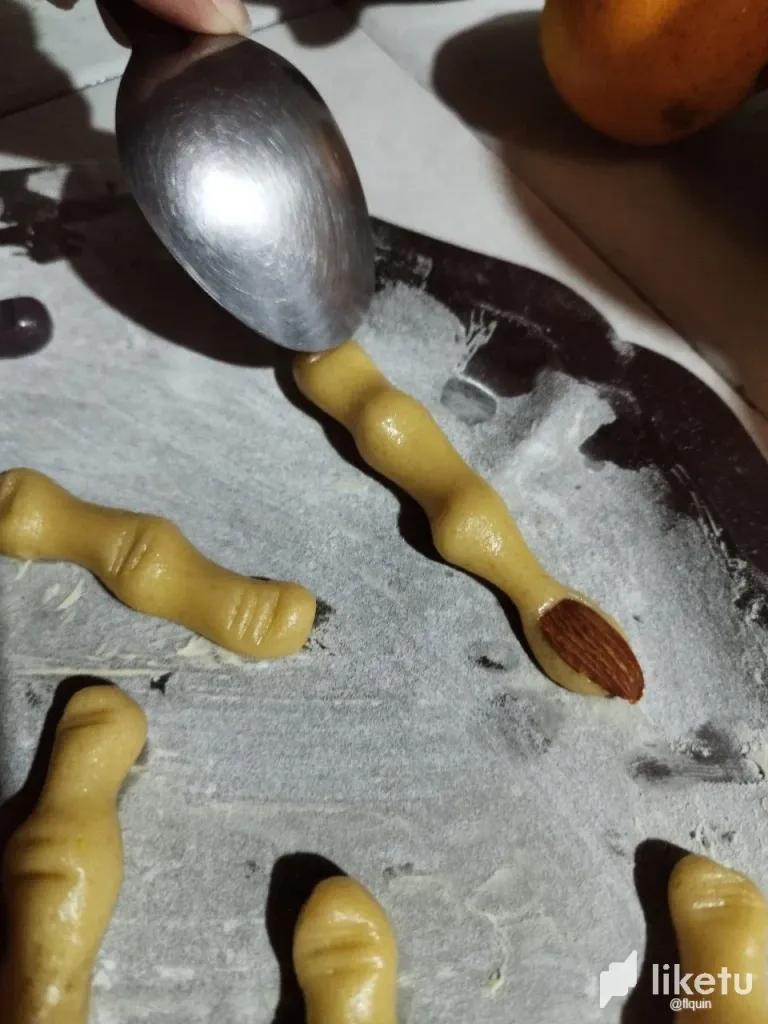
You make a little ball, from that portion of dough, then you stretch them to the size and thickness that you like and proceed to flatten a little the fingers of dough (to give it a better finger shape and that it is not like a stick) you would flatten the fingers of dough in three sections, you can use the shape that your fingers take in the kneading to create the knuckles.
Be sure to separate each finger in the pan that goes into the oven. Then, with some cutlery, you can demarcate the knuckle section (wrinkles in the knuckles) to give it a better shape.
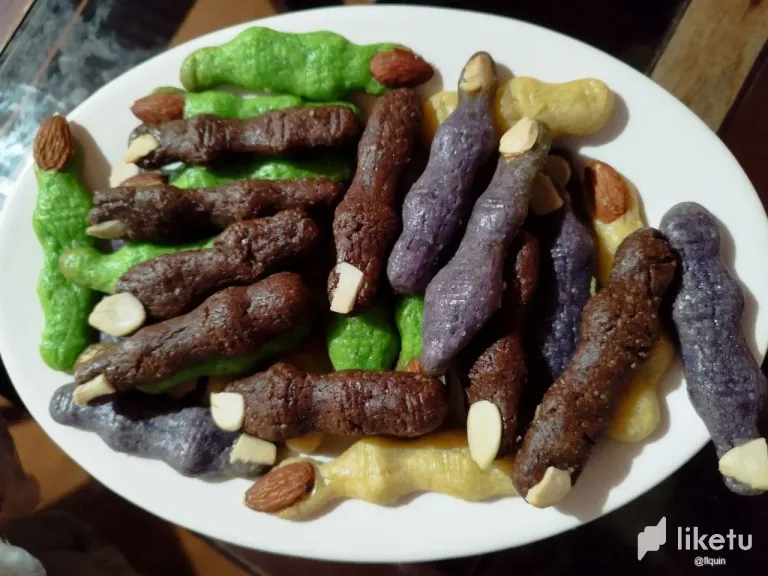
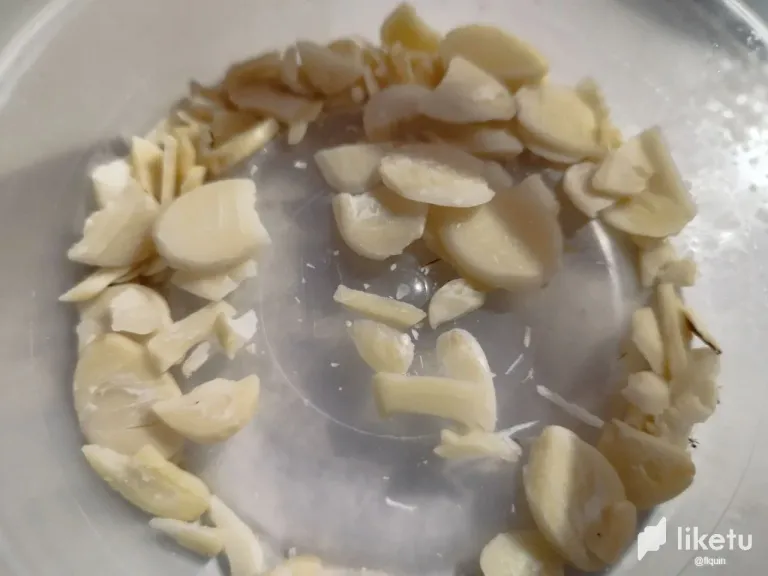
Finally, for the nails, we will use the almonds. For this, you will cut the almond in half and before attaching them to the finger, you will add the egg white where the nail would be located on the witch's finger, you do this with each finger. And, you start adding the almonds in the shape of nails to the fingers already varnished with the egg white.
Preheat the oven for a few minutes, while this happens, put the cookies in the freezer, so they get a little harder.
After about 15 / 30 minutes, remove the cookies from the freezer and proceed to bake the cookies at about 180 ° Celsius for about 20 minutes. There may be a difference in baking time. What will give away that they are ready is the smell. And, this time may vary according to our taste (we want them crispier or softer) But, like everything else, do not overbake them so they do not overbake and damage the design of the witches' fingers. This is not a recipe for making stones.
Well, I hope you like this recipe. Another thing, the nails (the almonds) can be painted with some edible coloring and will give a more bloody or repulsive touch according to your designs hahahah.
Let me know if you make the recipe and especially if you like it.
E S P A Ñ O L
¡Feliz día comunidad!
Sé que el día de Halloween ya terminó :( Pero, esta festividad nos ha dejado muy buenas sensaciones. Venimos de unos años un tanto lentos, donde las festividades se tuvieron que poner en pausa y junto a ellas muchas otras cosas más.
Pues, noté que en la cocina esta pausa impulsó la creatividad a millón. Lo podrán notar con las siguientes galletas que mi hermana preparó para la venta durante Halloween y créanme estas se vendían como pan caliente y aun precio muy accesible. unas tres galletas por 10 Bs, aproximadamente unos 0.2777 USD.
Si quieren hacerlas para una "octavita" como solemos llamar acá (un día extra para celebrar) aquí les dejo la receta. Espero la disfruten mucho.
- Harina 275 gramos
- Azúcar 85 gramos
- Mantequilla 225 gramos
- Huevo (Sólo la clara)
- Sal
- Vainilla 1 cucharada
- Almendras (cantidad necesaria)
Se bate la mantequilla a temperatura ambiente con el azúcar, hasta que ambas se integren correctamente.
Una vez la mantequilla y el azúcar se integren correctamente, agregas una cucharada de vainilla.
Continúas hasta que la mezcla se vea un poco más esponjosa, no se vean grumos y toda la mezcla sea homogénea.
Ahora, vamos a agregar la harina. Como está en polvo, se aprovecha la oportunidad de mezclar la harina con un poco de sal. Se revuelve bien y luego, se agrega la harina a la mezcla de mantequilla con azúcar. Esta combinación, la vas realizando poco a poco. Continúas la mezcla hasta que todos los ingredientes se hayan combinados correctamente.
Cuando la mezcla se haya realizado correctamente, puedes darle saber a la harina como gustes, si quieres tus galletas, de chocolate, de limón, de naranja… En este punto, divides la masa en las porciones de sabores de galletas que quieras y a cada mezcla, la preparas a tu gusto. Por ejemplo, si quieres de chocolate, puedes agregar cacao en polvo a la mezcla, a las de limón o naranja le agregas ralladura del fruto. Por supuesto, para ambientar a los dedos, puedes agregarle colorante comestible (de ser necesario)
Ya la masa hecha, con el color y sabor a nuestro gusto, procedemos a colocar la mezcla dentro del refrigerado para que repose.
En este punto, vamos a realizar los modelos de los dedos de bruja. Aquí, puedes ir disponiendo la cantidad de mezcla para hacer cada dedo, si quieres grandes, deformes… Pero, si quieres una guía, puedes tomar pociones de la masa de entre 10 gramos y 15 gramos, para que sean dedos de la misma longitud de nuestra mano.
Haces una bolita, de esa porción de masa, luego las estiras del tamaño y grosor que te agrade y procedes a aplastar un poco los dedos de masa (para darle una forma mejor de dedo y que no quede como un palo) aplastarías los dedos de masa en tres secciones, puedes utilizar la forma que tus dedos toman en el amasado para crear los nudillos.
Asegurate de separar cada dedo en la cacerola que va al horno. Luego, con algún cubierto, puedes ir demarcando la sección de los nudillos (arrugas en los nudillos) para darle una mejor forma.
Finalmente. para las uñas, emplearemos las almendras. Para esto, cortarás la almendra por la mitad y antes de fijarlas al dedo, añadirás la clara del huevo donde se ubicaría la uña en el dedo de la bruja, esto lo haces con cada dedo. Y, empiezas a añadir las almendras en forma de uñas a los dedos ya barnizados con la clara de huevo.
Pones a precalentar el horno por unos minutos, mientras pasa esto, mete en el congelador / freezer las galletas, para que se pongan un poco más duras.
Pasado unos 15 / 30 minutos, sacas las galletas del freezer y procedemos a hornear las galletas a unos 180° centígrados por unos 20 minutos. Tal vez haya diferencia de tiempo en el horneado. Lo que delatará que estén listas es el olor. Y, este tiempo puede variar según nuestro gusto (las queramos más crocantes o más suaves) Pero, como todo no hay que hornear de más para que no se tuesten de más y dañar el diseño de los dedos de bruja. Esta, no es una receta para hacer piedras.
Bueno, espero les guste esta receta. Otra cosa, las uñas (las almendras) pueden pintarlas con algún colorante comestible y le darán un toque más sangriento o repulsivo según sus diseños jajaj.
Me avisas si haces la receta y especialmente si te gustó.
For the best experience view this post on Liketu
me ha gustado mucho la creatividad que han tenido para hacer las galletas, pero sin ánimos de ofender XD yo no las comería, me parecen aterradoras jajaja (si las comería) autenticas y representativas del hallowen.
!PIZZA
Jajaj son horrendas pero deliciosas. Cuando vi la primera vez como le estaban quedando esas galletas a mi hermana, también me sorprendí por la creatividad.
Muchas gracias amiga Rosmi!
!PIZZA
!LOLZ
lolztoken.com
Udder Chaos!
Credit: reddit
@rosmiapure, I sent you an $LOLZ on behalf of flquin
(2/4)
NEW: Join LOLZ's Daily Earn and Burn Contest and win $LOLZ
$PIZZA slices delivered:
@flquin(2/5) tipped @rosmiapure
rosmiapure tipped flquin