✨🧡 Halo Eyes Naranja🧡✨ // ✨🧡 Halo Eyes Orange🧡✨
Versión en Español
Hello Hello comunidad de Makeup Power🧡
Hoy estoy feliz de traerles un nuevo look en esta oportunidad en tonos naranja, los tonos cálidos siempre serán mis favoritos a la hora de hacer un Halo eyes.
Este estilo es sumamente elegante y se puede llevar perfectamente como un maquillaje social, espero les guste el paso a paso de este look Halo Eyes.
Como siempre y es lo primero que debemos hacer a la hora de maquillarnos es aplicar un primer y/o crema hidratante esto permitirá que el acabado de la piel sea mas lindo y se prolongue el maquillaje por mas tiempo, también apliqué contorno de ojeras ya que esa zona es super delicada y debe estar hidratada, peiné mis cejas con jabón especial de cejas.
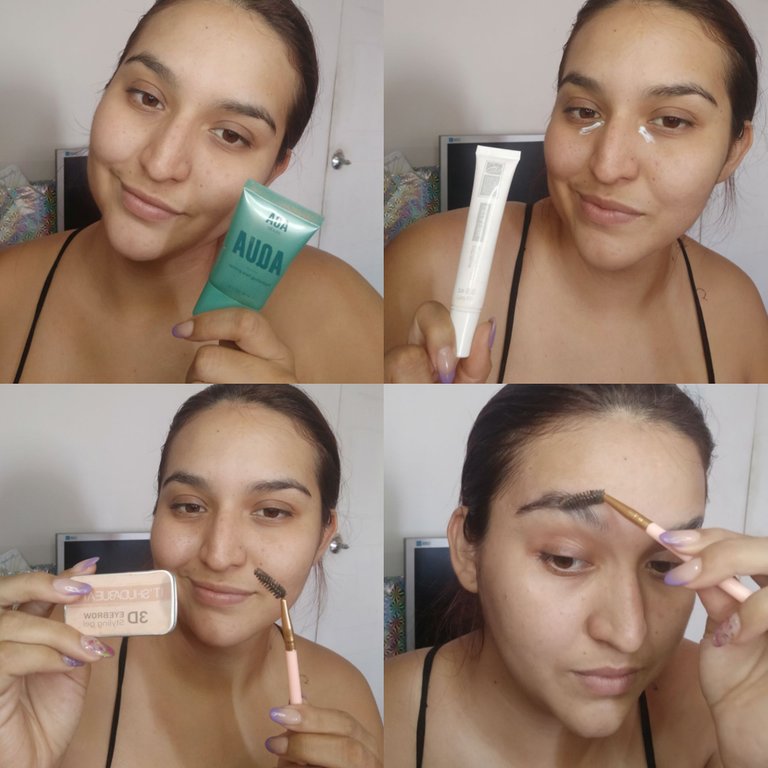
Luego tomé una brocha y una pomada de color castaño oscuro y rellené poco a poco los espacios en blanco que existen en mis cejas y con corrector enmarqué las cejas para un mejor acabado. Preparé el párpado con corrector y comencé a añador sombra.
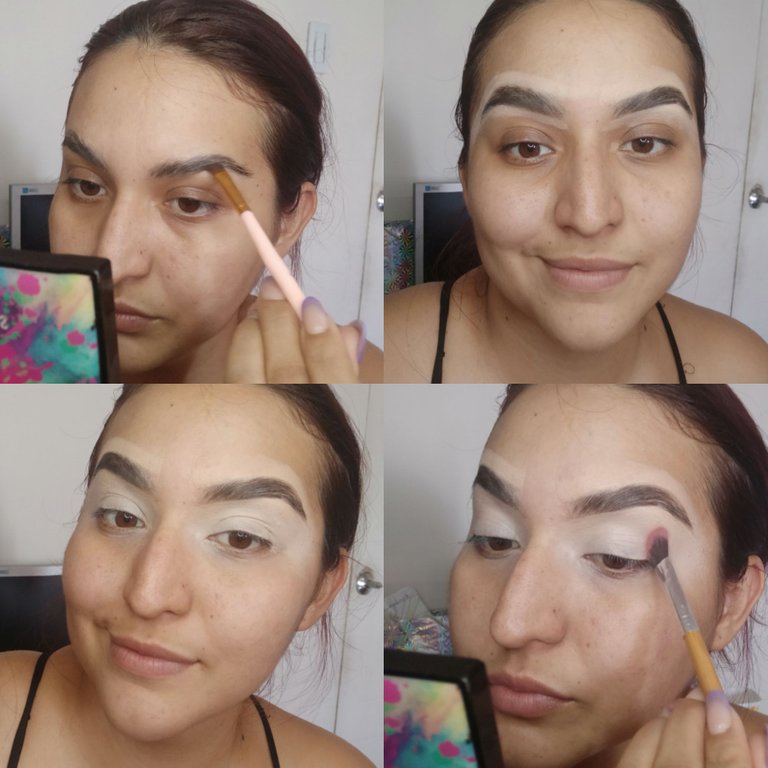
La forma en la que apliqué la sombra fue con una brocha de difuminar a toques en la esquina del ojo y el lagrimal, dejando un espacio en la mitad del párpado para allí colocar la sombra satinada y difuminé muy bien entre los bordes.
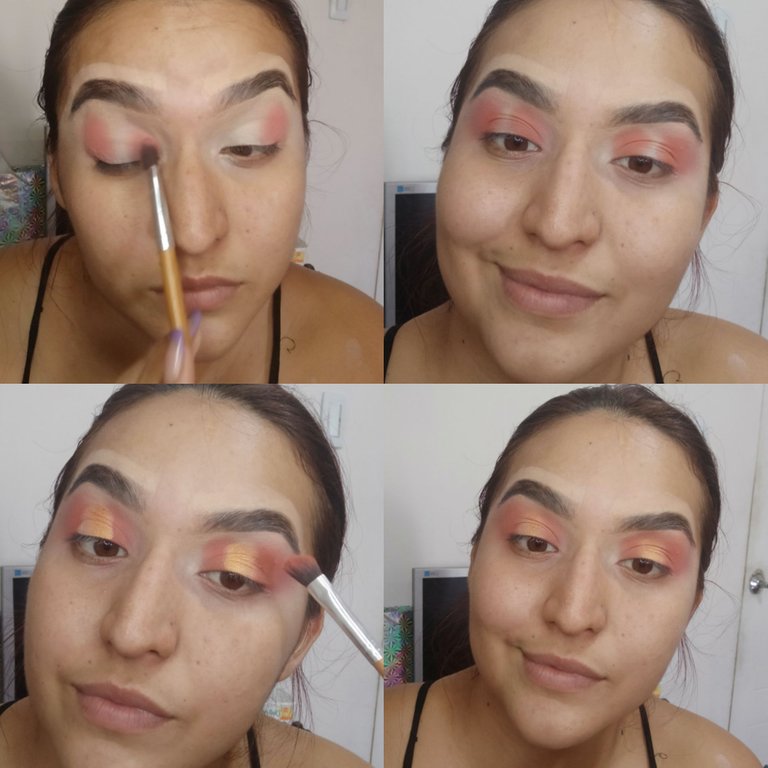
Para este estilo debemos añadir las sombras de poco a mucho hasta lograr la intensidad deseada.
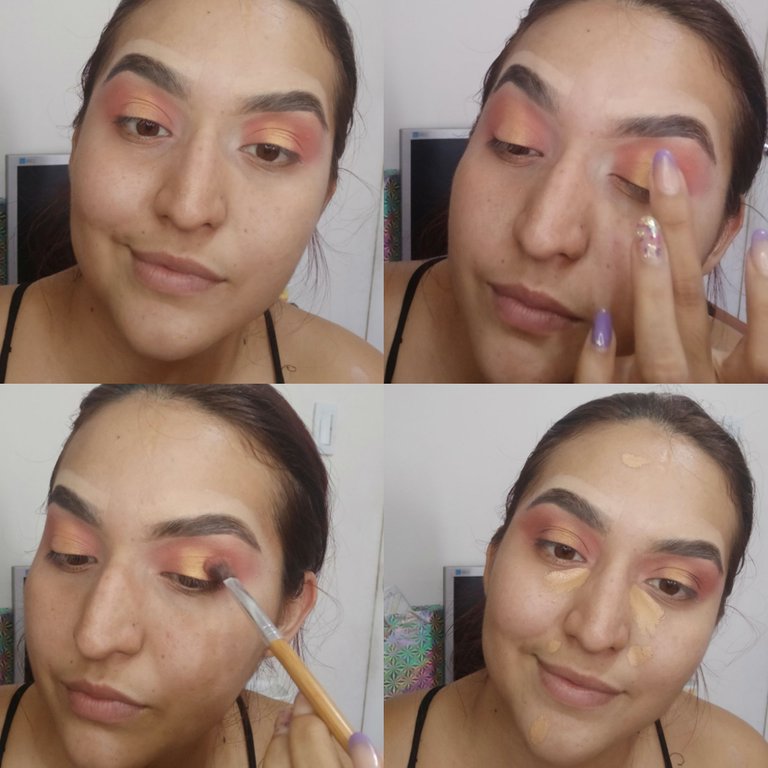
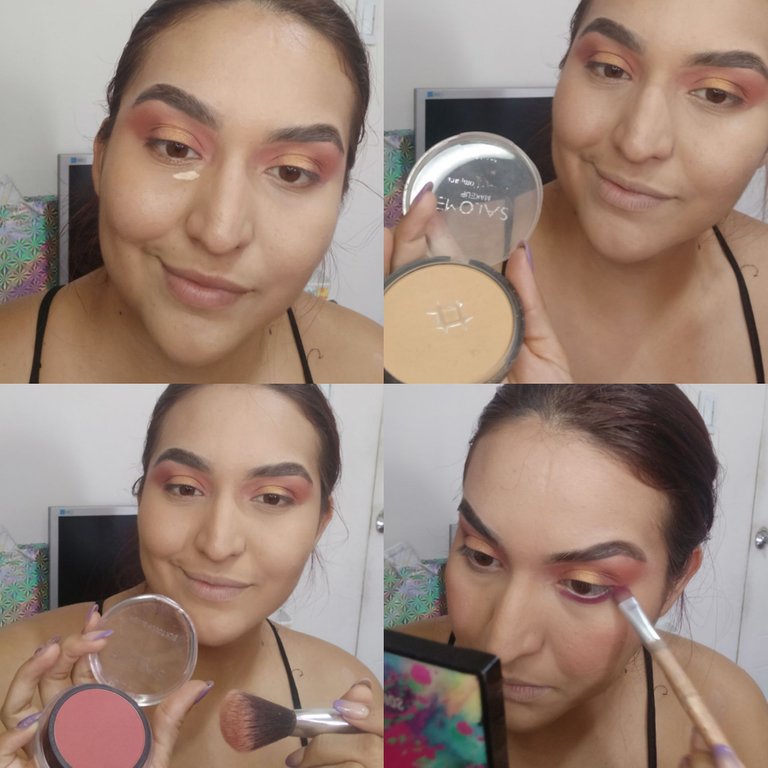
Luego de alcanzar la pigmentación y difuminado deseado, corregí la zona del rostro únicamente con corrector y luego sellé con polvo todo el rostro. Apliqué rubor y maquillé pestañas inferiores.
Añadí máscara de pestañas y pestañas, iluminé el área del lagrimal y me coloqué destellos pequeños de glitter en el párpado y para culminar añadí labial.
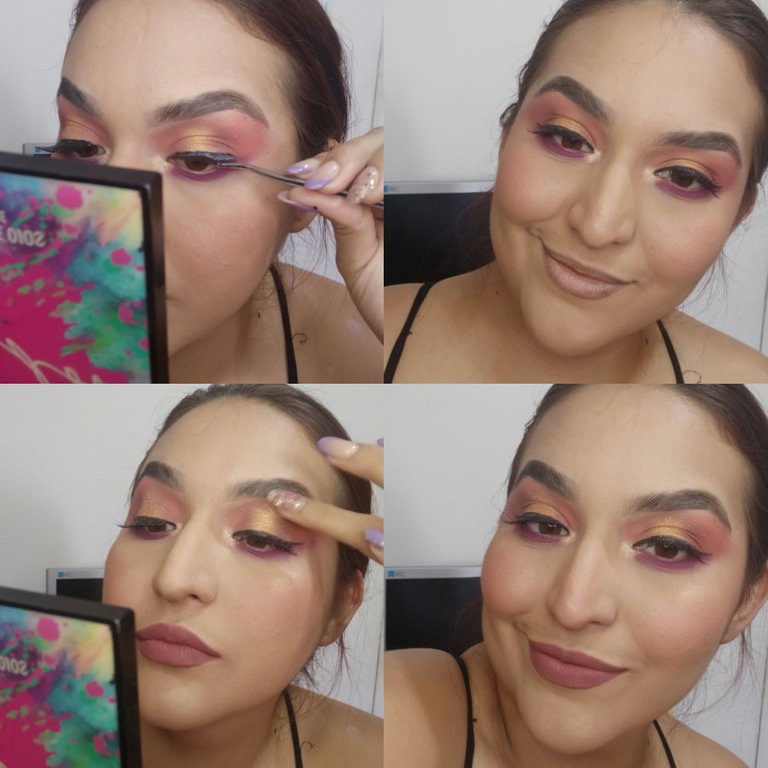
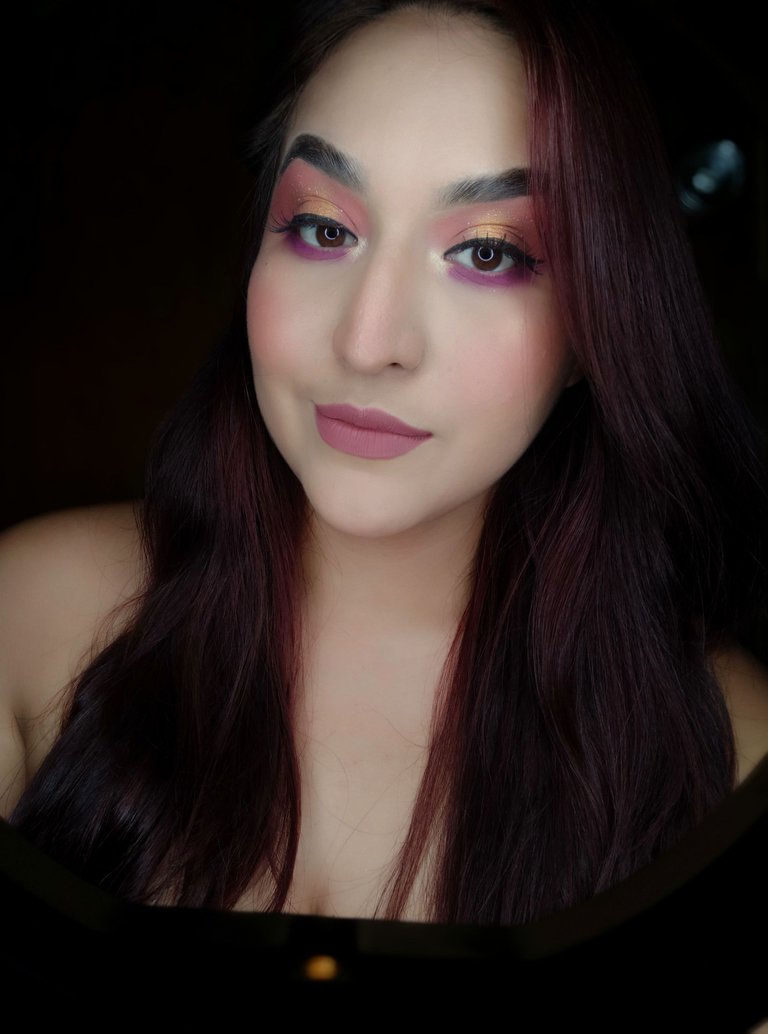
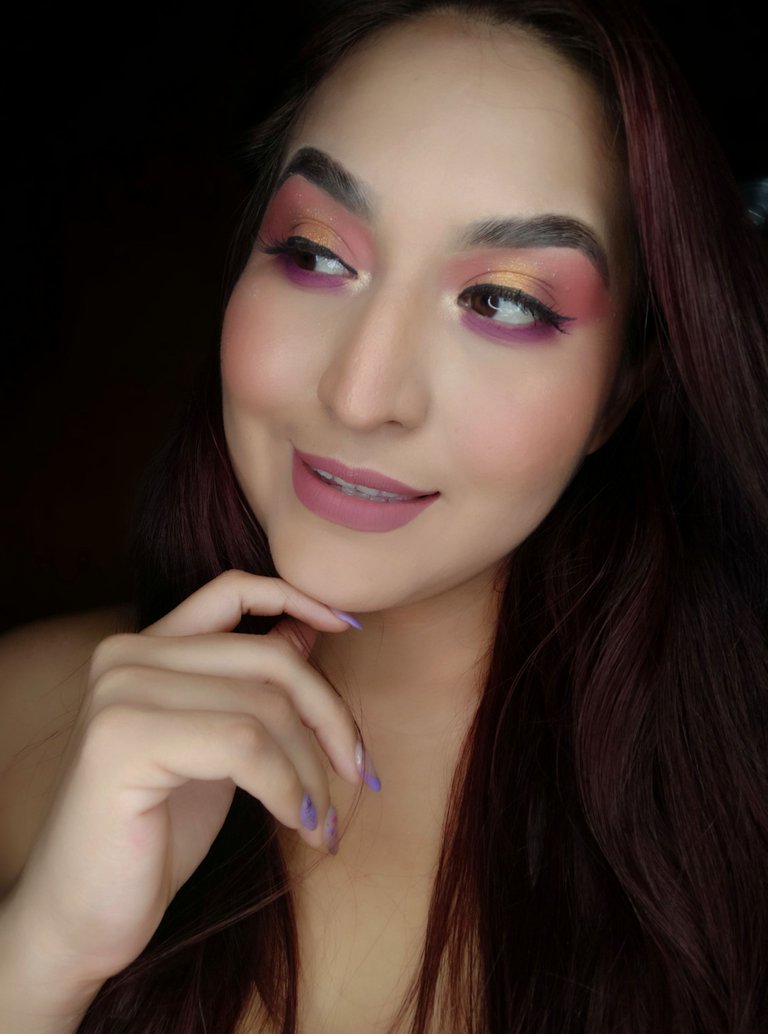
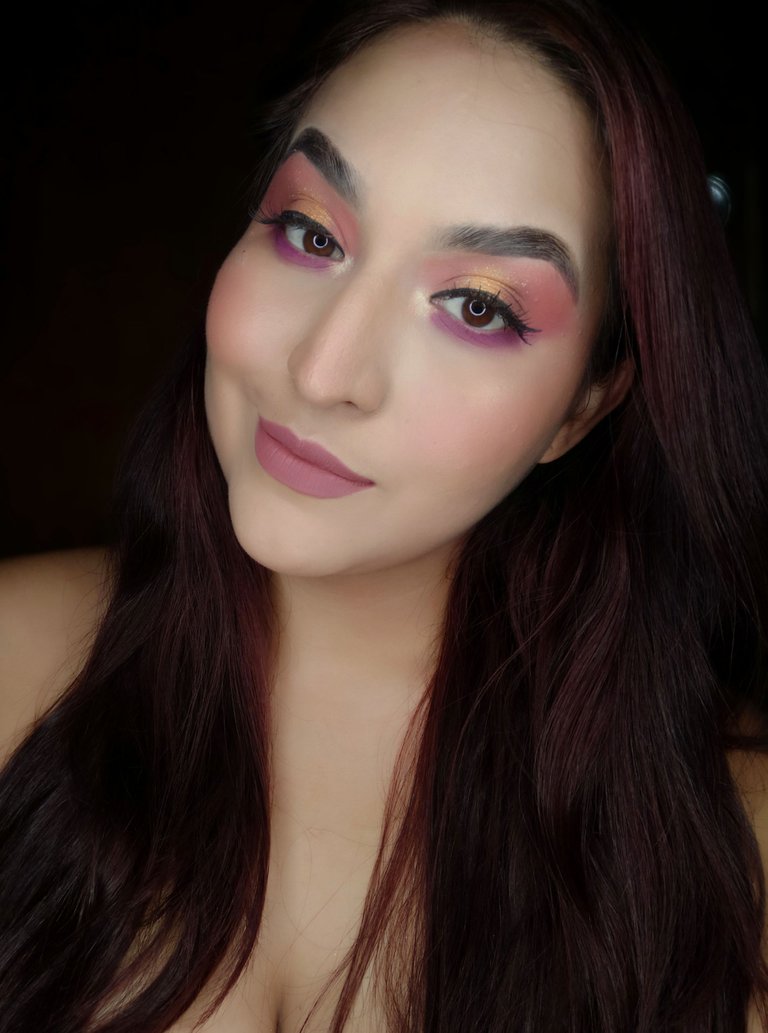
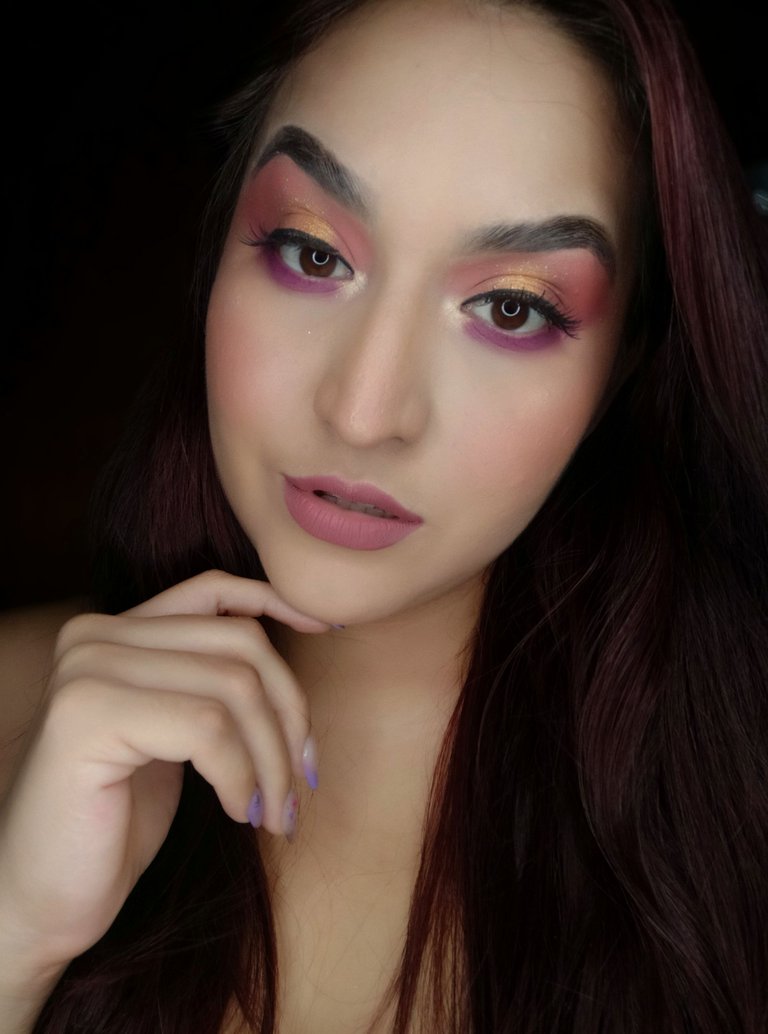
Este es el resultado final de un hermoso Halo Eyes en naranja 🧡
Espero les haya gustado el resultado y hayan aprendido un poco mas de mi tutorial. Gracias por pasar por mi blog, les envío un fuerte abrazo. Feliz Noche.❣
Fotos propiedad del autor.

English Version
Hello Hello Hello Makeup Power🧡 community.
Today I'm happy to bring you a new look this time in orange tones, warm tones will always be my favourite when it comes to making a Halo eyes.
This look is extremely elegant and can be worn perfectly as a social make up, I hope you like the step by step of this Halo Eyes look.
As always and is the first thing to do when applying makeup is to apply a primer and / or moisturizer this will allow the finish of the skin is nicer and prolong the makeup for longer, I also applied contour of dark circles as that area is super delicate and must be hydrated, I combed my eyebrows with special eyebrow soap.
Then I took a brush and a dark brown pomade and slowly filled in the blanks that exist in my eyebrows and with concealer I framed the brows for a better finish. I primed the lid with concealer and started adding shadow.
The way I applied the shadow was with a smudger brush in dabs at the corner of the eye and the tear trough, leaving a space in the middle of the eyelid to place the satin shadow there and I blended it very well between the edges.
For this look we need to add the shadows a little at a time until the desired intensity is achieved.
After achieving the desired pigmentation and blending, I corrected the area of the face with concealer only and then sealed with powder all over the face. I applied blush and made up the lower lashes.
I added mascara and lashes, illuminated the tear trough area and put small glitters of glitter on my eyelid and to top it all off I added lipstick.
This is the final result of a beautiful Halo Eyes in orange 🧡
I hope you liked the result and learned a little more from my tutorial. Thanks for stopping by my blog, I send you a big hug. Happy Night ❣.
Photos property of the author.
Francys 💕 que hermoso resultado el de tu maquillaje, el contraste que lograste es impecable. Me encantó ❤️
Gracias @eliigonzalez que bueno que te gustó a mí me encantó jajaja un abrazote 🤗❣️