DIY ~ Maintain your own shaving machine! ~ [ENG|ESP]
¡Buenas mis panas! ¿Como están? espero de corazón que estén muy bien, en esta oportunidad, les voy a hablar de como desarmar y rearmar una maquina de afeitar, sin fallar en el proceso, intentare ser explicativo y detallado con los pasos, aunque pronto verán que no es nada de lo que hay que tener miedo :) nada que con un poco de cuidado no se pueda hacer, por ende ¡Comencemos!
Hello my friends! How are you? I hope you are very well, in this opportunity, I am going to talk about how to disassemble and reassemble a razor, without failing in the process, I will try to be explanatory and detailed with the steps, but soon you will see that it is nothing to be afraid of :) nothing that with a little care can not be done, so let's start!
¿Que necesitas?
What do you need?
Mantener nuestras piezas en orden y funcionamiento siempre requiere de algo más que solo un destornillador, y aunque en este caso esto también es imprescindible, es lógico agregar otros elementos, dado que hablamos de una herramienta personal u de uso profesional.
Keeping our parts in order and in working order always requires more than just a screwdriver, and although in this case this is also essential, it is logical to add other elements, since we are talking about a personal tool or for professional use.
- Destornillador
- Un Trapo
- Un cepillo pequeño
- Alcohol desinfectante
- Screwdriver
- A Nap
- A Small Brush
- Disinfecting alcohol
Procedimiento
Procedure
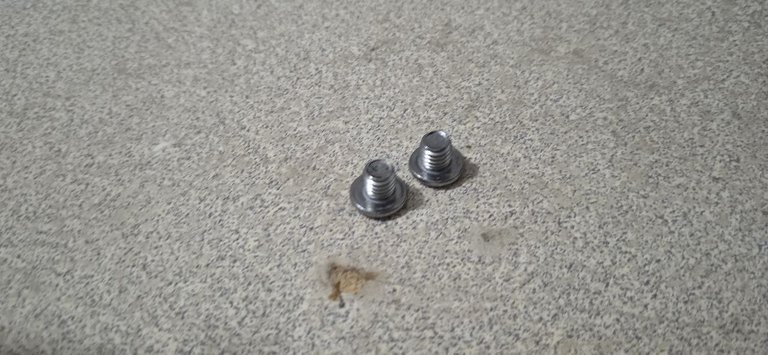

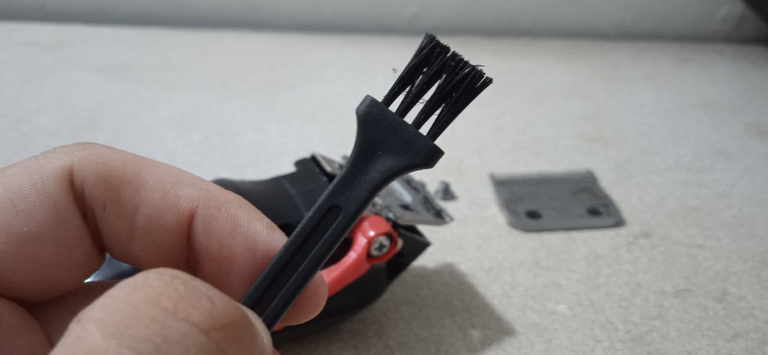
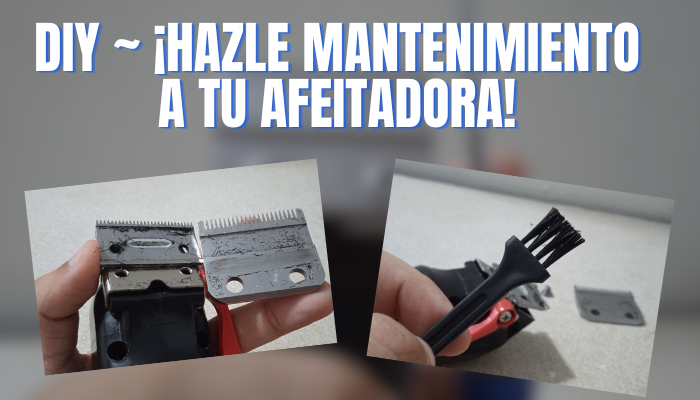
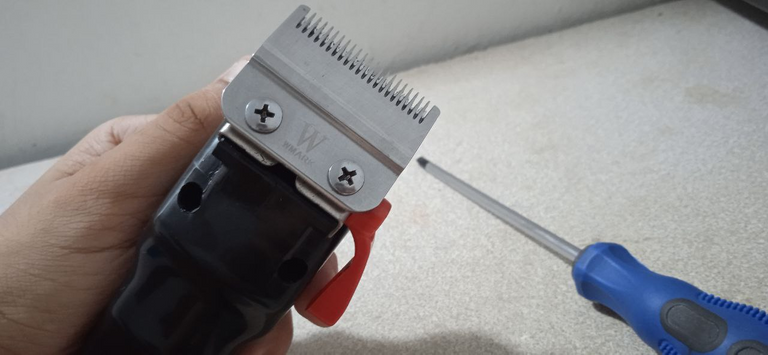
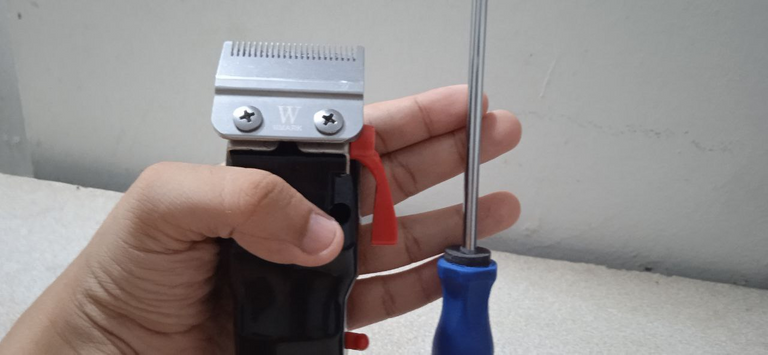
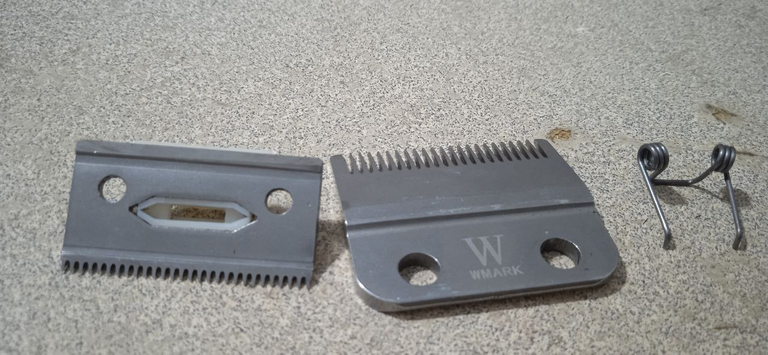
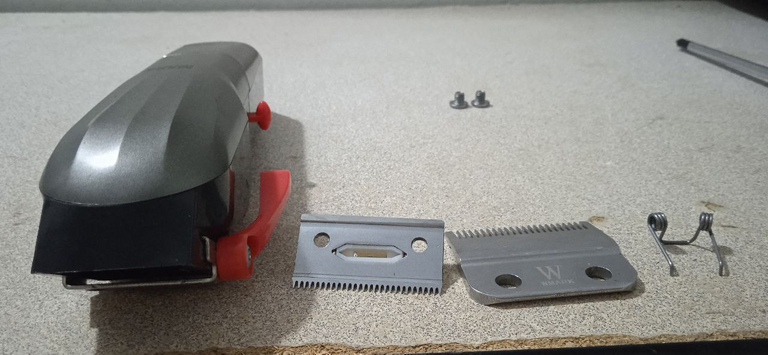
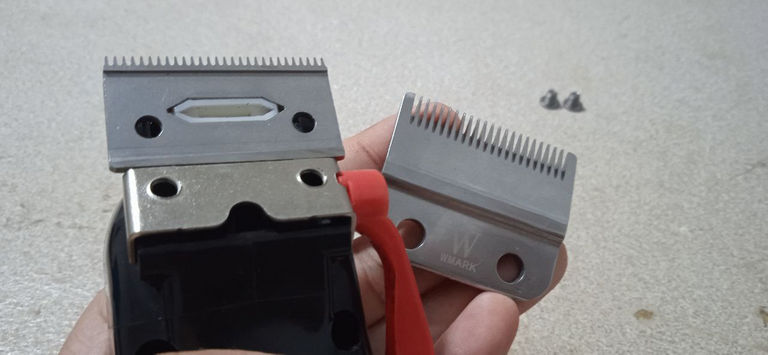
Lo primero que tenemos que hacer, es identificar los tornillos que unen nuestras cuchillas con la maquina principal, aclaro que esto puede variar dependiendo de algunos modelos de ciertas afeitadoras, pero en la que yo uso, sería tal y como salen en las imágenes, hay que tener mucho cuidado de no cortarse, puestas que cuchillas son bastante filosas, una vez retiramos los tornillos procedemos inspeccionar el estado de nuestras cuchillas fijándonos en si hay restos de pelo o no, si la hemos usado ya en algunos clientes y modelos, que no se sorprendan si encuentran varios residuos de cabello todavía en sus maquinas.
The first thing we have to do, is to identify the screws that join our blades with the main machine, I clarify that this may vary depending on some models of certain shavers, but in the one I use, it would be as shown in the pictures, you must be very careful not to cut yourself, these blades are quite sharp, once we remove the screws we proceed to inspect the condition of our blades looking at whether there are traces of hair or not, if we have already used it in some customers and models, do not be surprised if you find several residues and hair still in their machines.
¿Que une a las cuchillas y al motor?
What connects the blades and the motor?
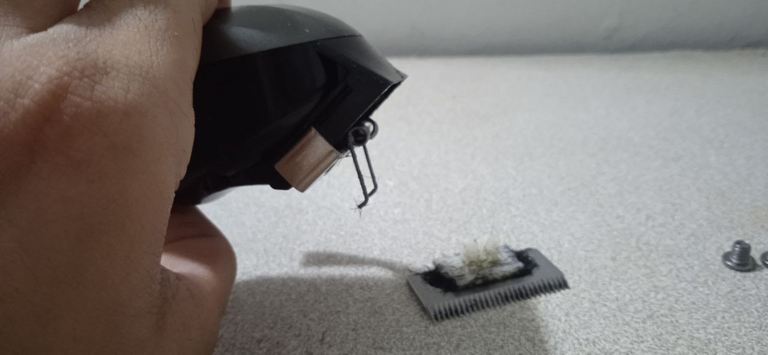
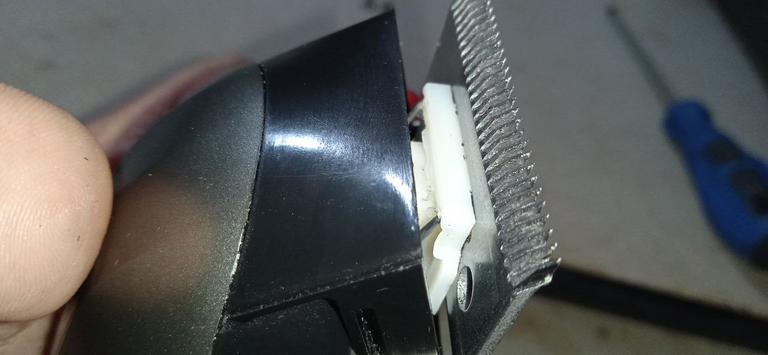
Nuevamente dependiendo de su maquina de afeitar, podremos encontrar una u otra cosa totalmente distinta a lo que mostrare aquí, en mi caso, esta unión depende de una especie de alambre no muy sofisticado que se engancha en el interior de la estructura de la maquina y a su vez, este mismo, se engancha con un plástico que va pegado a la cuchilla que realiza el corte y que se acopla con el motor interno de la maquina, haciendo posible so movimiento deslizante, para removerlo simplemente desenganchamos el alambre de la maquina, es más solo aplicando la gravedad, es posible sentir como se afloja por si mismo, cosa que podría asustar al principio, pero tranquilos, no han roto nada.
Again depending on your razor, we can find one or another thing totally different from what I will show here, in my case, this union depends on a kind of wire not very sophisticated that is hooked inside the structure of the machine and in turn, this same, is hooked with a plastic that is glued to the blade that performs the cut and that is coupled with the internal motor of the machine, making possible the sliding movement, to remove it we simply unhook the wire from the machine, it is possible to feel how it loosens by itself, which could be scary at first, but relax, you have not broken anything.
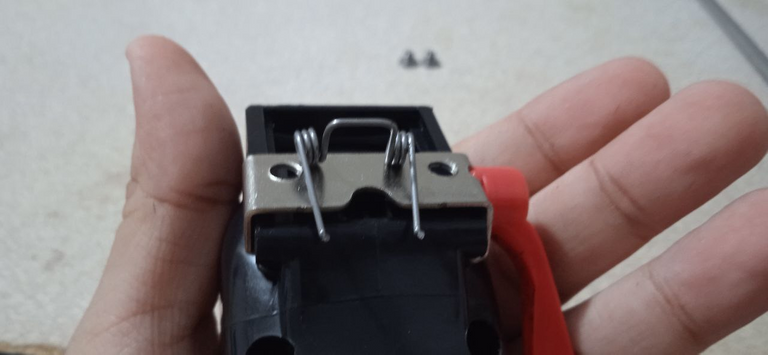
Todo limpio... ¿ahora?
All clean... and Now?
Una vez que le apliquemos un poderoso cepillo a las cuchillas y que nos tomemos nuestro cierto tiempo para pulir un poco las mismas de trocitos de pelos restantes en el interior de la maquina, podremos volver a resemblar la maquina, hacer este procedimiento no vas a llevar bajo nuestros mismos pasos con algunas excepciones y nuevos cuidados, eso si antes de todo, el alcohol, debe aplicarse primero sobre las hojillas para desinfectarlas apropiadamente.
Once we apply a powerful brush to the blades and we take our time to polish them a little of the remaining bits of hairs inside the machine, we will be able to resemblar the machine, do this procedure will not take under our same steps with some exceptions and new care, that if first of all, the alcohol must be applied first on the blades to disinfect them properly.
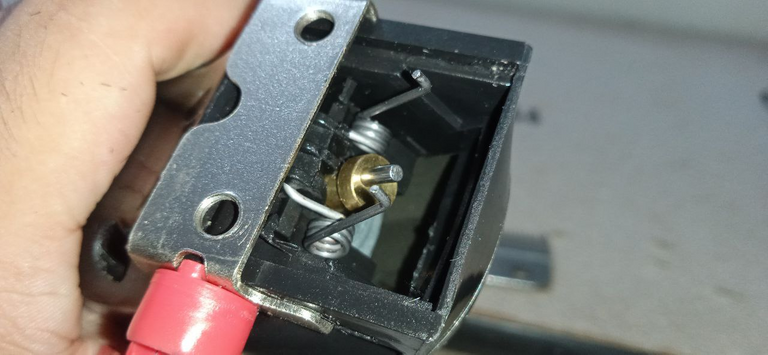
Como mencione antes, volver a enganchar las cuchillas y el alambre interno no supondrá un problema muy grave, sin embargo, para hacerlo de manera que no sea molesta para nosotros, es necesario jugar un poco con la gravedad.
As I mentioned before, reattaching the blades and the inner wire will not be a very serious problem, however, to do it in a way that is not annoying for us, it is necessary to play a little with gravity.
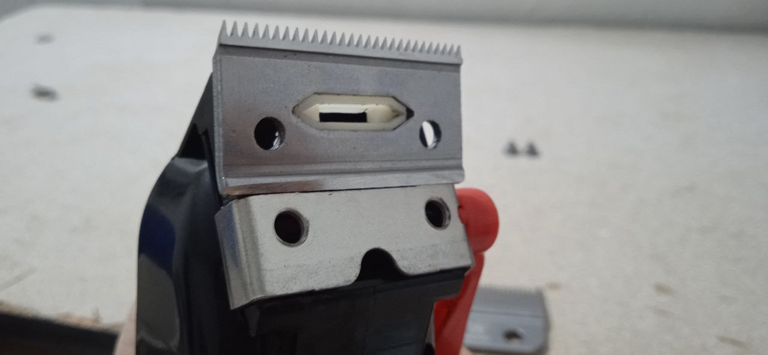
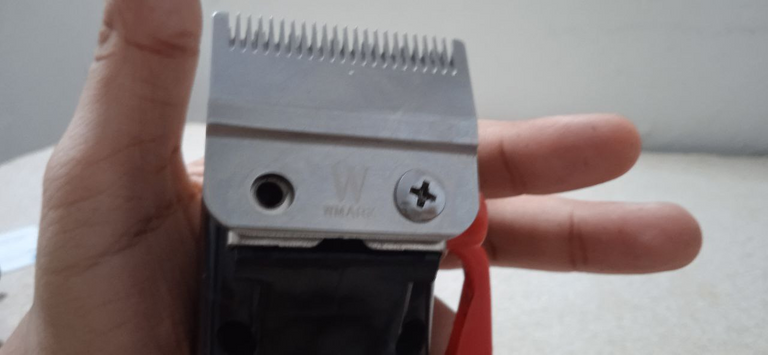
Para volver a tener nuestra maquina armada, volvemos a colocar la primera cuchilla encargada de realizar los cortes, dicha cuchilla como mencione tendrá una especie de plástico que a su vez, dispondrá de 2 hendiduras en la que irán las puntas del alambre interno de la maquina, colocandolos con mucho cuidado y asegurándonos de que queden relativamente fijados, créanme, es normal sentirse algo ansioso o inseguro haciendo este procedimiento uno solo, por lo que recomendaría que se apoyaran viendo videos de personas haciendo el mismo procedimiento para que estén más confiandos, dicho esto, cuando ya estén seguros de que ha quedado bien, procederemos a colocar la cuchilla faltante.
To return to have our machine armed, we return to place the first blade responsible for making the cuts, the blade as I mentioned will have a kind of plastic which in turn, will have 2 indentations in which will go the tips of the internal wire of the machine, placing them very carefully and making sure that they are relatively fixed, Believe me, it is normal to feel a little anxious or insecure doing this procedure by yourself, so I would recommend that you watch videos of people doing the same procedure to be more confident, that said, when you are sure that it has been well, we will proceed to place the missing blade.
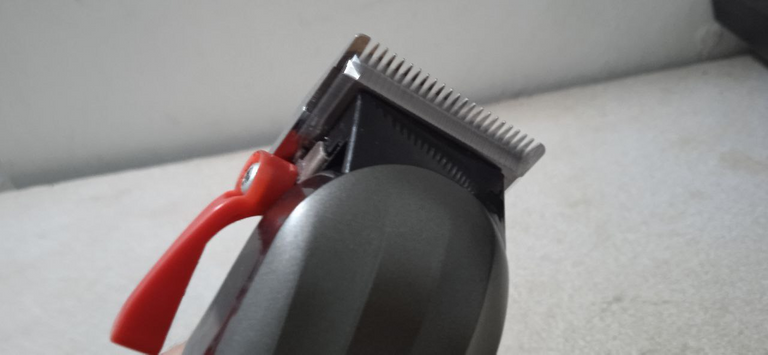
En este ultimo paso, trataremos de fijar la cuchilla faltante a la par de las hendiduras, teniendo bastante cuidado de no ser muy bruscos y colocando con precisión los tornillos en sus respectivos sitios, una vez hecho esto, y ajustando un poco la alineación de la cuchilla, podremos respirar gratamente, llegados a este punto solo tendríamos que probar y asegurarnos de que corta bien.
In this last step, we will try to fix the missing blade at the same level of the slots, being very careful not to be too rough and accurately placing the screws in their respective places, once this is done, and adjusting a little the alignment of the blade, we can breathe pleasantly, at this point we would only have to try and make sure that it cuts well.
Para probarla simplemente iniciamos nuestra maquina, y observamos el funcionamiento de las cuchillas, si todo sale bine, debería no tener ningún inconveniente, no obstante si se escucha algún sonido interno es imperativo que se corte el uso de inmediato y se proceda a desarmar de nuevo, aquí como pueden ver, yo no tuve mayor problema, con esto dicho, ya podemos decir que sabemos desarmar y armar nuestra herramienta sin problemas :)
To test it we simply start our machine, and observe the operation of the blades, if everything goes well, should not have any problems, however if you hear any internal sound is imperative to cut the use immediately and proceed to disassemble again, here as you can see, I had no major problem, with this said, we can say that we know how to disassemble and assemble our tool without problems :)
¡Muchas gracias por leer! Hasta una nueva oportunidad mis panas :) un gran saludo :D
Thank you very much for reading! Until a new opportunity my panas :D
Todas las fotos son de mi autoria y propiedad
All Photos are my own and are my property
0
0
0.000
Has sido votado por
PROYECTO ENLACE
'Conectando Ideas y Comunidades'
PROYECTO ENLACE es un proyecto de curación de habla hispana enfocado en recompensar contenido de calidad y apoyar autores en su proceso de crecimiento en HIVE.
Creemos y apostamos por el futuro de esta gran plataforma, y estamos muy emocionados de poder hacerla crecer junto a esta comunidad. Así que te invitamos a publicar en nuestra COMUNIDAD y estar atento a todas las actividades que tenemos preparadas y que estaremos publicando en breve.
¿QUIERES AUTOMATIZAR TUS GANANCIAS DE CURACIÓN? SE PARTE DEL PROYECTO ENLACE APOYANDO A NUESTRO TRAIL EN HIVE.VOTE INGRESA AQUÍ PARA CONOCER LOS DETALLES.
¿QUIERES INVERTIR ENLACE? DESCUBRE COMO HACERLO Y GENERAR INGRESOS DE FORMA SEMANAL MEDIANTE TU DELEGACIÓN DE HP AQUÍ TE EXPLICAMOS COMO.
Te invitamos a participar en nuestro servidor de Discord: https://discord.gg/3S9y7BbWfS
Atentamente
EQUIPO ENLACE 2023
Congratulations @franzzonline! You have completed the following achievement on the Hive blockchain And have been rewarded with New badge(s)
Your next target is to reach 10000 upvotes.
You can view your badges on your board and compare yourself to others in the Ranking
If you no longer want to receive notifications, reply to this comment with the word
STOPCheck out our last posts: