/Collar y Llavero Artesanal Hazlo tu misma/ Handmade Necklace and Keychain Make it yourself
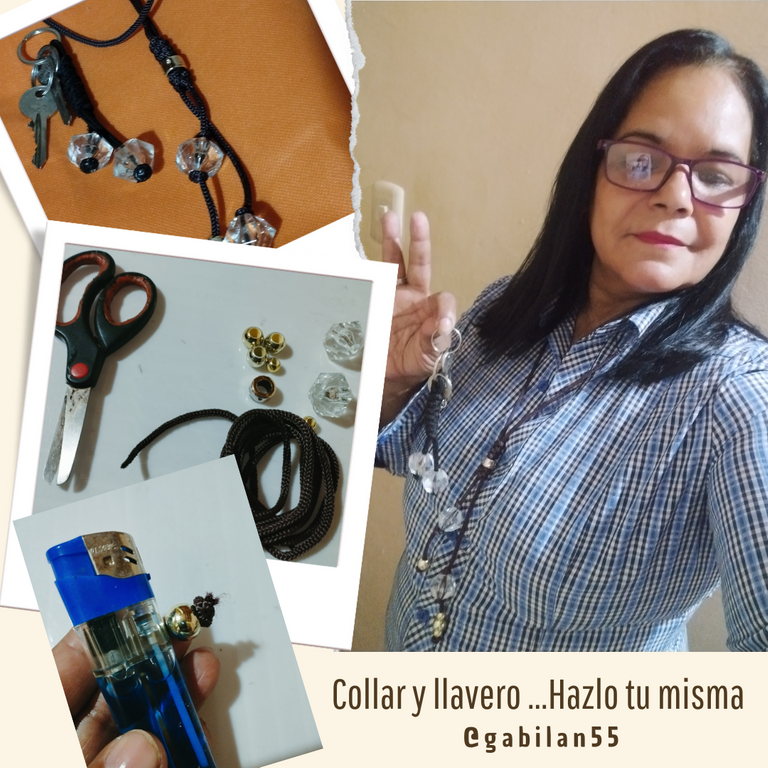
Woven necklace and keychain/ Image taken with my Redmi note 11 edited in canva
Hello howdy community of creativity @jewelry today I was talking with a dear friend who told me about this community that I did not know and the truth is that I am interested in the content they publish, I like to make different types of jewelry especially at the craft level and today I bring a project for those women who like necklaces and keychains, but the best thing is that we can do it ourselves.
Aprendí a usar estás herramientas porque se me presento un cumpleaño de una amiga y no tenía nada que obsequiarle así que me las ingenie para hacerle algo personalizado y con sus colores preferidos, un collar, ella jamás imagino que la sorprendería con un obsequio poco común.Iniciemos entonces con los siguientes pasos:
I learned to use these tools because I had a friend's birthday and I had nothing to give her so I managed to make her something personalized and with her favorite colors, a necklace, she never imagined that I would surprise her with an unusual gift.Let's start with the following steps.
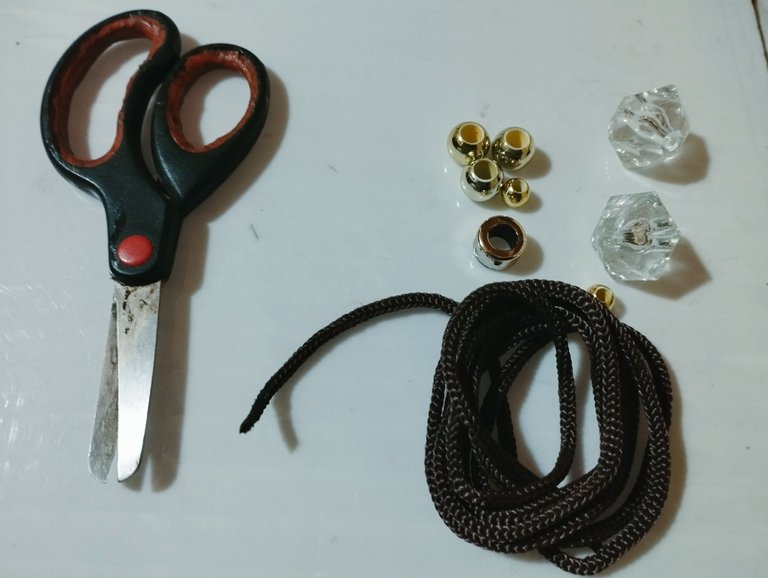
Materiales
Los materiales son muy sencillos, están en tu propia casa y no tienes que hacer gastos extras: 1 trenza de zapato que ya no uses, tijera, 1 aro color dorado que puede haber quedado de algún accesorio que ya no usas, 4 cuentas doradas medianas, 2 cuentas doradas grandes, 2 piedras de bisutería tipo diamante de plástico que también puede estar entre tus cosas sin darte cuenta.
Materials
The materials are very simple, they are in your own home and you don't have to spend extra money: 1 shoe braid that you no longer use, scissors, 1 gold-colored ring that may have been left over from an accessory that you no longer use, 4 medium golden beads, 2 large golden beads, 2 plastic diamond type costume jewelry stones that may also be among your things without realizing it.
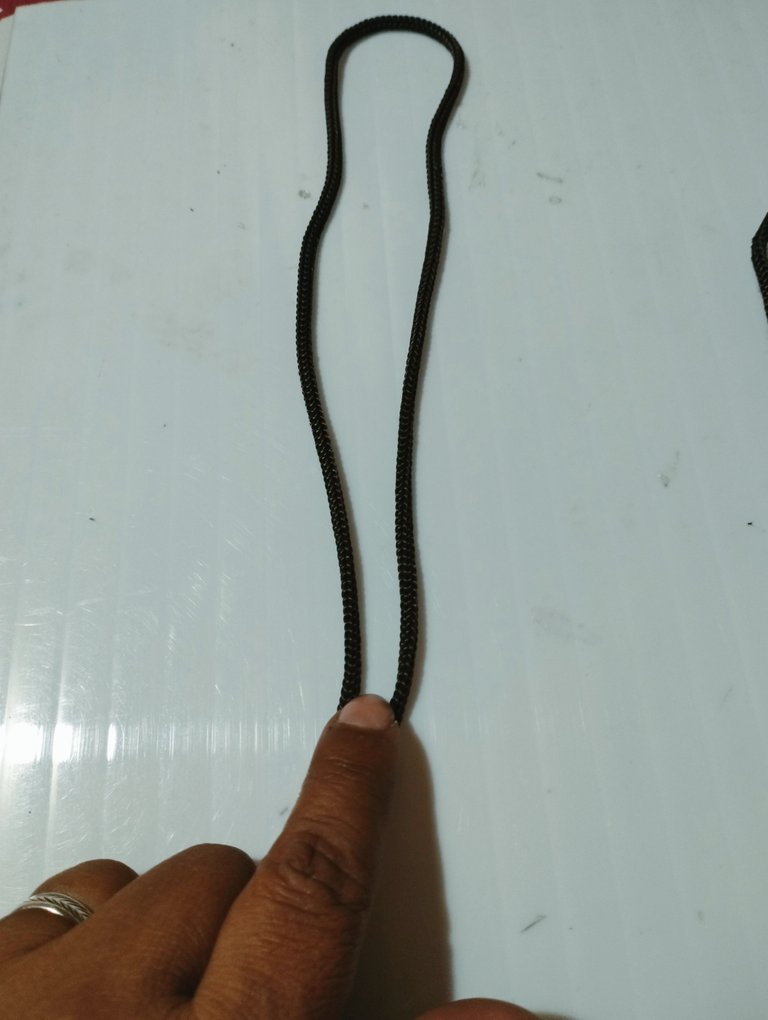
Paso 01
Dobla la trenza a la mitad, mide en el cuello los centímetros que necesitas desde el cuello hasta la entrada de los bustos de esta manera podrás pasar el collar por la cabeza sin dificultad porque este collar no tiene trancadero así que hay que estar pendiente que tomes las previsiones necesarias.
Fold the braid in half, measure in the neck the centimeters you need from the neck to the entrance of the busts in this way you will be able to pass the necklace through the head without difficulty because this necklace has no stringer so you have to be aware that you have to take the necessary precautions.

Paso 02
Haz un nudo en la trenza dónde comenzarás el tejido, de esta manera se hará más fácil realizar el tejido para no confundirte, una vez que ya tengas parte del tejido desata el nudo.
Make a knot in the braid where you will start the weaving, this way it will be easier to weave the weaving so you don't get confused, once you have part of the weaving untie the knot.
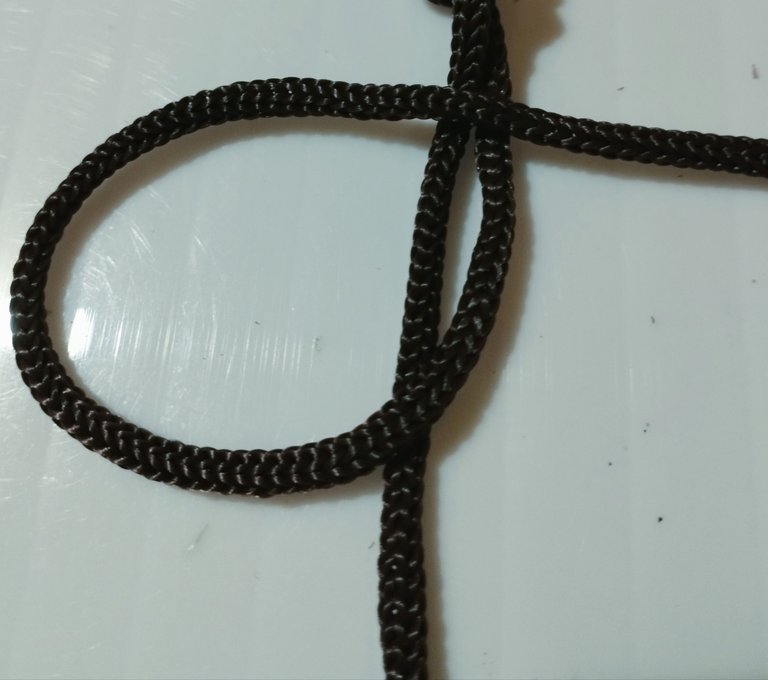
Paso 03
Pasas la trenza del lado izquierdo por encima de la trenza derecha haciendo un círculo, así como lo detalla la imagen.
Pass the braid on the left side over the right braid in a circle, as shown in the image.
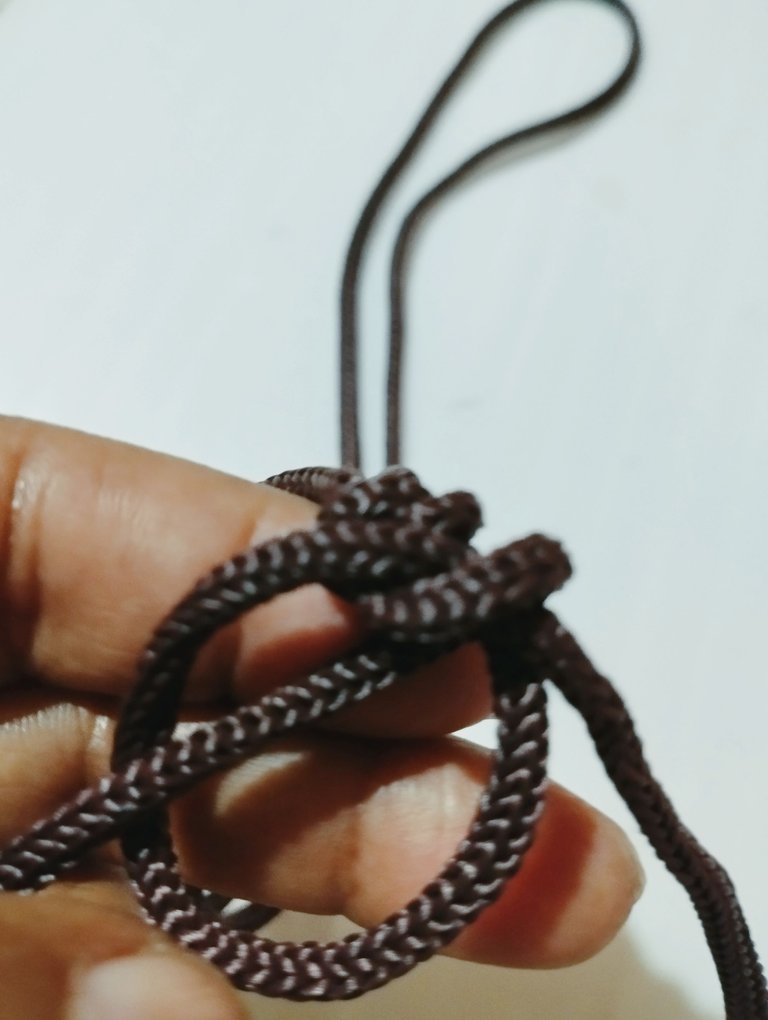
Paso 04
La trenza del lado derecho la pasas por encima del círculo y por debajo de la trenza del lado izquierdo e inmediatamente jalas con cuidado poco a poco para no perder la orientación del tejido, observa la imagen. Si no haces este paso con cuidado te puedes confundir, es cuestión de práctica
The braid on the right side you pass it over the circle and under the braid on the left side and immediately pull it carefully little by little so as not to lose the orientation of the weave, see the image. If you don't do this step carefully you can get confused, it's a matter of practice.
Paso 05
Vas a repetir este paso 4 o 5 veces de acuerdo al tamaño de la trenza o a tu gusto en mi caso solo lo repetí 3 veces.
You will repeat this step 4 or 5 times according to the size of the braid or your taste, in my case I only repeated it 3 times.
Paso 06
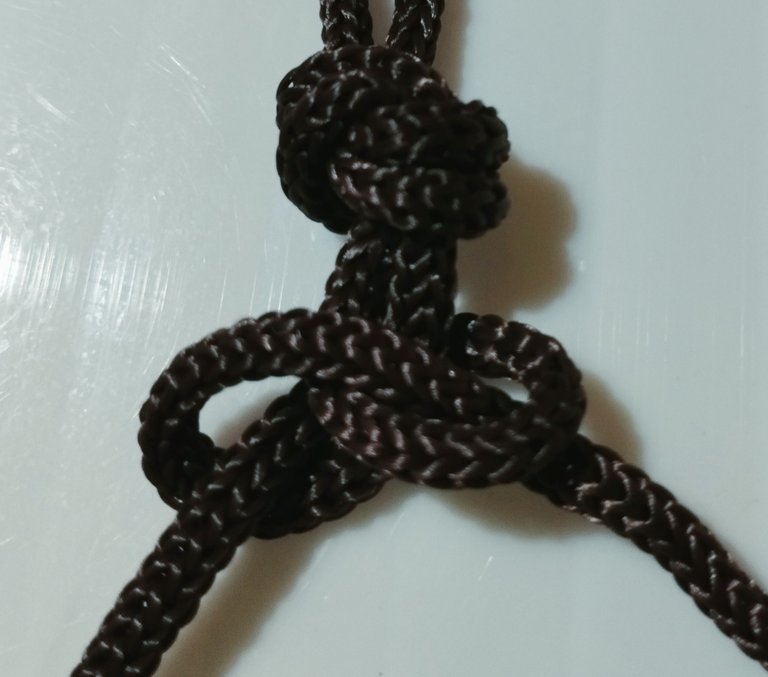
Si cumples el paso anterior te quedará el trenzado cómo lo indica la siguiente imagen.luego introduces el aro dorado.
If you follow the previous step you will have the braid as shown in the following image.then insert the golden ring.
Ahora repite el paso 4,5 y 6 para que el trenzado que hiciste de inicio sea igual que el final, así tendrás uniformidad, pero tú decides lo que más te guste.
Now repeat step 4, 5 and 6 so that the braid you did at the beginning is the same as the end, so you will have uniformity, but you decide what you like best.
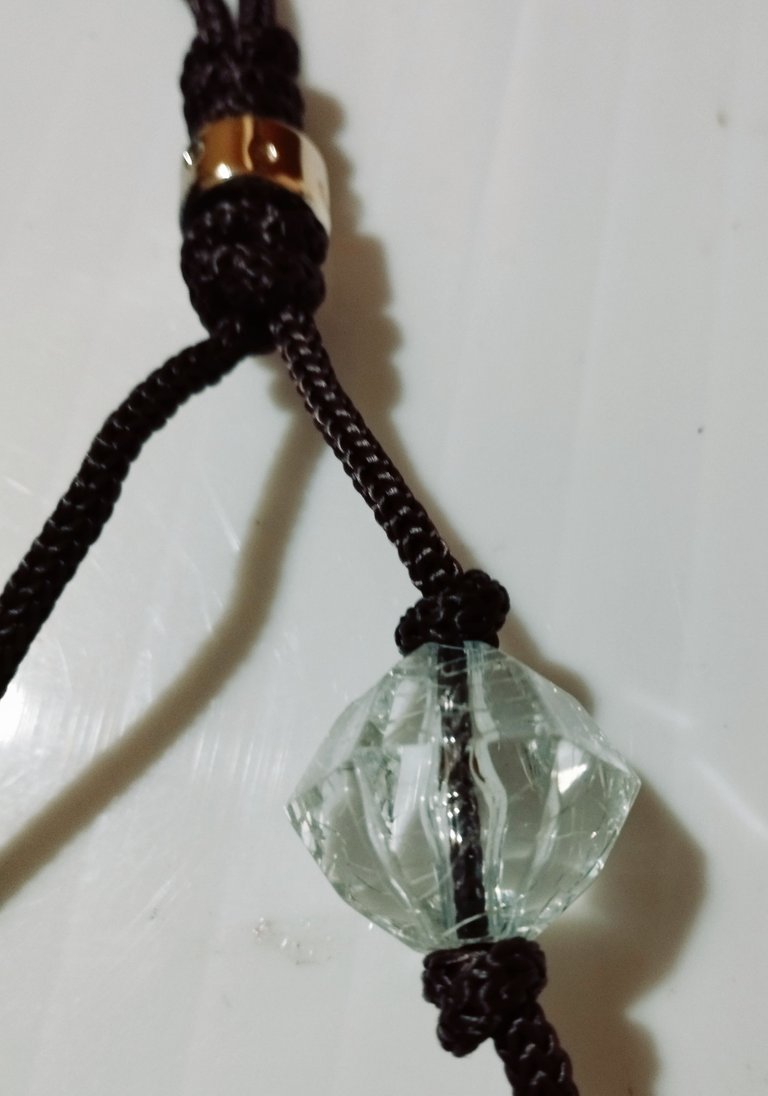
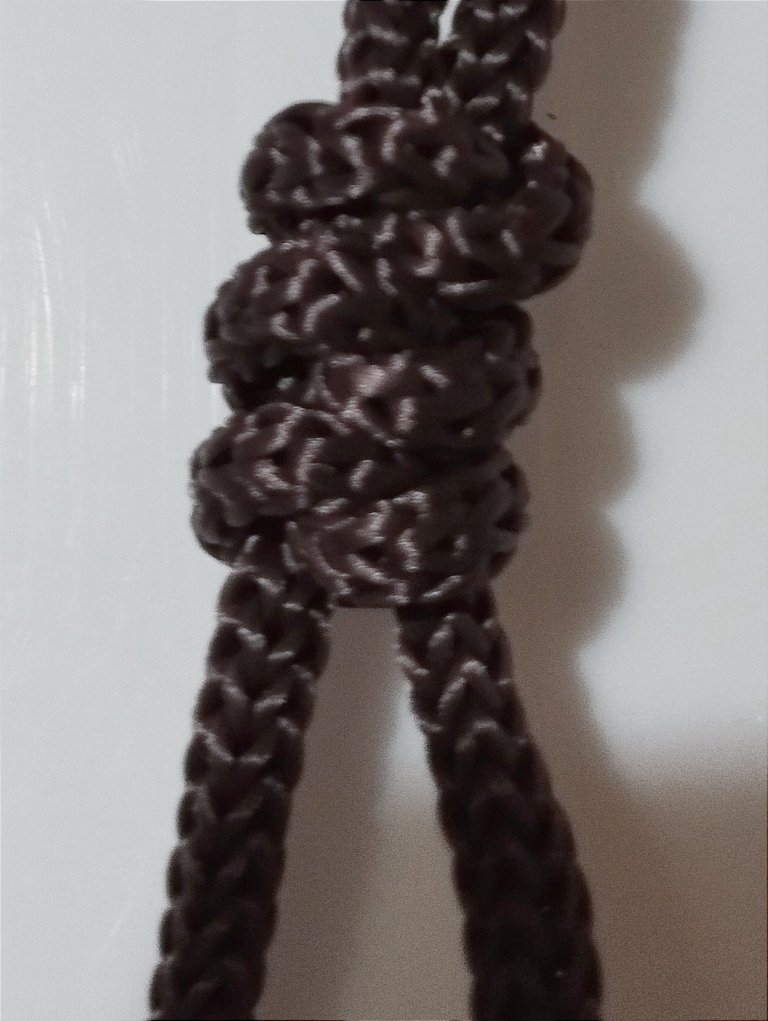
Paso 08
Luego que se introdujo el aro y se hizo el trenzado de nuevo se toma uno de los lados de la trenza se hace un nudo calculando la distancia y se introduce la piedra de diamante y se hace otro nudo como lo indica la imagen.
After the hoop is introduced and the braid is braided again, one side of the braid is taken, a knot is made calculating the distance and the diamond stone is introduced and another knot is made as shown in the image.
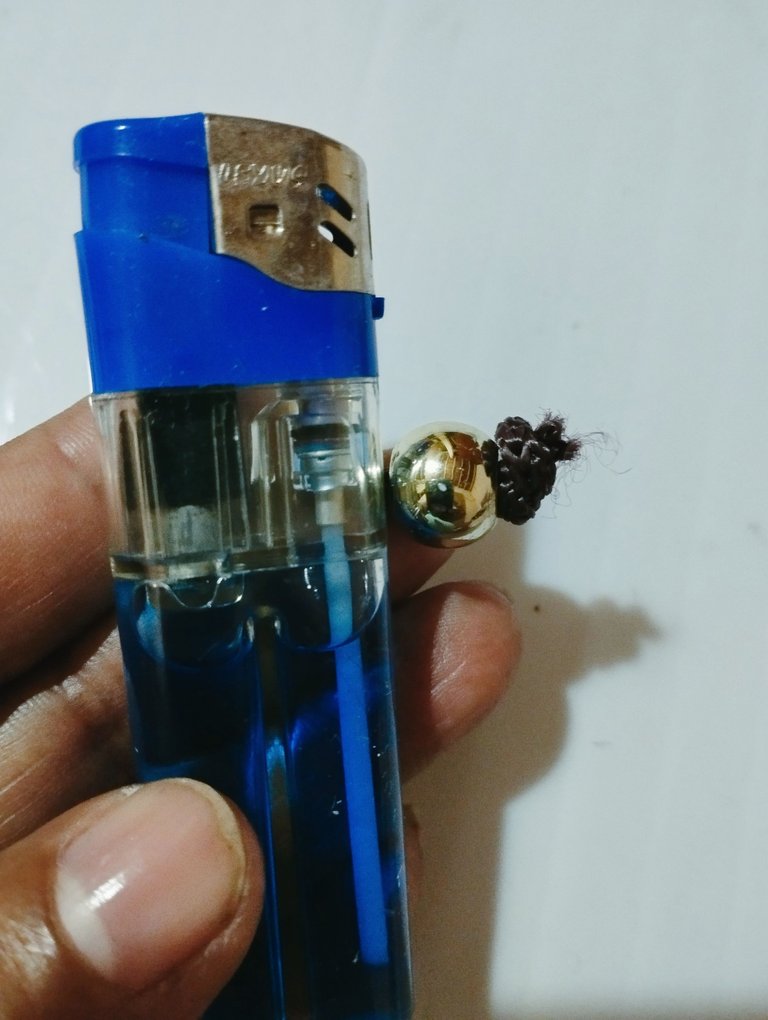
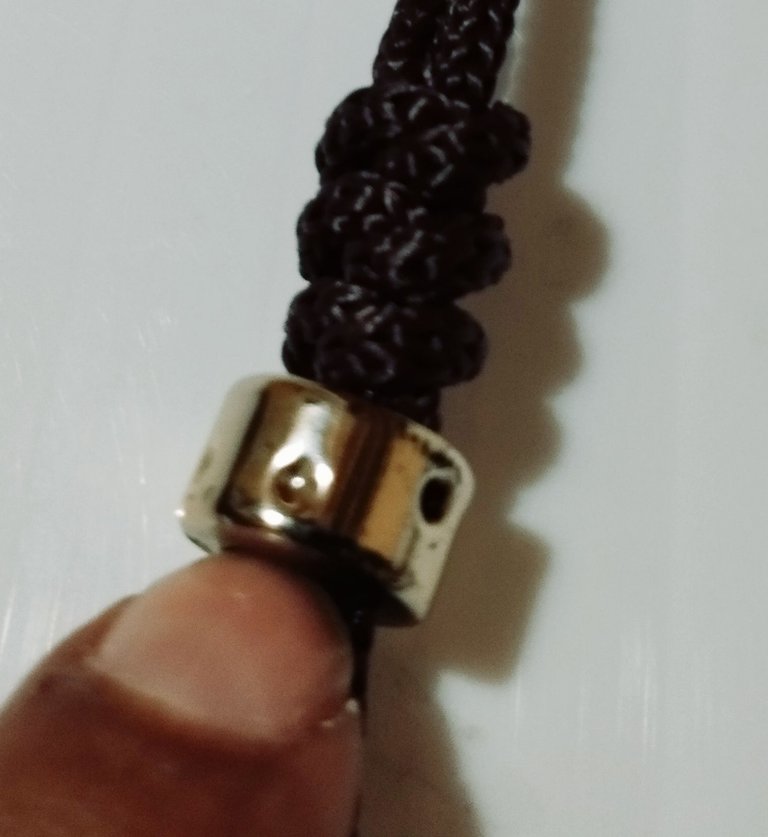
Paso 09
Haces el mismo procedimiento en el otro lado de la trenza, colocas las cuentas doradas y terminas cerrado todo el proceso quemando el nudo con un encendedor así aseguras las cuentas de no caerse por el constante uso.
Do the same procedure on the other side of the braid, place the golden beads and finish the whole process by burning the knot with a lighter to ensure that the beads do not fall off due to constant use.
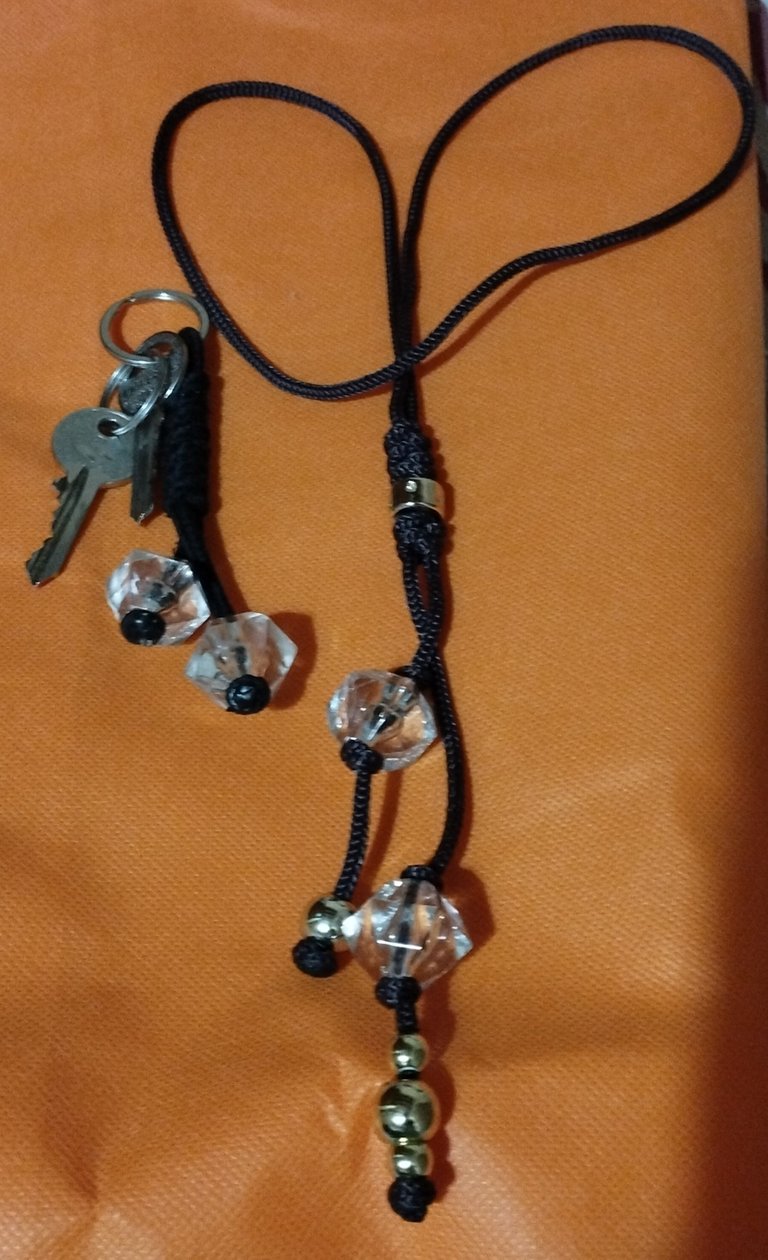
Aquí ya tenemos el diseño del collar terminado,luego puedes hacer el llavero que tiene el mismo procedimiento y sorprendes a tu amiga o a ese ser querido con un lindo juego de collar y llavero.
Here we already have the necklace design finished, then you can make the keychain that has the same procedure and surprise your friend or loved one with a nice set of necklace and keychain.
All images taken with my Redmi note 11
Congratulations @gabilan55! You have completed the following achievement on the Hive blockchain and have been rewarded with new badge(s):
Your next target is to reach 4500 upvotes.
You can view your badges on your board and compare yourself to others in the Ranking
If you no longer want to receive notifications, reply to this comment with the word
STOPCheck out the last post from @hivebuzz:
Primero que nada bienvenida a la comunidad, nos encanta tenerte aquí, este proyecto es muy bonito y nos muestras que no necesitamos de hacer grandes gastos para tener nuevos accesorios y hasta un llavero, solo basta con un poco de imaginación, el reciclaje es algo que nos encanta y esa trenza de zapatos transformada quedo genial, excelente proyecto, felicitaciones 👏
Muy agradecida por esta bienvenida me gusta darle vida a las cosas estaremos más a menudo desconocia la comunidad . Bendiciones
Bienvenida amiga querida 😊 me encanta como te quedó ese collar con solo una trenzas 😍.
Felicidades!
Gracias mi querida amiga por mostrame esta comunidad eres genial
Bienvenida @gabilan55, tus piezas están bellas, sencillas y delicadas, gracias por compartirlo.
Muy agradecida por la bienvenida espero seguir publicando de lo que me gusta hacer y que está comunidad crezca en empatía y ganancias . Por cierto quería configurar la publicacion con un 10% parA la comunidad pero no sé cómo hacerlo si me orienta con un post sobre eso por favor
Hola amiga, @gabilan55 Gracias por la intención. Te explico a través de las imágenes, esto debes realizarlo antes de publicar el post.
Vas a la parte de abajo de la publicación, y le das en ese votos que te marco en verde, que es configuración avanzada.
Se te desplegarán varias opciones, te debes dirigir al botón de beneficiario que te lo indico en el círculo verde, allí colocas el nombre de la comunidad o de quién desees obsequiar un porcentaje de tu publicación.
Luego verás está imagen, allí vas a seleccionar el porcentaje que le quieres obsequiar a la comunidad.
Gracias por la explicación lo tomaré en cuenta