Adorno colgante de navidad en forma de Santa || Hanging Christmas ornament in the shape of Santa
Hola querida comunidad de @NeedleWorkMonday espero hayan tenido un buen fin de semana.
Hoy lunes continúo con mis proyectos de navidad, que debo confesarles me encanta realizarlos, me relaja mucho a la hora de elaborarlos y por supuesto me emociona ya que cada vez se acerca más esta temporada tan linda.
Hoy les traigo el paso a paso de cómo elaborar un hermoso colgante en forma de la carita de Santa o papá Noel, es sencilla de elaborar y con un resultado muy lindo.
Ahora si, sin más preparemos nuestras agujas y comencemos.
Hello dear @NeedleWorkMonday community, I hope you had a great weekend.
Today Monday I continue with my Christmas projects, which I must confess I love to make them, it relaxes me a lot when it comes to making them and of course it excites me as this beautiful season is getting closer and closer.
Today I bring you the step by step of how to make a beautiful pendant in the shape of Santa's or Santa Claus' face, it is simple to make and with a very nice result.
Now, without further ado, let's get our needles ready and start.

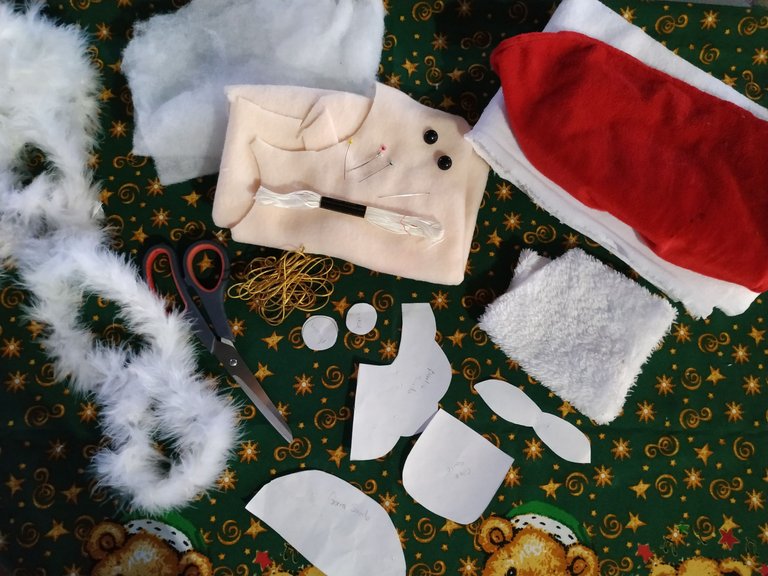
- Tela polar en colores: blanco, piel y rojo.
- Tela de peluche.
- Guata para relleno.
- Hilo dorado.
- Sedalina blanca y roja.
- Aguja para tejer.
- Alfileres.
- Tijeras.
- Silicón.
- Botones negros.
- adornos tipo plumas.
- Moldes.
- Polar fleece in colors: white, fur and red.
- Plush fabric.
- Wadding for stuffing.
- Golden thread.
- White and red fishing line.
- Knitting needle.
- Pins.
- Scissors.
- Silicone.
- Black buttons.
- Feather-like ornaments.
- Molds.

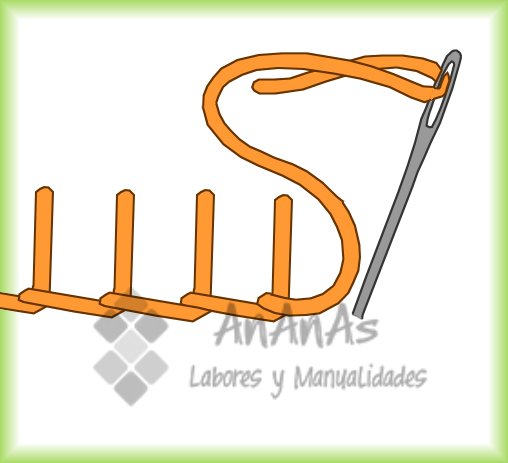
Este proyecto lo hice totalmente con costura a mano llamada punto ojal o festón y aquí les dejo una imagen de referencia.
This project was made entirely with hand stitching called buttonhole stitch or scallop stitch and here is a reference image.
Luego de tener los moldes listos los colocamos arriba de las telas para cortar las piezas. Nos deben de quedar las siguientes:
- Dos rojas para el gorro.
- Dos redondas de color piel para la cara.
- Una redonda pequeña para la nariz.
- Dos piezas de la barba.
- Dos piezas del bigote.
- Dos piezas de la borla del gorro.
After having the molds ready, we place them on top of the fabrics to cut the pieces. We should have the following pieces:
- Two red ones for the hat.
- Two round skin-colored ones for the face.
- A small round one for the nose.
- Two pieces for the beard.
- Two pieces for the mustache.
- Two pieces for the tassel of the cap.
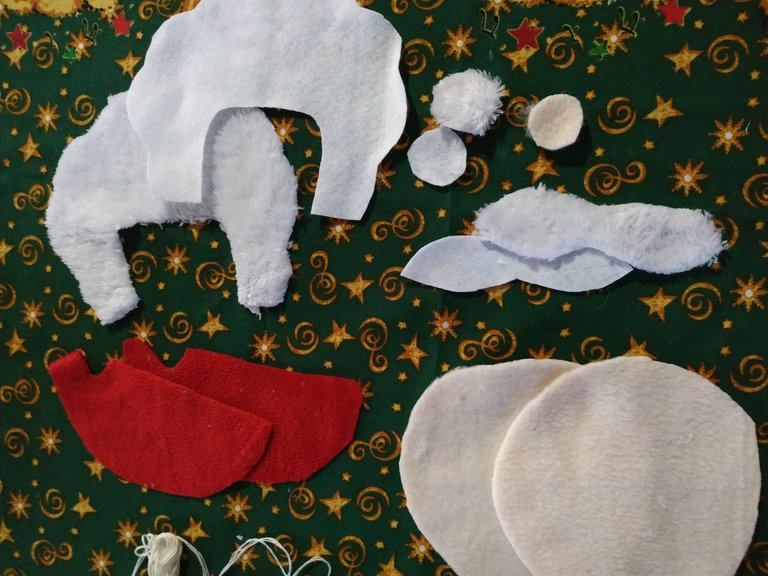
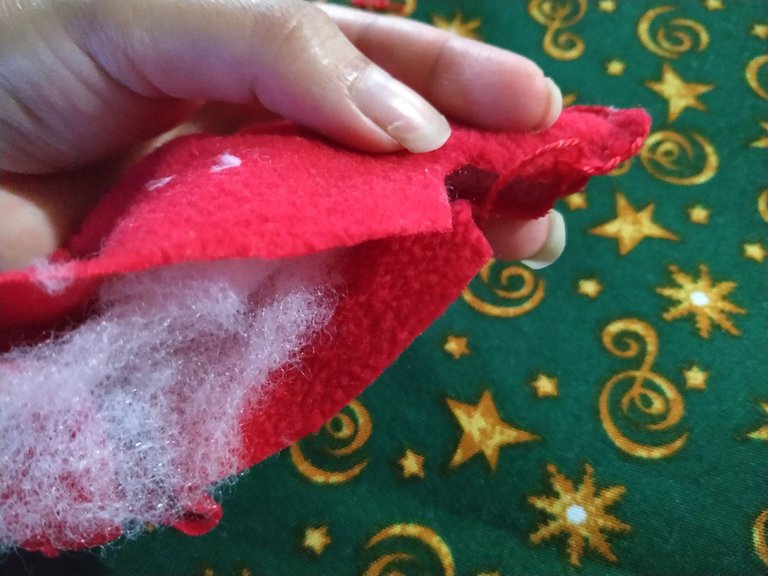
Cómo ven, para la parte delantera de la barba, la borla y el bigote utilice tela de peluche para darle más textura, así que en estas piezas recorte una de cada una de tela de peluche y una de cada una de tela polar.
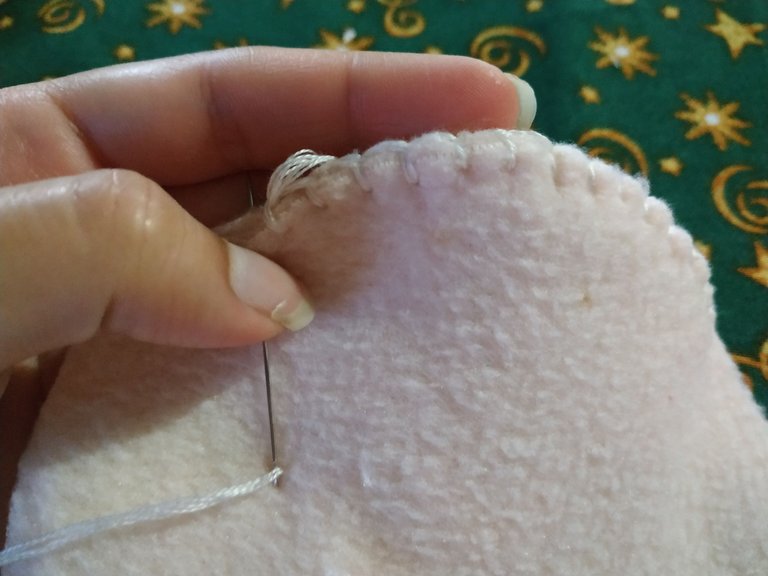
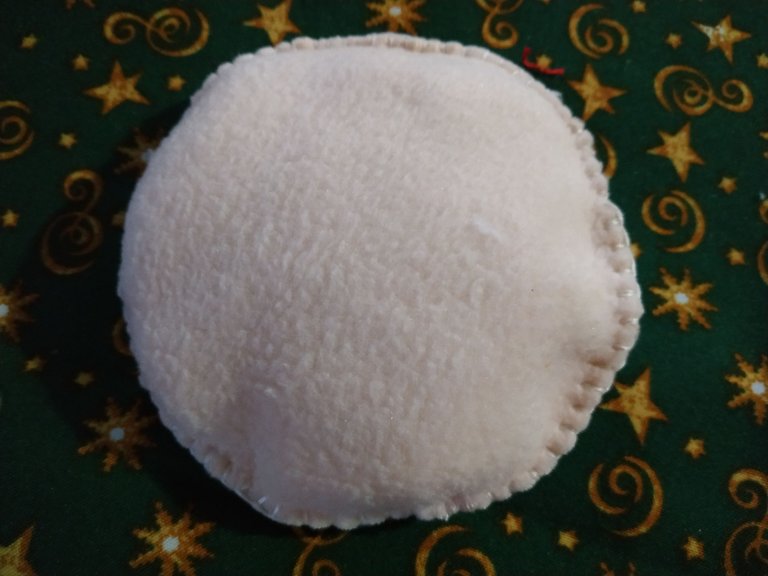
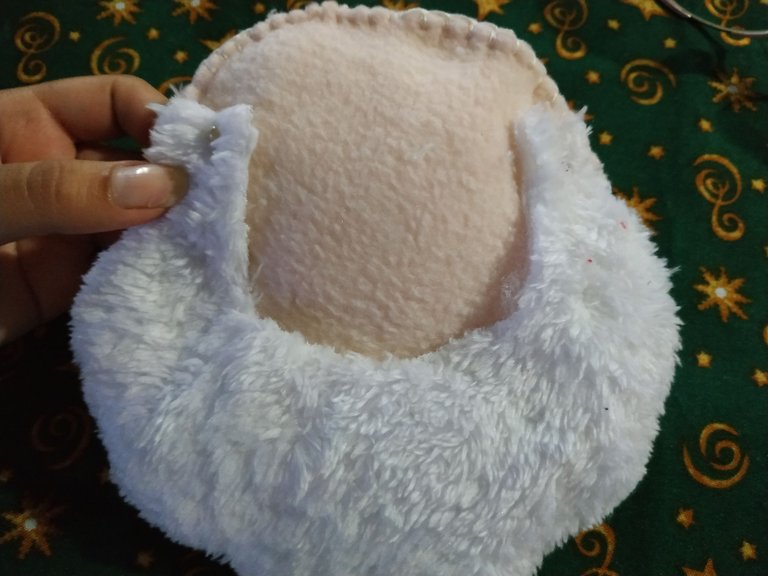
Al tener listas las piezas, tomamos las dos de la cara por el derecho y por todo el contorno le hacemos un bordado punto festón.
As you can see, for the front part of the beard, the tassel and the mustache I used plush fabric to give it more texture, so on these pieces I cut out one of each of the plush fabric and one of each of the fleece fabric.
Once the pieces are ready, we take the two pieces of the face on the right side and all around the contour we make a scallop stitch embroidery.
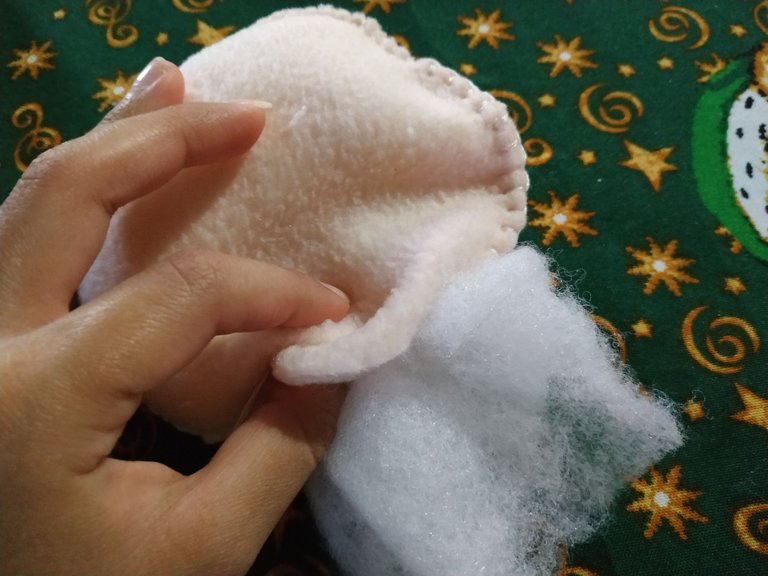
Cuando casi lleguemos al final le colocamos la guata de relleno y cerramos.
When we are almost at the end we place the stuffing wadding and close it.
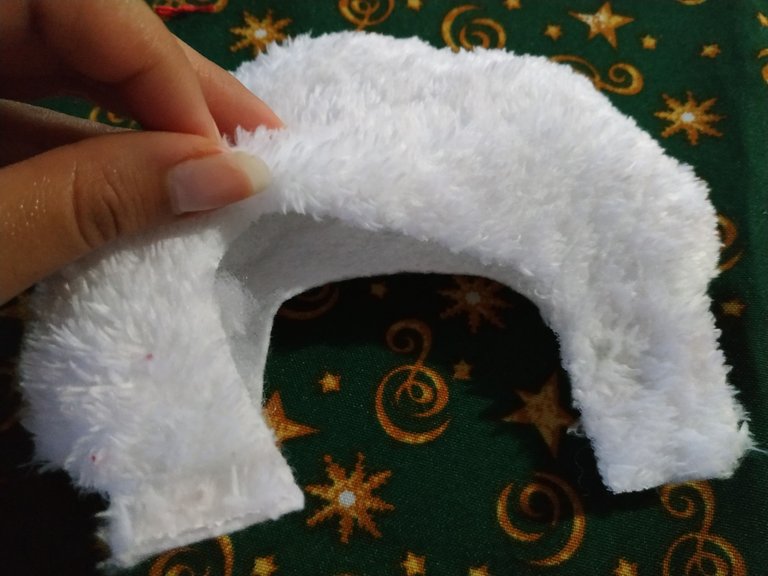
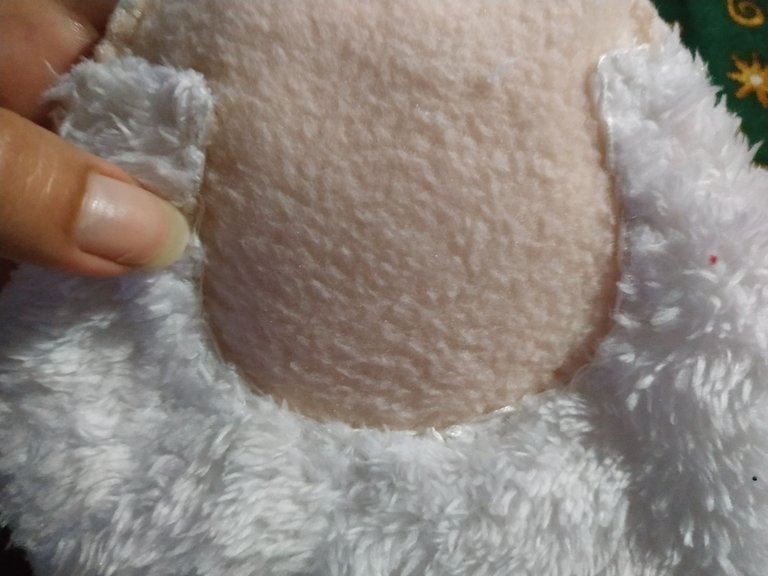
Cosemos de igual manera la barba le colocamos relleno y dejamos sin costura la parte interior.
We sew the beard in the same way, place stuffing and leave the inner part seamless.
La unimos a la cara con unos Alfileres y pasamos bordado festón por todo el contorno.
We join it to the face with some pins and we pass festoon embroidery all around the contour.
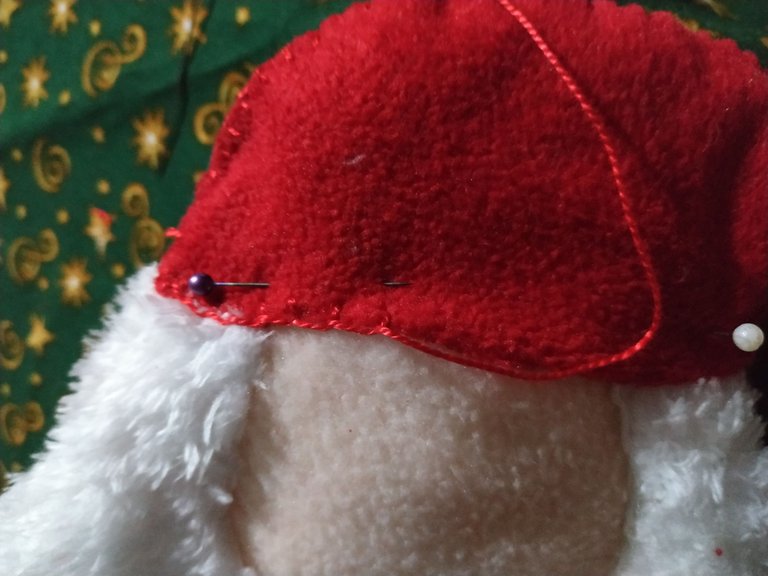
Tomamos las dos piezas del gorro y hacemos lo mismo pero dejamos sin coser la parte inferior.
We take the two pieces of the hat and do the same but leave the lower part unstitched.
Luego la acomodamos y fijamos con unos Alfileres de esta manera.
Pasamos costura y así nos quedará.
Then we arrange it and fix it with some pins in this way.
We sew the seam and this is how it will look like.

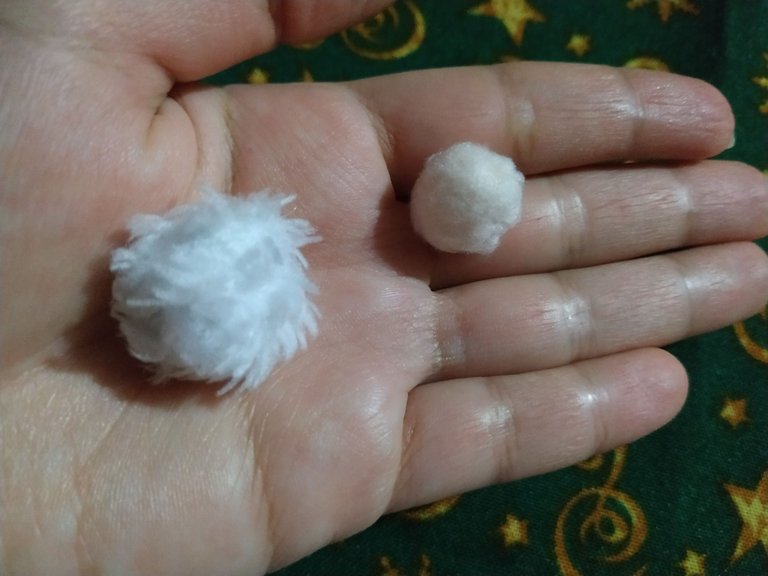
Hacemos dos bolitas para la nariz y la borla ayudandonos con guata para rellenarla y luego cosemos la borla al gorro.
We make two little balls for the nose and the tassel using wadding to fill it and then sew the tassel to the hat.
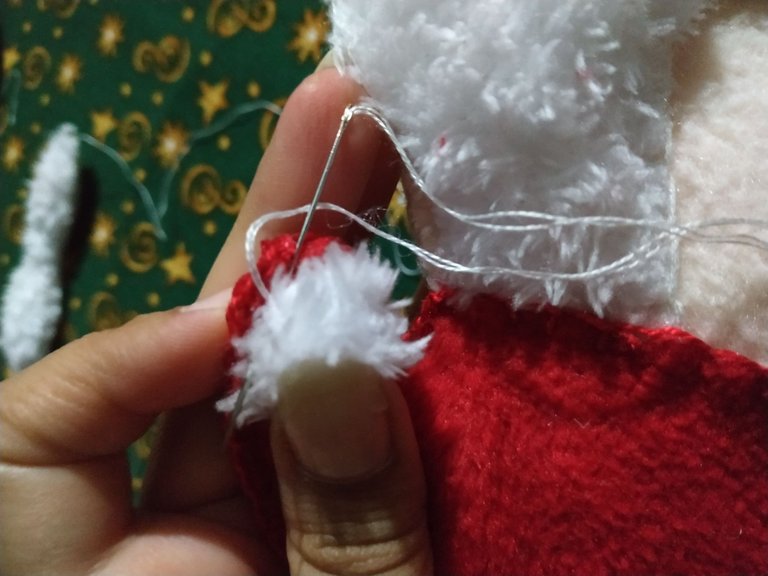
Pasamos punto festón al contorno del bigote, lo rellenamos y lo fijamos a la cara junto a la nariz.
We scallop stitch the outline of the mustache, fill it in and attach it to the face next to the nose.
Colocamos los adornos en la unión entre el gorro y la cara y pegamos con Silicón.
Place the ornaments at the junction between the cap and the face and glue with Silicone.
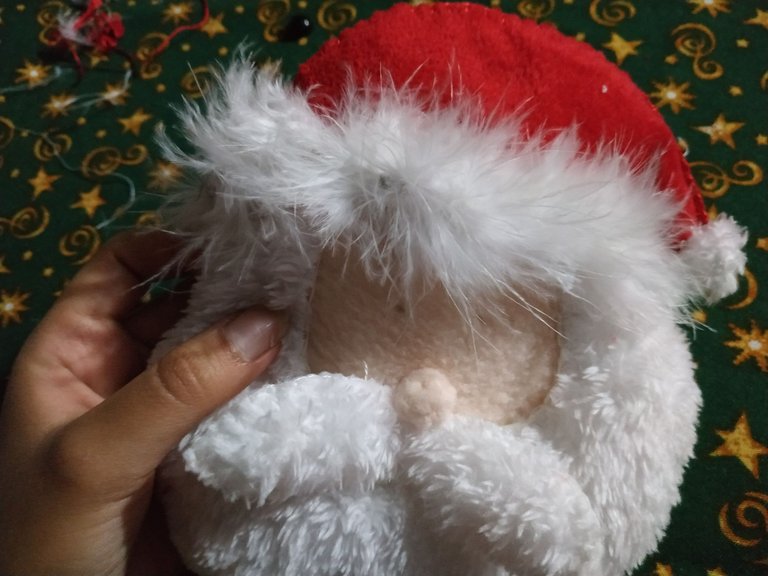
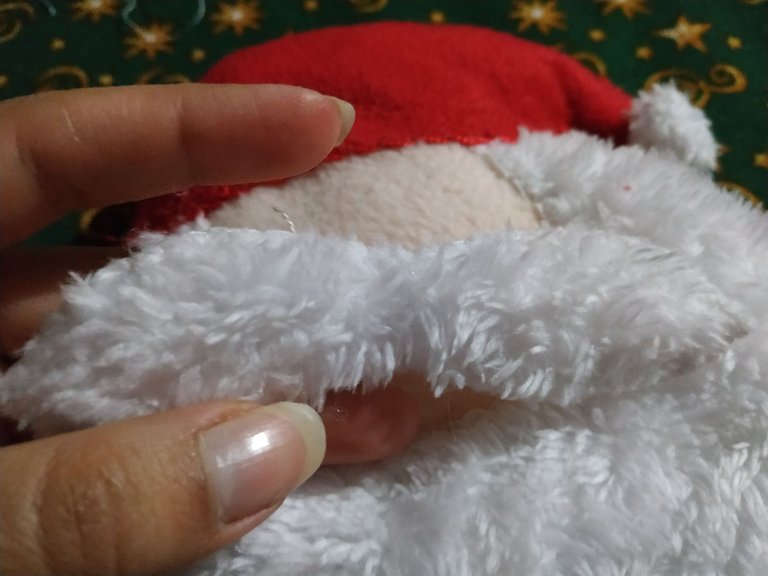
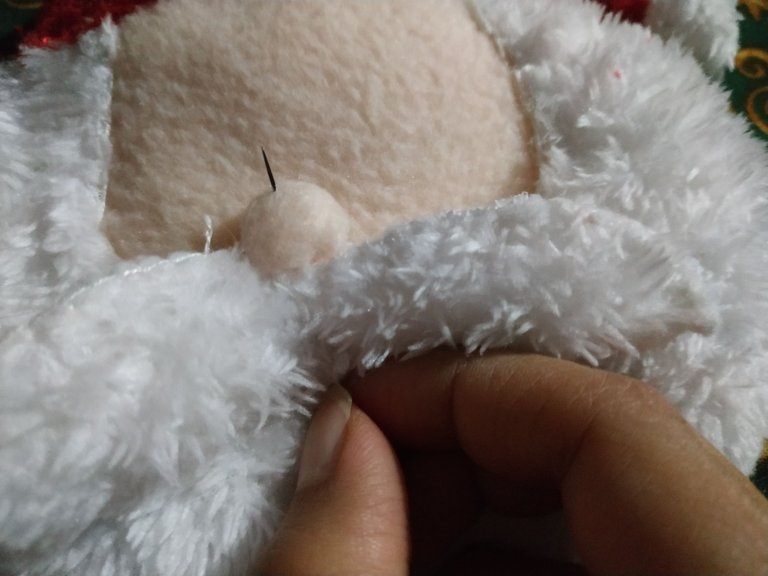
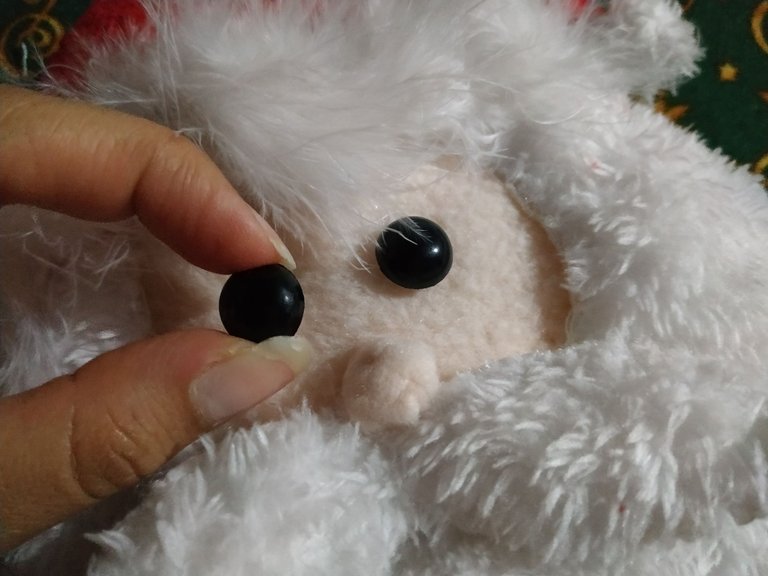
Dejamos secar y continuamos con los ojos. Para ellos utilice dos botones de color negro y estos también los fijé a la cara con silicón.
Let it dry and continue with the eyes. For them I used two black buttons and I also fixed them to the face with silicone.
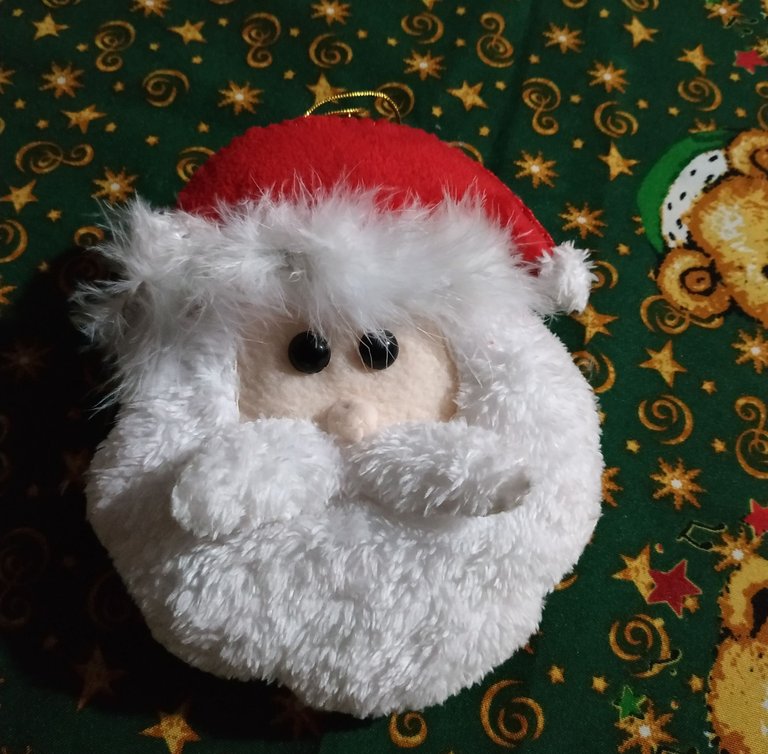
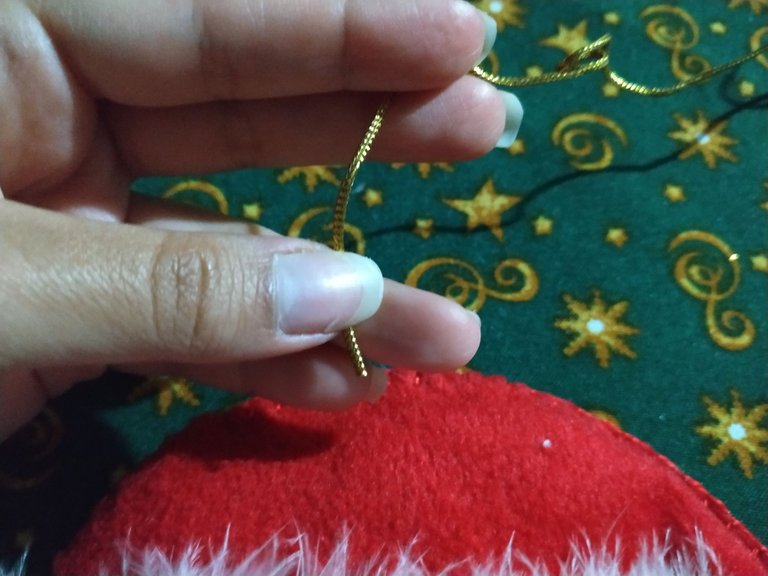
Por último colocamos la tira en la parte superior de la carita y estará listo nuestro colgante en forma de Santa.
Finally we place the strip on top of the face and our Santa-shaped pendant is ready.
Este es un trabajo que me pareció muy tierno y sé que se verá hermoso en el arbolito de navidad de este año en mi casa.
Muchas gracias por pasar por mi blog, les invito a dejar un comentario sobre este proyecto y déjenme saber que otros personajes navideños puedo hacer de esta manera.
This is a work that I found very cute and I know it will look beautiful on the Christmas tree in my house this year.
Thank you very much for stopping by my blog, I invite you to leave a comment about this project and let me know what other Christmas characters I can make this way.
Editado en Canva || Edited in canva
Fotos tomadas de mi teléfono Xiaomi Redmi Note 6 Pro || Photos taken from my Xiaomi Redmi Note 6 Pro phone.
Fuente del editor de imágenes || Image editor source
Good job
@tipu curate
!PGM
!LUV
!LOLZ
Upvoted 👌 (Mana: 0/23) Liquid rewards.
BUY AND STAKE THE PGM TO SEND A LOT OF TOKENS!
The tokens that the command sends are: 0.1 PGM-0.1 LVL-0.1 THGAMING-0.05 DEC-15 SBT-1 STARBITS-[0.00000001 BTC (SWAP.BTC) only if you have 2500 PGM in stake or more ]
5000 PGM IN STAKE = 2x rewards!
Discord
Support the curation account @ pgm-curator with a delegation 10 HP - 50 HP - 100 HP - 500 HP - 1000 HP
Get potential votes from @ pgm-curator by paying in PGM, here is a guide
I'm a bot, if you want a hand ask @ zottone444
Congratulations @gabimramirez! You have completed the following achievement on the Hive blockchain and have been rewarded with new badge(s):
Your next target is to reach 800 comments.
You can view your badges on your board and compare yourself to others in the Ranking
If you no longer want to receive notifications, reply to this comment with the word
STOPTo support your work, I also upvoted your post!
Check out the last post from @hivebuzz:
Support the HiveBuzz project. Vote for our proposal!
https://twitter.com/316102314/status/1587232270552793090
The rewards earned on this comment will go directly to the people sharing the post on Twitter as long as they are registered with @poshtoken. Sign up at https://hiveposh.com.
Ya veo que estas ansiosa de que llegue la navidad ajajaj, me gusta mucho esta creación sobre todo porque es hecha a mano, explicas muy bien con facilidad se puede seguir el tutorial, saludos Gabi.
jajajajja muchísimo, ya no veo la hora de colocar el arbolito de navidad. Muchas gracias amiga por tu comentario. Saludos y que tengas un buen día.
Buen día Gabi ❣️. Que lindo que te quedó este Papá Noel como le decimos nosotros. Poco a poco ya se acerca la navidad, mejor estar preparados para esta fecha tan especial. Tu adorno se verá muy bien con todas las decoraciones.
Saludos, que tengas un lindo día 😙.
Hola Laura, muchas gracias linda.
Igualmente, ten un buen día 😄
Aaawww, este Papá Noel quedó preciosoo, me gustó mucho. Gracias por compartir el paso a paso!!🤍
Muchas gracias linda
This is really beautiful, you have make me start feeling Christmas
Thank you very much 😄
que precioso, me encanta la navidad. creo q es la época más linda del año y podemos adornar la casa especialmente.
Muchas gracias linda, que tengas un buen día 😄
Hola @gabimramirez, sin duda un adorno muy lindo y tierno para decorar el árbol de navidad y lo más importante si no se dispone de una máquina se cose a mano obteniendo un excelente resultado.
Bendiciones!
Hola, muchas gracias. Si, y la verdad me encantó mucho aprender esta nueva técnica de costura a mano y el resultado queda muy bonito 😄
Este Papa Noel es como los que venden en los mercados, ¡está de lujo!. Un abrazo.
Aww gracias, un abrazo que tengas un buen día.
Wow so beautiful Santa and I love the beard how well did you made it thanks for sharing
Que ternura, son el tipo de adornos navideños que me gustan, asi tipo peluche, llenaria cada espacio de la casa con cositas así, te quedó hermoso ♥️