Aprende a confeccionar un top juvenil (Fácil y rápido) || Learn how to make a top (Easy and fast)

Feliz inicio de semana para todos.
Siempre me gusta estar muy cómoda cuando estoy en mi casa o cuando salgo a caminar y aunque los bra con varilla son muy comunes y nos hacen ver muy bien, nada se compara a la comodidad de un top; Es por eso que hoy les traigo el paso a paso de cómo elaborar un lindo top de dama juvenil que lleva muy pocos materiales para poder elaborarlo, gasta menos de un cuarto de metro de tela y además es muy fácil de hacer ya que solo nos guiaremos de dos moldes el cual les dejare con las medidas más adelante.
Happy start of the week to everyone.
I always like to be very comfortable when I'm at home or when I go for a walk and although the bra with rod are very common and make us look very good, nothing compares to the comfort of a top is why today I bring you the step by step on how to make a nice young lady top that takes very few materials to make it, spends less than a quarter meter of fabric and is also very easy to make since we will only be guided by two molds which I will leave you with the measurements later.
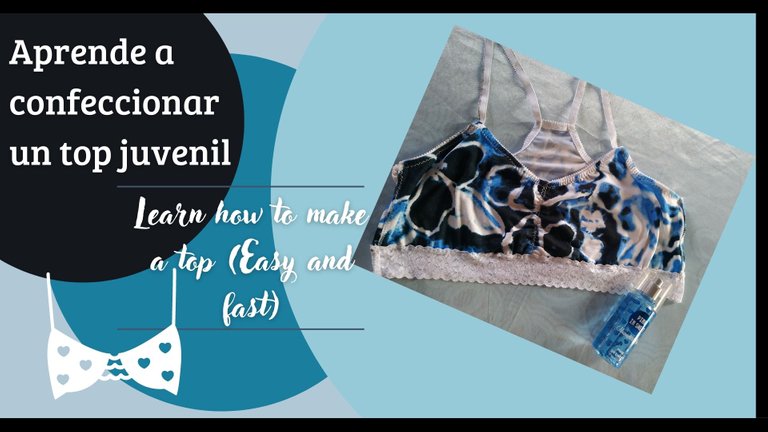
Editado en Canva || Edited in canva

- Tela de algodón.
- Encaje elástico de 3 cm y de 1 cm.
- Hilo.
- Alfileres.
- Cinta métrica.
- Tijeras.
- Cotton fabric.
- Elastic lace of 3 cm and 1 cm.
- Thread.
- Pins.
- Measuring tape.
- Scissors.


Comenzamos elaborando los moldes. (Talla única).
We start by making the molds (one size fits all).


Luego cuando ya los tengamos listos, vamos a colocar nuestra tela de algodón doblada a la mitad, con el derecho de tela hacia adentro y colocamos ambos moldes sobre ella, respetando el lado donde dice doblez.
Then when we have them ready, we are going to place our cotton fabric folded in half, with the right side of the fabric facing inwards and we place both molds on it, respecting the side where it says fold.


Cortamos al ras del molde y nos deben de quedar dos piezas.
Cut flush with the mold and we should have two pieces left.


Vamos a empezar a colocar el encaje elástico o morita empezando por la parte del escote de pecho.
We are going to start placing the elastic lace or morita starting from the neckline part of the chest.

Luego vamos a colocar una tira en medio y pasamos costura, estirando mientras cosemos para que nos quede de forma "arruchada".
Then we are going to place a strip in the middle and sew, stretching while sewing so that it is "puckered".


También colocamos el encaje en el Escote de espalda.
We also place the lace on the back neckline.

Seguimos colocando el encaje o morita a uno de los laterales, cuando lleguemos al fin de la costura debemos dejar una tira de 30 cm de largo y unir a la parte trasera con la misma tira para que se vea de forma continua.
We continue placing the lace or morita to one of the sides, when we reach the end of the seam we must leave a strip of 30 cm long and join the back with the same strip so that it is seen continuously.


Repetimos el proceso en el otro lateral.
Repeat the process on the other side.

Ahora pasamos costura en uno de los costados y procedemos a colocar el encaje de 3 centímetros de ancho por la parte inferior del top.
Now we sew the seam on one of the sides and proceed to place the 3 cm wide lace on the bottom of the top.


Debemos sobreponer el encaje a la tela del top medio centímetro para que se vean las ondas del mismo. Por último cerramos el otro costado.
We must overlap the lace to the fabric of the top half a centimeter so that the waves of the top are visible. Finally we close the other side.

Y tendremos listo este bello top de dama estilo juvenil.
And we will have ready this beautiful lady's top in a youthful style.

Editado en Canva || Edited in canva
This post has been manually curated by @steemflow from Indiaunited community. Join us on our Discord Server.
Do you know that you can earn a passive income by delegating to @indiaunited. We share 100 % of the curation rewards with the delegators.
Here are some handy links for delegations: 100HP, 250HP, 500HP, 1000HP.
Read our latest announcement post to get more information.
Please contribute to the community by upvoting this comment and posts made by @indiaunited.
Thank you for your support
está muy lindo, me gustó este modelo. Gracias por compartir
Muchas gracias
Se ve muy comodo y muy fresco, gracias por compartir.
Es muy cómodo amiga, tengo varios con este estilo y siempre los recomiendo. Muchas gracias por leer mi blog ❤️
https://twitter.com/genicedelvalle1/status/1572019881788178436
The rewards earned on this comment will go directly to the people sharing the post on Twitter as long as they are registered with @poshtoken. Sign up at https://hiveposh.com.
Me encantó porque es muy lindo el modelo y super clara la explicación de los pasos. Además debe ser muy cómodo para el verano.
Muchas gracias, la verdad es que es muy muy cómodo
Precioso tu trabajo mi bella @gabimramirez 🤗 Se ve super cómodo y lindo. El encaje me parece que le da un toque muy femenino y delicado. Gracias por dejar el patrón con las medidas 💟
Hola linda, quise agregarle este toque más femenino con el encaje. Muchas gracias por tu comentario y leer mi publicación, Saludos ❤️
Mi querida Gaby me encanta tu proyecto, gracias por compartir
Muchas gracias amiga ❤️
Yo soy adicta a este tipo de prendas, son bastantes cómodas de usar.
El color que elegiste es muy bonito y la tela se ve muy suave, quedó hermoso el resultado.
Debo decir que también me encantan este tipo de prendas, nada como la comodidad jeje. Muchas gracias por tu comentario ❤️
!discovery 30
This post was shared and voted inside the discord by the curators team of discovery-it
Join our community! hive-193212
Discovery-it is also a Witness, vote for us here
Delegate to us for passive income. Check our 80% fee-back Program
Thank you very much
Your content has been voted as a part of Encouragement program. Keep up the good work!
Use Ecency daily to boost your growth on platform!
Support Ecency
Vote for new Proposal
Delegate HP and earn more
Thank you very much for your support
Thank you for sharing this amazing post on HIVE!
Your content got selected by our fellow curator @stevenson7 & you just received a little thank you via an upvote from our non-profit curation initiative!
You will be featured in one of our recurring curation compilations and on our pinterest boards! Both are aiming to offer you a stage to widen your audience within and outside of the DIY scene of hive.
Join the official DIYHub community on HIVE and show us more of your amazing work and feel free to connect with us and other DIYers via our discord server: https://discord.gg/mY5uCfQ !
If you want to support our goal to motivate other DIY/art/music/homesteading/... creators just delegate to us and earn 100% of your curation rewards!
Stay creative & hive on!
Thank you very much
Well detailed and beautiful outcome, I thanks for sharing @gabimramirez
Thank you very much for reading my publication. Have a nice day