Blusa con mangas arruchadas [ESP - ENG]
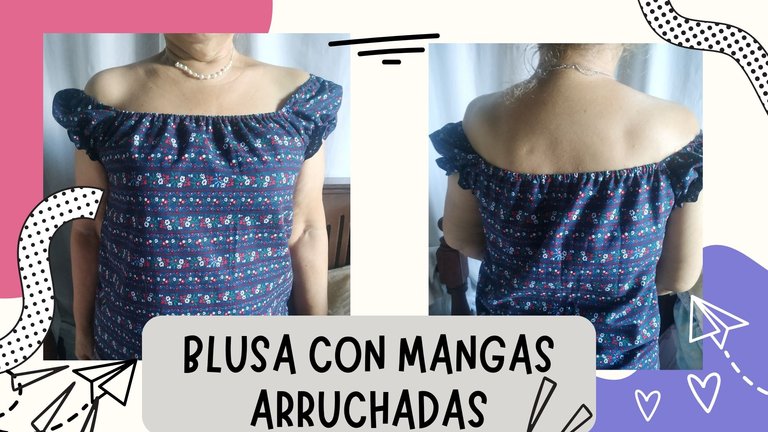

Hola, hola 👋 mis queridos amigos de Hive, feliz lunes y feliz inicio de semana para todos. El día de hoy para lunes de agujas les quiero presentar un nuevo proyecto que hice para mi mamá , se trata de una blusa clásica con mangas arruchadas con hilo elástico, la misma se hizo con una tela que tenía guardada hace un tiempo y a pesar de no ser una tela elástica se pudo hacer la blusa gracias al diseño de los patrones que hacen que no quede justa al cuerpo.

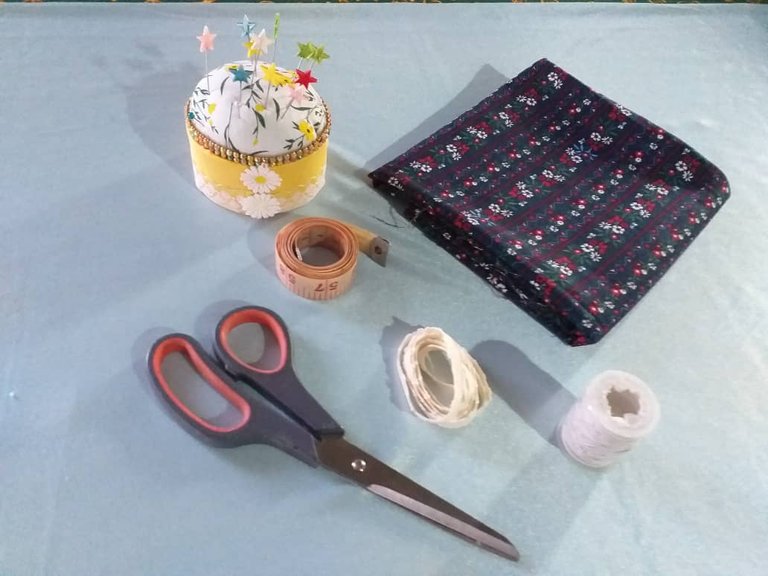
- Tela Chalis estampado.
- Elástico de medio centímetro.
- Hilo elástico.
- Tijeras.
- Agujas.
- Alfileres.
- Patrones.

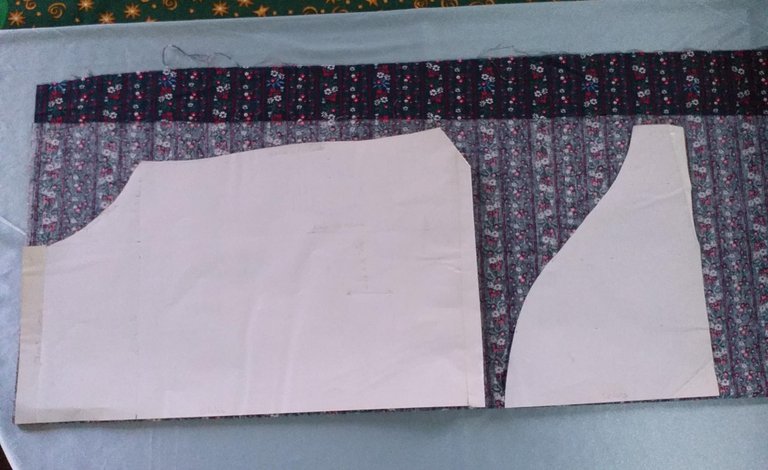
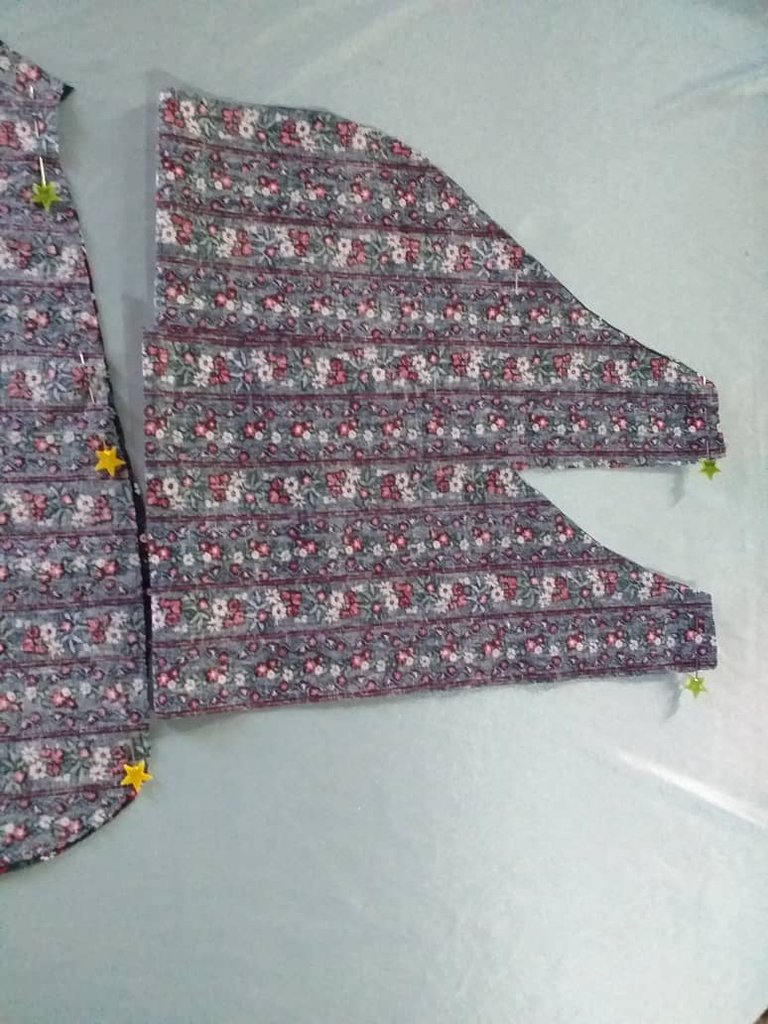
Como primer paso debemos de colocar sobre nuestra tela los patrones de la blusa, en este caso solo vamos a trabajar con dos que serán, el mismo para la parte delantera y trasera y uno para ambas mangas.
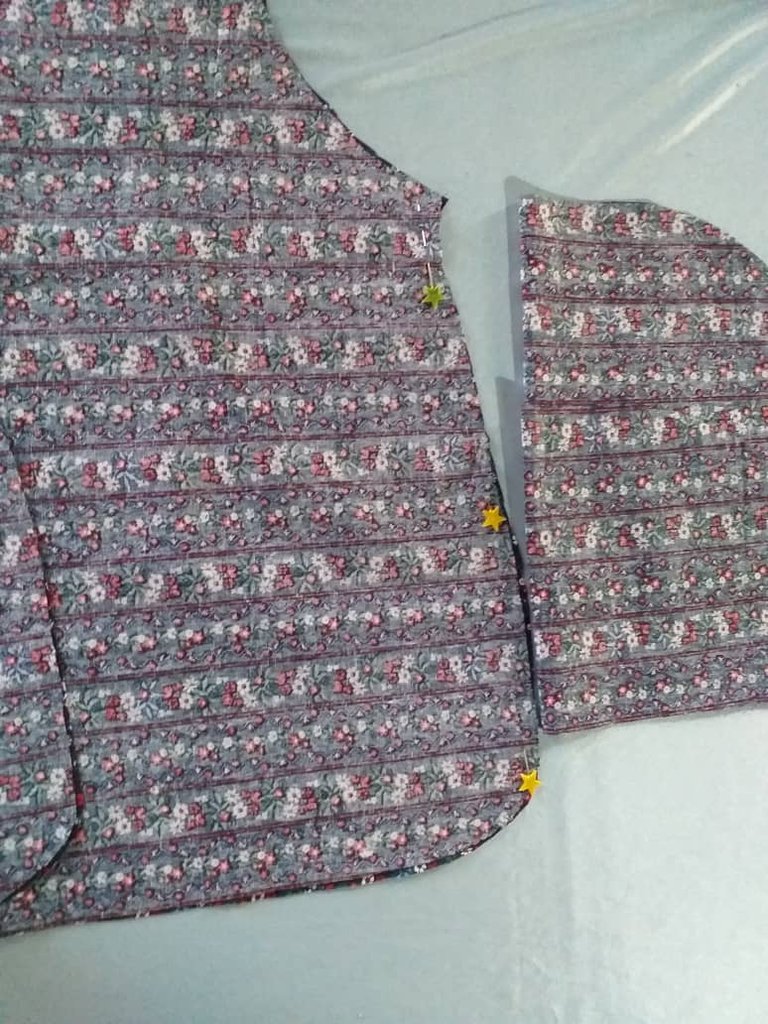
Luego de tener cortadas las piezas, procedemos a unir la parte delantera y posterior del torso y para ello nos ayudamos con unos alfileres los cuales colocaremos en los laterales para pasar costura.
En la parte derecha de la foto tenemos ambas mangas a las cuales se le debe pasar costura por uno de los laterales, igualmente se coloca unos alfileres para guiarse.
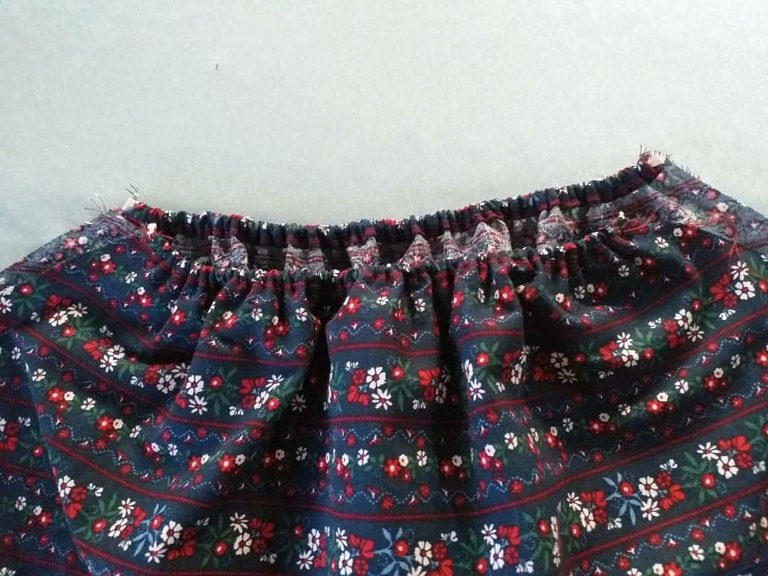
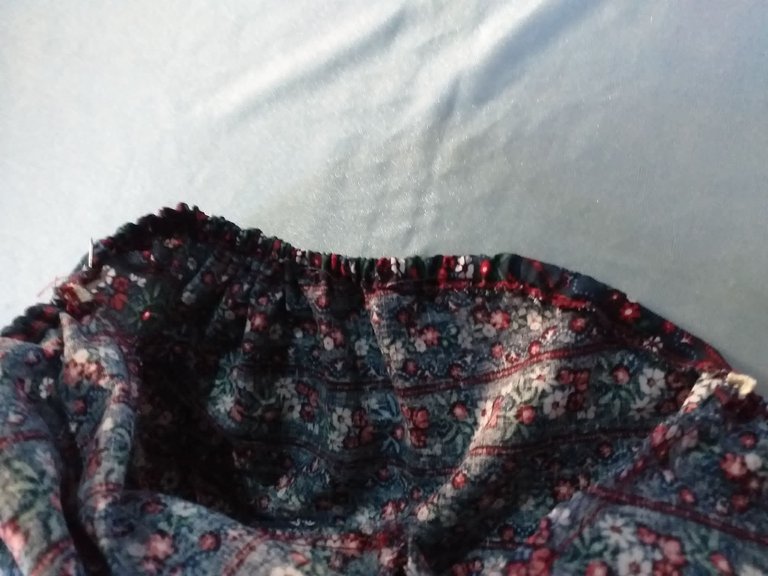
Luego coser la parte delantera y posterior, procedemos a colocar por todo el contorno superior el encaje elástico, vamos a estirar de 5 a 6 de manera que nos quede bien distribuido el elástico y no se vea deforme la blusa.
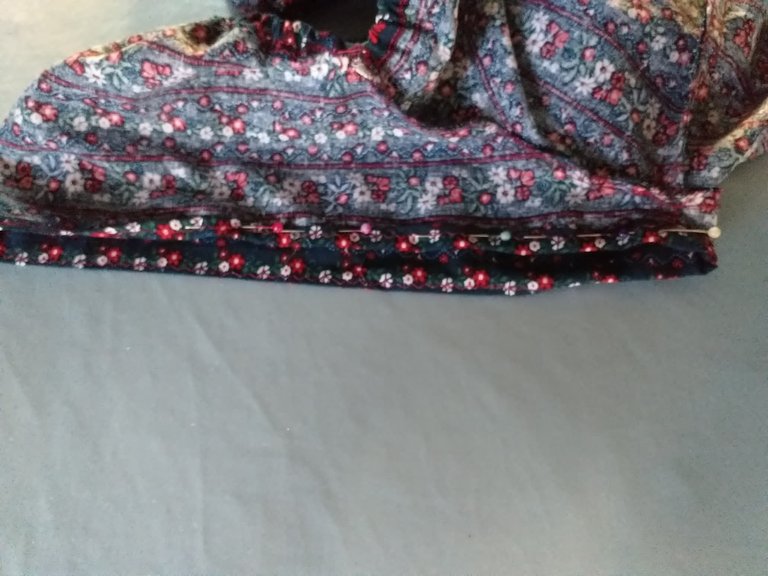
Del mismo modo pasamos inmediatamente costura por la parte inferior de la blusa, ya que unimos ambas piezas y podemos hacerlo.
Procedemos a unir las mangas a la blusa, nos guiamos por la costura que hicimos a las mangas y de allí las vamos a cuadrar utilizando los alfileres que nos guiarán.
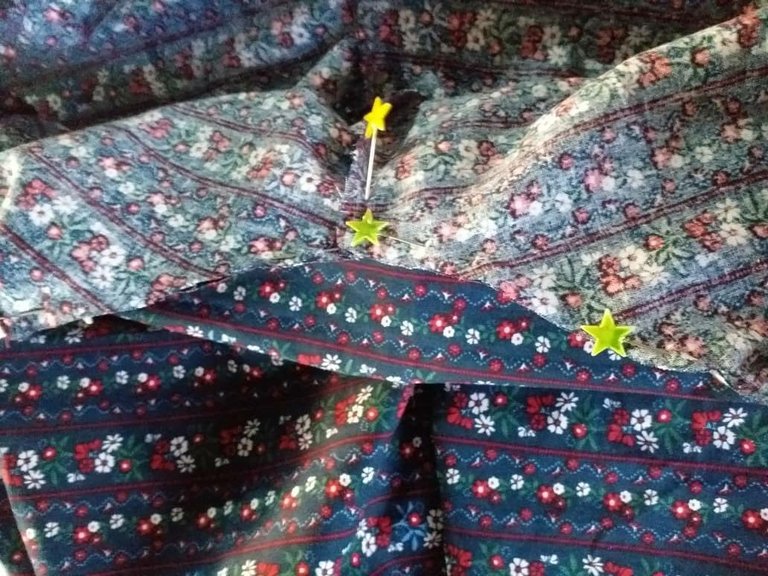
Luego de unir ambas mangas, es momento de que "arruchemos" las mangas para ello vamos a utilizar el hilo elástico.

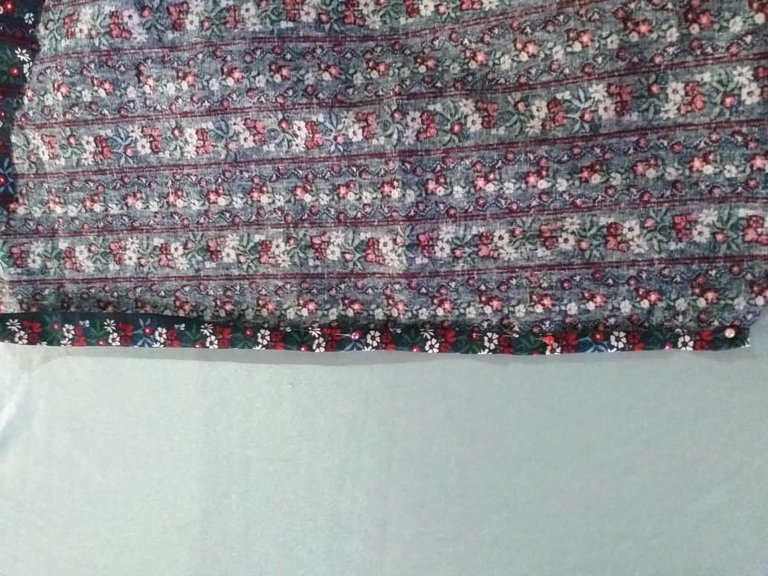
Luego de esto hacemos un doble dobladillo, para la manga, le pasamos la plancha y luego costura recta por todo el contorno. Repetimos para la siguiente manga y con esto tendremos listo este proyecto.
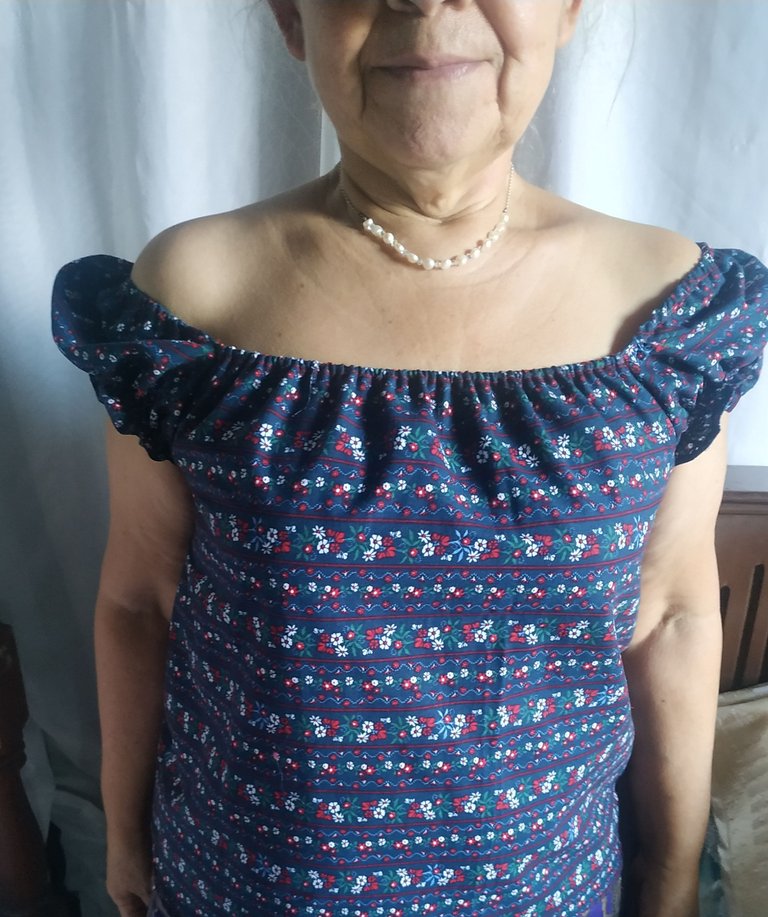
Esta es una blusa muy casual y clásica que nos servirá para usar de diario, el proceso para elaborarla es bastante sencilla y además podemos utilizar diferentes telas para la elaboración de la misma, en mi caso y como les comenté en un principio, se utilizó tela rígida pero si tienen tela stretch pueden utilizarla de igual manera.
Hasta aquí mi proyecto del día de hoy, espero les haya gustado y como siempre les deseo un feliz día y noche.

Hello, hello 👋 my dear friends of Hive, happy Monday and happy start of the week for everyone. Today for needle Monday I want to present you a new project I made for my mom, it is a classic blouse with ruffled sleeves with elastic thread, it was made with a fabric that I had saved some time ago and despite not being an elastic fabric it was possible to make the blouse thanks to the design of the patterns that make it not fit tight to the body.
- Printed shawl fabric.
- Half centimeter elastic.
- Elastic thread.
- Scissors.
- Needles.
- Pins.
- Pat Pins.
As a first step we must place on our fabric the patterns of the blouse, in this case we will only work with two that will be the same for the front and back and one for both sleeves.
After having cut the pieces, we proceed to join the front and back of the torso and for this we will use some pins which we will place on the sides to pass the seam.
On the right side of the photo we have both sleeves which must be sewn on one of the sides, also we place some pins to guide us.
After sewing the front and back, we proceed to place the elastic lace all around the upper contour, we will stretch 5 to 6 so that the elastic is well distributed and the blouse does not look deformed.
In the same way, we immediately sew the seam at the bottom of the blouse, since we join both pieces and we can do it.
We proceed to join the sleeves to the blouse, we are guided by the seam we made to the sleeves and from there we are going to square them using the pins that will guide us.
After joining both sleeves, it is time to "ruffle" the sleeves using the elastic thread.
After this we make a double hem, for the sleeve, we pass the iron and then straight stitch all the way around. Repeat for the next sleeve and with this we will have this project ready.
This is a very casual and classic blouse that will serve us to use daily, the process to make it is quite simple and we can also use different fabrics for the development of the same, in my case and as I told you in the beginning, rigid fabric was used but if you have stretch fabric can be used in the same way.
So far my project today, I hope you liked it and as always I wish you a happy day and night! .
Fotos tomadas de mi teléfono Xiaomi Redmi Note 6 Pro y mi teléfono Samsung J4 Pro|| Photos taken from my Xiaomi Redmi Note 6 Pro phone and my Samsung J4 Pro phone.
Fuente del editor de imágenes || Image editor source
Me parece perfecto que quede un poco holgada para que el foco de atención sea el hermoso trabajo que has hecho en las mangas y hombros.
Quedó hermosa.
Hola 👋 si, siento que queda muy bien un poco holgada, además que al ser una tela rígida era un poco difícil hacerla más justa al cuerpo.
Gracias por tu comentario y saludos.
!LUV
gabimramirez, metzli sent you LUV. 🙂 (3/5) tools | trade | connect | daily
Made with LUV by crrdlx.