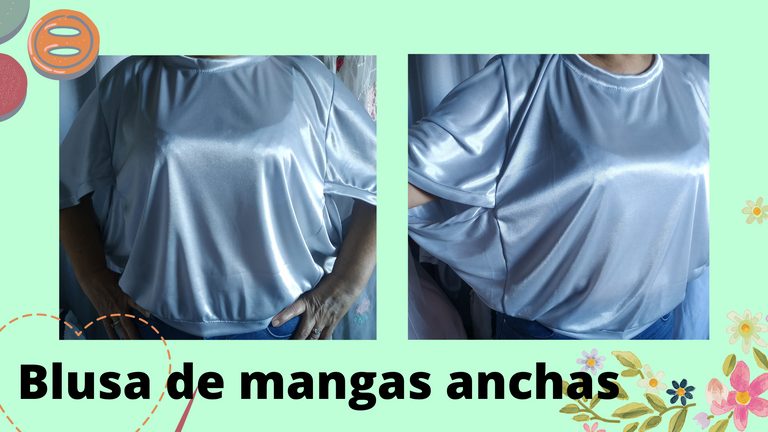
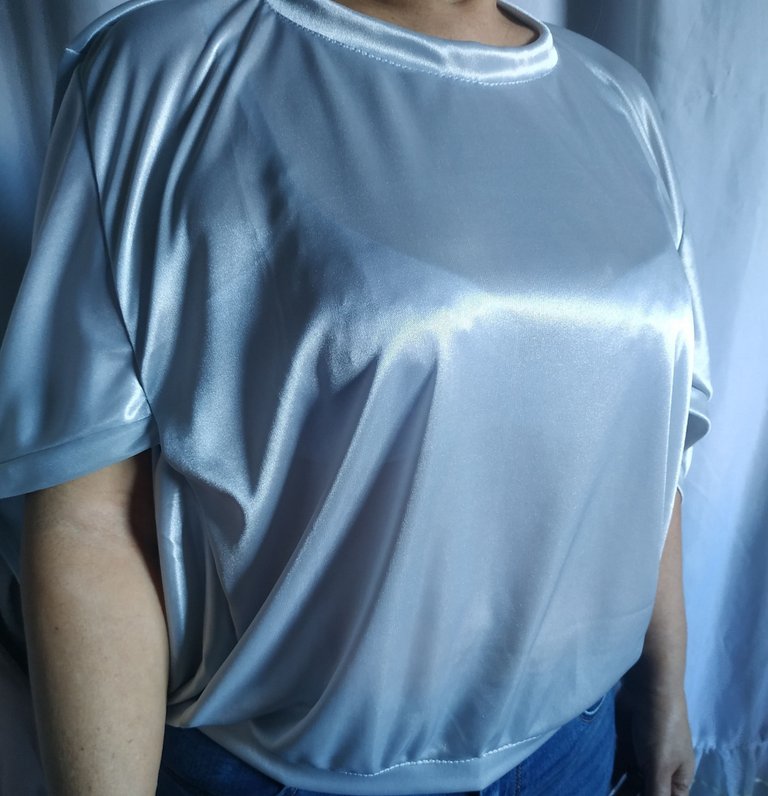
Blusa de mangas anchas || Blouse with wide sleeves
Hola a todos los miembros de esta linda comunidad, feliz lunes y feliz inicio de semana, el día de hoy les enseñaré a elaborar esta blusa de color plateada.
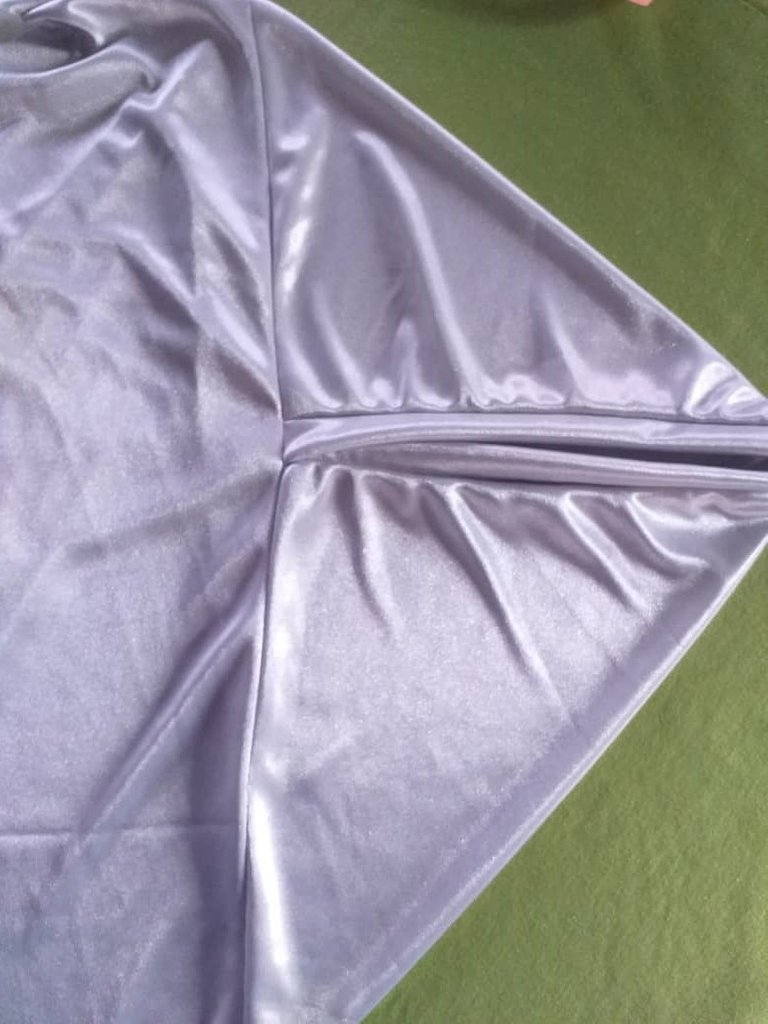
Lo que diferencia esta blusa es sus mangas, son muy diferentes a la de una blusa común, quedan en forma de caída y le dan un toque a la blusa más elegante o casual dependiendo de la tela que utilicemos.
Hello to all the members of this beautiful community, happy Monday and happy beginning of the week, today I will teach you how to make this silver blouse.
What differentiates this blouse is its sleeves, they are very different from a common blouse, they are in the form of fall and give a touch to the blouse more elegant or casual depending on the fabric we use.
Editado en Canva || Edited in Canva

- Tela.
- Hilo.
- Alfileres.
- Tijeras.
- Molde o patrón.
- Fabric.
- Thread.
- Pins.
- Scissors.
- Mold or pattern.


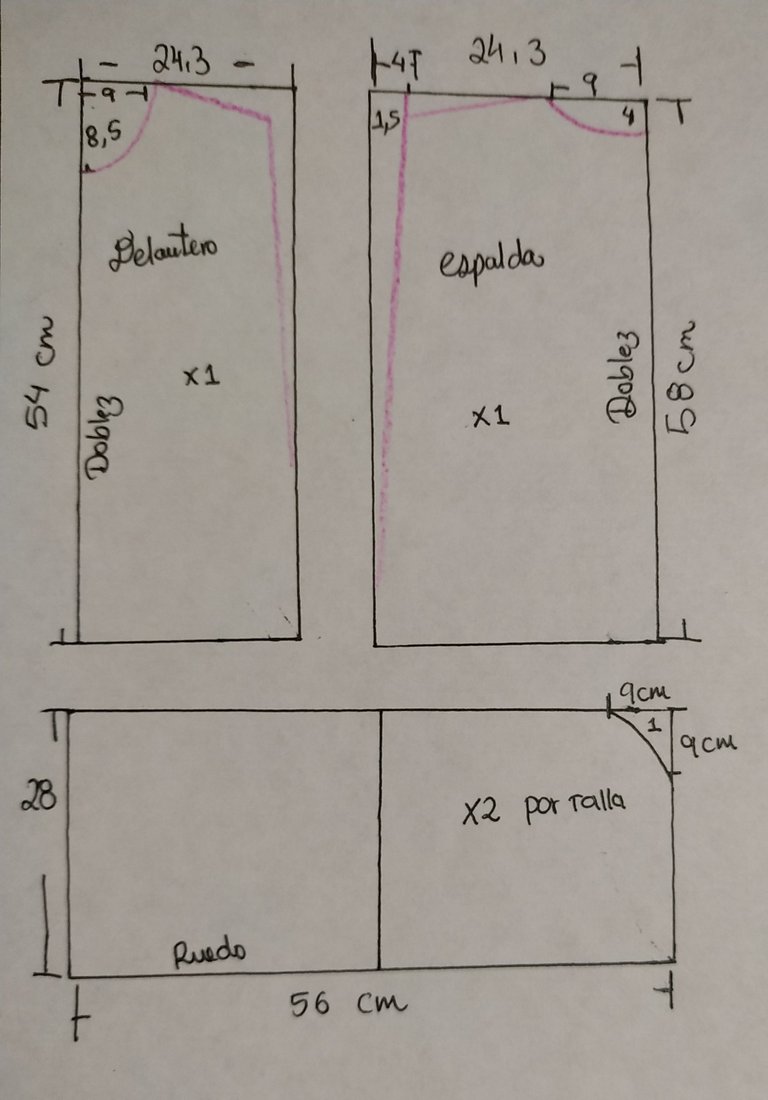
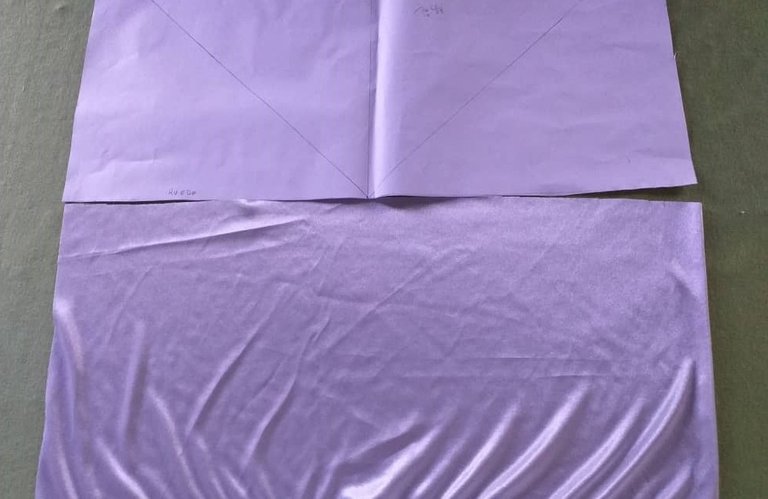
Como primer paso vamos a elaborar los moldes, estos son para una blusa talla S – M.
As a first step we are going to make the molds, these are for a size S - M blouse.
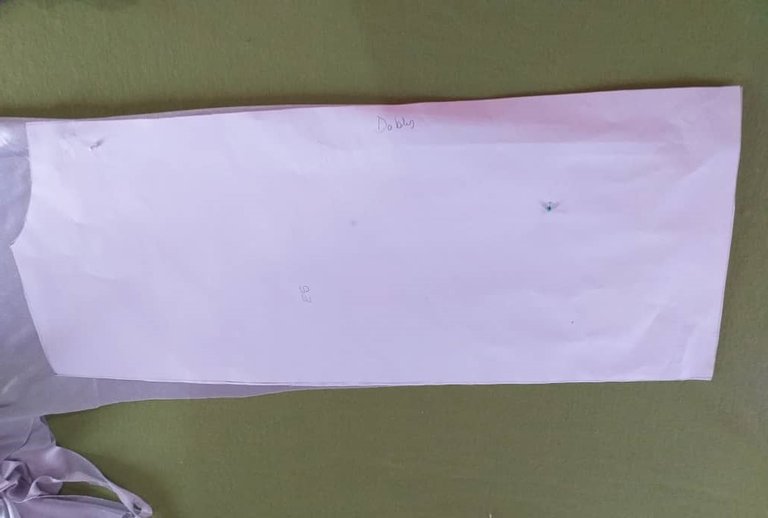
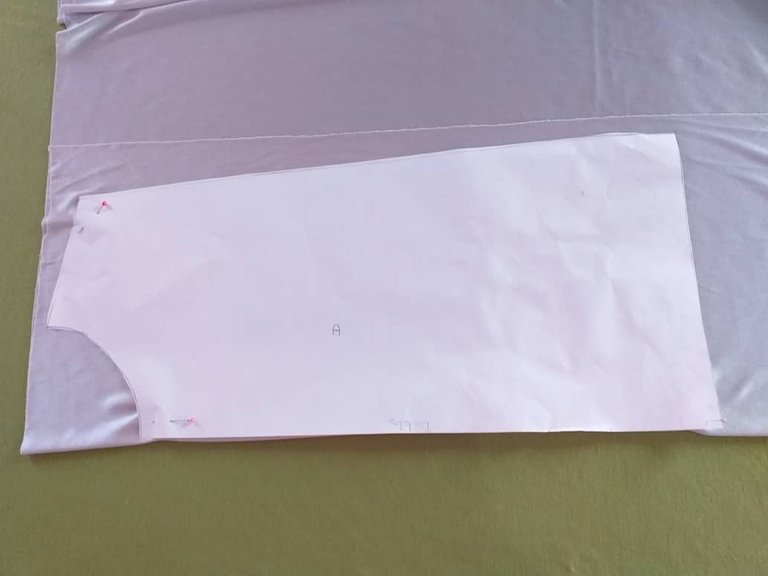
Luego colocamos los moldes, delantero y trasero, arriba de la tela en una superficie plana. Respetamos donde dice doblez en cada molde.
Then we place the molds, front and back, on top of the fabric on a flat surface. We respect where it says fold on each mold.
La tela que utilice para elaborar esta prenda es muselina elástica.
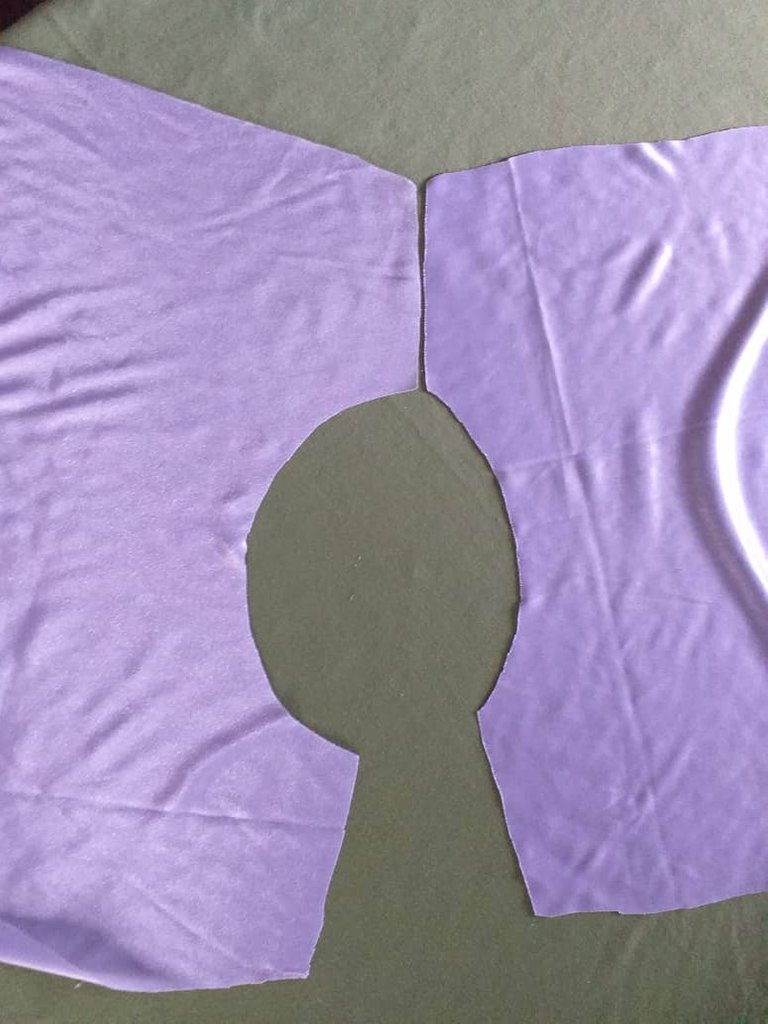
Nos deben de quedar dos piezas, una delantera y una trasera. Y hacemos lo mismo con las mangas, nos deben de quedar dos piezas.
The fabric I used to make this garment is elastic muslin.
We should have two pieces left, a front and a back. And we do the same with the sleeves, we should have two pieces left.
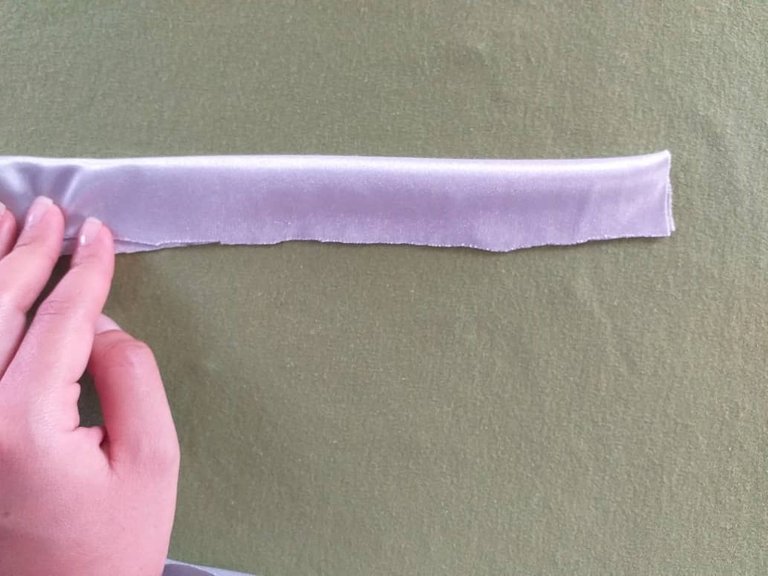
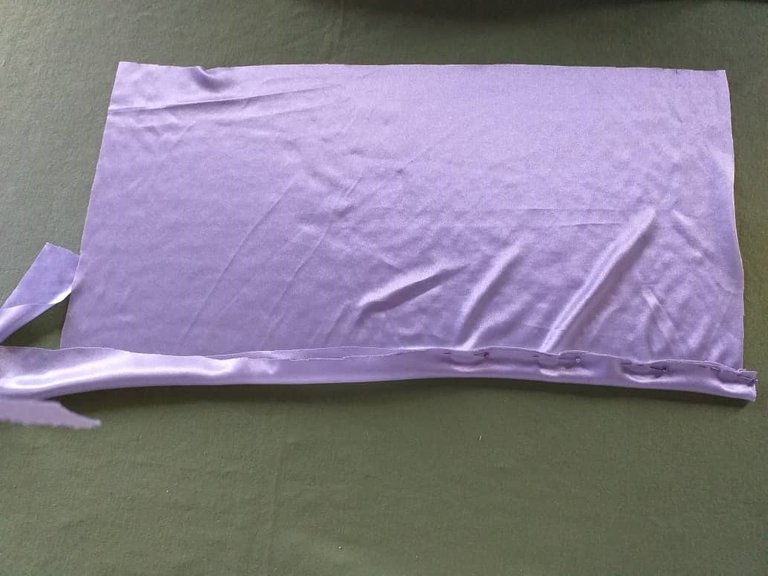
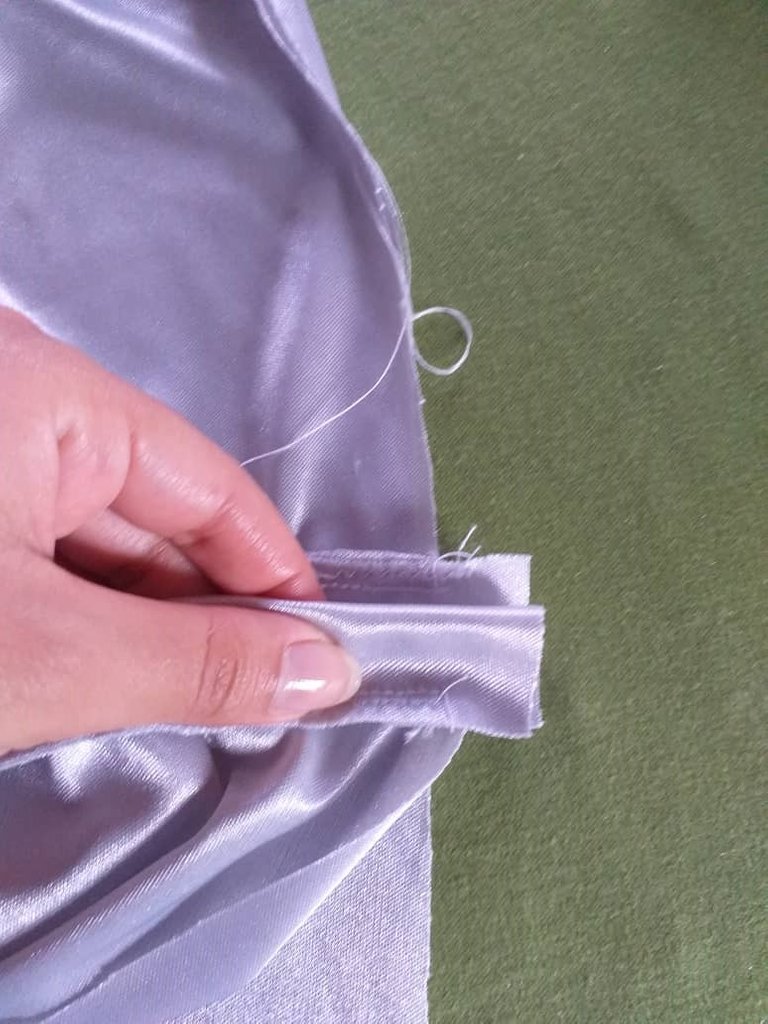
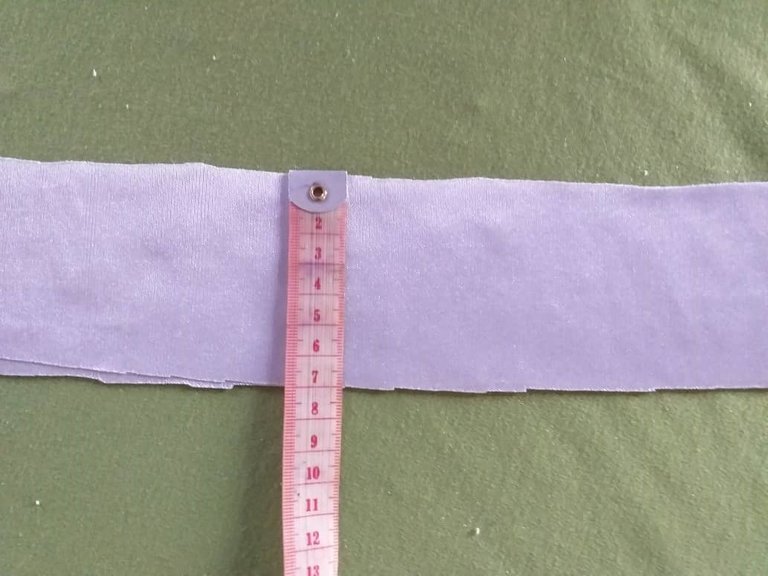
Vamos a hacer dos tiras de 5 centímetros de ancho por 56 centímetros de largo cada una. La doblamos a la mitad y la unimos a la parte inferior de la manga, donde dice ruedo y donde no está la curva.
La sujetamos con unos alfileres y cosemos.
Como esta es una tela elástica, debemos estirar el ruedo unos milímetros, mientras va pasando la costura de la máquina.
We are going to make two strips of 5 centimeters wide by 56 centimeters long each. Fold it in half and join it to the bottom of the sleeve, where it says "hem" and where the curve is not.
We fasten it with pins and sew.
As this is an elastic fabric, we must stretch the hem a few millimeters, while passing the machine seam.

Ahora vamos a unir la parte delantera con la trasera, por la parte de los hombros.
Now we are going to join the front and the back, at the shoulders.
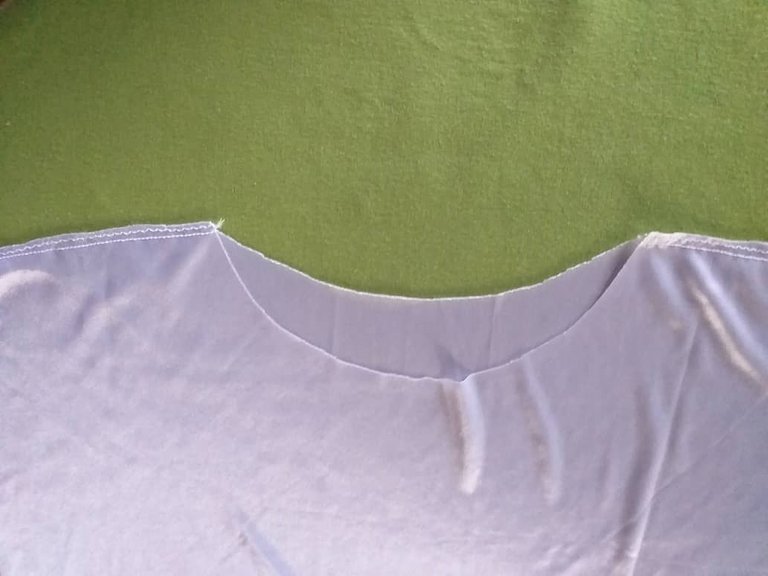
Al coserlo vamos a notar que en la parte inferior nos va a quedar más larga la parte trasera que la delantera. Esto es normal, así que vamos a acomodarlo de manera que queden a la misma altura y esto hará que en la parte de los hombros, nos quede la costura hacia adelante, entonces le haremos unas marcas en cada hombro y esto nos ayudara a la hora de fijar las mangas.
When sewing it we will notice that the back part will be longer than the front part at the bottom. This is normal, so we are going to arrange it so that they are at the same height and this will make that in the part of the shoulders, we have the seam forward, then we will make some marks on each shoulder and this will help us when it comes to fix the sleeves.
Para hacer la otra marca, tomamos una de las mangas y la doblamos de esta manera, centramos bien y en una de las esquina le hacemos otra marca con un lápiz.
To make the other mark, we take one of the sleeves and fold it in this way, center it well and in one of the corners we make another mark with a pencil.

Vamos a colocar la blusa abierta de esta manera y colocamos la manga para unirla por el lateral, para ello unimos ambas marcas que hicimos.
We are going to place the blouse open in this way and place the sleeve to join it on the side, for this we join both marks we made.
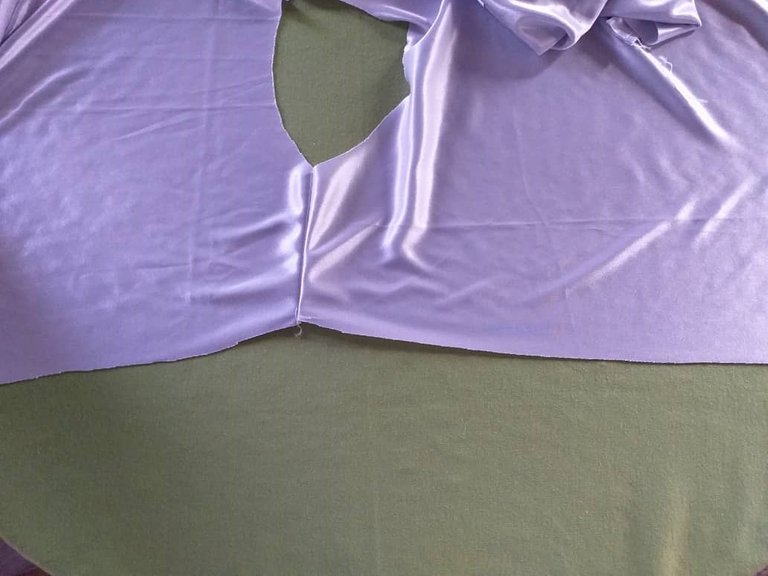
Luego vamos a ir uniendo la manga por todo el costado con unos alfileres antes de coser, vamos a unir la parte de la manga más corta para la parte delantera y la parte más larga para la parte trasera.
Then we are going to join the sleeve all along the side with some pins before sewing, we are going to join the shorter part of the sleeve for the front and the longer part for the back.
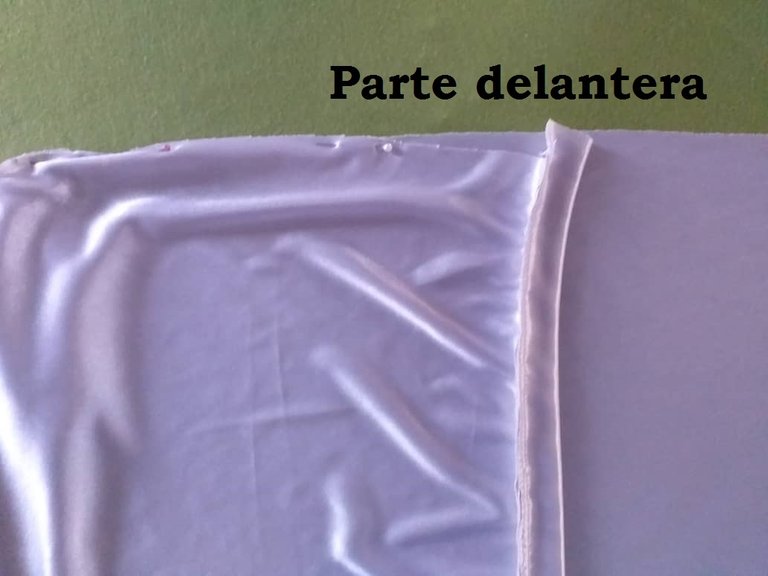

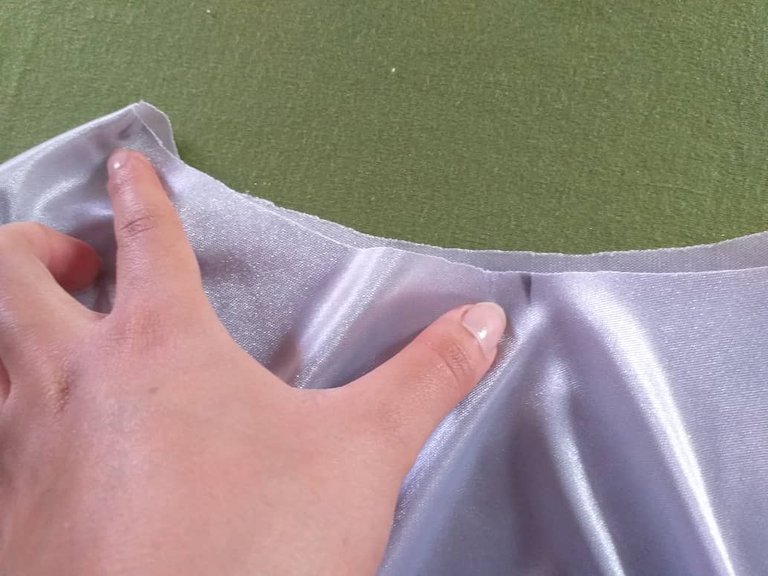
Pasamos costura, luego nos vamos a la parte delantera que nos debe quedar así.
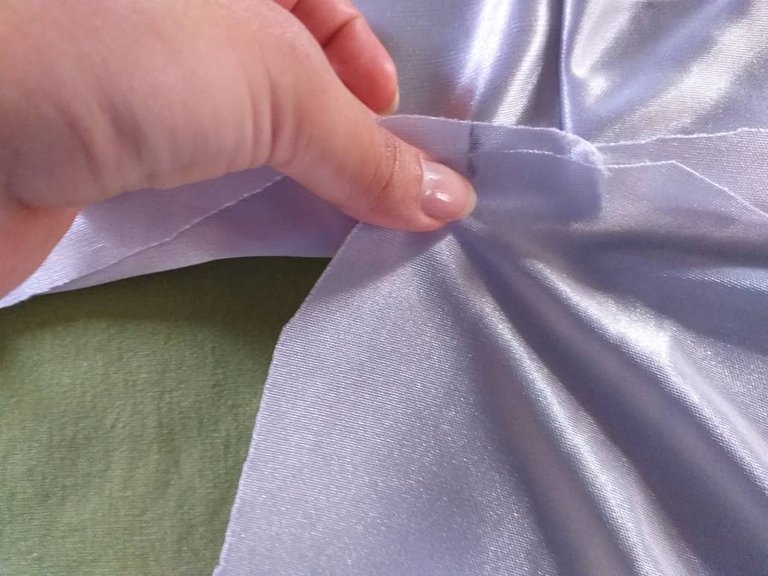
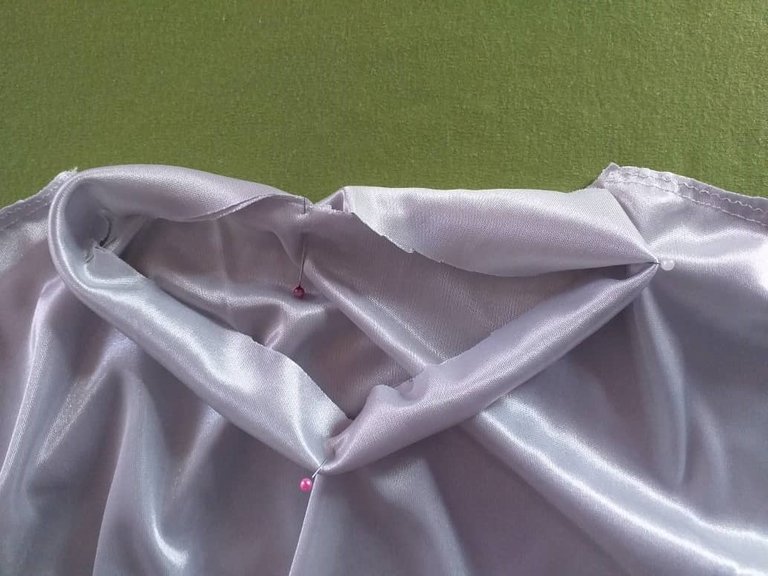
A esta le vamos a unir la otra esquina de la manga (con ruedo) sobreponiendo una con otra y unimos con la parte del lateral trasero de la blusa que nos falta unir.
We pass seam, then we go to the front part that should look like this.
To this we are going to join the other corner of the sleeve (with hem) overlapping one with the other and we join with the part of the back side of the blouse that we have not joined yet.
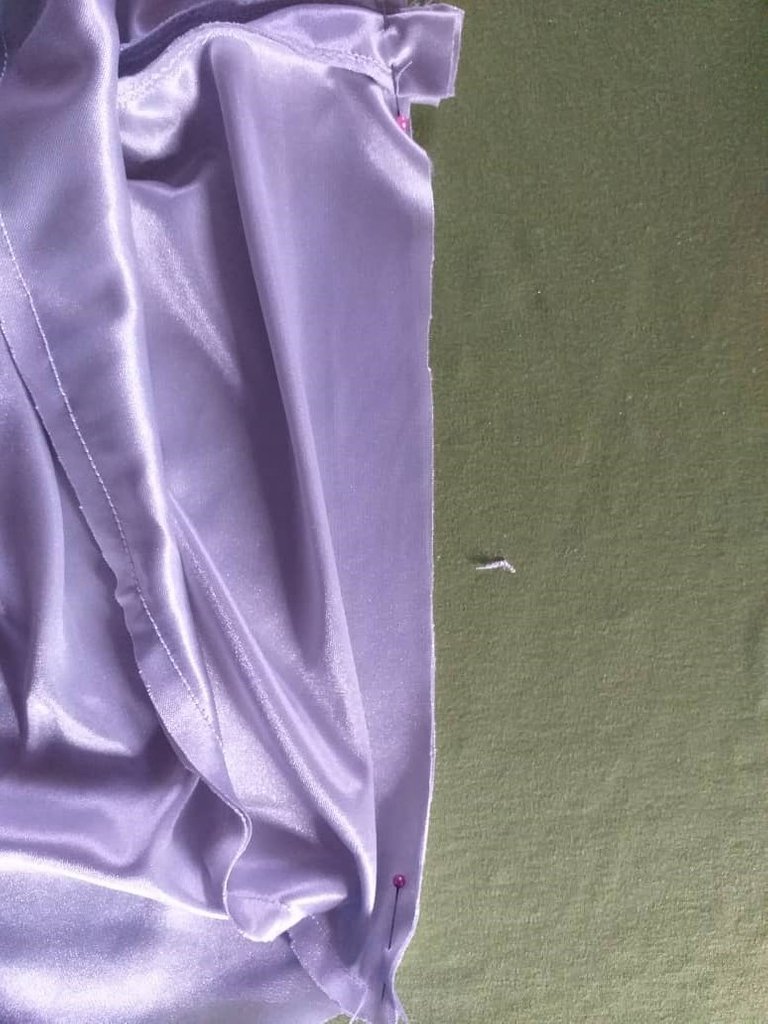
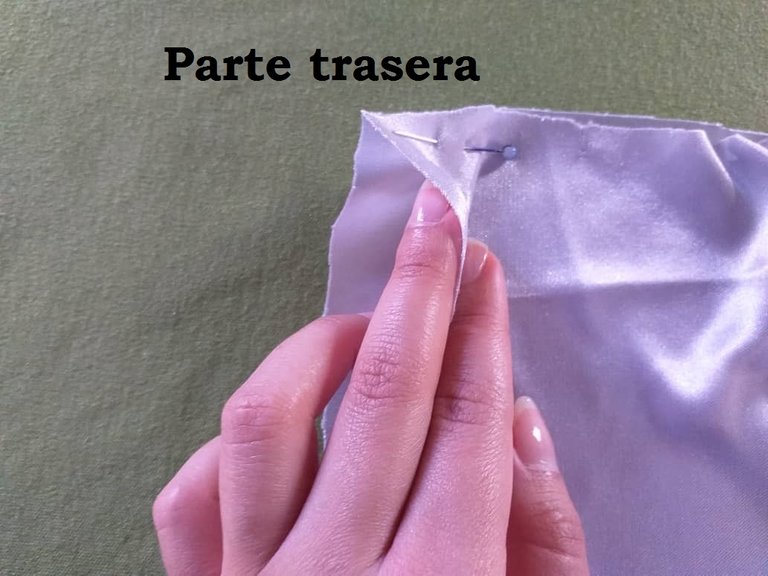
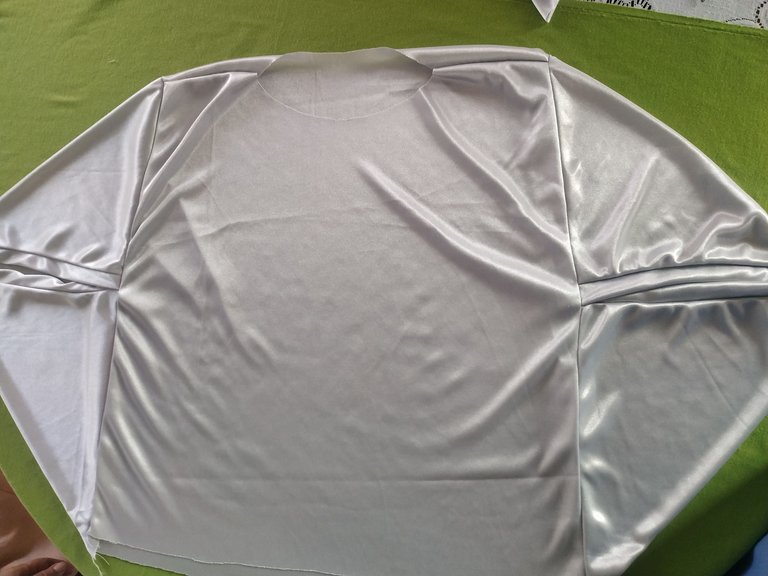
Así nos debe de ir quedando luego de coserla.
This is how it should look after sewing.
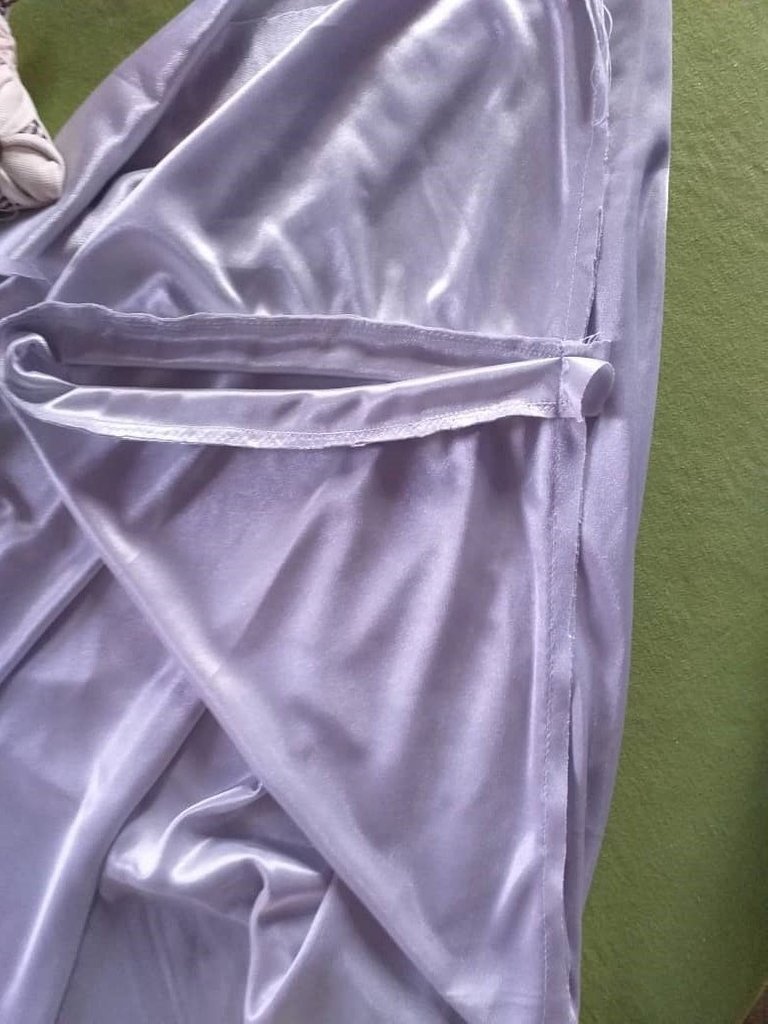
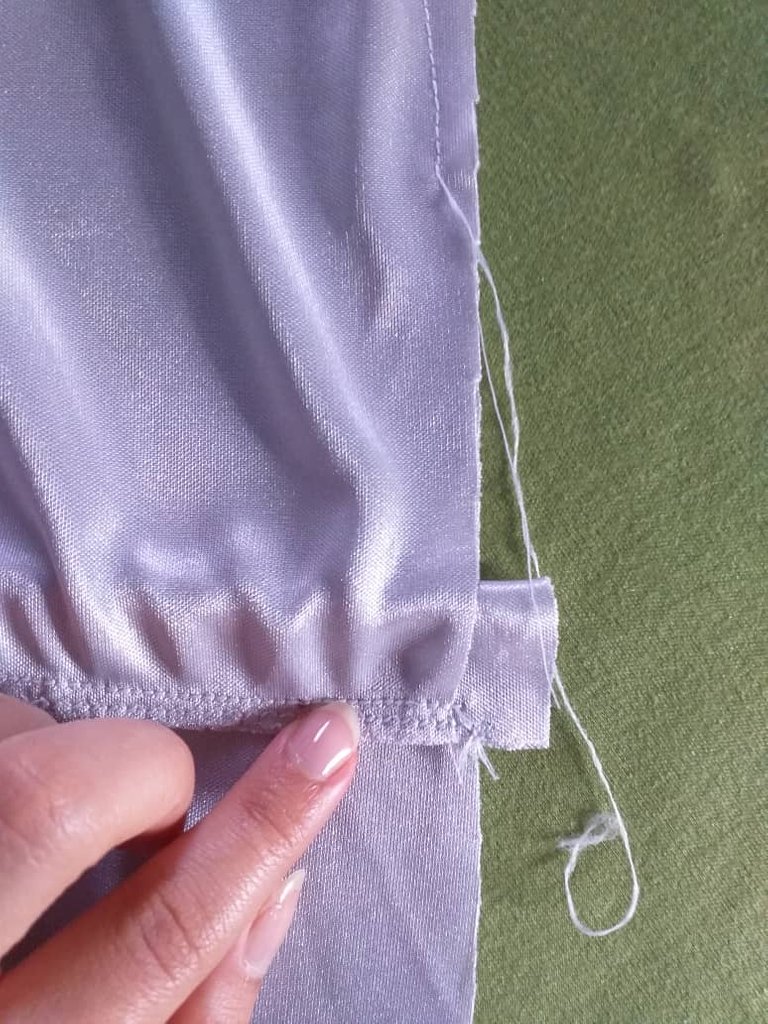
Repetimos el proceso con la otra manga.
Repeat the process with the other sleeve.
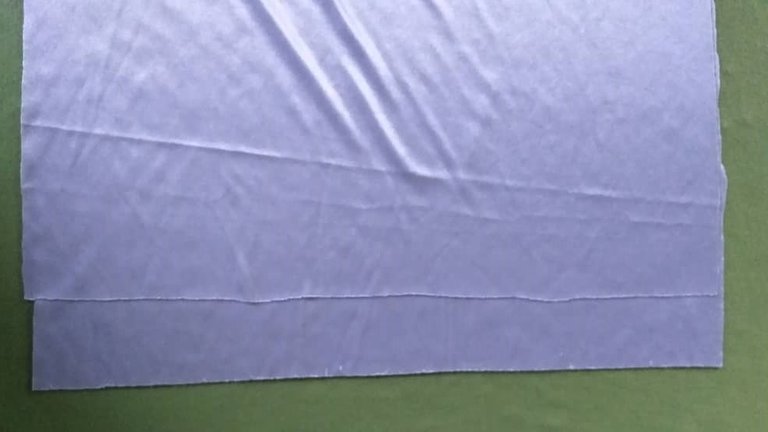
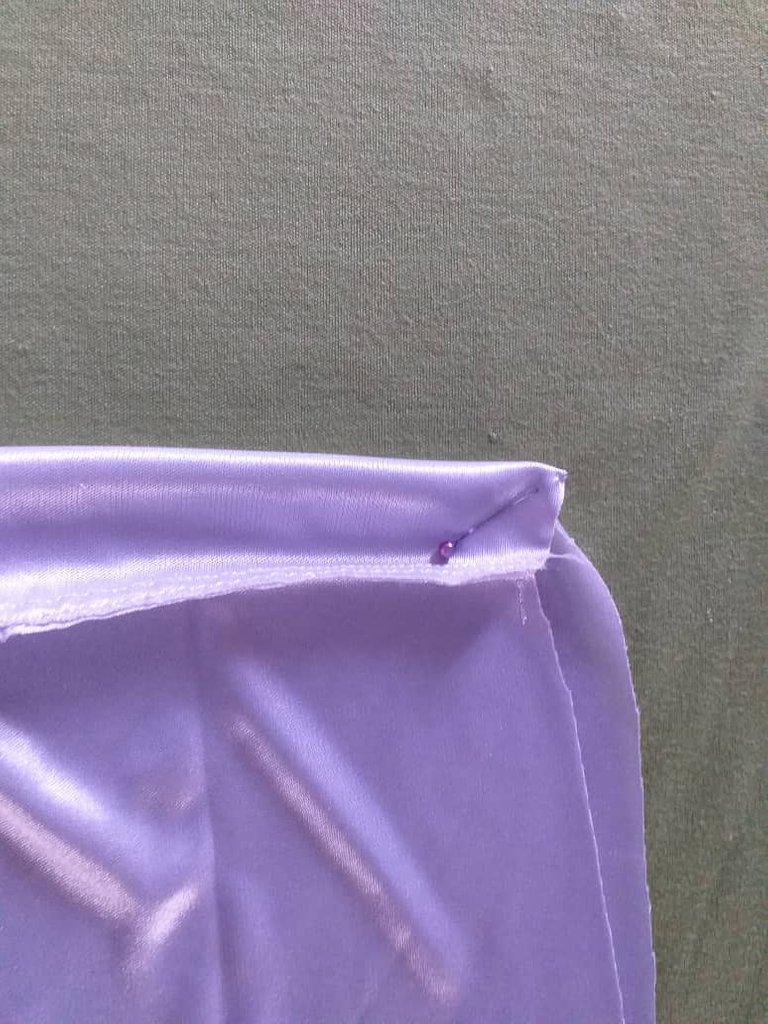
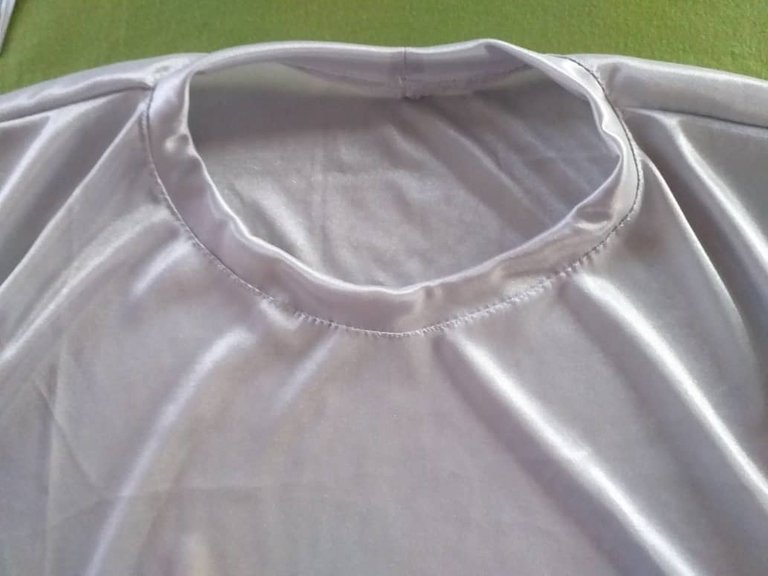
Recortamos otra tira de 5 cm de ancho para hacer el cuello, el largo va a depender de lo que mida el cuello de la camisa, así que debes de medirlo y sabrás el largo.
Doblamos esta tira a la mitad y acomodamos en el cuello de la blusa, debemos centrarlo colocando cuatro alfileres y tener cuidado de estirar de a medio centímetro mientras vamos pasando la costura recta.
Cut another 5 cm wide strip to make the collar, the length will depend on the length of the collar of the shirt, so you should measure it and you will know the length.
Fold this strip in half and place it on the collar of the blouse, we must center it by placing four pins and be careful to stretch half a centimeter while passing the straight seam.
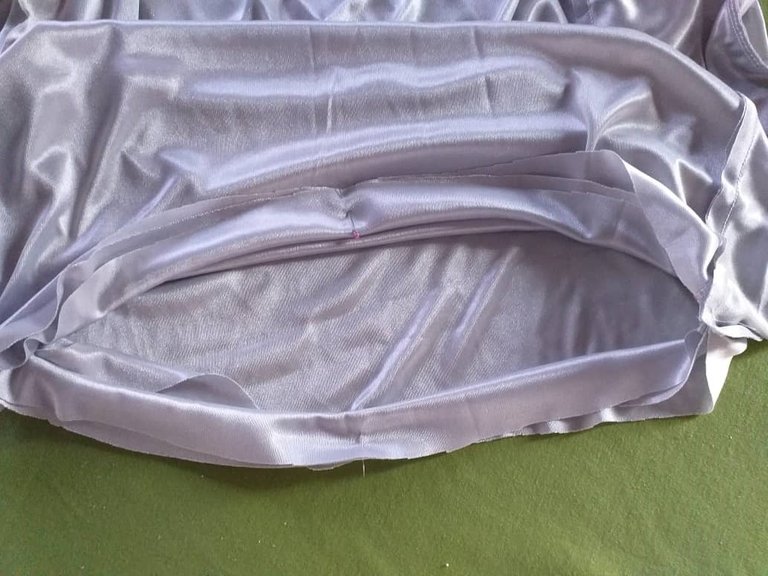
Para terminar nos falta hacer el acabado de la parte inferior de la blusa y puedes hacerle una costura simple o hacerle una cinturilla o fajón.
Yo le hice una cinturilla, así que recorte una tira de 7 cm de ancha por 98 cm y lo uní de la misma manera que hice con el cuello de la camisa.
Finally we need to finish the bottom of the blouse and you can make a simple seam or make a waistband or sash.
I made a waistband, so I cut a strip 7 cm wide by 98 cm and joined it in the same way I did with the collar of the shirt.
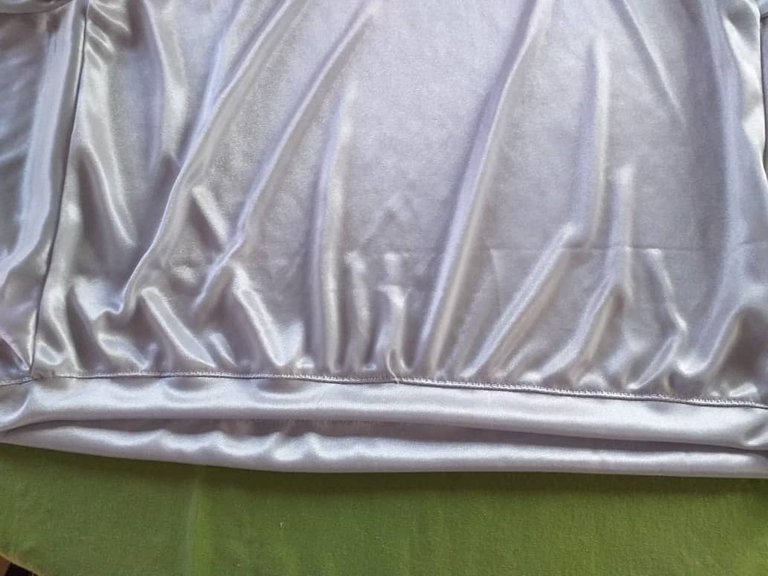
Coloque la prenda por el lado del revés y le uní la tira doblada a la mitad por todo el contorno con unos alfileres, luego lleve a la máquina de coser pasando costura doble y así me quedó.
I placed the garment inside out and attached the strip folded in half all the way around with pins, then I took it to the sewing machine with a double seam and that's how it looked.
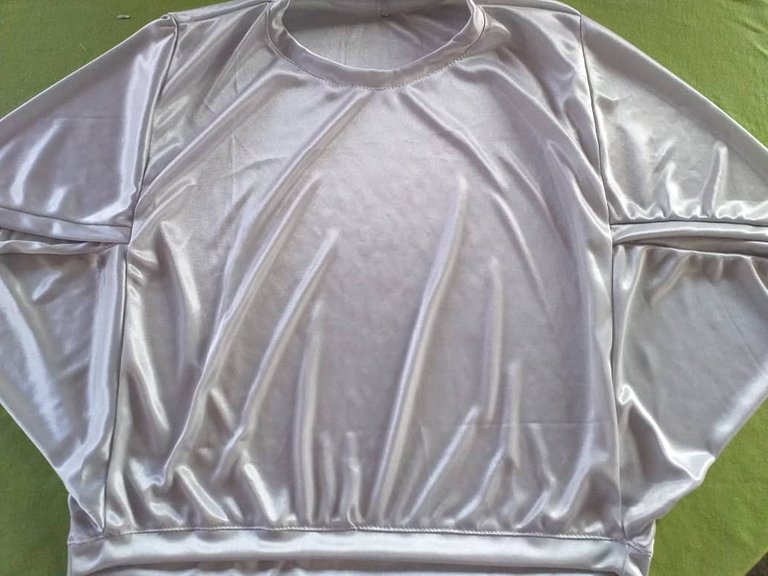
Con esto tendremos lista está linda blusa color plateada.
With this we will have ready this beautiful silver blouse.
Editado en Canva || Edited in Canva
Fotos tomadas de mi teléfono Xiaomi Redmi Note 6 Pro y mi teléfono Samsung J4 plus || Photos taken from my Xiaomi Redmi Note 6 Pro pone and my Samsung J4 plus phone.
Fuente del editor de imágenes || Image editor source
https://twitter.com/Mavis166/status/1556806578103324672
The rewards earned on this comment will go directly to the people sharing the post on Twitter as long as they are registered with @poshtoken. Sign up at https://hiveposh.com.
@gabimramirez que hermosa quedó esta blusa, me la voy a copiar gracias por compartirla
Muchas gracias Gladymar ❤️
Excelente trabajo 👌 este corté de mangas es muy diferente y único, gracias por compartir ☺️
Hola, muchas gracias. Si, es un corte muy diferente y el resultado me gustó mucho.
Qué buen diseño!! Las formas de las mangas se ven muy originales. Te felicito por este trabajo❤
Hola, muchas gracias por tu comentario ❤️