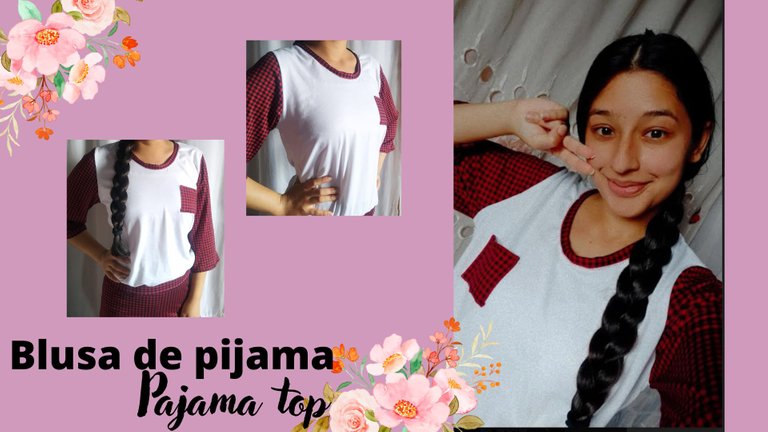
Blusa de pijama || Pajama top
Feliz inicio de semana para todos, hoy lunes les traigo el paso a paso de cómo elaborar una hermosa blusa de pijama que realice utilizando los retazos de tela que me sobraron del pantalón que hice la semana pasada.
Esta es una manera de utilizar tela sobrante y además combinar y armar la pijama completa.
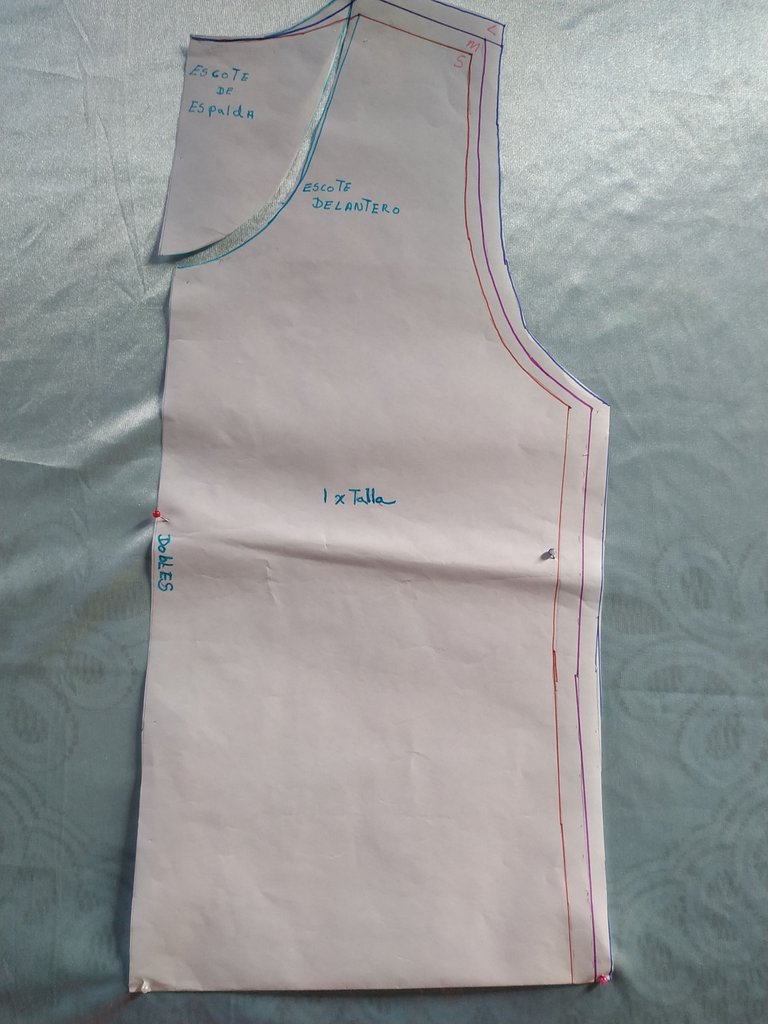
Esta prenda es sencilla de elaborar y utilizaremos dos moldes que les dejaré más adelante.
Happy start of the week to everyone, today Monday I bring you the step by step of how to make a beautiful pajama top that I made using the scraps of fabric that I had left over from the pants I made last week.
This is a way to use leftover fabric and also to combine and assemble the complete pajamas.
This garment is easy to make and we will use two patterns that I will leave you later.
Editado en Canva || Edited in canva

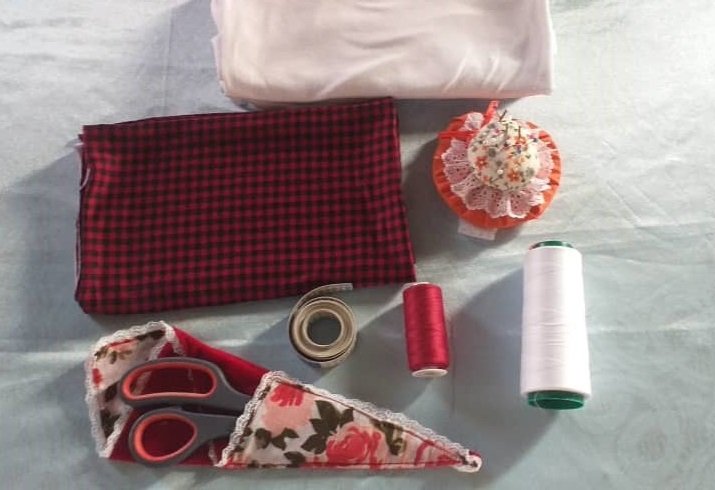
- Tela de algodón Micro 180.
- Hilos.
- Tijeras.
- Alfileres.
- Cinta métrica.
- Moldes.
- Micro 180 cotton fabric.
- Threads.
- Scissors.
- Pins.
- Measuring tape.
- Molds.

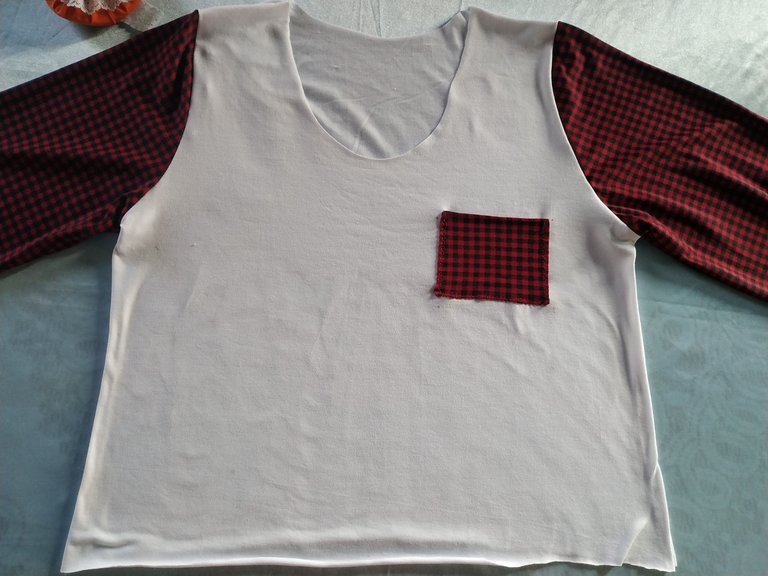
Para este proyecto utilicé dos telas de algodón de diferentes colores, una blanca para hacer la parte delantera y trasera, y la otra de cuadros rojos que como les comenté son los retazos del pantalón que les compartí la semana pasada; Esta tela nos servirá para hacer las mangas, cuello, bolsillo y una cinturilla.
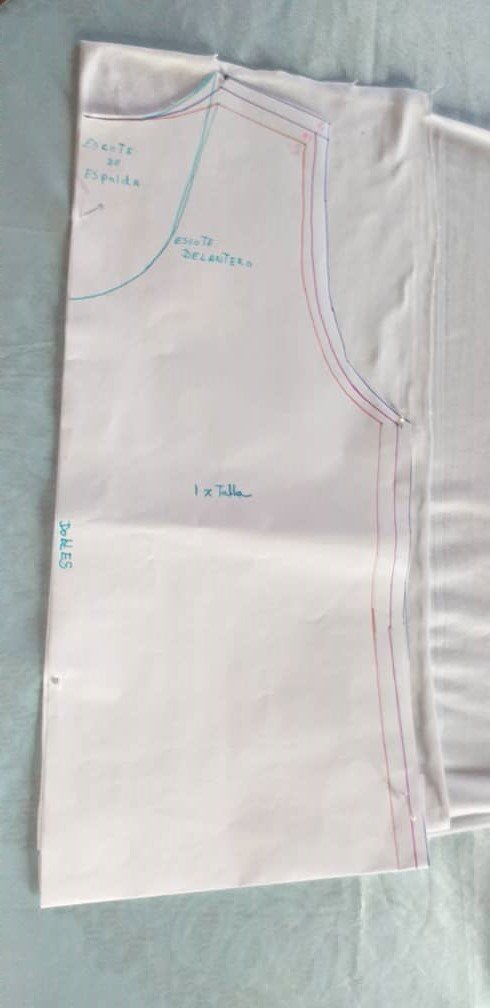
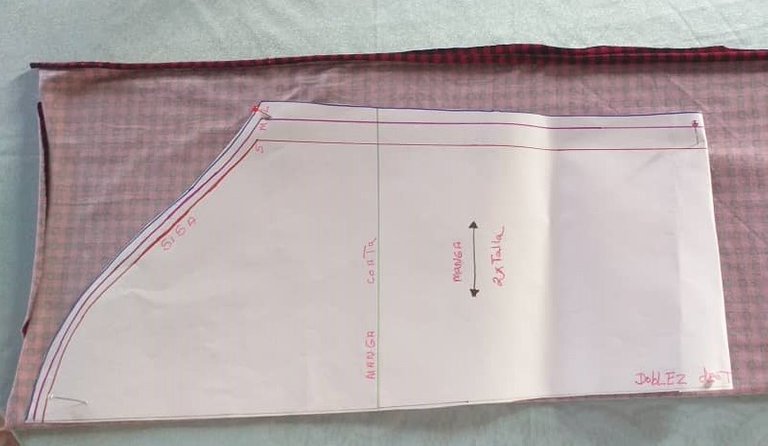
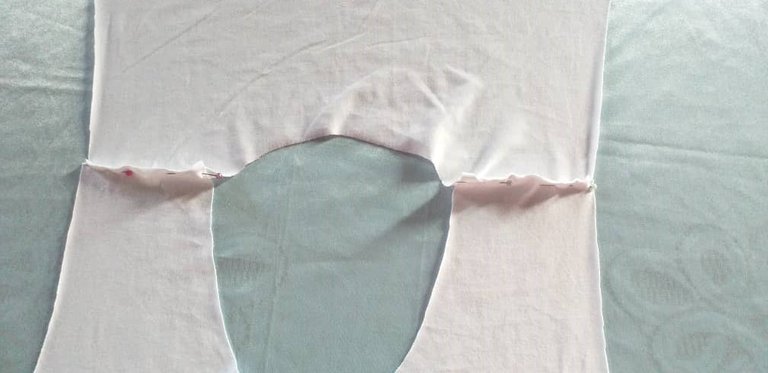
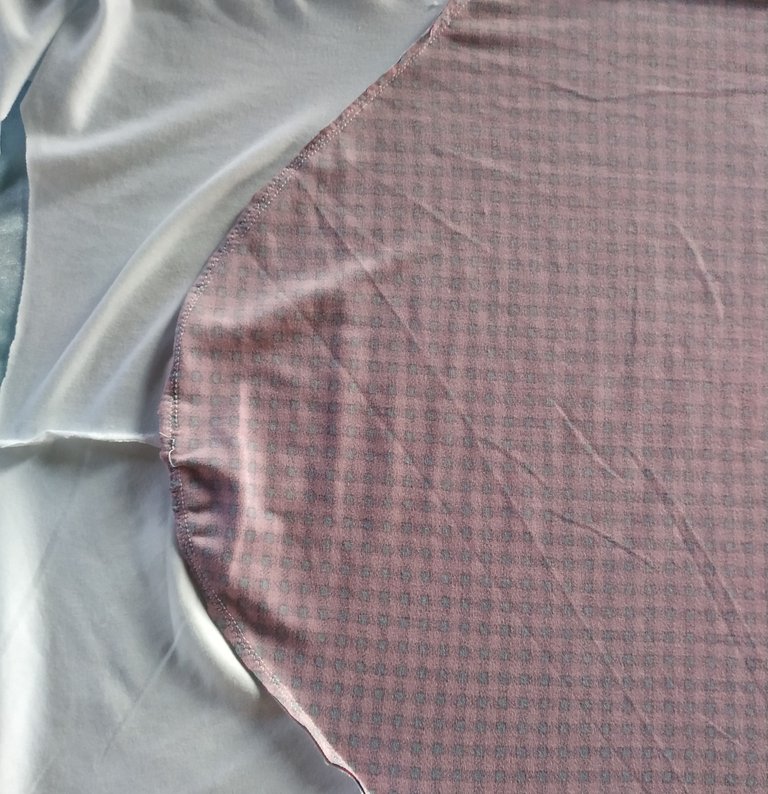
Colocamos la tela blanca en una superficie plana y colocamos sobre ella el molde, respetando la parte que dice doblez. Con el mismo molde hacemos la parte delantera recortando la parte del escote de espalda.
For this project I used two cotton fabrics of different colors, one white to make the front and back, and the other in red plaid, which as I told you are the remnants of the pants I shared with you last week; This fabric will be used to make the sleeves, collar, pocket and a waistband.
We place the white fabric on a flat surface and place the mold on it, respecting the part that says fold. With the same mold we make the front part cutting out the back neckline.
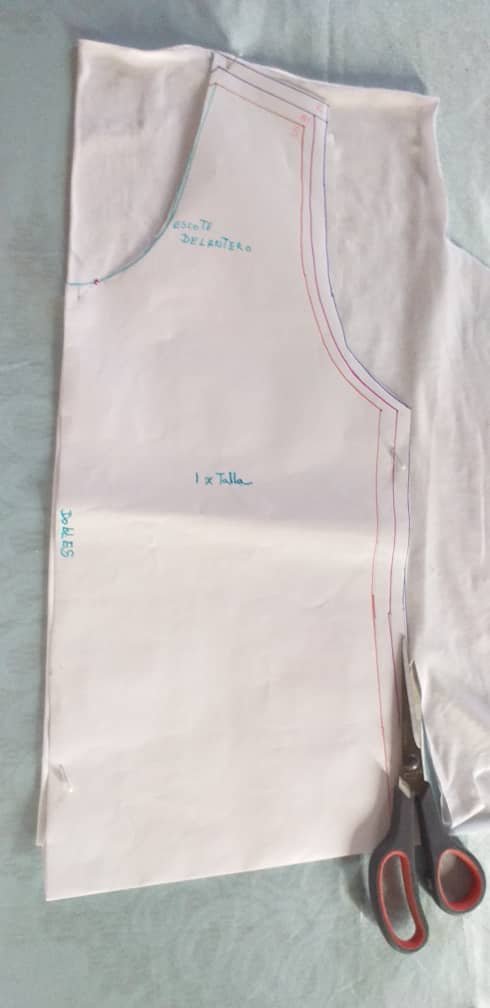
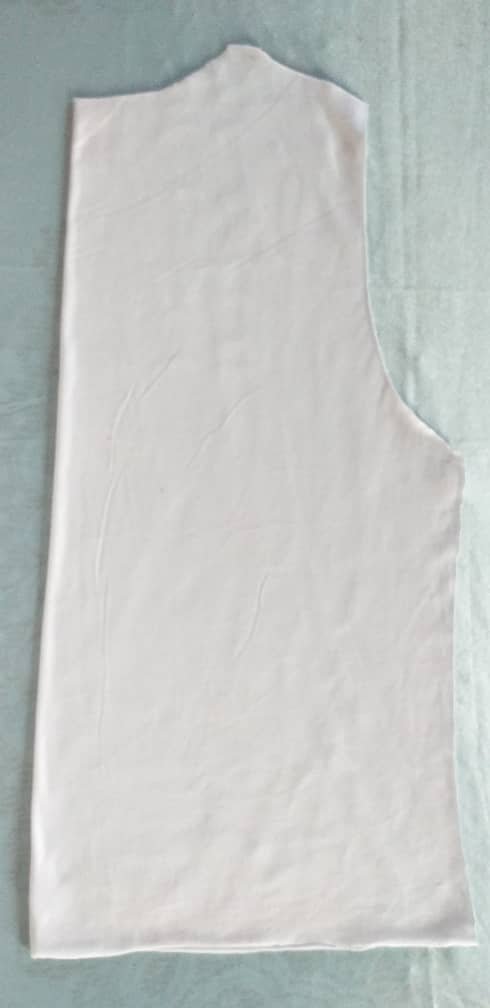
Recortamos por todo el contorno de las piezas y así nos debe de quedar.
We cut around the contour of the pieces and this is how it should look like.
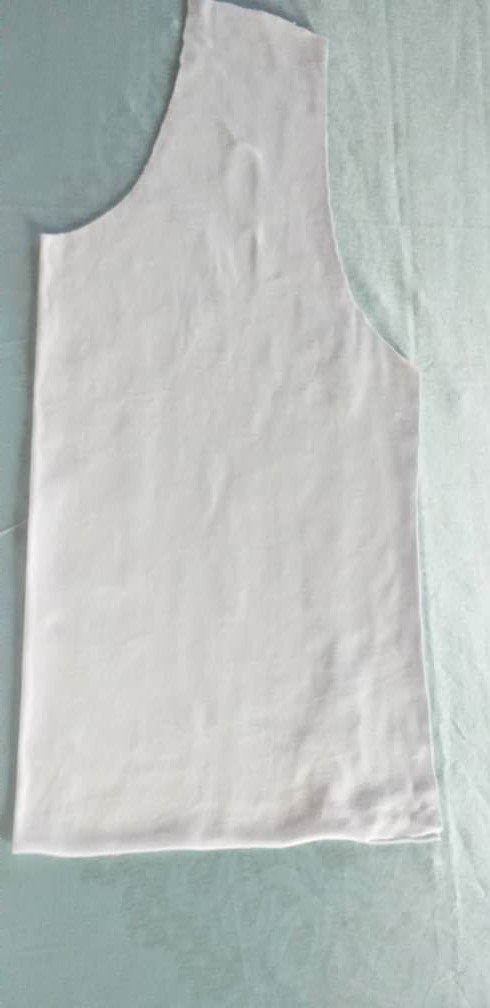
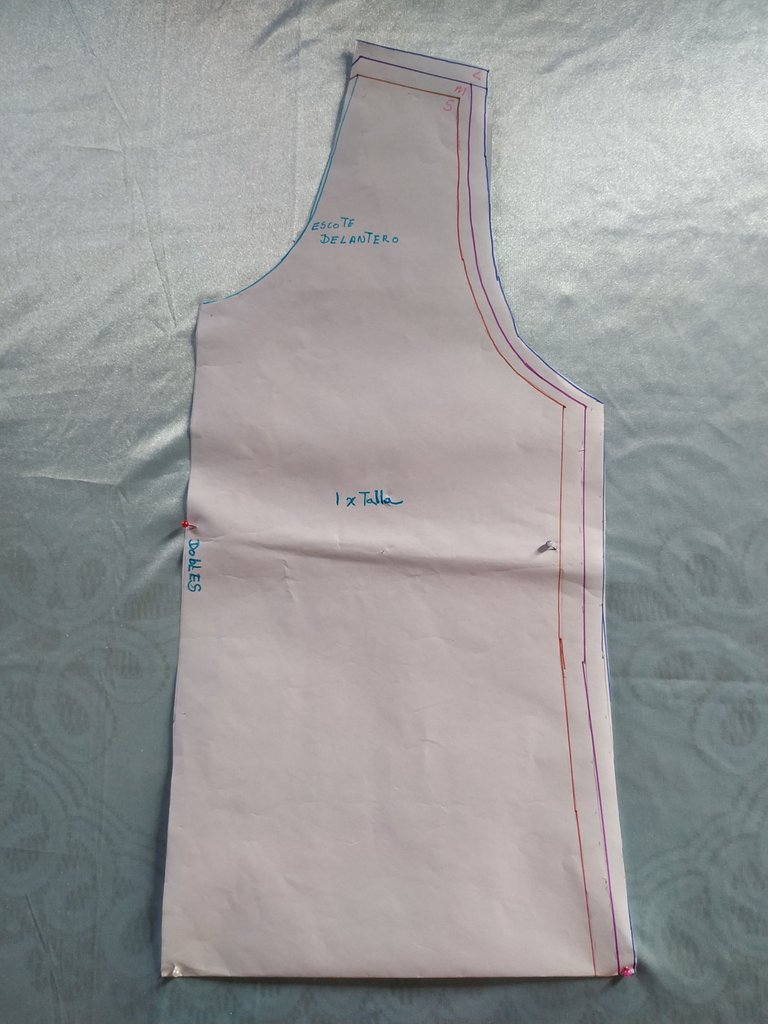
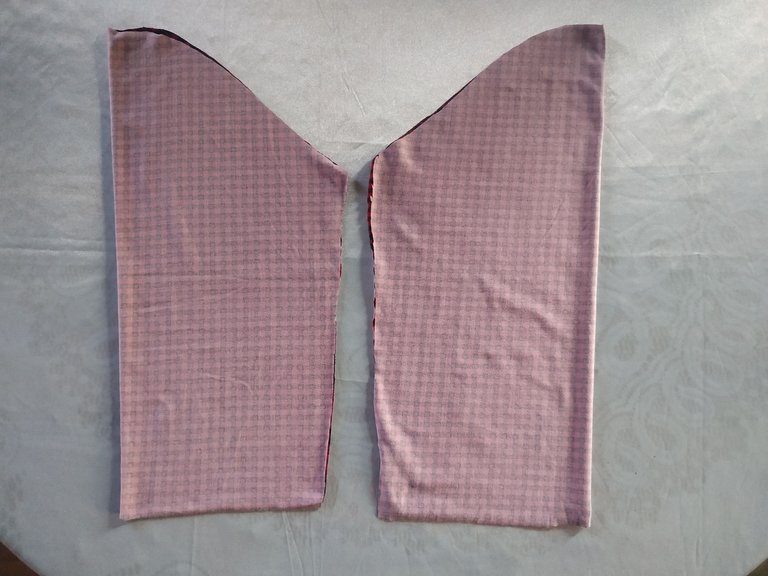
Hacemos lo mismo con las mangas.
We do the same with the sleeves.
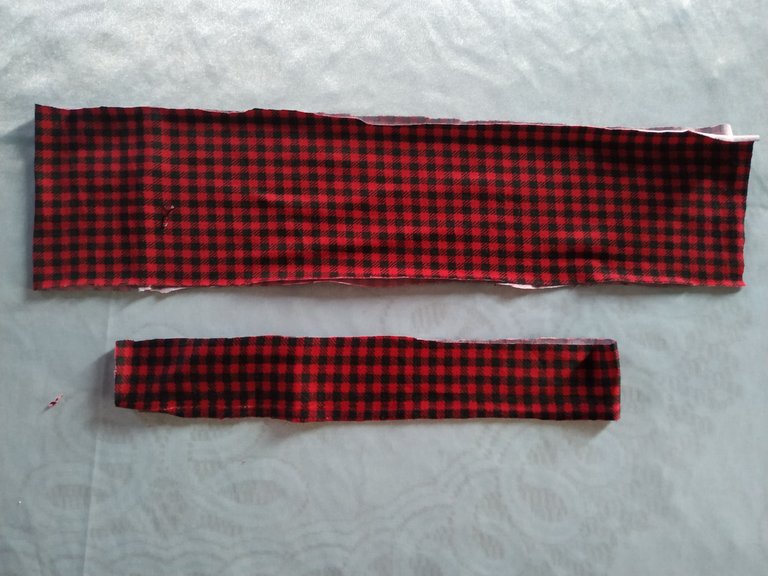
Ahora con la tela roja hacemos dos tiras, una de 4 centímetros de ancho por lo que mida el cuello. Y la otra de 6 cm de ancho por el largo de la cintura.
Now with the red fabric we make two strips, one of 4 cm wide for the length of the neck. And the other 6 cm wide for the length of the waist.
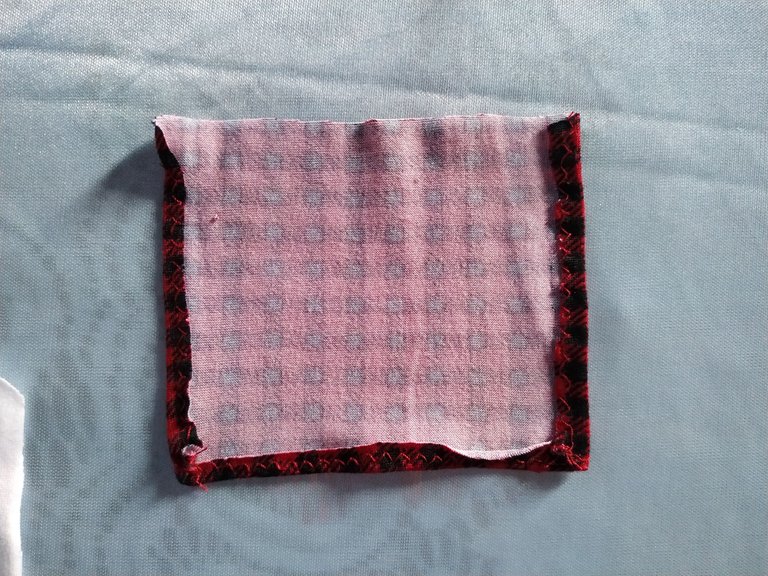
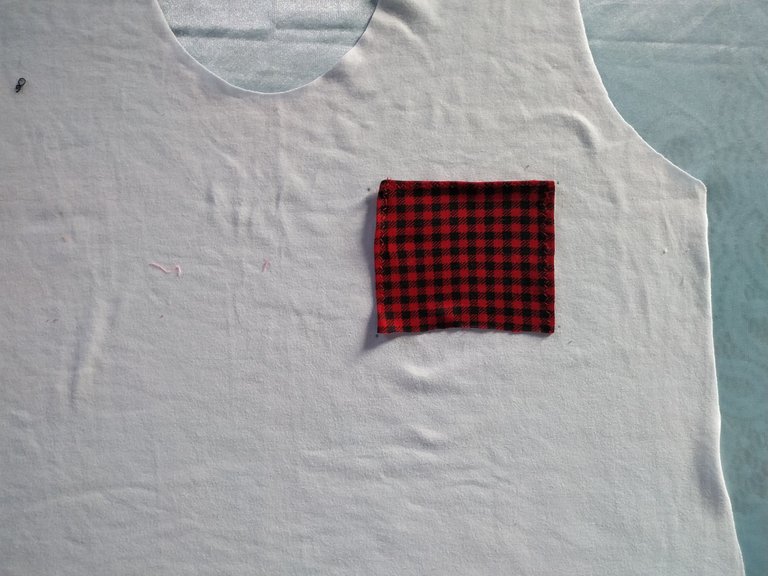
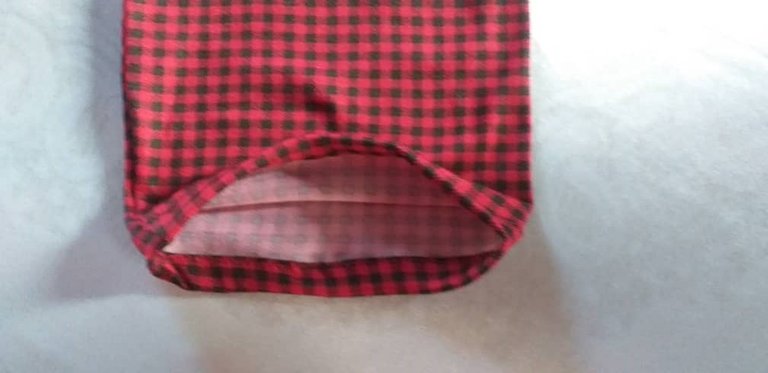
Luego recortamos de lo que nos queda de tela un cuadrado de 7 x 7 centímetros y lo cosemos por los lados. Acomodamos en la parte delantera de la blusa y cosemos.
Then we cut out a square of 7 x 7 centimeters from the remaining fabric and sew it along the sides. Place on the front of the blouse and sew.
Teniendo esto listo unimos los hombros de la parte delantera de la blusa con la parte trasera.
Having this ready we join the shoulders of the front part of the blouse with the back part.

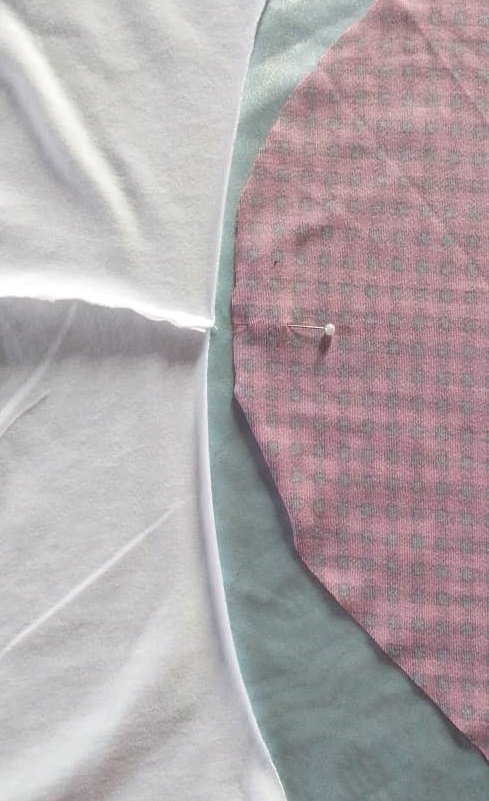
Luego le vamos a unir la manga, así que la colocamos de esta manera, tratando de que coincida el centro de la manga con la unión que acabamos de hacer de ambas piezas.
Then we are going to join the sleeve, so we place it in this way, trying to match the center of the sleeve with the union we have just made of both pieces.
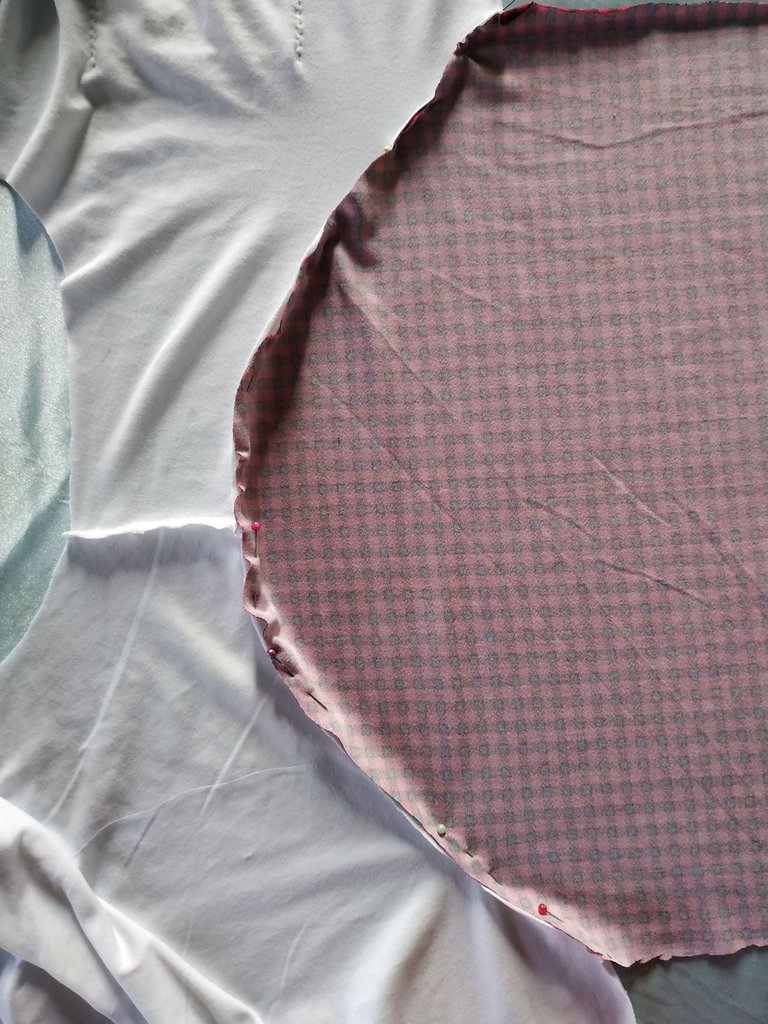
Repetimos el proceso con la otra manga y luego pasamos costura por los laterales y las mangas.
Repeat the process with the other sleeve and then sew through the sides and sleeves.

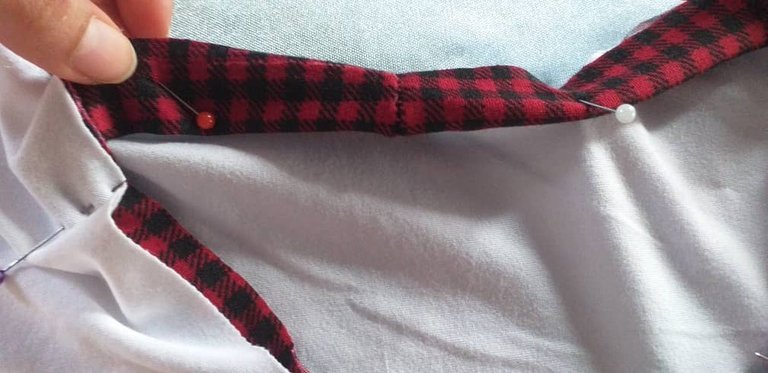
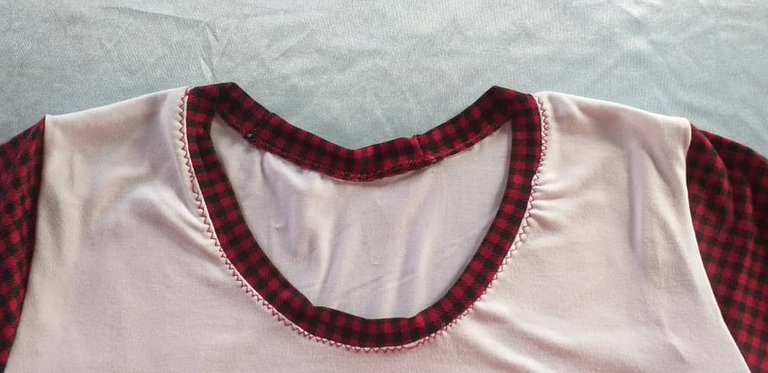
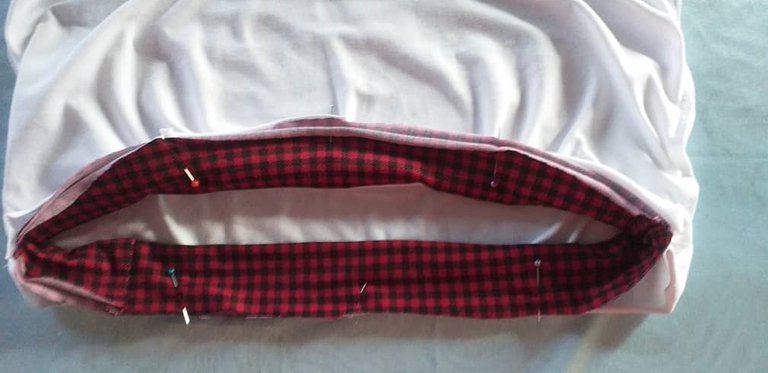
Comenzamos a elaborar el cuello así que tomamos la tira que hicimos y la doblamos a la mitad, la unimos por todo el contorno del cuello de la blusa ayudándonos con unos alfileres y asegurándonos de que quede bien fijo antes de pasar costura.
We begin to make the collar, so we take the strip we made and fold it in half, we join it all around the neck of the blouse with the help of some pins and making sure that it is well fixed before sewing.
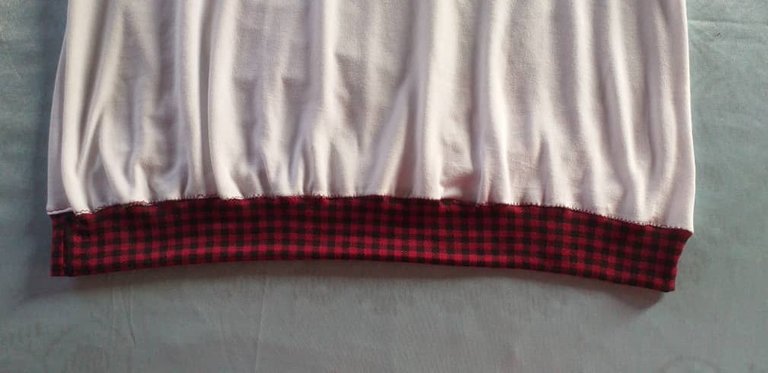
Hacemos lo mismo con la cinturilla o tira de cintura, a esta le vamos a quitar 3 centímetros de largo para que nos queden unas ondas.
Centramos con unos alfileres y cosemos.
We do the same with the waistband or waistband strip, we are going to remove 3 centimeters of length so that we have some waves.
Center with pins and sew.
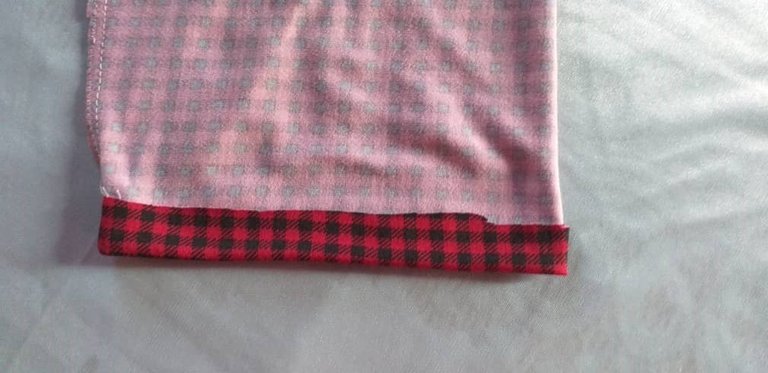
Por último le hacemos el dobladillo a las mangas, doblamos dos veces y pasamos costura.
Finally, we hem the sleeves, fold twice and sew the seam allowance.
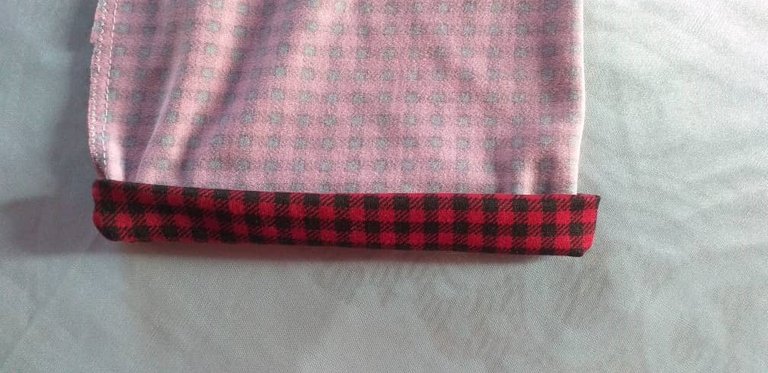
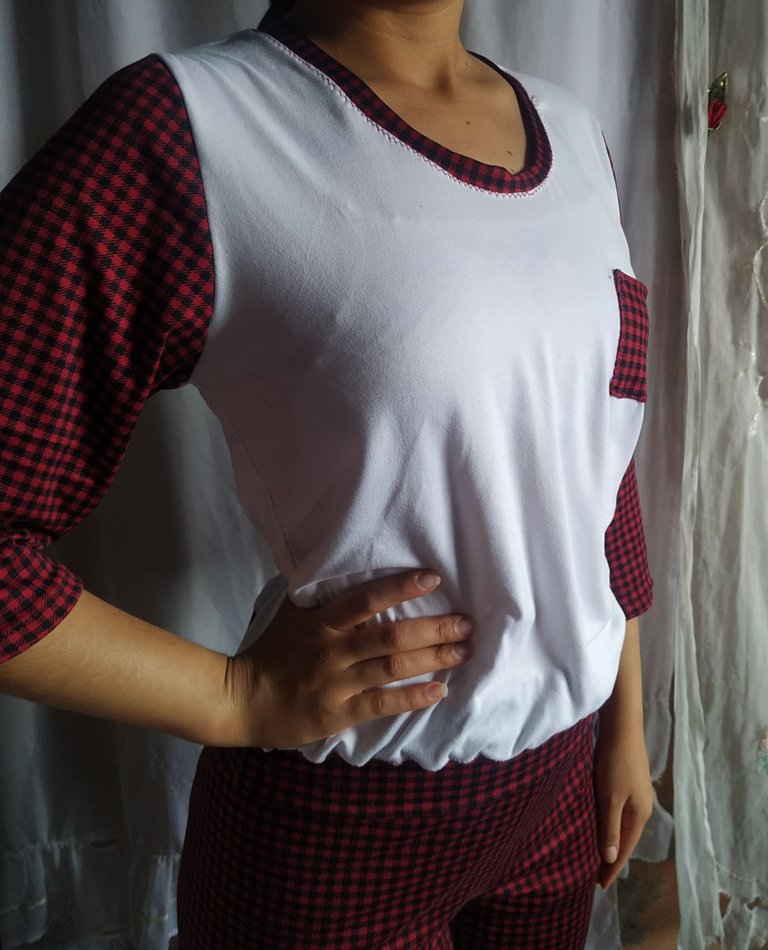
Cortamos los hilos y telas sobrantes y con esto tendríamos lista esta hermosa blusa con manga ¾ de pijama.
We cut the leftover threads and fabrics and with this we would have ready this beautiful blouse with ¾ sleeve pajama top.
Editado en Canva || Edited in canva
Fotos tomadas de mi teléfono Xiaomi Redmi Note 6 Pro y mi teléfono Samsung J4 plus || Photos taken from my Xiaomi Redmi Note 6 Pro pone and my Samsung J4 plus phone.
Fuente del editor de imágenes || Image editor source
https://twitter.com/genicedelvalle1/status/1566941507822796807
https://twitter.com/EstBridge/status/1567646542118670337
The rewards earned on this comment will go directly to the people( @solips ) sharing the post on Twitter as long as they are registered with @poshtoken. Sign up at https://hiveposh.com.
Excelente @gabimramirez te quedó muy comercial.
Saludos y un abrazo 🤗🤗
Hola Yenny, muchas gracias.
Mi amiga Gaby esta pijama está de catalogo, excelente
Hola amiga muchas gracias, saludos.
Hola Gabi, que elegancia este pijama. La combinación de las telas quedó muy bien, ahora tenes un conjunto completo con un diseño bien pensado. Te felicito ❤️.
Hola Laura muchas gracias ❤️
Congratulations @gabimramirez! You have completed the following achievement on the Hive blockchain and have been rewarded with new badge(s):
Your next target is to reach 900 upvotes.
You can view your badges on your board and compare yourself to others in the Ranking
If you no longer want to receive notifications, reply to this comment with the word
STOPCheck out the last post from @hivebuzz:
Support the HiveBuzz project. Vote for our proposal!
Great tutorial the pajama top look so beautiful, thanks for share this with us I love it