Caja decorativa con materiales de reciclaje [ESP - ENG]

¿Cómo están amigos de Hive? Feliz jueves para todos.
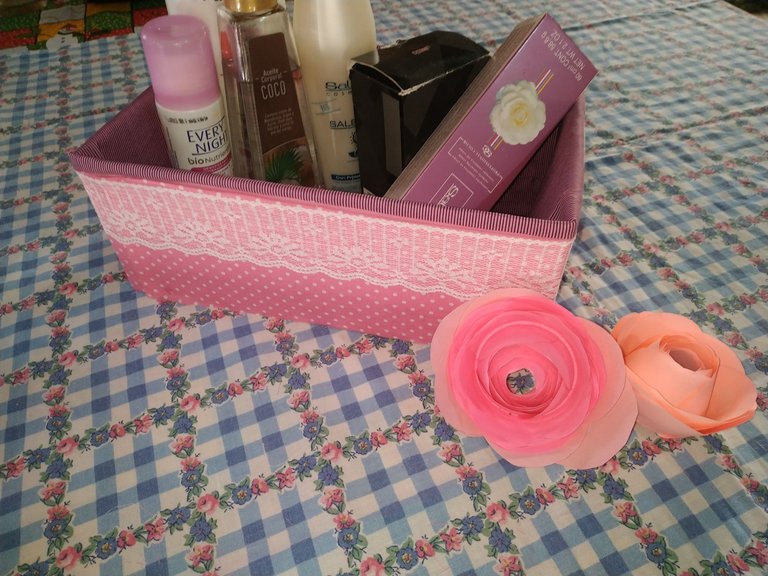
El día de hoy quiero compartirles una manualidad que me encantó hacer; Se trata de una bella caja decorativa que elaboré a partir de materiales de reciclaje, es decir utlicé una caja de zapatos como base, asi como retazos de telas de proyectos anteriores.
Esta pequeña caja la hice para portar todos mis productos personales y que se vean de una manera muy bonita y organizada. El resultado fue mejor de lo esperado, ya que al colocar todos mis productos se veía increible y de verdad se notó el cambio en mi mesa de noche.
A continuación, les presentó el paso a paso junto a todos los materiales que necesitan para elaborarla. Sin embargo,recuerden que toda manualidad que realices debes de colocarle tu sello personal, el que marca la diferencia, asi que espero les sirva este tutorial de base para que hagan su propio proyecto y coloquen toda su imaginación en ello.

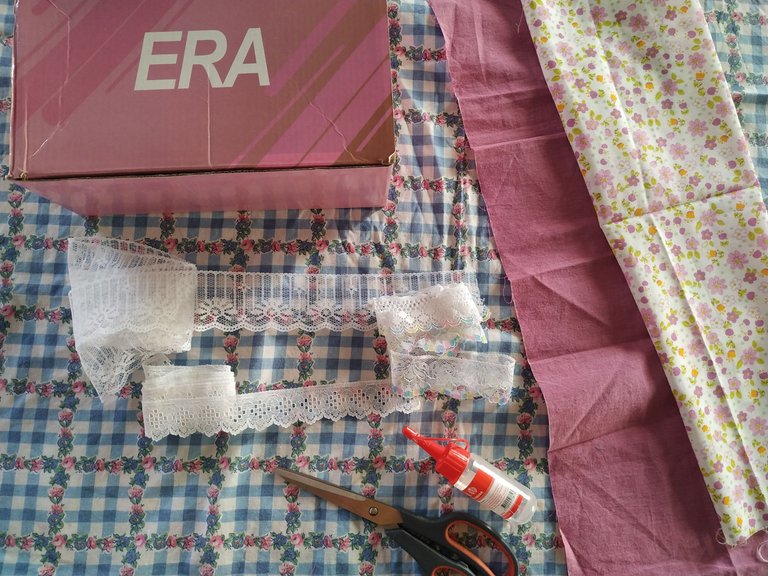
- Caja de zapatos.
- Retazos de telas rígidas.
- Encaje rígido.
- Silicón frío.
- Tijeras.

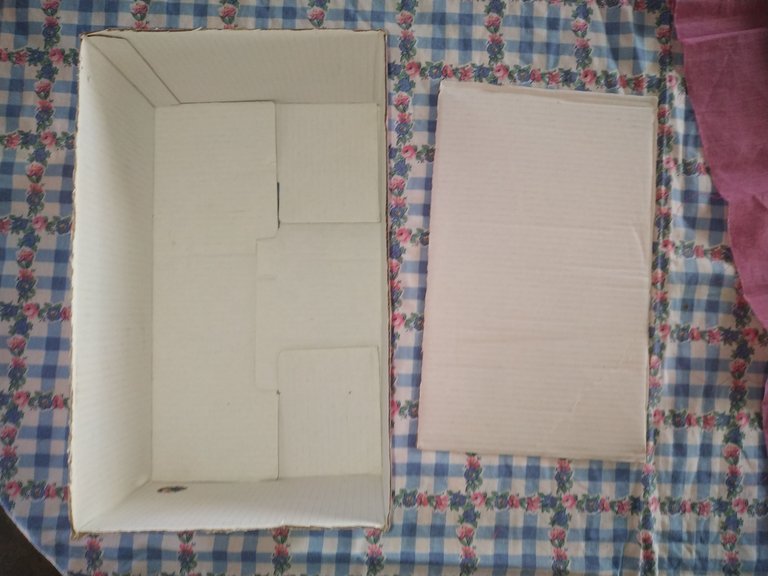
Como primer paso debemos tomar la caja de zapatos y quitarle la tapa y las solapas de los laterales. Cuando lo hagamos podemos empezar a forrar con la tela.
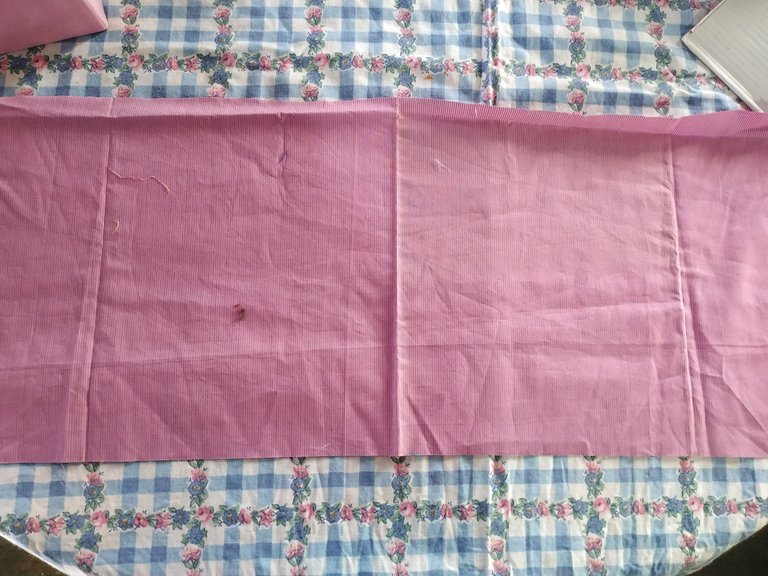
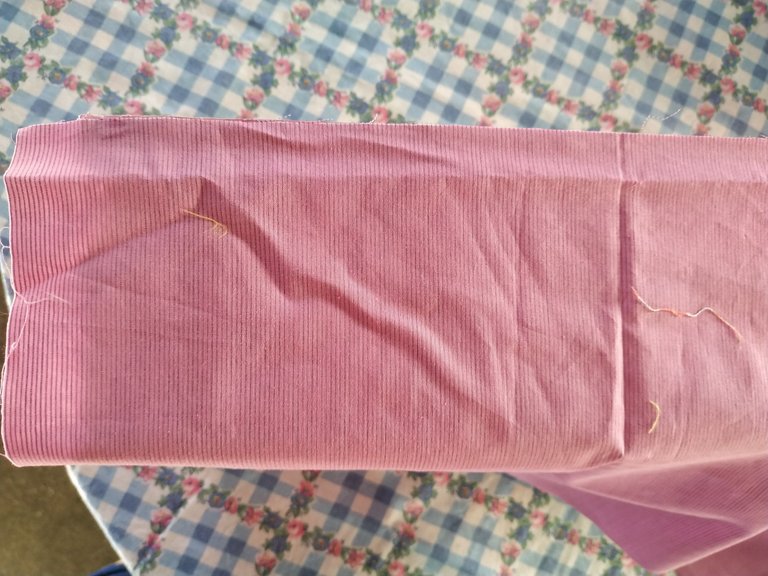
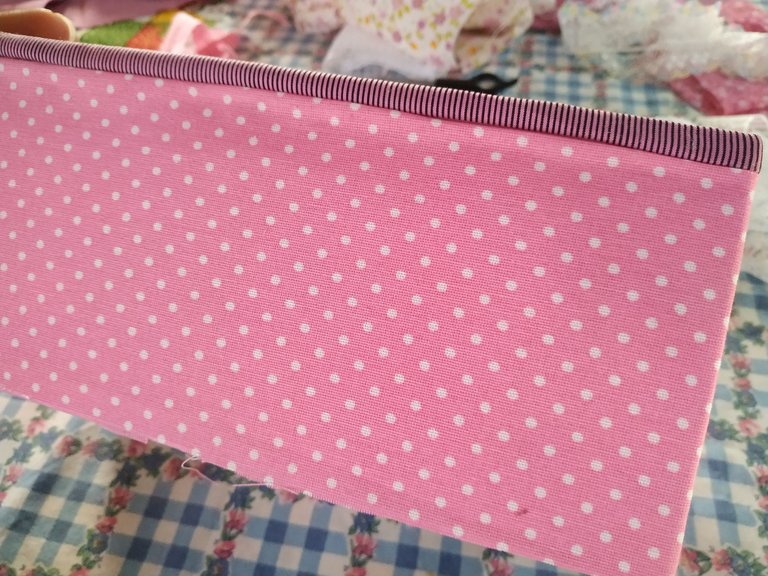
Vamos a tomar uno de los retazos de tela y los cortamos en una tira lo suficientemente larga para cubrir todo el contorno de la caja y del ancho necesario. Por mi parte, yo lo deje de 15cm de ancho.
Por todo el contorno vamos a colocar silicón frio y pegamos la tela por el lado posterior de la tela (el revés).
Damos vuelta a la tela y así quedará.
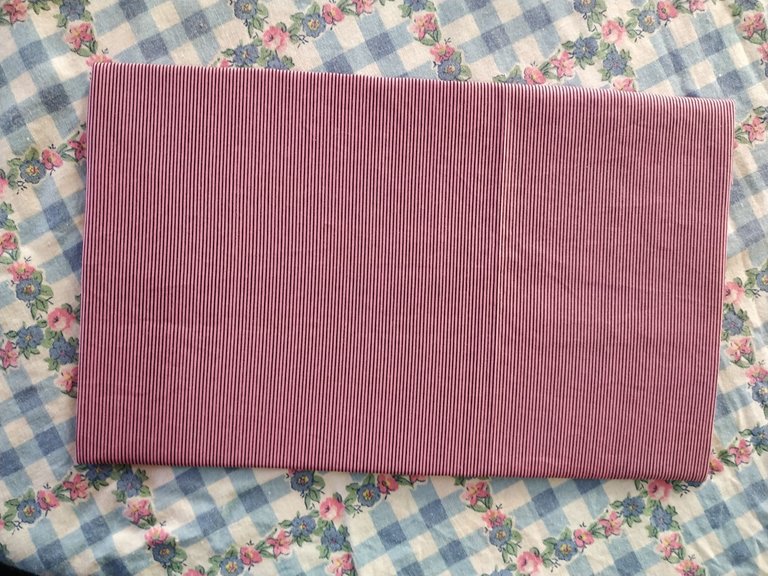
Vamos a recortar las solapas de la tapa de la caja para que nos quede un rectángulo. El mismo lo vamos a forrar con la misma tela color rosada.
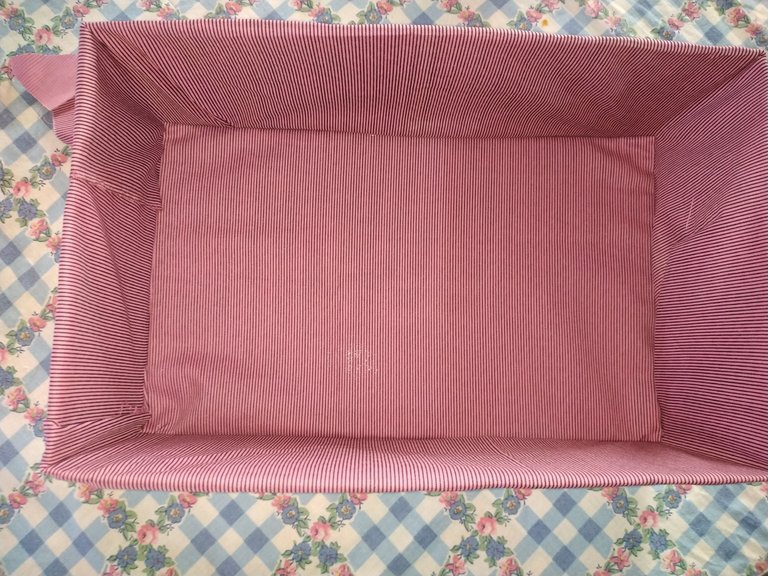
Ahora, debemos colocar la tela muy bien de manera que al introducir en rectángulo que acabamos de forrar quede muy bien presionada y el contorno con buen acabado.

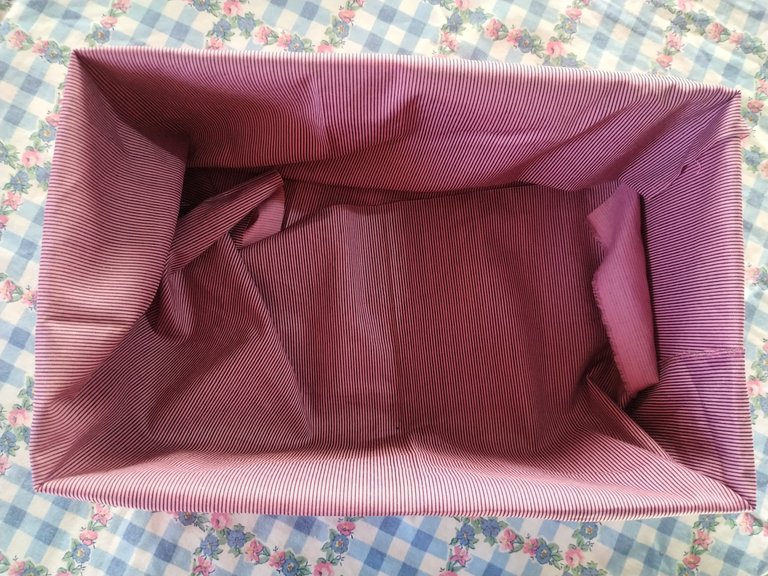
Continuamos forrando con otra tela por los laterales, igualmente pegamos con ayuda del silicón.
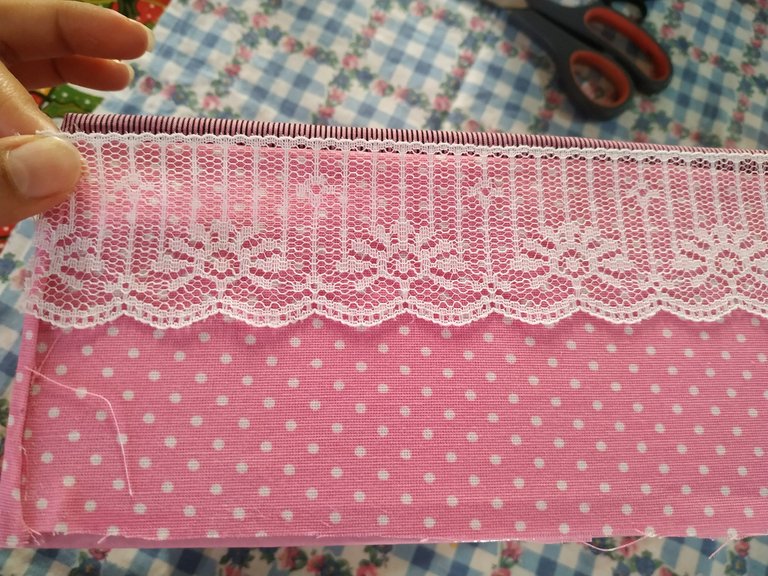
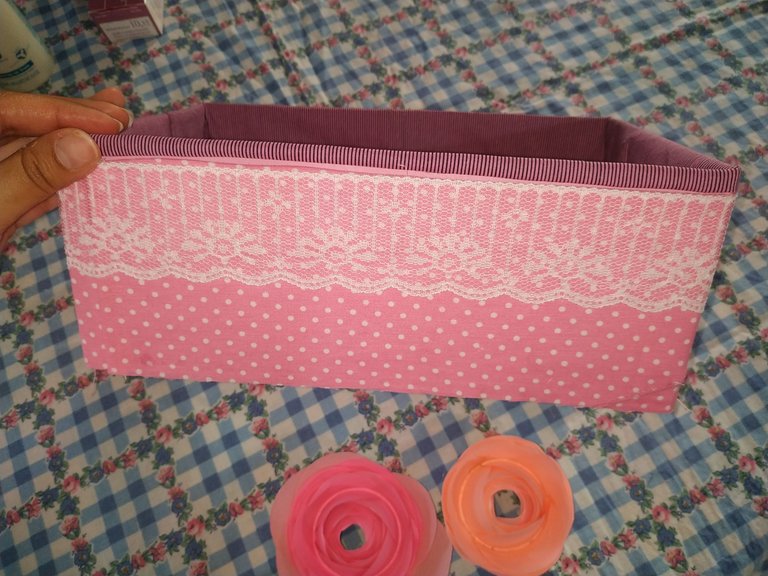
Para que quede mucho mejor vamos a adherir encaje rígido color blanco de 5 cm de ancho, para ello solo colocaremos el silicón en cada esquina de la caja para que no afecte el diseño del encaje. Este me parece un toque muy bonito que eleva mucho el diseño de la caja, ya que pienso que el encaje es un material muy elegante que se usa desde hace muchisimo tiempo y al combinarlo con el lindo color rosa de fondo, queda muy bien.
Al terminar de pegar todo el encaje, finalizamos este proyecto.
A gusto personal, pueden agregarle algunas decoraciones varias como perlas o cintas.
Espero les haya gustado y me gustaría saber en los comentarios que opinan de mi publicación del día de hoy. Como siempre les deseo que tengan un feliz día y noche.

How are you Hive friends? Happy Thursday to all of you.
Today I want to share with you a craft that I loved to do; It is a beautiful decorative box that I made from recycled materials, that is to say I used a shoe box as a base, as well as fabric scraps from previous projects.
I made this small box to carry all my personal products and make them look very nice and organized. The result was better than expected, because when I placed all my products it looked amazing and I really noticed the change in my nightstand.
Here is the step-by-step along with all the materials you need to make it. However, remember that every craft you do you must put your personal stamp, which makes the difference, so I hope this tutorial will serve as a basis for you to make your own project and put all your imagination into it.
- Shoe box.
- Pieces of rigid fabrics.
- Rigid lace.
- Cold silicone.
- Scissors.
As a first step we must take the shoe box and remove the lid and the flaps on the sides. When we do that we can start lining it with the fabric.
We are going to take one of the fabric scraps and cut it into a strip long enough to cover the entire contour of the box and the necessary width. For my part, I left it 15cm wide.
We are going to apply cold silicone all around the contour and glue the fabric on the back side of the fabric (the reverse side).
Turn the fabric over and it will look like this.
We are going to cut out the flaps of the lid of the box so that we have a rectangle. We are going to line it with the same pink fabric.
Now, we must place the fabric very well so that when we introduce the rectangle that we have just lined, it is very well pressed and the outline is well finished.
We continue lining with another fabric on the sides, also glued with the help of silicone.
To make it look much better we are going to adhere rigid white lace of 5 cm wide, for this we will only place the silicone on each corner of the box so that it does not affect the lace design. I think this is a very nice touch that elevates the design of the box, since I think that lace is a very elegant material that has been used for a long time and when combined with the pretty pink background color, it looks great.
When we finish gluing all the lace, we finish this project.
If you like, you can add some decorations such as pearls or ribbons.
I hope you liked it and I would like to know in the comments what you think of today's post. As always I wish you a happy day and night.

Editado en Canva || Edited in canva
Fotos tomadas de mi teléfono Xiaomi Redmi Note 6 Pro || Photos taken from my Xiaomi Redmi Note 6 Pro phone.
Fuente del editor de imágenes y separadores || Image editor source and separators
Está súper bella. Yo necesito una para mis cremitas. Gracias por el tutorial ❤️❤️❤️
Quedo muy original y de mucha utilidad, gracias por compartir.