Conjunto en algodón de dama [ESP - ENG]

Que tal mis queridos amigos de Hive, feliz martes para todos.
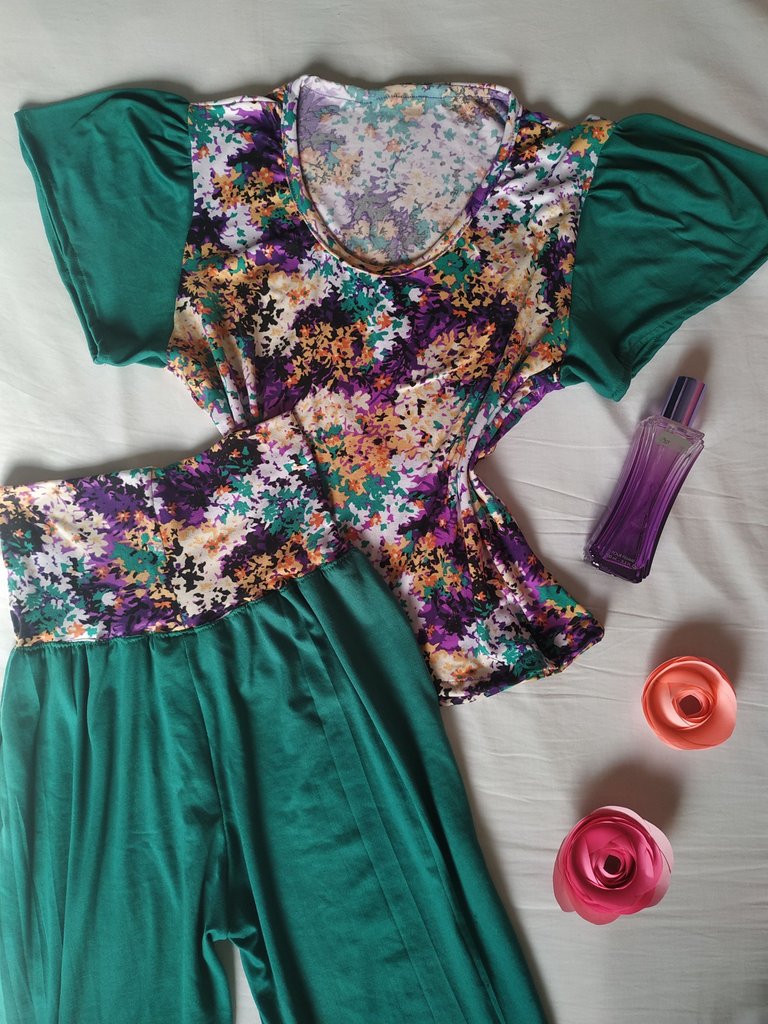
El día de hoy quiero enseñarles como elaboré desde cero un bello conjunto de dama, para ello y en su totalidad utilice tela de algodón micro 180, una tela muy suave y cómoda que hace que este tipo de conjuntos sean fáciles de usar.
También este molde se puede optar para hacer una pijama pero en este caso lo hice para que mi mamá este en la casa. Espero les guste el tutorial del día de hoy, les deseo que tengan un buen día y noche.

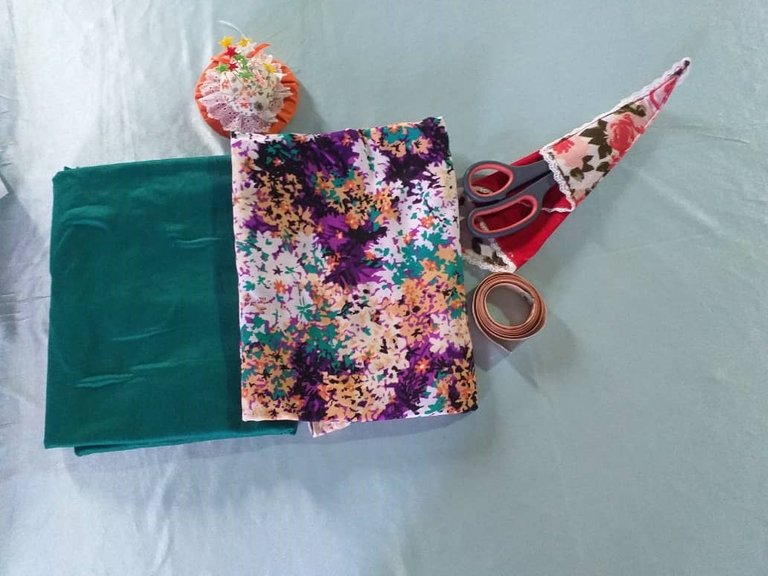
- Tela unicolor micro 180.
- Tela estampada micro 180.
- Alfileres.
- Agujas.
- Cinta métrica.
- Hilo.
- Moldes o patrones.

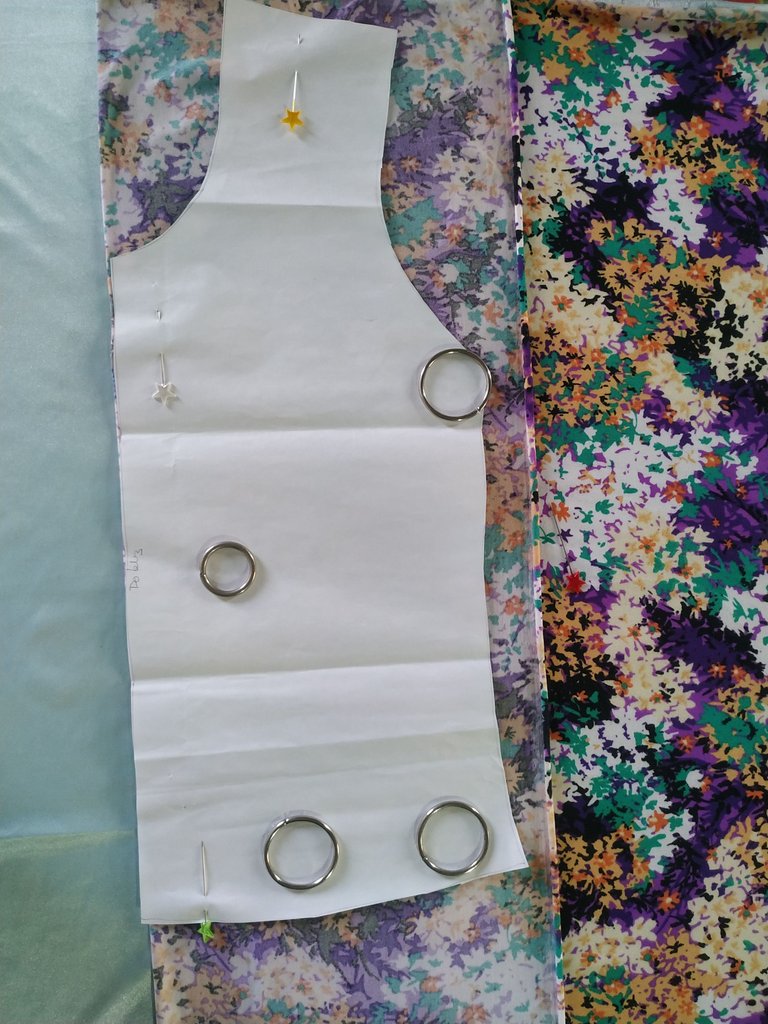
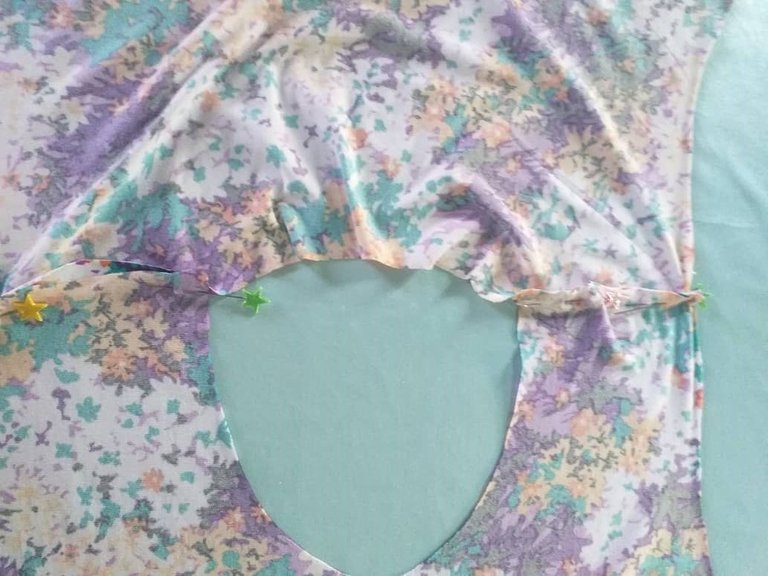
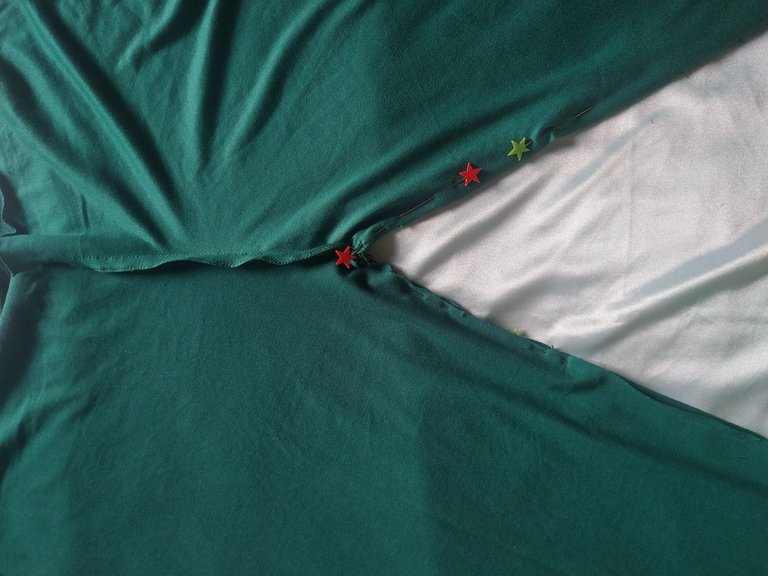
Comenzamos con la blusa, para ello vamos a colocar la tela sobre una superficie plana y le vamos a hacer un doblez, arriba de ella colocamos el molde de la prenda y cortamos al ras. Usamos el mismo molde para la parte delantera y trasera de la prenda pero en la parte delantera vamos a hacer un escote más pronunciado.

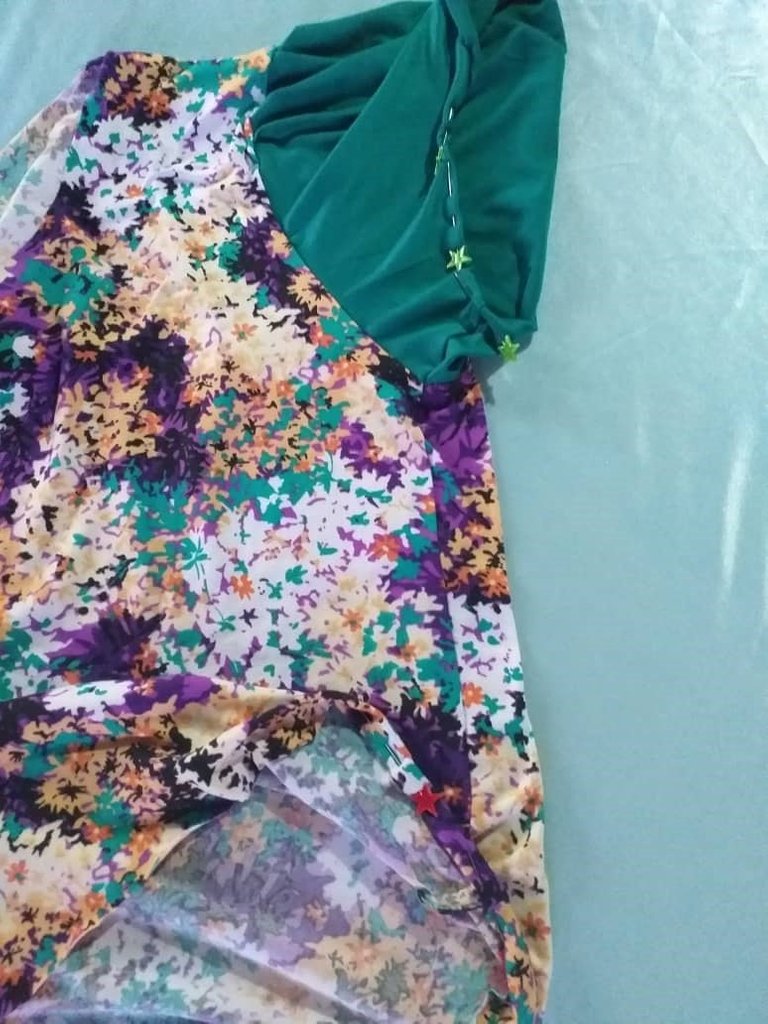
Cuando tengamos ambas piezas vamos a extenderlas y unirlas con unos alfileres por la parte de los hombros, vamos a pasar costura. Luego procedemos a colocar las mangas (Esta parte tuve que saltarla ya que por error borré las fotos de este paso).
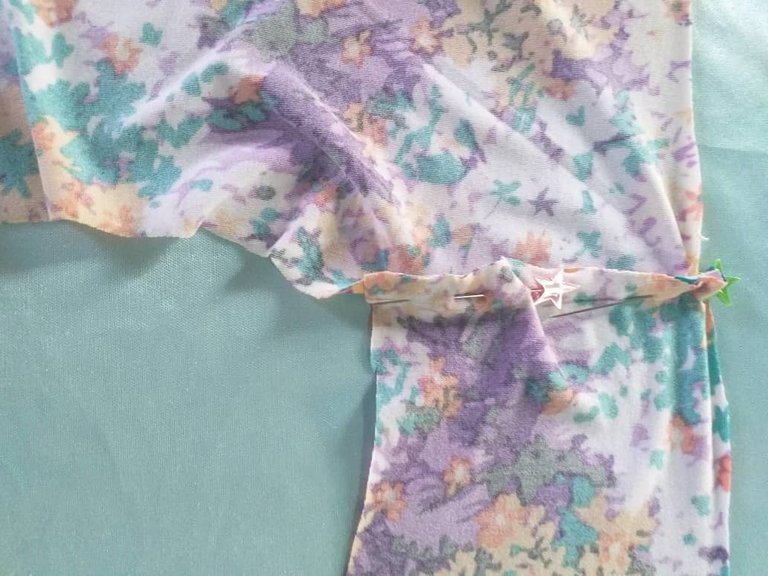
Cuando tengamos las mangas listas vamos a pasar orillo en la manga y en la parte inferior de la blusa, haciendo un dobladillo simple. Podemos ayudarnos con unos alfileres.
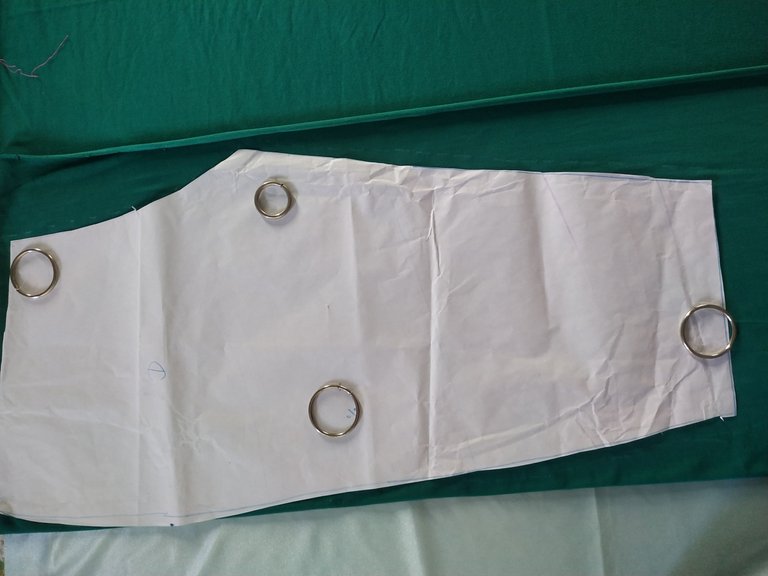
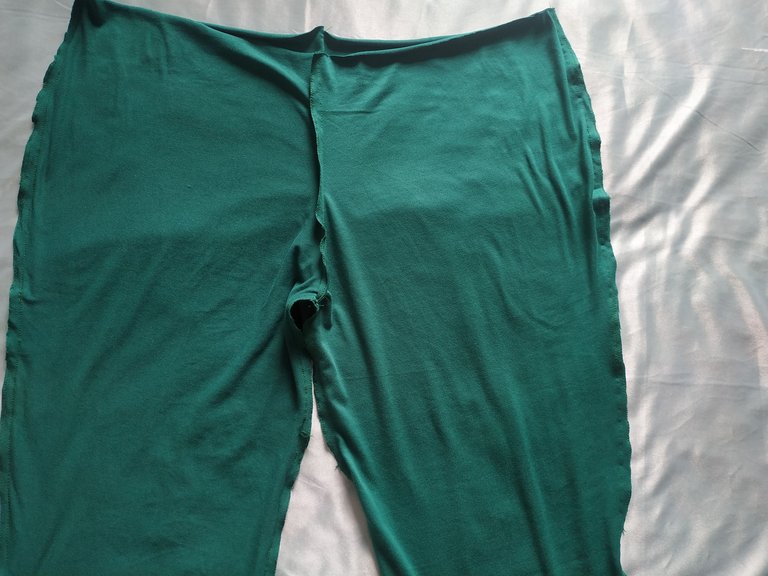
Para hacer el pantalón, licra o mono del conjunto vamos a colocar sobre la tela los moldes delantero y posterior (con doblez) para que nos queden dos piezas.
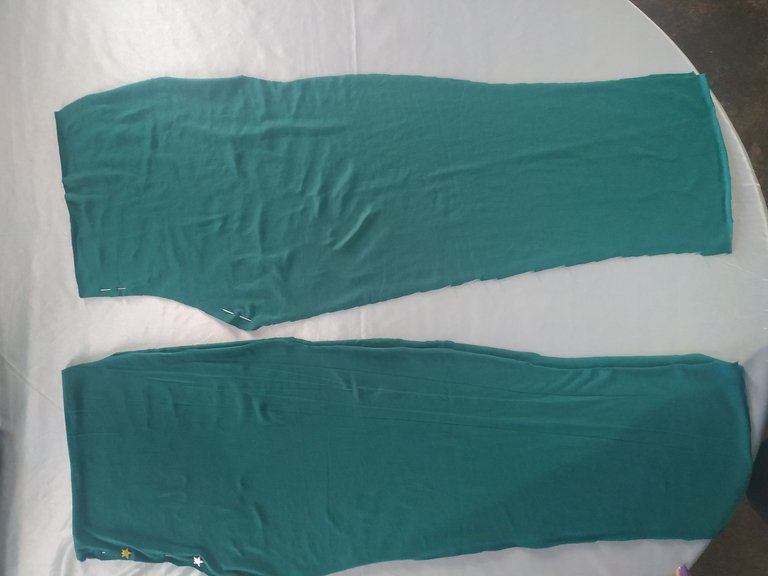
Unimos y pasamos costura en los tiros del pantalón y luego por la entrepierna, pasamos costura zigzag en nuestra Singer casera o podemos pasar la fileteadora.
Continuamos uniendo los laterales del pantalón con costura recta.
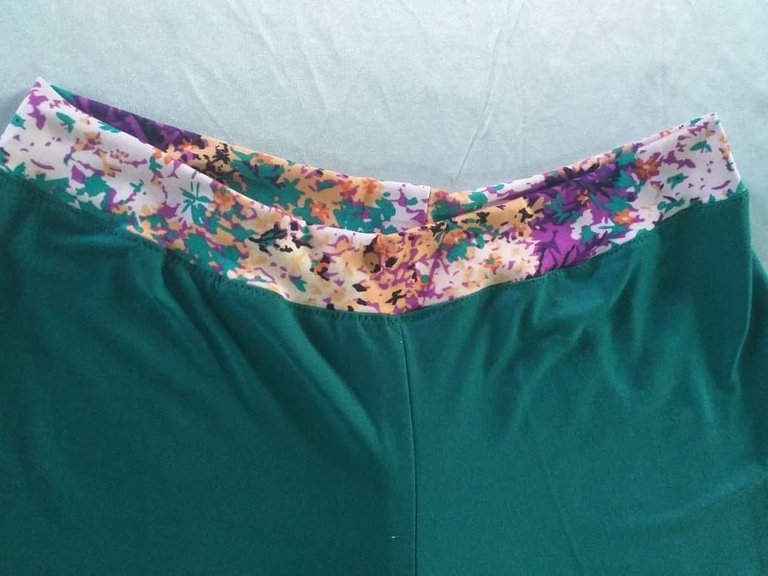
Por ultimo unimos la cintura que la hice con la tela estampada. La misma la hice con una tira de 15 cm de ancho, la doble a la mitad y pase costura por la parte del revés, luego se da vuelta y se une a la cintura del pantalón, se debe de cuadrar los cuatro cuadrantes para que quede lo más centrado posible.

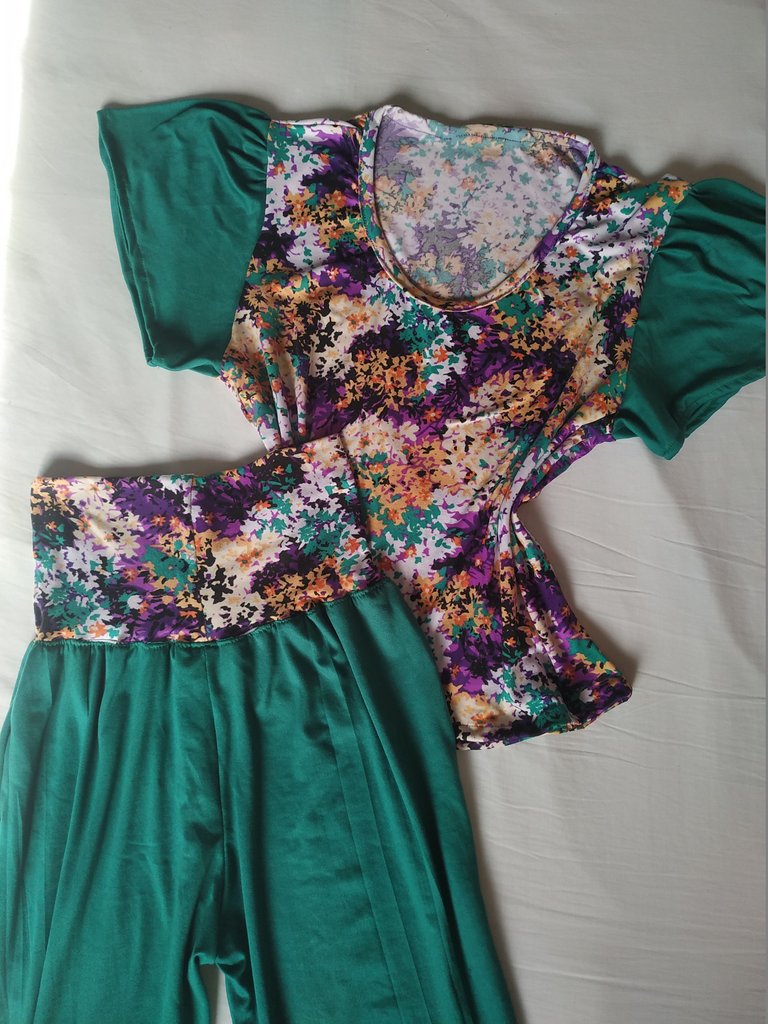
Con esto tendremos listo este bello y práctico conjunto de dama (señorial). Muchas gracias mis amigos de Hive, que tengan un buen día y noche.

Hello my dear friends of Hive, happy Tuesday to all of you.
Today I want to show you how I made from scratch a beautiful set of lady, for this and in its entirety I used micro cotton fabric 180, a very soft and comfortable fabric that makes this type of sets are easy to use.
Also this mold can be used to make pajamas but in this case I made it for my mom to be at home. I hope you like today's tutorial, I wish you have a nice day and night.

- Unicolor fabric micro 180.
- Printed fabric micro 180.
- Pins.
- Needles.
- Tape measure.
- Thread.
- Molds or patterns.

We start with the blouse, for this we are going to place the fabric on a flat surface and we are going to make a fold, on top of it we place the mold of the garment and cut flush. We use the same mold for the front and back of the garment but in the front we are going to make a more pronounced neckline.
When we have both pieces we are going to extend them and join them with some pins on the shoulders, we are going to sew the seam. Then we proceed to place the sleeves (I had to skip this part because by mistake I deleted the photos of this step).
When we have the sleeves ready, we are going to pass selvage on the sleeve and on the bottom of the blouse, making a simple hem. We can help ourselves with some pins.
To make the pants, lycra or overall of the set, we are going to place the front and back molds (with folds) on the fabric so that we have two pieces.
We join and stitch on the trouser straps and then on the crotch, we zigzag stitch on our homemade Singer or we can use the filet machine.
We continue joining the sides of the pants with a straight seam.
Finally we join the waistband that I made with the printed fabric. I made it with a 15 cm wide strip, fold it in half and sew the seam on the back side, then turn it over and join it to the waistband of the pants, you must square the four quadrants so that it is as centered as possible.
With this we will have ready this beautiful and practical lady's outfit. Thank you very much my friends of Hive, have a nice day and night.
Editado en Canva || Edited in canva
Hola @gabimramirez, te quedó muy lindo este conjunto.
Se ve bastante fresco y cómodo.
Gracias por compartir con nosotros. Saludos 🤗
Hola!! Está super lindo este conjunto!!💕 me gustan mucho la combinación de las telas. Espero que tu mamá disfrute de este bonito regalo!! Saludos🌷
Tu mamá ha de estar feliz con su nuevo conjunto de casa, se fresco y cómodo. También los colores son muy enérgicos. Un bello conjunto.
La tela se ve muy fresca y suave, el color es muy alegre ¡me encantó esta pijama! ¡Felicidades!