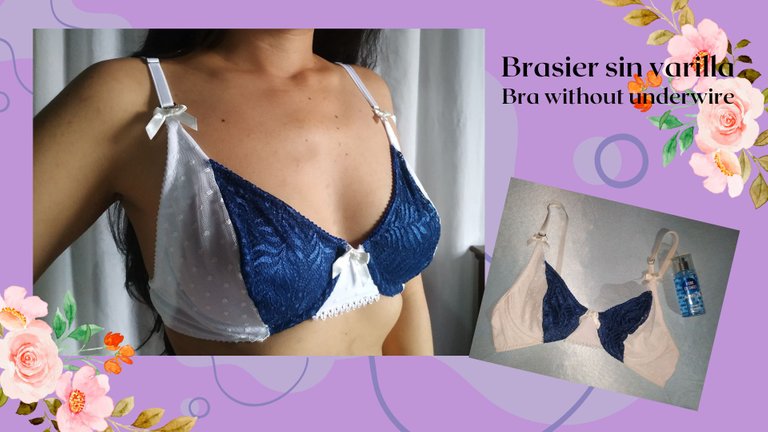
Mi nueva creación: Brasier con varilla || My new creation: Bra with underwire
Editado en Canva || Edited in canva

Hola a todos mis queridos Hivers, feliz lunes, espero esta semana este llena de muchas bendiciones para todos.
El día de hoy les traigo un nuevo proyecto de agujas, se trata de un brasier de dama con varillas. Este es el primero que hago, así que debo admitir que me tomo mucho más tiempo del que esperaba, para poder hacerlo tuve que comprar algunos materiales pero ya contaba con la mayoría, así que al adquirir este molde, quite cualquier miedo que tenía y puse mis manos a la obra con el proyecto.

- Tela micro 180.
- Tela de encaje semi elástico.
- Tela de encaje rígido.
- Ballena y pasa ballena.
- Morita.
- Tira de brasier.
- Gafete.
- 8 y G para tira de brasier.
- Alfileres y agujas.
- Hilo.
- Cinta métrica.
- Tijera.
- Moldes.


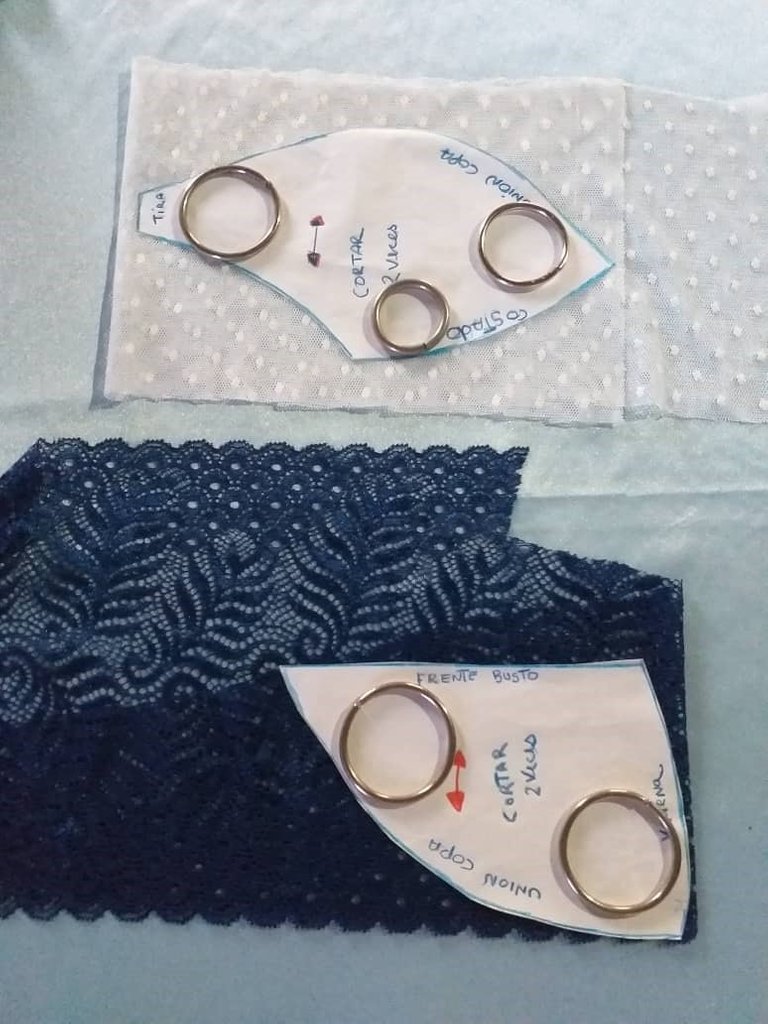
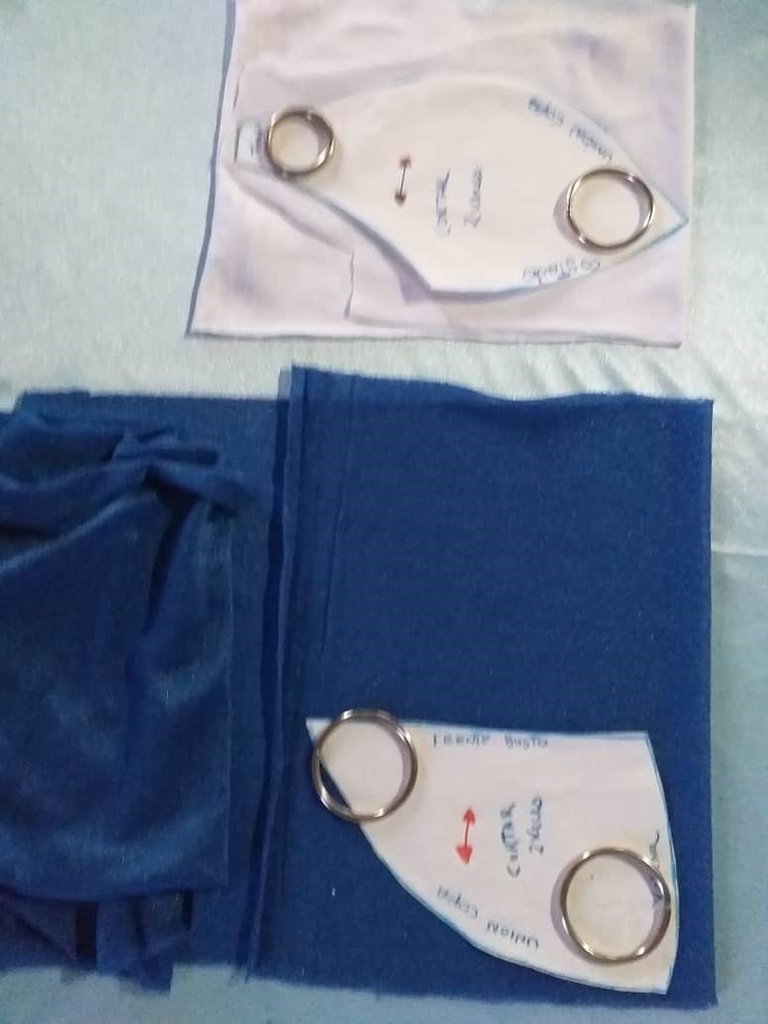
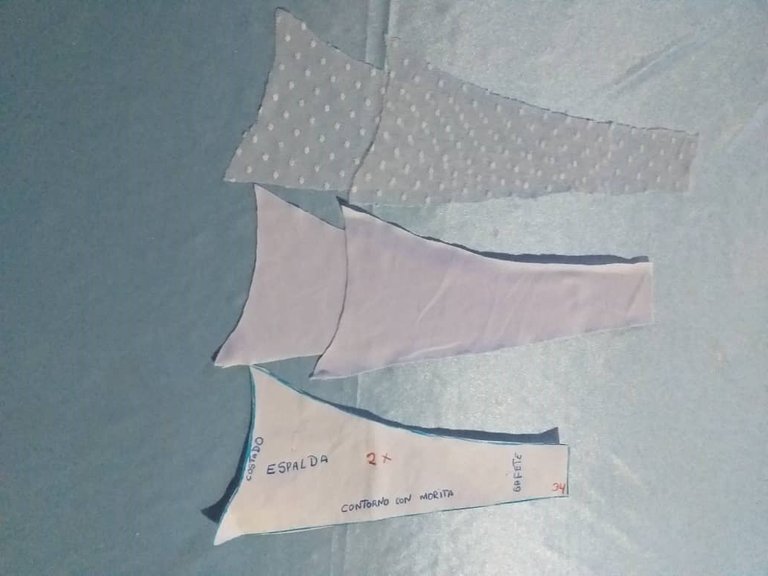
Como primer paso recorte todas las piezas, para ello coloque los moldes o patrones sobre las telas a usar, para poder mantenerlas fijas usé unos aros metálicos que le dan un peso a los moldes para poder recortarlos sin que se muevan.
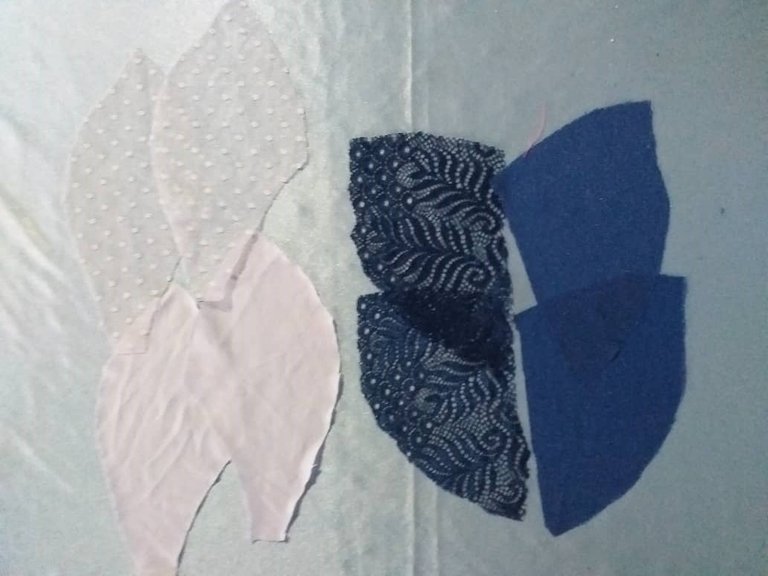
Estas son las piezas.
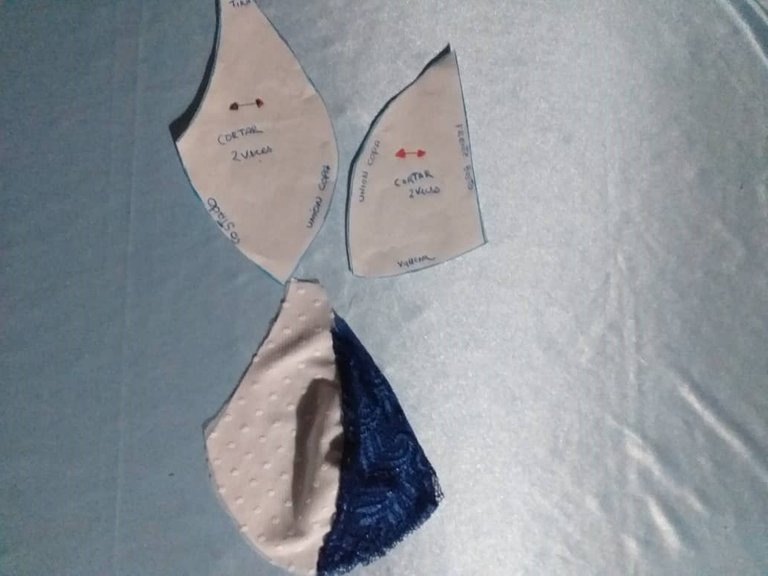
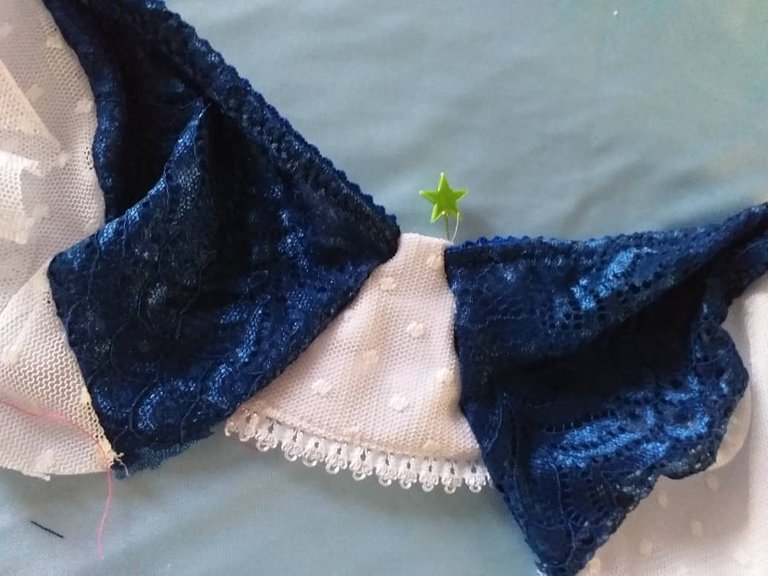
Para empezar a armar el brasier, debemos comenzar con la copa, la cual vamos a unir por la unión de copa tal como se indica en la foto.
Cuando tengamos las copas listas, vamos a colocar morita por el escote de pecho. Estiramos lo mínimo cuando pasamos costura.
En medio de las copas va la pieza triangular a la cual le vamos a colocar morita en la parte inferior antes de unirla a las copas, este será el centro de la parte delantera del brasier.
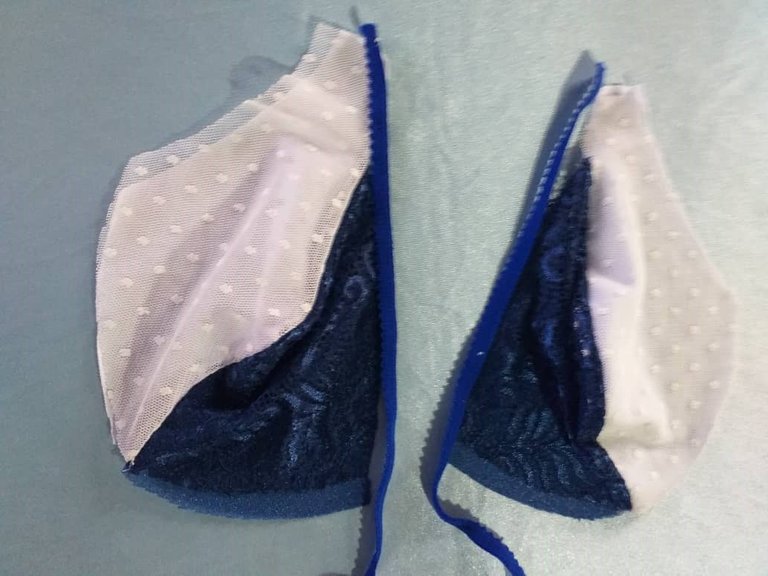
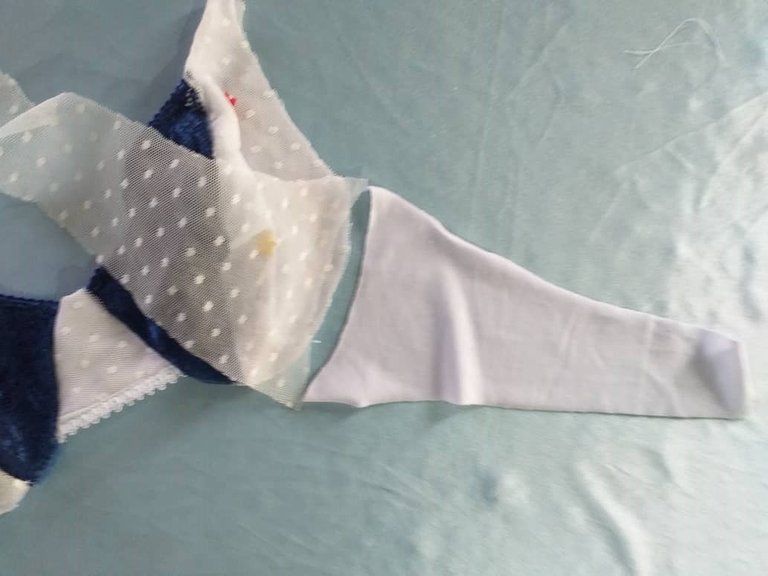
Continuamos uniendo los costados del brasier, es decir los laterales que unirán la parte delantera con la espalda, para ello unimos como se indica en la foto, luego volvemos a pasar costura.
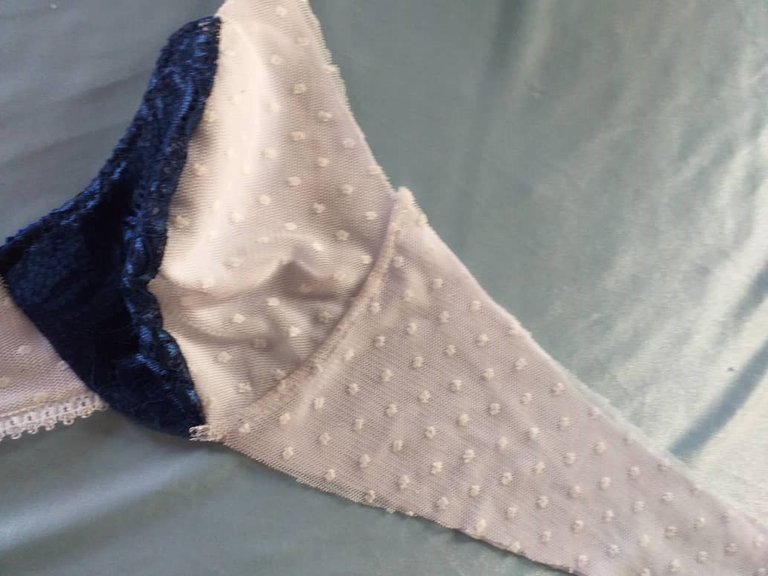
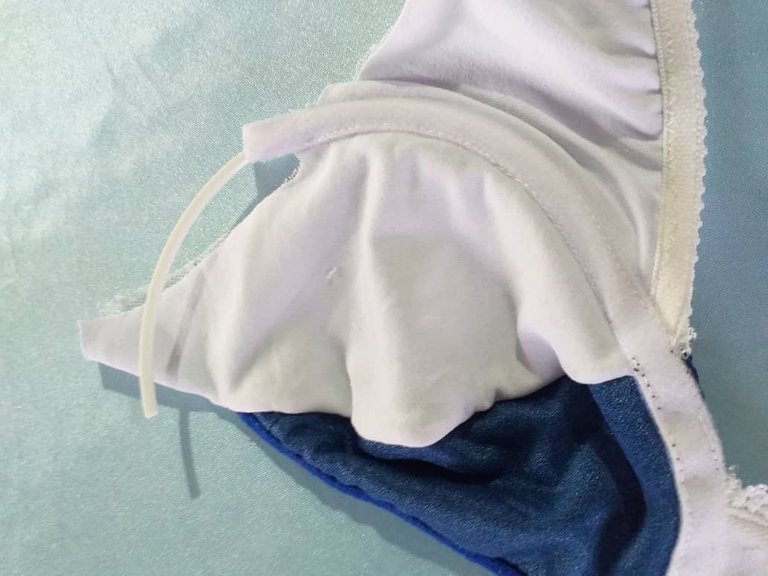
Cuando tengamos unidos los laterales, comenzamos a unir el pasa ballena, esta es una tira que es hueva en el centro, en ella pasará la varilla o ballena del brasier. Debemos ajustar con unos alfileres antes de pasar costura, así nos aseguramos que no se mueva mientras cosemos. Debemos también tener mucho cuidado en esta parte ya que hay que pasar costura muy cerca del orillo de la pasa ballena para que no interrumpa el paso de la varilla. Repetimos el proceso en la otra copa. Y colocamos las varillas.
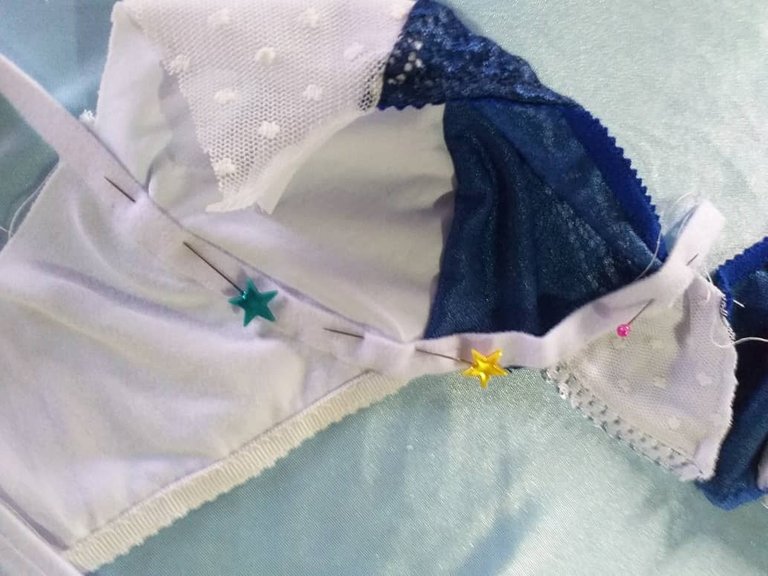
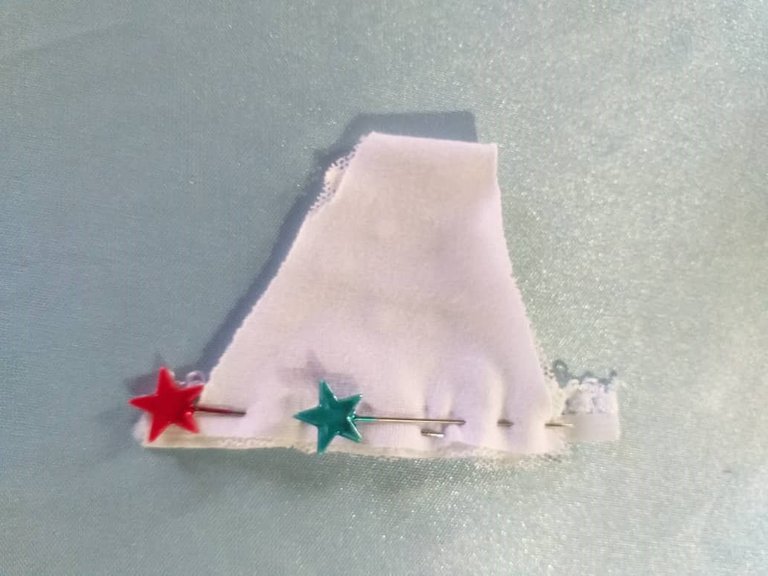
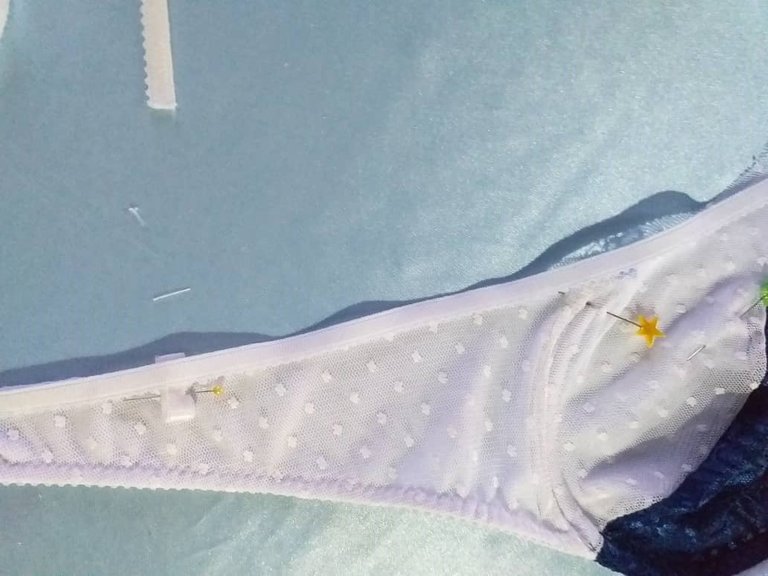
Cuando esté listo continuamos colocando encaje o morita por la parte de los laterales hacia las copas. Estiramos de cinco a siete. Cuando lleguemos a la parte de la copa dejamos dos centímetros de tira, está la doblamos y cosemos de nuevo, allí ira la G o el gancho de la tira.

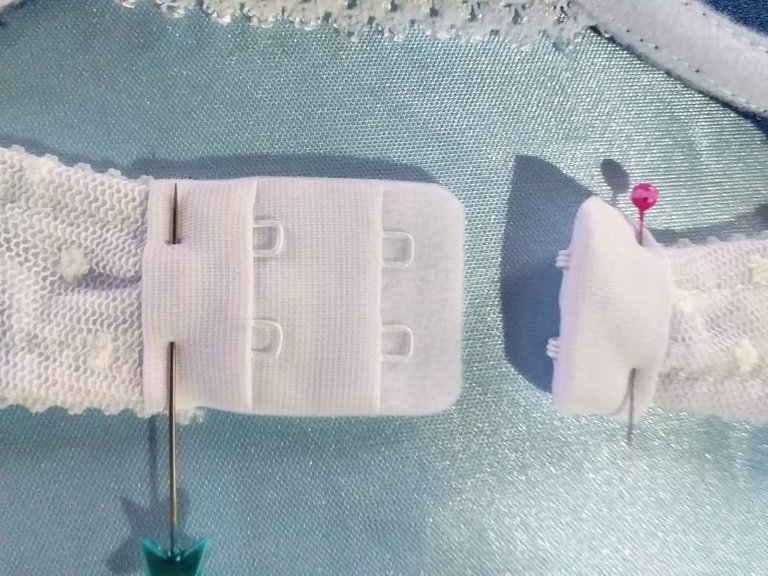
Colocamos el gafete en la parte de atrás y por ultimo ajustamos las tiras, si se desea pueden comprarlas ya hechas, estas las venden en tiendas de lencería.
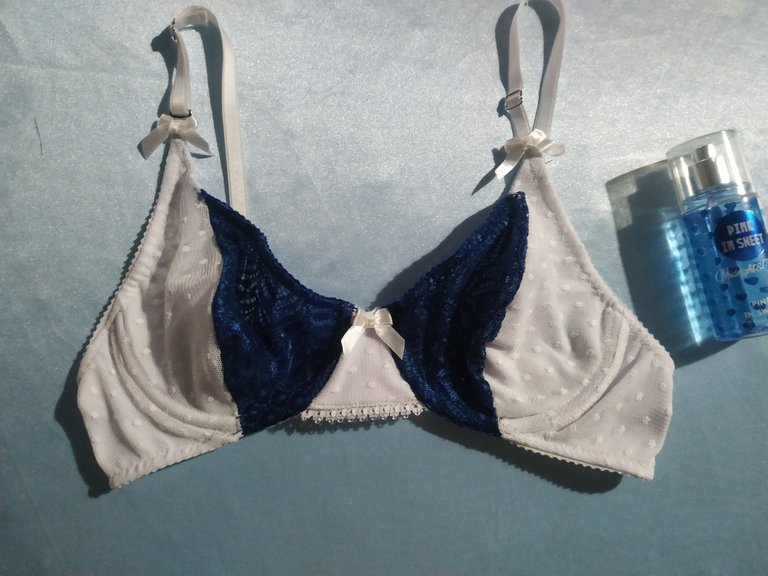
Decoramos con unos pequeños lazos y con esto tendremos listo este bello brasier.
Como ven es una pieza que requiere trabajo, pero el resultado vale la pena. Espero les haya gustado mi publicación de hoy, como siempre les deseo que tengan un lindo día y noche.

Hello to all my dear Hivers, happy Monday, I hope this week is full of blessings for all of you.
Today I bring you a new needle project, this is a lady's bra with underwire. This is the first one I do, so I must admit that it took me much more time than I expected, in order to do it I had to buy some materials but I already had most of them, so when I acquired this mold, I removed any fear I had and put my hands to work with the project.

- Micro fabric 180.
- Semi-elastic lace fabric.
- Rigid lace fabric.
- Whale and whale pass.
- Morita.
- Bra strap.
- Badge.
- 8 and G for bra strap.
- Pins and needles.
- Thread.
- Tape measure.
- Scissors.
- Molds.

As a first step I cut all the pieces, for this I placed the molds or patterns on the fabrics to be used, to keep them fixed I used some metal rings that give a weight to the molds to be able to cut them without moving.
These are the pieces.
To start assembling the bra, we must begin with the cup, which we will join by the cup junction as shown in the photo.
When we have the cups ready, we are going to place morita for the chest neckline. Stretch as little as possible when sewing.
In the middle of the cups goes the triangular piece to which we are going to place morita at the bottom before joining it to the cups, this will be the center of the front of the bra.
We continue joining the sides of the bra, i.e. the sides that will join the front with the back, for this we join as shown in the photo, then we return to pass the seam.
We continue joining the sides of the bra, that is to say the sides that will join the front with the back, for this we join as shown in the photo, then we return to pass seam, when we have joined the sides, we begin to join the whale pass, this is a strip that is hollow in the center, in it will pass the rod or whale of the bra. We must adjust with a few pins before sewing, so we make sure it does not move while sewing. We must also be very careful in this part since we must pass the seam very close to the edge of the whalebone so that it does not interrupt the passage of the rod. Repeat the process on the other cup. And place the rods.
When it is ready, continue placing lace or morita on the sides towards the cups. Stretch from five to seven. When we get to the part of the cup we leave two centimeters of strip, we fold it and sew it again, there will be the G or the hook of the strip.
We place the badge on the back and finally we adjust the strips, if you wish you can buy them already made, these are sold in lingerie stores.
We decorate with a few small bows and with this we will have this beautiful bra ready.
As you can see it is a piece that requires work, but the result is worth it. I hope you liked my publication today, as always I wish you have a nice day and night.

Te quedo genial, creo que es uno de los brasieres sin varilla mas bonito que e visto, muy buen acabado gracias por compartir tu creación.
Gracias linda. Saludos
Hola gracias por compartir tu publicación,. Bonito tu brasiere😄
Gracias a ti por apreciar mi trabajo, siempre trato de traer los proyectos lo mejor elaborado posible, saludos linda.
Hey @gabimramirez!
Actifit (@actifit) is Hive's flagship Move2Earn Project. We've been building on hive for almost 5 years now and have an active community of 7,000+ subscribers & 600+ active users.
We provide many services on top of hive, supportive to both hive and actifit vision. We've also partnered with many great projects and communities on hive.
We're looking for your vote to support actifit's growth and services on hive blockchain.
Click one of below links to view/vote on the proposal:
Hola, te felicito por atreverte a romper con el temor y dar ese primer paso con la confección de este brasier, Me pregunto si lo cosiste a mano, de ser así admiro aún mas lo que has hecho y la verdad eres muy audaz, te arriesgaste y lo conseguiste.
Felicidades.
Gracias ❤️ lo hice en máquina de coser singer casera, solo que no tome fotos cuando pasé costura en la misma, Igual muchas gracias por tu comentario, me motiva mucho a seguir creando proyectos y traerlos a la comunidad.
Que tengas un buen día.
https://twitter.com/1523133015488184320/status/1651012970812522499
The rewards earned on this comment will go directly to the people sharing the post on Twitter as long as they are registered with @poshtoken. Sign up at https://hiveposh.com.
This is really beautiful, I will give a try to this