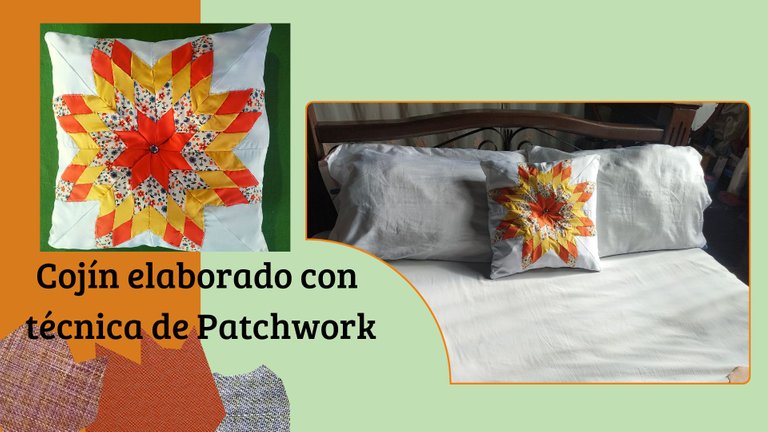
Mi participación en el concurso de Patchwork world || My participation in the Patchwork world contest
Hola queridos amigos de esta gran comunidad, bienvenidos de nuevo a mi blog.
Hace unos días mi amiga @jennyzer compartió su participación a este concurso de la comunidad de #HiveDiy y me invitó para que también participara, esa idea me emocionó mucho, porque siempre había escuchado sobre la técnica de Patchwork pero nunca me había animado a hacerla así que esta fue la oportunidad.
Me puse a pensar que hacer ya que tenía muchos trocitos de tela rígida guardados que me servirían y al ver los hermosos diseños que han publicado los últimos días quería hacer algo que estuviera a la altura de ellos.
Decidí hacer un cojín y aplicar la técnica de patchwork en forma de estrella, este trabajo lo realice junto a mi mamá y nos tomó unos dos días hacerlo ya que la idea era que quedará lo más prolijo y bonito posible.
Hello dear friends of this great community, welcome back to my blog.
A few days ago my friend @jennyzer shared her participation in this contest of the #HiveDiy community and invited me to participate too, that idea made me very excited, because I had always heard about the Patchwork technique but I had never dared to do it so this was the opportunity.
I started to think about what to do since I had many pieces of stiff fabric saved that I could use and seeing the beautiful designs that have been published in recent days I wanted to do something that would be at the height of them.
I decided to make a cushion and apply the patchwork technique in the shape of a star, this work was done with my mom and it took us about two days to do it because the idea was to make it as neat and beautiful as possible.

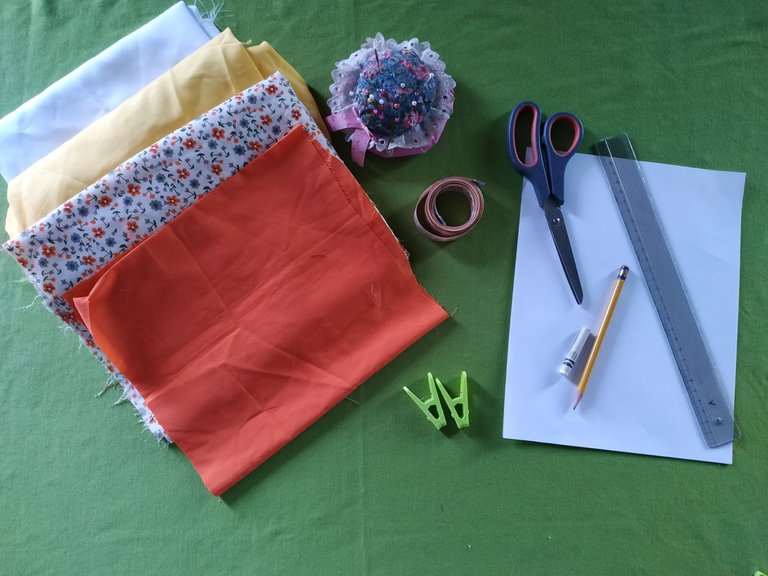
- Retazos de tela.
- Alfileres.
- Cinta métrica.
- Tijera.
- Hilo y aguja.
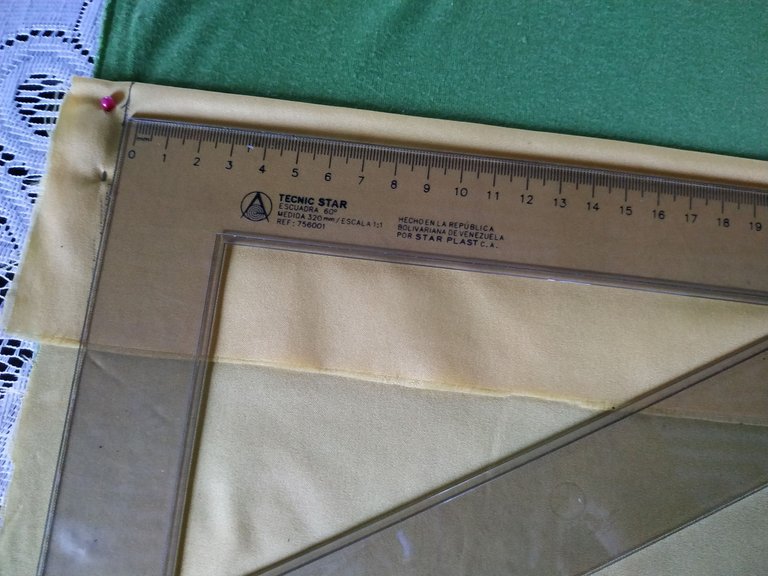
- Regla y hojas.
- Lápiz o tiza.
- Fabric scraps.
- Pins.
- Tape measure.
- Scissors.
- Thread and needle.
- Ruler and sheets.
- Pencil or chalk.

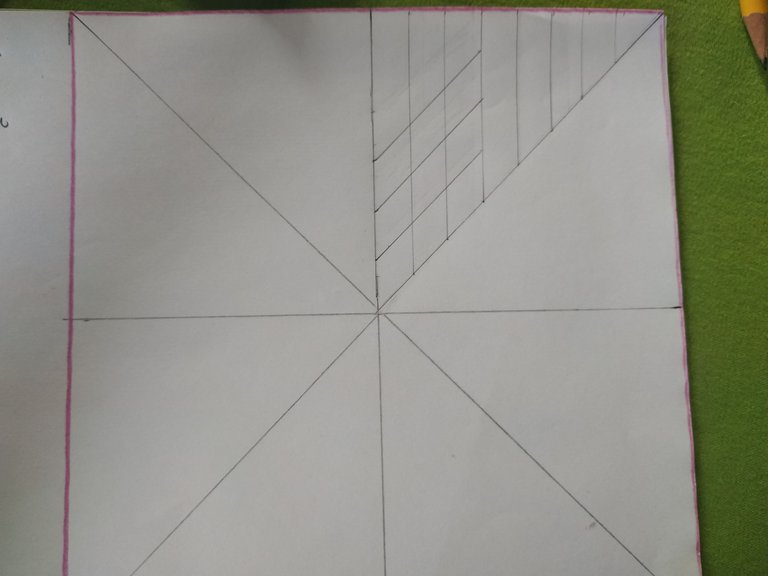
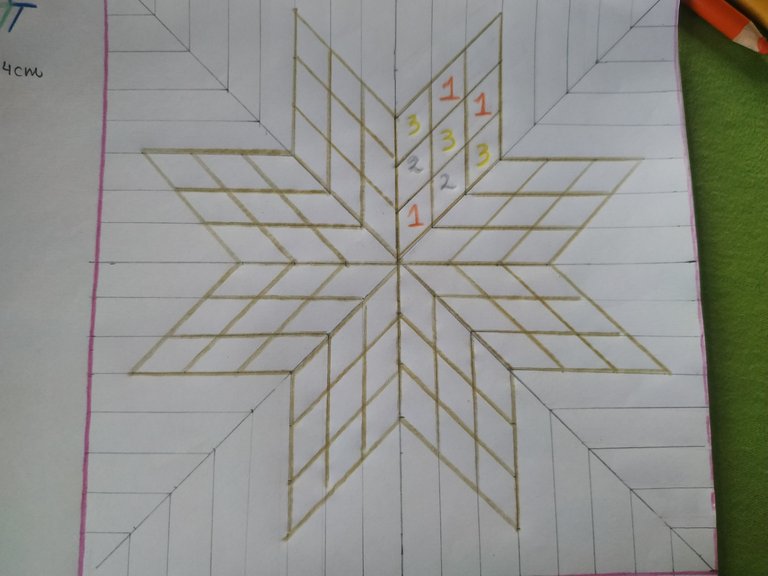
Como primer paso elaboré los patrones, la estrella la hice a partir de un cuadrado que dividí en ocho partes y luego la estrella al dividí en pequeños rombos con las siguientes dimensiones.
As a first step I made the patterns, the star I made from a square that I divided into eight parts and then the star I divided into small rhombuses with the following dimensions.
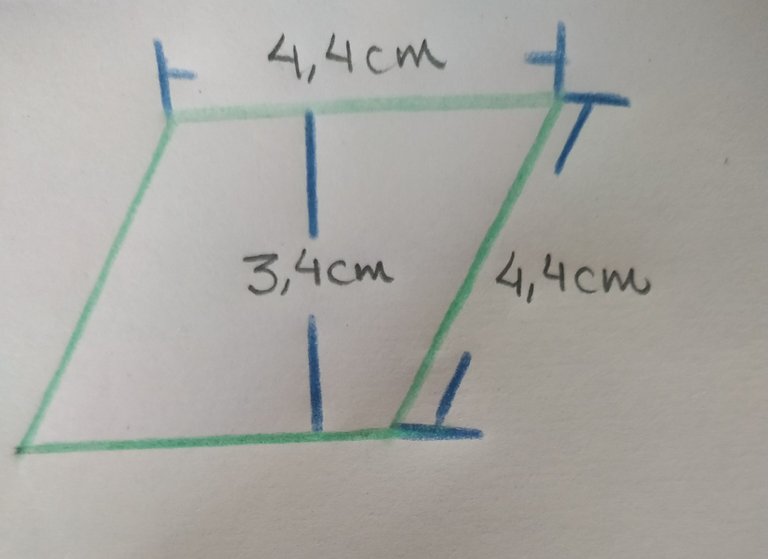
Cada división estará conformada por 9 rombos, y deben llevar una secuencia. Para que esta secuencia fuera fácil de seguir les asigne un color y un número.
Each division will be made up of 9 diamonds, and they must have a sequence. To make this sequence easy to follow, I assigned them a color and a number.
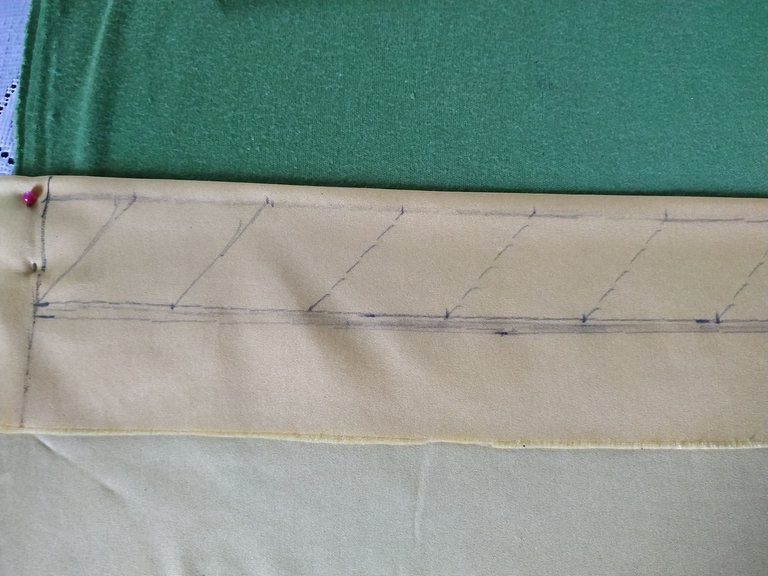
Sabiendo el tamaño y forma comencé a dibujar los rombos en las telas, fijando la tela con unas pinzas y alfileres para poder dibujar sin que se cambiara de posición.
Knowing the size and shape I began to draw the rhombuses on the fabrics, fixing the fabric with tweezers and pins to be able to draw without changing its position.
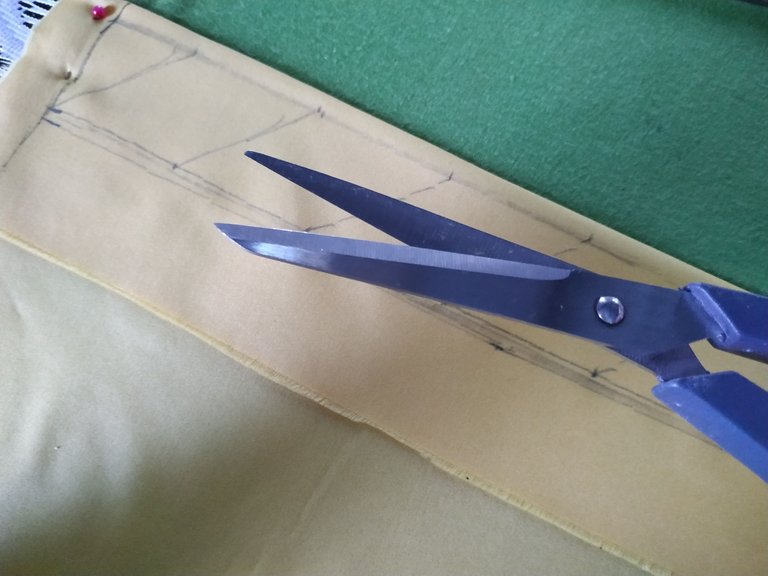
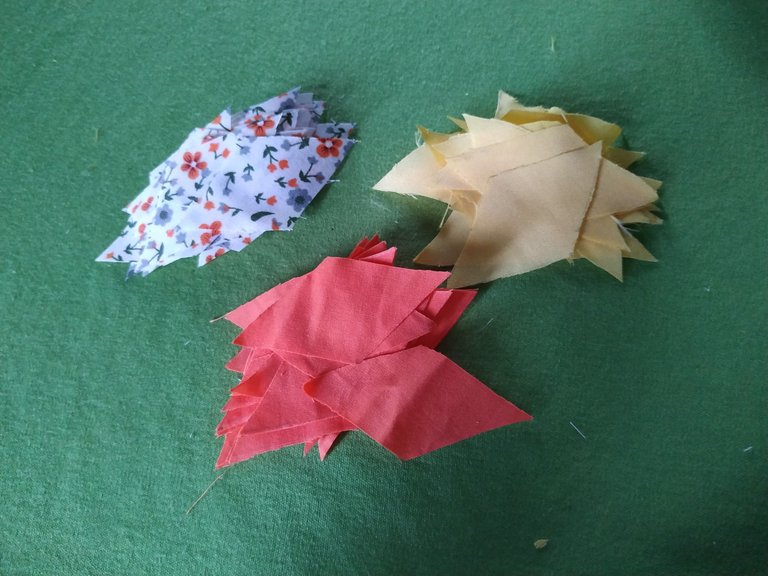
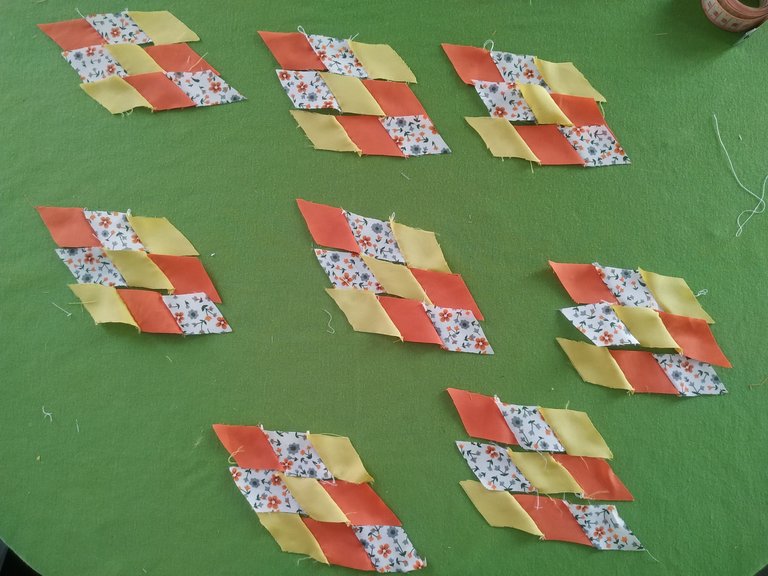
Luego las recorté con mucho cuidado y repetí el proceso con las otras telas. Utilizaré tres telas diferentes para que en total fueran 24 rombos por color.
Then I carefully cut them out and repeated the process with the other fabrics. I will use three different fabrics for a total of 24 diamonds per color.
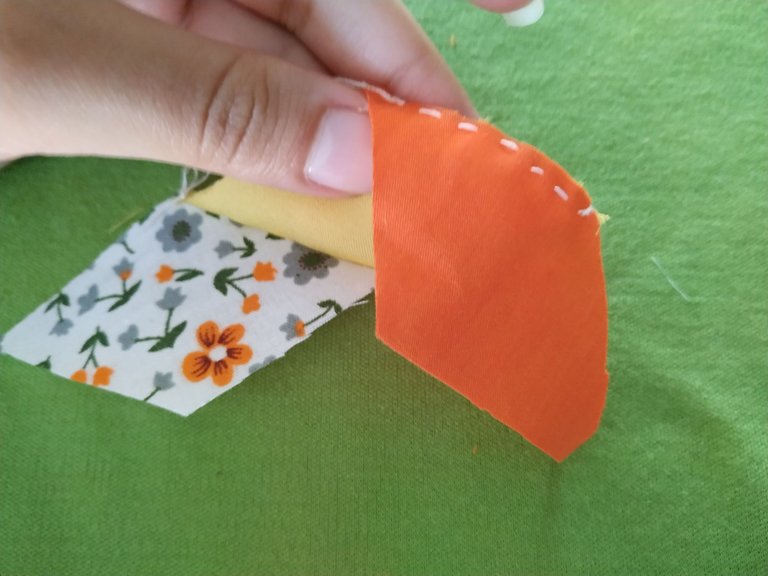
Ahora tomando en cuenta el orden del patrón empecé a coser a mano los rombos por líneas.
Now, taking into account the order of the pattern, I started to sew the rhombuses by lines by hand.
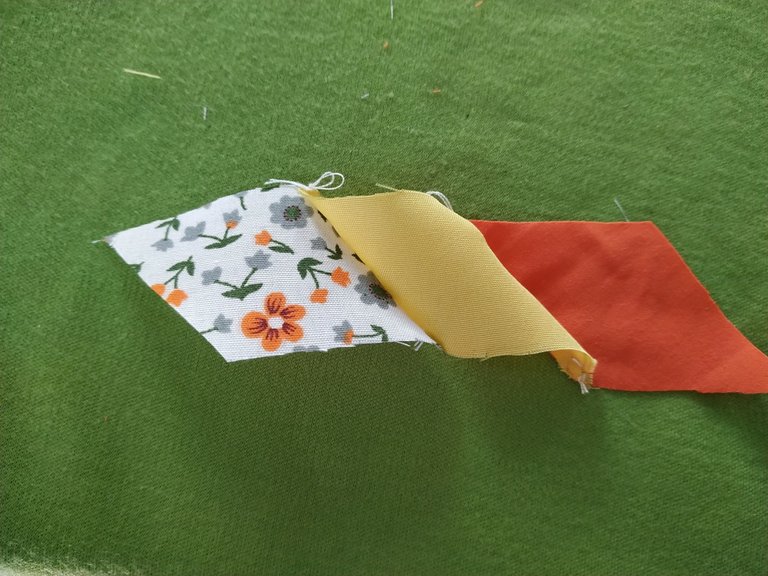
Nos deben de quedar tres líneas así.
We should be left with three lines like this.
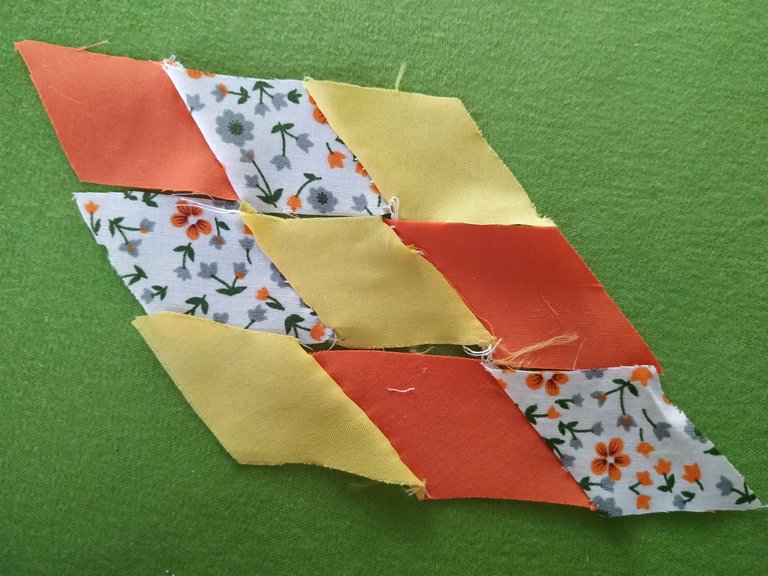
Cosemos estas líneas (también a mano) respetando el orden que llevan y luego les pasamos la plancha para que quede bien planas y se puedan trabajar mejor.
Al unir estas líneas veremos que se van formando los rombos más grandes así que repetimos el proceso de nuevo para obtener las 8 piezas.
We sew these lines (also by hand) respecting the order of the lines and then we pass the iron over them so that they lie flat and can be worked better.
When we join these lines we will see that the larger diamonds are forming so we repeat the process again to get the 8 pieces.
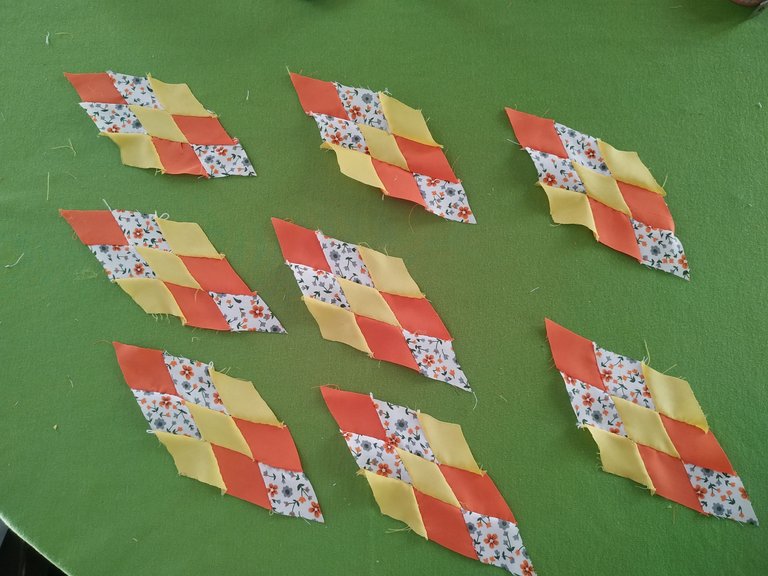
En este momento uní las piezas sin coser y me di cuenta lo bello que iba quedando.
At this point I joined the pieces together without sewing and realized how beautiful it was turning out.
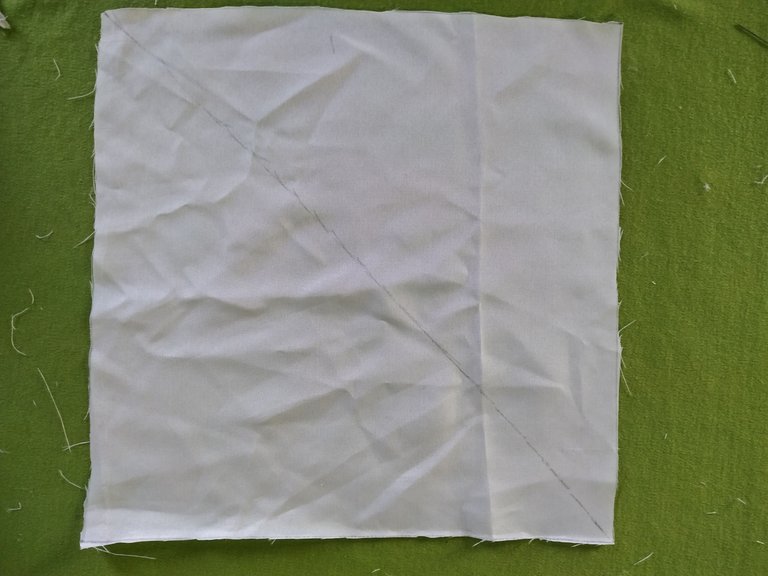
Ahora para continuar, en la tela blanca que va a ser el fondo del cojín vamos a dibujar un cuadrado de 14.8 cm a cada lado, luego le cortaremos a una diagonal para que nos queden dos triángulos rectángulos. Este proceso lo vamos a repetir 4 veces más para obtener 8 triángulos.
Now to continue, on the white fabric that will be the bottom of the cushion we will draw a square of 14.8 cm on each side, then we will cut a diagonal so that we have two right triangles. We will repeat this process 4 more times to obtain 8 triangles.

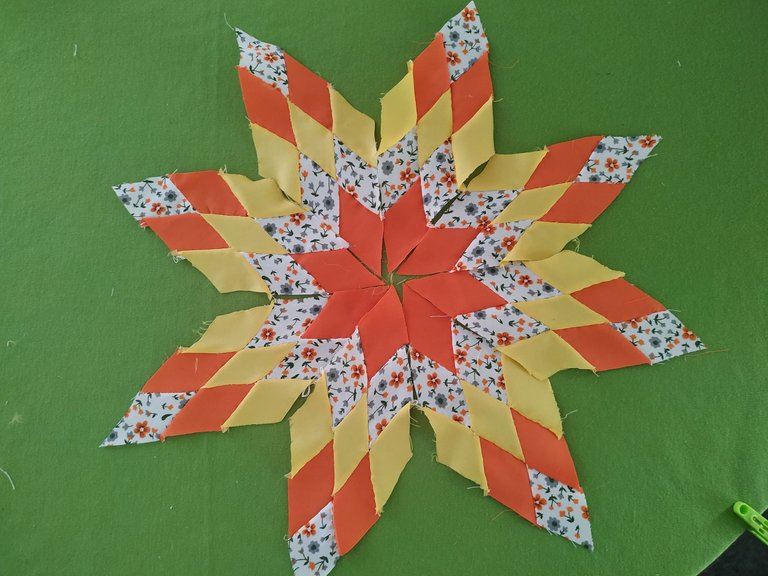
Vamos a tomar dos de los triángulos y en una de las esquinas le vamos a colocar los rombos, verificando que el color principal quede siempre hacia la esquina del triángulo (el color principal en mi caso fue el naranja).
We are going to take two of the triangles and in one of the corners we are going to place the rhombuses, making sure that the main color is always towards the corner of the triangle (the main color in my case was orange).
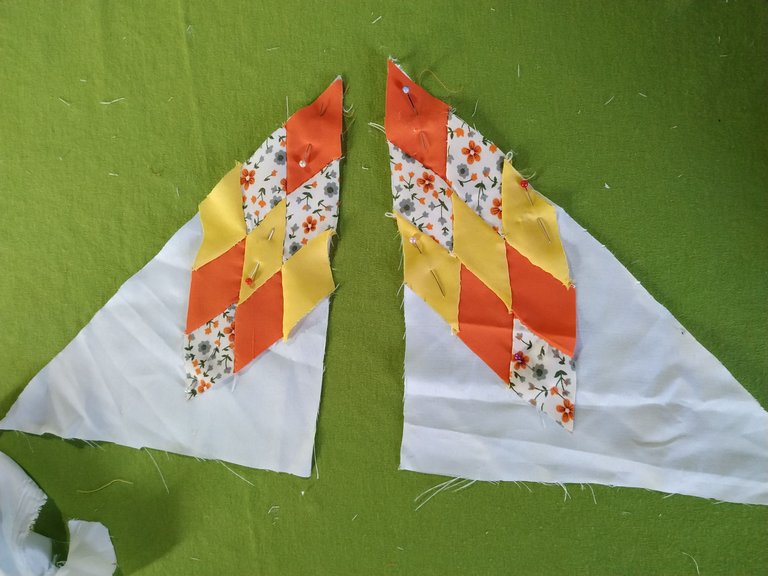
Debemos ayudarnos con los alfileres y si es posible hacer un hilvanado para verificar que las uniones de los rombos queden bien y que los colores coincidan con la secuencia del patrón.
Luego de acomodarlo con los alfileres, los unimos uno arriba del otro, derecho con derecho y vamos a pasar costura esta vez en máquina de coser por uno de los lados o laterales y nos debe de quedar así.
We must help ourselves with the pins and if possible do a basting to verify that the joints of the rhombuses are well and that the colors match the sequence of the pattern.
After arranging it with the pins, we join them one on top of the other, right side to right side and we are going to sew this time with the sewing machine on one of the sides and it should look like this.
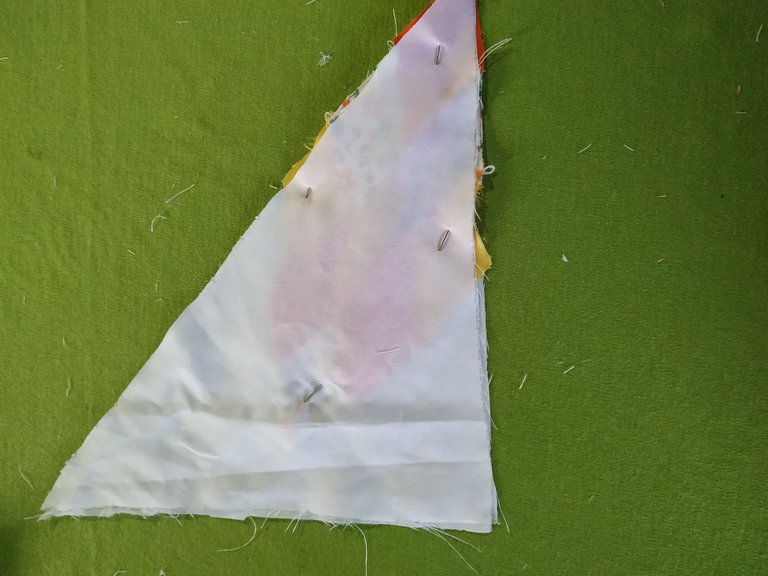
Repetimos el proceso con las demás y nos deben de quedar estas piezas.
Repeat the process with the rest of the pieces and we should have these pieces.
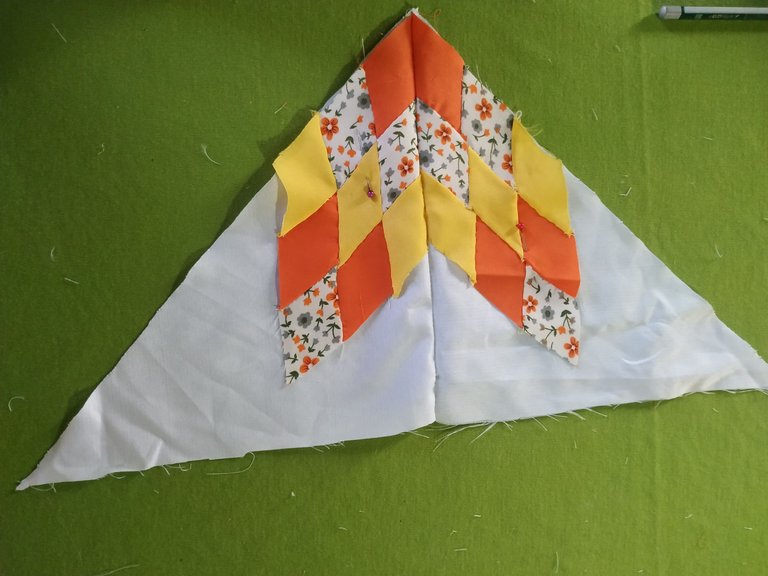
Estas cuatro piezas las vamos a coser en máquina por los laterales para armar un cuadrado.
Este sería el frente del cojín.
These four pieces are going to be sewn by machine on the sides to form a square.
This would be the front of the cushion.
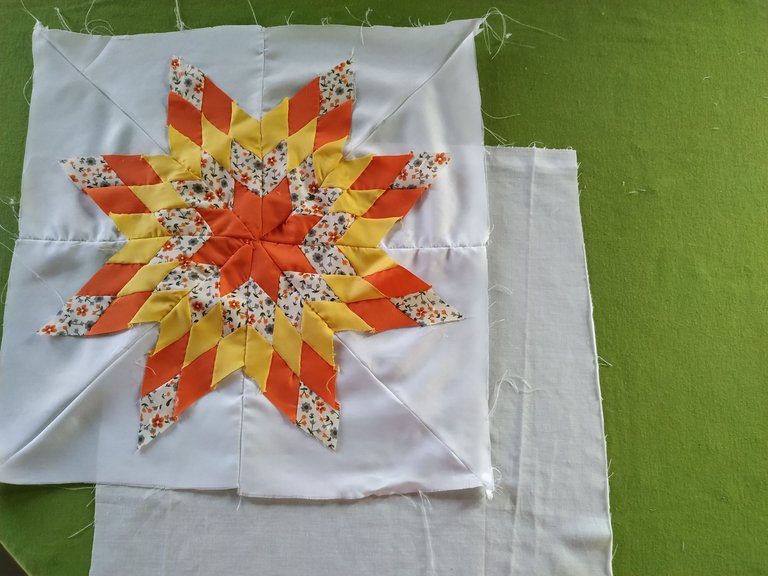
Ahora con la tela blanca vamos a hacer dos cuadrados más de 43 cm en cada lado.
Tomamos uno de los cuadros y lo colocamos frente a frente con el cuadrado que acabamos de hacer y le vamos a pasar costura por todo el orillo a excepción de unos 4 cm que dejaremos para poder darle vuelta.
Now with the white fabric we are going to make two more squares of 43 cm on each side.
We take one of the squares and place it face to face with the square we just made and we are going to stitch all around the selvedge except for about 4 cm that we will leave to be able to turn it over.

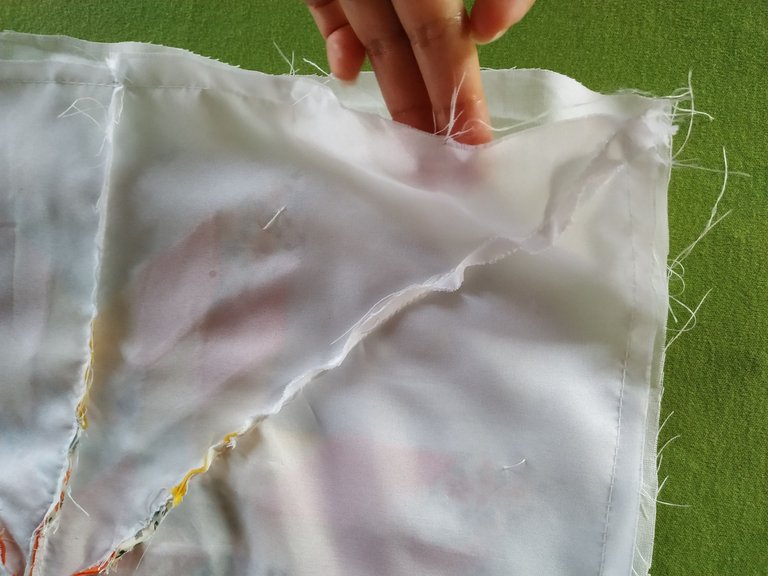
Damos vuelta y terminamos de coser el espacio faltante.
We turn over and finish sewing the missing space.
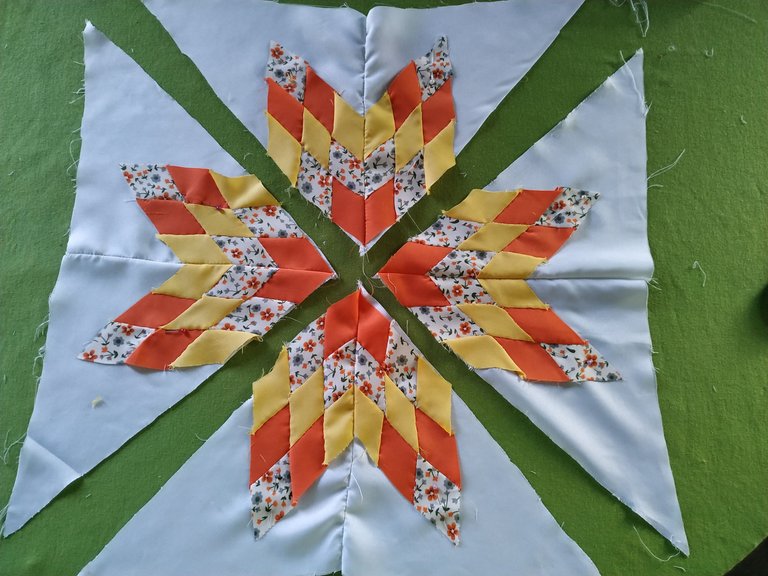
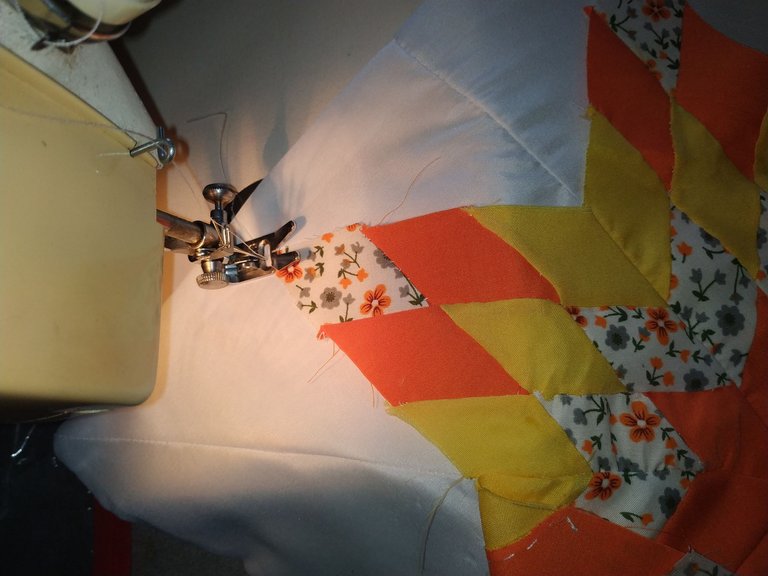
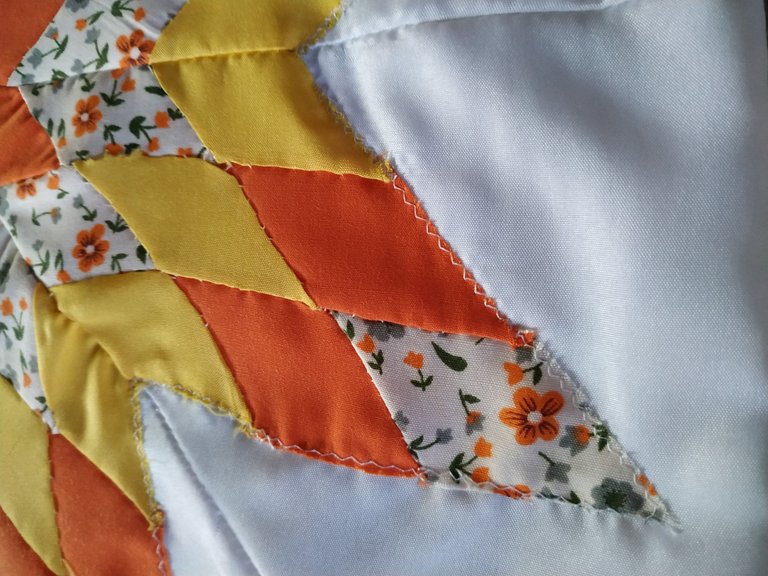
Ahora pasamos costura de zigzag por todo el contorno de la estrella para fijar nuestro dibujo de una manera que se vea pulcra y no dañe el trabajo que llevamos.
Now we zigzag stitch all around the star to fix our drawing in a way that looks neat and does not damage the work we are doing.
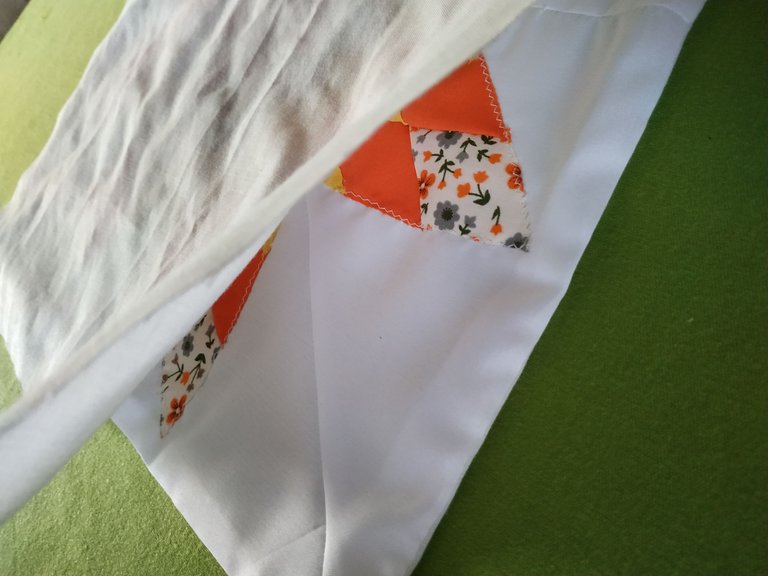
Cuando tengamos esto listo colocamos el otro cuadrado de tela frente con frente y pasamos costura por todo alrededor del cojín y dejando un espacio para poder dar vuelta y colocar el relleno.
When we have this ready, we place the other square of fabric facing each other and sew all around the cushion, leaving a space to be able to turn and place the filling.
Damos vuelta y colocamos el relleno dentro (pueden ser retazos de tela, o relleno de un cojín viejo).
Cosemos el espacio que quedo abierto.
Turn over and place the stuffing inside (it can be scraps of fabric, or stuffing from an old cushion).
We sew the space left open.
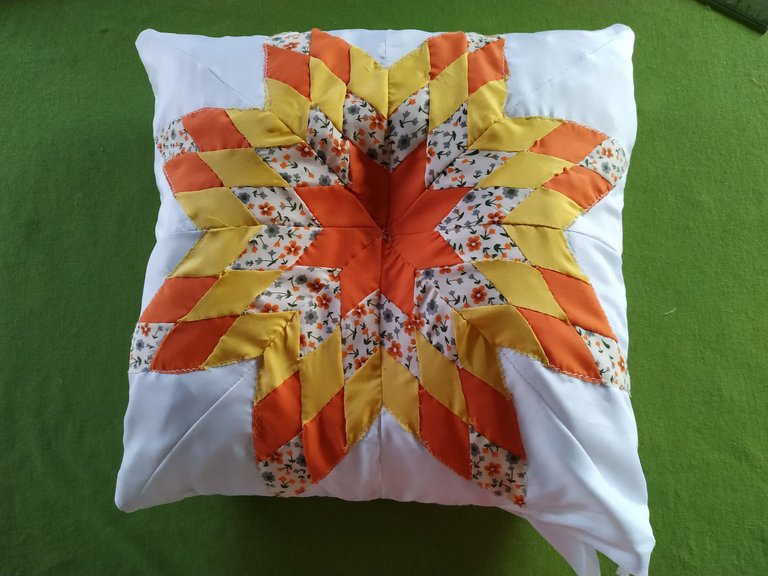
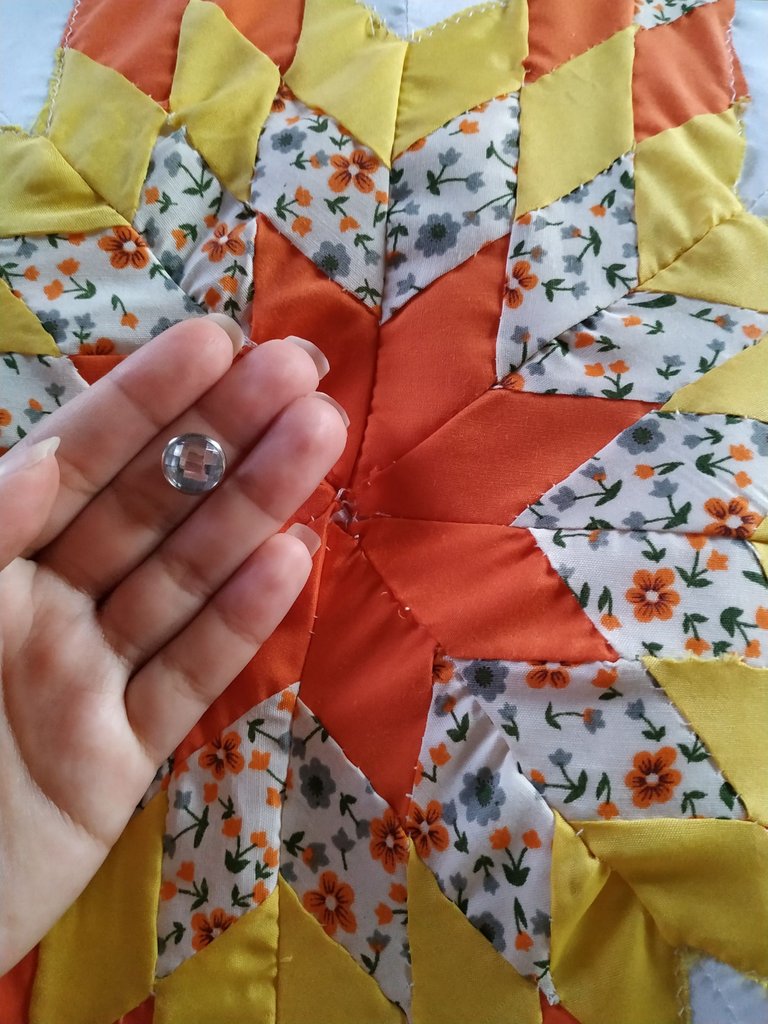
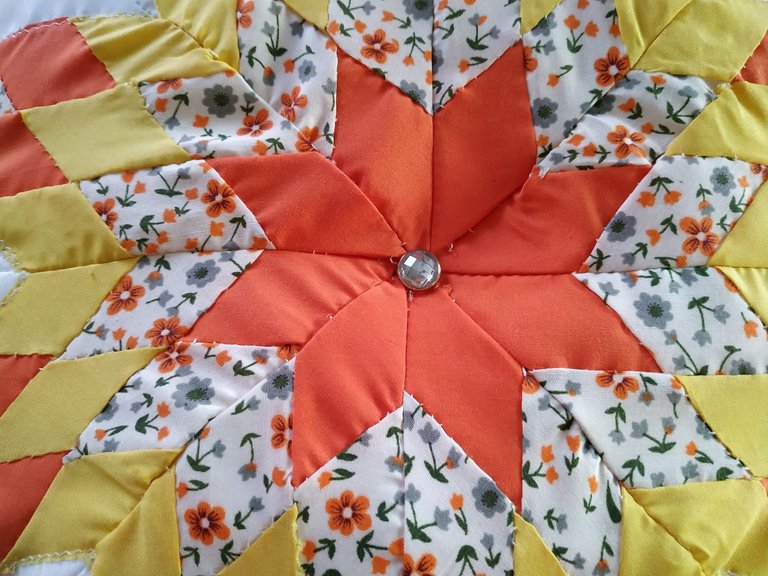
Colocamos una aplicación en el medio de la estrella y acomodamos el relleno del cojín.
Place an appliqué in the middle of the star and place the cushion filling.
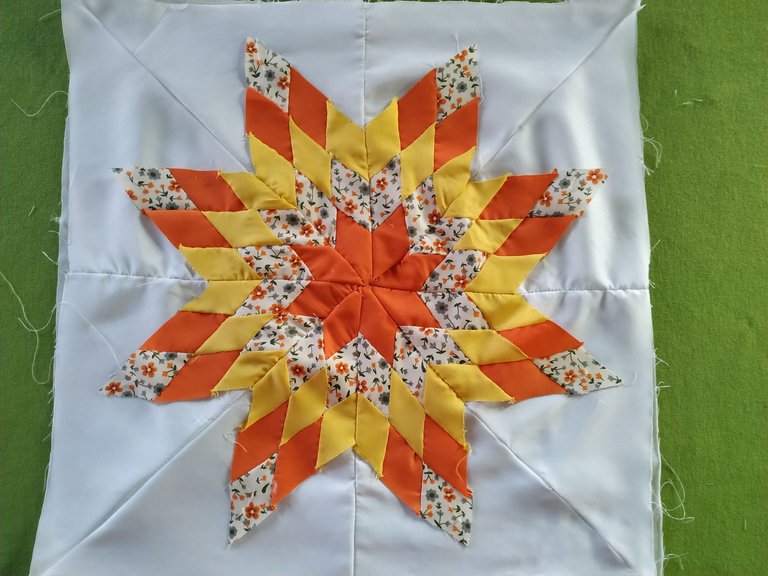
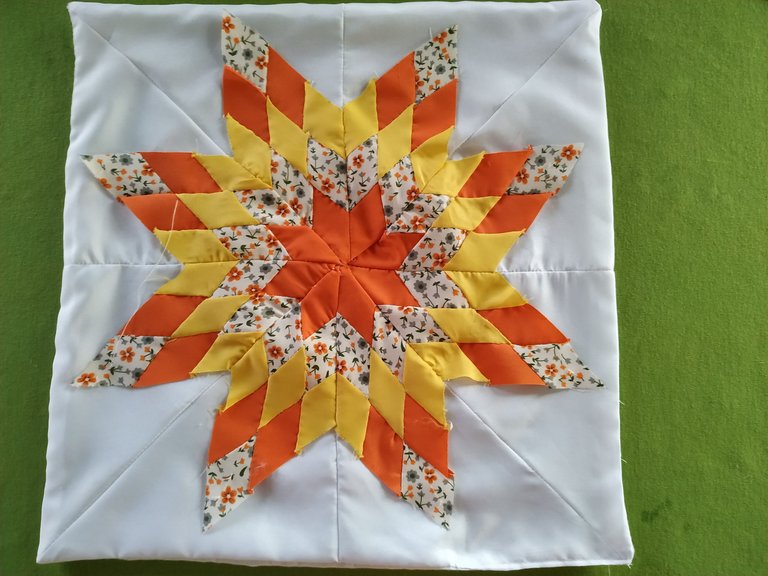
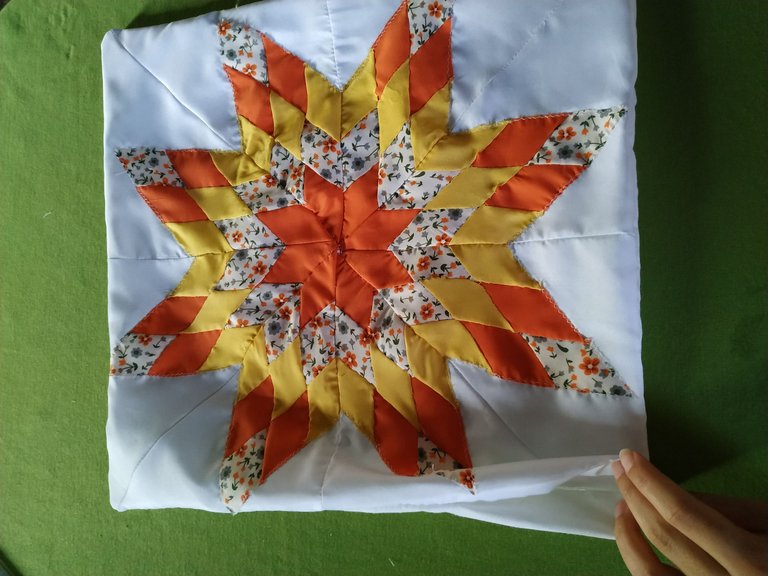
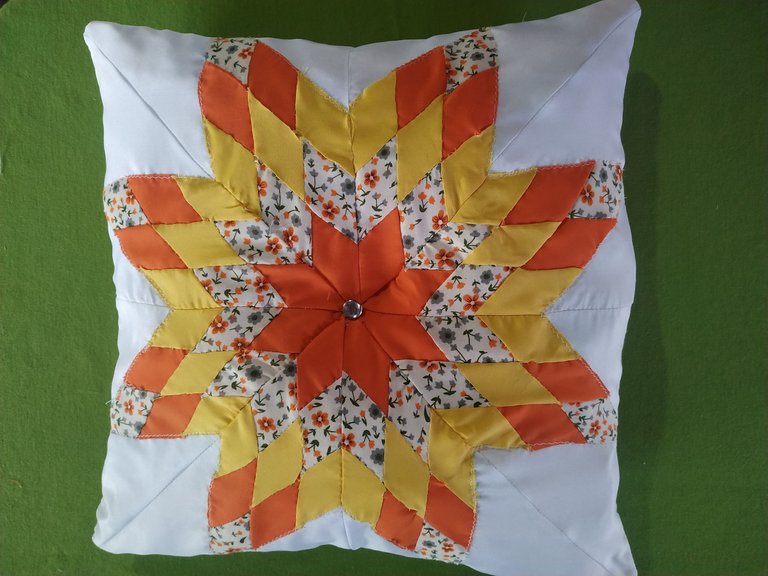
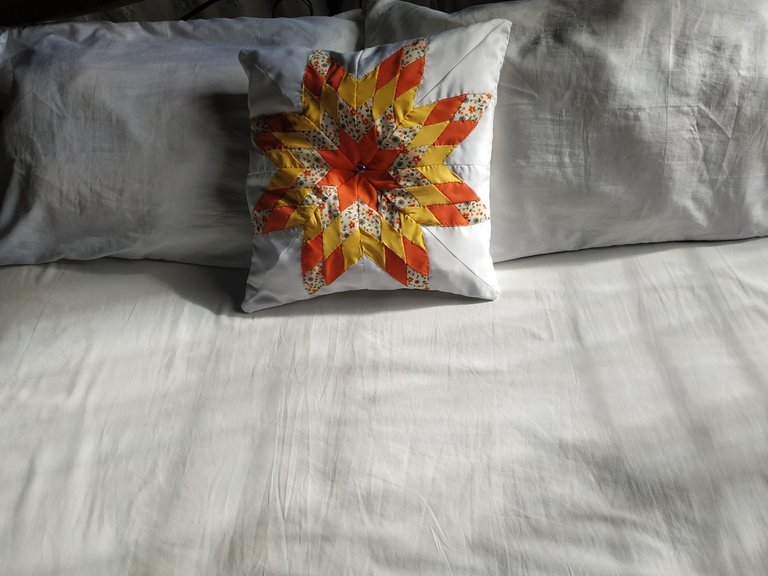
Con esto tendremos listo este bello cojín que en su frente tiene esta linda estrella hecha con la técnica de Patchwork.
With this we will have ready this beautiful cushion that on its front has this cute star made with the Patchwork technique.
Amé hacer este proyecto y aún más el hacerlo con mi mamá, el pasar tiempo con ella y sacar adelante una técnica que nunca habíamos practicado.
Ella me ayudó mucho y aportó ideas que hicieron que el resultado fuera mejor de lo que esperaba.
Muchas gracias a todos por leer mi blog, hasta la próxima.
I loved doing this project and even more to do it with my mom, to spend time with her and to bring forward a technique that we had never practiced.
She helped me a lot and contributed ideas that made the result better than I expected.
Thank you all for reading my blog, see you next time.
Fotos tomadas de mi teléfono Xiaomi Redmi Note 6 Pro || Photos taken from my Xiaomi Redmi Note 6 Pro phone.
Fuente del editor de imágenes || Image editor source
Hermoso trabajo lleno de bastante dedicación, un resultado muy bello.
!discovery 35
Muchas gracias 😄
This post was shared and voted inside the discord by the curators team of discovery-it
Join our community! hive-193212
Discovery-it is also a Witness, vote for us here
Delegate to us for passive income. Check our 80% fee-back Program
Congratulations @gabimramirez!
You raised your level and are now a Minnow!
Check out the last post from @hivebuzz:
Support the HiveBuzz project. Vote for our proposal!
¡Que lindo cojín! que buen trabajo amiga @gabimramirez 💓 💕 💜 suerte en el concurso ¡saludos y éxitos amiga! 👍 💮
Muchas gracias 😊 😊
@gabimramirez 🤩 excellent 👌