Panty con Encaje ❤️ [ESP - ENG]

Hola a todos mis queridos amigos de Hive, feliz lunes y feliz inicio de semana.
Espero que ayer pasarán un bello día de las madres junto a aquellas mujeres guerreras y hermosas que tienen la dicha de ser mamá. Por mi parte agradezco a Dios por permitirme pasar otro año junto a mi hermosa madre.
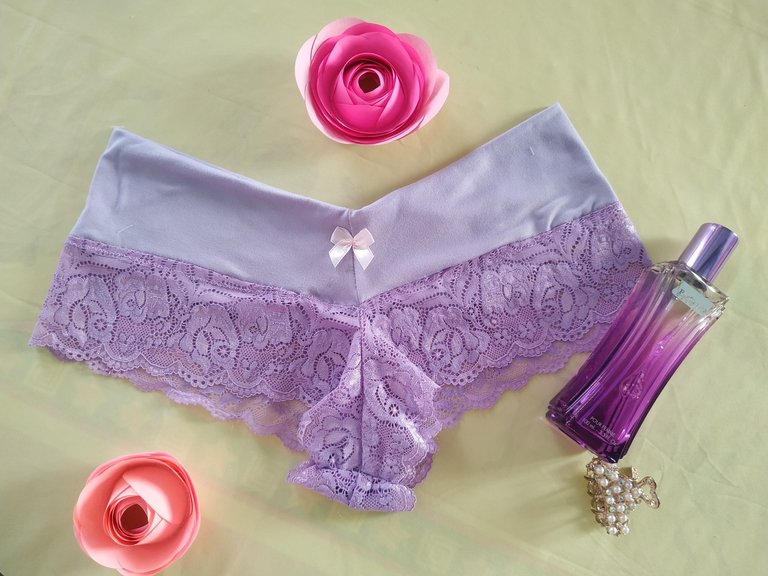
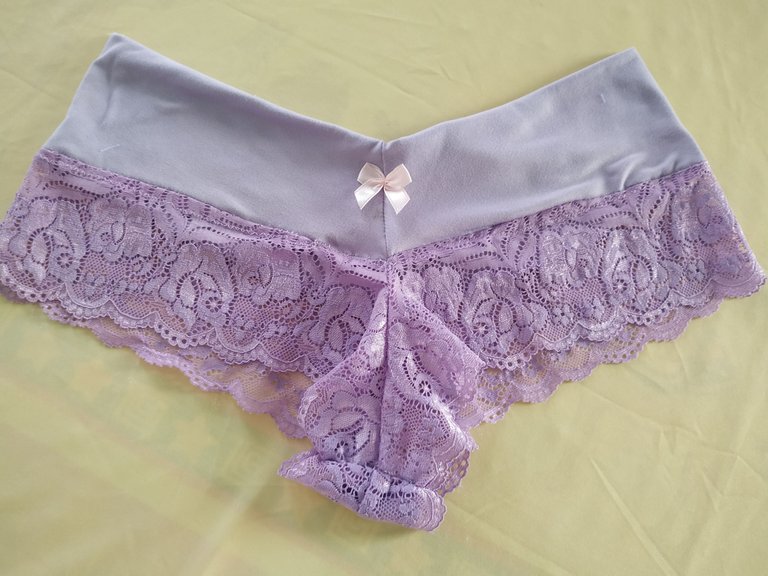
El día de hoy vuelvo con otro diseño de panty que me pareció muy hermoso, se trata de una panty con encaje color lila que está muy en tendencia. Ademas de ser muy sencilla de elaborar sus materiales son muy pocos así que no se pueden perder el paso a paso.

- Tela de algodón micro 180.
- Encaje elástico.
- Alfileres y agujas.
- Tijeras.
- Cinta métrica.
- Hilo.
- Moldes.
- Lazo decorativo.
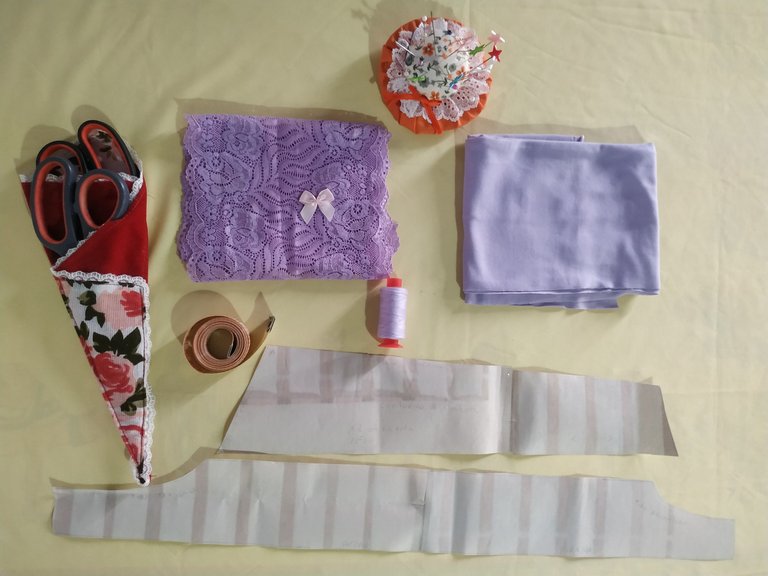

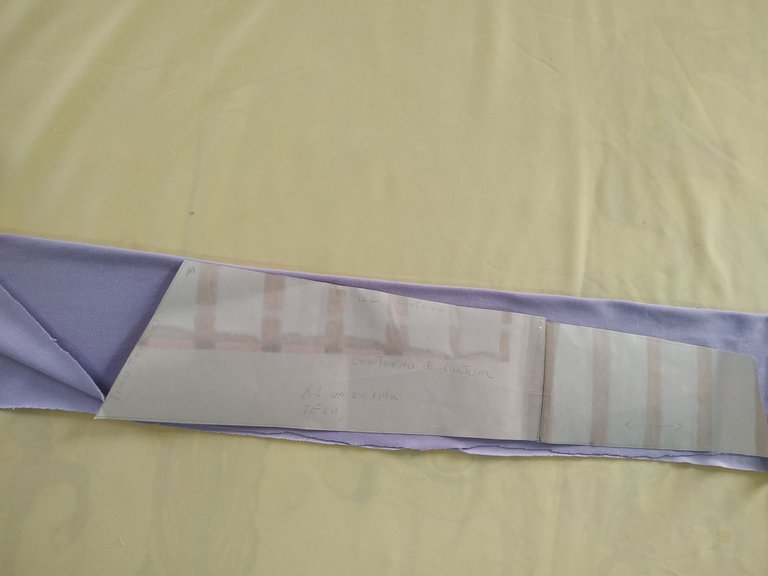
Estas son las piezas que debemos recortar para poder armar la panty.
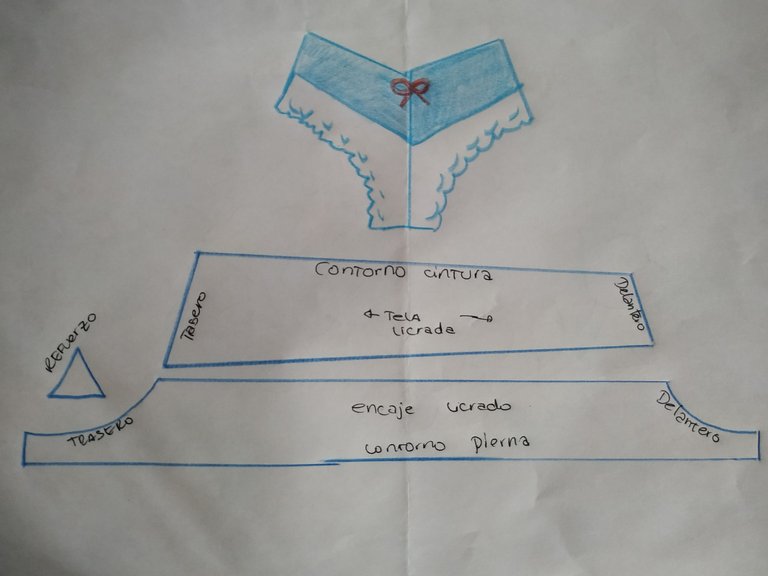
Así que como primer paso vamos a cortar las piezas y para ello sobre las telas colocamos los moldes y cortamos a la medida del mismo.
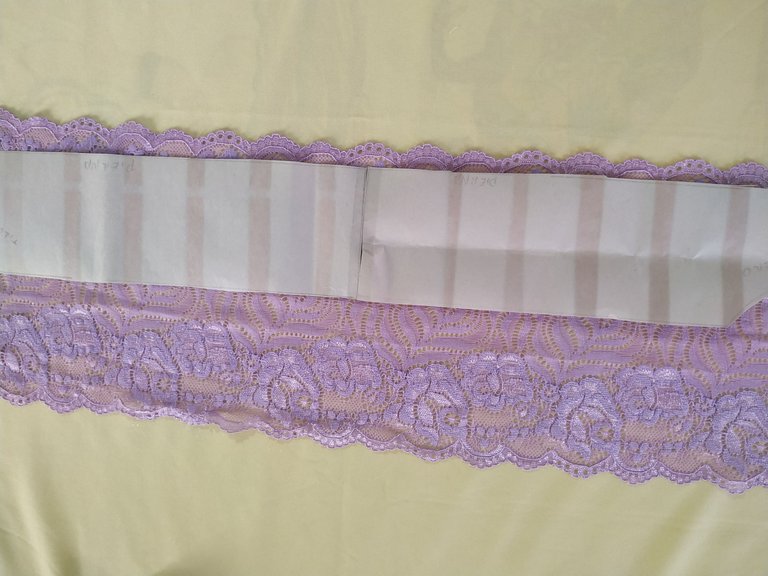
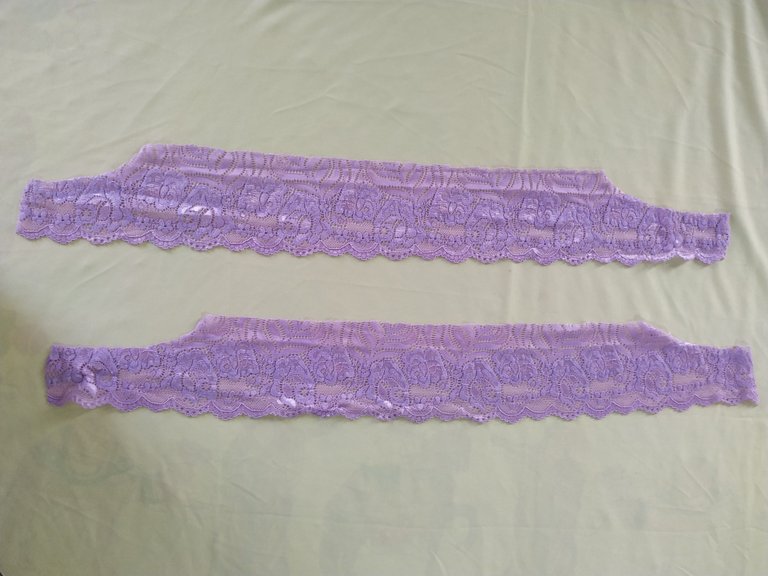
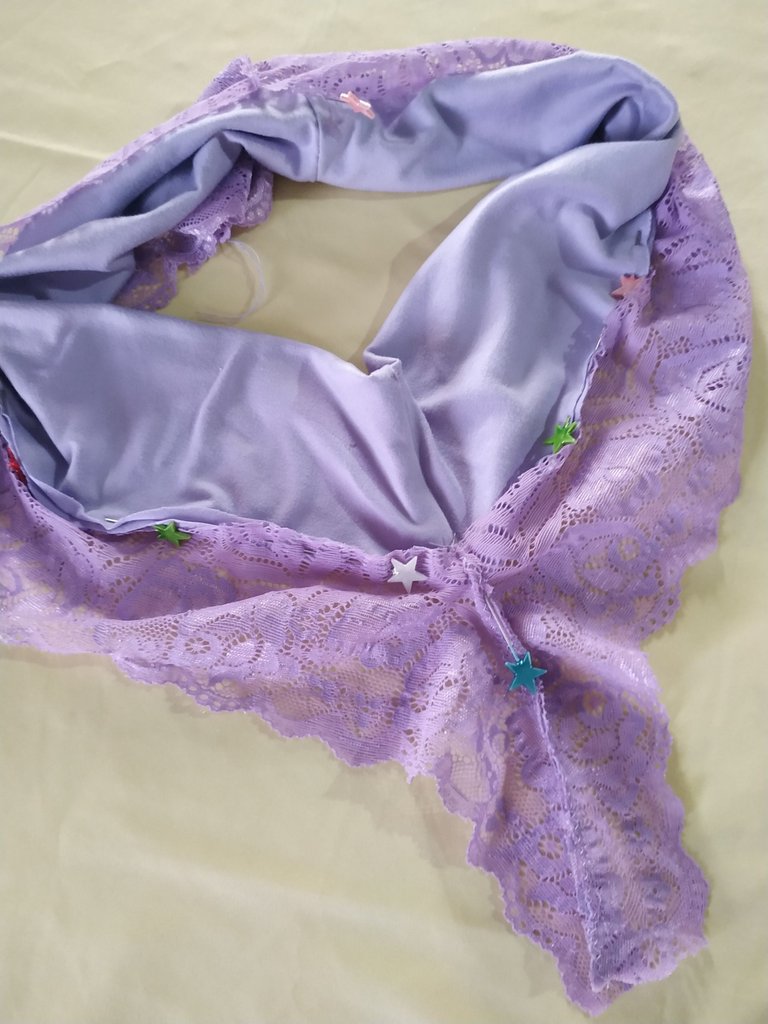
Del encaje nos debe de quedar dos piezas, ellas saldrán del mismo encaje ya que al utilizar un encaje de 18cm de ancho nos permite doblar a la mitad y de allí sacar los moldes para ambas piernas.
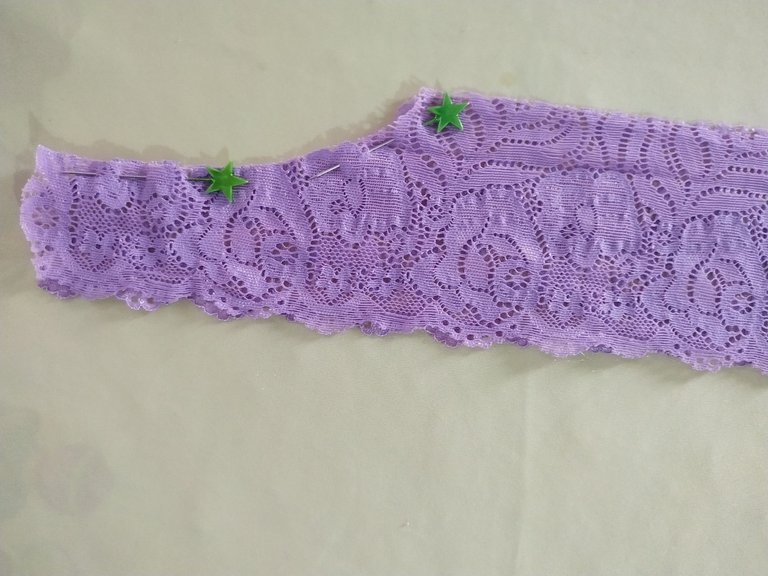
Estas piezas las colocaremos una arriba de la otra y luego procedemos a unir por la parte delantera y trasera, unimos con unos alfileres y pasamos costura.
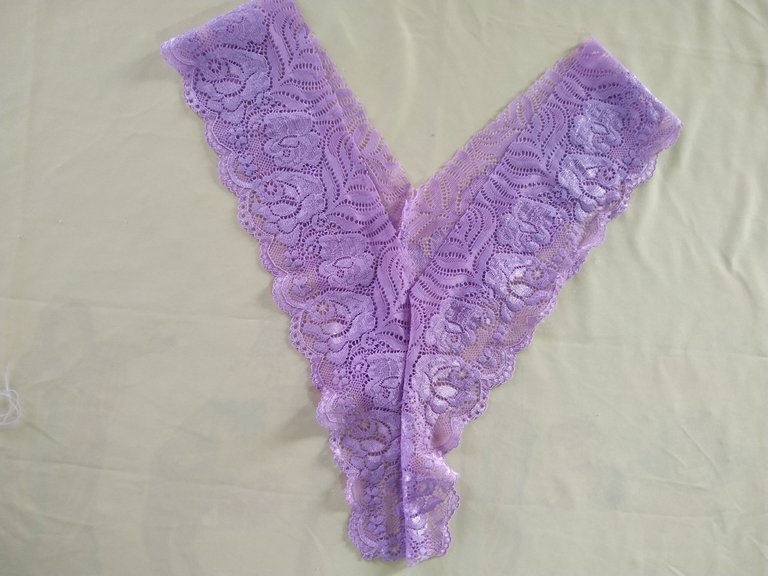
A este encaje le daremos vuelta para que quede por el derecho y luego lo giramos 90° y así nos quedará.
Para la cintura tomamos las piezas y las unimos a los laterales con unos alfileres para pasar costura. Damos un giro de 90 grados y luego vuelta, nos quedará de esta manera.
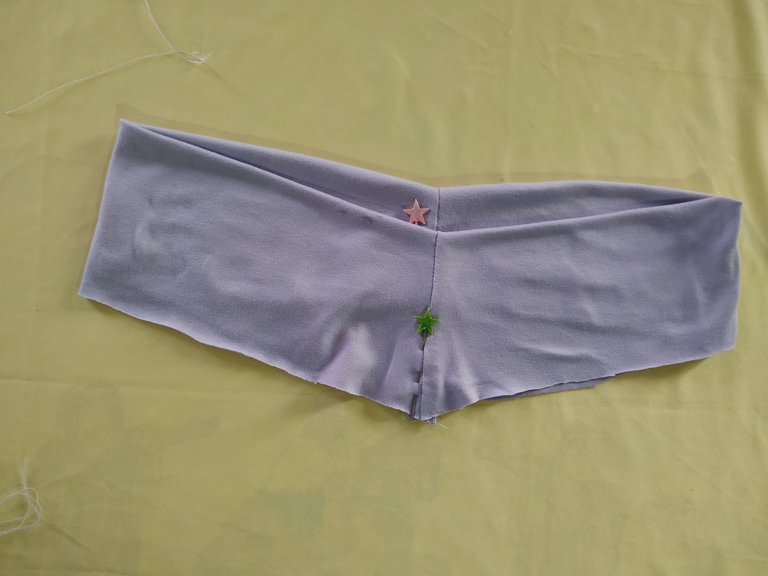
Vamos a unir ambas piezas con ayuda de unos alfileres, comenzamos por la parte delantera la cual vamos a centrar a la unión de la parte delantera del encaje. De allí podemos cuadrar el resto de la pieza.
Cómo ven, al unir las piezas se armará la panty.
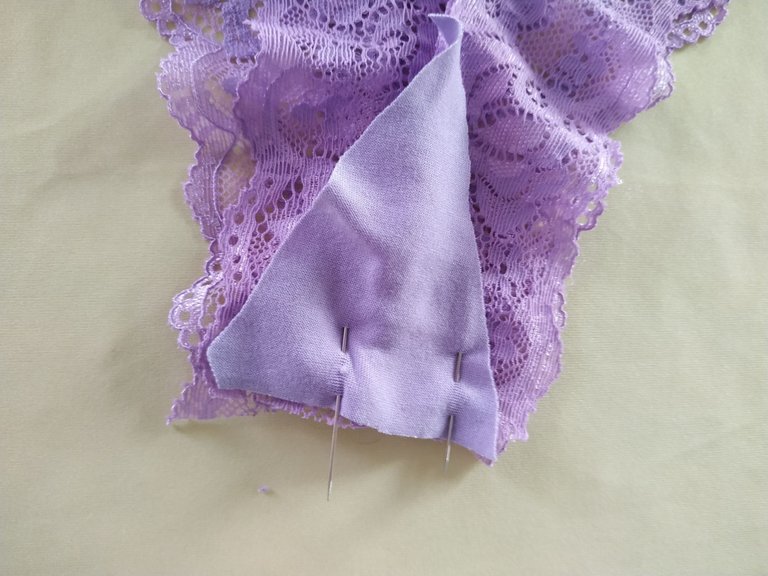
Continuamos con el refuerzo en la entrepierna y para ello recortamos un triángulo con tela de algodón micro 180. Al colocar el refuerzo debemos unir la entrepierna de la panty.
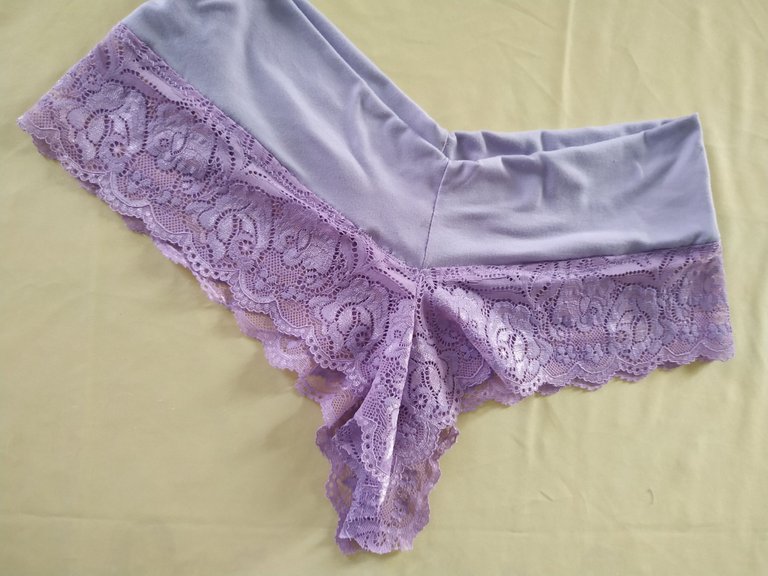
Cosemos, colocamos un lazo de decoración y con esto tendremos lista está bella y sexy panty de encaje.
Me gusta mucho el acabado de esta panty, y gracias a las ondas del encaje en la parte de la pierna no necesita morita ni sesgo.
Espero les haya gustado mi publicación de hoy y como siempre les deseo que tengan un buen día y noche.

Hello to all my dear friends of Hive, happy Monday and happy start of the week.
I hope you had a beautiful Mother's Day yesterday, together with those beautiful warrior women who have the joy of being a mom. I thank God for allowing me to spend another year with my beautiful mother.
Today I return with another panty design that I found very beautiful, it is a panty with lilac lace that is very in trend. Besides being very simple to make, its materials are very few so you can not miss the step by step.

- Micro fabric 180.
- Elastic lace.
- Pins and needles.
- Scissors.
- Tape measure.
- Thread.
- Molds.
- Decorative ribbon.

These are the pieces that we must cut out in order to assemble the panty.
So as a first step we are going to cut the pieces and for this we place the molds on the fabrics and cut them to size.
From the lace we should have two pieces left, they will come out of the same lace since using a 18cm wide lace allows us to fold it in half and from there take the molds for both legs.
These pieces will be placed one on top of the other and then we proceed to join the front and back, we join them with pins and sew them together.
We will turn this lace so that it is on the right side and then we turn it 90° and this is how it will look like.
For the waistband, we take the pieces and join them to the sides with pins to pass the seam. We make a 90 degree turn and then turn around, it will look like this.
We are going to join both pieces with the help of some pins, we start with the front part which we are going to center to the union of the front part of the lace. From there we can square the rest of the piece.
As you can see, by joining the pieces together, the panty will be assembled.
We continue with the reinforcement in the crotch and for this we cut out a triangle with micro cotton fabric 180. When placing the reinforcement we must join the crotch of the panty.
We sew, place a decorative bow and with this we will have ready this beautiful and sexy lace panty.
I really like the finish of this panty, and thanks to the waves of the lace on the leg part it doesn't need morita or bias.
I hope you liked my post today and as always I wish you have a nice day and night.
Editado en Canva || Edited in canva
Fotos tomadas de mi teléfono Xiaomi Redmi Note 6 Pro y mi teléfono Samsung J4 plus || Photos taken from my Xiaomi Redmi Note 6 Pro pone and my Samsung J4 plus phone.
Fuente del editor de imágenes y separadores || Image editor source and separators
Hola @gabimramirez, es un gusto saludarte. El panty está realmente hermoso y delicado, el color lila es muy bonito. Me gusta mucho la manera tan ordenadaen la que nos presentas el paso a paso, te felicito por tus progresos en la costura. Saludos!
Hola Katty, muchas gracias por tu lindo comentario, siempre me alaga recibir estos elogios de personas tan talentosas como tu.
Saludos 🤗
Hola amiga @gabimramirez muy bonito tu trabajo y un fino acabado. Felicitaciones y gracias por mostrarnos el paso a paso de tu costura. Saludos.
Hola linda, me gusta mucho como quedan los acabados gracias al encaje, siento que le da un plus a la prenda, gracias por tu comentario.
Me encantó este modelo de panty, sobre todo la combinación de telas y me cae como anillo al dedo porque tengo un poco de Blonda stresh negra y quería hacer una panty pero la veo muy poca y al usar como tú acá otra tela en combinación creo que si me resultará. Gracias por compartirnos tu trabajo. Felicidades. Buen post.
Espero con este tutorial la aproveches al máximo, saludos Mariela.
I love the way you break down each of the steps you follow to achieve this beautiful pant, you make it simple to understand it
I always try to do my best to explain the project as well as possible, thank you for appreciating it.
Best regards my friend.
Hola @gabyramirez, te quedó muy linda la panty, la combinación de colores está genial, luce muy delicada, el encaje agrega un estilo sensual je je.
Feliz martes!
El color morado claro o lila luce muy bien siento que escogí bien jeje. Gracias por tu lindo comentario ❤️
Thanks for your support. ❤️
HERMOSA PIEZA DE ROPA INTIMA. ME ENCANTO.
Gracias linda
Que bonita te quedó esta panty de encaje, amiga. Se ve delicada y el color es súper tierno 💟
El color me gustó desde que lo vi y ademas esta muy en tendencia los colores pasteles. Gracias por pasarte por mi blog linda, saludos.
This is a so beautiful piece 😍, I also love the colour used and will try this out
Thanks for sharing 😊