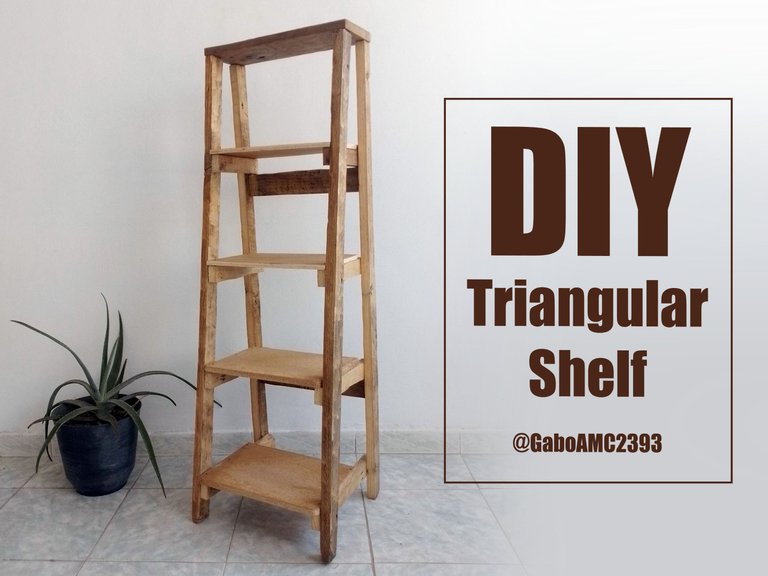
DIY: Triangular Shelf / Estante Triangular
Working with wood is not easy, it requires a lot of skill and some knowledge to do it well; however, it is something I like to do and from time to time I do some woodwork.
Recently I was asked to make a kind of triangular wooden shelf, something decorative but functional, that would serve to place objects in the room. But to make this shelf I would need wood, so I looked for some planks I had around the house and started working on them.
Trabajar con madera no es fácil, requiere de mucha habilidad y de ciertos conocimientos para hacerlo bien; sin embargo, es algo que me gusta hacer y de vez en cuando hago algunos trabajos en madera.
Recientemente me pidieron hacer un tipo de estante triangular de madera, algo decorativo pero funcional, que serviría para colocar objetos en la habitación. Pero para hacer este estante necesitaría madera, así que busqué algunos tablones que tenía por la casa y comencé a trabajar en ellos.
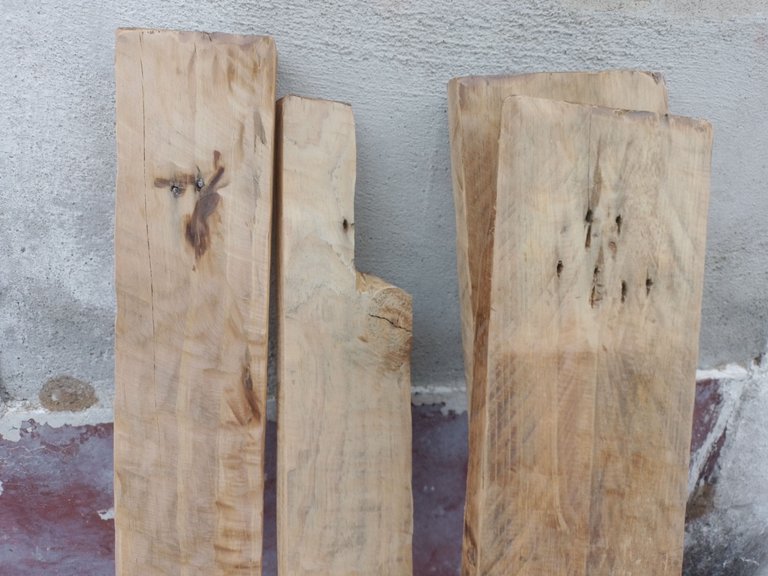
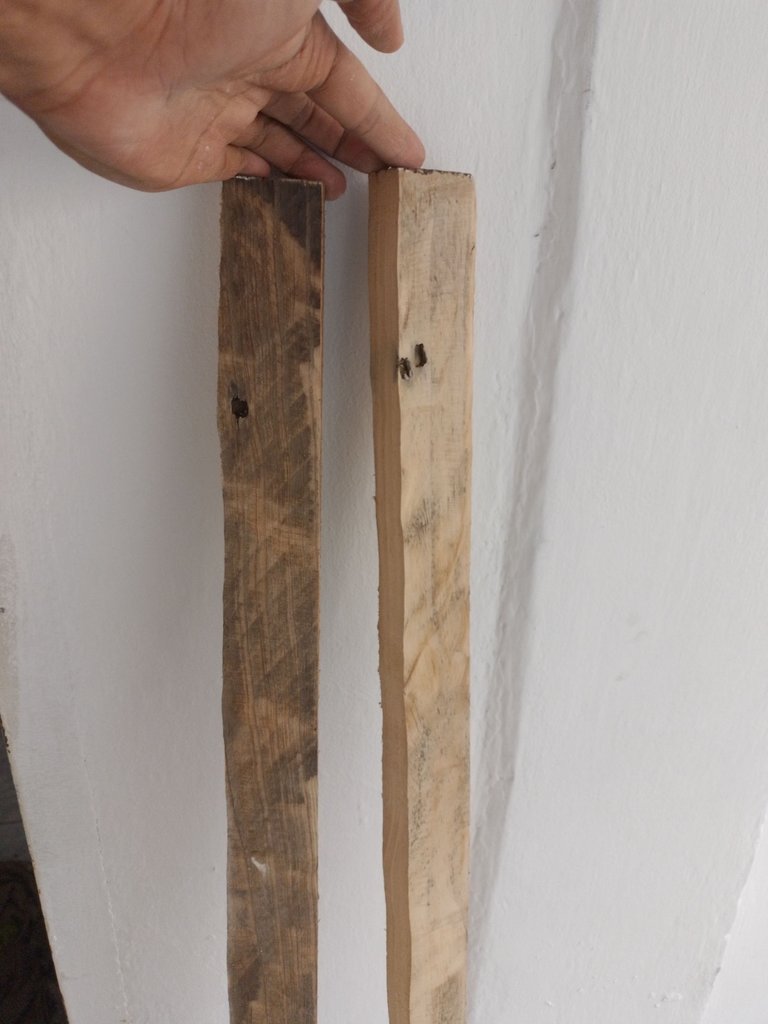
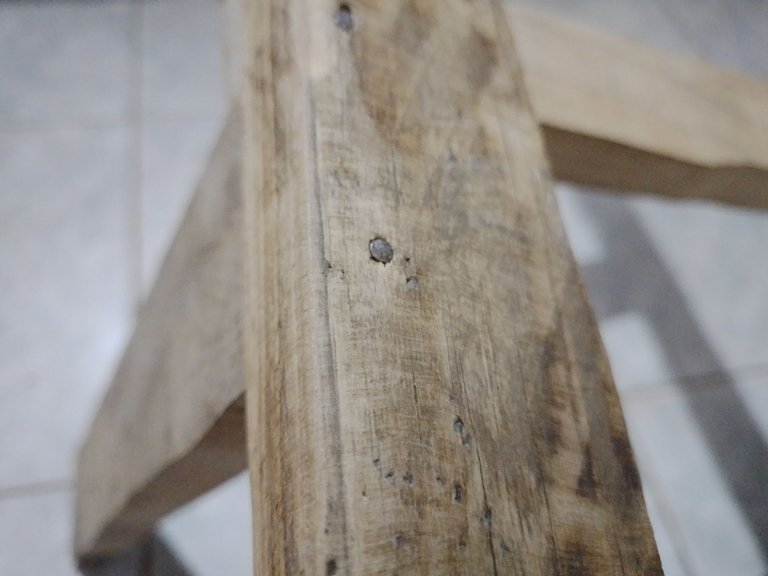
They were long planks, all about the same size. Sometimes I'm not much of a measurement guy, so I just measure with my eyes or even with my hands.
Eran tablones largos, todos del mismo tamaño aproximadamente. A veces no soy de trabajar mucho con medidas, así que simplemente voy midiendo con la mirada o incluso con mis manos.
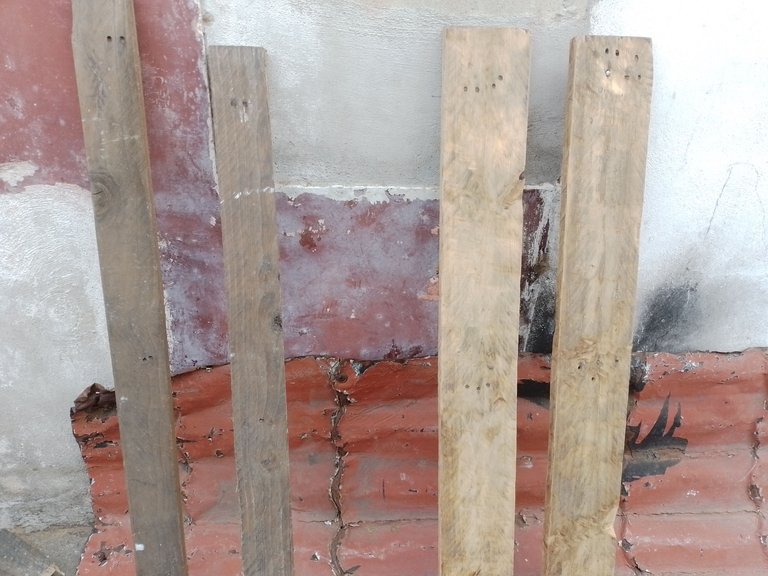
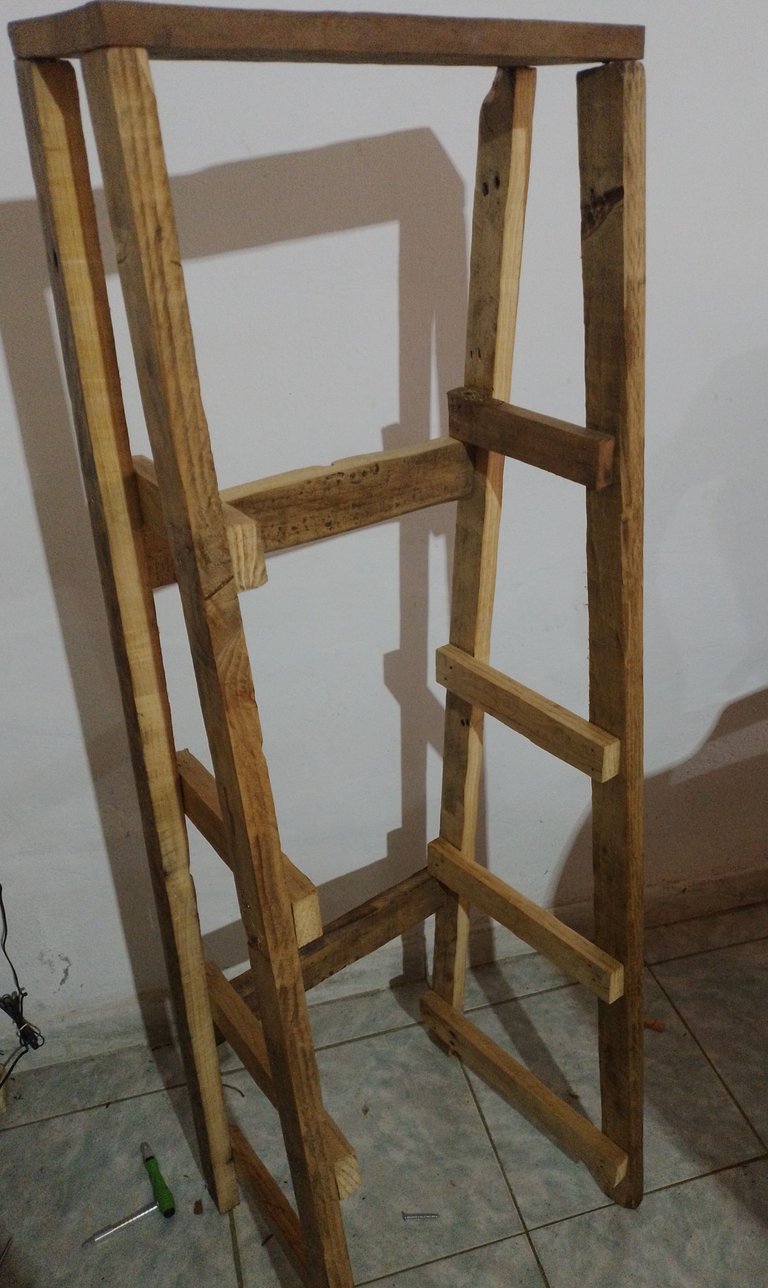
I would actually need two strips of wood, but since the planks were wide, I simply split them in half, vertically, to get two strips of the same length but thinner.
These two slats would be the ones that would give the triangular shape to my shelf.
En sí necesitaría dos listones de madera, pero como los tablones eran anchos, simplemente los dividí a la mitad, de manera vertical, para sacar dos listones del mismo largo pero más delgados.
Estos dos listones serían los que darían la forma triangular a mi estante.
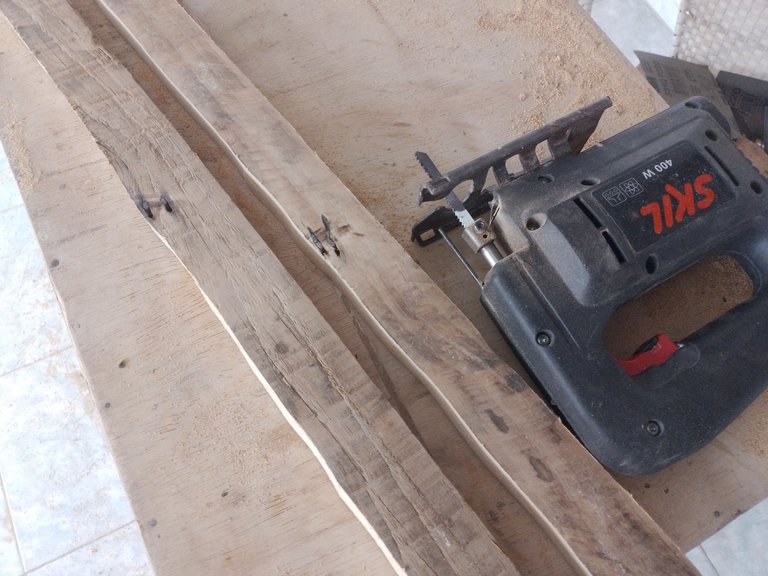
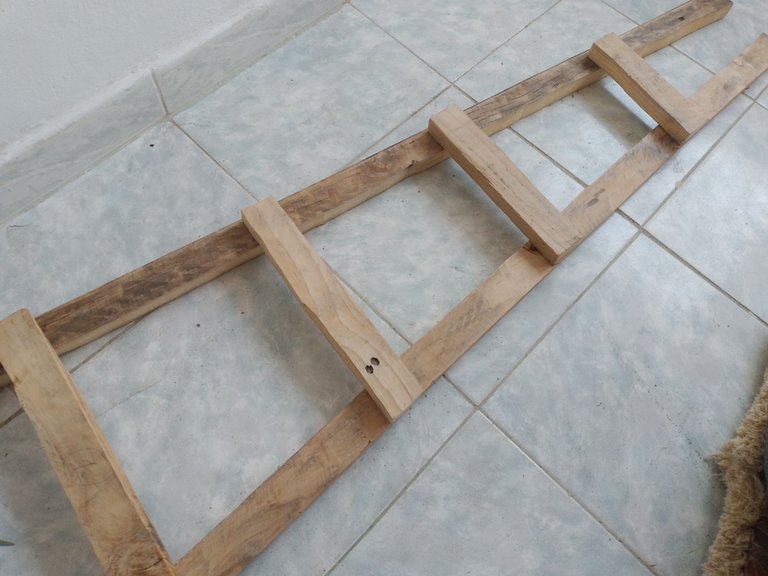
I cut four much smaller strips. In these I did use measurements to create that triangular effect and to have some symmetry. The bottom ribbon, the longest, was cut to 34 centimeters, the following ones were cut 5cm shorter than the previous one, being the second one 29 centimeters long, the third one 24 centimeters long and the last one 19 centimeters long.
Below you can see a picture of how everything looked in its place, without nailing or screwing anything.
Corté cuatro listones mucho más pequeñas. En estos sí usé medidas para lograr crear ese efecto triangular y que hubiese cierta simetría. El listón de abajo, el más largo, lo corté de 34 centímetros, a los siguientes les reduje 5cm con respecto al anterior, siendo el segundo de 29 centímetros, el tercero de 24 y el último de 19 centímetros de largo.
A continuación pueden ver una fotografía de cómo se veía todo en su lugar, sin clavar ni atornillar nada.
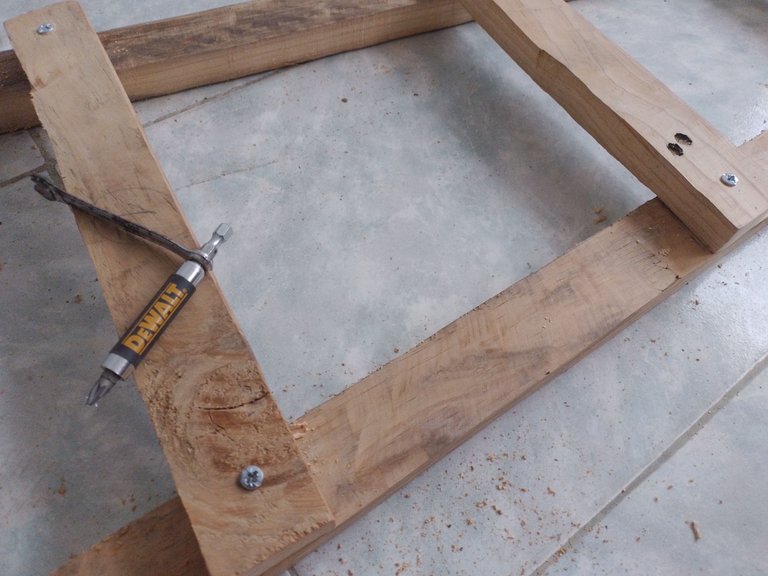
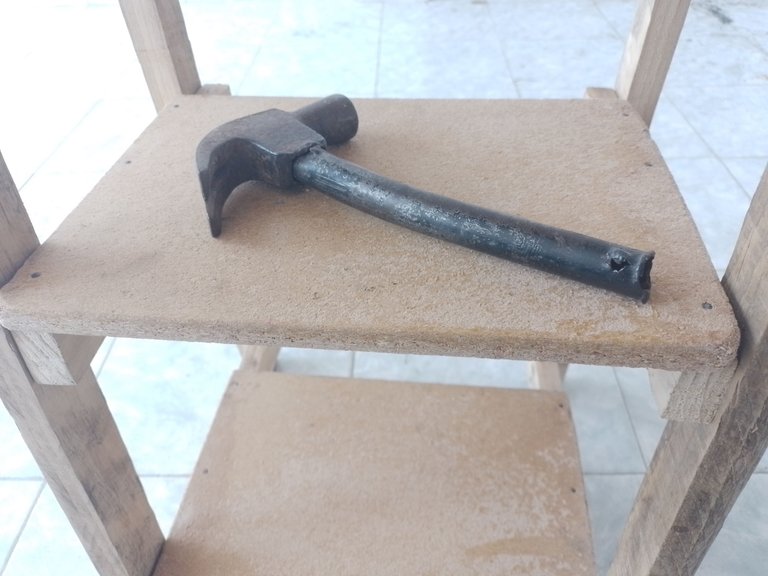
Once I saw that everything was in place, I used a drill to drill holes in the wood and screwed everything into place. I made the holes big enough for the screw to go through and not be on top of the wood. I only used screws in some parts, to give more strength, but in other parts I used wood nails.
Una vez que vi que todo estaba en su sitio, usé un taladro para abrir agujeros en la madera y atornillé cada cosa en su lugar. Hice agujeros lo suficientemente grandes para que el tornillo pasara y no quedara encima de la madera. Solo usé tornillos en algunas partes, para dar mas fuerza, pero en otras partes usé clavos de madera.
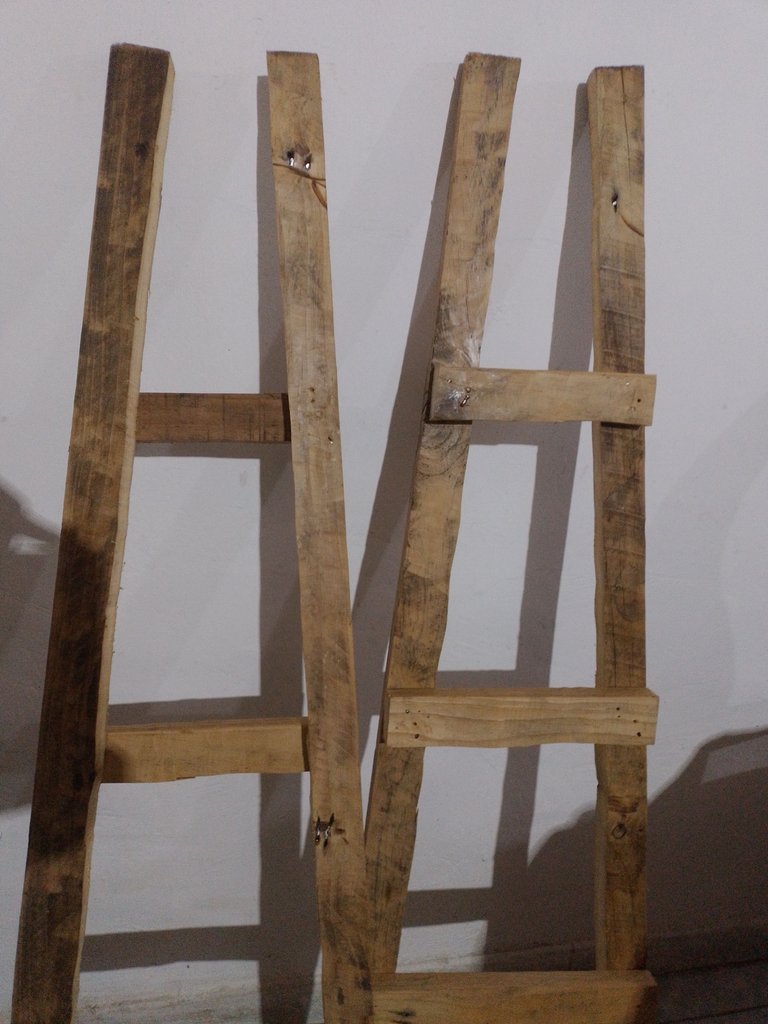
From each triangle I had to make two, so the same thing I did with the first one, I repeated it with the second one. Same measurements, same process, only in reverse, as you can see in the image below:
De cada triángulo debía hacer dos, así que lo mismo que hice con el primero, lo repetí con el segundo. Mismas medidas, mismo proceso, solo que a la inversa, tal como pueden ver en la imagen de abajo:
On the other hand, to join these two triangles, I cut two wooden strips of 34 centimeters each and placed them horizontally between the two triangles, using nails to hold the wood together.
Por otra parte, para unir estos dos triángulos, corté dos listones de madera de 34 centímetros cada uno y los coloqué de manera horizontal entre los dos triángulos, usando clavos para mantener unidas las maderas.
I cut a piece of wood 39 centimeters long and 14.5 centimeters long. This was to give more support to the upper part of the whole shelf, so that the whole piece would be firmer.
Corté un trozo de madera de 39 centímetros de largo y 14,5 de largo. Esto para darle mayor soporte a la parte superior de todo el estante, para que quedase con mayor firmeza toda la pieza.
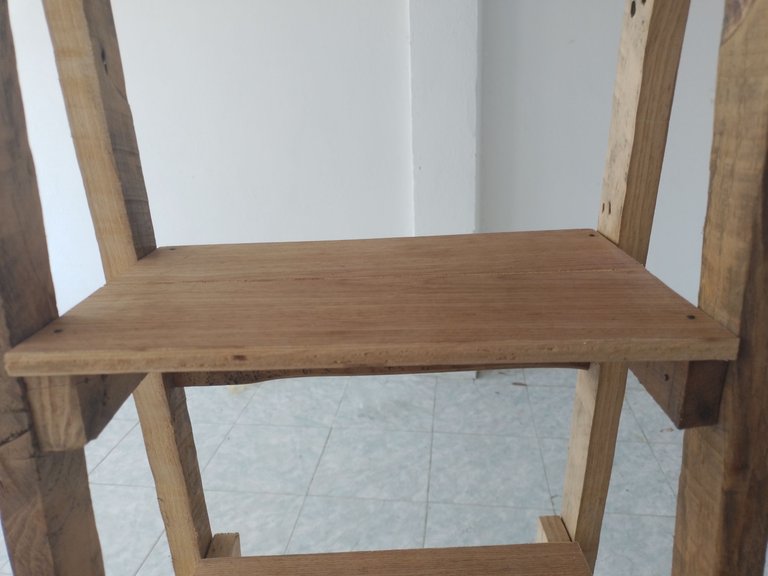
Finally, I cut smaller pieces of wood, 34 centimeters long each, to fit the size of the shelf. These would be the shelf shelves, which will serve to place all the decoration we want.
Finalmente corté maderas más pequeñas, de 34 centímetros de largo cada una, para que calzara con la medida del estante. Estos serían los entrepaños del estante, que servirán para colocar toda la decoración que queramos.

I used small nails to fasten each of the shelves to the supporting wood. On the small shelves I used four nails, one in each corner; on the other hand, on the larger shelves I used six nails, four for the corners and two more for the centers.
Usé clavos pequeño para fijar cada uno de los entrepaños en las maderas de soporte. En los entrepaños pequeños usé cuatro clavos, uno en cada esquina; por otra parte, en los entrepaños más grandes usé seis clavos, cuatro para las esquinas y dos mas para los centros.
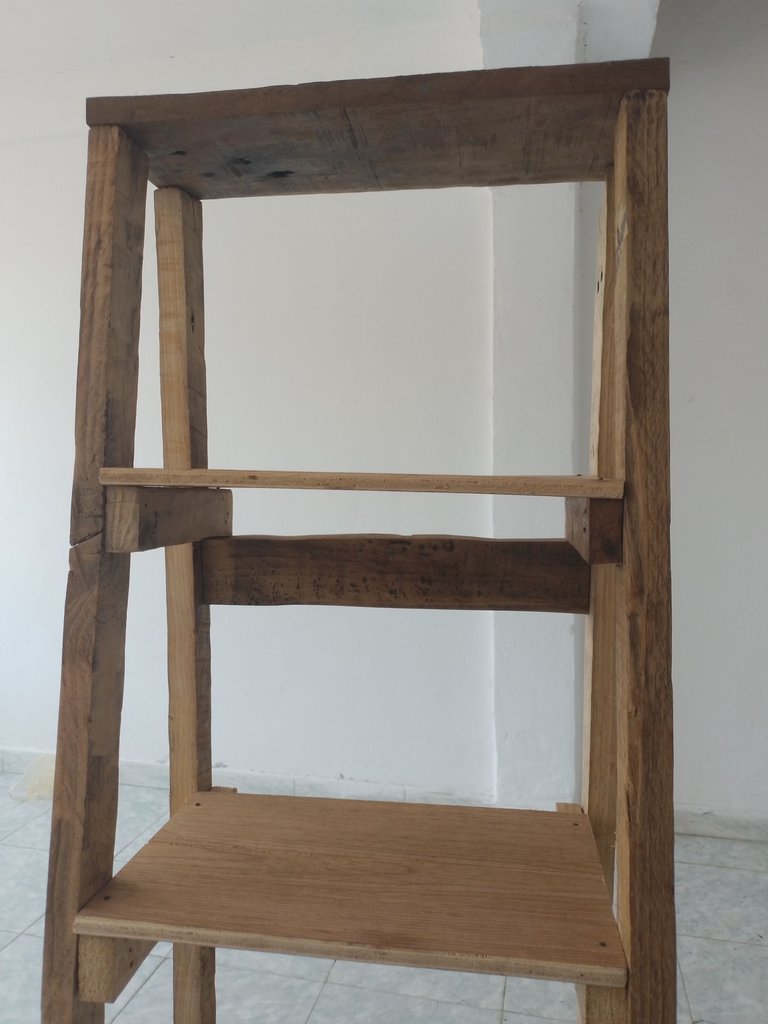
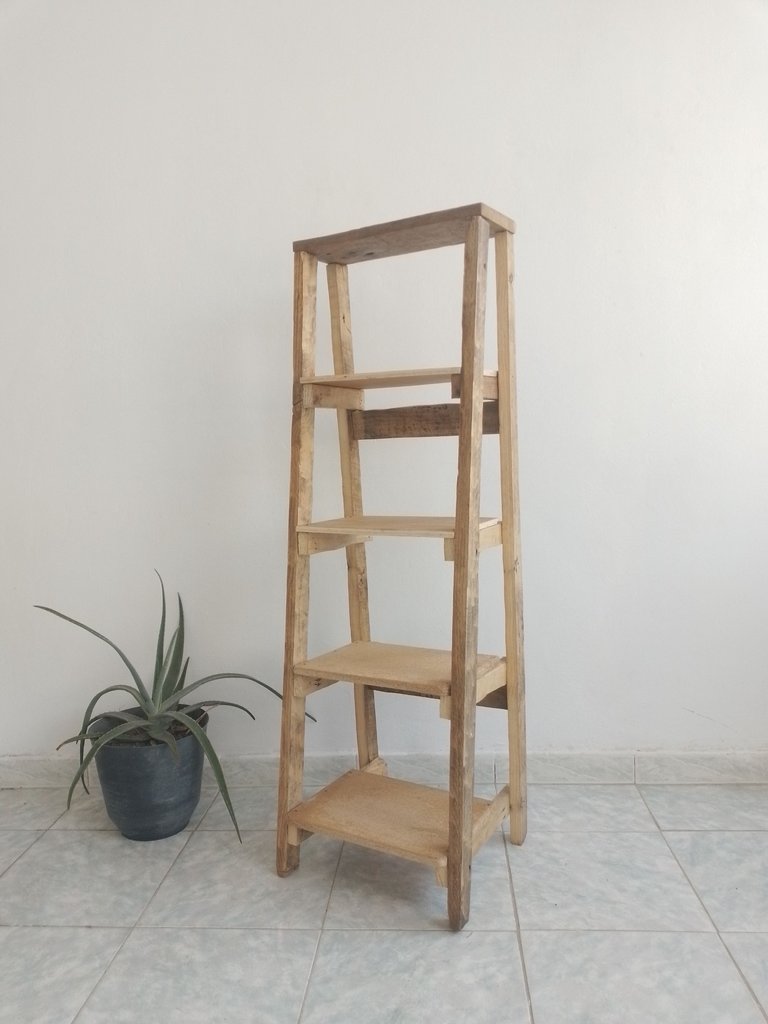
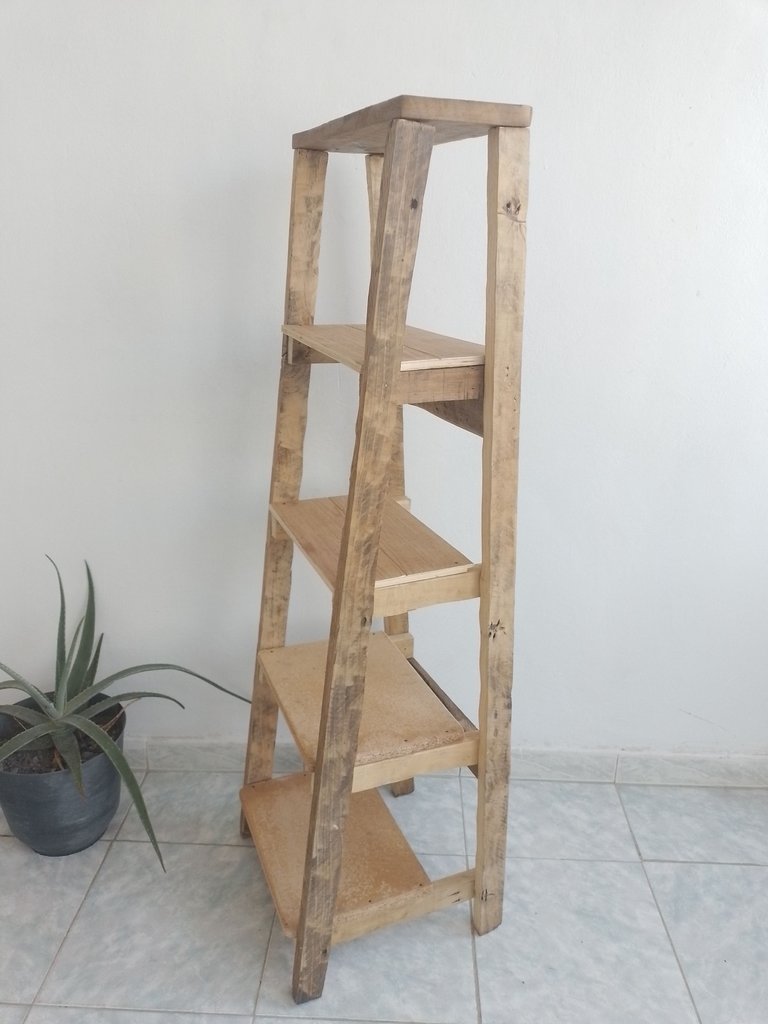
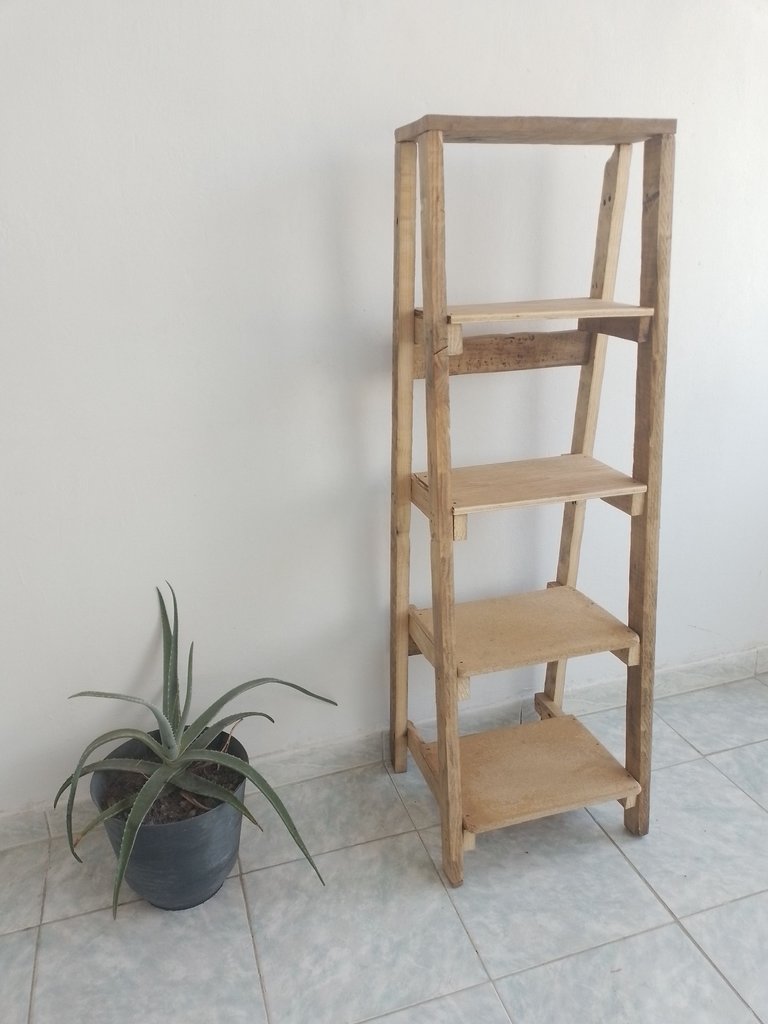
This way the shelf was completely finished. Obviously it's something handmade and I'm not a professional carpenter either, so it wasn't completely exact in terms of measurements, but at least it looks nice and resistant, which is what matters to me.
De esta manera el estante quedó completamente terminado. Obviamente es algo artesanal y tampoco soy carpintero profesional, así que no quedó completamente exacto en cuanto a medidas, pero al menos se ve bonito y resistente, que es lo que me importa.
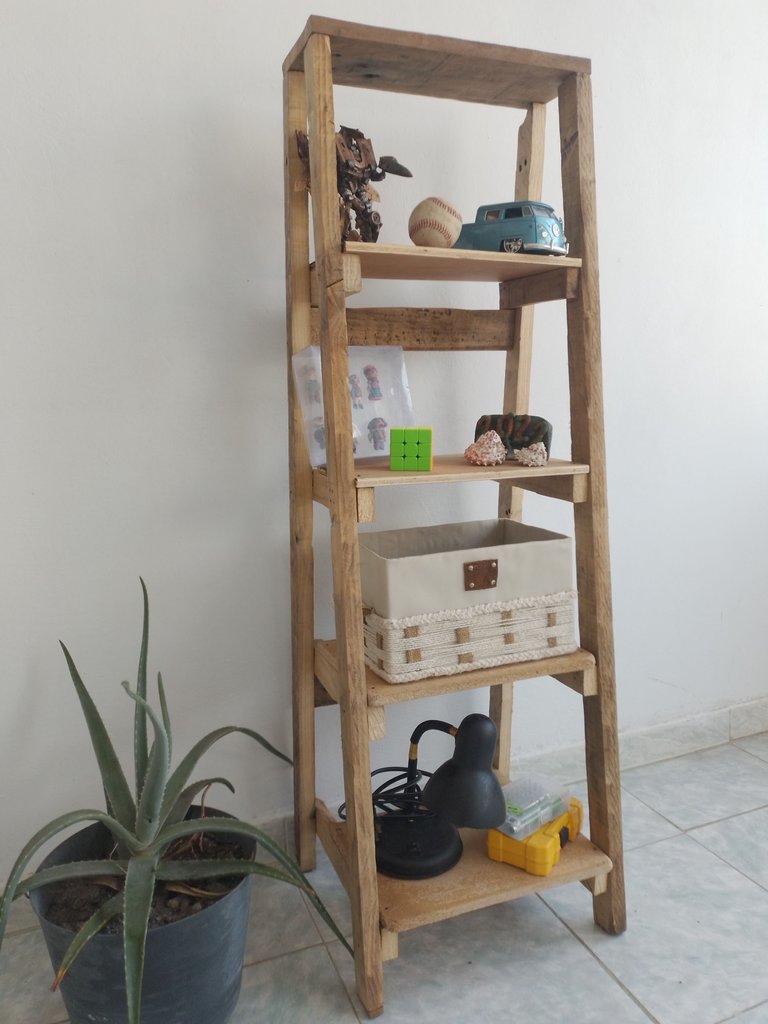
Below is a series of photographs of the final result.
A continuación los dejo con una serie de fotografías del resultado final


Well friends, that's all for now. I sincerely hope that you have found this tutorial useful or at least liked it. I invite you to leave your opinions below in the comments, as always I will be happy to read them.
I appreciate you taking the time to visit my publication. With nothing more to add I will say goodbye then...
See you next time!
Bien amigos, esto ha sido todo por ahora. Espero de corazón que este tutorial les haya parecido útil o cuando menos haya sido de su agrado. Los invito a dejar sus opiniones abajo en los comentarios, como siempre estaré encantado de leerlos.
Agradezco que se tomaran el tiempo de visitar mi publicación. Sin más que agregar me despido entonces...
¡Hasta la próxima!


it does look very nice. there is heart in it, a piece of you. and it will always be around you, materialized.
the more i see and experience diy, the more it becomes clear to me that this is the way to go. we have a self-build spice rack in our van and it brings so much joy to see it, know we made it ourselves and that it is unique.
It's always great to do things for yourself, because they will always have a part of you in what you did, it's the way to go.
Great job on the shelf. I am pretty tempted to give it a go myself.
I have picked this post on behalf of the @OurPick project! Check out our Reading Suggestions posts!
Please consider voting for our Liotes HIVE Witness. Thank you!
It is interesting to do this kind of work, I hope you dare. Thanks for your support!
It's very unique idea and you have designed this shelf very beautifully
Siempre he admirado a las personas que tienen la habilidad de crear cosas maravillosas con pocos elementos, sobretodo en madera. Este estante es bello, con un estilo minimalista y rústico a la vez. Luce genial, gran trabajo. Felicidades.
Si esa era la idea, algo minimalista pero que luciera muy bien, me alegra que te haya gustado.
Definitivamente te quedó genial el estante, el diseño en forma triangular y de escalera que le diste, me encantan las cosas de madera rústicas y que mantenga su color original de madera totalmente crudo.
Gran trabajo 💙
!DIY
!PIZZA
Pues es algo artesanal, hecho a mano, así que lucen bien estas cosas rústicas que ciertamente lo hacen ver como algo hecho a mano. Gracias por pasar a comentar y valorar mi trabajo!
$PIZZA slices delivered:
@dayadam(1/5) tipped @gaboamc2393
Excelente, de verdad que gran arte los que saben trabajar con madera
You can query your personal balance by
!DIYSTATSBeautiful shelf that you present to us made of recycled wood, the design was very nice. Good job, congratulations
a community encouraging first-hand content, and each individual living their best life.
Simple yet Aesthetic. This is good for minimalist design
Great outcome! Thank you for the tutorial. I’m keen on making one just like this in the future.
¡Wuao! me encanto @gaboamc2393 , mis matas se vería muy lindas y en Navidad los adornos y los patas largas se verían geniales.
Esta hermoso, al natural. Que Dios siga bendiciendo tu mente creativa.
👏.