Tooth Fairy by Guillermo del Toro/ Hada de los dientes de Guillermo del Toro
🧚♂️ Tooth Fairy by Guillermo del Toro/ Hada de los dientes de Guillermo del Toro🧚♀️
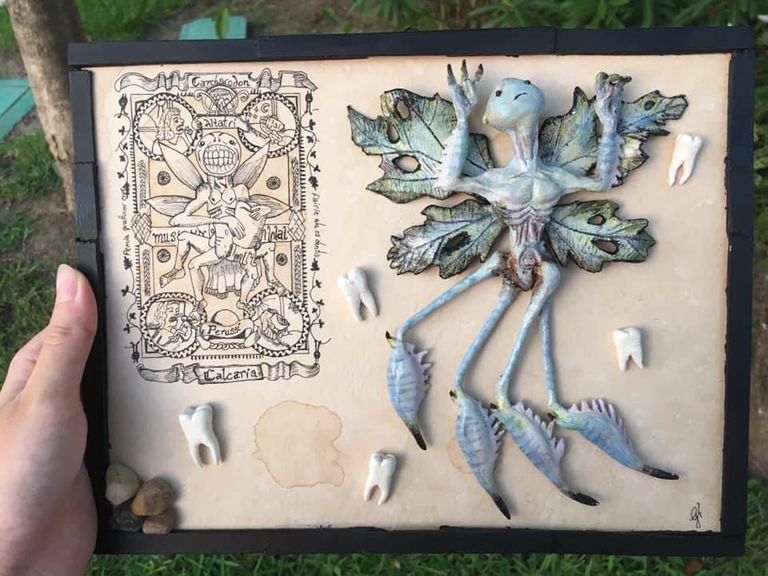
Welcome back to my blog! today I want to show you step by step how to make Guillermo del Toro's tooth fairy from the movie "hellboy" in an entomological box. 🧚♀️💛
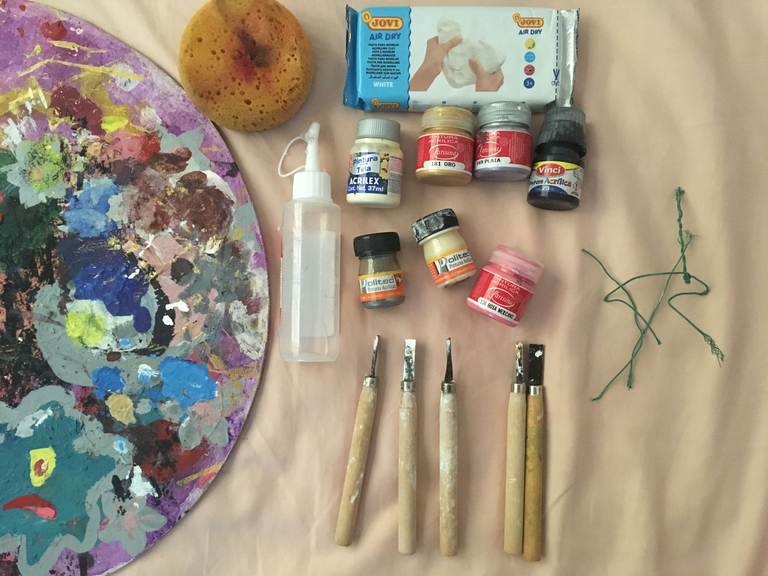
⭐The materials I used were:
- Water
- Chisels
- Brushes
- Pink, gray, green, green, black, brown, blue paint.
- Moldable Foami
- Sponge
- Wire
- Silicon
- White air-drying clay
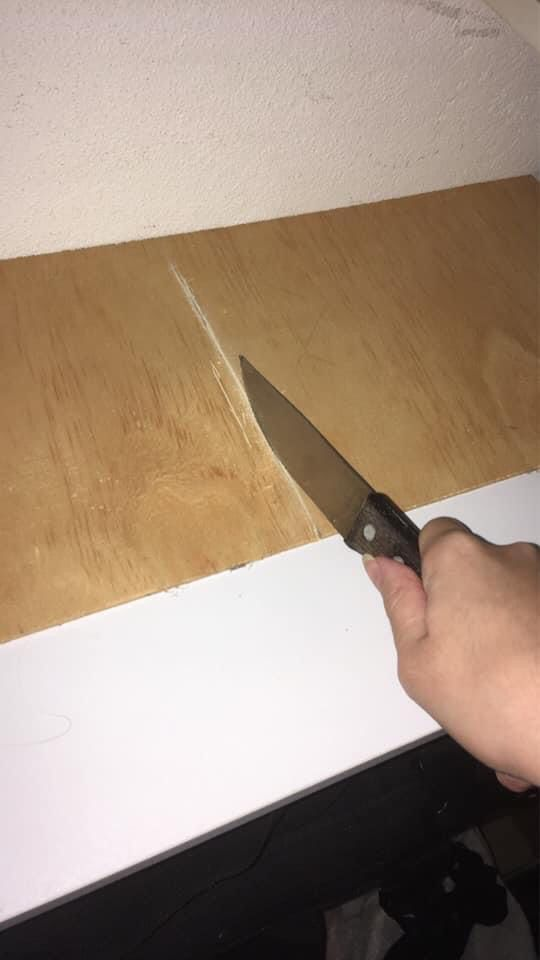
- Piece of wood
- Wooden tongue depressor
- Wooden palette for painting.
- White glue
- Gel pencil
- White sheet
- Soluble coffee
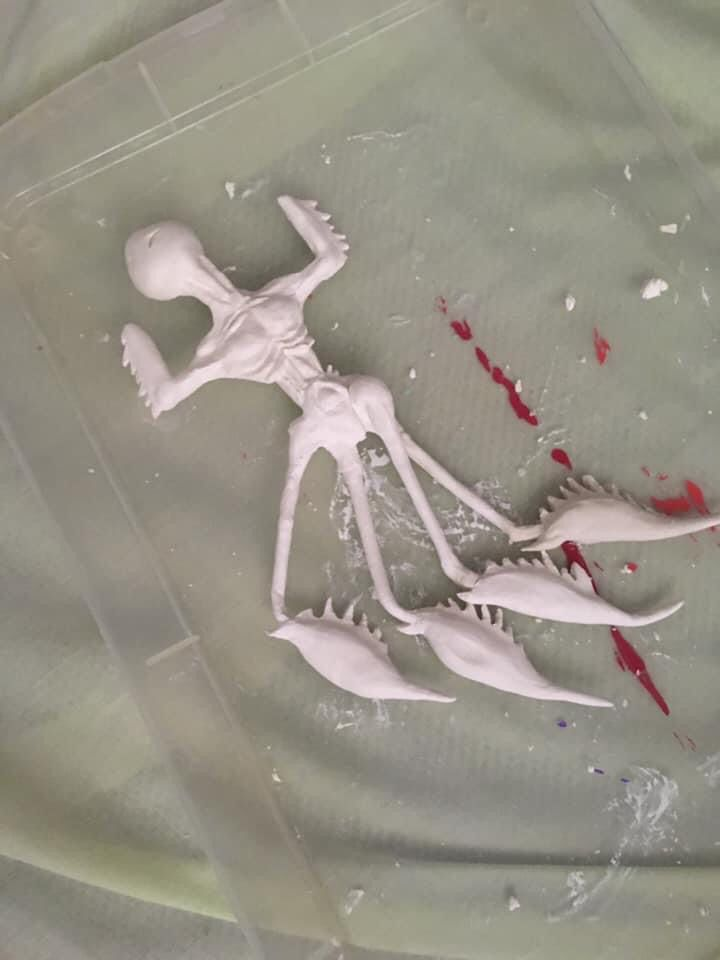
We take the clay and make a little ball giving it the shape of a head, we introduce a piece of wire to make it easier to mold the neck and thorax. With a chisel and water we will give the anatomical details of the body, neck, abdomen.
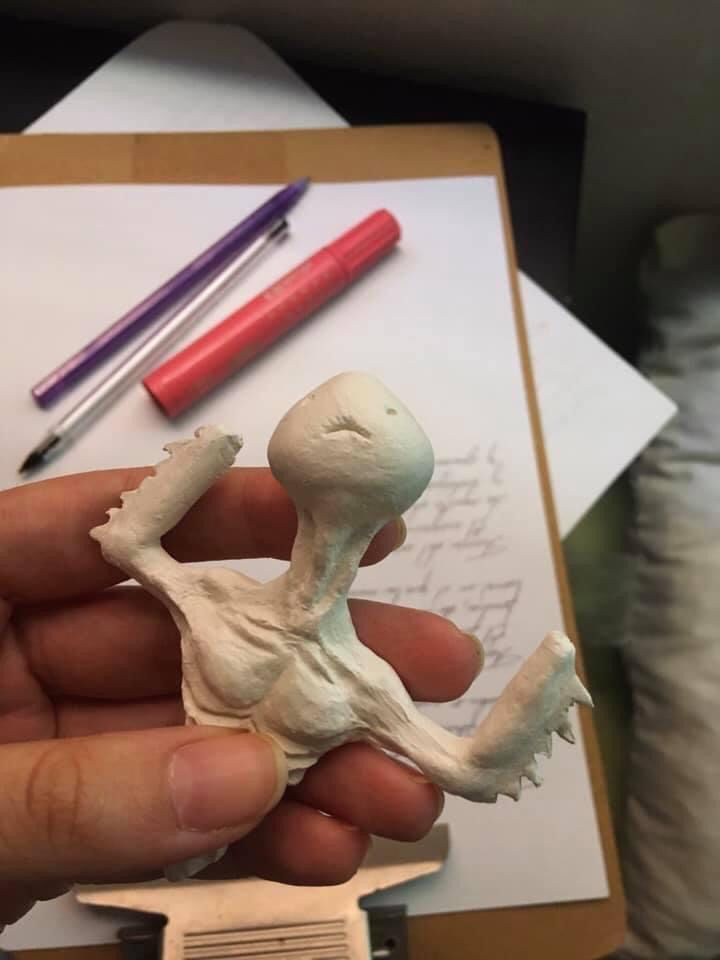
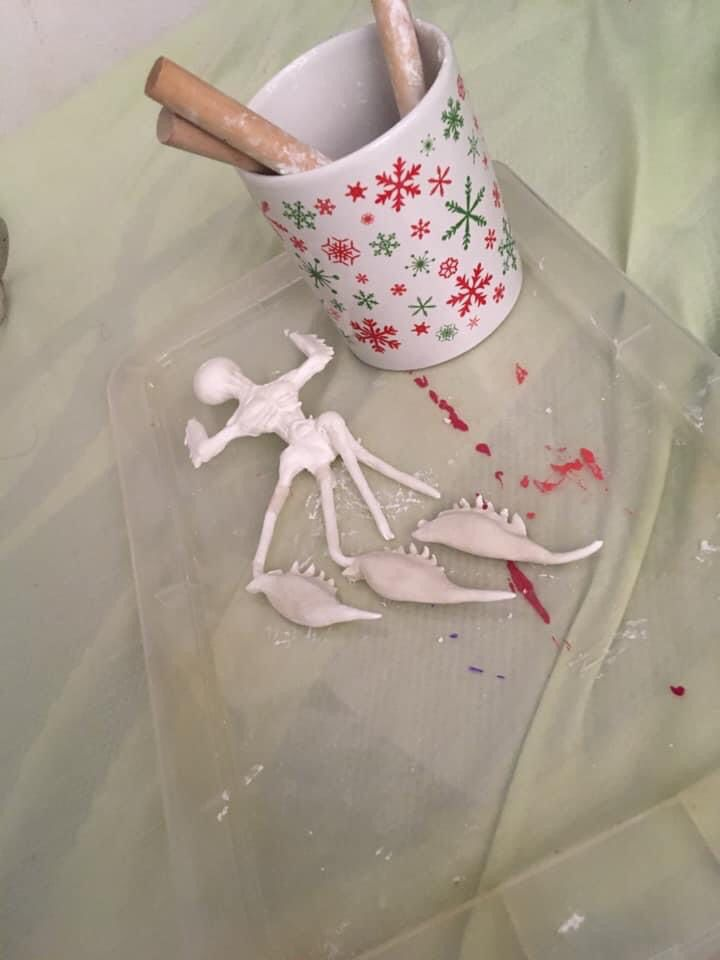
We let dry for a day the upper part of the body, and meanwhile we will make the lower part that would be the coccyx, his long legs and his little legs.
Remember that everything must be molded with a little water so that the clay does not dry out or crack.
Once all the parts are dry we will glue them with water and clay.
For the wings of the fairy we will make a pattern on a leaf, flatten clay and cut with a straight chisel.
Shape it like a leaf and let it dry.
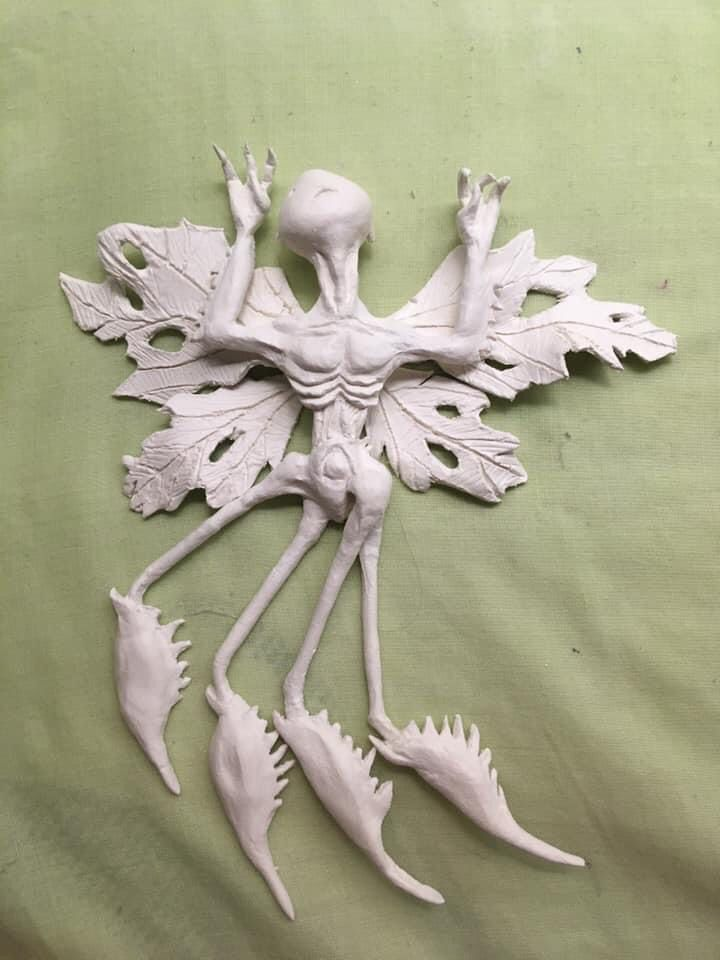
The wings will be glued with silicone, and we begin to mold his hands.
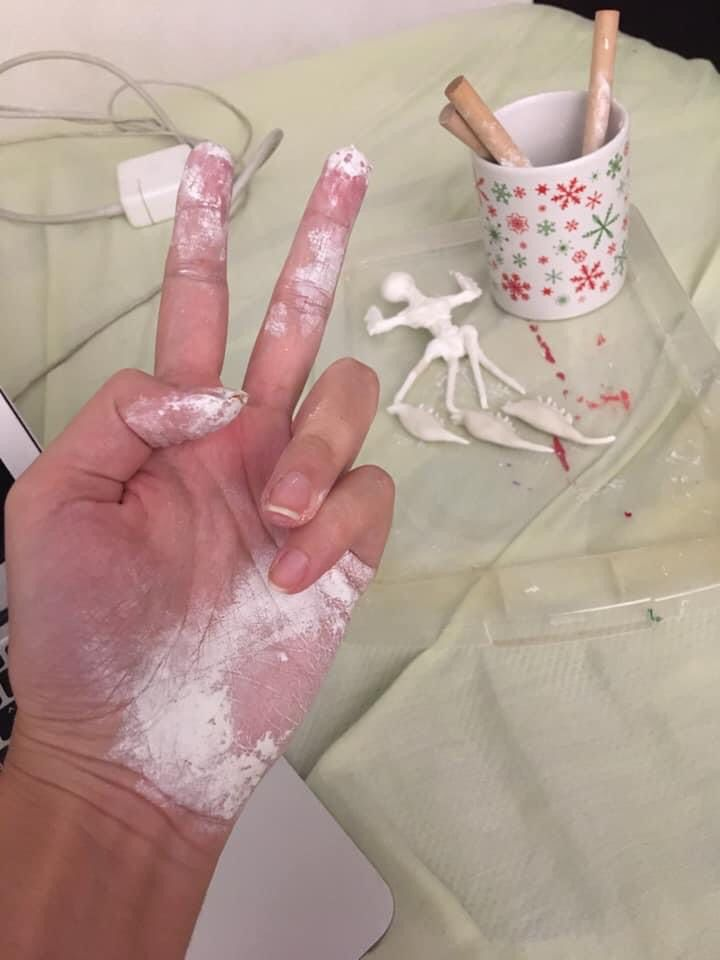
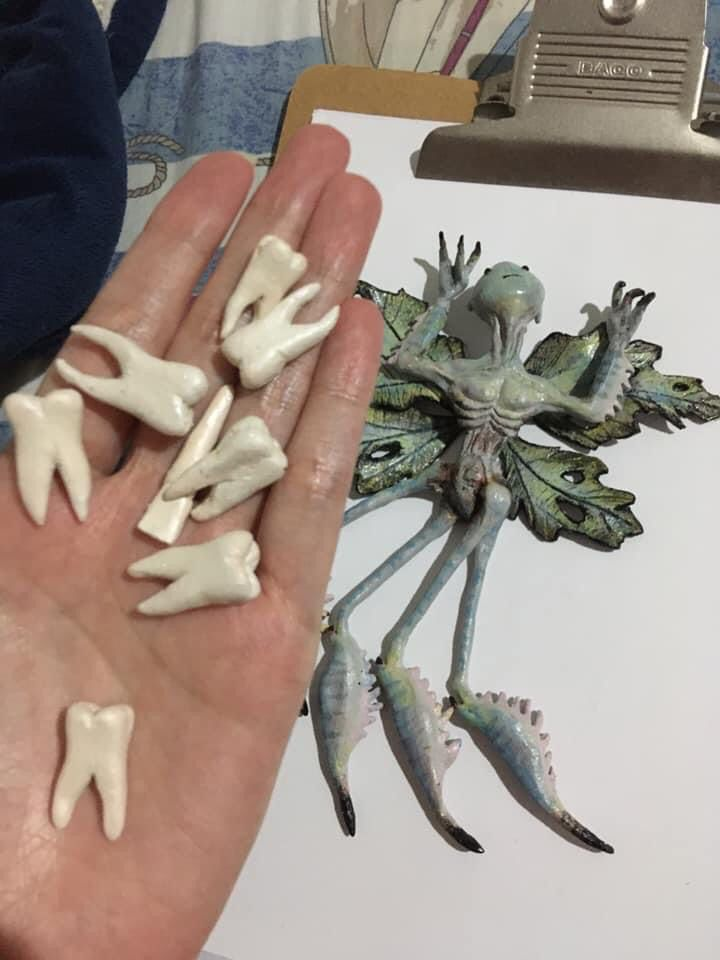
I made the teeth with the moldable foami and let them dry.
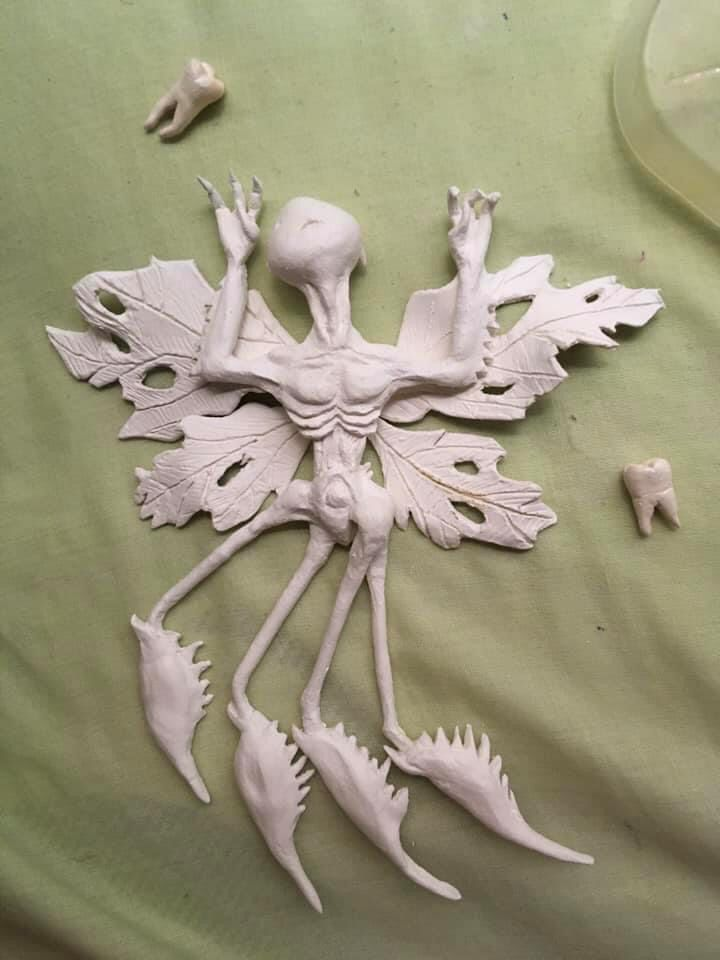
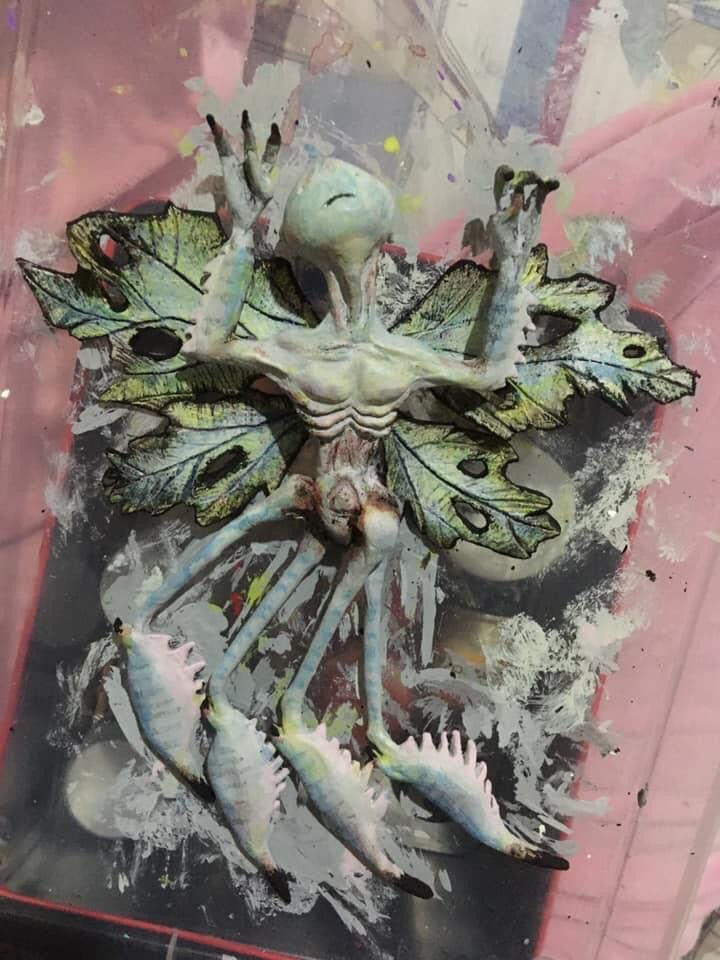
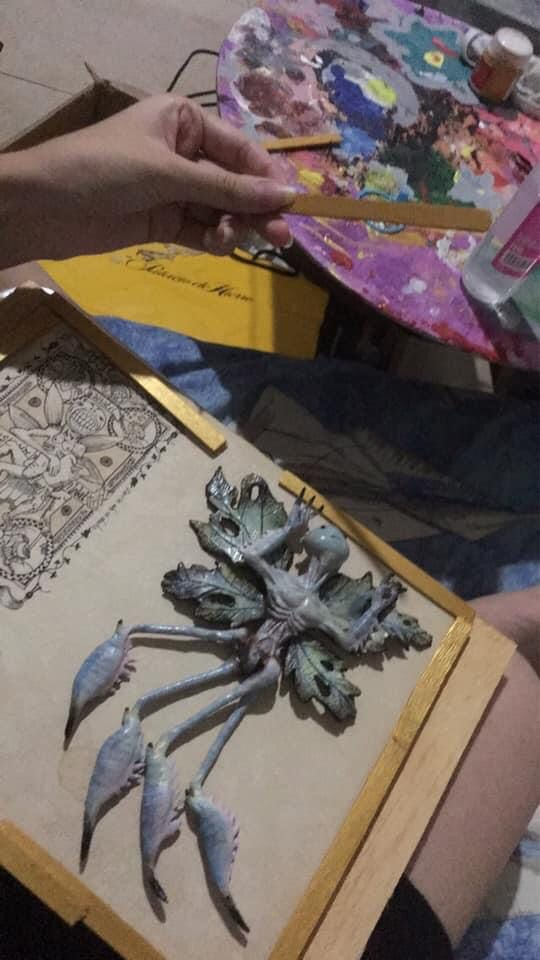
We continue to paint the fairy, as the base of the clay is white it is easier to place the paints with the brushes and blur details with the sponge to make it gradient.
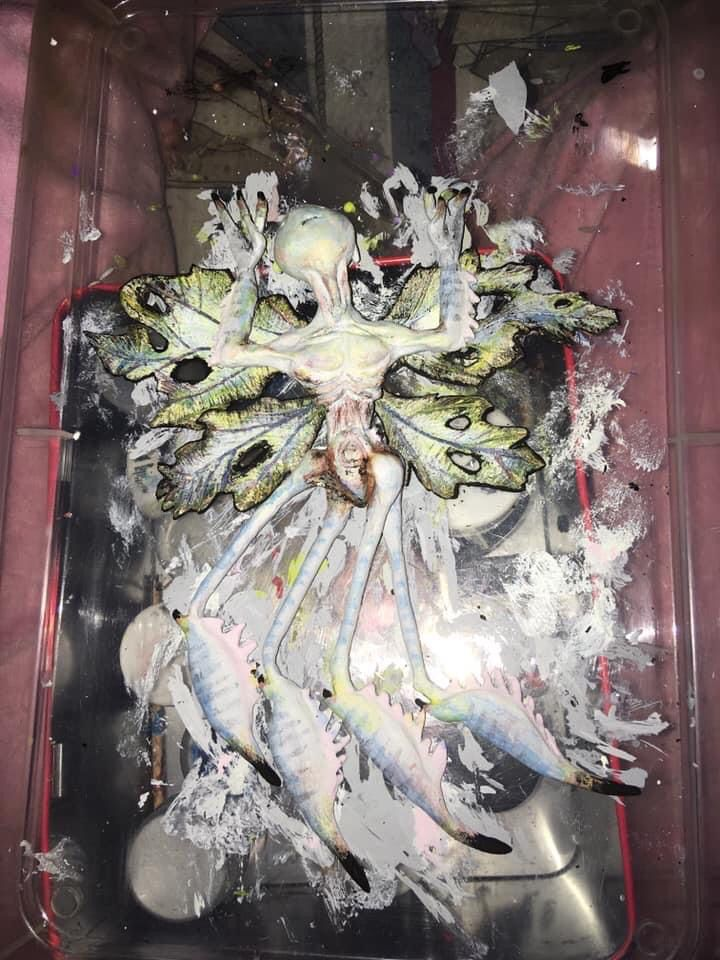
We make some mini balls for the eyes, paint them black and place them.

We varnished the Fairy with white glue to make it shiny.
I made more teeth with moldable foami to decorate.
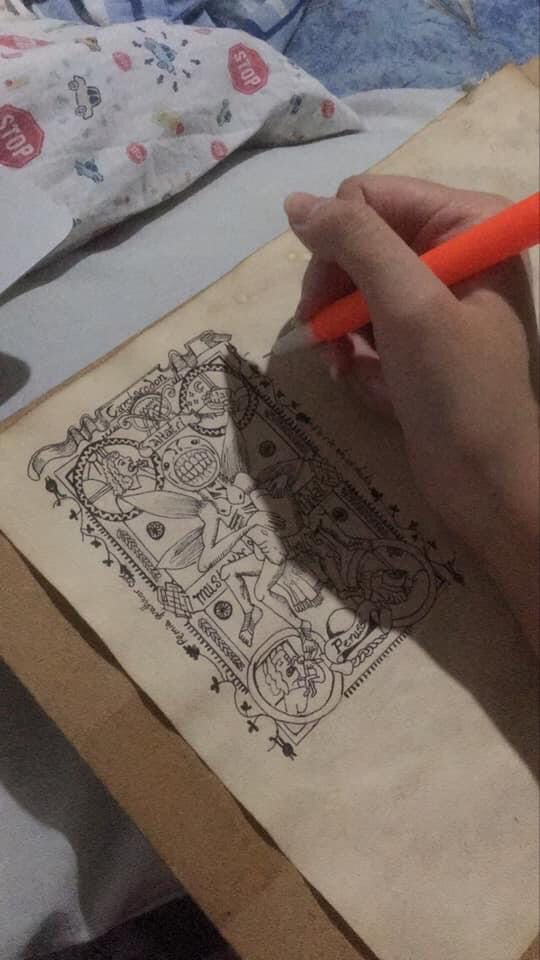
We take a white sheet and bathe it with coffee and let it dry in the sun to give it an old and antique touch.
And with a gel pen we will make the decorations on the leaf.
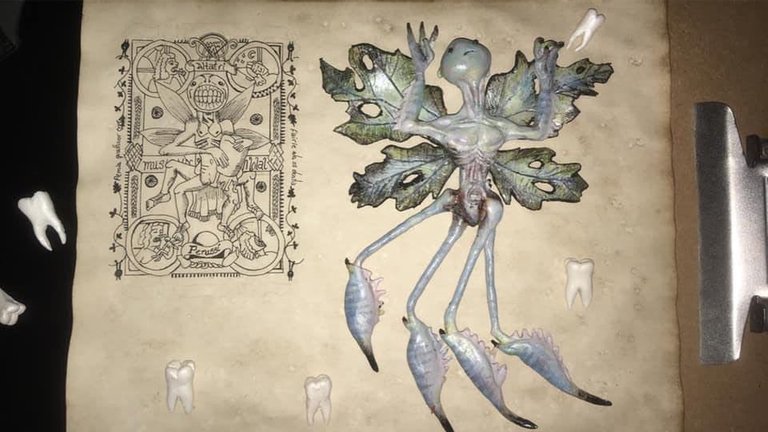
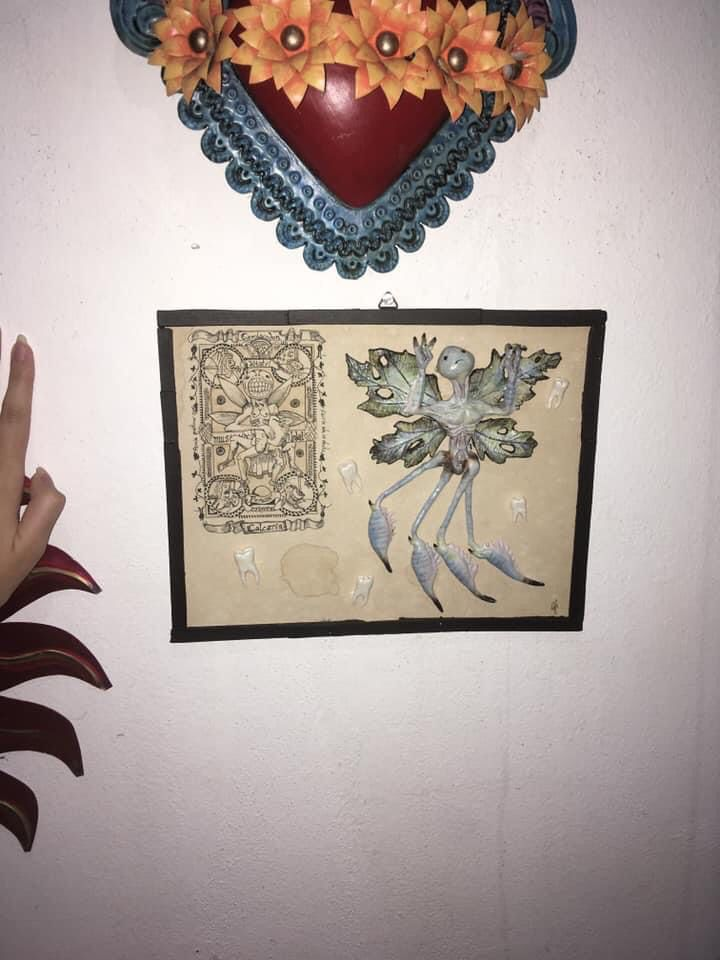
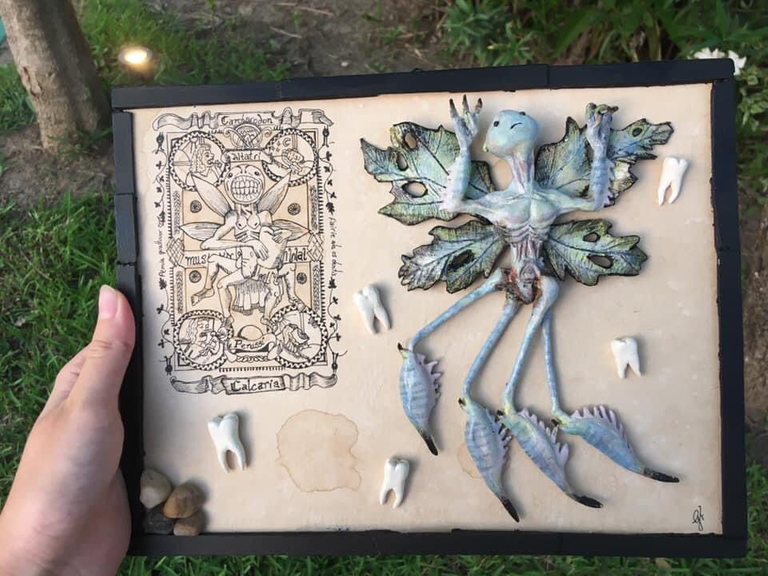
Cut the wood, glue the decorated leaf as a background and carefully glue the fairy with the liquid silicone.
And we glue the tongue depressors around it simulating the frame of the entomological box.
I had painted the abatelenguas in gold color but I was not convinced about how it looked so I painted them again but in black color.
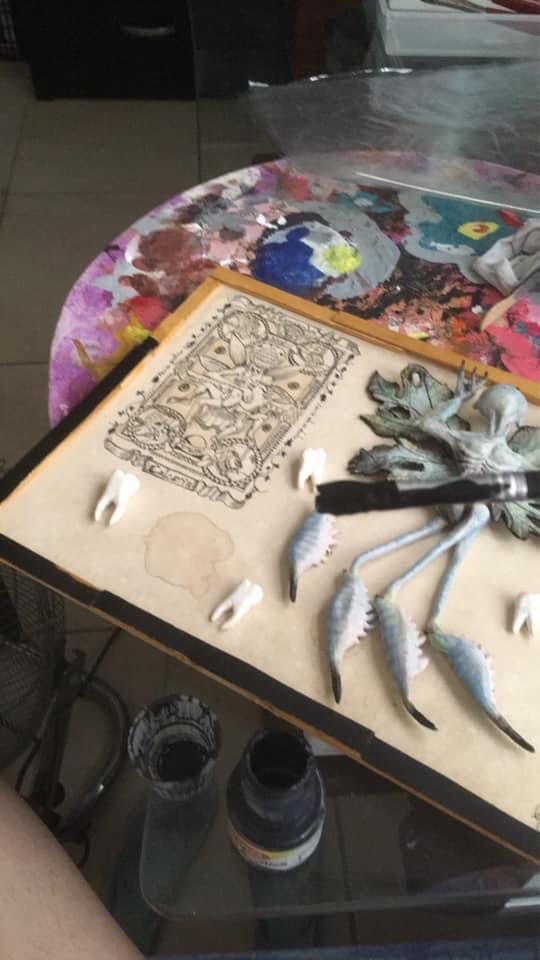
And I glued the little decorative teeth around them together with some pebbles I got.
Dear reader, thank you for reading this post which is 100% original, the writing, content and photos are of my authorship, which were taken with the Iphone 5s camera.
Translation made with DeepL.
🧚♂️ Hada de los dientes de Guillermo del Toro🧚♀️
Bienvenidos nuevamente a mi blog! hoy les quiero mostrar paso a paso de como elaborar el hada de los dientes de Guillermo del Toro de la película "hellboy" en una caja entomológica.
⭐Los materiales que ocupe fueron:
- Agua
- Cinceles
- Pinceles
- Pintura rosa, gris, verde, negro, marrón, azul.
- Foami moldeable
- Esponja
- Alambre
- Silicon
- Arcilla Blanca que seca al aire
- Trozo de madera
- Abatelenguas de madera
- Paleta de madera para la pintura.
- Pegamento Blanco
- Lapicero de gel
- Hoja blanca
- Café soluble
Agarramos la arcilla y hacemos una bolita dándole forma de cabeza, introducimos un trozo de alambre para que se nos sea mas fácil moldear el cuello y el tórax. Con un cincel y agua le iremos dando los detalles anatómicos del cuerpo, cuello, abdomen.
Dejamos secar por un día la parte superior del cuerpo, y por mientras iremos realizando la parte inferior que seria el coxis, sus largas piernas y sus patitas.
Recuerden que todo se debe ir moldeando con un poco de agua para que no se nos seque, ni se nos agriete la arcilla.
Ya que estén secas todas las partes las iremos pegando con agua y arcilla.
Para las alas del hada haremos un patrón en una hoja, aplastamos arcilla y recortamos con un cincel recto.
Le damos formas como de hoja y dejamos secar.
Las alas las pegaremos con silicón , y empezamos a moldear sus manos.
Los dientes los hice con el foami moldeable y los deje secar.
Proseguimos a pintar el hada, como la base de la arcilla es blanca se nos hace mas fácil colocar las pinturas con los pinceles y difuminamos detalles con la esponja para que quede degradado.
Hacemos unas mini bolitas para los ojos, pintamos de negro y los colocamos.
Barnizamos el Hada con el pegamento blanco para que quede brilloso.
Hice mas dientes con foami moldeable para decorar.
Agarramos una hoja blanca y la bañaremos con café y la dejaremos secar al sol para que le de un toque viejito y antiguo.
Y con un lapicero de gel haremos las decoraciones en la hoja
Cortamos la madera, pegamos la hoja decorada como fondo y pegamos cuidadosamente al hada con el silicón liquido.
Y pegamos los abatelenguas al rededor simulando el marco de la caja entomológica.
Había pintado los abatelenguas de color dorado pero no me convenció como se veía así que los pinte nuevamente pero de color negro.
Y les pegue los dientitos decorativos al rededor juntos con unas piedritas que conseguí.
Apreciado lector gracias por leer este post el cual es 100% original, la redacción, contenido y fotos son de mi autoría, las cuales fueron tomadas con la cámara del Iphone 5s
Traducción realizada con DeepL.
Congratulations @gagabrielaf! You have completed the following achievement on the Hive blockchain and have been rewarded with new badge(s):
Your next target is to reach 50 replies.
You can view your badges on your board and compare yourself to others in the Ranking
If you no longer want to receive notifications, reply to this comment with the word
STOPCheck out the last post from @hivebuzz:
Support the HiveBuzz project. Vote for our proposal!
Divine Creative! Extraordinary!
This is great! I saw this on the #ecency discord group. You got your post out!
I am definitely going to share this.
Very cool art work 🤗👌👌🍷🍷🍷 I must follow to see more what you going to do.
Felicidades excelente trabajo, mucha creatividad y esfuerzo de tu parte.
Yay! 🤗
Your content has been boosted with Ecency Points, by @foxkoit.
Use Ecency daily to boost your growth on platform!
Support Ecency
Vote for new Proposal
Delegate HP and earn more
Quite creative. Amazing display of imagination!!!
Bienvenida a nuestra comunidad, gracias por mostrarnos tu trabajo genial en artes plásticas, sobre todo explicarnos paso a paso cómo podríamos lograrlos nosotros mismos. Es un estupendo proyecto creativo.
La ame
Te quedó espectacular