(ENG)ESP) RECYCLABLE MULTI-PURPOSE ORGANIZER INSPIRED BY THE HEALER OF THE FOREST
Hello, hello! How are you? Dear #hivers a very cordial greeting to all members of this prestigious community as it is @Holozing, I hope today is a blessed day for each of us. It is my first time publishing in this community although I had already heard and read about it, I really wanted to publish content here but I was not encouraged, until I was a little more informed, I am very happy to share with you all this post, this time I was inspired by the healer of the forest, I really liked her for her hair and green eyes, because green has many meanings and among them is the nature, I will make a multifunctional organizer that is I can organize either my pencils, threads, needles, craft tools among others. Without further ado, let's get to work!
¡Hola, hola! ¿Que tal? Queridos #hivers un saludo muy cordial para todos los integrantes de esta prestigiosa comunidad como lo es @Holozing, espero que hoy sea un día bendecido para cada uno de nosotros. Es mi primera vez publicando en está comunidad aunque ya había escuchado y leído de ella, tenía muchas ganas de publicar contenido aquí pero no me animaba, hasta estar un poco mas informada, estoy muy feliz de poder compartir con todos ustedes este post, en esta oportunidad me inspire en la sanadora del bosque, me gusto mucho ella por su cabellera y ojos verdes, porque el verde tiene muchos significados y entre ellos esta la naturaleza, voy a hacer un organizador multifuncional es decir puedo organizar ya sea mis lápices, los hilos, las agujas, los instrumentos de manualidades entre otro. Sin más preámbulo manos a la obra!
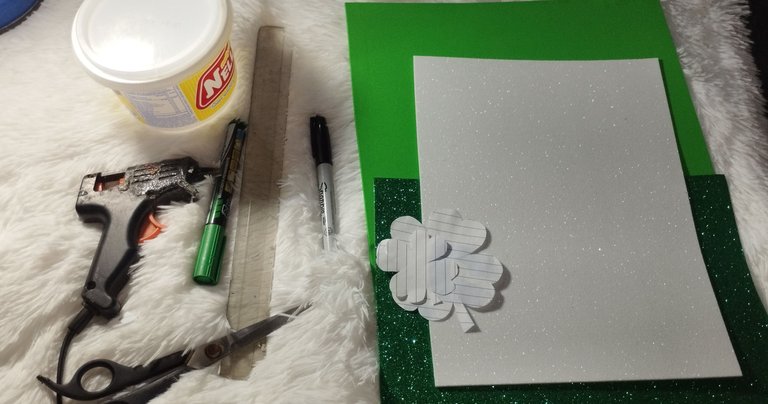
Materials to be used:
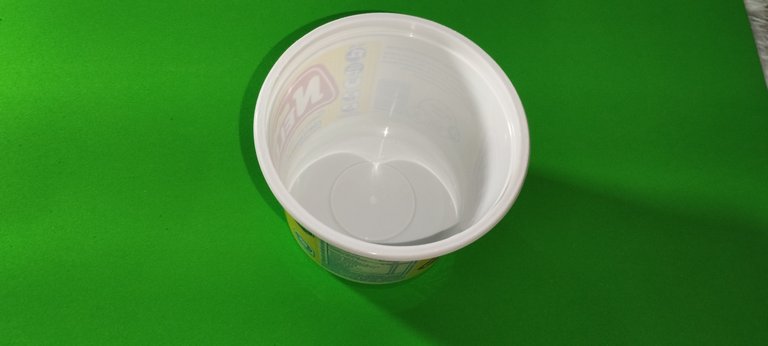
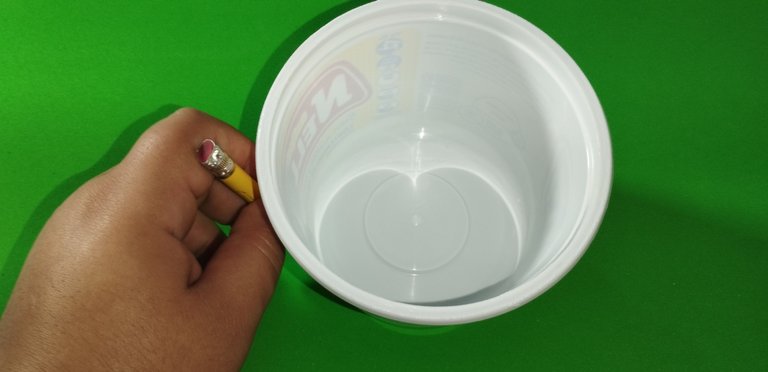
1 empty butter container.
light green foami.
frosted dark green foami.
frosted white foami.
shamrock molds 🍀.
scissors ✂️.
silicone stick.
pencil ✏️.
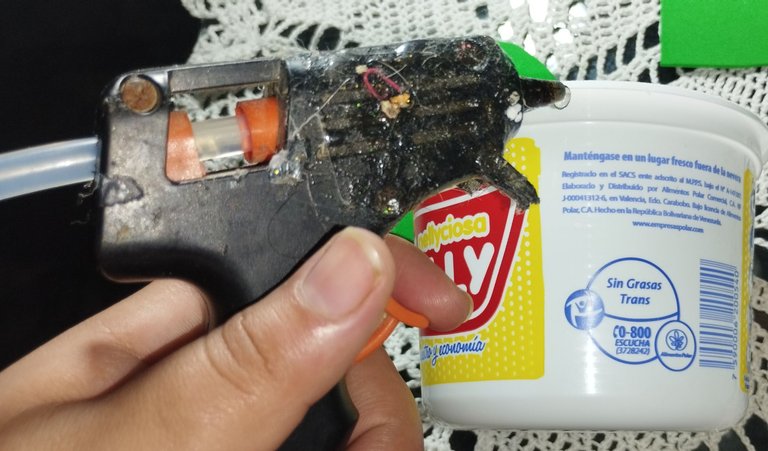
silicone gun.
ruler.
black and green marker pen.
Materiales a utilizar:
- 1 envase de mantequilla vacío.
- foami verde claro.
- foami verde oscuro escarchado.
- foami blanco escarchado.
- moldes de trébol 🍀.
- tijeras ✂️.
- silicón en barra.
- lápiz ✏️.
- pistola de silicón.
- regla.
- rotulador de color negro y verde.
Elaboración:
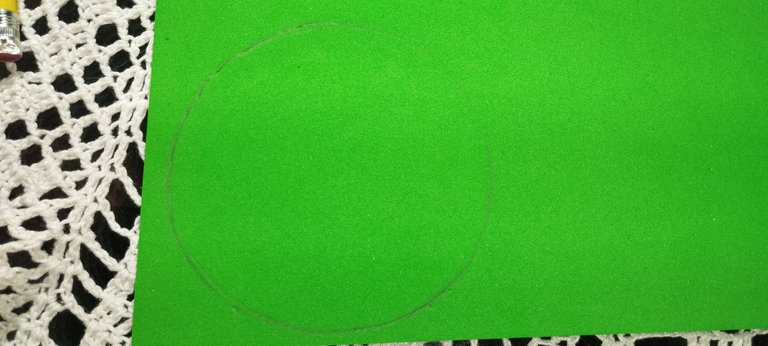
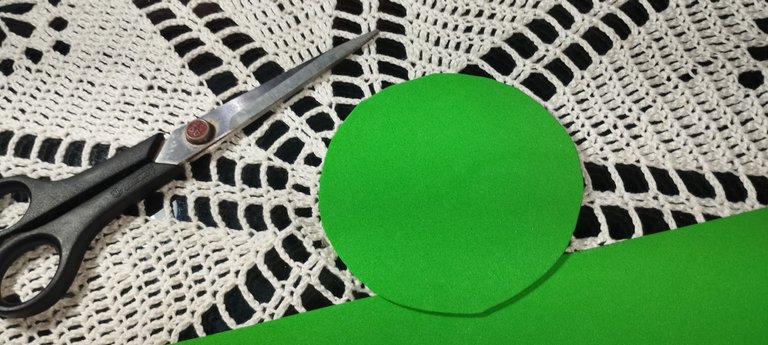
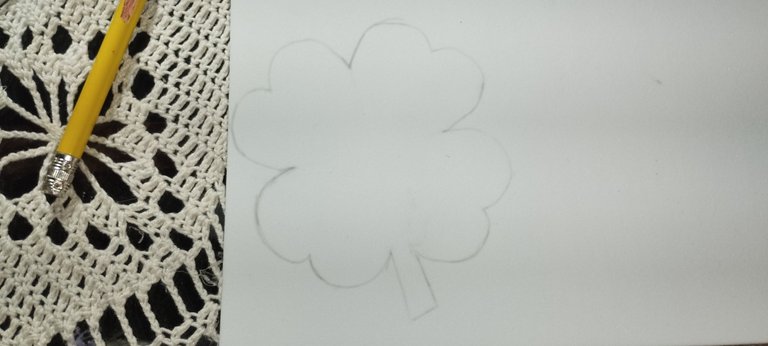
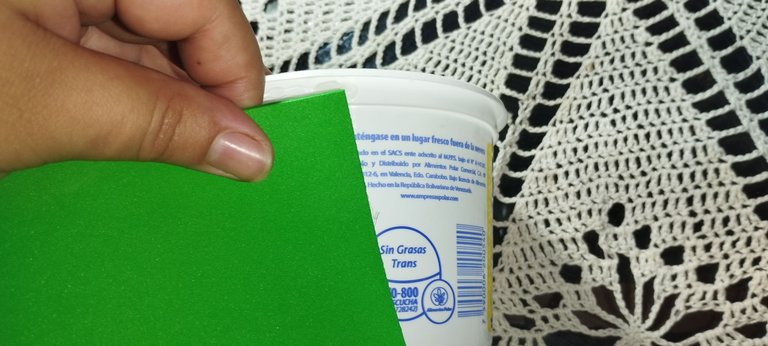
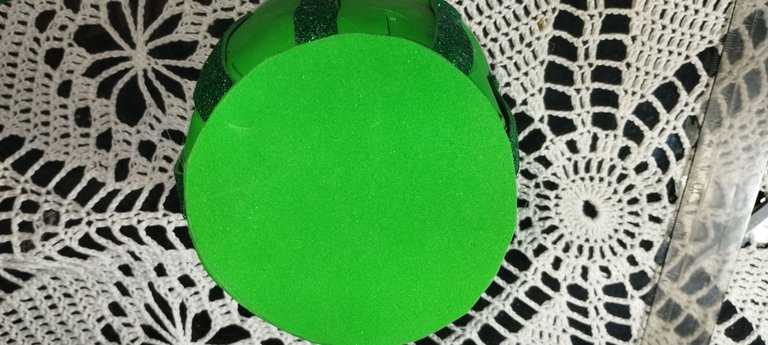
- Paso 1: Empezamos tomando el envase y lo colocamos encima del foami verde claro, con el lápiz marcamos el radio de la parte inferior del mismo, y cortamos
Elaboración:
- Paso 1: Empezamos tomando el envase y lo colocamos encima del foami verde claro, con el lápiz marcamos el radio de la parte inferior del mismo, y cortamos.
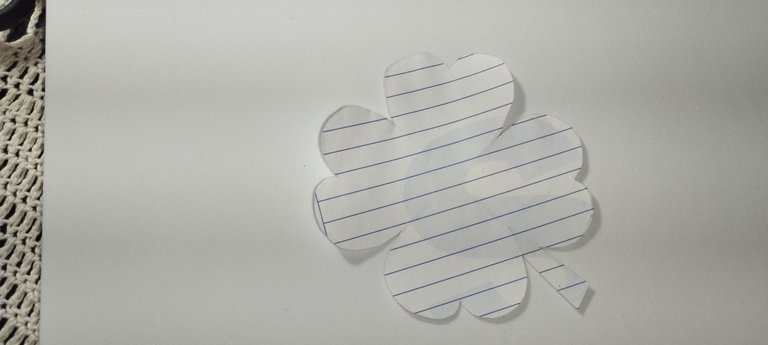
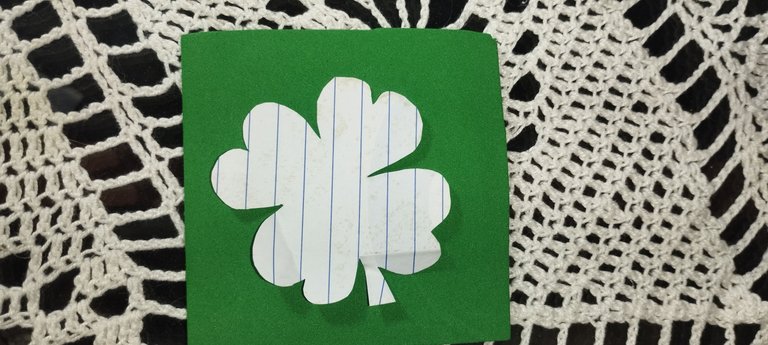
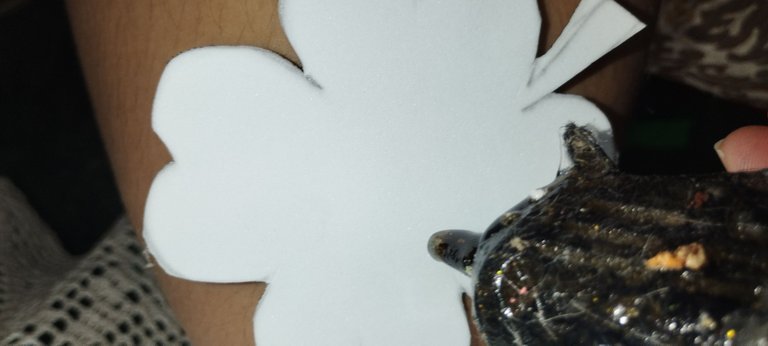
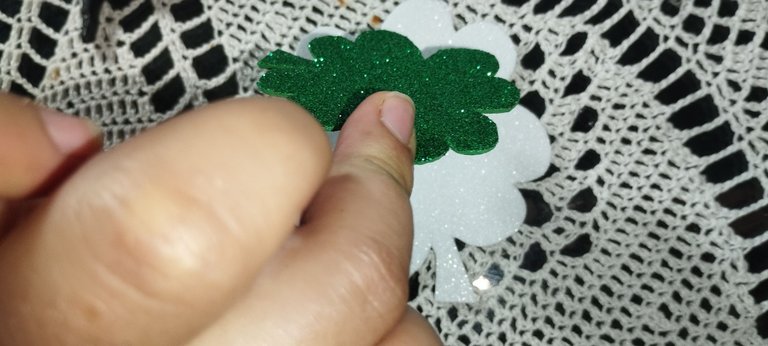
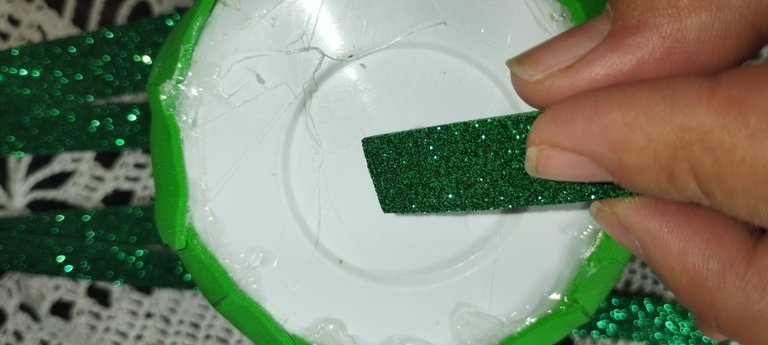
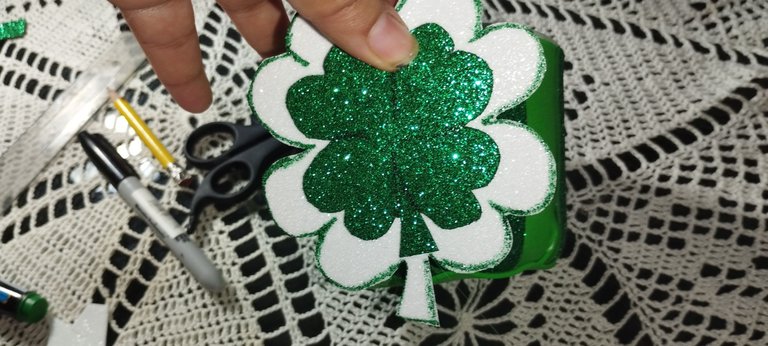
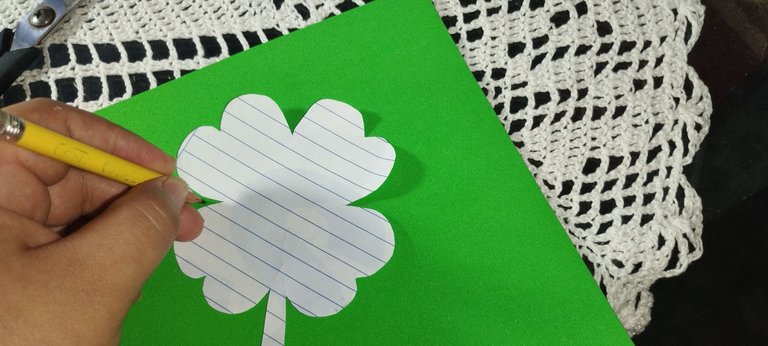
- Step 2:then we take the mold of the big clover and place it on the white foami and the small mold we place it on the dark green foami, we mark, cut and put silicone in the middle of the white clover and on it we glue the green clover.
- Paso 2: luego tomamos el molde de el trébol grande y lo colocamos sobre el foami blanco y el molde pequeño lo colocamos sobre el foami verde oscuro, marcamos, cortamos y echamos silicón en el medio del trébol blanco y sobre el mismo pegamos el trebol verde

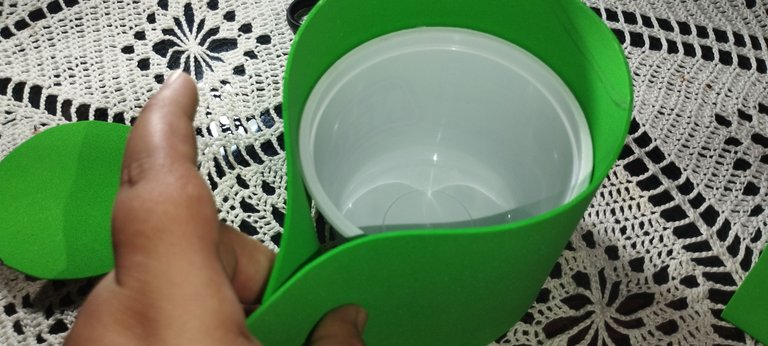
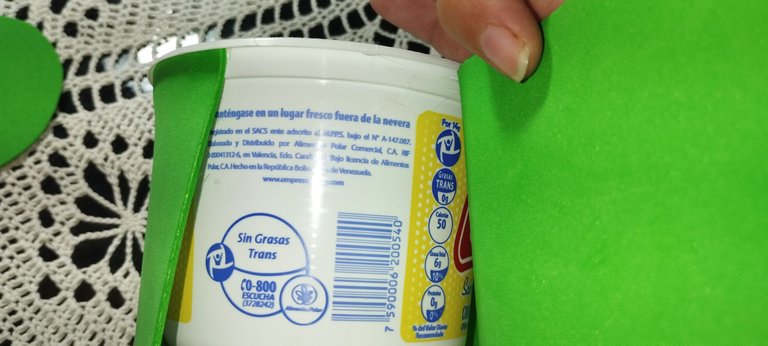
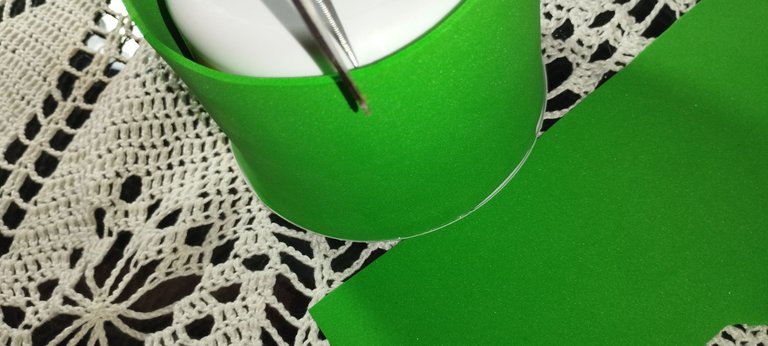
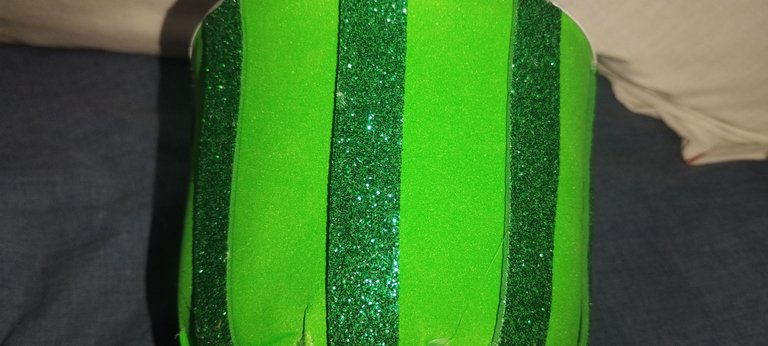
- Step 3: next we take the light green foami and cover the whole container, to measure, we put silicone on the upper part and stick it all around the container, we cut the excess part at the bottom, we also make small cuts in the foami and we put silicone on the container and stick the lower part.
- Paso 3: seguidamente agarramos el foami verde claro y cubrimos todo el envase, para medir, en la parte superior echamos silicón y vamos pegando por todo el contorno del mismo, la parte sobrante inferior la cortamos, también hacemos pequeños cortes en el foami y echamos silicón al envase y pegamos esa parte inferior.
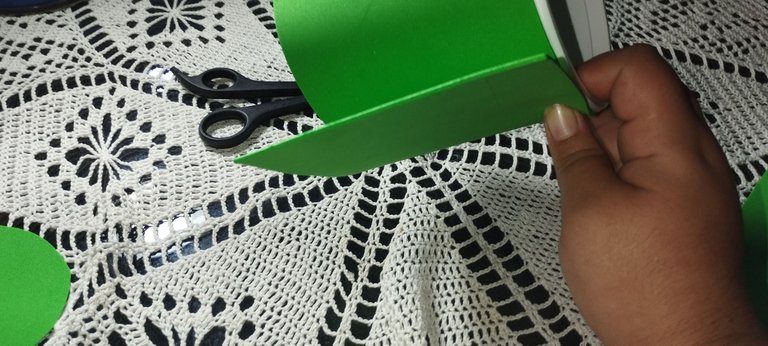

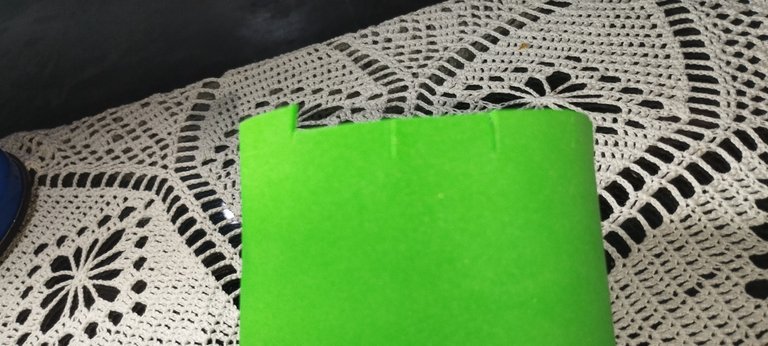

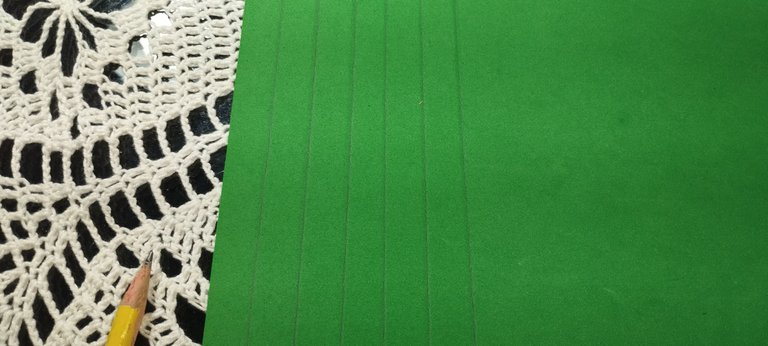
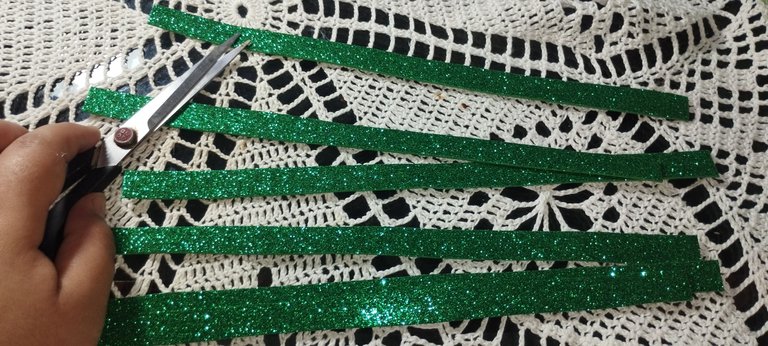
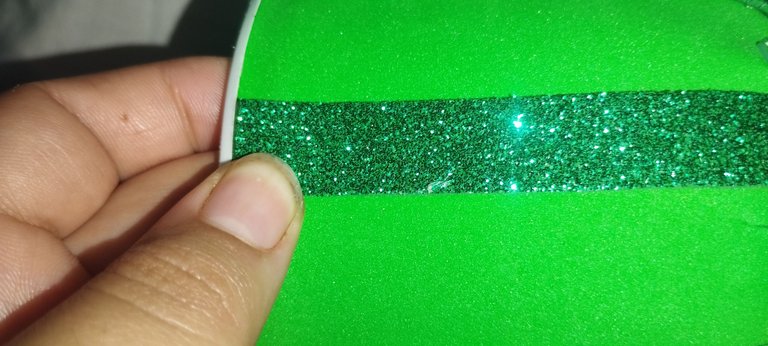
- Step 4: Then on the dark green foami, we draw 6 lines of one centimeter, cut and paste from the center of the bottom of the container to the top of it, the first one we have to put is to cover the tie that was left from the foami that we covered the container, and so we place the lines you want to decorate.
- Paso 4: Después en el foami verde oscuros, trazamos 6 líneas de un centímetro, cortamos y pegamos del centro de la parte inferior del envase hasta la parte superior del mismo, la primera que tenemos que poner es para tapar el empate que quedo del foami con que cubrimos el envase, y así colocamos las lineas que quieras para adornar.

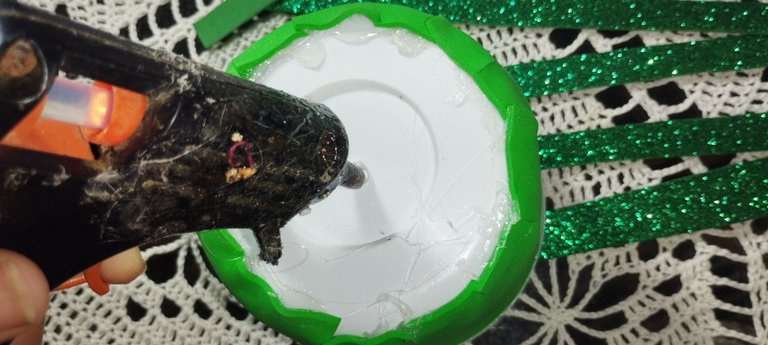
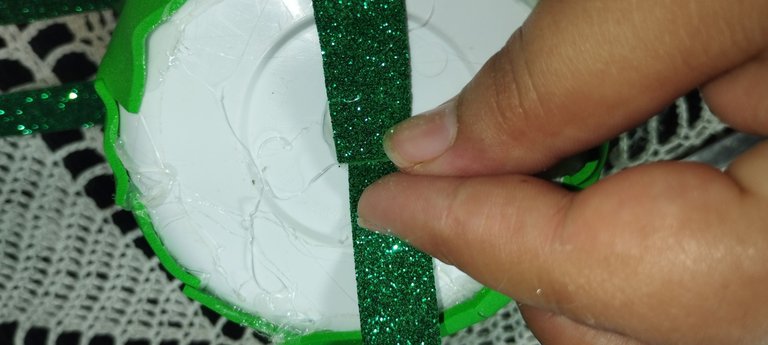
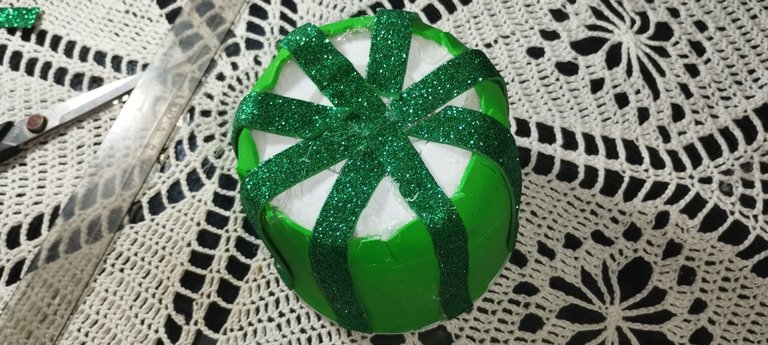
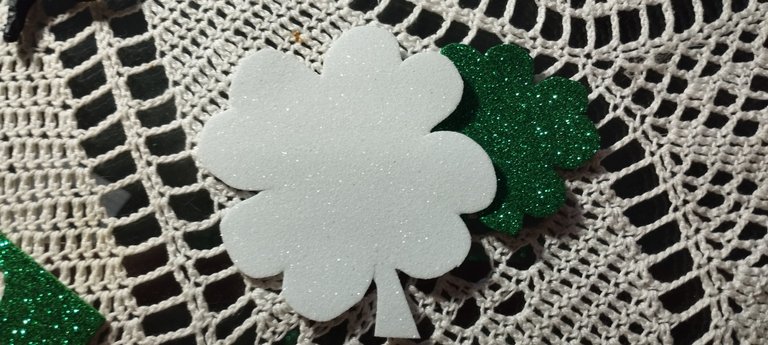
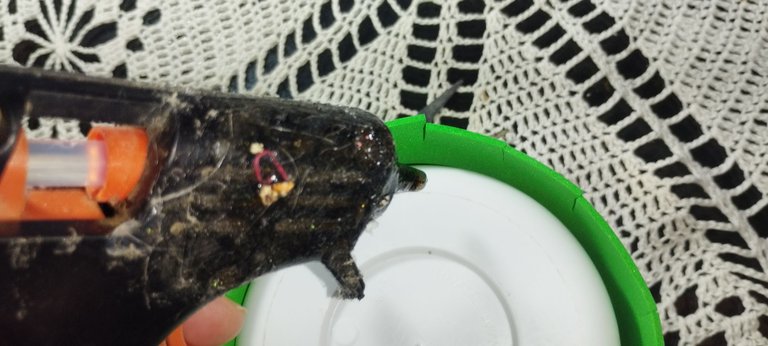
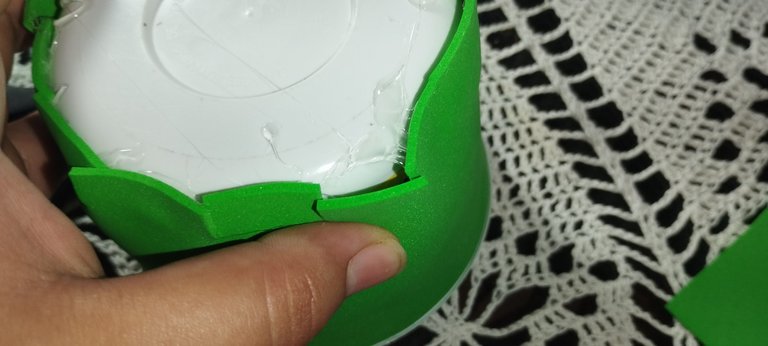
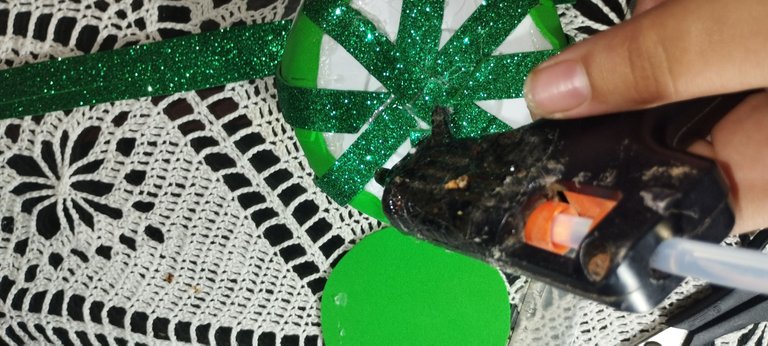
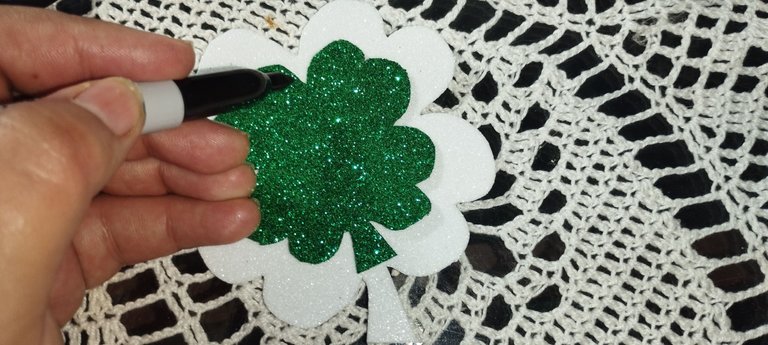
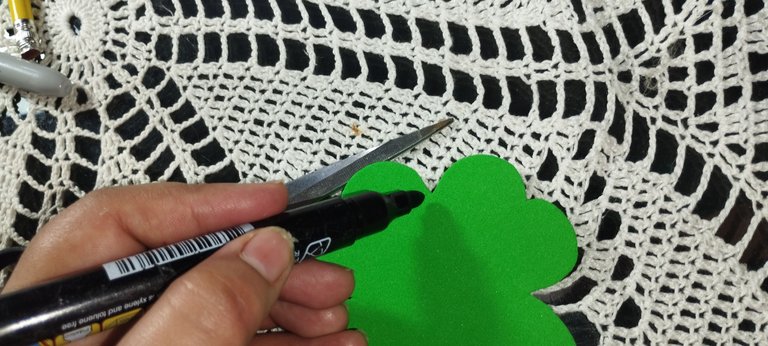
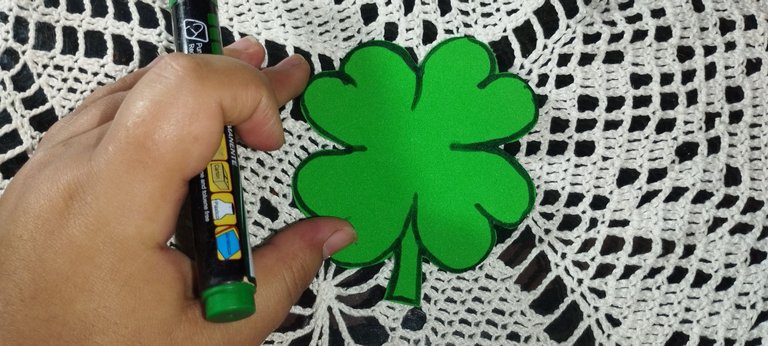
- Step 5: now we put enough silicone on the bottom of the container and glue the circle we made at the beginning, with the help of the green marker we make the edges of the white clover and with the black marker we do the same with the green clover and glue the clover in the middle part of it.
- Paso 5: ahora echamos suficiente silicón en la parte inferior del envase y pegamos el círculo que hicimos al inicio, con ayuda del rotulador verde hacemos los bordes del trébol blanco y con el rotulador negro hacemos lo mismo con el trébol verde y pegamos el trebol en la parte del medio del mismo


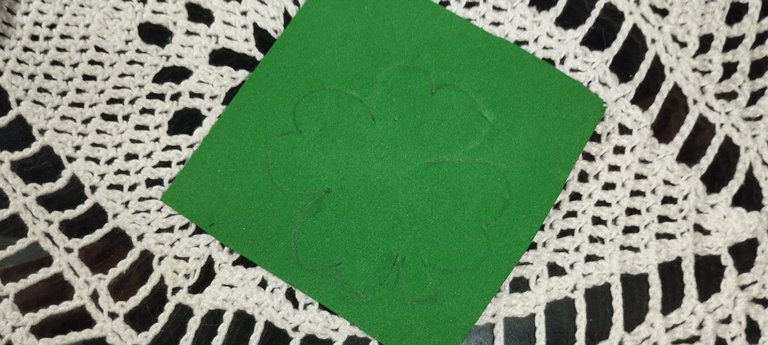
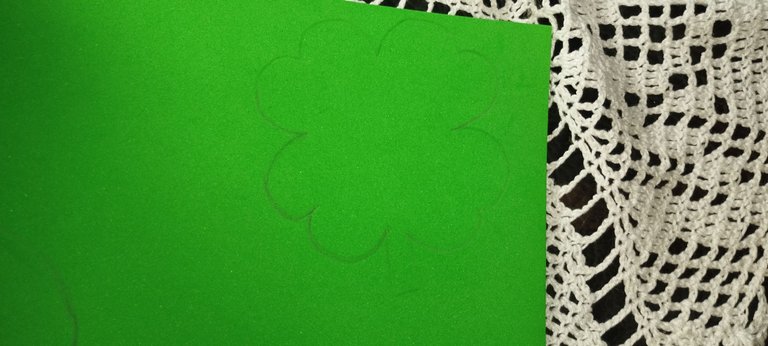
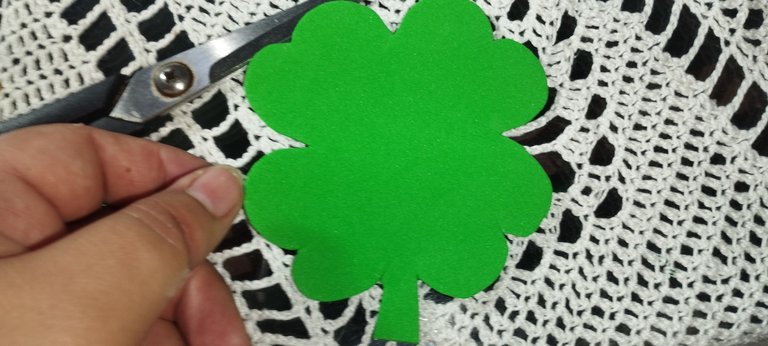
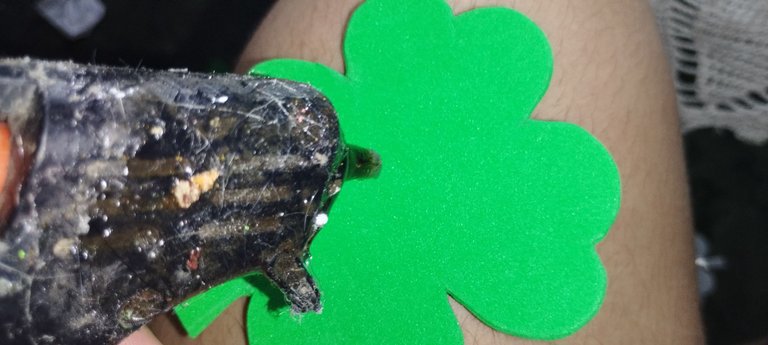
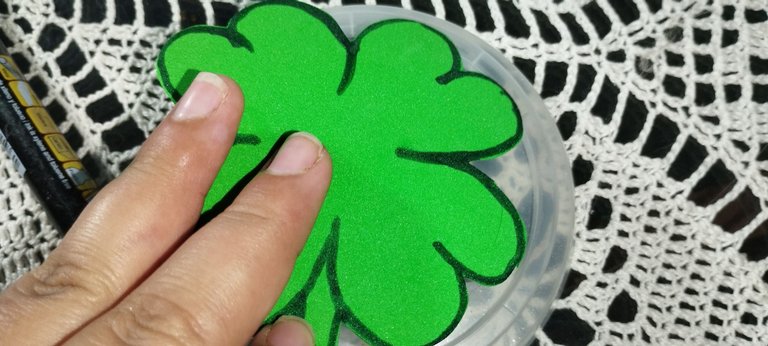
- Final Step: take the large clover mold and place it on the light green foami, mark, cut, make the green with the green marker and glue it on the lid of the container.
- Paso Final:agarramos el molde de trébol grande y lo colocamos sobre el foami verde claro, marcamos, cortamos, hacemos el verde con el rotulador verde y pegamos en la tapa del envase
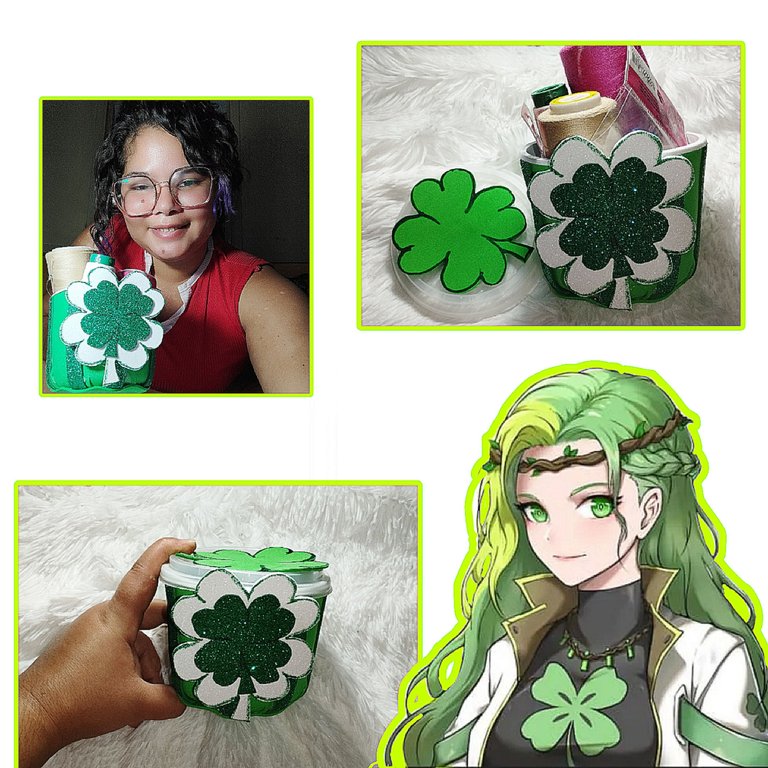
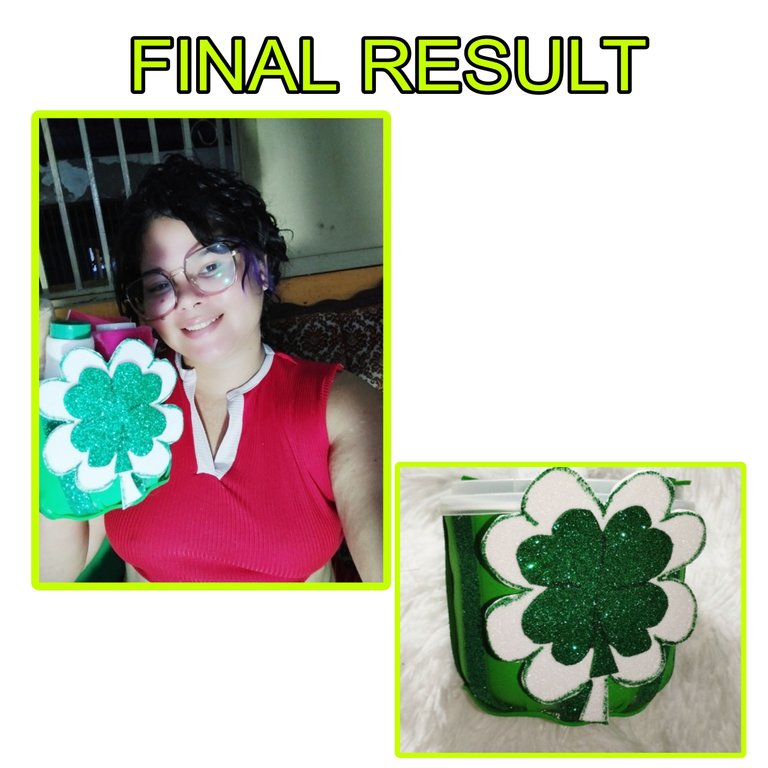
well friends I hope my post has been of your total pleasure and help ... here I leave the final result.
bueno amigos espero que mi post haya sido de su total agrado y de ayuda.. por aquí les dejo el resultado final
Thanks for reading my post, see you later.
Photos taken from my Redmi note 11 pro cell phone and edited from PicsArt
Translation with our trusted friend Deepl
GREETINGS AND MANY BLESSINGS
- Gracias por leer mi post, hasta luego.
- fotos tomadas desde mi celular Redmi note 11 pro y editadas desde PicsArt
- Traducción con nuestro amigo de confianza Deepl
- SALUDOS Y MUCHAS BENDICIONES