[Eng-Esp] Dinosaur in chochet-Amigurumi

Saludos mis amores, feliz de estar nuevamente con ustedes compartiendo un nuevo proyecto, el cual para mi fue un reto desde el momento en el que dije; si lo hago, pues se trata de un dinosaurio rex para un niño que al principio lo quería en color rojo y ya a lo último se decidió por amarillo con marrón. Al principio pensé en tejer por lo menos la cabeza y cuerpo en una sola pieza pero después me puse a pensar que seria mucho más fácil realizar pieza por pieza lo cual fue muy acertado; el resultado para mi fue satisfactorio y puedo decir que disfrute al hacer cada pieza porque me conecte con el diseño de tal manera que no me importó lo que estuviese sucediendo a mi alrededor y eso ayudo a que este dino obtuviese un mejor resultado.
Greetings my loves, happy to be with you again sharing a new project, which for me was a challenge from the moment I said; yes I do it, because it is a rex dinosaur for a child who at first wanted it in red and at the end decided for yellow with brown. At first I thought of knitting at least the head and body in one piece but then I started to think that it would be much easier to do it piece by piece which was very successful; the result for me was satisfactory and I can say that I enjoyed making each piece because I connected with the design in such a way that I did not care about what was happening around me and that helped this dino to get a better result.
Materiales
Crochet en color amarillo suave y marrón claro
Aguja de tejer
Relleno
Aguja lanera
Tijera
Hilo de coser en color negro
Aguja de coser
Materials
Crochet in soft yellow and light brown colors
Knitting needle
Stuffing
Knitting needle
Scissors
Sewing thread in black color
Sewing needle
Proceso/Process
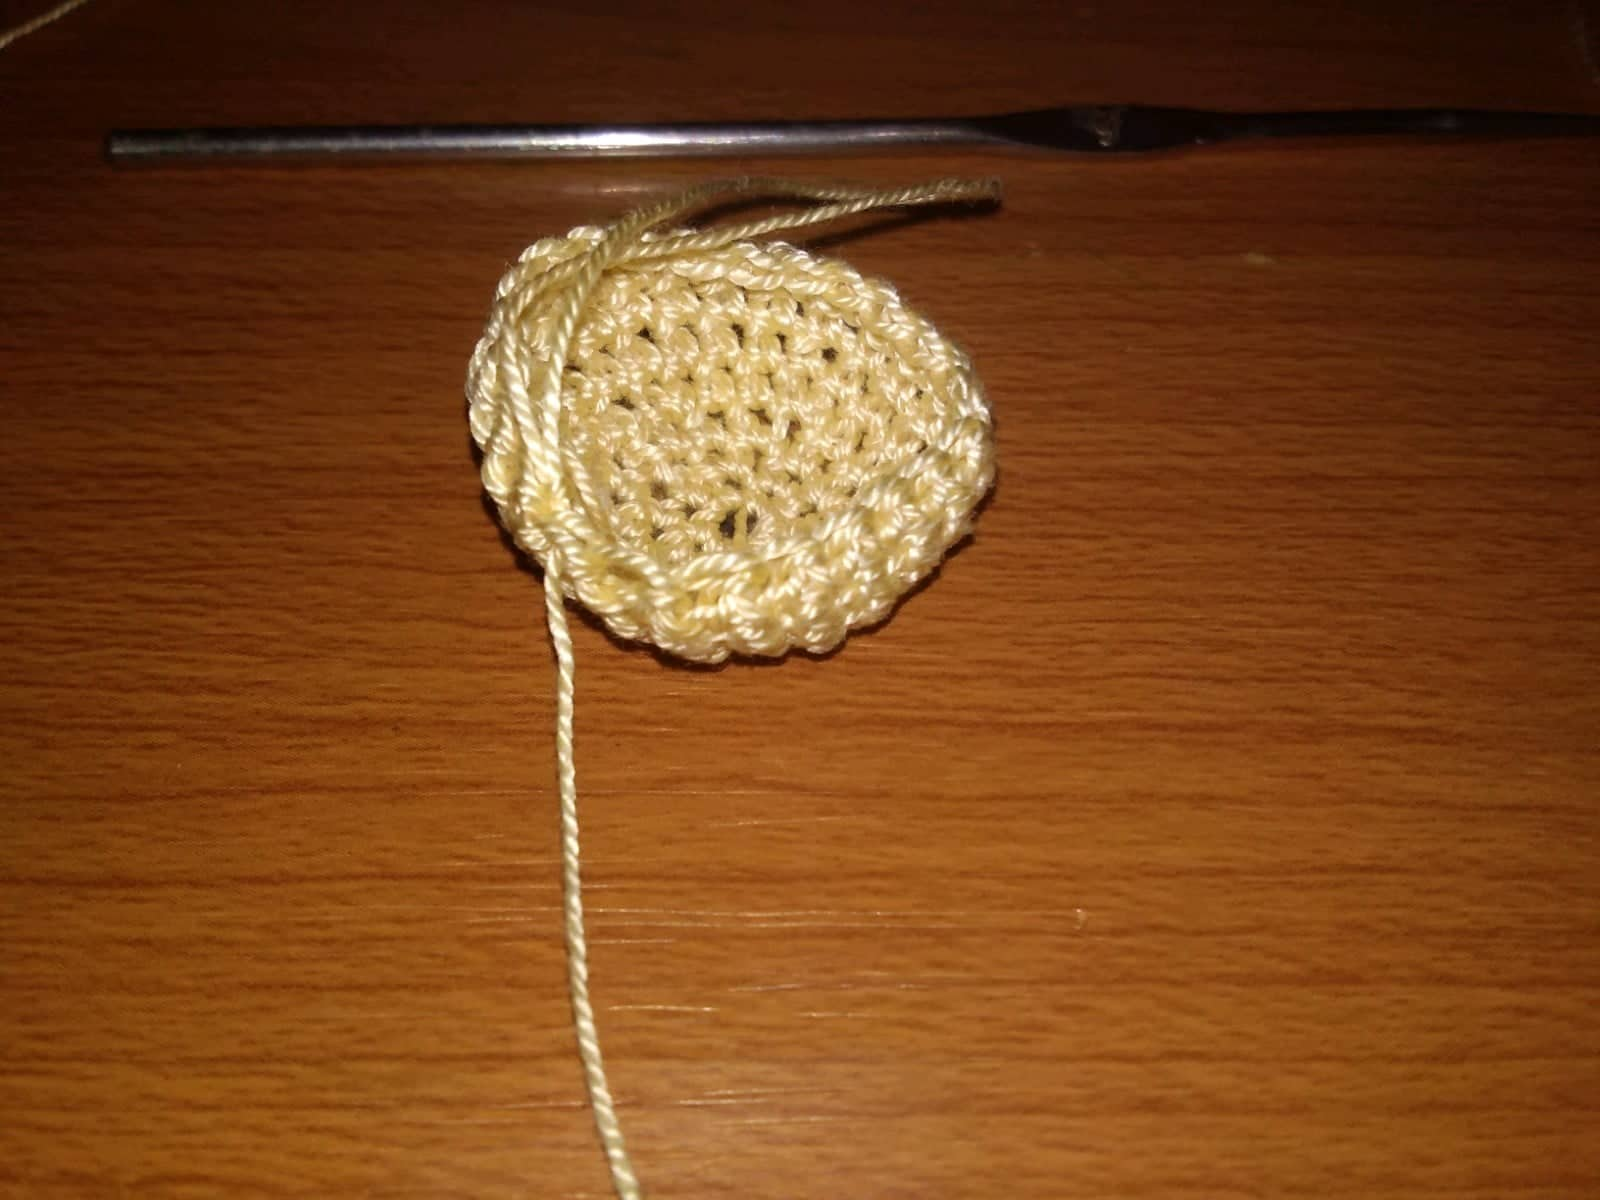
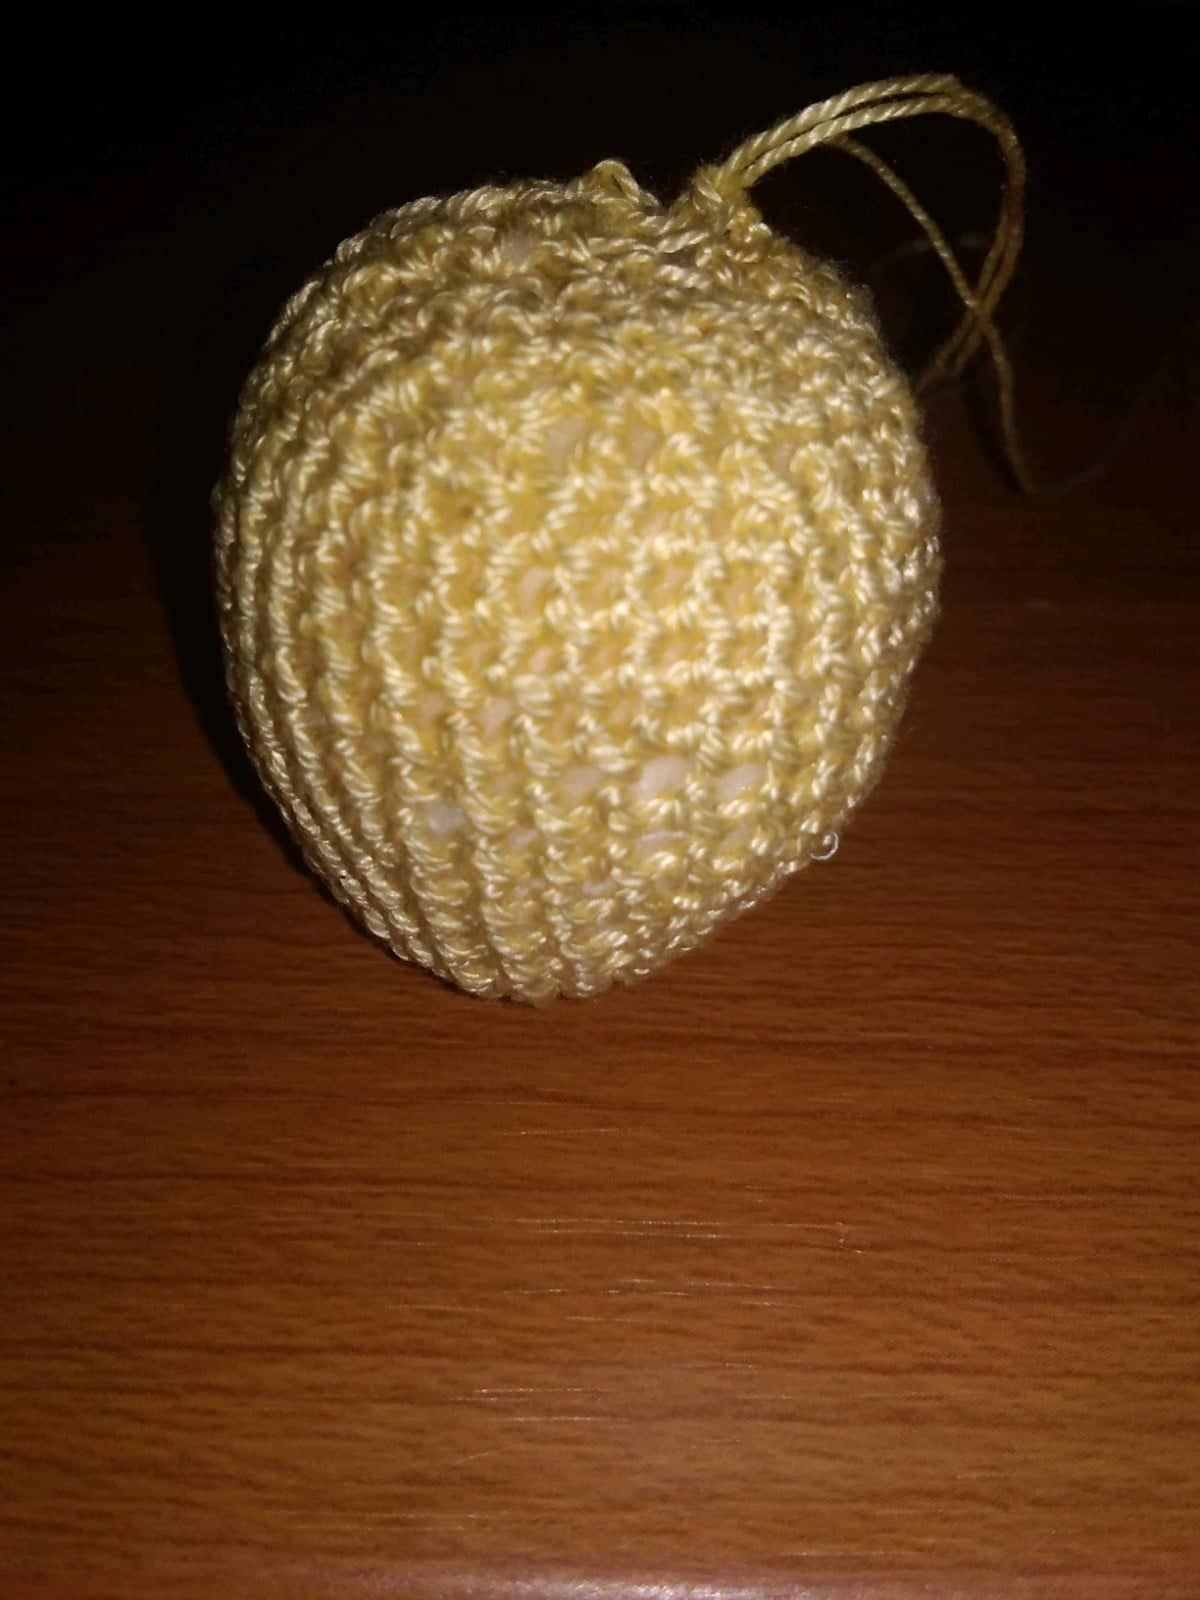
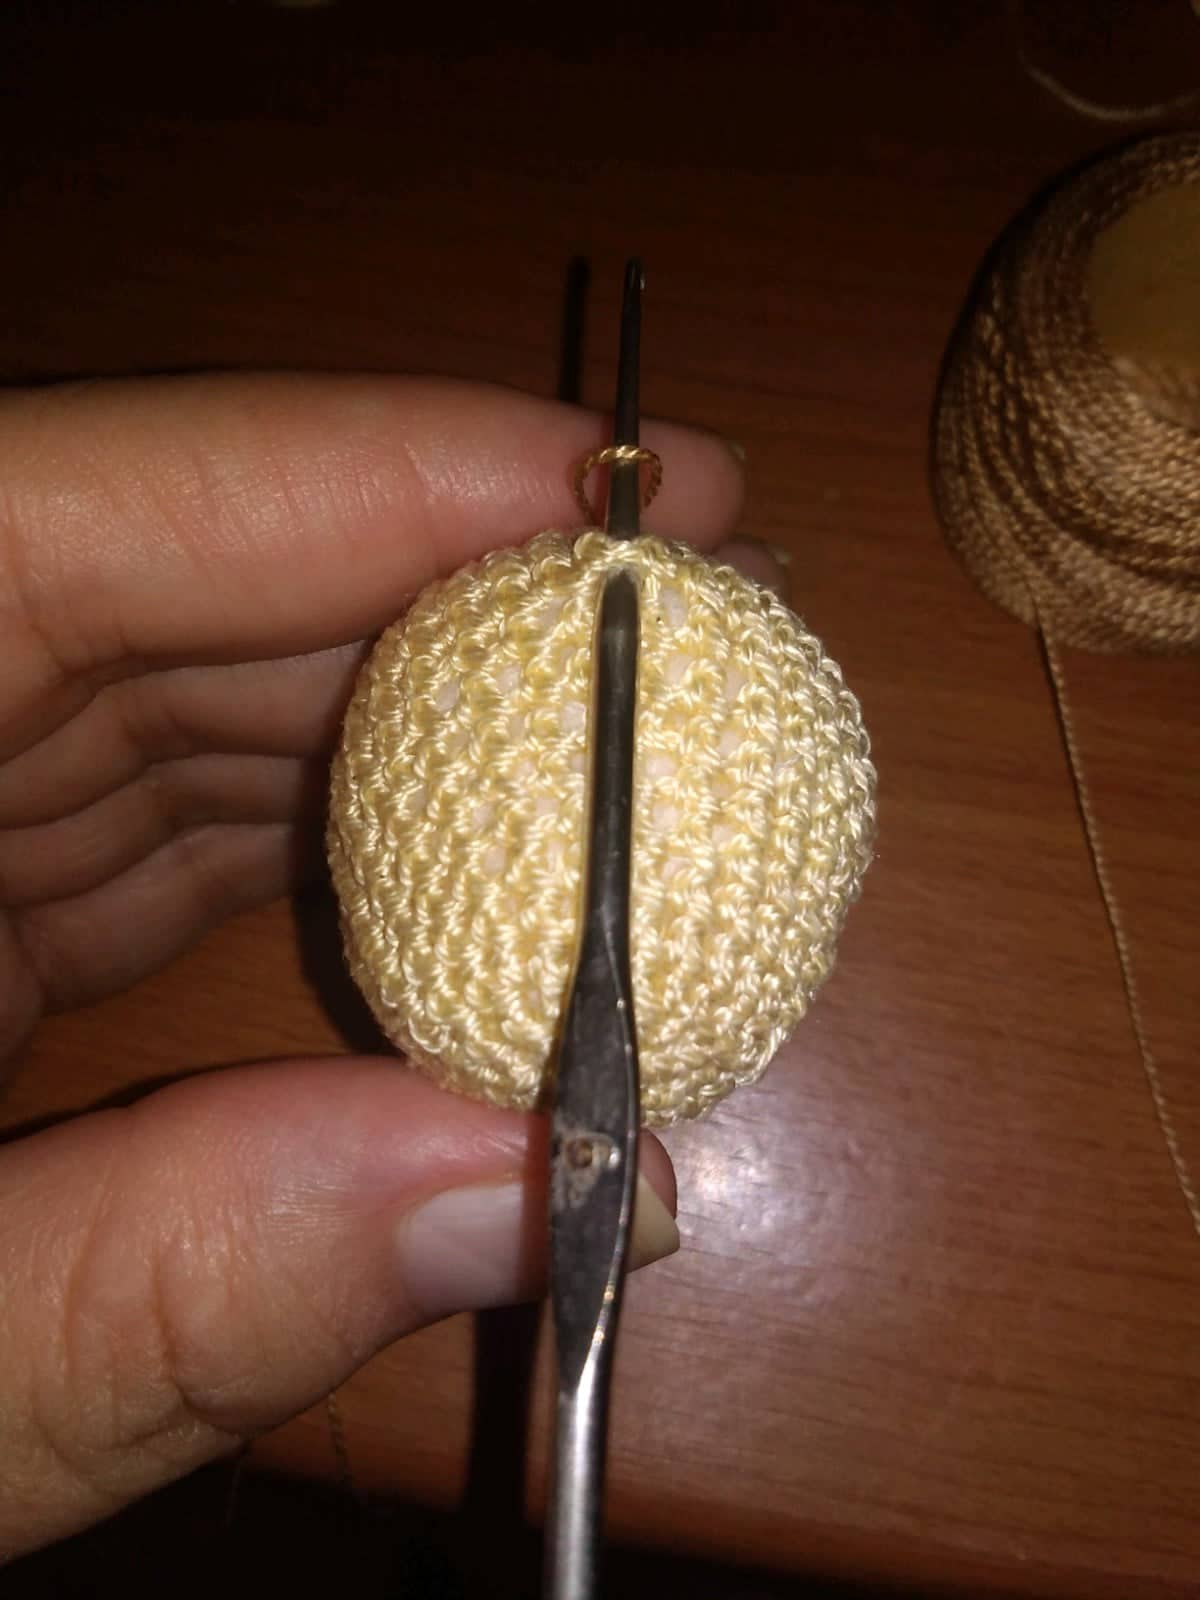
Lo primero que realice fue la cabeza y para ello comencé con el anillo mágico de 6 puntos bajos con unión de punto deslizado, en la segunda vuelta realice aumentos logrando 12 puntos, en las dos siguientes vueltas fueron 3 puntos bases mas un aumento, 4 puntos bases mas un aumentos; obteniendo 18 y 24 puntos respectivamente; ya para las siguientes 4 vueltas son solo puntos base sin aumento, en la siguiente vuelta seria la 9 son 3 puntos base mas un aumento, en la vuelta 10 y 11 solo puntos base sin aumento, en la vuelta 12 serán 4 puntos base mas un aumento, en las siguientes 3 vueltas es un punto por espacio; a partir de la vuelta 16 comenzamos a disminuir con 4 puntos bases y una disminución, así será hasta llegar a la vuelta 19 que culminamos con un punto base y una disminución; rellenar y la última vuelta es solo de disminución para luego rematar dejando hilo excedente para terminar cosiendo con la aguja lanera.
The first thing I made was the head and for this I started with the magic ring of 6 low stitches with slipped stitch join, in the second round I made increases achieving 12 stitches, in the next two rounds were 3 base stitches plus an increase, 4 base stitches plus an increase; obtaining 18 and 24 stitches respectively; already for the following 4 rounds are only base stitches without increase, in the next round would be 9 are 3 base stitches plus an increase, in round 10 and 11 only base stitches without increase, in round 12 will be 4 base stitches plus an increase, in the following 3 rounds is one stitch per space; from round 16 we begin to decrease with 4 base stitches and a decrease, so it will be until we reach round 19 that we finish with a base stitch and a decrease; fill and the last round is only decrease and then finish off leaving excess thread to finish sewing with the wool needle.


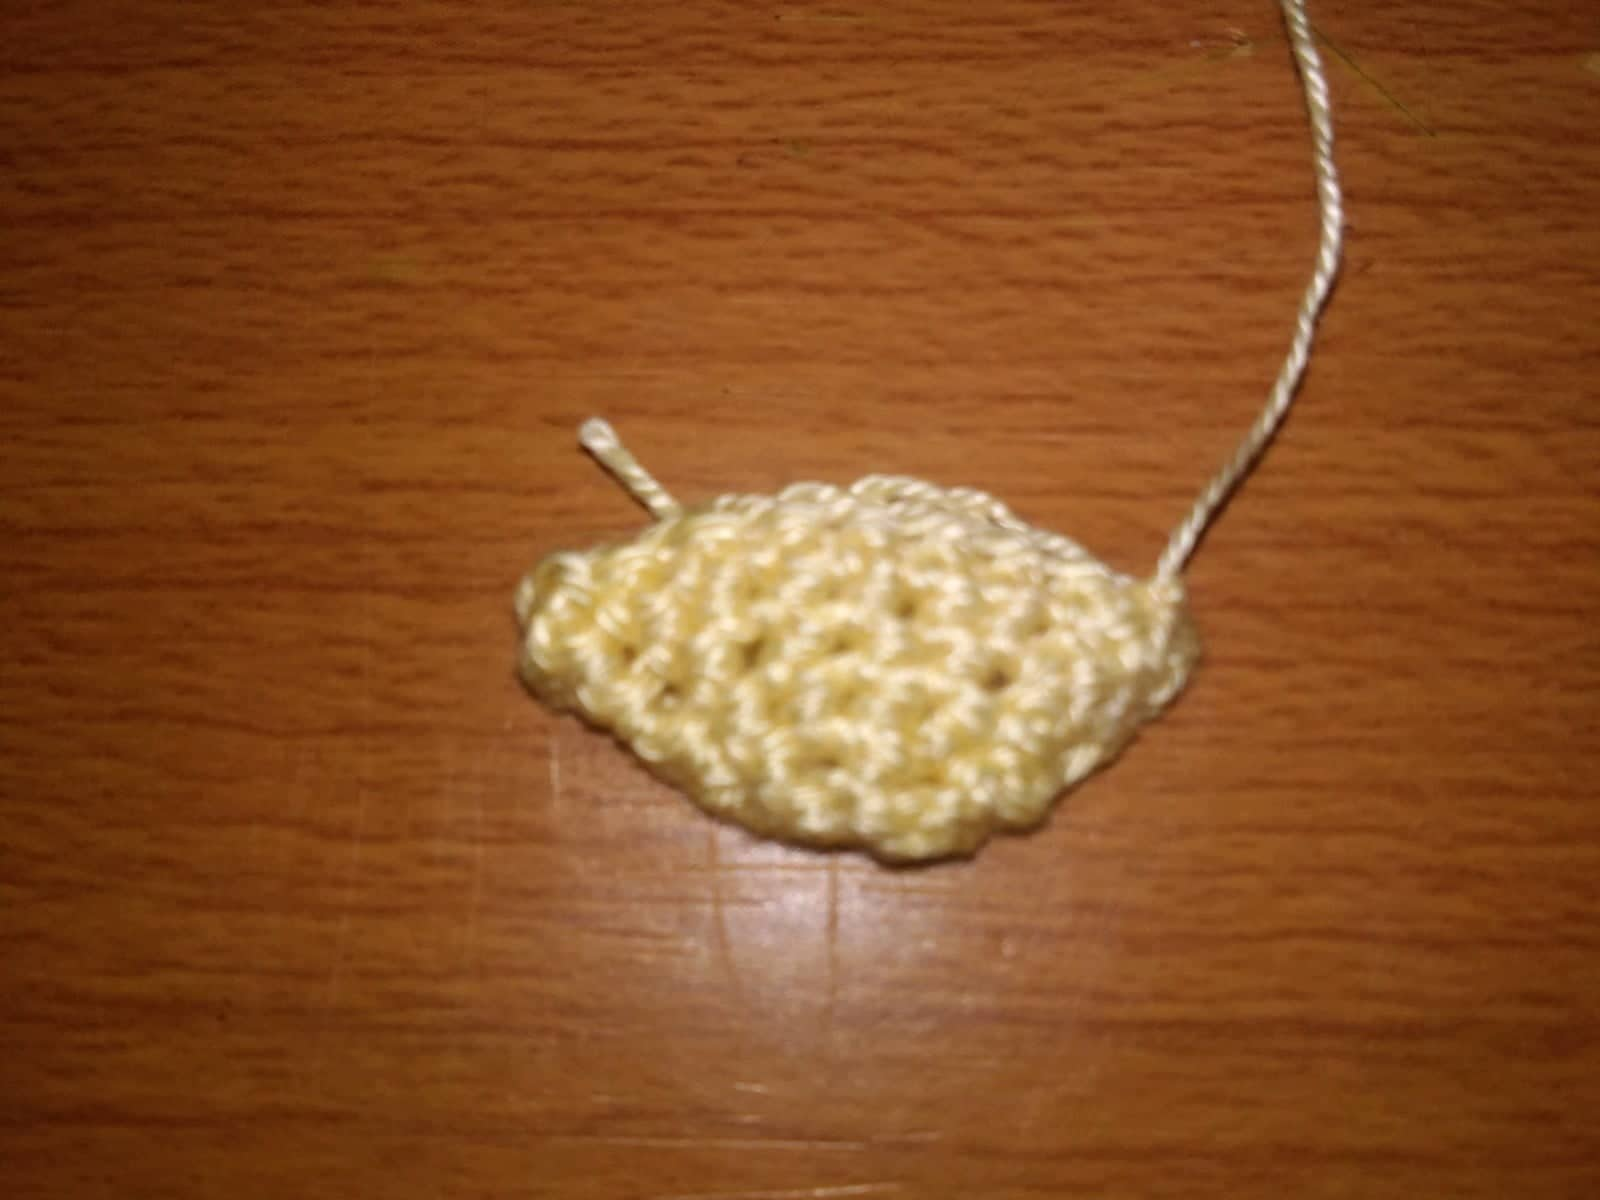
Para el cuerpo, igualmente será el anillo mágico con 6 puntos base y en la segunda vuelta es de aumento logrando 12 puntos, en las siguientes 2 vueltas es un punto un aumento y 2 puntos mas un aumento; en las siguientes 3 vueltas solo puntos base; a partir de la vuelta 8 comenzamos a disminuir con 2 puntos base y una disminución, en las siguientes 2 vueltas serán solo puntos base sin aumento ni disminución, la vuelta 11 será un punto y una disminución, en vuelta 12 y 13 solo puntos base, rematar dejando hilo excedente y rellenar.
For the body, it will also be the magic ring with 6 base stitches and in the second round it is an increase achieving 12 stitches, in the following 2 rounds it is one stitch, one increase and 2 stitches plus one increase; in the following 3 rounds only base stitches; from round 8 we start to decrease with 2 base stitches and one decrease, in the following 2 rounds it will be only base stitches without increase or decrease, round 11 will be one stitch and one decrease, in rounds 12 and 13 only base stitches, finish off leaving excess yarn and fill in.
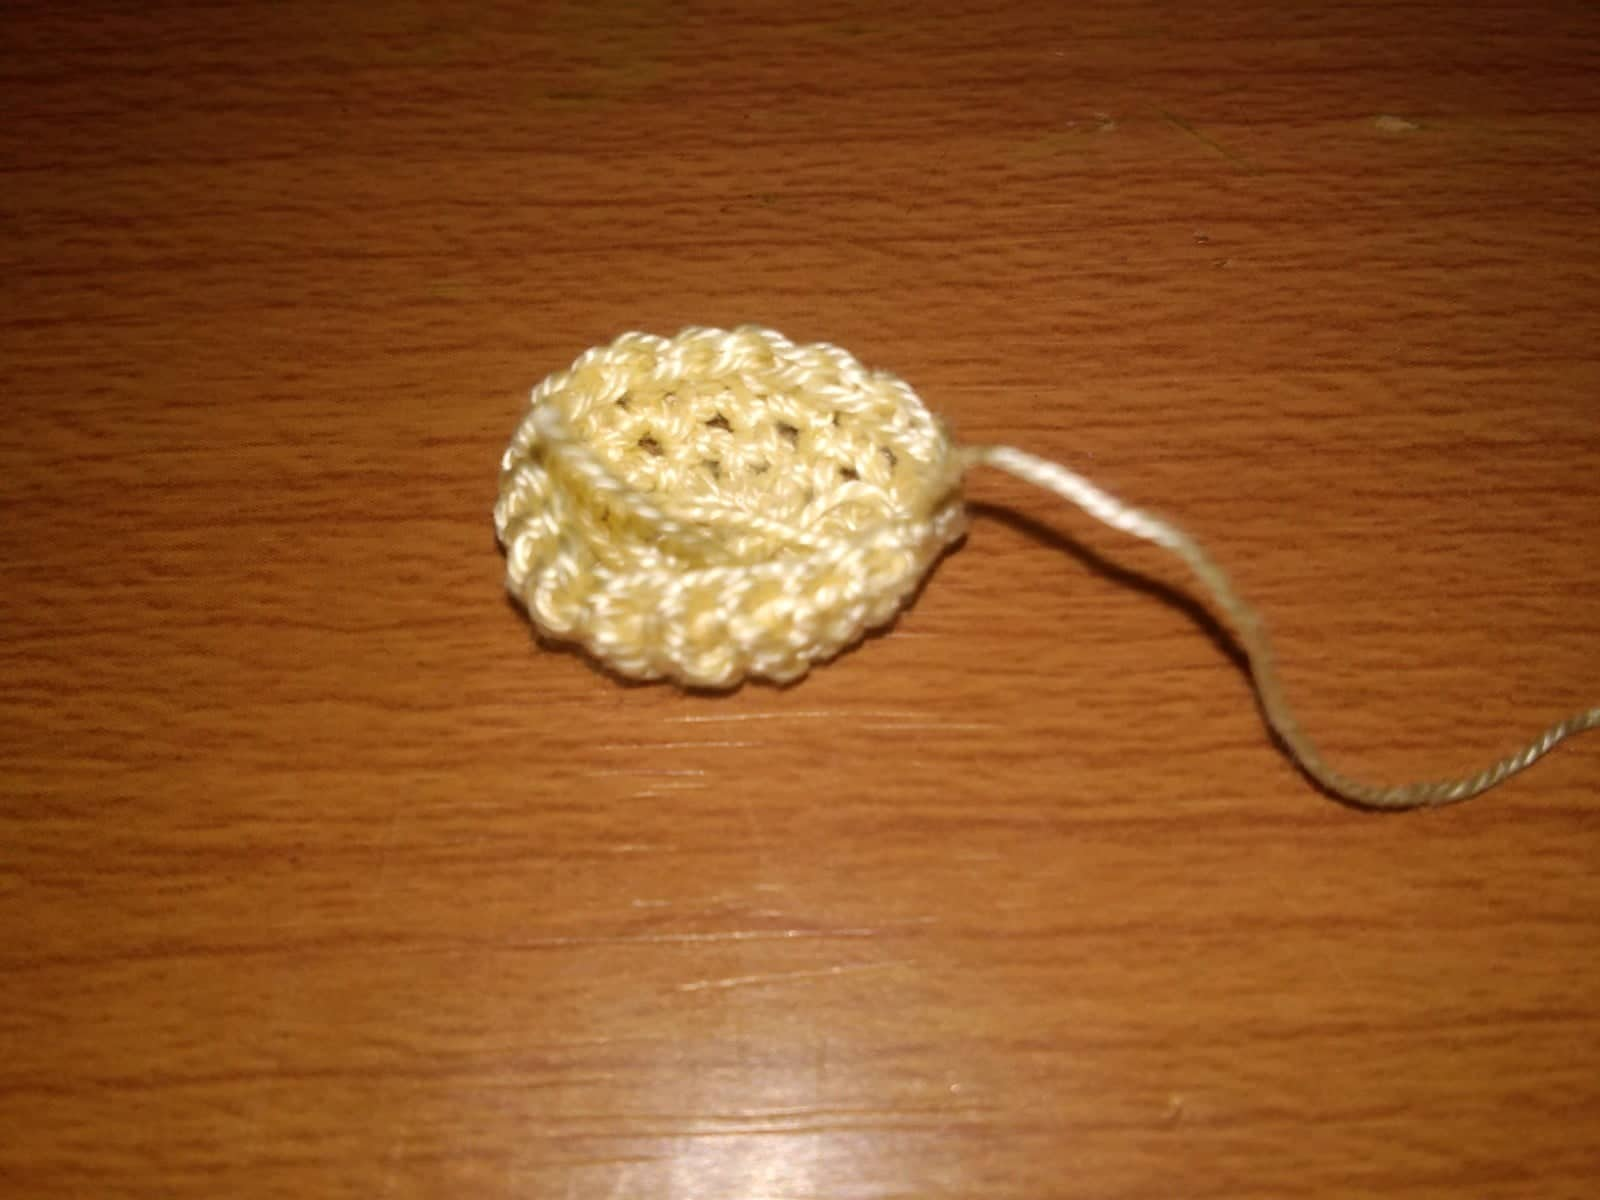
Para la cola se teje una especie de triangulo, con un anillo de 6 puntos bases, en la segunda vuelta solo puntos base, en la vuelta 3 será de aumentos logrando 12 puntos, en la vuelta 4 solo punto por espacio quedando los mismos 12 puntos, ya para la 5 es un punto base mas un aumento y en la 6 un punto en cada espacio, rematar dejando hilo excedente y rellenar.
For the tail we knit a kind of triangle, with a ring of 6 base stitches, in the second row only base stitches, in row 3 will be of increases achieving 12 stitches, in row 4 only one stitch per space remaining the same 12 stitches, and for row 5 is a base stitch plus an increase and in row 6 a stitch in each space, finish off leaving excess yarn and fill in.
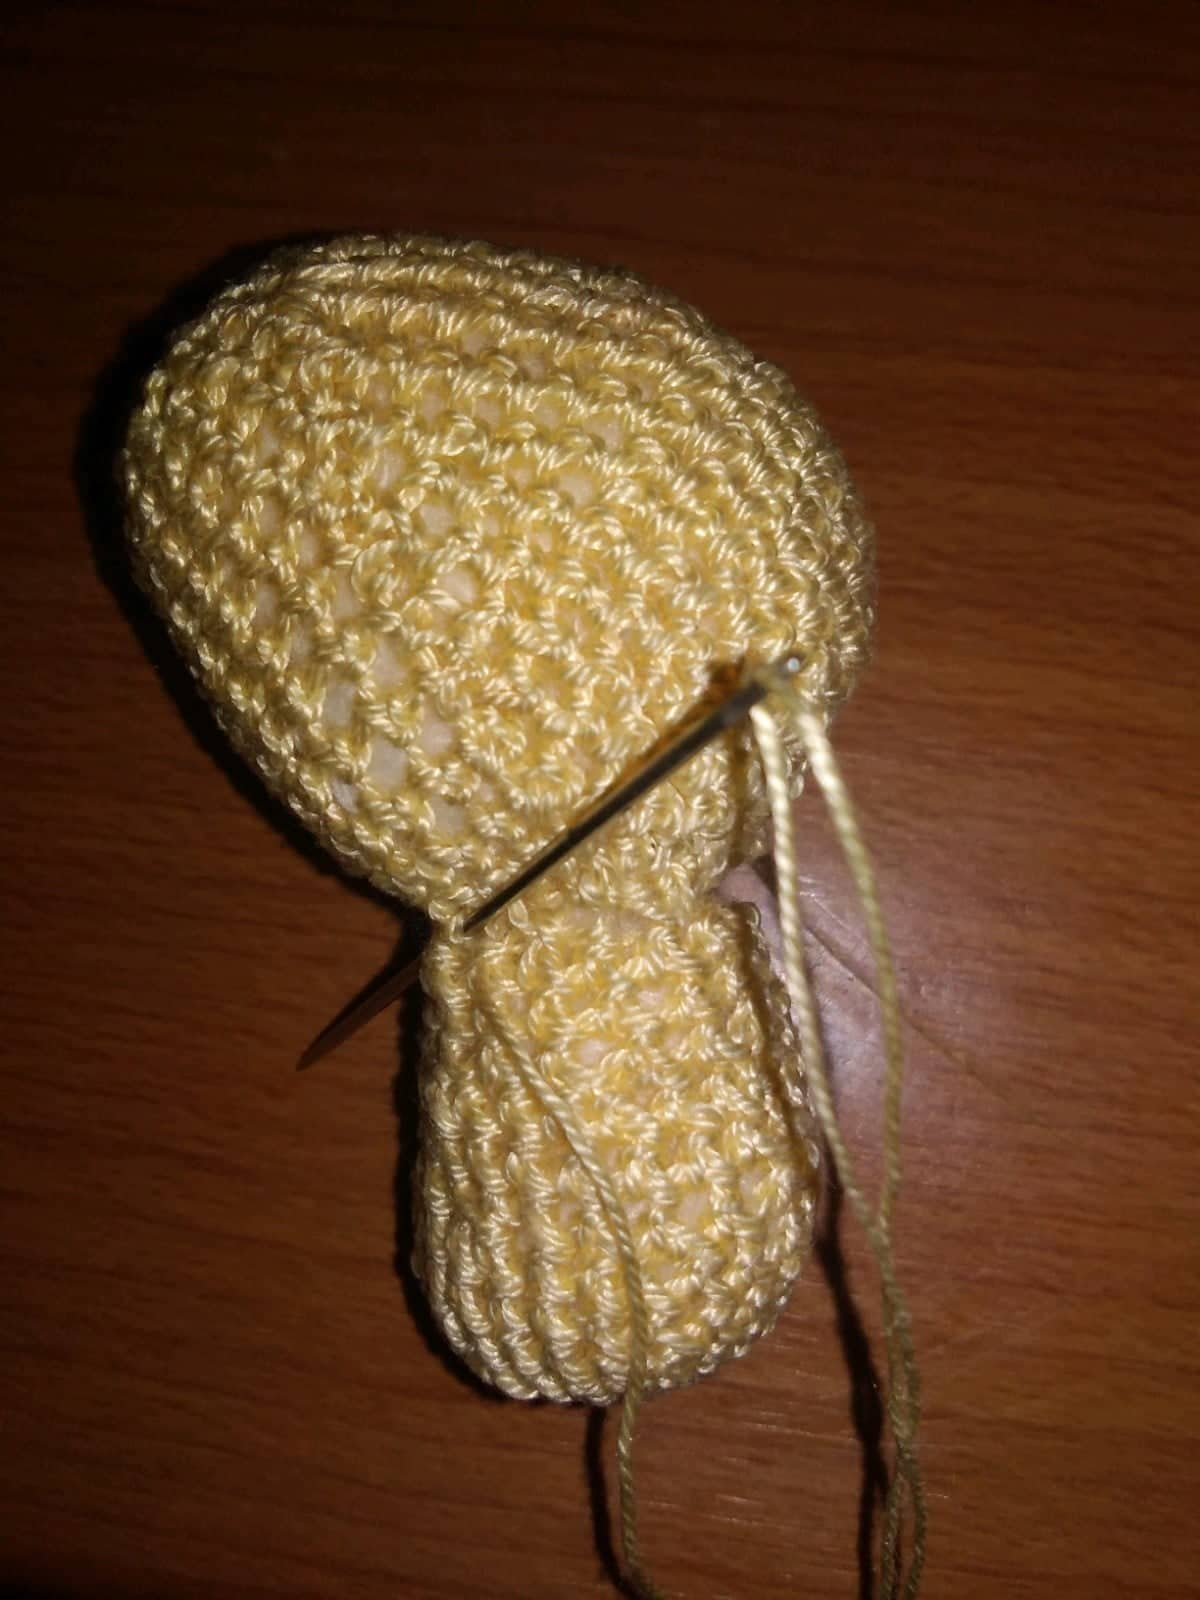
El siguiente paso será unir las piezas que ya tenemos y comenzamos por la cabeza y el cuerpo y seguidamente la cola; tratando que esta última quede a manera que el dinosaurio se pueda sostener de pie.
The next step will be to join the pieces we already have and we start with the head and the body and then the tail; trying to make the tail so that the dinosaur can stand upright.
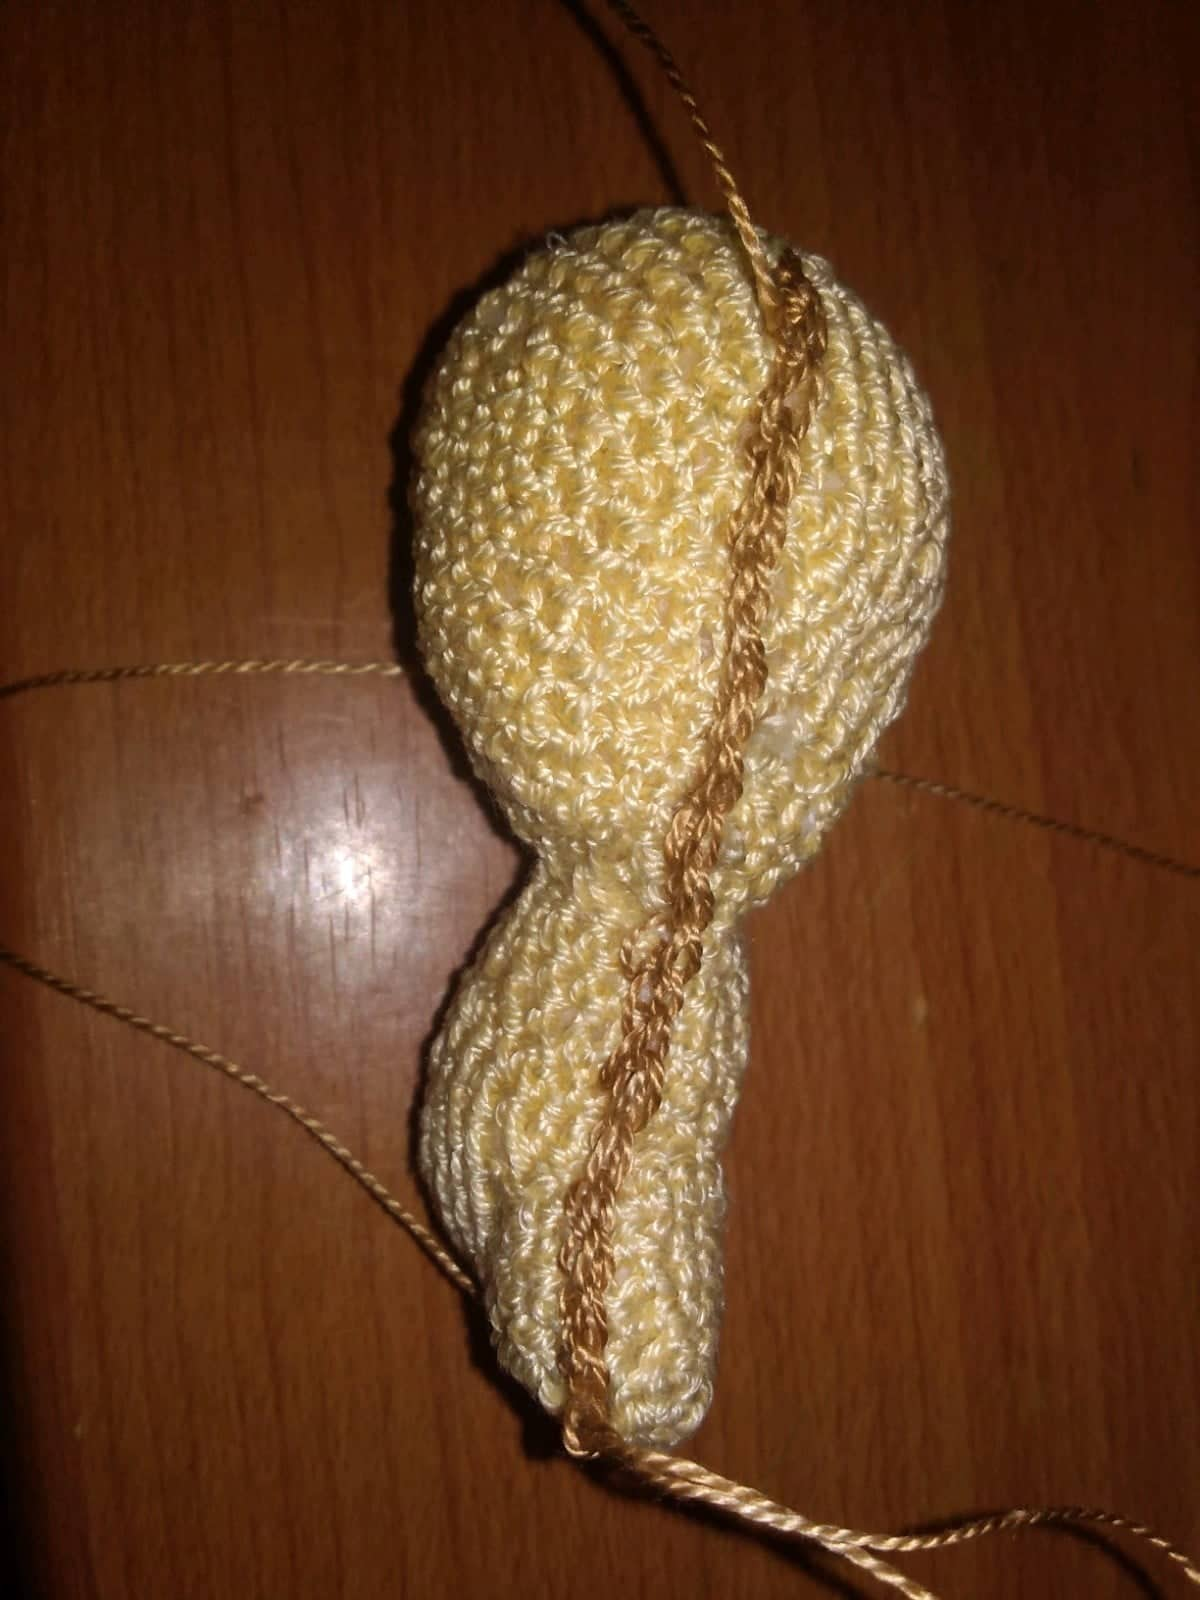
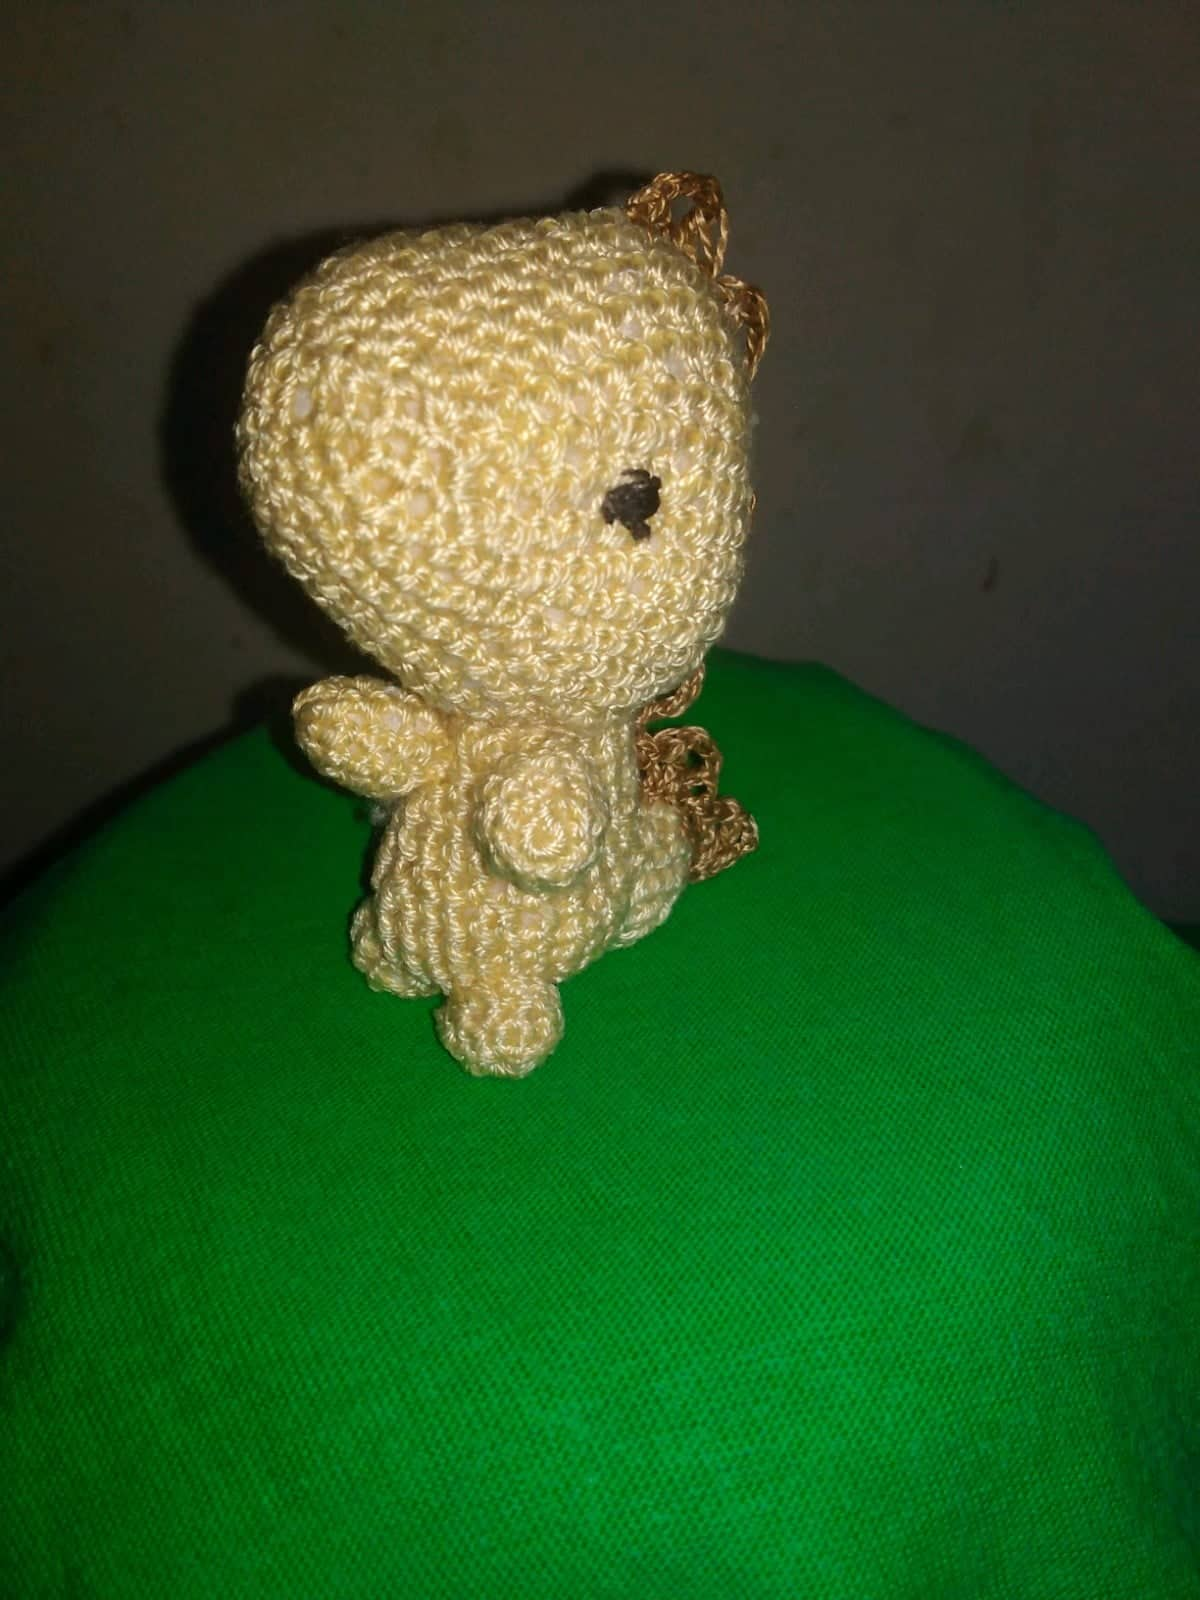
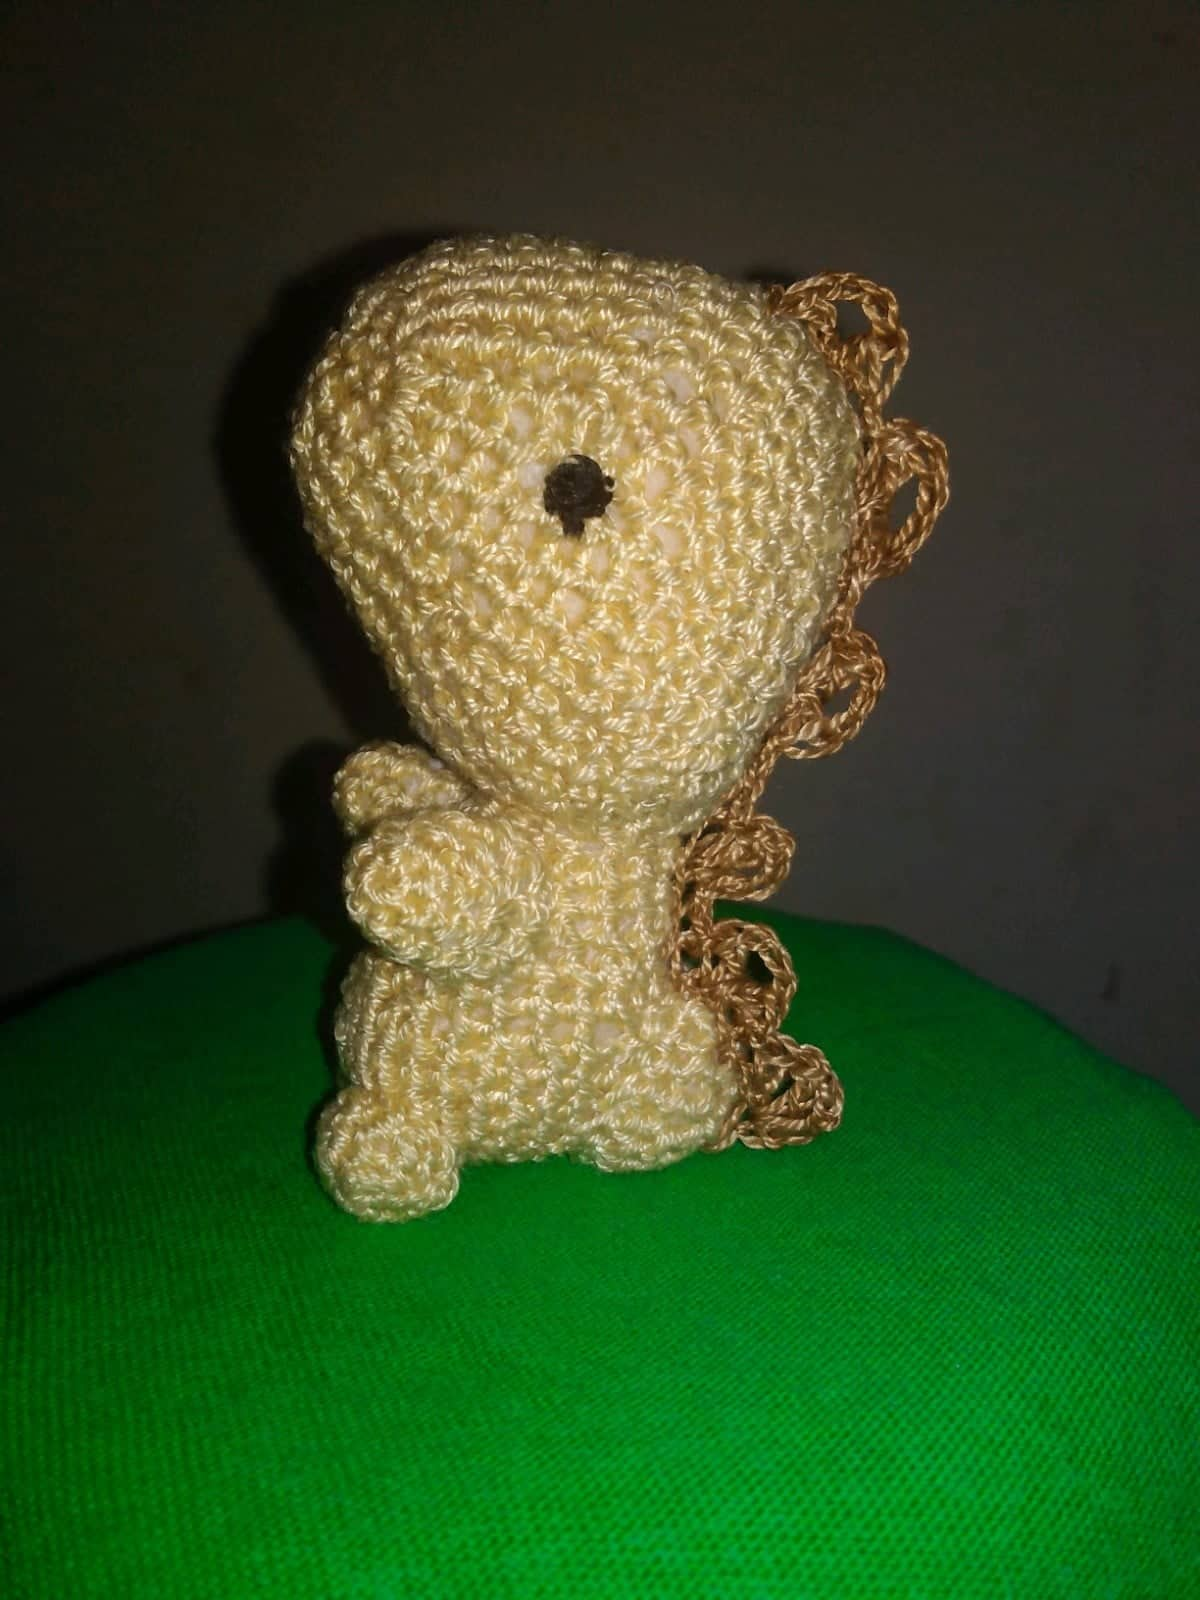
Luego de tener el cuerpo armado, vamos a trabajar con el hilo de color marrón para hacer lo que son las púas que van desde la cabeza hasta la cola y para ello contamos desde la vuelta número uno hasta llegar a la 11, teniendo en cuenta que es necesario que este tejido quede justo en el centro; entonces introducimos la aguja para tomar el hilo y hace un punto deslizado que quede como una cadeneta y así vamos hasta la punta de la cola completando 27 cadenetas; al llegar al final levantamos una cadeneta y regresamos ahora sí haciendo las puas, en un mismi punto hacer un punto alto mas tes cadenetas y otro punto alto, los siguientes dos puntos será bajos, luego repetimos el mismo proceso y así sucesivamente hasta llegar al comienzo del tejido donde rematamos y escondemos el hilo.
After having the body assembled, we are going to work with the brown thread to make the barbs that go from the head to the tail and for this we count from the turn number one until we reach turn 11, taking into account that it is necessary that this fabric is right in the center; then we introduce the needle to take the thread and make a slipped stitch that is like a chain stitch and so we go to the tip of the tail completing 27 chain stitches; when we reach the end we lift a chain stitch and we return now making the stitches, in the same stitch we make a high stitch plus three chain stitches and another high stitch, the following two stitches will be low, then we repeat the same process and so on until we reach the beginning of the fabric where we finish and hide the yarn.
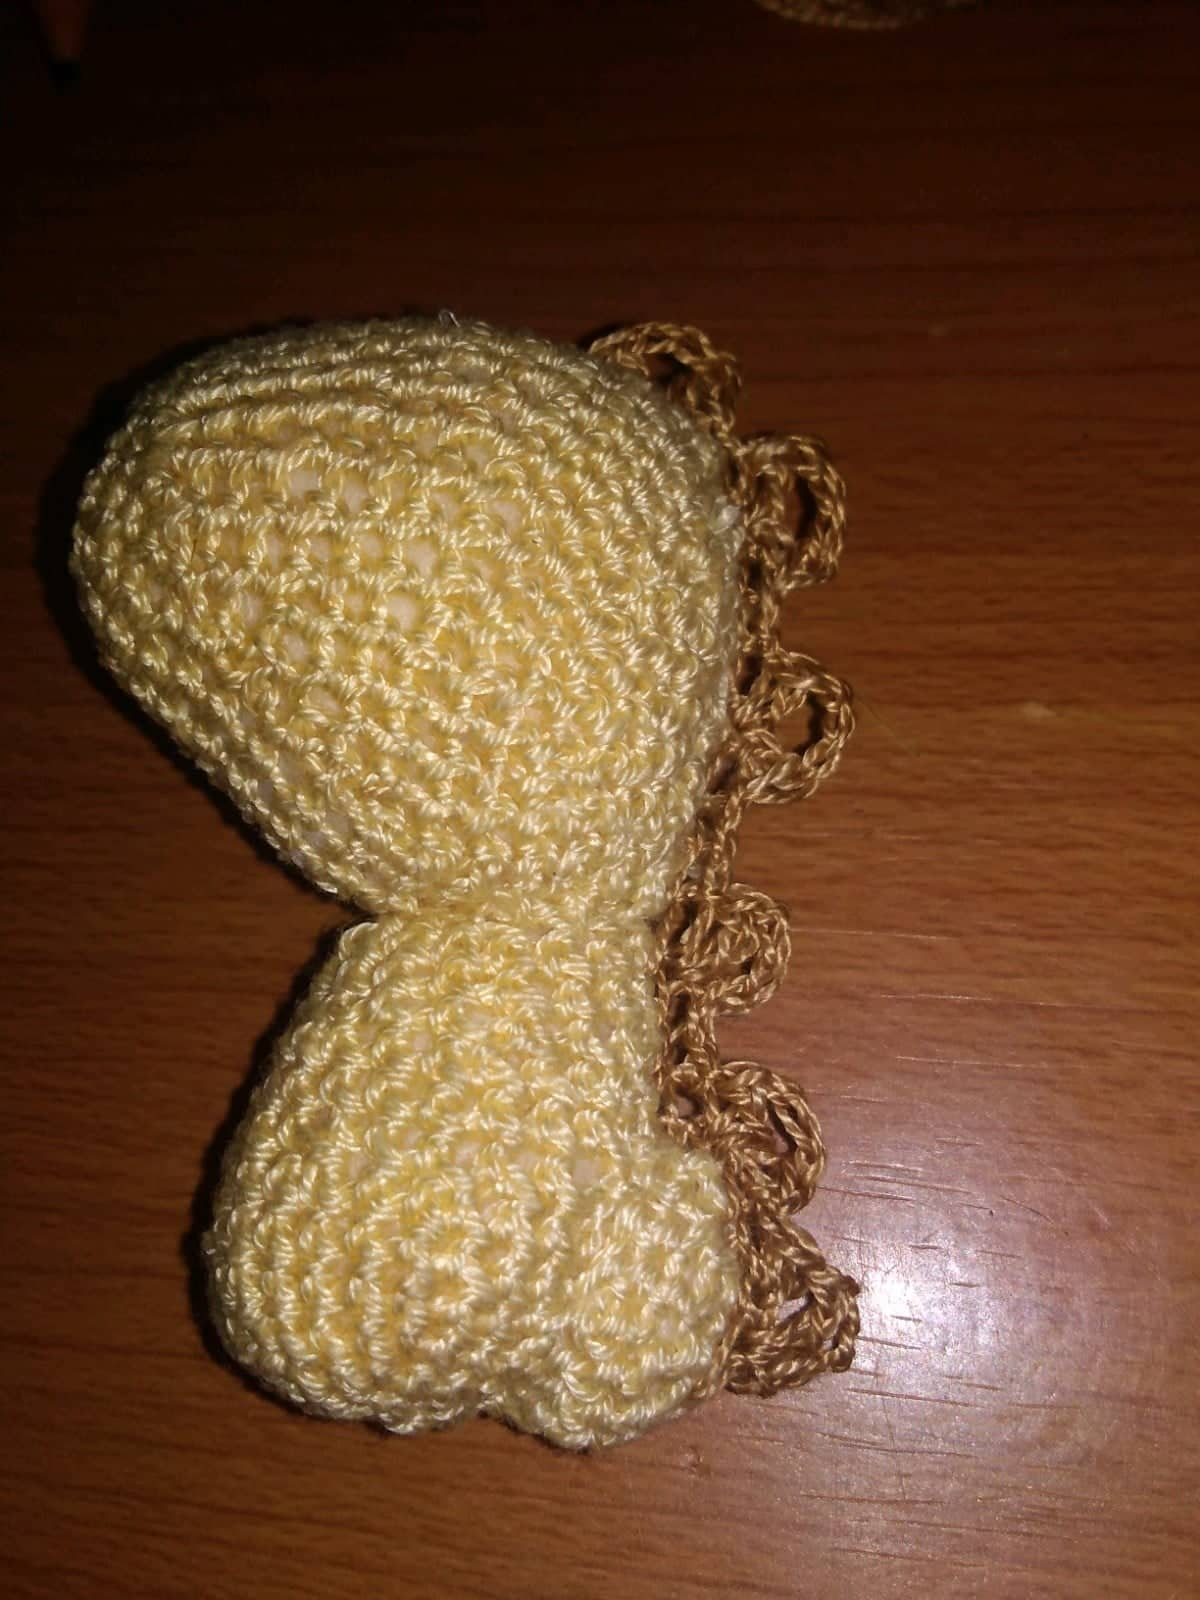
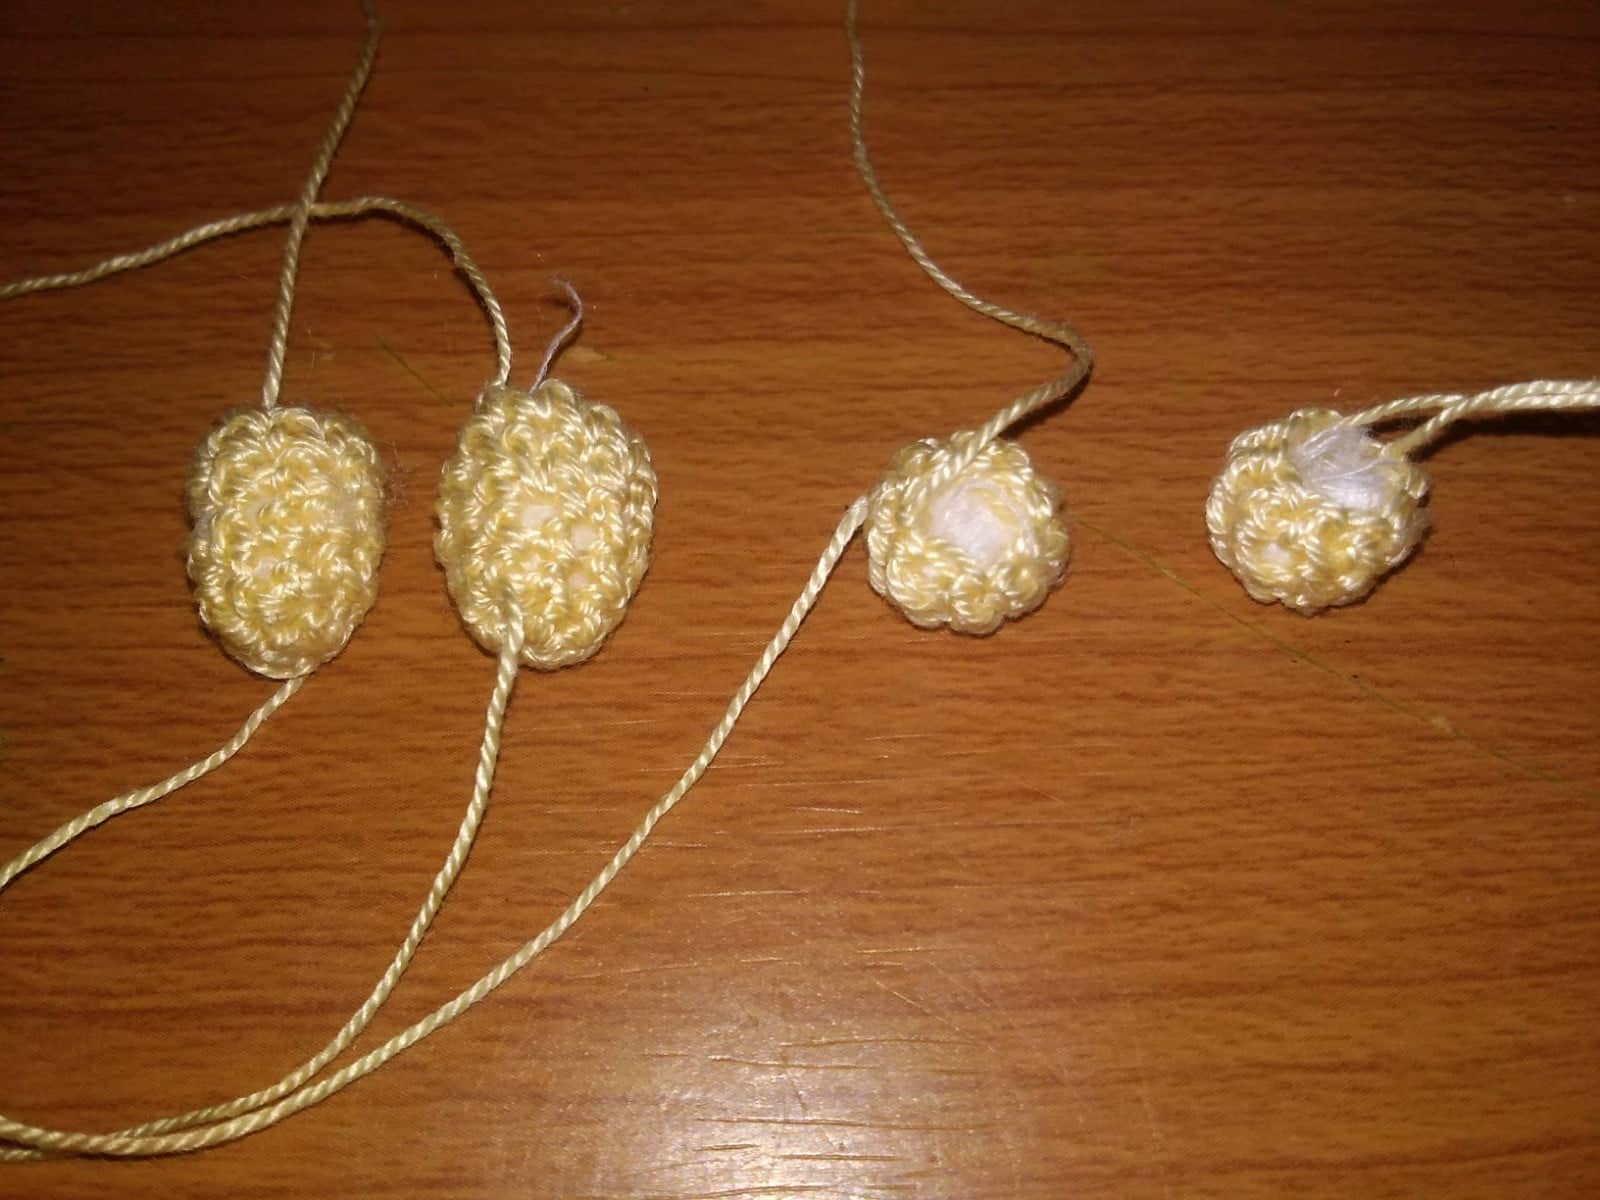
En la primera imagen se puede visualizar como quedan las púas. Lo siguiente serán las patas y brazos, que son muy facil de realizar pero a la vez un tanto incomodo por ser muy pequeños; para ambos iniciamos con un anillo mágico de 8 puntos base y en las siguientes 3 vueltas es solo puntos base, rematar dejando hilo excedente y luego se rellena; esto para las patas porque para las manos se realiza una vuelta más.
In the first image you can see how the barbs look like. Next will be the legs and arms, which are very easy to make but at the same time a little uncomfortable because they are very small; for both we start with a magic ring of 8 base stitches and in the following 3 rounds is only base stitches, finish off leaving excess yarn and then fill in; this for the legs because for the hands is done one more round.


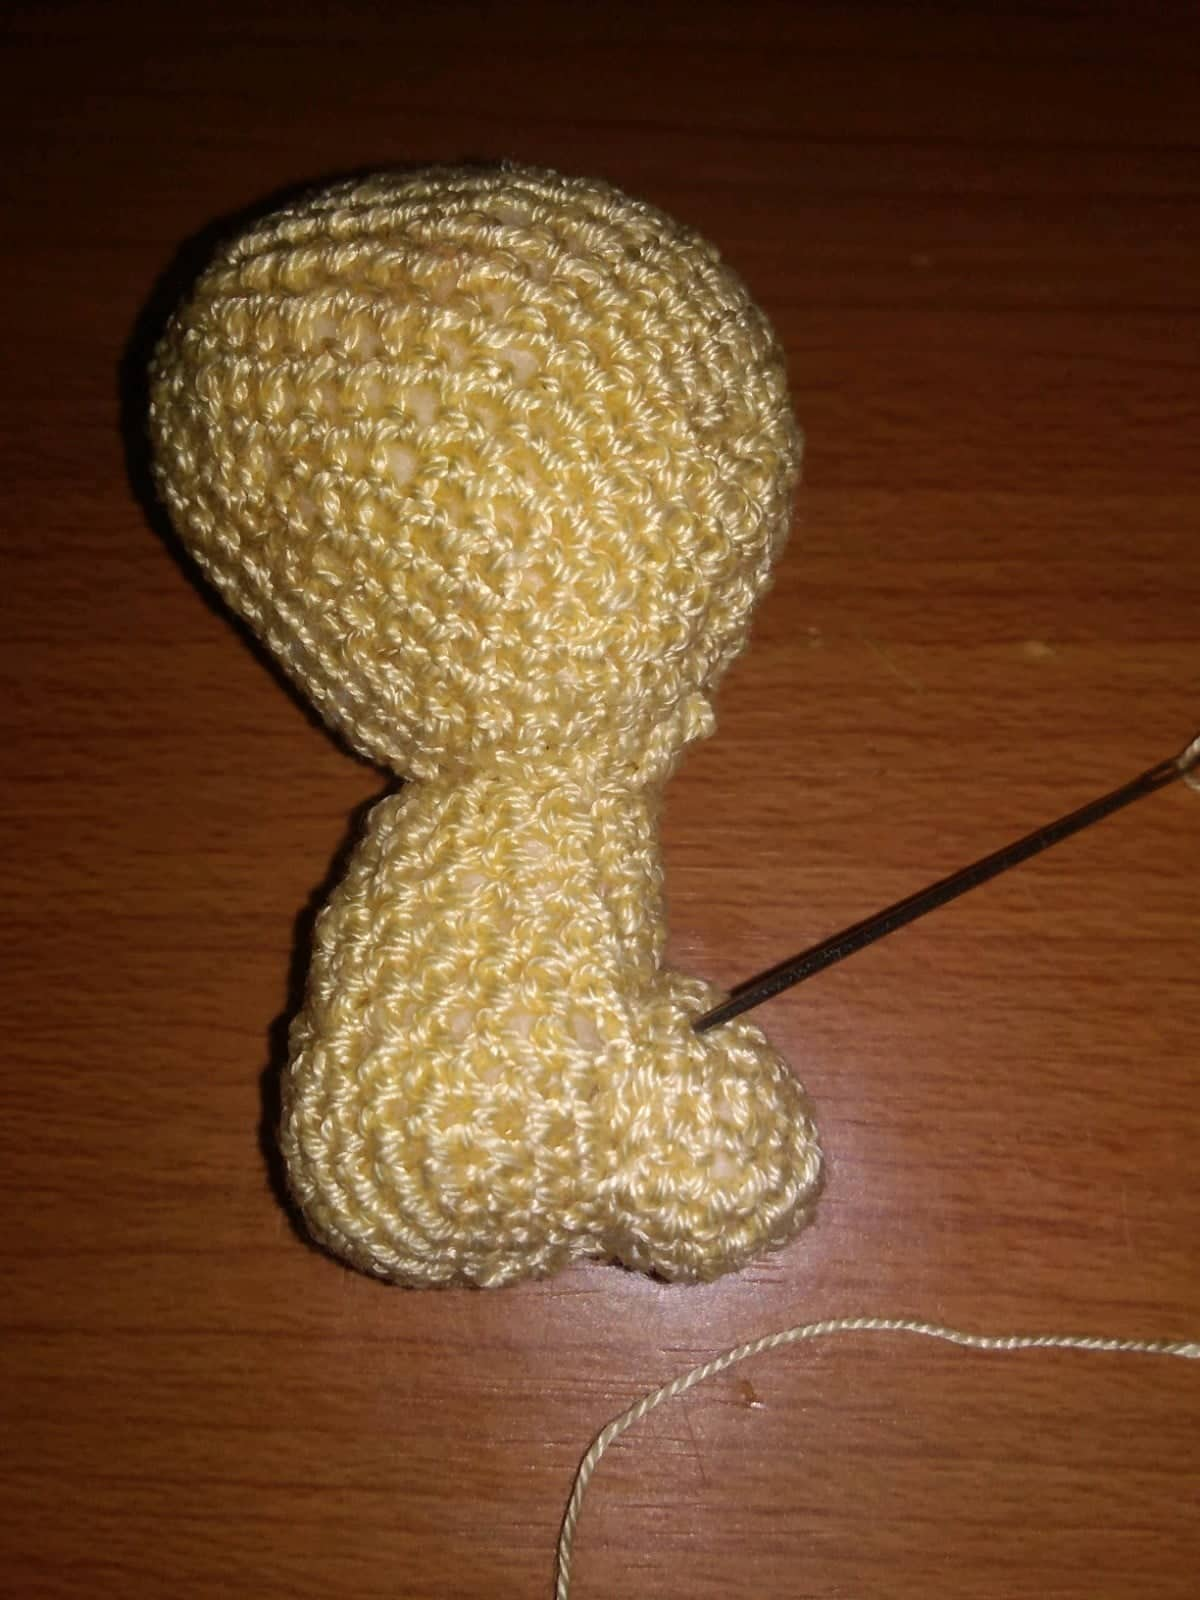
En esta parte cosemos patas y brazos al cuerpo, tomando en cuenta que las patas deben ir en dirección diagonal a la cola para que el dino pueda mantenerse de pie.
In this part we sew legs and arms to the body, taking into account that the legs should go diagonally to the tail so that the dino can stand upright.

Por último, con el hilo negro de coser realizamos los ojos tratando que estos queden entre las vueltas 9 y 10 de la cabeza para que estén en una misma dirección. Así es como quedó este lindo y tierno dinosaurio el cual puede ser usado para llavero, souvenir o simplemente como peluche.
Finally, with the black sewing thread, we sew the eyes, trying to place them between turns 9 and 10 of the head so that they are in the same direction. This is how this cute and cuddly dinosaur turned out, which can be used as a keychain, souvenir or simply as a stuffed animal.
0
0
0.000
Ahhh que cuchi te quedó @giocondina 😍
Sii, muy lindo. Gracias!
Que lindo! gracias por compartir.
Me agrada que te guste, gracias!
Congratulations @giocondina! You have completed the following achievement on the Hive blockchain and have been rewarded with new badge(s):
Your next target is to reach 70000 upvotes.
You can view your badges on your board and compare yourself to others in the Ranking
If you no longer want to receive notifications, reply to this comment with the word
STOPCheck out the last post from @hivebuzz:
Support the HiveBuzz project. Vote for our proposal!
Nice crochet. You really take time to make sure the outcome is so beautiful
Thank you for your comment. Best regards!
Qué bonito patrón, parece un dino bebé!! Gracias por compartirlo ❤
Realmente lo es, que bueno que te gustó.
Me encantan las cosas tejidas 😊 lástima que nunca aprendí.
Gracias por compartir tu talento en Hive... Saludos 💕.
Nunca es tarde para comenzar y aprender, gracias por comentar.