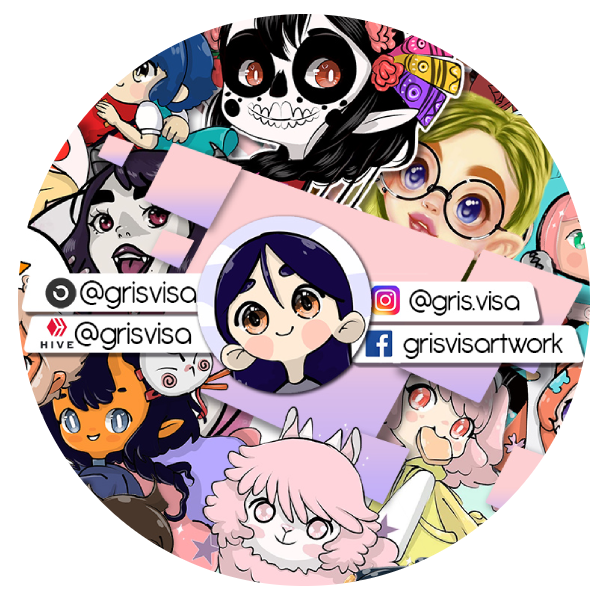
A Special #DrawThisInYourStyle Illustration Using Vector Art

English // Español
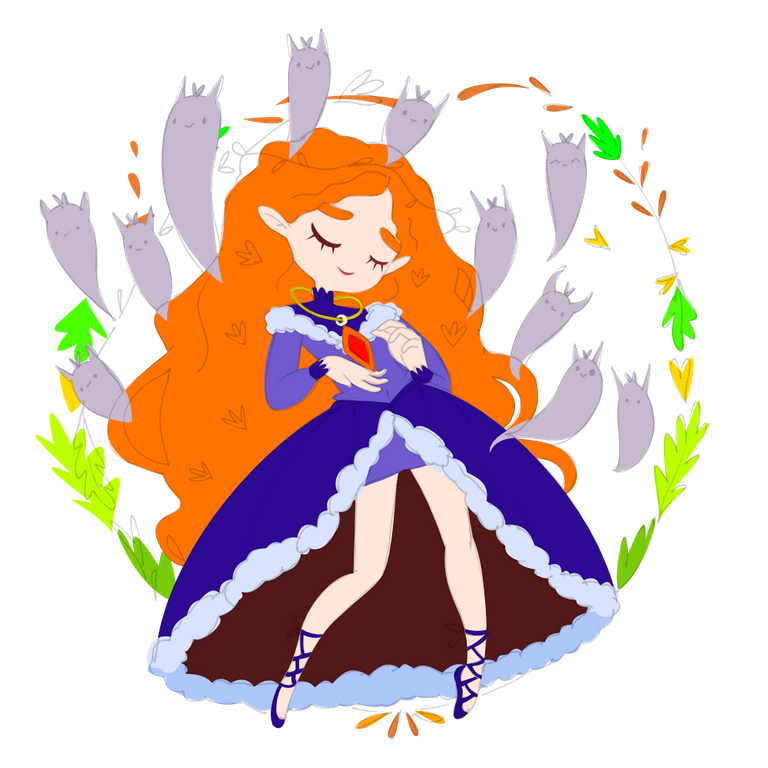
Hello little Hivers lovers of illustration, today I am very excited to show you an illustration that I made in vectors that took me a whole day to make because I had to learn how to use the application.😅
This illustration was done in Affinity Designer which is a super beautiful application that can be used in the iPad, (I think there is also the version for desktop) since I had the idea of acquiring the iPad I was excited about the idea of being able to return to the vectors since I had already worked with Corel Draw and Illustrator and I thought that with Procreate I could return to using vectors.
Unfortunately, shortly before I bought the iPad Pro I found out that vectors could not be made with Procreate. Still, I was not discouraged, and making some research I came to this app that really has a lot to offer. Years had passed since I last worked with vectors, this has been an app that facilitates the whole process of creation. Starting with the fact that not only can you make vectors but also you can work with pixels outside and inside the vectors to give texture and depth.
Affinity Designer is a fantastic fusion between pixels with all the advantages of vectors that preserve the quality of the image whatever its size. So far I haven't seen Affinity have a way to save the process on video, so I saved some steps for you to appreciate, you can see them in the process section.
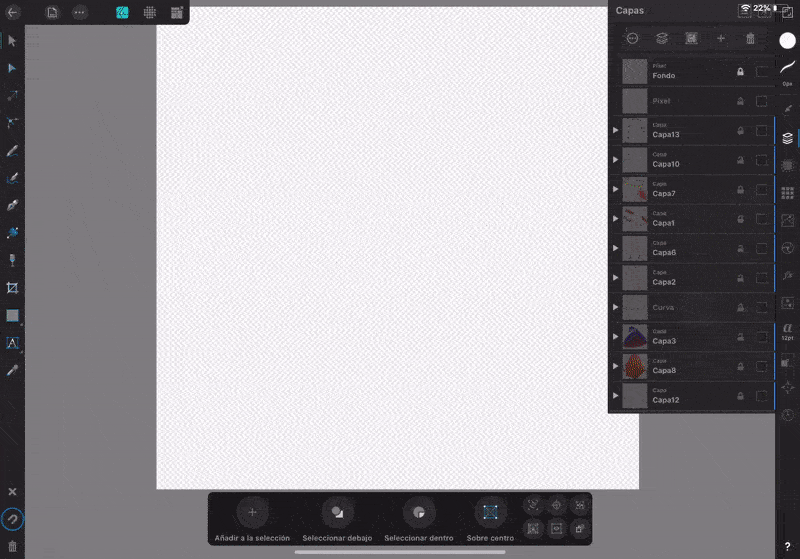
Each part of the illustration is in a different vector layer and each one of these layers has inside a layer of the pixel with which I made the textures. It was a bit of tedious work but it was worth it when I saw the final result. I made the sketch in ibis Paint X on my cell phone although I could have done it in Affinity 👌 👌 without any problems.
I want to keep practicing with this app and see what else it has to surprise me.
Remember that practice and perseverance makes the master.
See you soon in another post where I will share more great apps.
Translated from Spanish to English with the help of https://www.deepl.com/es/translator
Original Illustration by nat_orsh
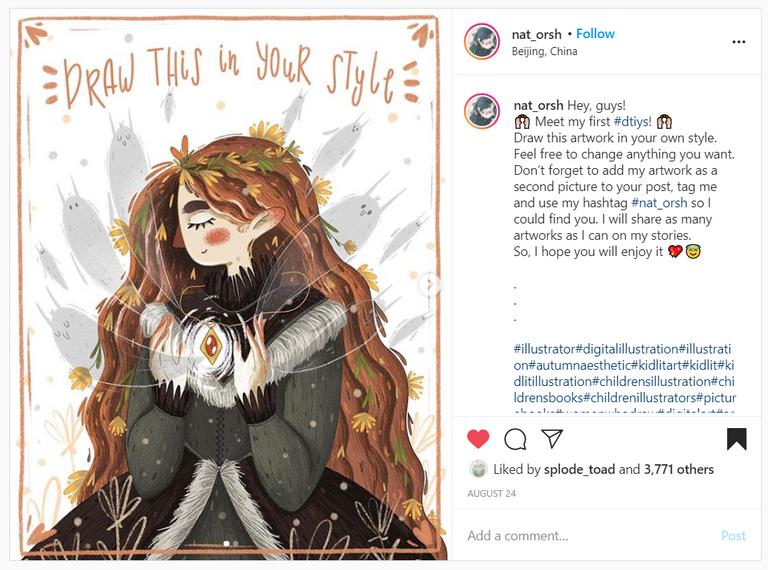
Hive Exclusive!
I haven't shared my version on Instagram
Todavía no he compartido mi versión en Instagram
Process Section // Sección del Paso a Paso:
Sketch // Boceto - ibisPaint X:
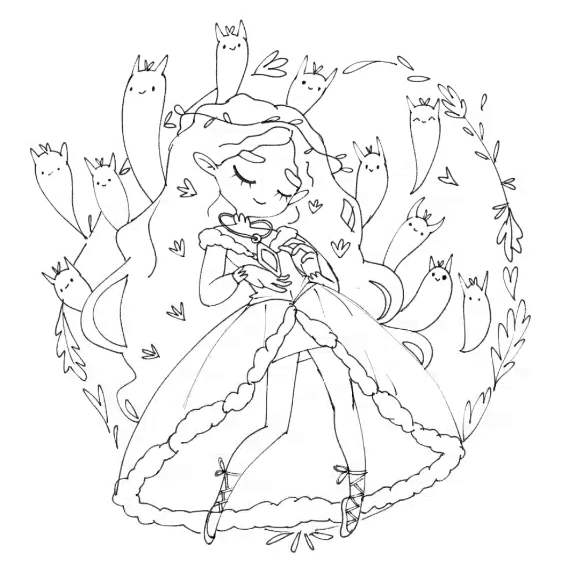
Line Art // Dibujo en Línea - Affinity Designer:


Adding Color // Añadiendo Color
These are all the layers // Estas son todas las capas - Affinity Designer:
Final Drawing:

Hola pequeños Hivers amantes de la ilustración, el día de hoy estoy muy emocionada de mostrarles una ilustración realizada en vectores que me tomo todo un día hacer porque tuve que aprender a usar la aplicación.😅
Esta ilustración fue realizada en Affinity Designer que es una aplicación super bella que se puede usar en el iPad, (creo que también está la versión para escritorio) desde que tenía la idea de adquirir el iPad me emocionaba la idea de poder retomar los vectores puesto que ya antes había trabajado con Corel Draw e Ilustrator y creía que con Procreate podría volver a usar vectores.
Por desgracia poco antes de adquirir el iPad Pro me enteré que con Procreate no se podían hacer vectores. Aún así no me desanime y preguntando llegué a esta app que en verdad que no le pide nada a Procreate. Para mi que tenía años sin trabajar con vectores, ha sido una app que me facilita todo el proceso de creación. Empezando por el hecho de que no solo se pueden hacer vectores sino que también se pueden trabajar pixeles fuera y dentro de los vectores para dar textura y profundidad.
Affinity Designer es una fantástica fusión entre los píxeles con todas las ventajas de los vectores que conservan la calidad de la imagen sea cual sea su tamaño. Hasta el momento no he visto que Affinity tenga modo de guardar el proceso en video, así que guardé algunos pasos para que lo puedan apreciar, los pueden ver en la sección de procesos.
Cada parte de la ilustración está en una capa de vector diferente y cada una de estas capas tiene dentro una capa de pixel con las que hice las texturas. Fue un trabajo un tanto tedioso y tardado pero valió mucho la pena al ver el resultado final. El boceto lo hice en ibis Paint X en el celular aunque en realidad sin ningún problema lo podría haber hecho en Affinity 👌👌👌
Quiero seguir practicando con esta app y ver qué más herramientas tiene para sorprenderme.
Recuerden que la práctica y constancia hace al maestro.
Nos vemos pronto en otro post donde les compartiré más apps geniales.
Until Next Time // ¡Hasta la Próxima!
Congratulations @grisvisa! You received a personal badge!
Wait until the end of Power Up Day to find out the size of your Power-Bee.
May the Hive Power be with you!
You can view your badges on your board and compare yourself to others in the Ranking
Do not miss the last post from @hivebuzz:
Congratulations @grisvisa! You received a personal badge!
Participate in the next Power Up Day and try to power-up more HIVE to get a bigger Power-Bee.
May the Hive Power be with you!
You can view your badges on your board and compare yourself to others in the Ranking
Do not miss the last post from @hivebuzz:
Ay pero que bonita te ha quedado a tu estilo. Increible.
¡Muchas gracias! Me costó más trabajo de lo normal, pero valió la pena.
Nice draw
Thank you!