Innovating!! tapas made with scraps, taking advantage and creating💃/// Innovando !! tapas hechas con retazos, sacando provecho y creando💃
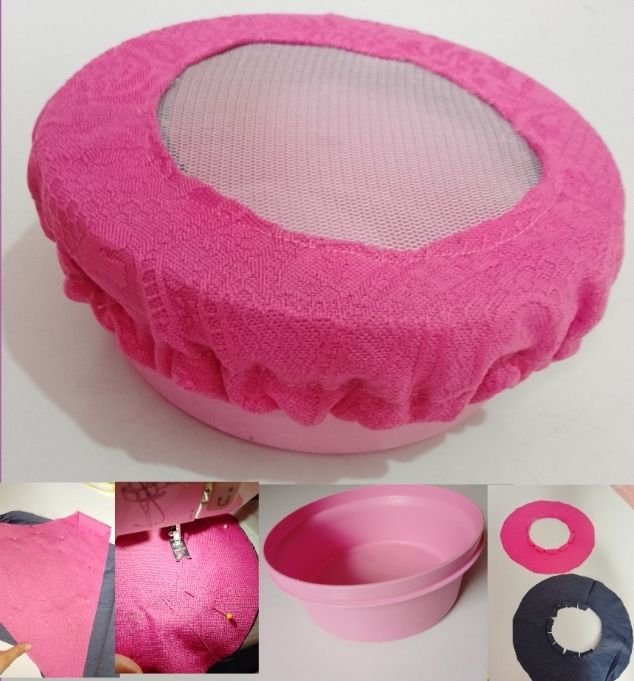
Hello hello my beautiful people here I am with you again and sharing a very creative work that I just did and very useful for our kitchen, always when we dedicate ourselves to the kitchen we leave a cup with food that does not have a lid and what we do is place a dish to prevent the flies from getting on it, because I started to make a kind of cover with cloth, something that I think is very creative and useful, I hope you like it
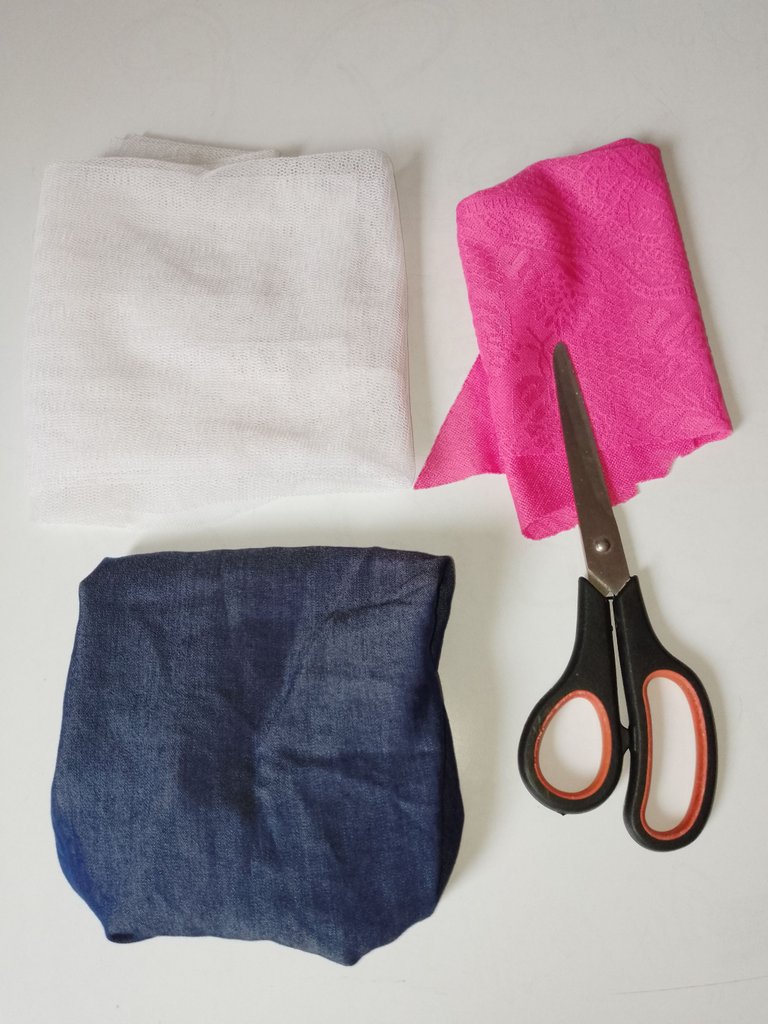
For this use the following materials:
*Tulle fabric
*Pink fabric (remnant)
*Blue fabric
*elastic
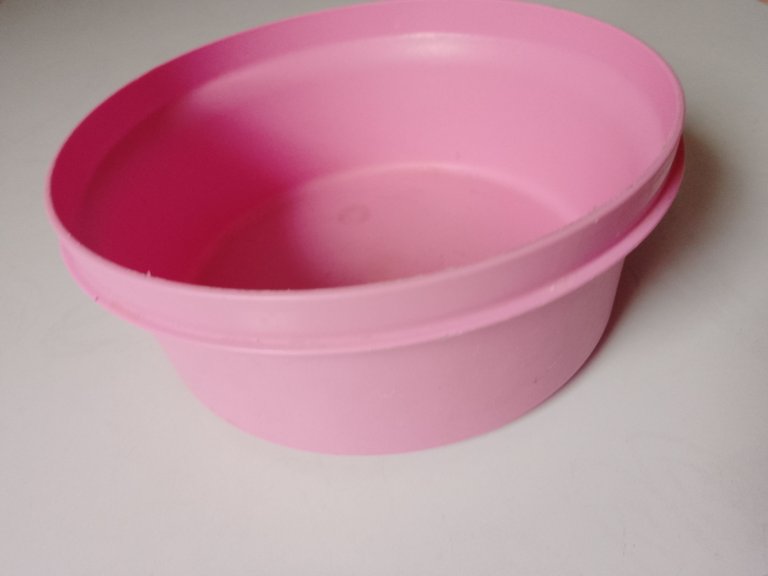
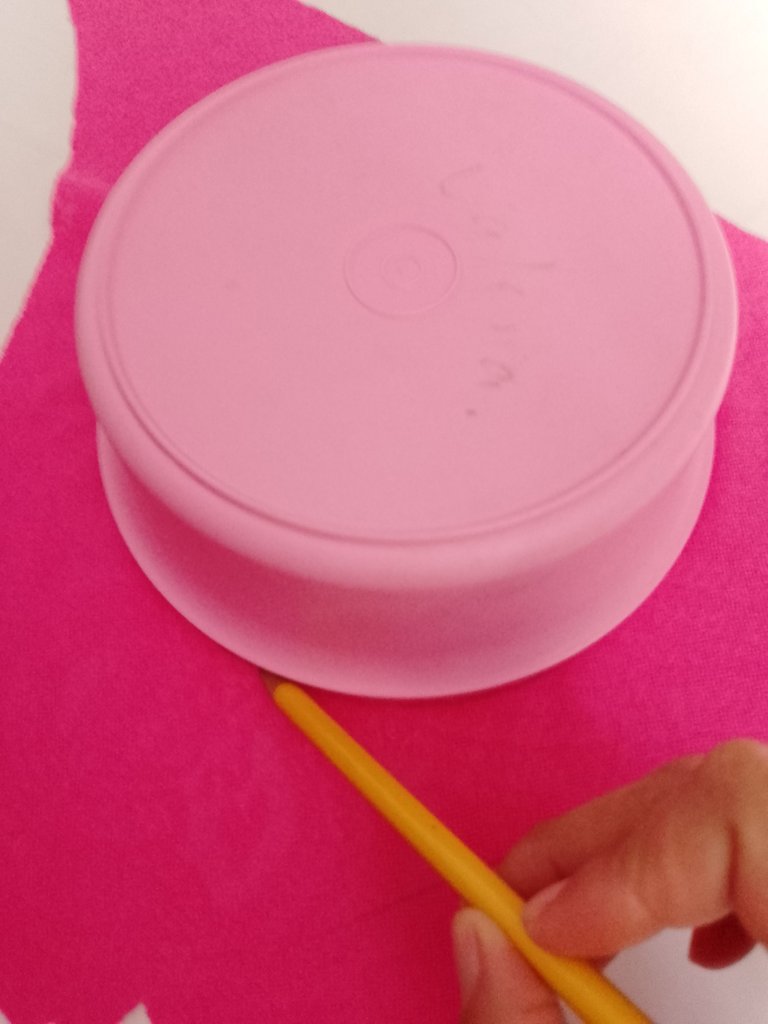
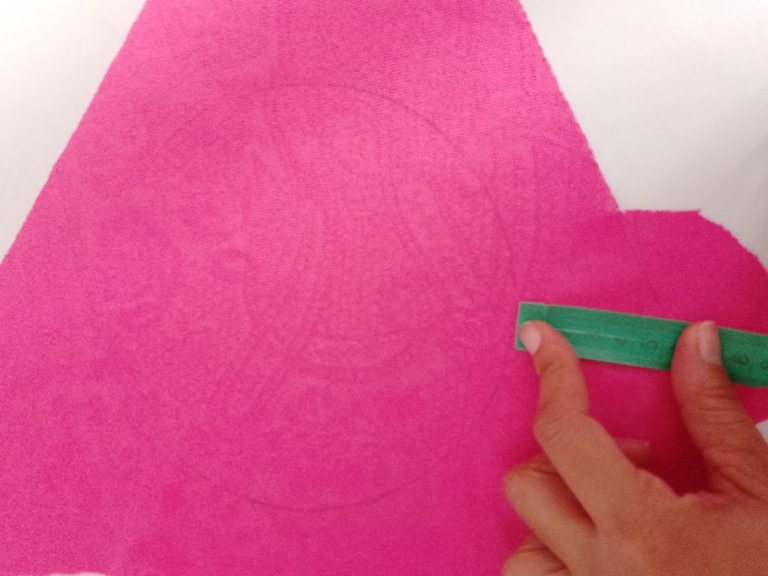
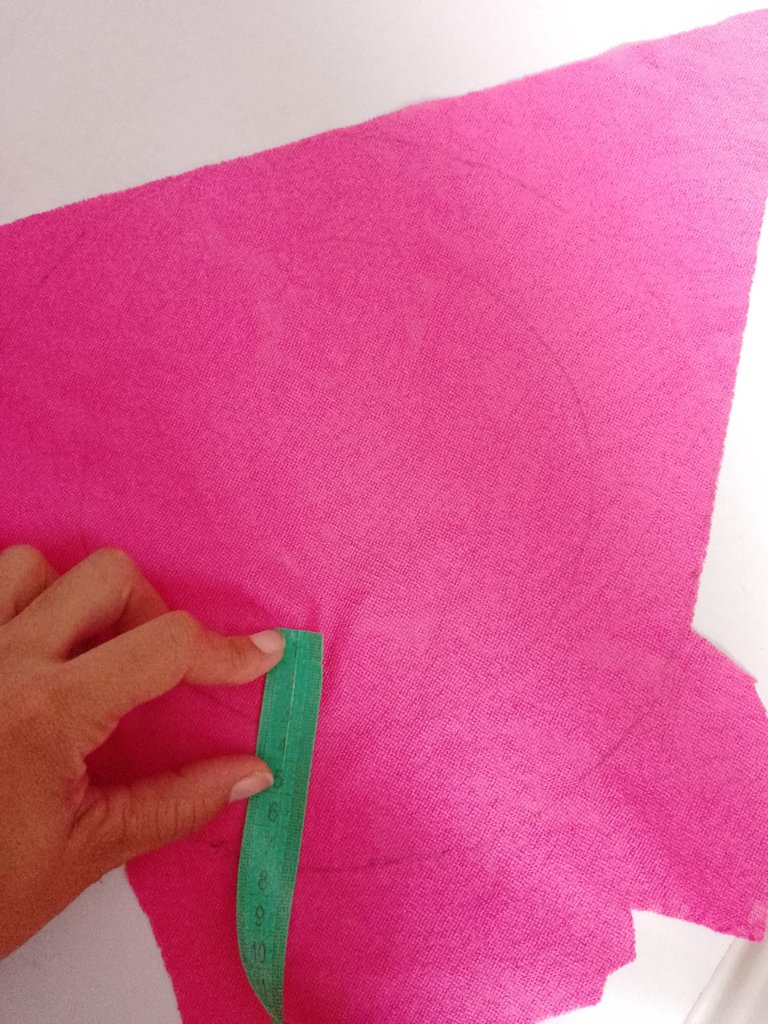
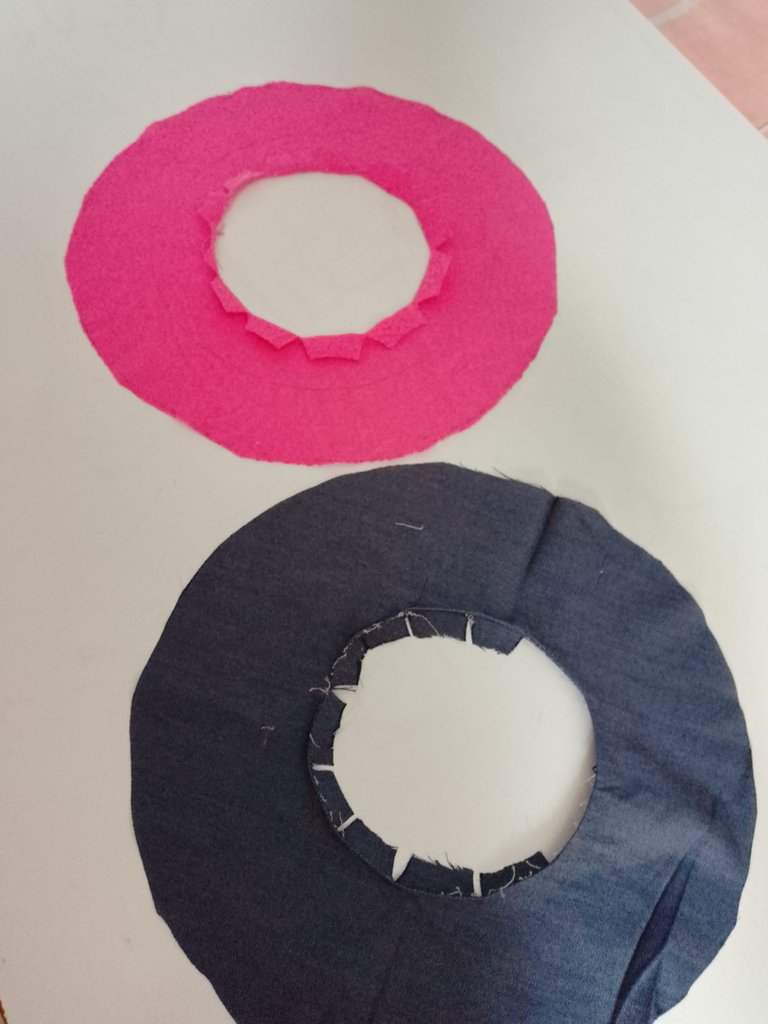
The first thing I did was take the cup that I use the most and place it upside down on the blue and rolled fabric, this to get the measurement and also mark it 4cm outwards and 3cm inwards as you can see in the photos
Hola hola mi gente bella aquí estoy nuevamente con ustedes y compartiendo un trabajo muy creativo que acabo de hacer y muy útil para nuestra cocina, siempre cuando nos dedicamos a la cocina dejamos alguna taza que no tiene tapa con comida y lo que hacemos es colocarle un plato para evitar que se le paren las moscas, pues me puse a hacerle una especie de tapa con tela algo que a mí parecer es muy creativo y útil espero les guste
Para esto utilice los siguientes materiales:
- Tela de tul
- Tela rosada (retazo)
- Tela azul
- Elástica
The first thing I did was take the cup that I use the most and place it upside down on the blue and rolled fabric, this to get the measurement and also mark it 4cm outwards and 3cm inwards as you can see in the photos
Lo primero que hice fue agarrar la taza que más utilizo y colocarla boca abajo sobre la tela azul y la rodada, esto para sacar la medida y también marcarle 4cm hacia afuera y 3cm hacia adentro como lo apreciarán en las fotos
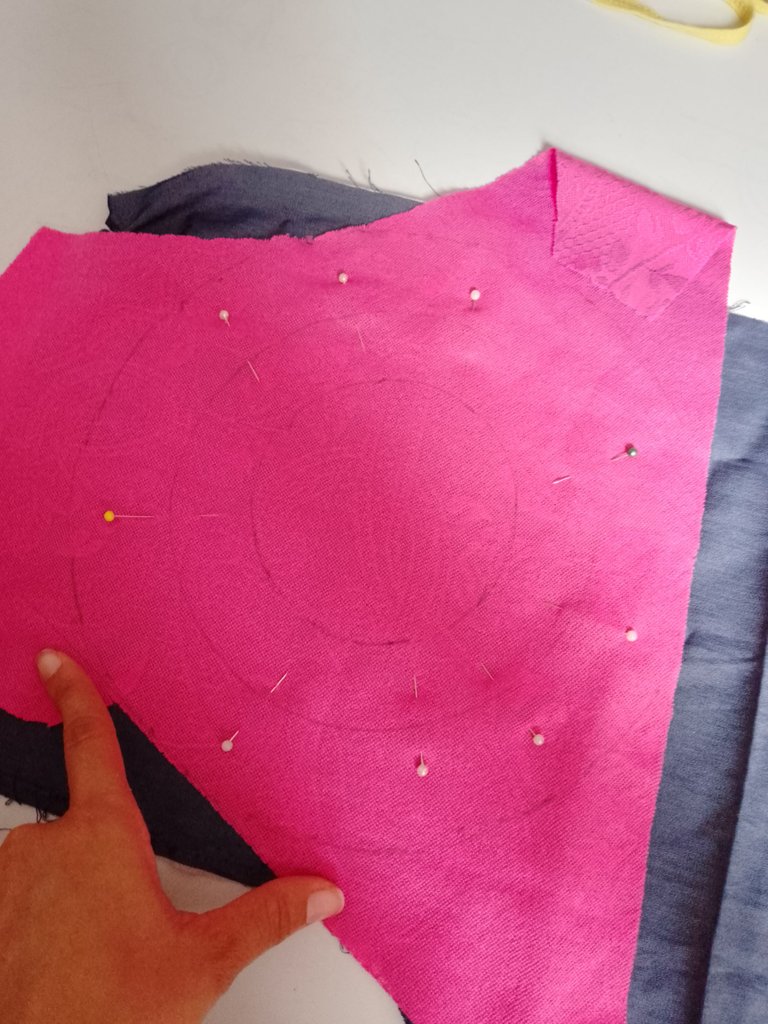
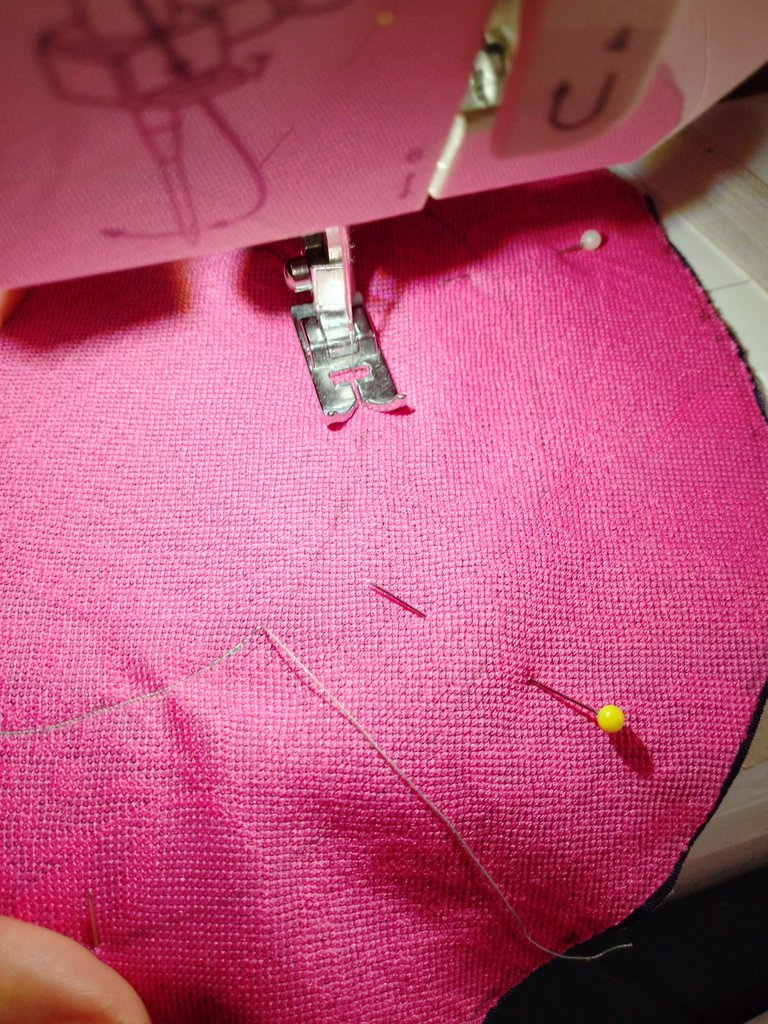
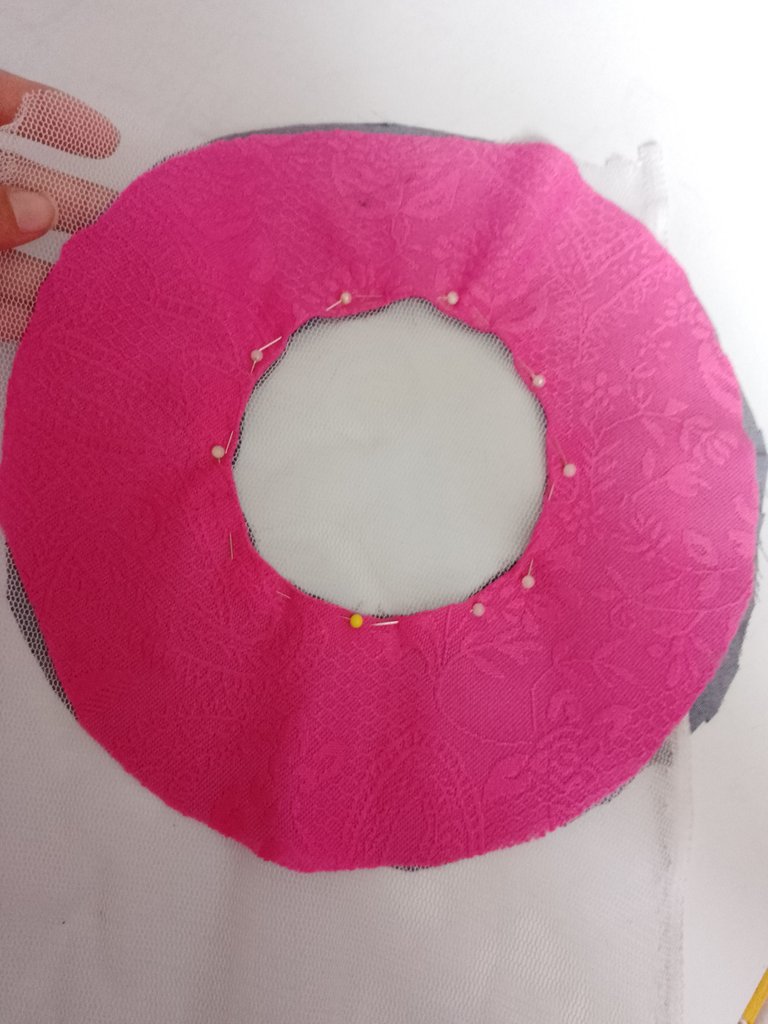
Here we have it ready and with pins to work better, I am going to sew in the first circle and then I will cut in the middle 1cm from the seam and I will make pickets to be able to turn to the right side and iron, this seam after doing all the above the I am going to dismantle it since I did it to be able to iron and the new seam that I will proceed to make was round
Ya aquí lo tenemos listo y con alfileres para trabajar mejor, voy a coser en el primer círculo y luego cortaré por el medio a 1cm de la costura y haré piquetes para poder voltear al derecho y plancha, está costura después de hacer todo lo anterior la voy a desbaratar ya que la hice para poder planchar y la nueva costura que procederé a hacer me quedé redonda
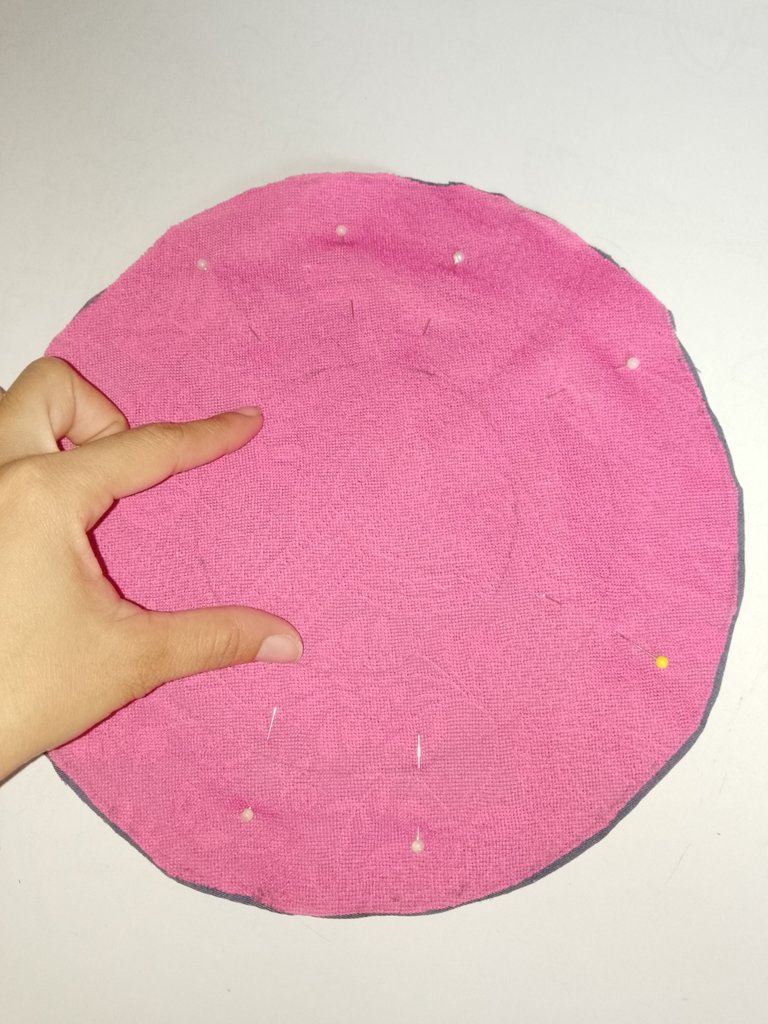
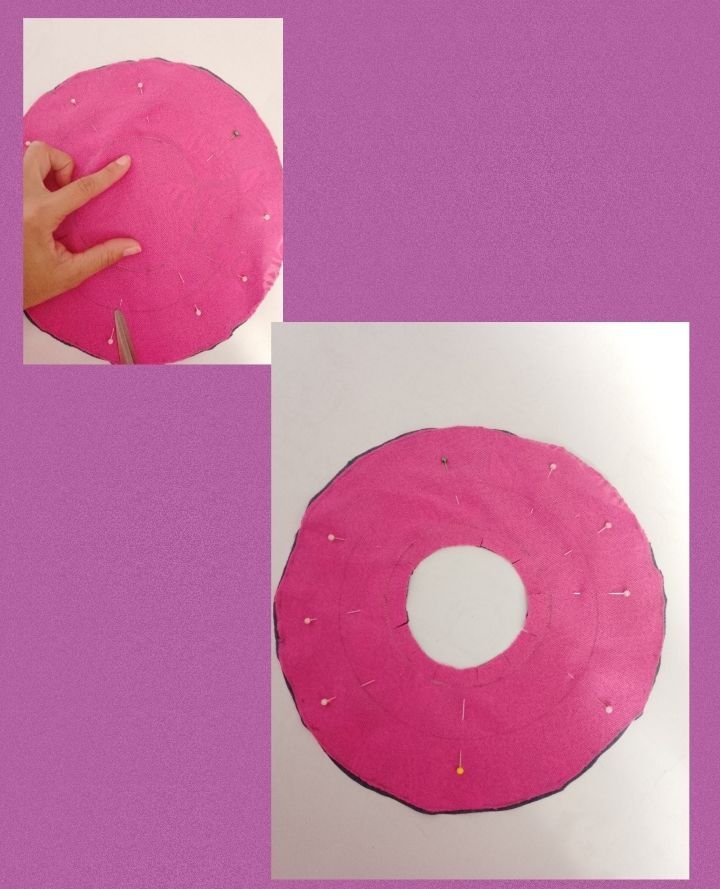
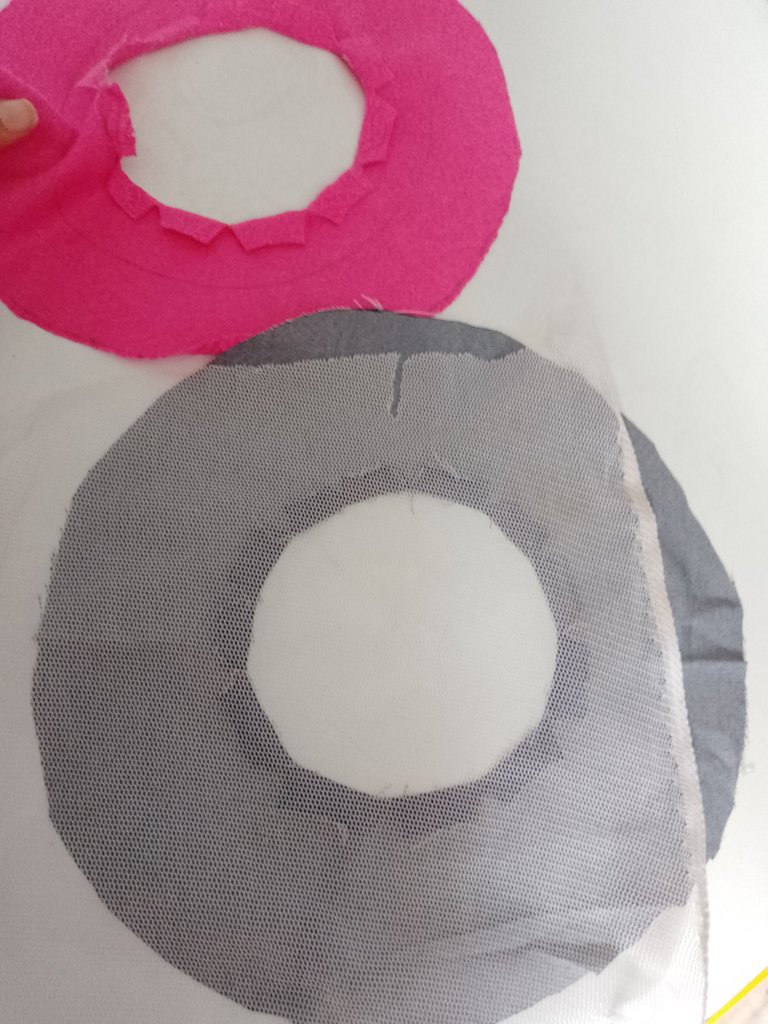
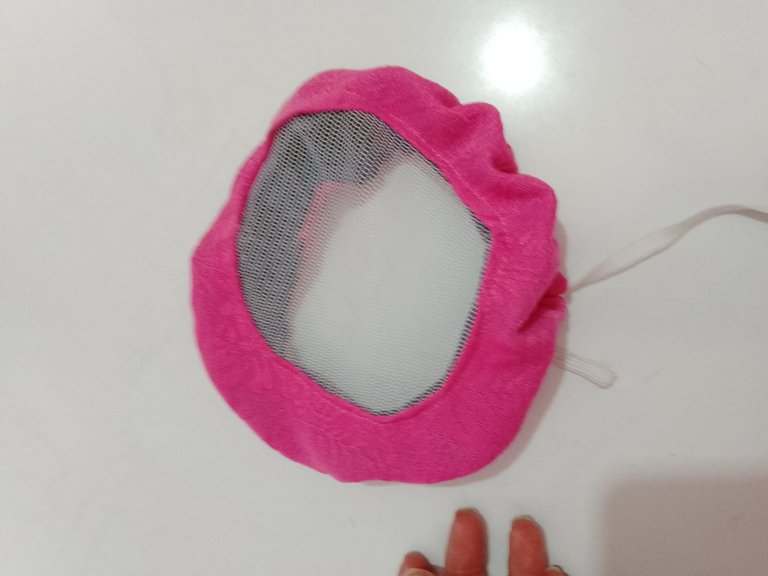
Here you can see the piece without ironing and already ironed with pins, once ironed the next thing will be to place the tulle fabric in the center and make a seam on the edge🥰🥰
Aquí puedes ver la pieza sin planchar y planchada ya con alfileres, ya planchada lo siguiente será colocar la tela de tul en el centro y hacer costura en el borde
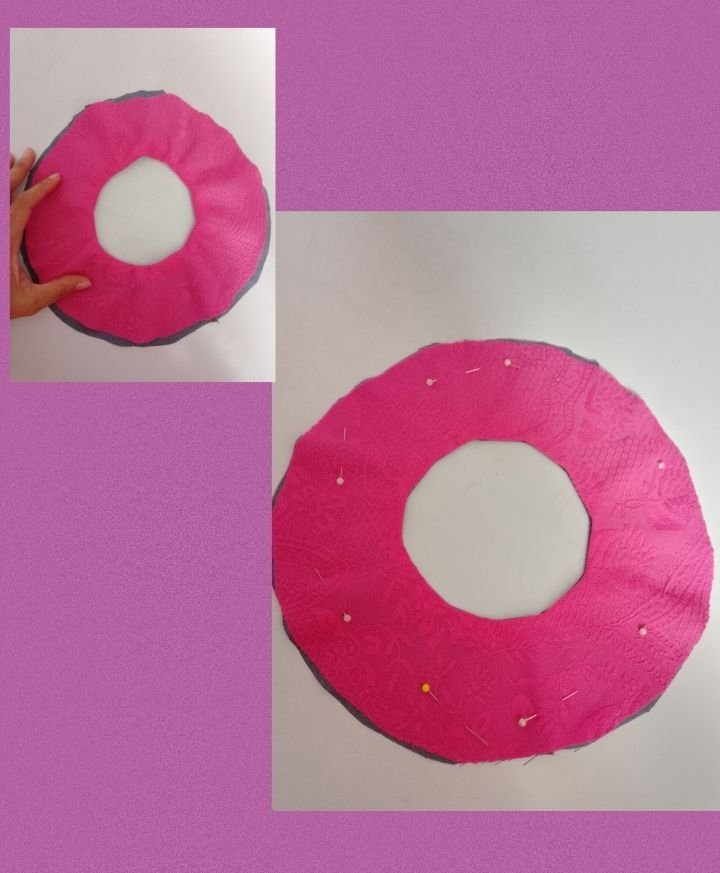

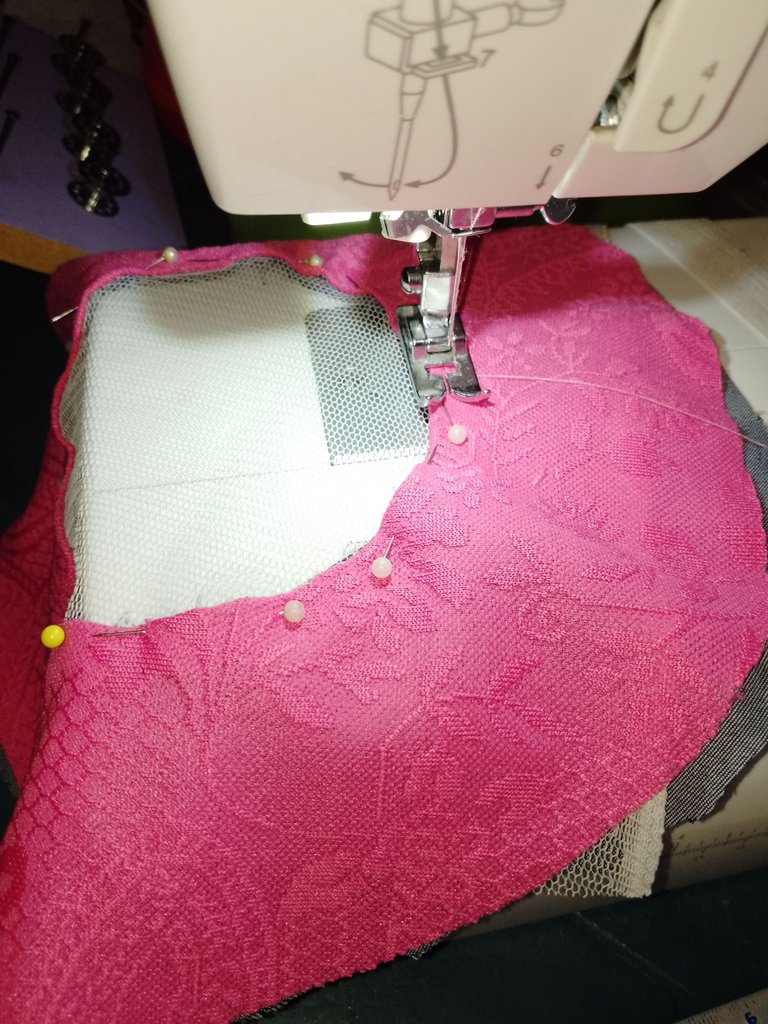
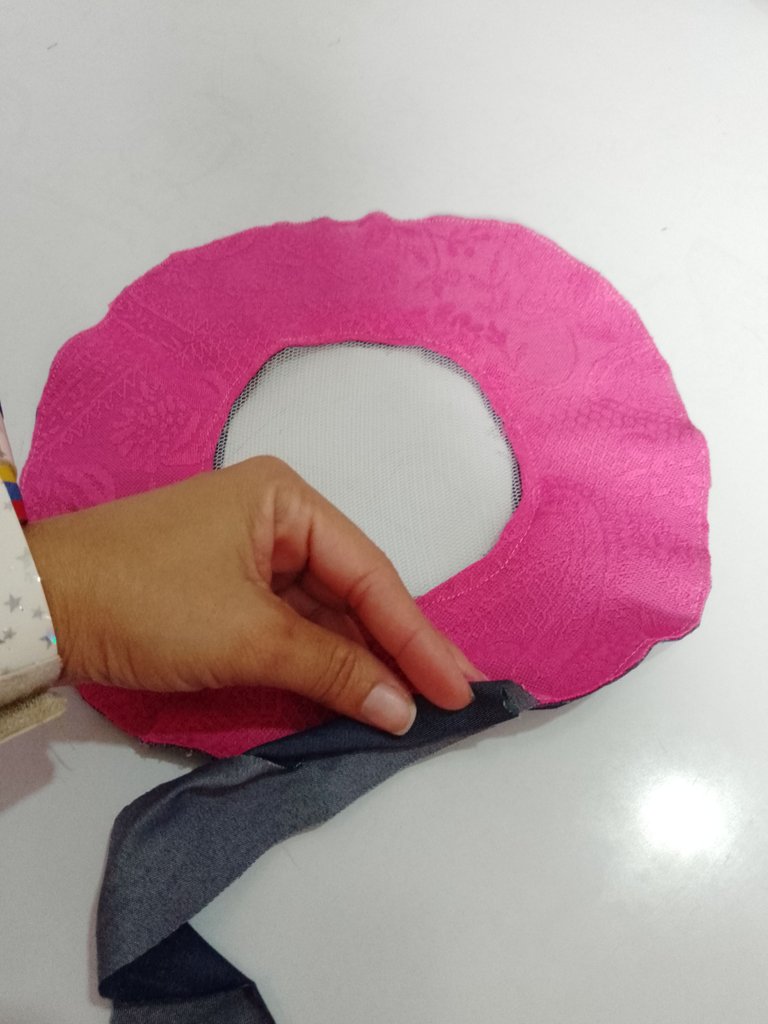
Now that my seam is ready, I am going to pass another seam, this time along the edge, and I am going to place a 3cm inward bias, and once I am ready, I will place the elastic on it, measuring it in the cup so that it fits
Ya lista mi costura voy a pasar otra costura está vez por la orilla y le voy a colocar un sesgo hacia adentro de 3cm y una vez listo pasaré a colocarle la elástica midiendo en la taza para que quede ajustado
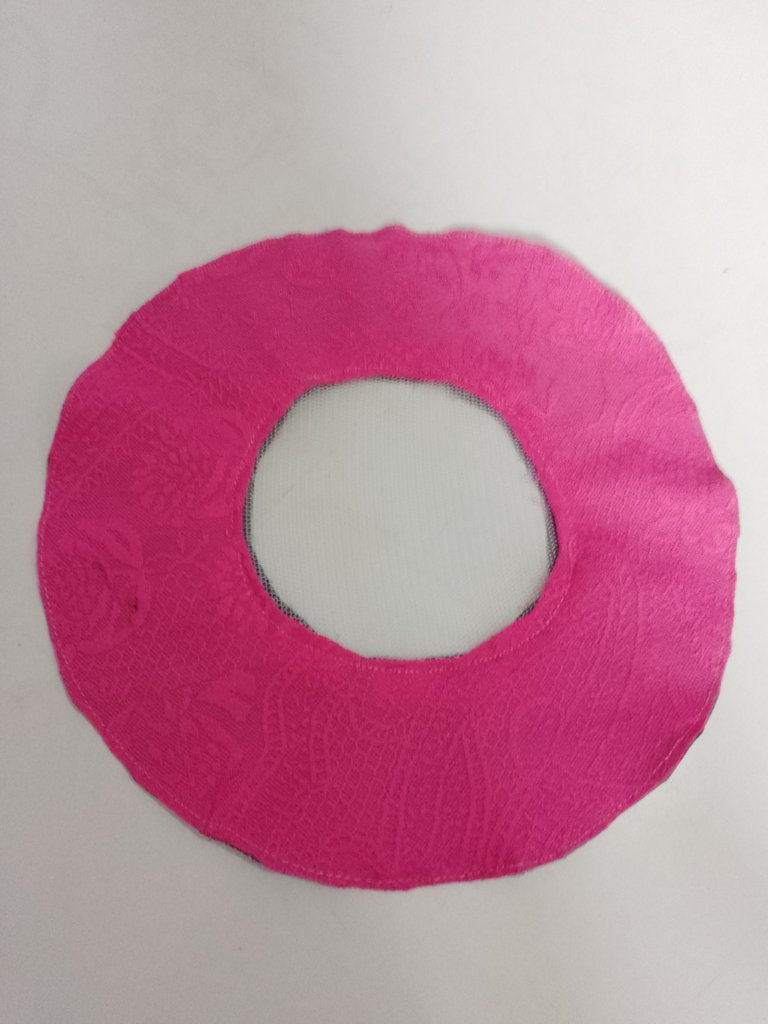

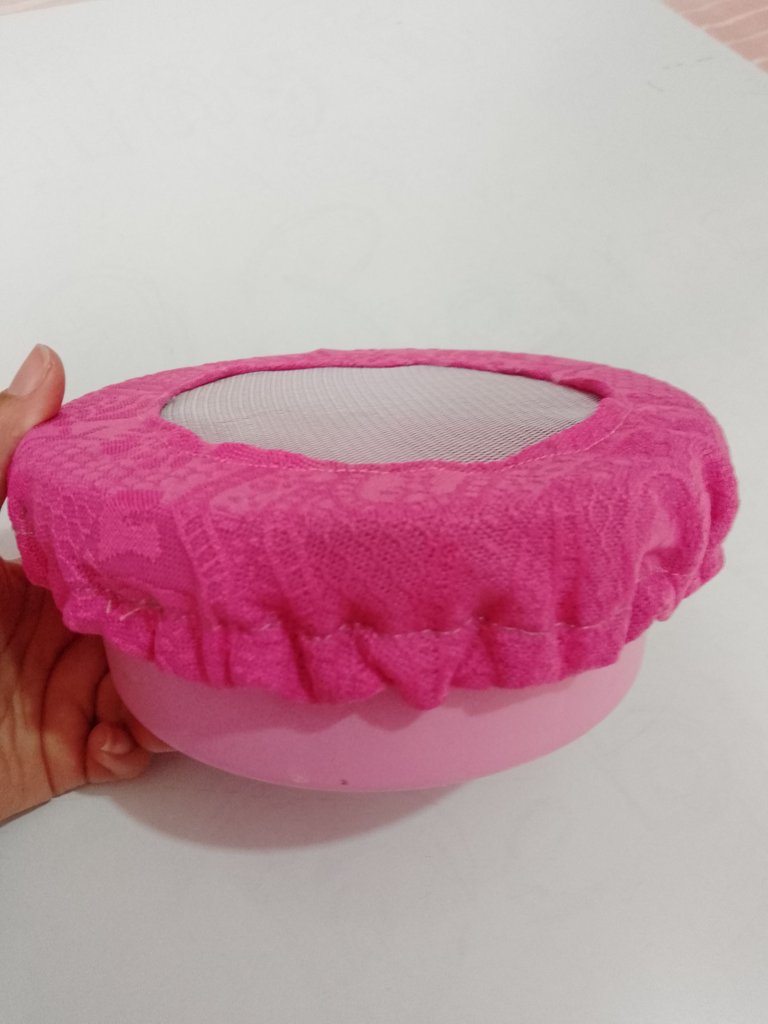
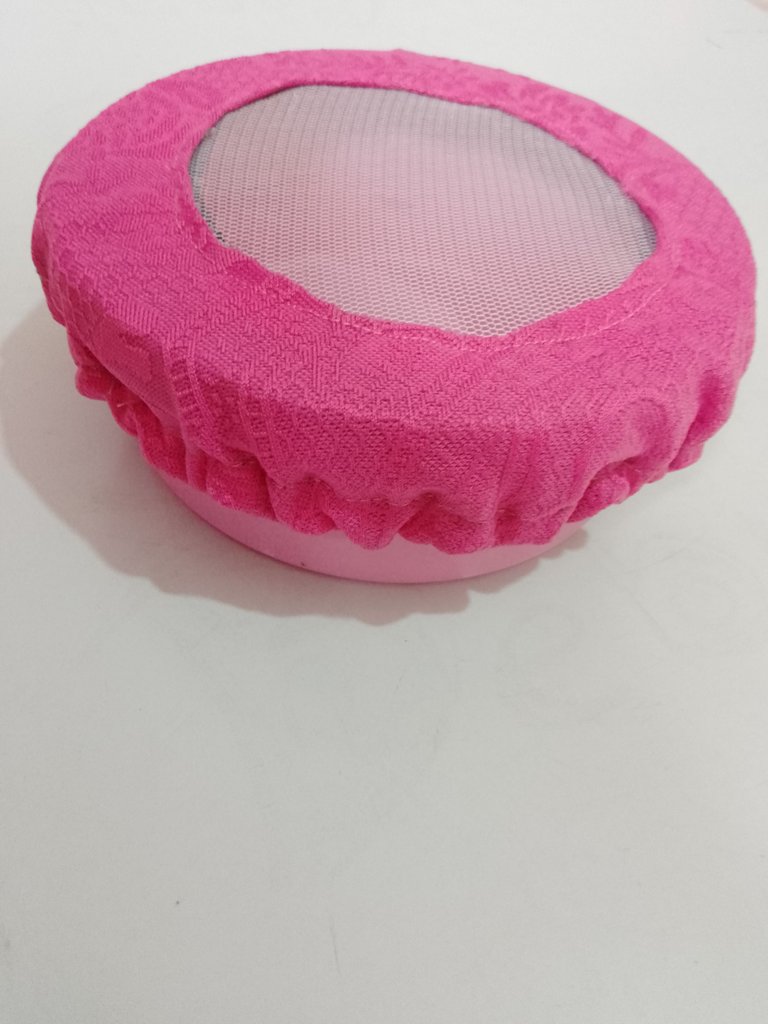
And in this way our cover is very practical and easy to make, I hope you like it, thank you for always supporting me in my work, I do it with great dedication. they are loved🥰🥰
Y de esta manera queda nuestra tapa muy práctica y facil de hacer espero les guste, gracias por estar siempre apoyándome en mis trabajos, lo hago con mucha dedicación. se les quiere 🥰🥰

Your content has been voted as a part of Encouragement program. Keep up the good work!
Use Ecency daily to boost your growth on platform!
Support Ecency
Vote for new Proposal
Delegate HP and earn more
Thank you for sharing this amazing post on HIVE!
Your content got selected by our fellow curator @stevenson7 & you just received a little thank you via an upvote from our non-profit curation initiative!
You will be featured in one of our recurring curation compilations and on our pinterest boards! Both are aiming to offer you a stage to widen your audience within and outside of the DIY scene of hive.
Join the official DIYHub community on HIVE and show us more of your amazing work and feel free to connect with us and other DIYers via our discord server: https://discord.gg/mY5uCfQ !
If you want to support our goal to motivate other DIY/art/music/homesteading/... creators just delegate to us and earn 100% of your curation rewards!
Stay creative & hive on!
Top notch i love your creativity 🥰
This is creative indeed and nice finishing not considering the stress and energy spent to achieve such a great skill.
This is very creative work and really useful for those bowls and containers that have no lid for covering.
Thanks for sharing this innovative idea :)
Excelente amiga, muy creativo tu proyecto
Thanks for the support, I love that you like my work, very grateful, thanks for being.