[DIY] Paint with me a delicious breakfast with watercolors 🎨🖌️| Step by step (ENG/SPA)
Hi, guys! ❤️
As I mentioned in my previous art tutorial, I have been painting with watercolor, mostly portraits. But this time I wanted to try something different and one thing I noticed is that food in drawings looks beautiful, with its vivid colors and details.
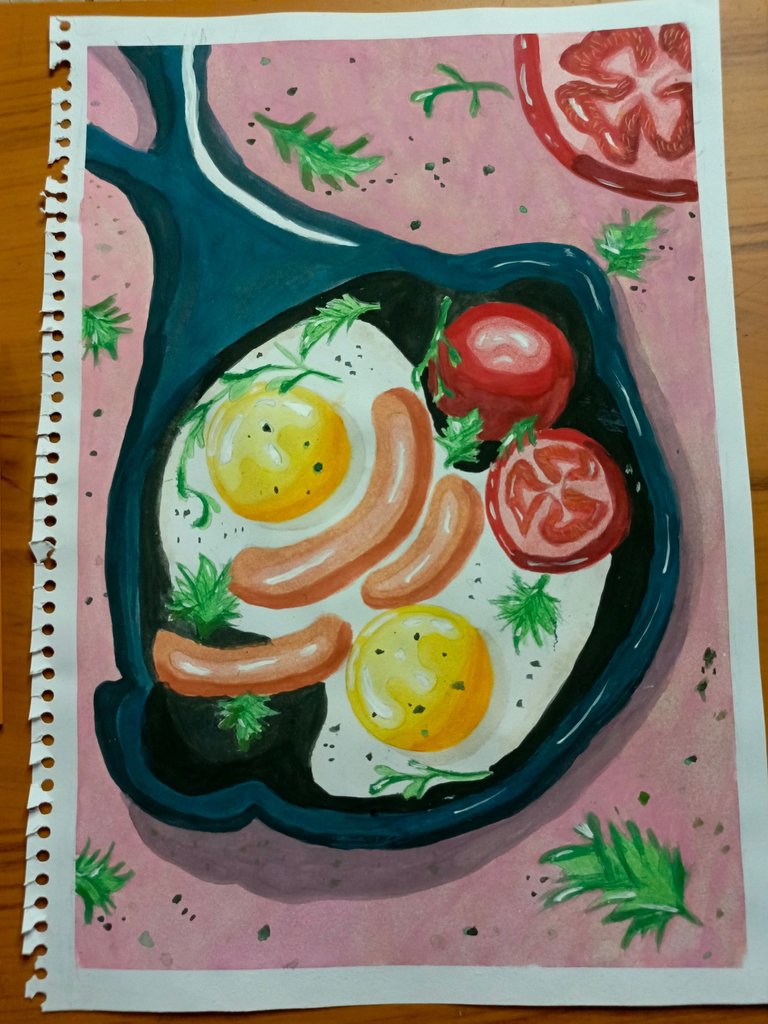
So I decided to paint a nice breakfast of eggs with sausage and tomatoes.

🖌️🎨 STEP BY STEP 🖌️🎨
Step 1 🖌️🎨
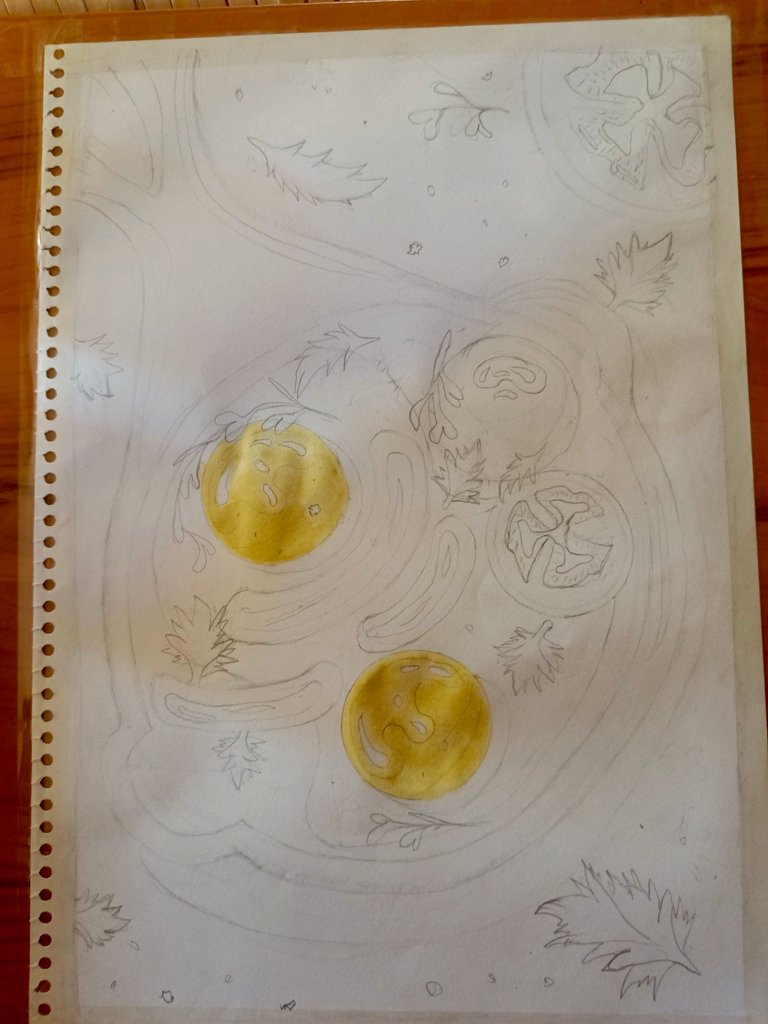
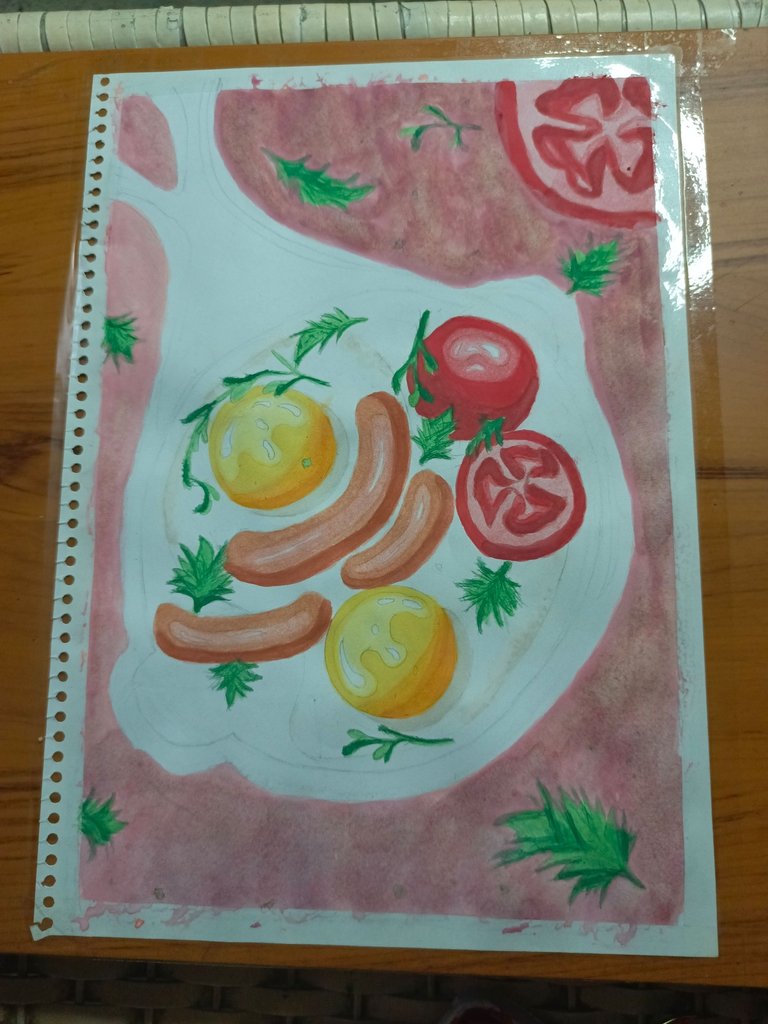
The first thing I did was to draw the breakfast with HB 2 graphite pencil. The idea is to make the strokes as light as possible, since the darker they are, the more complicated it is to make them disappear with watercolor, besides, in the worst case, the color can run and darken.
Unfortunately, it is still difficult for me not to sharpen the pencil so much.

Step 2 🖌️🎨
For the egg yolk I wanted to make a kind of gradient in yellow and orange tones, so first I used a first layer of yellow quite diluted, without painting the glitters that I drew, those should remain white.
Then I applied a second coat of yellow but mixed with a little bit of orange, but this time without painting the top of the yolk.

Step 3 🖌️🎨
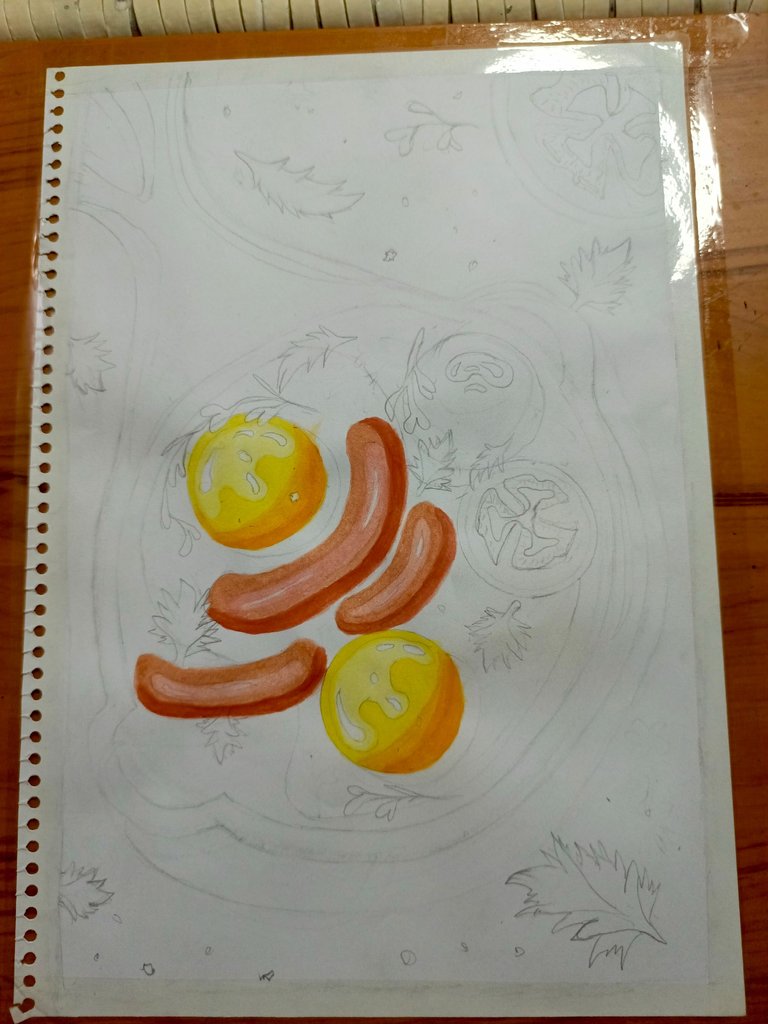
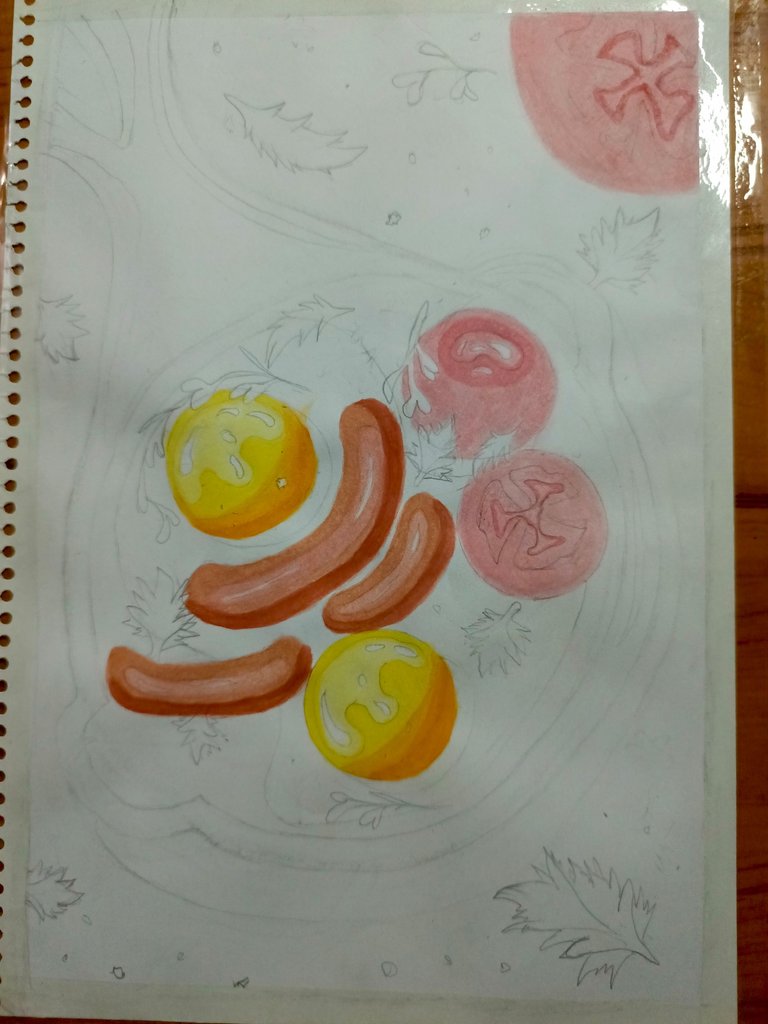
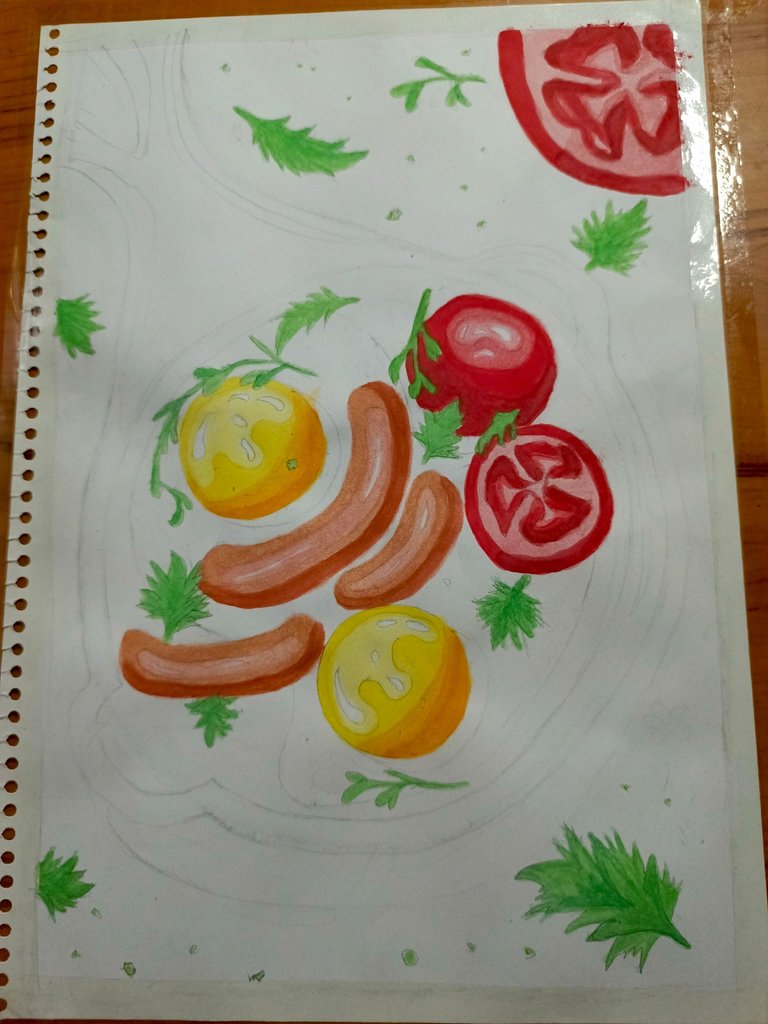
I continued making the color gradient in the yolk, darkening the color with orange in each layer. I painted the sausages with a mixture of orange with brown and a little bit of red. At the end I made a gradient with the yolk so that the volume could be seen.
Then I painted the tomatoes with a fairly diluted layer of red as a base
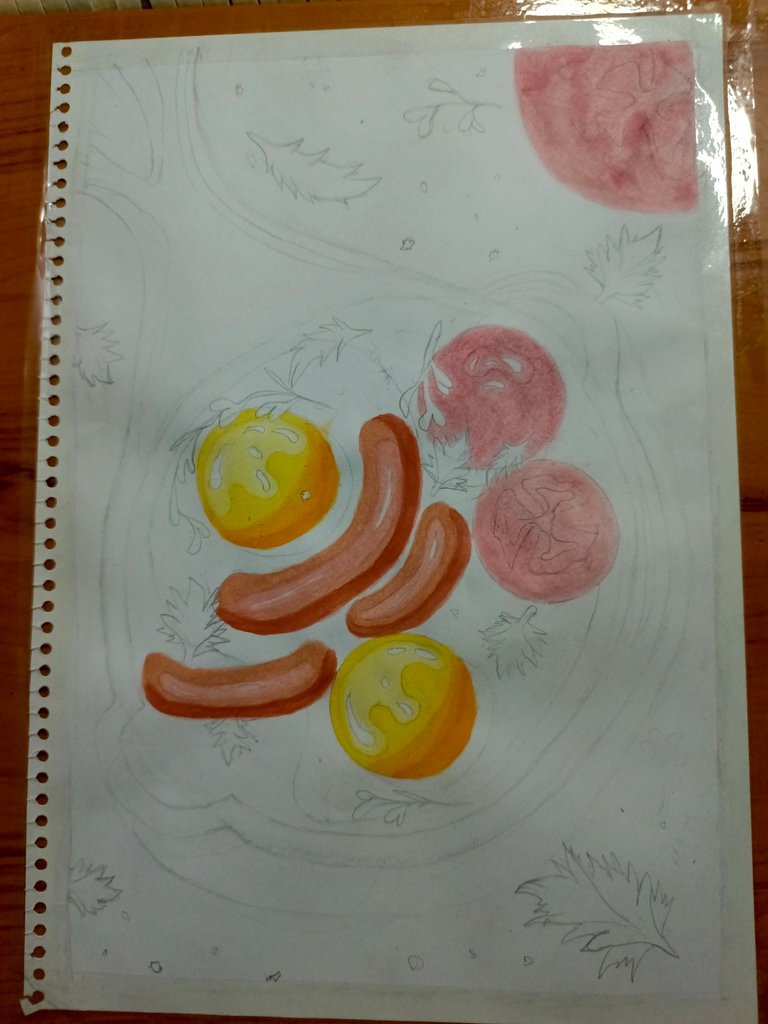
Step 4 🖌️🎨
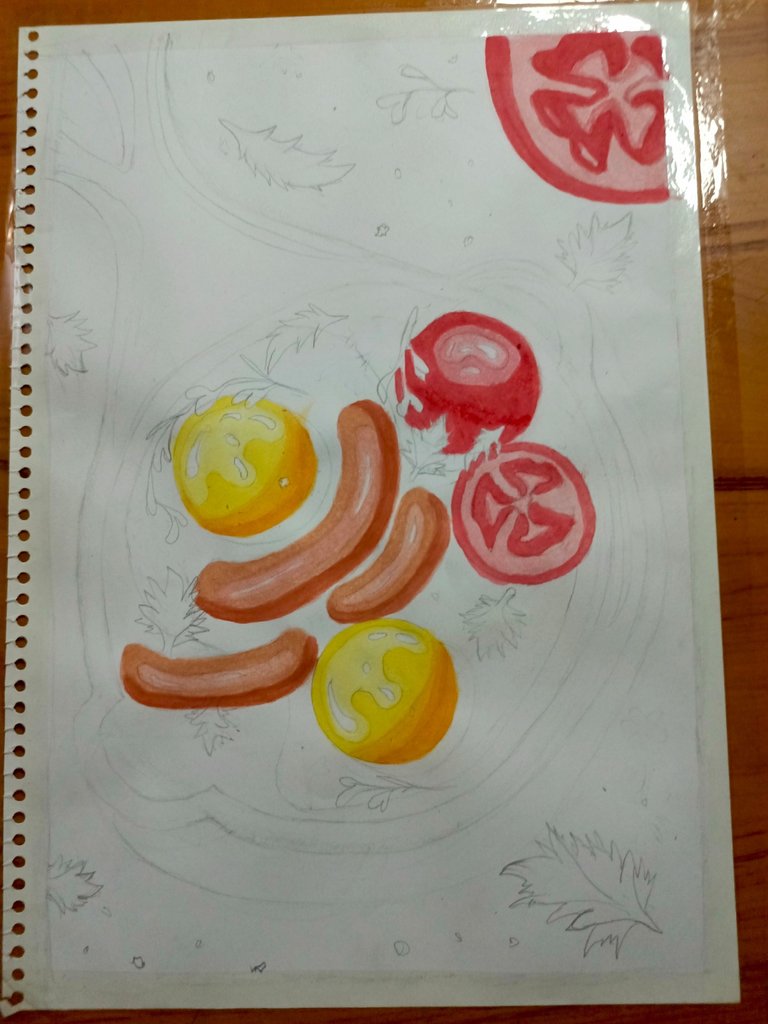
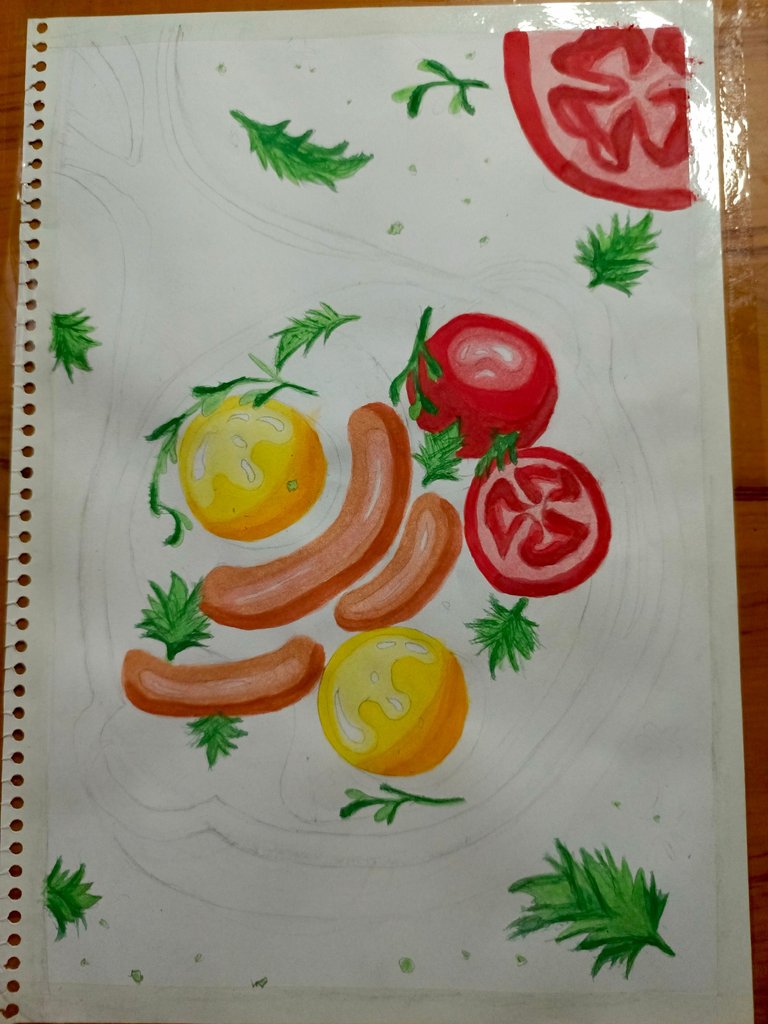
With a slightly darker shade of red I outlined the edges of the heart of the tomatoes and started to detail the whole tomato. The idea was to make a light effect on the top and shadow on the bottom. A gradient, basically.
With the same tone that I used for the edges of the heart of the tomato I painted the skin.

Step 5 🖌️🎨
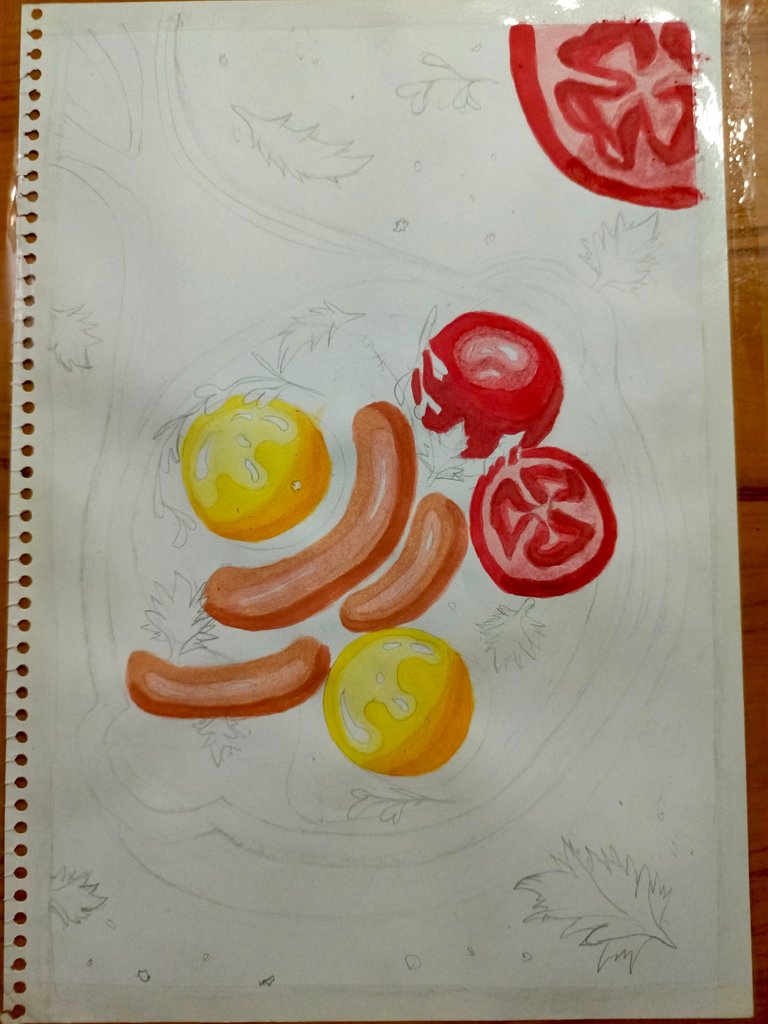
I intensified the colors and made shadows on the right side of the tomato slices. I used brown to darken the red in the most predominant shadows.
When we paint with watercolor we must start from the lightest to the darkest color. You have to be very patient. Don't despair. (If you don't have that much patience, you can use a hair dryer 😂)
Step 6 🖌️🎨
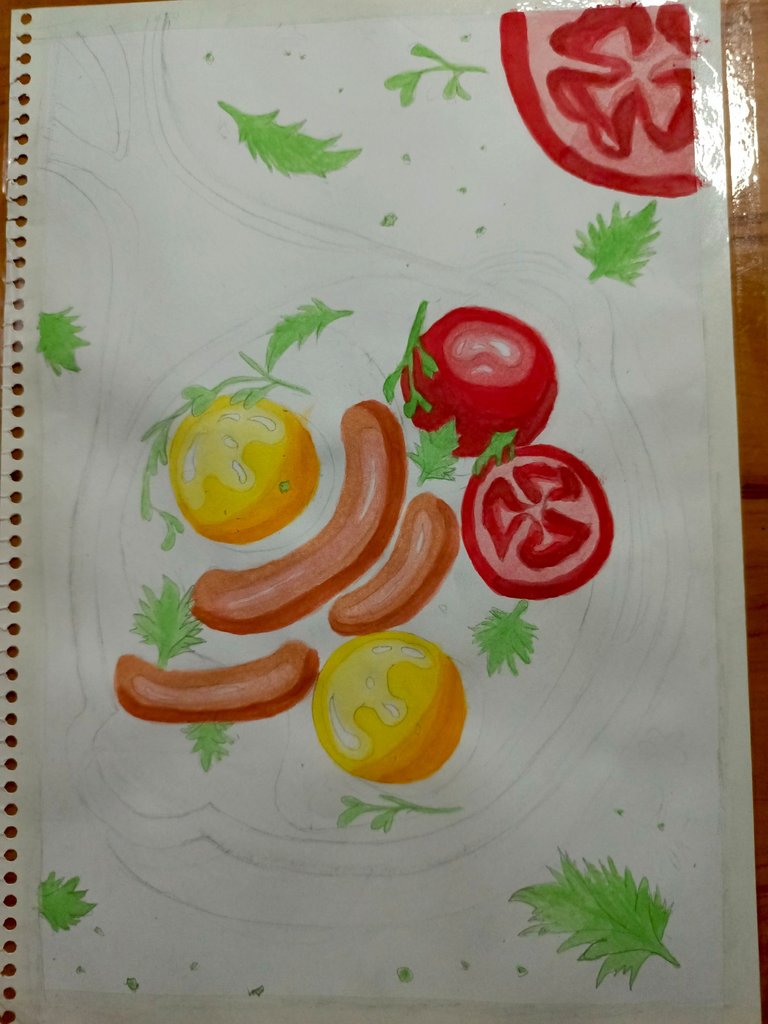
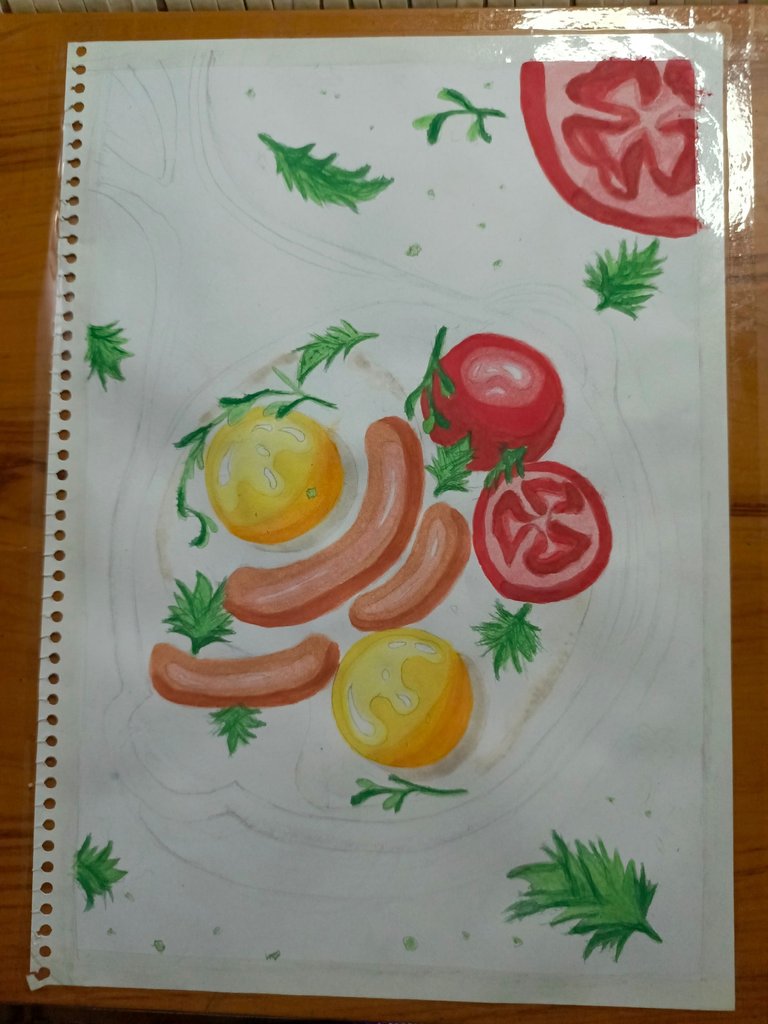
I used apple green to paint the grasses and then a darker green for the edges.
Step 7 🖌️🎨
With the same green and a little black I painted some parts of the herbs to simulate shadows. And with a super diluted yellow ochre and a little bit of brown I painted some edges of the egg white, since we know that they hurt to darken when we fry it.
Step 8 🖌️🎨
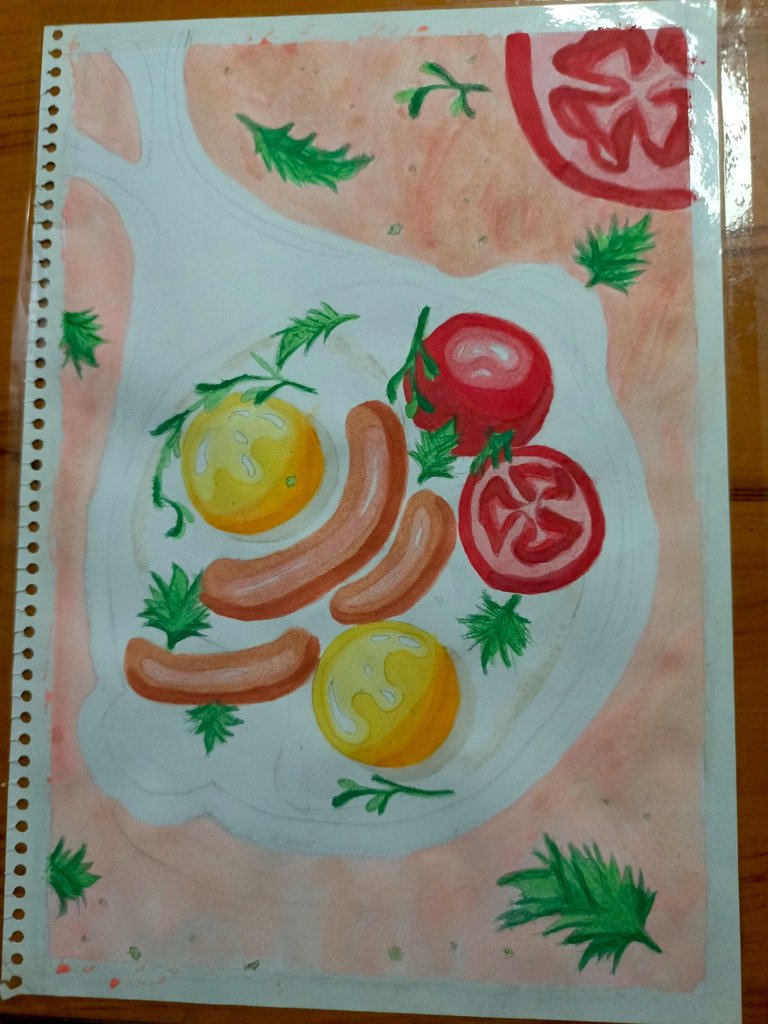
I think the most tedious part of the drawings is painting the background, or at least for me 😂.
But we need a really nice drawing, so I started painting it with a mix of pink, and brown for the first layer and for the following ones I used pink, purple and black.
Step 9 🖌️🎨
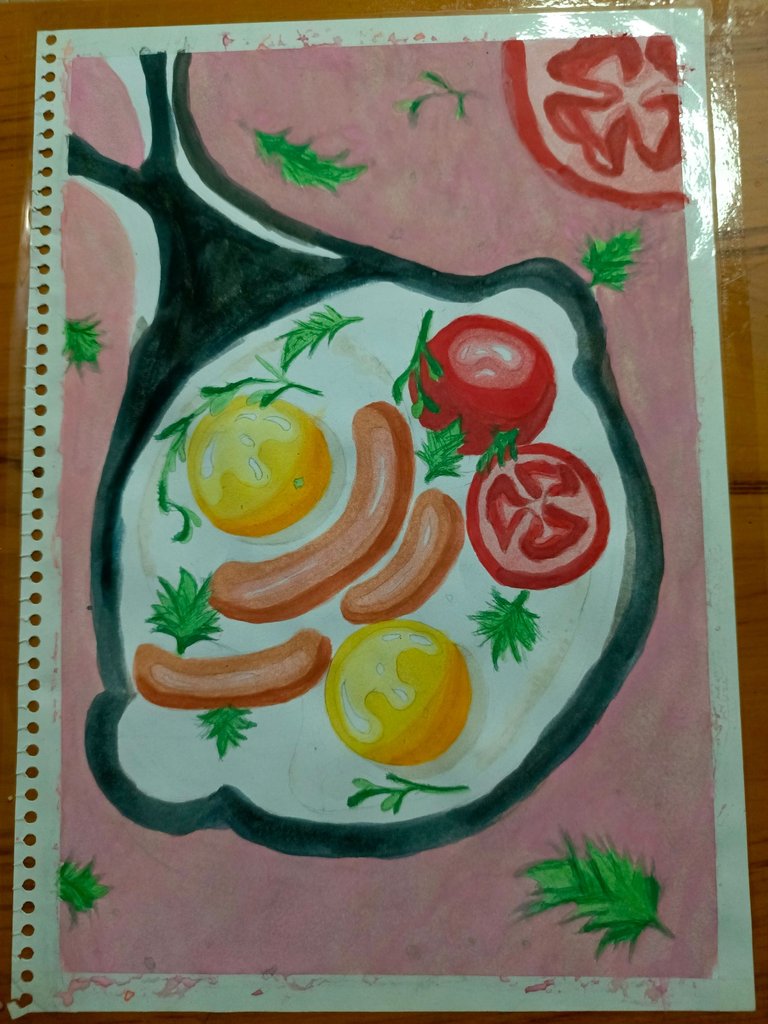
Next, I painted the outside of the frying pan with black but then I regretted it and painted the next layer with dark blue, taking advantage of the fact that the black layer was quite light. I tried not to paint the shine I did to the handle of the frying pan.
Step 10 🖌️🎨
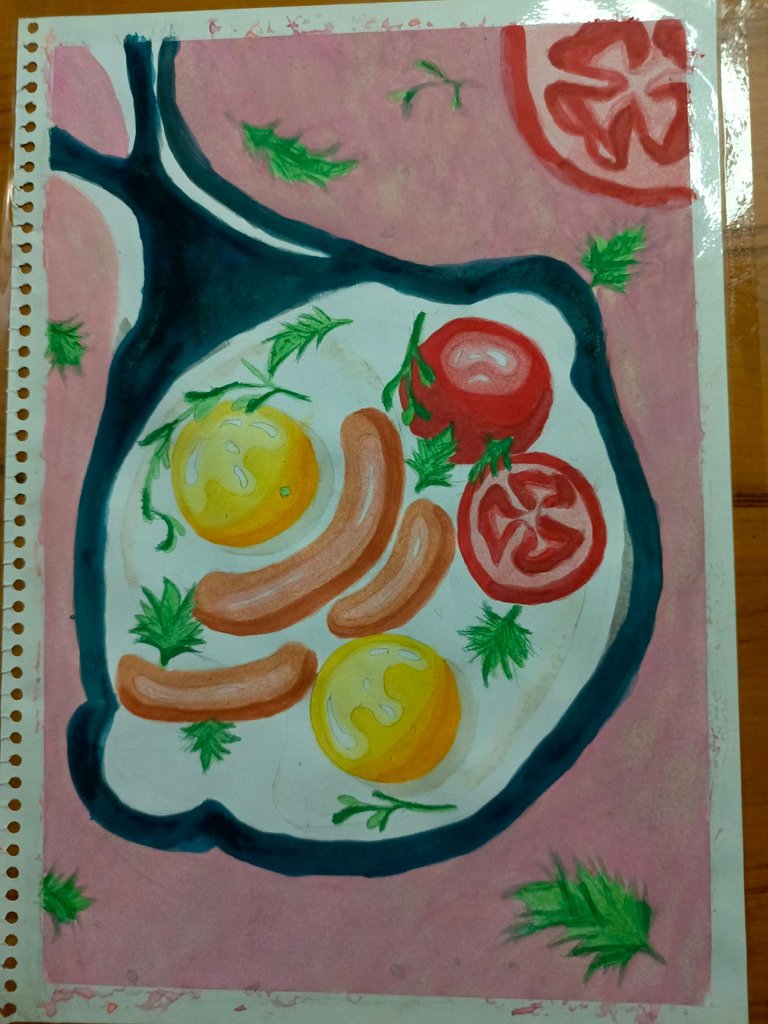
Afterwards, I painted a new layer of blue on the frying pan to intensify the color and with a darker blue I painted the inner part of the handle of the frying pan (the holes), and its left side to give it depth.
Then with a darker shade of the background color of the drawing, I made the shadow of the frying pan. I used the same colors. I just added more black to darken it.

Step 11 🖌️🎨
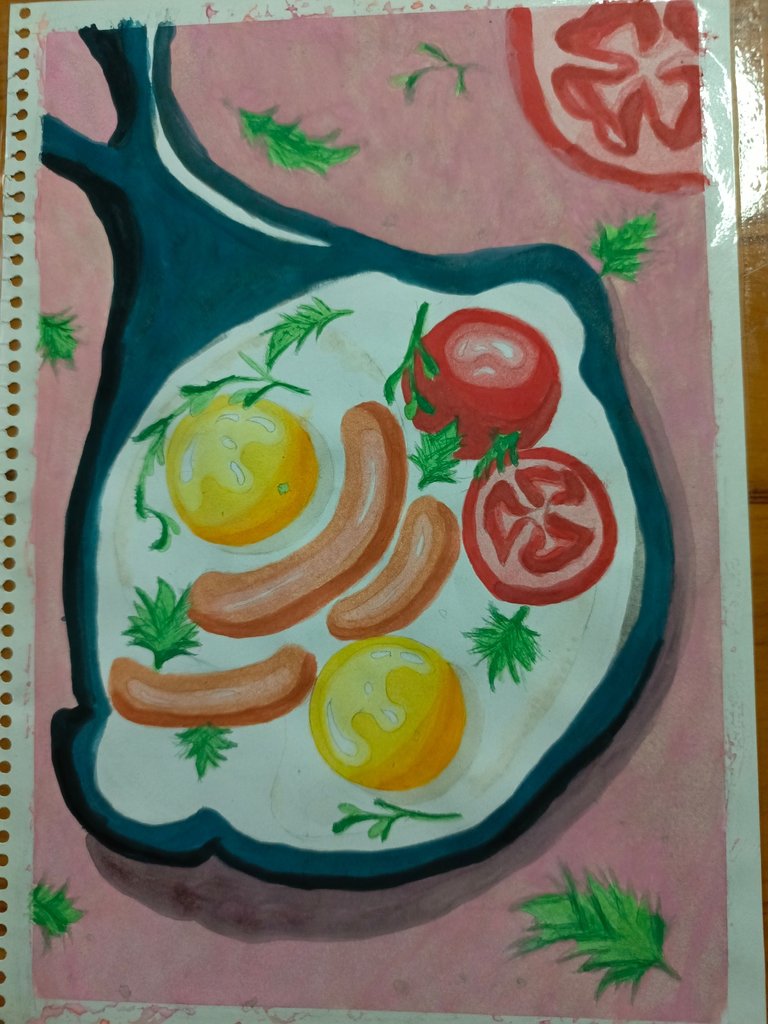
I painted the inner part of the frying pan with black, being very careful not to stain the other elements of the drawing.
Then I intensified all the colors, that is to say, I painted a new layer to make the colors look more vivid. Lights and shadows. As I stained some of the highlights a bit, and forgot to leave space for others, I helped myself with a white tempera and made reflections with it, on the edge of the frying pan, the heart of the tomatoes, and on the herbs.
The yellow of the egg yolks I darkened them a little with orange to make the gradient look more proportional.
Finally, I did the tomato seeds with an orange crayon. .
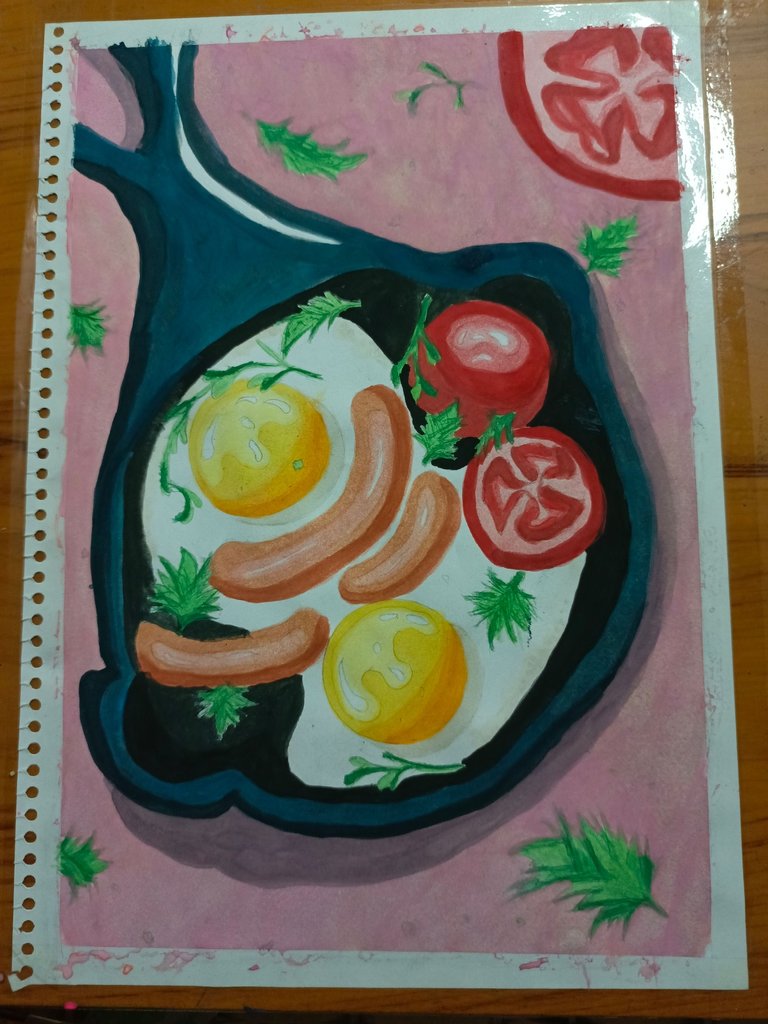
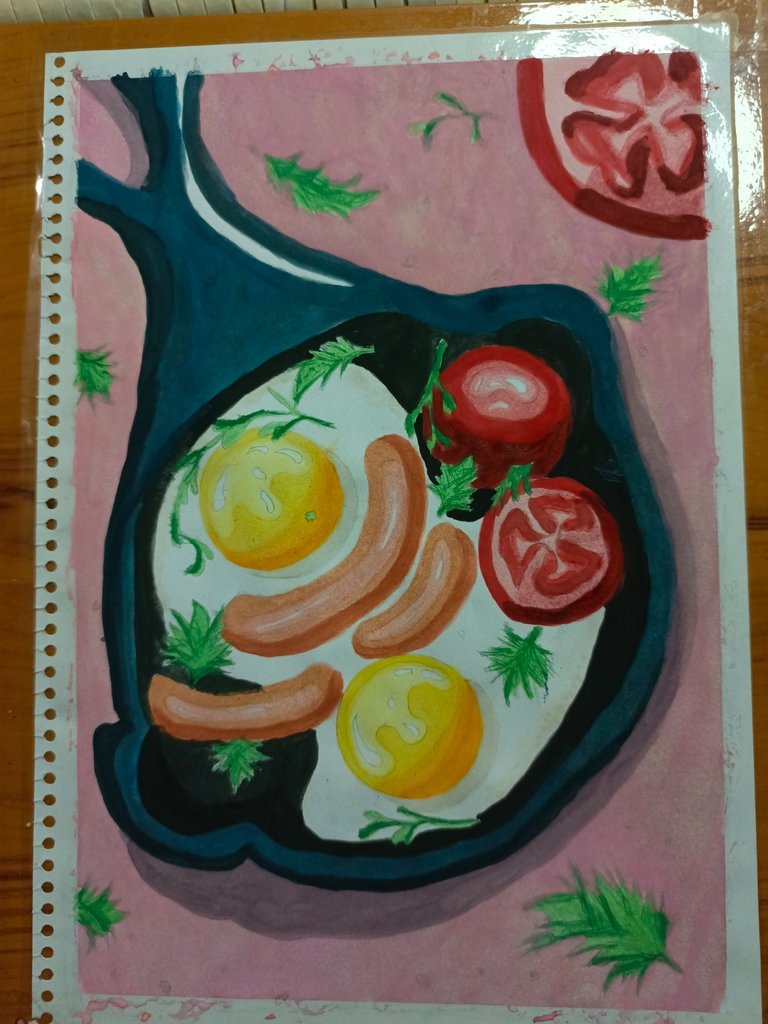
☀️🖌️ FINAL RESULT ☀️🖌️
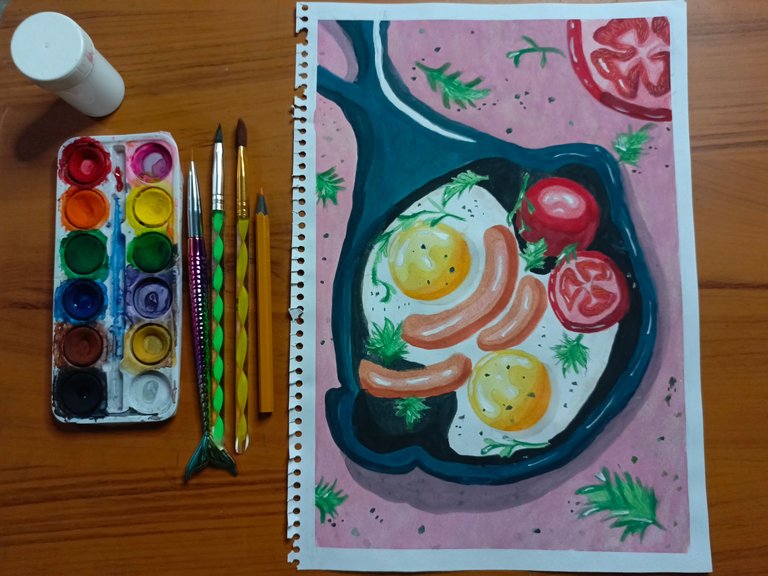
And in this way I painted this rich and beautiful breakfast. It took me approximately 10 hours painting. With few and short breaks. I should have rested more but when I start painting I feel I must stop until I finish 😂 I must work on it.
The photos are my property
Visual identity by @pentaghast

¡Hola, amigos! ❤️
Como les mencioné en mi anterior tutorial de arte, he estado pintando con acuarela, en su mayoría retratos. Pero esta vez quise probar algo distinto y algo que noté es que la comida en dibujos se ve preciosa, con sus colores vivos y sus detalles.
Así que decidí pintar un lindo desayuno de huevos con salchichas y tomates.
🖌️🎨 PASO A PASO 🖌️🎨
Paso 1 🖌️🎨
Lo primero que hice fue dibujar el desayuno con lápiz de grafito HB 2. La idea es que los trazos sean lo más claros posibles, ya que mientras más oscuros más complicado es que desaparezcan con la acuarela, además que en el peor de los casos se puede correr y oscurecer el color.
Lastimosamente aún me cuesta no afincar tanto el lápiz.
Paso 2 🖌️🎨
Para la yema del huevo quería hacer una especie de degradado en tonos amarillos y naranjas, así que primero usé una primera capa de color amarillo bastante diluida, sin pintar los brillos que le dibujé, esos deben permanecer en blanco.
Luego apliqué una segunda capa de amarillo pero mezclada con un poquito de naranja, pero esta vez sin pintar la parte de arriba de la yema.
Paso 3 🖌️🎨
Seguí haciendo el degradado de colores en la yema, oscureciendo el color con naranja en cada capa. Las salchichas las pinté con una mezcla de naranja con marrón y un poquito de rojo. al final que con la yema hice un degradado para que se le viera el volumen.
Luego pinté los tomates con una capa de rojo bastante diluida como base.
Paso 4 🖌️🎨
Con un tono un poco más oscuro de rojo delinee los bordes del corazón de los tomates y empecé a detallar el tomate que se ve entero. La idea era hacerle un efecto de luz en la parte de arriba y sombra en la parte de abajo. Un degradado, básicamente.
Con el mismo tono que usé para los bordes del corazón del tomate pinté la piel.
Paso 5 🖌️🎨
Intensifiqué los colores y les hice sombras en la parte derecha de las rodajas de tomate. Usé el marrón para oscurecer el rojo en las sombras más predominantes.
Cuando pintamos con acuarela debemos empezar desde el color más claro hasta el más oscuro. Hay que tener mucha paciencia. No desesperes. (Si no tienes tanta paciencia, puedes usar un secador de cabello 😂)
Paso 6 🖌️🎨
Usé verde manzana para pintar las hierbas y luego un verde más oscuro para los bordes.
Paso 7 🖌️🎨
Con el mismo verde y un poco de negro pinté algunas partes de las hierbas para simular sombras. Y con un amarillo ocre super diluido y un poquito de marrón pinté algunos bordes de la clara de huevo, ya que sabemos que duelen oscurecer cuando lo freímos.
Paso 8 🖌️🎨
Creo que parte más tediosa de los dibujos es pintar el fondo, o al menos para mí 😂
Pero necesitamos un dibujo muy lindo, así que lo empecé a pintar con una mezcla de rosado, y marrón para la primera capa y para las siguientes usé rosado, púrpura y negro.
Paso 9 🖌️🎨
Seguidamente, pinté la parte externa del sartén con negro pero luego me arrepentí y la siguiente capa la pinté con azul oscuro, aprovechando que la capa de negro estaba bastante clara. Traté de no pintar el brillo que le hice al mango del sartén.
Paso 10 🖌️🎨
Posteriormente, le pinté una nueva capa de azul al sartén para intensificar el color y con un azul más oscuro pinté la parte interna del mango del sartén (los agujeros), y su lado izquierdo para darle profundidad.
Luego con un tono más oscuro del color del fondo del dibujo, hice la sombra del sartén. Usé los mismos colores. Solo añadí más cantidad de negro para oscurecer.
Paso 11 🖌️🎨
La parte interna del sartén la pinté con negro, con bastante cuidado para así no manchar los otros elementos del dibujo.
Luego intensifiqué todos los colores, es decir, pinté una nueva capa para que los colores se vieran más vivos. Luces y sombras. Como manché un poco algunos brillos, y olvidé dejar el espacio para otros, me ayudé con una tempera de color blanco e hice reflejos con ella, en el borde del sartén, el corazón de los tomates, y en las hierbas.
El amarillo de las yemas del huevo los oscurecí un poquito con naranja para que se viera más proporcional el degradado.
Finalmente, las semillas del tomate las hice con un creyón naranja.
☀️🖌️ RESULTADO FINAL ☀️🖌️
Y de esta manera pinté este rico y hermoso desayuno. Me tardé aproximadamente 10 horas pintando. Con pocos y cortos descansos. Debí descansar más pero cuando empiezo a pintar siento que me debo parar hasta terminar 😂 debo trabajar en ello.
Las fotos son de mi propiedad
Identidad visual por @pentaghast
Amiga, te quedó bellísimo, te felicito por tu gran talento, espero ver muchos dibujos... me estás motivando mucho, así que pronto me pongo las pilas jeje
Un abrazote mi Bany, dulces sueños. <3
Muchas gracias, amiga. Un abrazote ❤️❤️❤️
Has sido votado por
PROYECTO ENLACE
'Conectando Ideas y Comunidades'
PROYECTO ENLACE es un proyecto de curación de habla hispana enfocado en recompensar contenido de calidad y apoyar autores en su proceso de crecimiento en HIVE.
Creemos y apostamos por el futuro de esta gran plataforma, y estamos muy emocionados de poder hacerla crecer junto a esta comunidad. Así que te invitamos a publicar en nuestra COMUNIDAD y estar atento a todas las actividades que tenemos preparadas y que estaremos publicando en breve.
¿QUIERES AUTOMATIZAR TUS GANANCIAS DE CURACIÓN? SE PARTE DEL PROYECTO ENLACE APOYANDO A NUESTRO TRAIL EN HIVE.VOTE INGRESA AQUÍ PARA CONOCER LOS DETALLES.
¿QUIERES INVERTIR ENLACE? DESCUBRE COMO HACERLO Y GENERAR INGRESOS DE FORMA SEMANAL MEDIANTE TU DELEGACIÓN DE HP AQUÍ TE EXPLICAMOS COMO.
Te invitamos a participar en nuestro servidor de Discord: https://discord.gg/3S9y7BbWfS
Atentamente
EQUIPO ENLACE 2023
Gracias por el apoyo, amigos ❤️
The result looks like a real food ✌️ I feel hungry 😅
Ohh hahaha. Well, maybe that's your cue to make yourself a nice breakfast with eggs and sausage.
Thanks!
🙂🌸
Albiii qué espectacular! Me encantó! Ojalá yo pudiera hacer algo parecido pero ni me acerco
Muchas gracias, Eve ❤️ yo tampoco imaginé que podría hacer algo así. Cuestión de práctica.
¿Se puede traer a la realidad y comerlo? 👀 Se ve muy tentador jejeje
Muy lindo trabajo has hecho amiga, que bueno estes probando cosas distintas en acuarela, a mi me gusta dibujar mas no pintar, siempre me queda feo el coloreado jaja
Excelente dibujo 😍
Jajaja yo tambien quisiera comerlo. Sí antoja 🙈😂😂
Muchas gracias, amiga. Quizás si te pones te sale bonito. Todo es práctica ❤️
QUEEE!! Albi esto quedó fenomenal 😍😍😍😍 amiga no dejes de trabajar en lo que amas, disfrutas y sabes que puedes mejorar con esfuerzo, sin duda alguna tienes talento, quedo divino me encanta ❤️❤️❤️
Ayyy Ely. Que linda. Muchas gracias ❤️❤️❤️
Te quedó increíble Bani, me encantó 😍
Gracias, mi Vane 🥹❤️❤️
Hermosa pintura, y los colores se ven real, feliz dia.
¡Muchas gracias! ❤️❤️
Amigaaaa, te quedó precioso este dibujo.. Ame cada detalle de él 💕😍
Admiro tu paciencia jaja🙈💕
Graciassss, aliz.
Y sí, requiere mucha paciencia jajaja.
Quedo bello, me gusta mucho la acuarela aunque la verdad no la se manejar en lo absoluto.
Muchísimas gracias ❤️
Todo es cuestión de práctica.
Wow Albani has mejorado muchísimo esto me encanta 😍
Muchas gracias, Made 🥹 ❤️❤️❤️❤️❤️
Me encanto el resultado final, una excelente combinación de colores, te felicito amiga, tienes una gran imaginación, un hermoso arte, quiero aprender a dibujar asi, cuestión de práctica, me gusta porque asi uno se deja llevar por la imaginación, la creatividad, aprendiendo cada día, gracias por compartir tu talento, éxitos, saludos.
Gracias, nohe! Atrévete, si lo deseas. Es cuestión de práctica. Al principio no saldrá como queremos pero luego va mejorando ❤️
Me encantó totalmente el resultado final 😍. Los colores se ven súper vibrantes, te quedó genial.
!DIY
¡Muchísimas gracias! ❤️❤️❤️
You can query your personal balance by
!DIYSTATSWow, de verdad que sabes usar esas acuarelas muy bien, quede fascinada con el dibujo, se ve apetitoso y a la vez muy tierno, me encantó, un abrazo enorme linda.💜
¡Ay, muchas gracias Stefania! ❤️❤️❤️
Bani, has mejorado muchísimo! Me encanta cómo te ha quedado este trabajo, los huevos están brutales!
Te felicito amiga, continua con tus prácticas que se que cada vez serán mejores tus pinturas.
¡Muchas gracias, Rosita! Me alegra que te guste ❤️❤️❤️
Obvio seguiré practicando
Amigaaa de verdad estoy tan orgullosa, siento que has mejorado mucho! Me encanta como quedo esa acuarela, me están dando ganas de comprarme unas. Pero no se nada jajaja, ni marcas ni nada!
Me encanta tu avance! Espero que mejores cada día más!💛
Muchas gracias, amiga linda 🥺❤️❤️
La verdad yo tampoco sé de marcas jaja. Aún no compro acuarelas de buena calidad. Cuando quieras intentarlo me dices y te explico lo que sé ❤️❤️ todo es cuestión de práctica y un poquito de guía.
Qué lindo pintaaaas!!! Tienes mucho talento bella😍
¡Muchas gracias, Vero linda! ❤️❤️❤️
Amiga bella, me alegro mucho por ti gran avancé. Te felicito amiga, sigue así 💕
La combinación de colores, las luces y sombras está increíble.
💕
Gracias, mi valen! Un abrazote ❤️❤️
Amiga, te quedo precioso un gran trabajo, valieron la pena esas 10 horas, ya que te ha quedado genial
Además nos has dado un gran paso a paso.
Se te dan muy bien los dibujos, esperamos más.
Besitos y bendiciones 🥰
Un abrazote, Leidi! Mil gracias 💕💕
Amii hermoso es muy poco para describir tu dibujo, me encanta el nivel de detalles que tiene, es un dibujo y aun así se ve delicioso y hasta provoca 😍 Lo haces increíble ♥️
Sii. Es el dibujo con más detalles que he hecho. Me alegra que te guste, amiga. Muchas gracias ❤️
Wow, te quedó bastante bien me gustó mucho el resultado final, los detalles te quedaron muy bien logrados, la practica hace al maestro ¡sigue así! 😀
¡Muchas gracias, Daniel! 🥺❤️❤️
Pero que belleza amiga, te quedó muy lindo cada detalle. Me gustó mucho que hasta se me antojo desayunar eso jajaja. Felicidades amiga, cada vez mejor❤️
Me pone feliz leer eso, amiga. Muchas gracias ❤️
Lindo trabajo, te quedo precioso, saludos.
Gracias, @coromoto20! ❤️