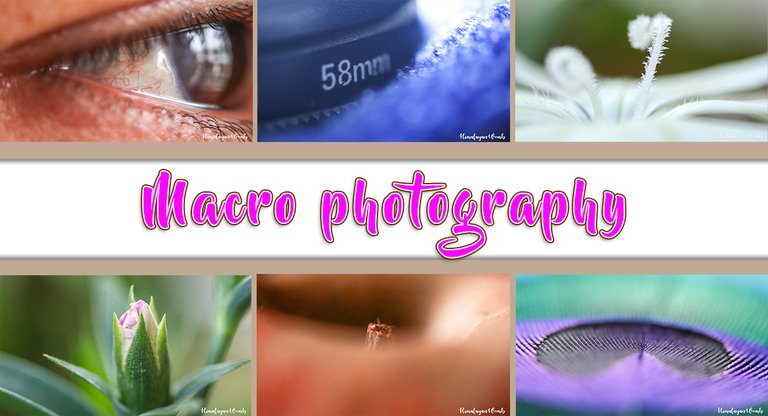
Exploring Macro World | A Reverse Lens Experiment
You want to do and learn a lot but when your pocket is empty, you wait until the money comes to complete your work. For example, for many years I wanted to buy a macro lens but did not have the money. Then I saw a hack on YouTube in which you can photograph any subject by making your kit lens a macro lens. Then I got motivation from @aleister's post and finally I decided to get into this process.
 Graphic created in Adobe Photoshop
 The final kick
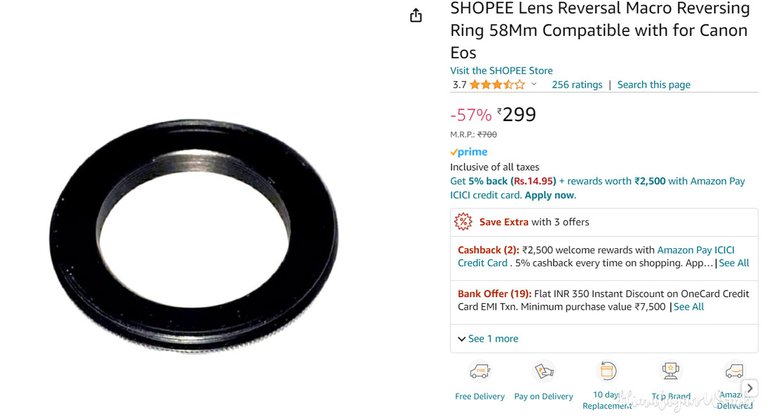 Odered
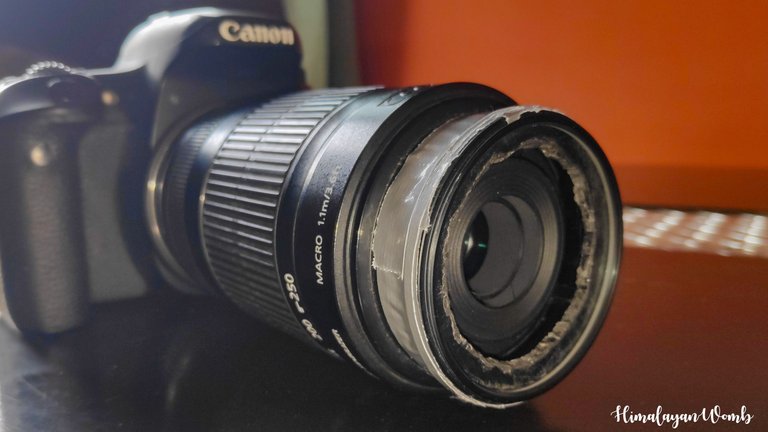
I place an order on Amazon thinking that the reverse lens will make me the uncrowned king of macro photography. After a few days, I received the lens and now my concern is that I have to get my camera from my friend. It takes me about 2 weeks to get my camera back and finally today I try this reverse macro lens. The results are as expected but I have only one concern and that is that the front area of the lens is open due to which dust particles can enter it.
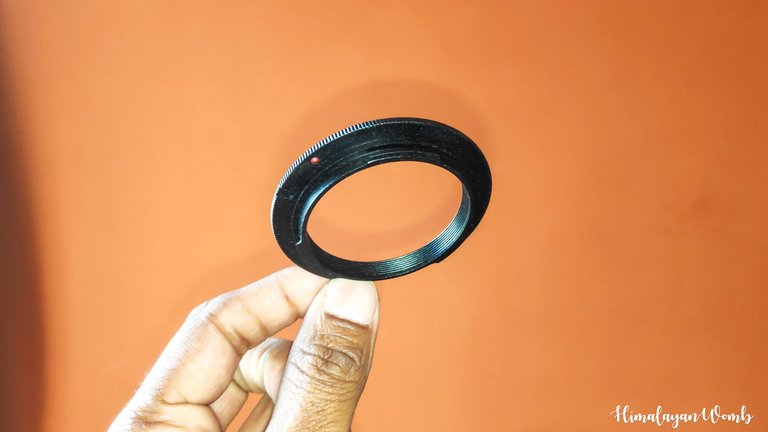 Received
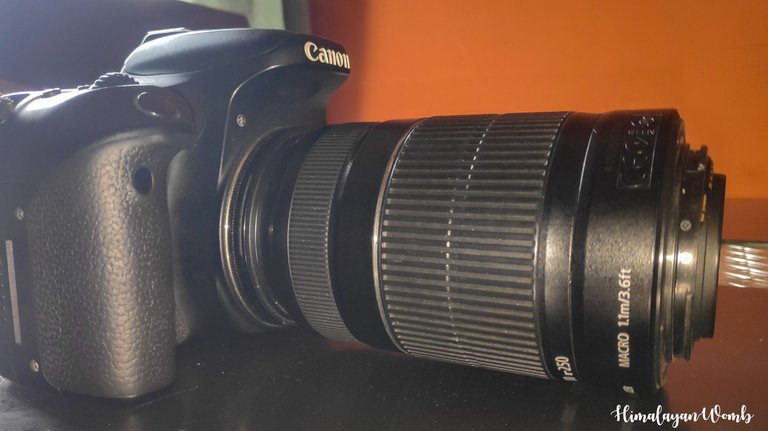
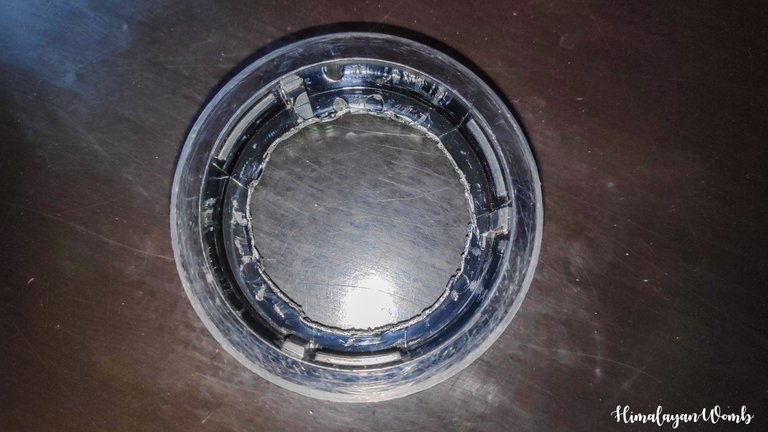
 Installed the Macro reverse ring
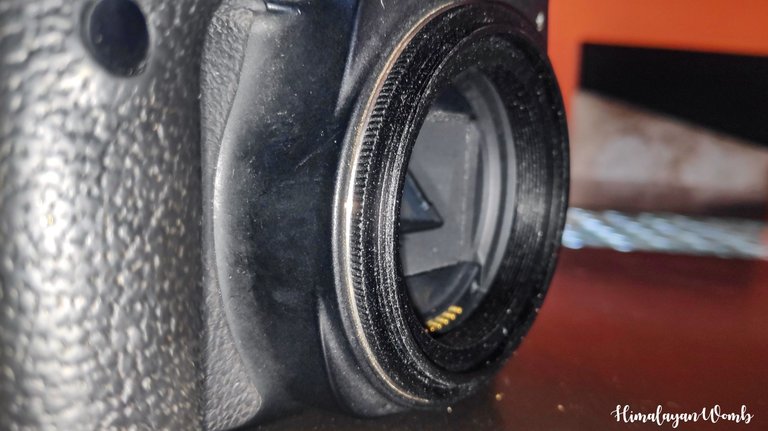
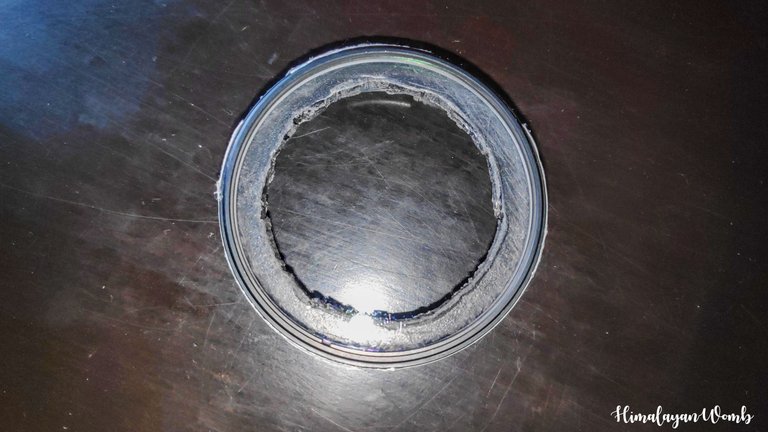
 Reverse ring opens the lens from the front side
 This is what it looks like when you reverse the lens
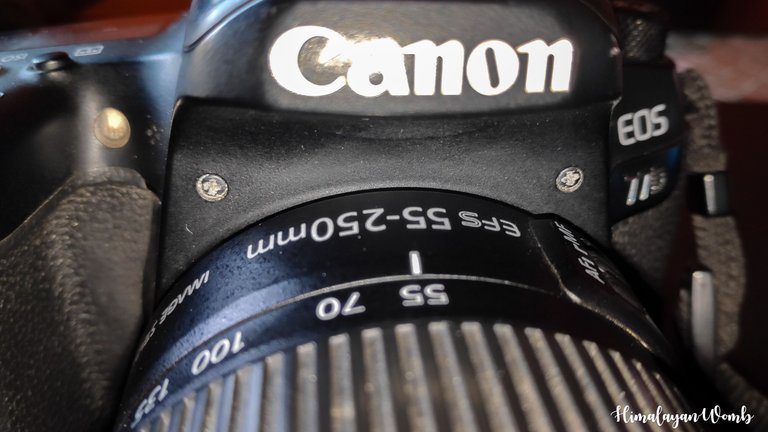
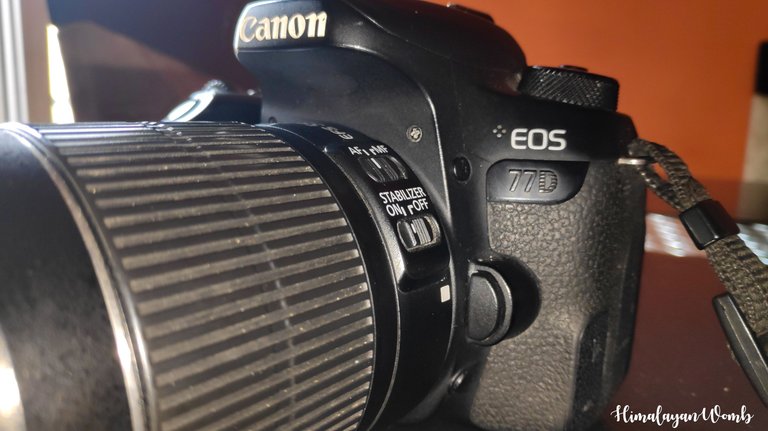
For this, I cut off the cap of the lens from the back and stick a filter on it with duct tape so that the path of entry of dust is closed and the lens remains safe. When you have to make arrangements because you do not have money and if the camera or lens gets damaged, then forget that you will be able to buy it again. I have a Canon 77D lens with which I use a 55-250mm lens. Although most of the photographers have recommended kit lens 18-55mm for this experiment, but I cannot do this because I do not have this lens.
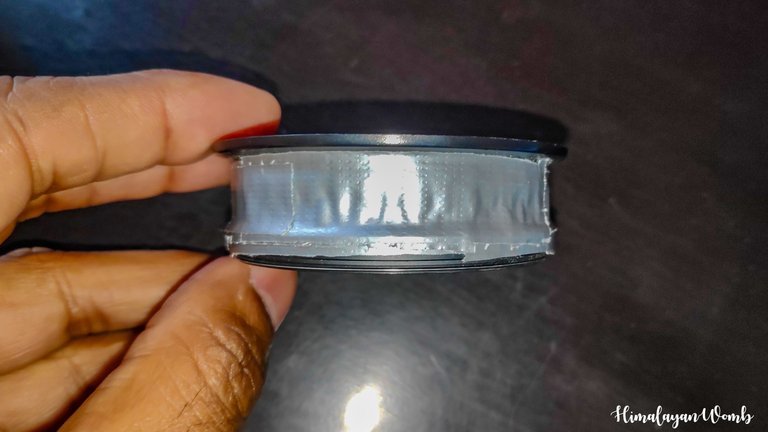
 This is what the lens cap looks like when cut
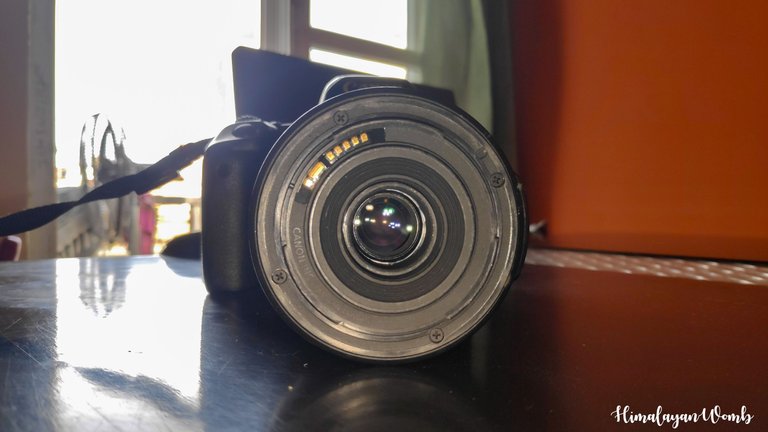
 I have installed a filter on the other side of the lens to keep out dust.
 A DIY that will prevent dust from entering the lens
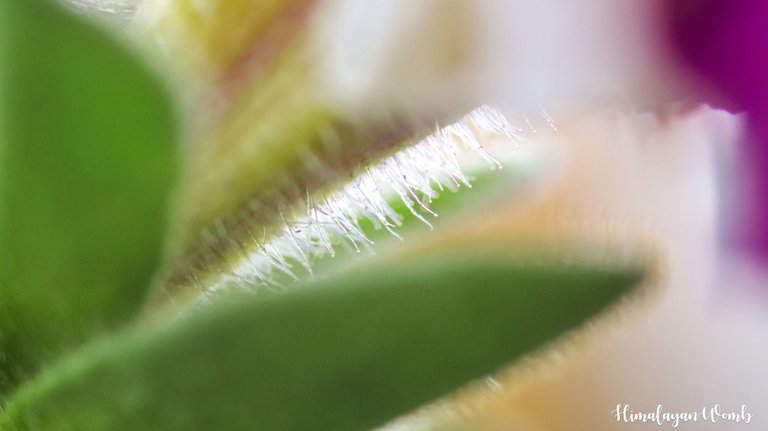
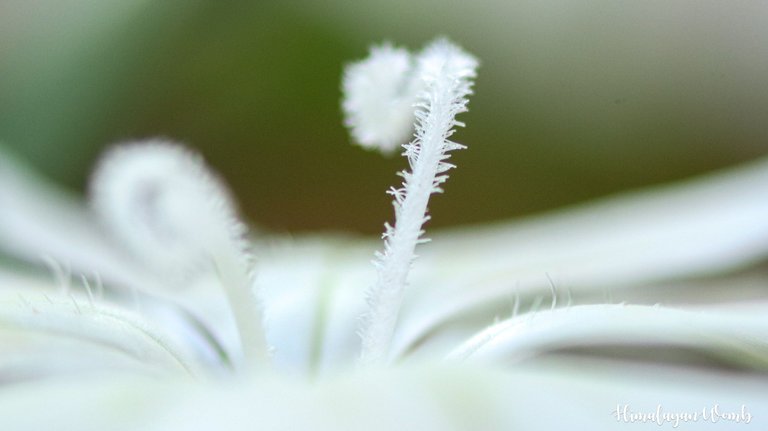
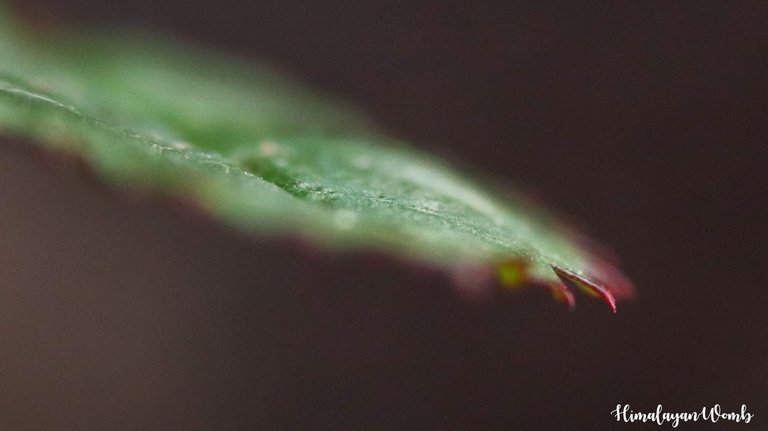
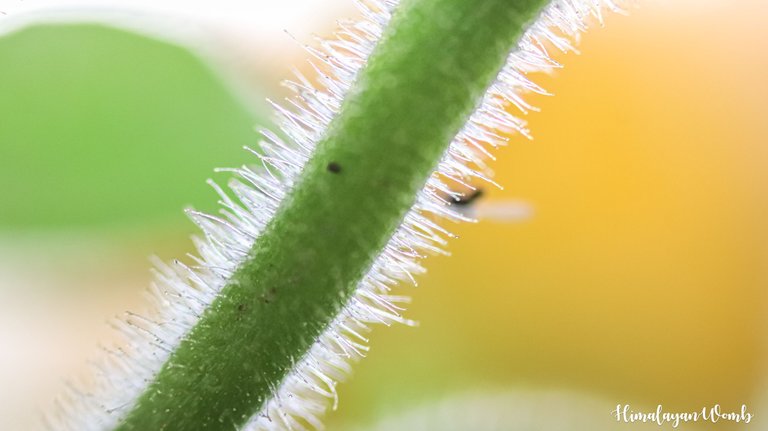
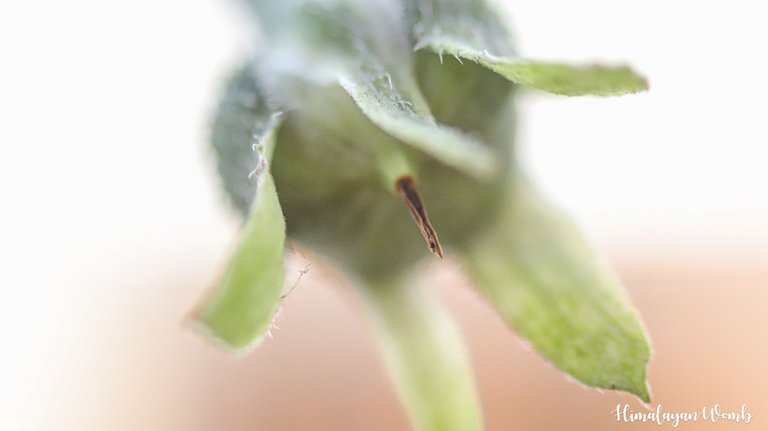
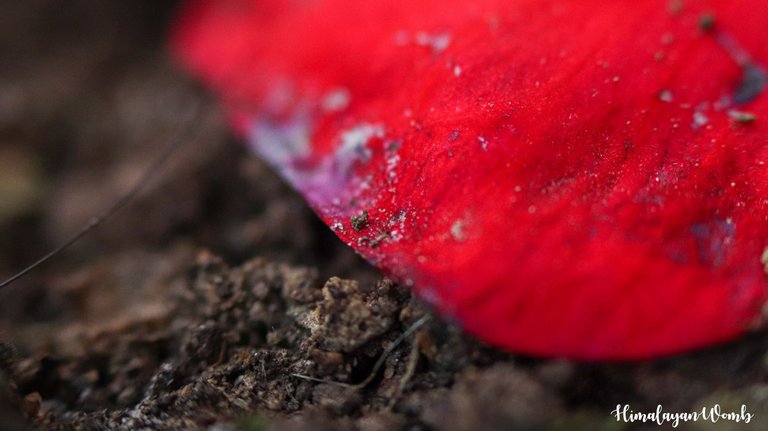
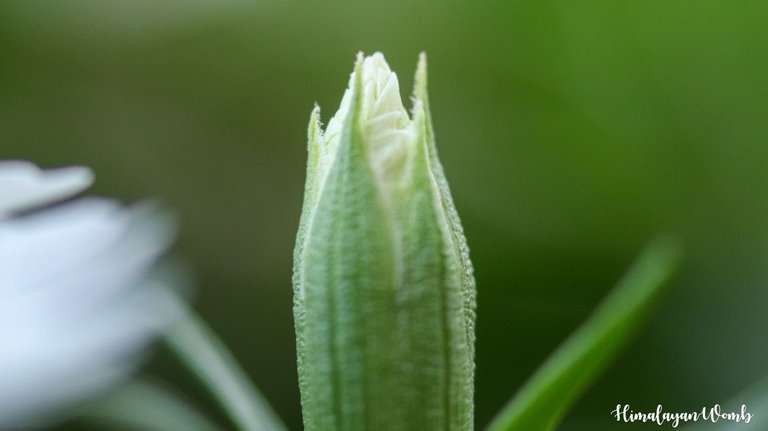
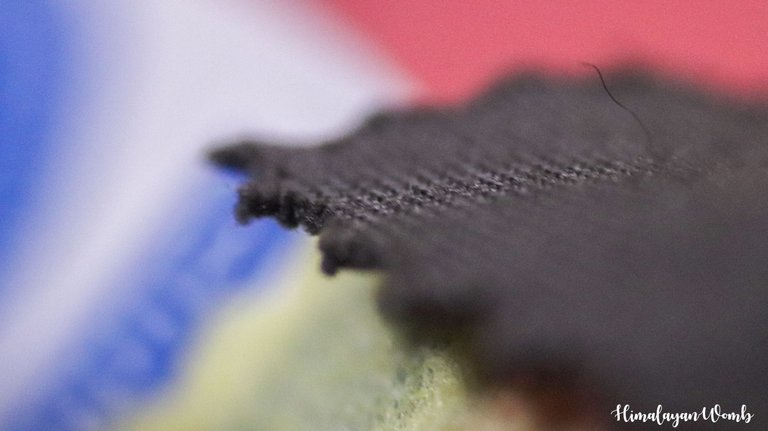
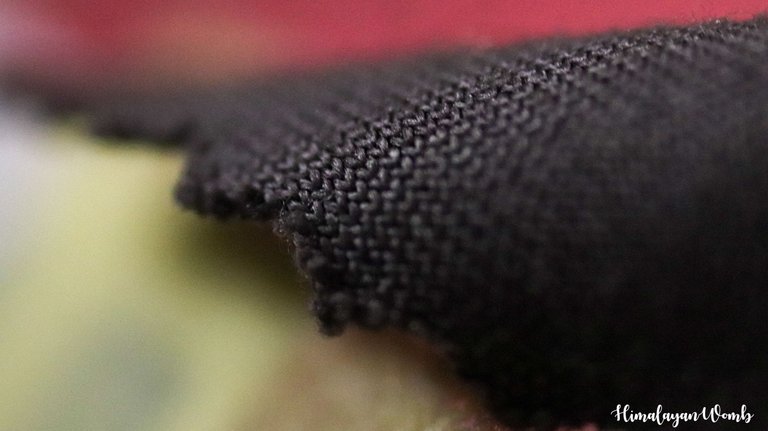
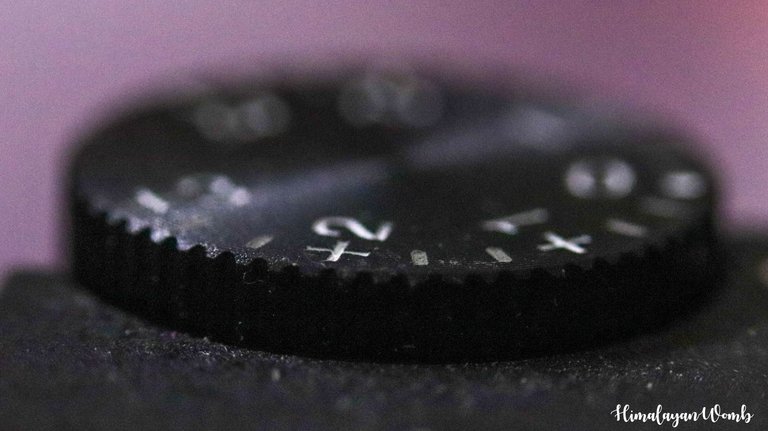
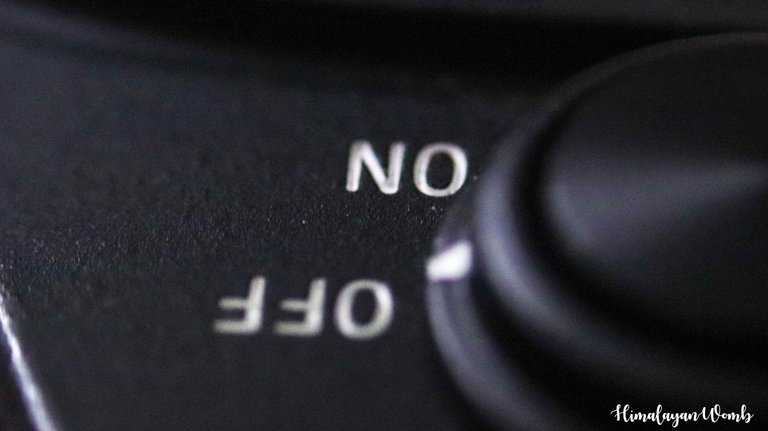
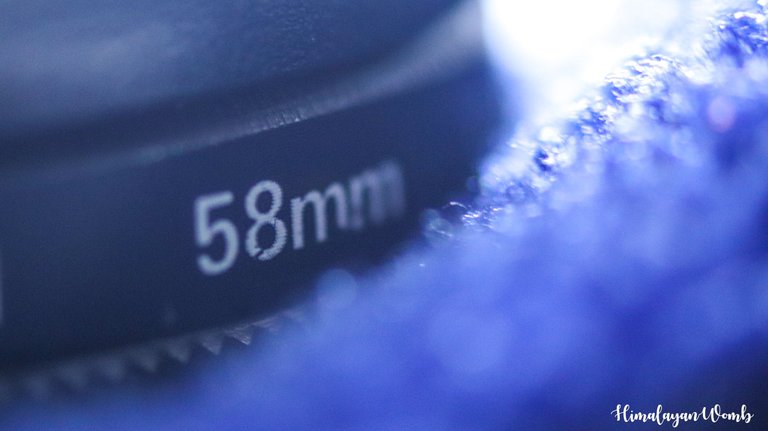
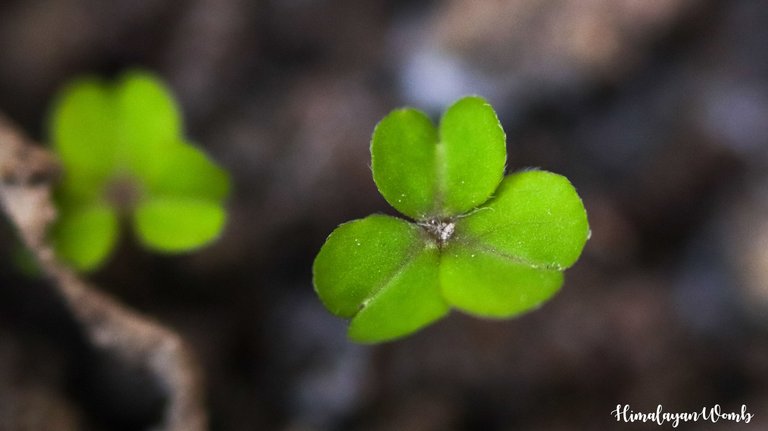
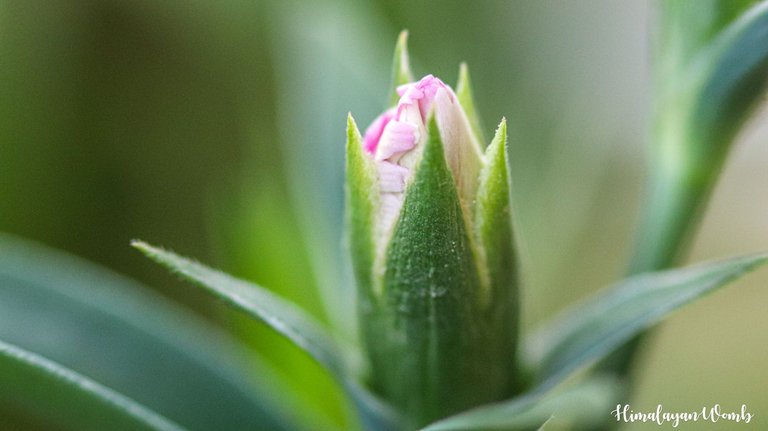
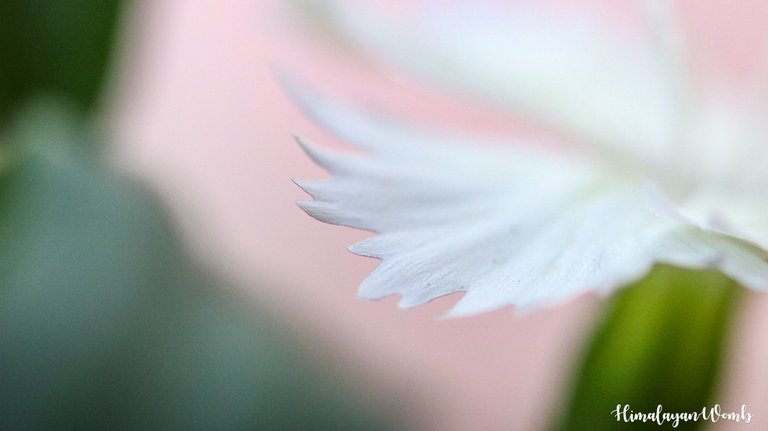
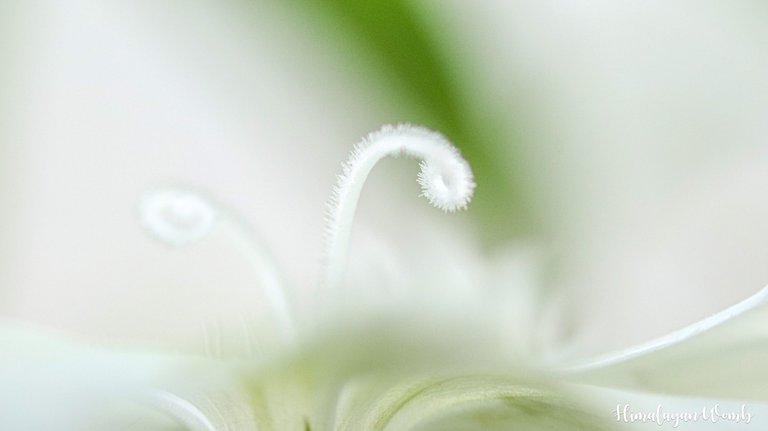
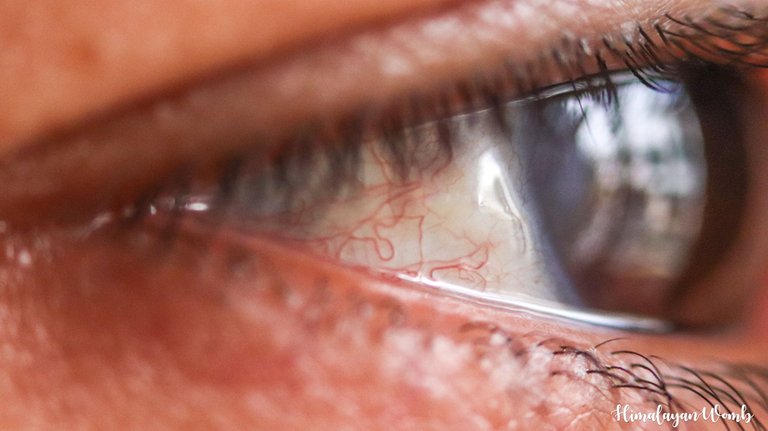
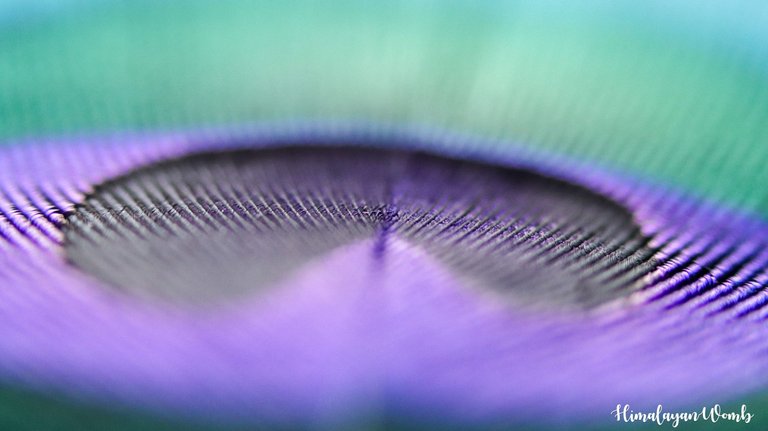
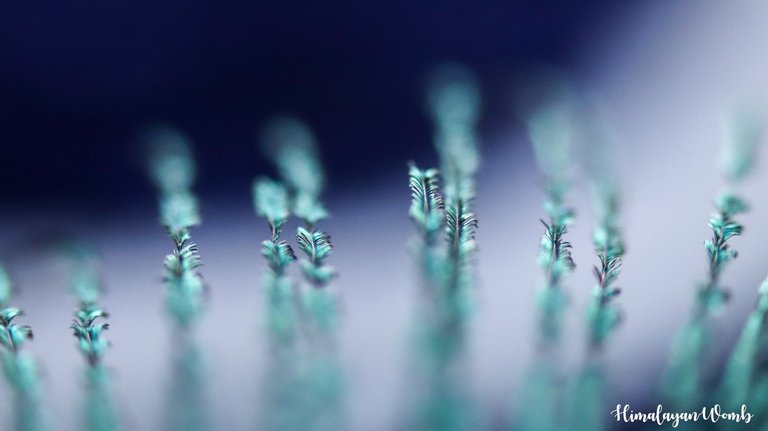
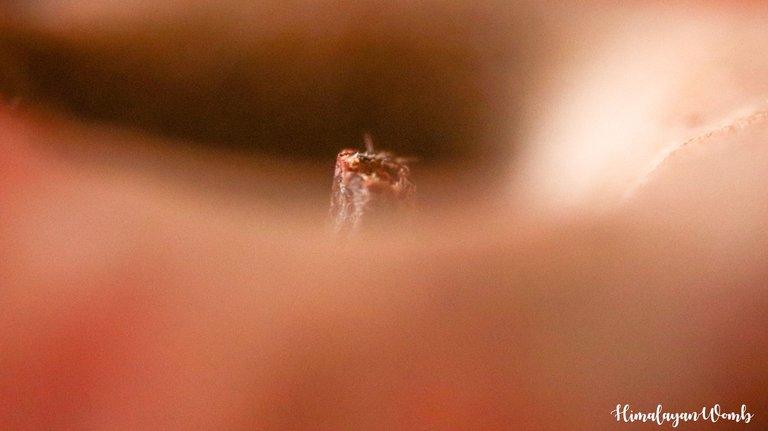
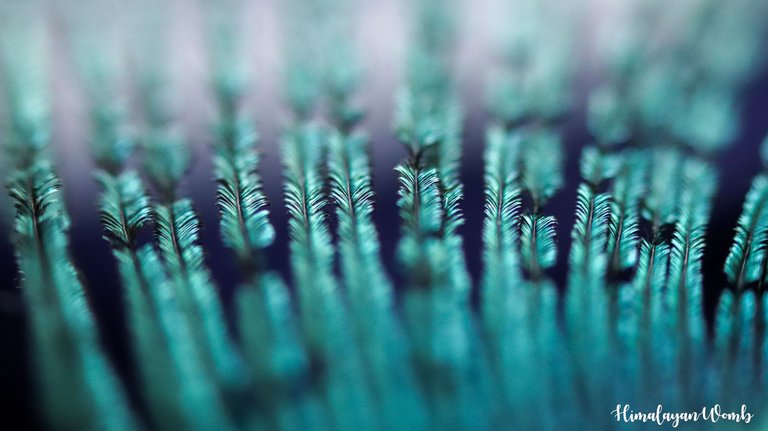
 And here is the final result
I don't have an external flash nor a tripod for the camera, so I try macro shots by holding the camera in my hand. The results were very good. I really liked some of the shots. In this technique we lose our control over the aperture, hence we have to manually adjust the camera according to the distance of the subject. By doing this most of the time the photos become blurred. For this I kept the shutter speed at least 500 and the ISO at 3200. The results were quite good with these settings.
Here are the final results:

How did you like this macro experiment? If you want to know something more about this, please leave your feedback or question in the comment box. I will reply as soon as possible. Thank you very much for reading this post or viewing the photo. See you in the next post where some more experiments will be done and the results will be presented to you. Till then stay healthy and keep smiling.
The effect of using the device is strong!
Thank you....I guess I have used it beyond the limit. Haha
That's awesome shots 👍
I'm just trying it with my phone 😜
हाहा...आजकल फोन चाँद की फोटो भी क्लिक कर लेते हैं
Haha..bt camera aur professional talent ki barabri koi nhi kr skta 😊
satya vachan
I've heard of this hack before too but I wasn't able to try since you'd need an extension ring like that haha. Wow the results are just the same as an actual macro lenses. Beautiful :D Just sucks that you really have to be careful of it so no dust would come in. The ring is surprisingly really cheap tho
It took me almost 2 years to buy and try this ring. I was surprised to see the results. To prevent dust from entering the lens, I cut the lens cap and placed a filter on it. Now I can click as many macro shots as I want without worrying about getting dust.
Aah, I didn't understand that part. I thought you need to have a glass to block it out entirely
Same thing I did but in another way
Thank you for motivation
You did it :) excellent result, love the pictures, well done. Keep up the good work;)
Thanks for motivation. You are the champ.
Any feedback for me.
Wow.. amazing 😍
jai kunwari maa ki