[ENG-ESP] Replacing a stained piece of flannel. / Reemplazando una pieza manchada de la franela.
Hello friends, I am happily grateful for giving me the opportunity to continue sharing my ideas with you, so today I did a simple sewing. Here I am going to give you a brief explanation of what it is about.
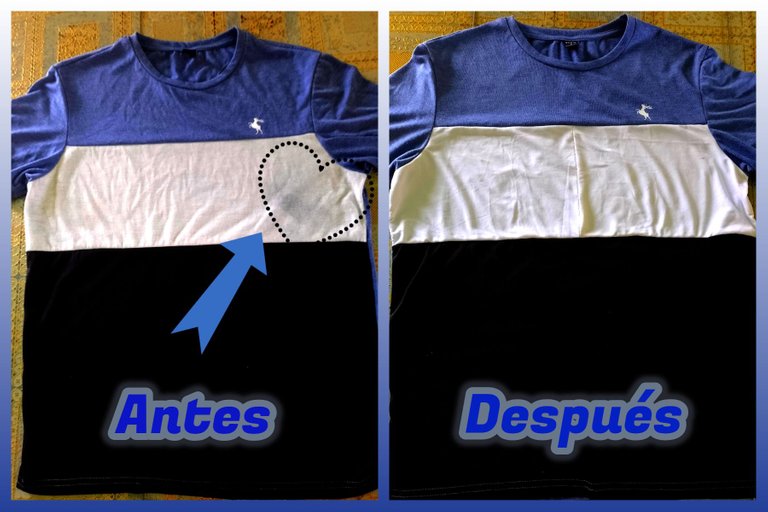
I washed some dark clothes and along with that there was a flannel that I had dyed, and when I remembered it was already late, what happened was that one of the flannels got stained and it's very noticeable. The important thing is that everything has a solution, I looked through my things and I found a piece of white cloth, well better than the one that had the flannel, and without further ado, I'll leave it for you to see how the flannel piece changes.
Hola amigos, felizmente agradecida, por darme la oportunidad de seguir compartiendo con ustedes de mis ideas, están así que este día hice una costura sencilla. Acá les voy a dar una breve explicación de que se trata.
Lave una ropa oscura y junto con esa había una franela que había teñido, y cuando recordé ya era tarde, lo que sucedió fue que una de las franelas se manchó y se nota mucho. Lo importante es que todo tiene solución, busque entre mis cosas y encontré un pedazo de tela blanca, bueno mejor que la que tenía la franela, y sin más que decir, los dejaré para que ustedes vean como cambie la pieza de la franela.
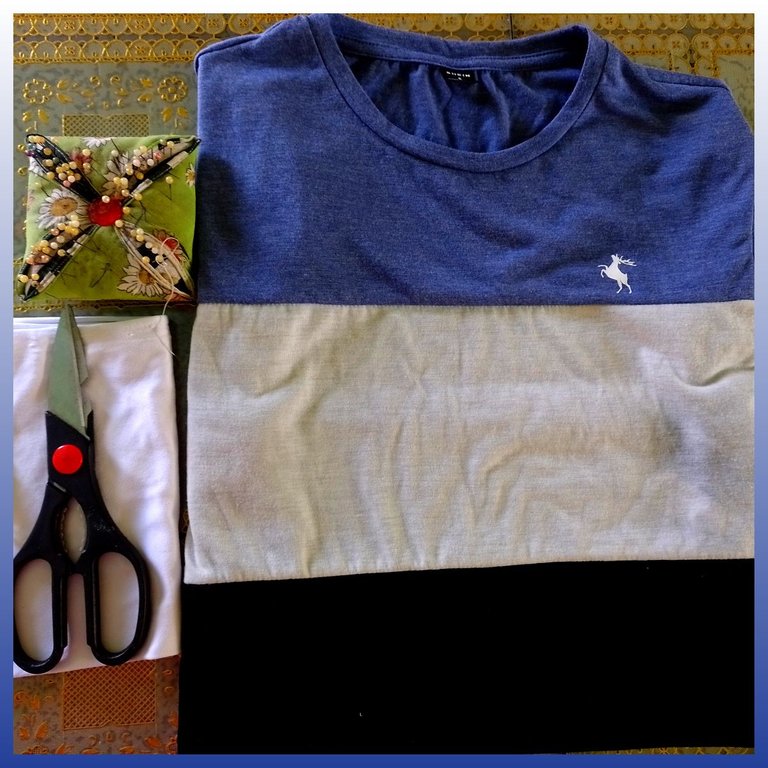
Materials:
~ Flannel.
~ White cloth.
~ Pins.
~ Seam Destroyer.
~ Scissors.
Materiales:
~ Franela.
~ Tela blanca.
~ Alfileres.
~ Desbaratador de costura.
~ Tijera.
Step 1:
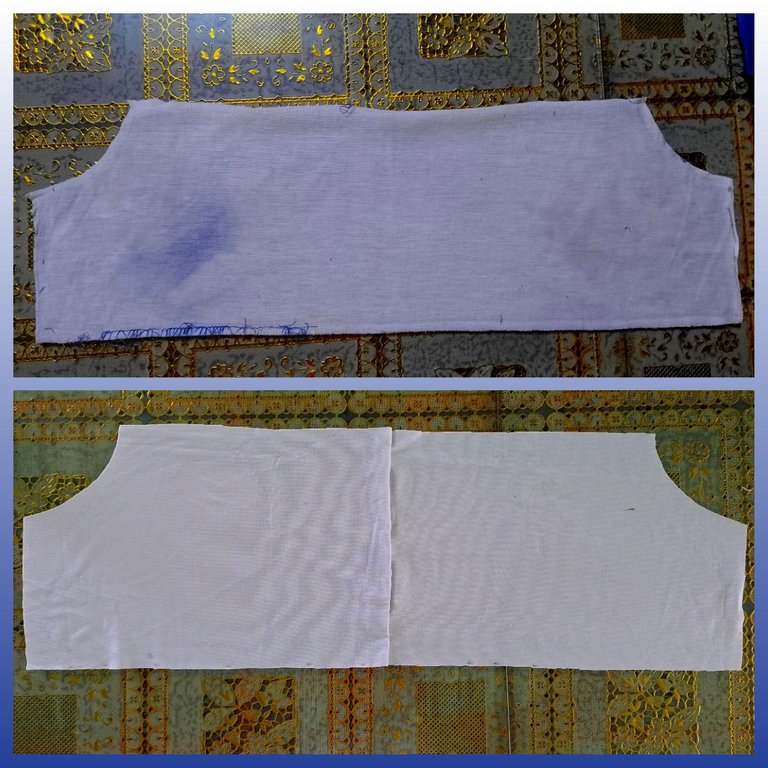
On this part, use the ripper to unstitch the full white rectangle, which is the affected part.
Paso 1:
En esta parte, utilice el desbaratador para descoser el rectángulo completo blanco, la cual es la parte afectada.

Step 2:
Place the affected piece on the other fabric and cut the piece again, but since the piece of fabric was very small I had to adjust the mold in such a way that I could remove 2 pieces. And then join them to have the complete piece.
Paso 2:
Coloque la pieza afectada sobre la otra tela y corte de nuevo la pieza, pero como el pedazo de tela era muy pequeño tuve que ajustar el molde de manera tal de poder sacar 2 piezas. Y luego unirlas para tener la pieza completa.
Step 3:
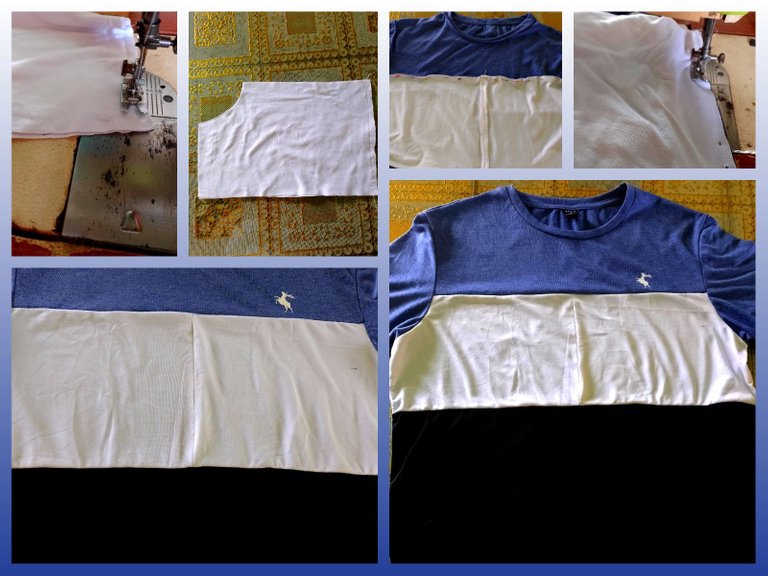
Here face the two pieces, in order to unite in the center, passing a straight seam. Then I opened it and pressed it with pins to the flannel, in order to pass another straight seam around the entire contour, here is the sample, you can see the change that the flannel gave, and the steps I used are very simple, in order to change the previous rectangle . I already finished the flannel, I hope you have an excellent day. 😘
Paso 3:
Aquí enfrente las dos piezas, para así unir en centro, pasando una costura recta. Luego la abrí y la prense con alfileres a la franela, para así pasar otra costura recta por todo el contorno, aquí está la muestra pueden ver el cambio que dio la franela, y muy sencillos los pasos que use, para así cambiar el rectángulo anterior. Ya doy terminada la franela, espero que tengan un excelente día. 😘
Collage making program: Fotojet Link
Translated from google translator Link
Photo editing program: PhotoFiltre 7
Las fotos fueron tomadas desde un Xiaomi Mi A2.
Programa para hacer el collage: Fotojet Enlace
Traducido del traductor de Google Enlace
Programa para editar fotos: PhotoFiltre 7
I say goodbye until another opportunity.
Thanks for your support.
Me despido hasta otra oportunidad.
Gracias por su apoyo.
Copyright @imargasa. All rights reserved.
Oooh que bronca que da cuando se destiñe alguna prenda que nos gusta. Que bien que pudiste reemplazar lo sucio, y es verdad que quedó mejor que antes. ¡Te felicito!