Sculpture of a pretty painter in foamy
Hello to all art lovers!!! and happy New Year!!! and that this year is filled with a lot of creativity and passion for everyone ^_^
I hope that this year will be very prosperous for everyone, and I especially hope that I can start several of my goals, to direct myself to be a good artist, although I have several obstacles and pending problems from last year, I am optimistic to solve them soon, although they are several, but if all goes well you may have most of them resolved by February.
One of my main purposes in this 2023, is to do more works this year, both drawings in pencil or with colors, more sculptures and resume digital drawings (to resume these drawings I have to buy a new monitor, that's why I didn't come back to draw like this) and be more active with posts, speaking of which I was supposed to share this sculpture before the 31st, but helping with cleaning the house and other commitments made it impossible for me, so this sculpture went from being my last publication of 2022 to become my first publication of 2023, I hope this means something positive and not that I will be late with the delivery date of my work for the rest of the year T_T

To make a great sculpture
This sculpture could be said to be my first commission, a colleague I have at work, he has an art store where he sells various products and articles related exclusively to the world of art and that are difficult to find, among these products he brought a mass of moldable foamy, and he asked me to try it to see if it was worth it, he specifically asked me to make a doll that he was painting, in order to promote that mass of foamy by showing the public what can be done with it, he told me He gave me a blue one to make his order and a red one for me, that was my payment for all this :-P
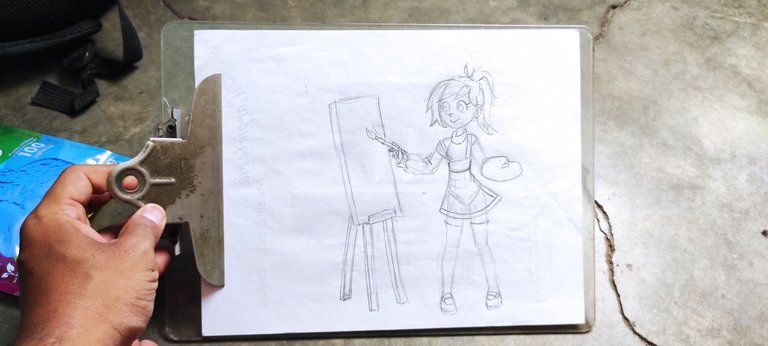
Like any project for a sculpture, first I made a pencil sketch of the design that the sculpture would have, I decided that it should be a girl, because it has been shown many times that female characters are much more striking in the visual section, and as the objective of this sculpture is to attract attention, a girl would be the most appropriate ^_^
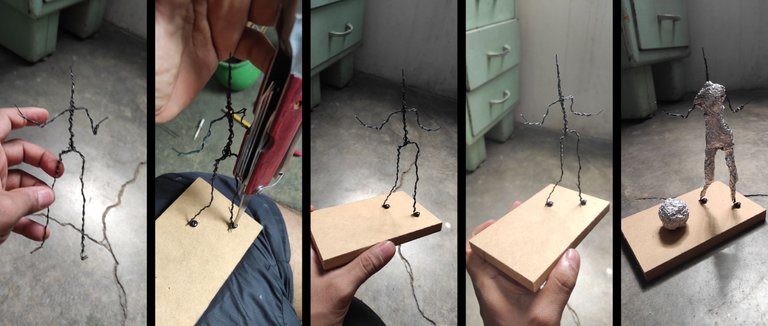
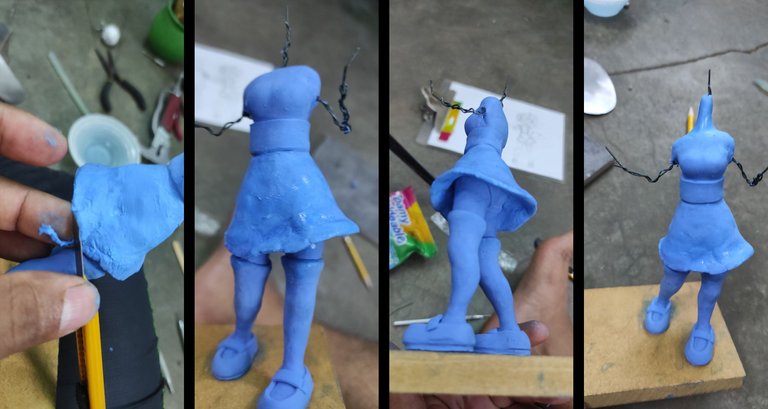
With the design ready, I began to wind florist wire, which is the only one I had, to make the entire structure that would support the figure, I screwed both feet and made the folds to hold it, I drew it in the sketch, and finally added aluminum foil to give volume, and with what I learned in my last sculpture I made the neck very long and the head is just a ball of aluminum foil, which I will work on later.
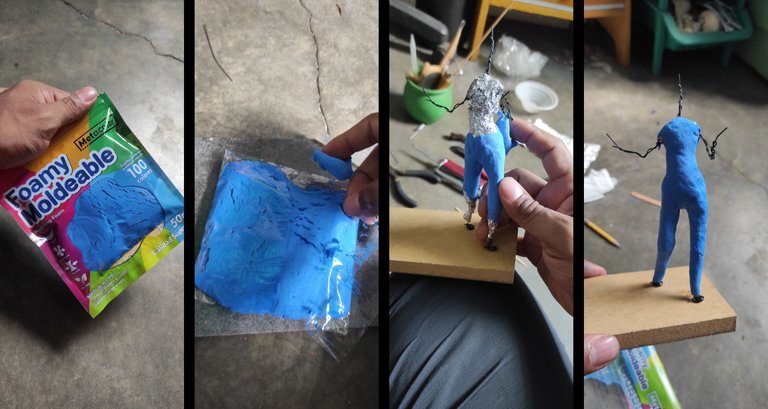
The foamy mass for molding is a strange material, the first thing I noticed is that it is very light, it weighs practically nothing, and its peculiarity is that when it dries it hardens like a sheet of foamy, I took small pieces and went covering the whole body and both legs, except the arms.
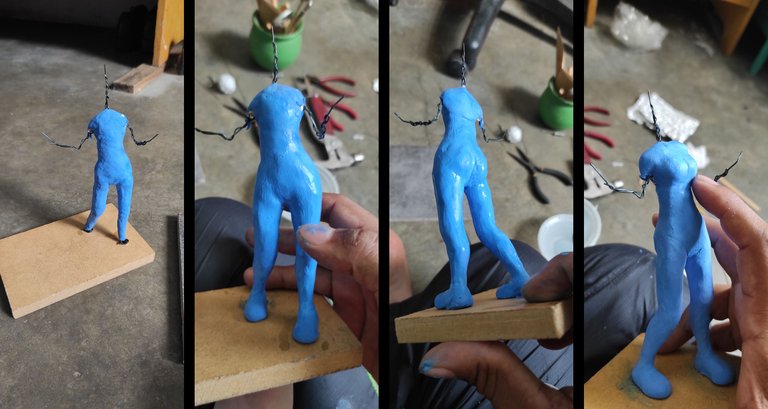
One thing I noticed is that it tends to dry quickly, which prevented me from working on the details or correcting the volume and proportions. It occurred to me to add water as it is done with clay, problem solved if I could correct and smooth the figure, accentuating the hips and the shape of the butt, to complete I added the feet, I did not detail them because I would have shoes, and finally I added her breasts, which I softened.
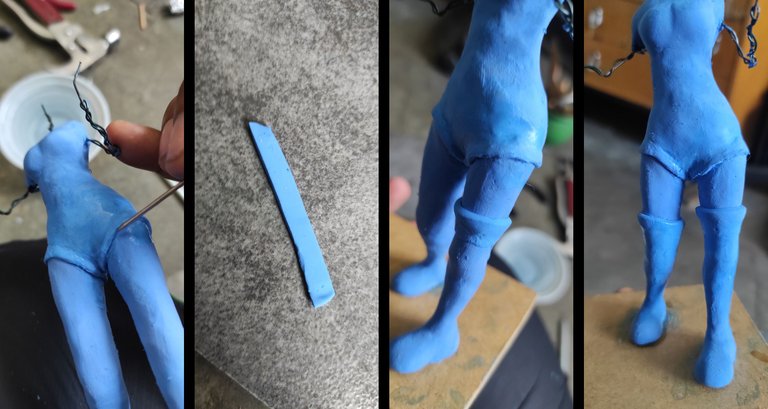
This material, it was difficult for me to get used to it, mainly because of its texture and because it adhered a lot to the wood, and it is practically the material with which my tools are made, with it you can only use metal, with a metal skewer I could make the marks on the underwear (this character will wear a skirt and I would feel bad if I didn't make some panties for her) I have to practice this type of detail more because I didn't achieve the result I wanted, but what I did would help, then cut some strips which I put on the thighs to make the long socks.
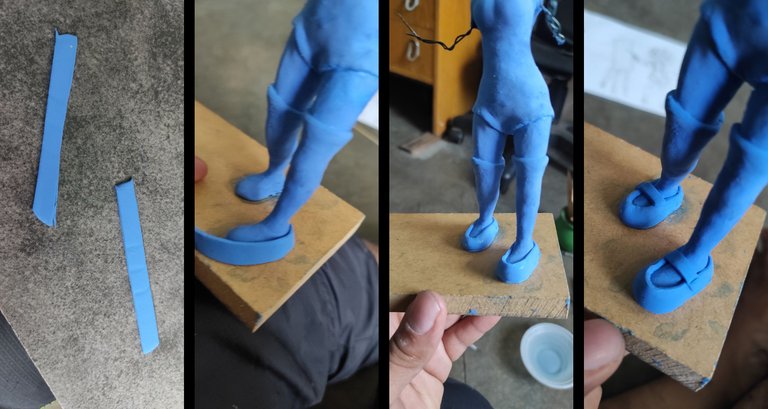
The feet had already hardened completely so I couldn't remove them, so I had no choice but to make strips, and cover the sides of the feet to mark the shoes, finally I made some small strips to put on both feet and give the appearance that he is wearing loafers.
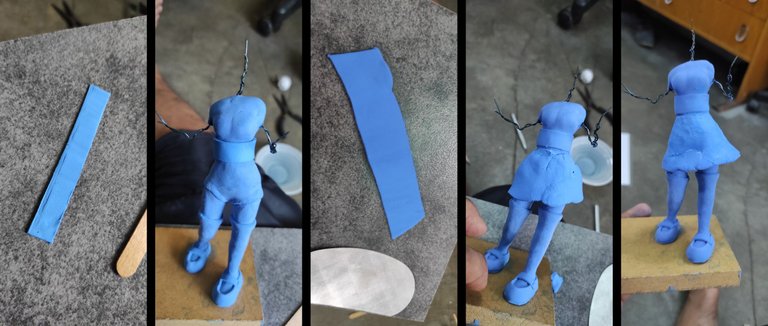
I made a long rectangle and placed it at the waist of the figure, which I spliced very carefully not to lose the edges of the belt that I had just made, then I proceeded to make the skirt, which I made a large and long rectangle for her, when I placed it on the figure, I realized that this was the worst way to make a skirt.
I had to stretch the material a lot which caused it to warp a lot, I had to fight a lot to get it into a good shape, finally I had to use a cutter to even out the whole edge of the skirt, then use water on my fingers to butt and fix the disaster, after all the lower part of the sculpture was ready so I start the upper part making the neck.
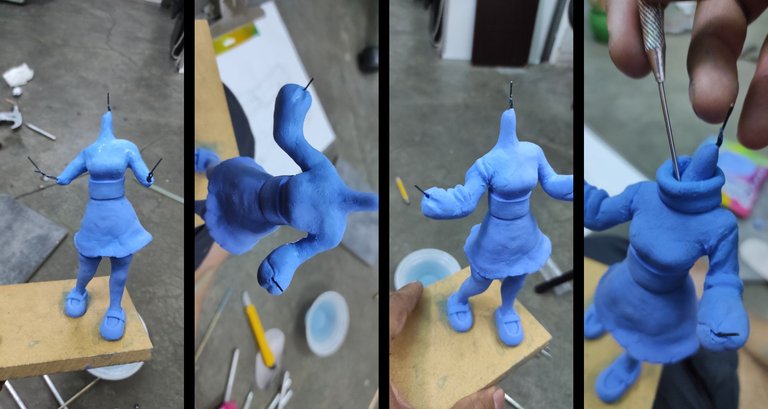
After doing the neck, I mark the clavicles and the shape of the shoulders because for the pose the left shoulder should be higher than the right, I continue with the arms as she will be wearing a sweater, the biceps are thin and the forearms exaggerated large, with the shape ready, make many folds at the joints and seam marks on the shoulders, to finally make a hollow cylinder to shape the turtleneck.
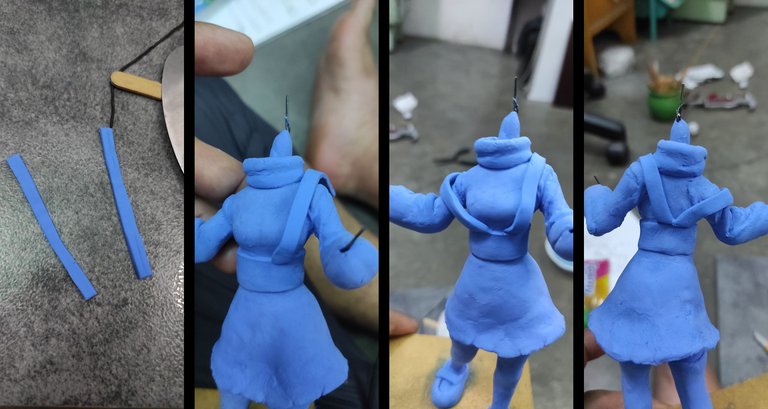
To finish with the clothes, the skirt has straps, which I made with two very long rectangular straps, to show some dynamism to the figure, the strap that goes through the left shoulder is well placed, but the strap on the right shoulder is fall mara demonstrate the movement of the right arm.
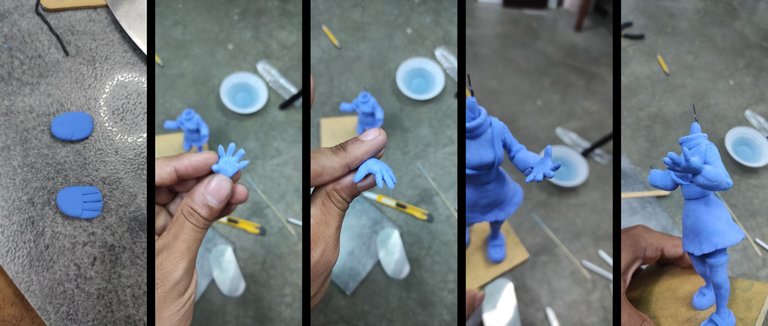
It's time to make the hands and first I make the left hand, which should show a posture of holding something, because in fact that hand will have a great color palette.
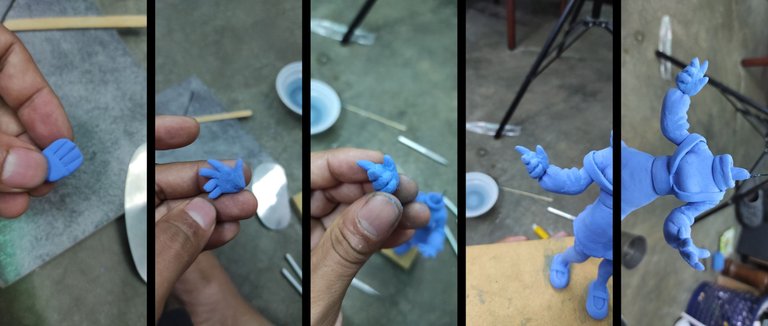
The right hand was a little more complicated, due to the fact that it must hold a brush, to achieve the pose it was an intermission of fist and pointing.
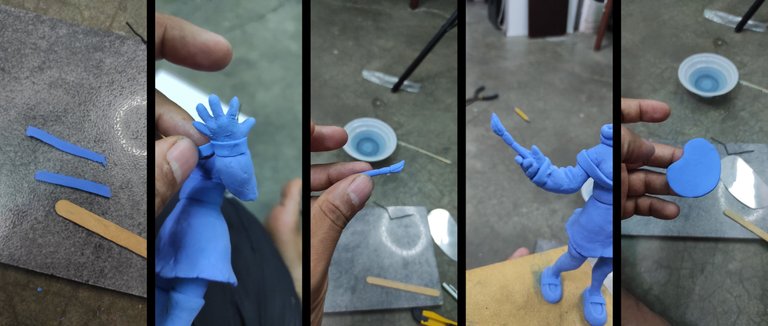
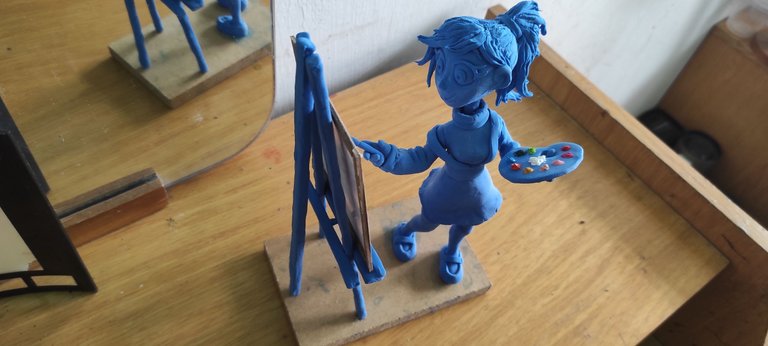
With both hands placed on the arms, and completing the sweater, I made two small strips of foam, which I placed around both wrists, which I spliced very carefully, then I began to make the brush, which consisted of a small piece of wire covered with the material to which I made several marks until it had the shape of a brush and when it was firm I placed it in my right hand, with a good piece of material I began to make the color mixing palette.
I flattened the dough enough and shaped it like a bean, and then using a pen I made a hole in it, wait for the material to harden a bit so that it was firm enough on its own, and then place it with carefully on the left hand, and making sure that the thumb went through the hole.
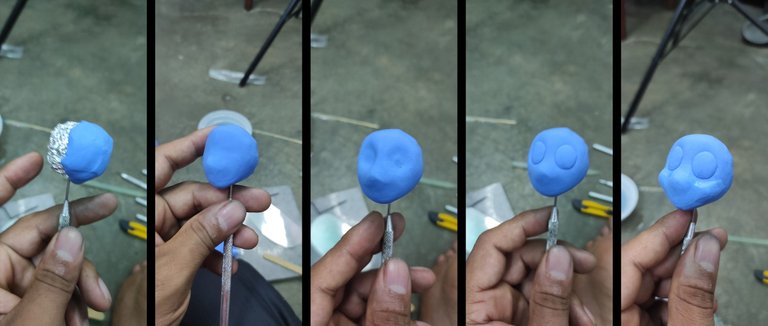
The body was already completely ready, so I began to make the head, the first thing I did was fix the aluminum ball to the metal spike, to have a place to lean on, then I began to cover it with the material until I had the shape of the head with her jaw, I mark with my fingers where the eyes would be, which I made with two circles of foamy, and then add more material to make the cheeks.

With the head better defined, I began to define the face, I made the mouth tracing a curve using a needle, then I made the nose by adding a small portion of the material in a triangular shape, then using more material I finished the eyes by adding the irises and eyelashes, I have to admit that this could not be done with plasticine, point for the moldable foamy, after completing the face I made the ears, I have to admit that I need a lot of practice with the faces, I still have a lot to improve, especially with the ears .
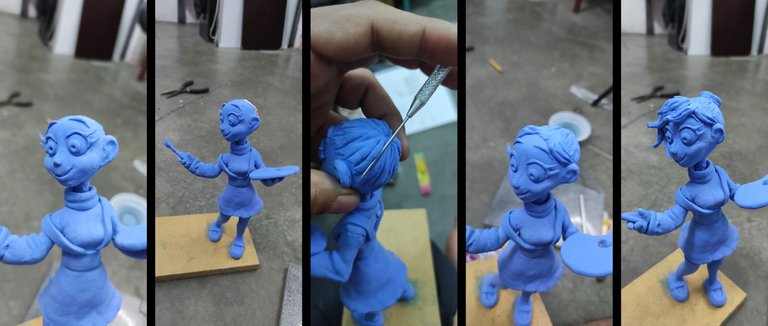
I added eyebrows to the head to finish the face once and for all, and to be able to place the head on the body, first I had to moisten the neck so that it adhered correctly, with that ready I began to mark all the lines of the hair, and make several strands for the bangs that she has on her forehead, and then I made the tape where the ponytail will come from, the material made it difficult for me to mark the texture of the hair but even so I have to practice more this texture, I still can't that it remains as I would like it to remain.
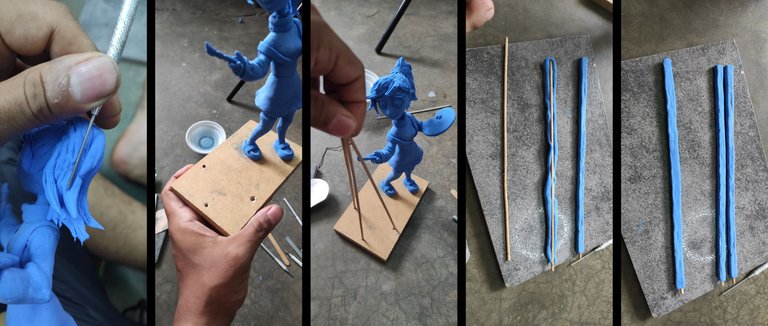
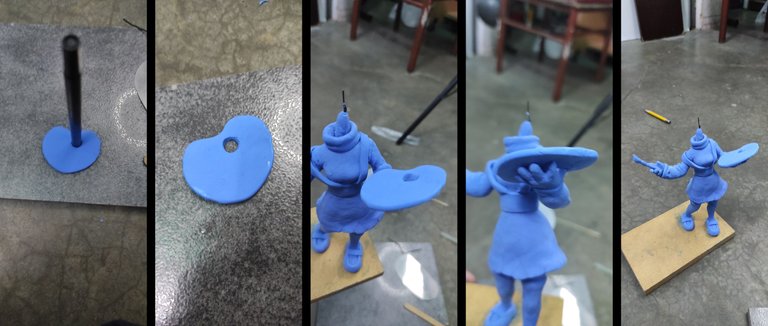
I made the horse's tail by mixing several shapes of letter S of different sizes, and when they were together with a needle I gave it the texture of the hair, the figure of the painter girl was ready, all that remained was to make her easel, on the wooden base I made 3 holes with a drill, then I lined 3 wooden sticks with the foam and then give each one a rectangular shape.
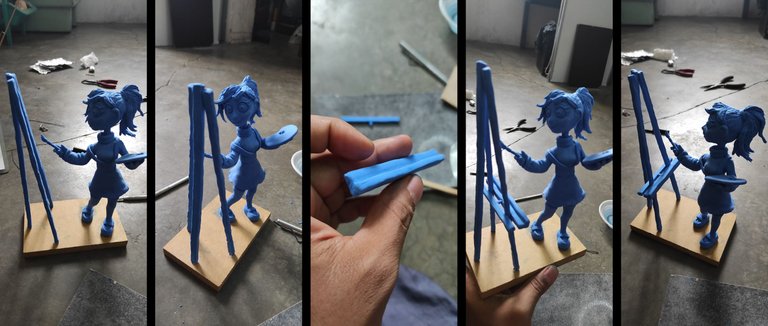
Then place each of these pieces in the holes, the good thing is that I achieved the correct angles and these could be spread on top, I covered 2 smaller sticks to make the canvas support, I made one of them bigger and with a groove, both pieces place them around the two front pieces, finally complete the painter's easel.
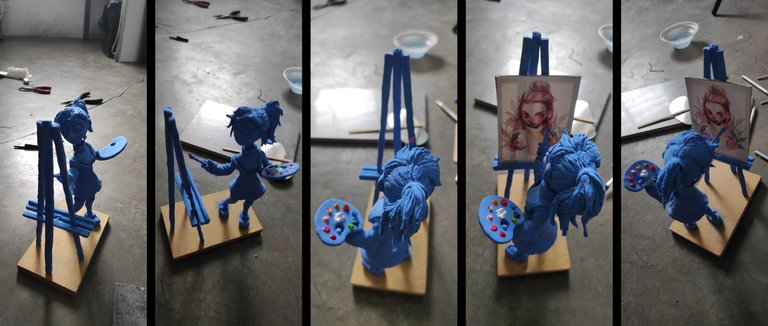
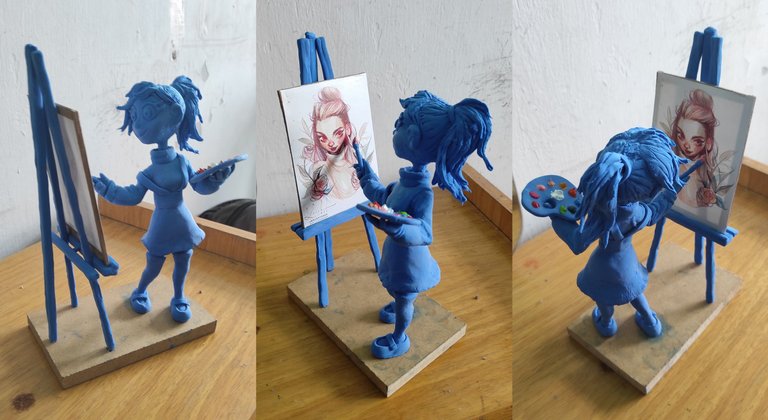
I couldn't paint this figure because it was necessary for it to be noticed that it was made with that moldable foamy, but she is supposed to be a painter and I needed it to be noticed, so I found some old oil paintings that I bought several years ago, and I added small dots of color on the mixing palette, and on the tip of the brush.
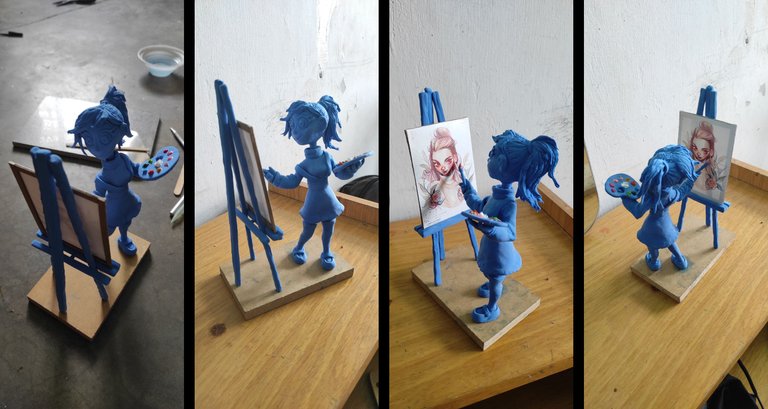
I wanted to make the canvas out of the same material as the sculpture, but I didn't have enough left, (I'm still surprised by what the 50 grams that the package said it yielded) I took a small print that I had there of the artist Loish which the brushstrokes were very noticeable, to this print I glued four strips of cardboard to simulate the frame of a canvas.
And that's how I finished the sculpture of this nice painter girl, without a doubt the material is good, it's just a matter of getting used to it, I highly recommend it ^_^

Thank you very much for reading my post
I hope you liked my foamy sculpture
If you have any suggestions or advice
Write it in the comments that I will be reading them
See you in a next publication
Inu-Jim

Copyright @inu-jim –Allrightsreserved
I hope you liked my foamy sculpture
If you have any suggestions or advice
Write it in the comments that I will be reading them
See you in a next publication
Inu-Jim
Copyright @inu-jim –Allrightsreserved
https://twitter.com/1267870977788166144/status/1610320670394548224
https://twitter.com/885463169111666690/status/1610326666257092610
The rewards earned on this comment will go directly to the people( @stevenson7 ) sharing the post on Twitter as long as they are registered with @poshtoken. Sign up at https://hiveposh.com.
These is incredible. The painter is so cute.
The detailing is brilliant too
Thank you for sharing this post on HIVE!
Your content got selected by our fellow curator stevenson7 & you just received a little thank you upvote from us for your great work! Your post will be featured in one of our recurring compilations which are aiming to offer you a stage to widen your audience within the DIY scene of Hive. Stay creative & HIVE ON!
Please vote for our hive witness <3
beautiful art, how well elaborated, greetings.
Grat post! I love this foamy mass because it's very clan, haha. And even though you can't work for long, that could be also an advantage. I loved your sculpture.
so adorable and so detailed.😍
Well if that's what you can create with a totally new medium from scratch then I don't even know.
You have serious skills right there! 👀
Incredibly beautiful😍
Oh wow! You’re so incredibly talented and creative. I love everything about this project 😍💙