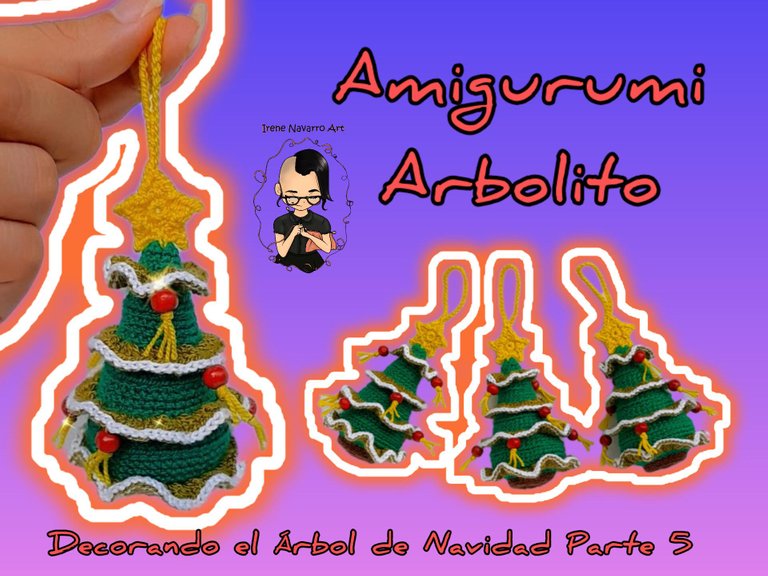
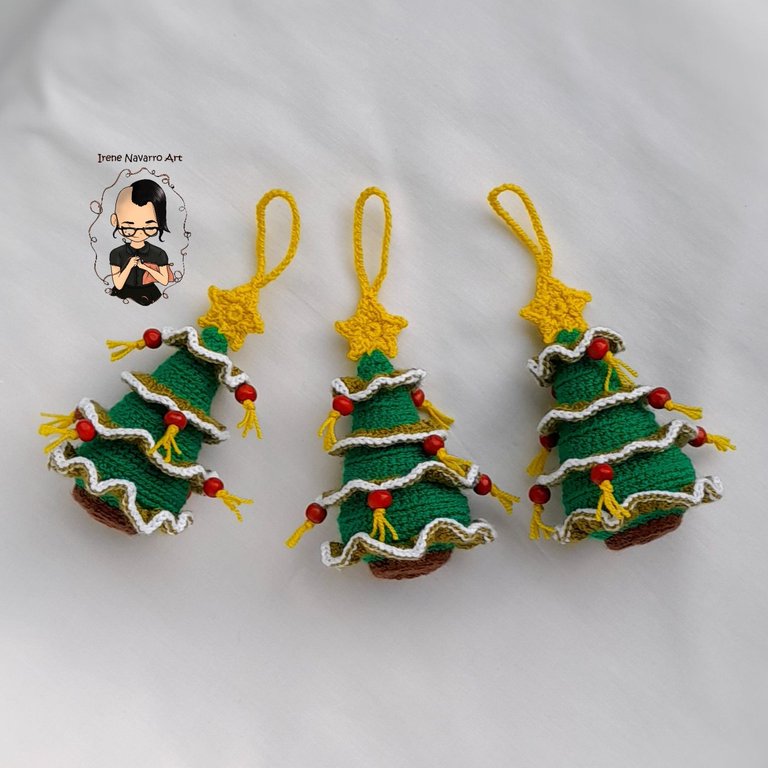
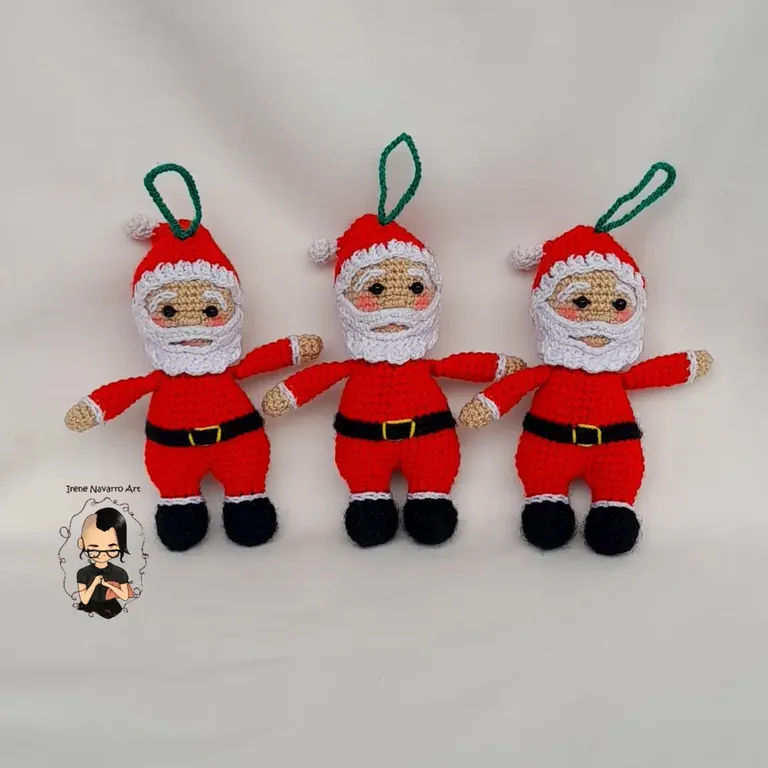
Amigurumi Arbolito// Decorando el Árbol de Navidad Parte 5
Greetings dear #NeedleWorkMonday community, this is the fifth publication of this great Christmas project that I have proposed, decorating the Christmas tree with amigurumis has become a tough but very satisfying task, however, fatigue has set in, they hurt many more hands for having worked in crochet for so many days in a row, I feel that even in this project it took me much longer due to the pain, at first the plan was to make at least 10 figure models, that is to say that it would be 30 amigurumis, but now I've been 15 and I feel exhausted, I don't know if I decide to leave it here or if I continue for a few more days, I await your opinion in the comments 😄 and as always here I share the detailed tutorial with all the love in the world.

Materiales/ Materials
- Hilo acrílico para crochet: marrón, verde oscuro, verde claro, blanco y amarillo.
- Ganchillo # 4 (1.25mm)
- Relleno
- Cuentas de color rojo
- Aguja de ojal grande
- Acrylic yarn for crochet: brown, dark green, light green, white and yellow.
- Hook # 4 (1.25mm)
- filler
- Red beads
- Large buttonhole needle
Proceso/ Process
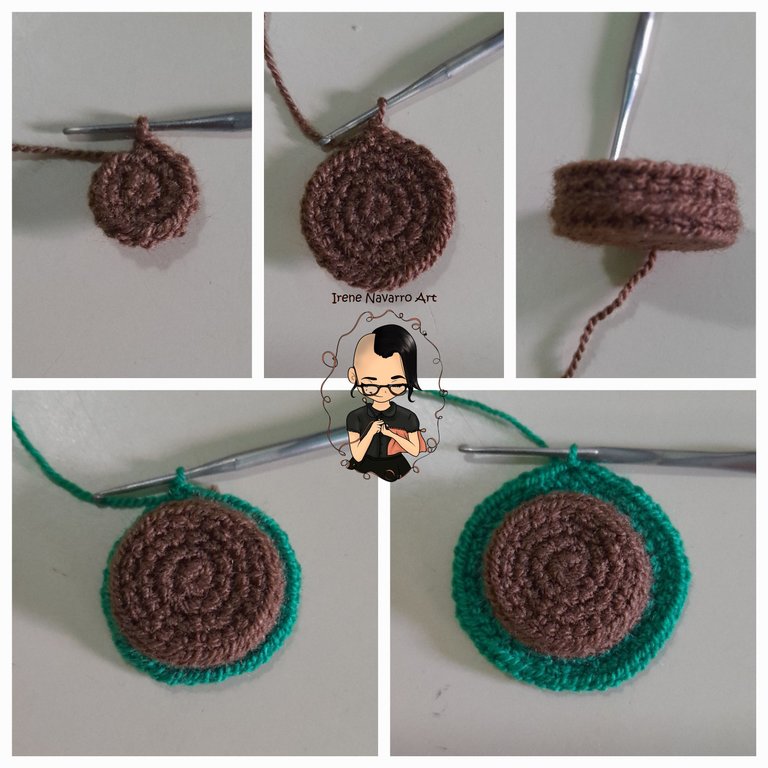
Con hilo marrón hacer 8 puntos bajos en un anillo
Hilera 1: 8 aumentos. Total de puntadas: 16
Hilera 2: (1 punto bajo, 1 aumento) X 8. Total de puntadas: 24
Hilera 3: 24 puntos bajos
Hilera 4: Tomando solo el lado de atrás hacer 24 puntos deslizados
Hilera 5: Tomando solo el lado de atrás hacer 24 puntos bajos
Hilera 6: 24 puntos bajos
Hilera 7: Con hilo verde, Tomando solo el lado frontal (1 punto bajo, 1 aumento) X 12. Total de puntadas: 36
Hilera 8: (2 puntos bajos, 1 aumento) X 12. Total de puntadas: 48
Terminar con un punto deslizado.
With brown thread make 8 single crochets in a ring
Row 1: 8 increases. Total stitches: 16
Row 2: (1 single crochet, 1 increase) X 8. Total stitches: 24
Row 3: 24 single crochet
Row 4: Taking only the back side make 24 slip stitches
Row 5: Taking only the back side make 24 single crochets
Row 6: 24 single crochet
Row 7: With green thread, Taking only the front side (1 single crochet, 1 increase) X 12. Total stitches: 36
Row 8: (2 single crochets, 1 increase) X 12. Total stitches: 48
Finish with a slip stitch.
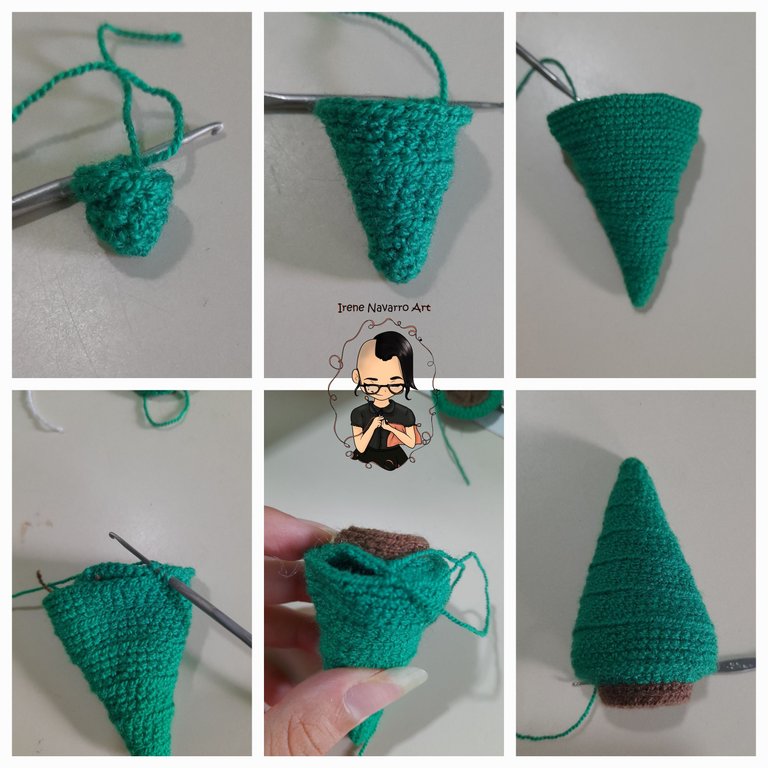
Con hilo verde hacer 6 puntos bajos en un anillo.
Hilera 1: (1 punto bajo, 1 aumento) X 3. Total de puntadas: 9
Hilera 2: 9 puntos bajos.
Hilera 3: (1 punto bajo, 1 aumento, 1 punto bajo) X 3. Total de puntadas: 12
Hilera 4: 12 puntos bajos
Hilera 5: Tomando solo el lado de atrás (3 puntos bajos, 1 aumento) X 3. Total de puntadas: 15
Hilera 6: 15 puntos bajos
Hilera 7: (2 puntos bajos, 1 aumento, 2 puntos bajos) X 3. Total de puntadas: 18
Hilera 8: 18 puntos bajos.
Hilera 9: Tomando solo el lado de atrás (5 puntos bajos, 1 aumento) X 3. Total de puntadas: 21
Hilera 10: 21 puntos bajos.
Hilera 11: (3 puntos bajos, 1 aumento, 3 puntos bajos) X 3. Total de puntadas: 24
Hilera 12: 24 puntos bajos
Hilera 13: Tomando solo el lado de atrás (7 puntos bajos, 1 aumento) X 3. Total de puntadas: 27
Hilera 14: 27 puntos bajos
Hilera 15: (4 puntos bajos, 1 aumento, 4 puntos bajos) X 3. Total de puntadas: 30
Hilera 16: 30 puntos bajos
Hilera 17: Tomando solo el lado de atrás (9 puntos bajos, 1 aumento) X 3. Total de puntadas: 33
Hilera 18: 33 puntos bajos
Hilera 19: (5 puntos bajos, 1 aumento, 5 puntos bajos) X 3. Total de puntadas: 36
Hilera 20: 36 puntos bajos.
Hilera 21: Tomando solo el lado de atrás (11 puntos bajos, 1 aumento) X 3. Total de puntadas: 39
Hilera 22: 39 puntos bajos.
Hilera 23: (6 puntos bajos, 1 aumento, 6 puntos bajos) X 3. Total de puntadas: 42
Hilera 24: 42 puntos bajos.
Hilera 25: Tomando solo el lado de atrás (13 puntos bajos, 1 aumento) X 3. Total de puntadas: 45
Hilera 26: 45 puntos bajos.
Hilera 27: (7 puntos bajos, 1 aumento, 7 puntos bajos) X 3. Total de puntadas: 48
Hilera 28: 48 puntos bajos.
Hilera 29: Rellenar y unir ambas partes con puntos deslizados tomando el lado frontal de ambas partes juntas.
With green thread make 6 single crochets in a ring.
Row 1: (1 single crochet, 1 increase) X 3. Total stitches: 9
Row 2: 9 single crochets.
Row 3: (1 single crochet, 1 increase, 1 single crochet) X 3. Total stitches: 12
Row 4: 12 single crochet
Row 5: Taking only the back side (3 single crochet, 1 increase) X 3. Total stitches: 15
Row 6: 15 single crochet
Row 7: (2 single crochets, 1 increase, 2 single crochets) X 3. Total stitches: 18
Row 8: 18 single crochet.
Row 9: Taking only the back side (5 single crochet, 1 increase) X 3. Total stitches: 21
Row 10: 21 single crochet.
Row 11: (3 single crochets, 1 increase, 3 single crochets) X 3. Total stitches: 24
Row 12: 24 single crochet
Row 13: Taking only the back side (7 single crochet, 1 increase) X 3. Total stitches: 27
Row 14: 27 single crochet
Row 15: (4 single crochets, 1 increase, 4 single crochets) X 3. Total stitches: 30
Row 16: 30 single crochet
Row 17: Taking only the back side (9 single crochet, 1 increase) X 3. Total stitches: 33
Row 18: 33 single crochet
Row 19: (5 single crochets, 1 increase, 5 single crochets) X 3. Total stitches: 36
Row 20: 36 single crochet.
Row 21: Taking only the back side (11 single crochet, 1 increase) X 3. Total stitches: 39
Row 22: 39 single crochet.
Row 23: (6 single crochets, 1 increase, 6 single crochets) X 3. Total stitches: 42
Row 24: 42 single crochet.
Row 25: Taking only the back side (13 single crochet, 1 increase) X 3. Total stitches: 45
Row 26: 45 single crochet.
Row 27: (7 single crochets, 1 increase, 7 single crochets) X 3. Total stitches: 48
Row 28: 48 single crochet.
Row 29: Fill and join both parts with slip stitches taking the front side of both parts together.
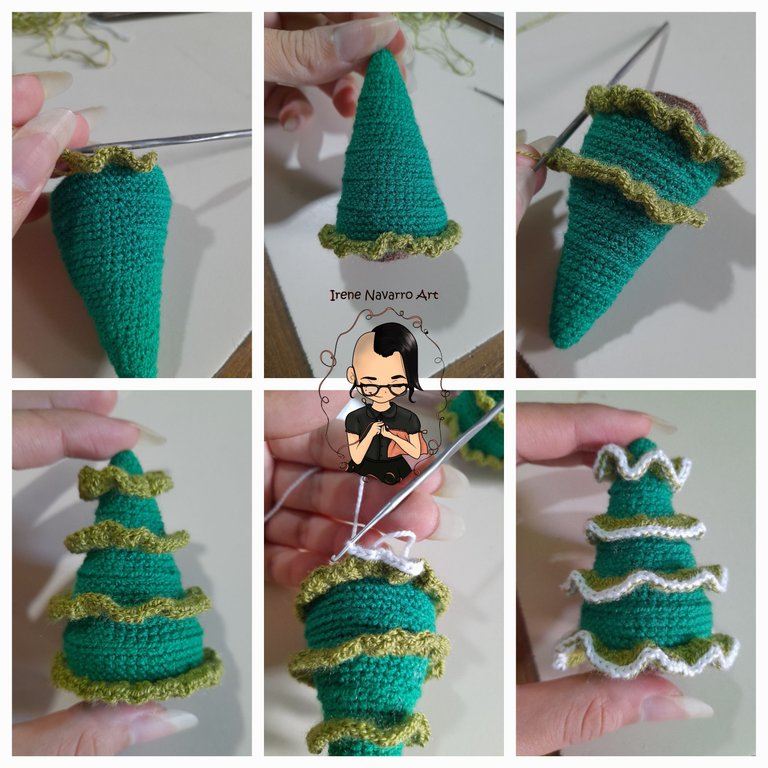
Con el hilo verde claro trabajar sobre las hileras 13 ,21 y 28: Hacer 4 puntos altos juntos, saltar un punto y repetir hasta el final de la hilera.
En la hilera 5: hacer 4 puntos altos juntos en todas las puntadas.
Luego con hilo blanco hacer una hilera de puntos deslizados.
With the light green yarn work over rows 13, 21 and 28: Make 4 treble crochets together, skip one stitch and repeat until the end of the row.
On row 5: make 4 treble crochets together across all stitches.
Then with white thread make a row of slip stitches.
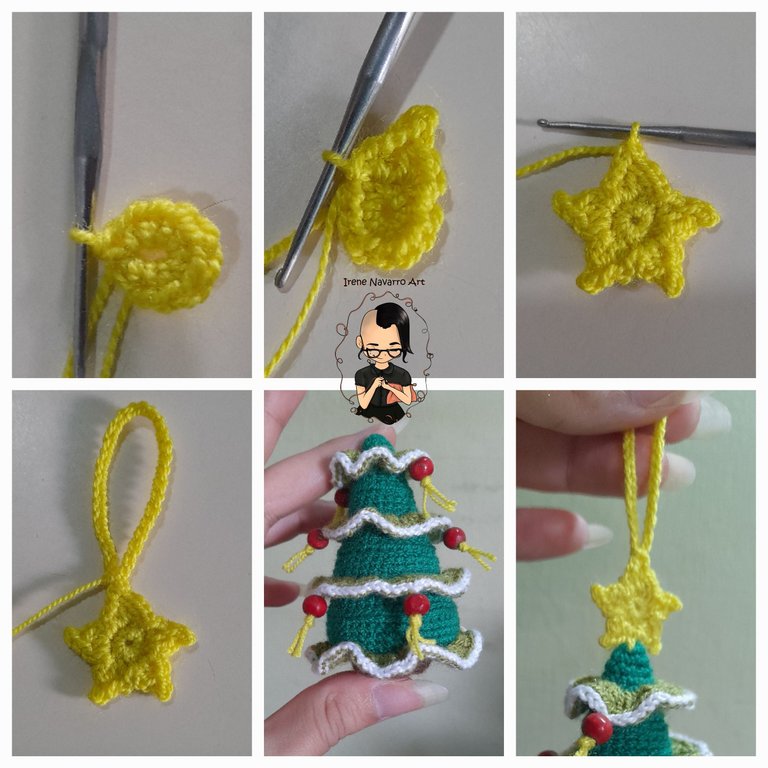
Con hilo amarillo hacer 10 puntos bajos en un anillo y repetir la siguiente secuencia de puntadas:
1 puntos deslizado, 1 punto bajo y 1 punto medio alto juntos.
Hacer 2 cadenas y un punto deslizado en la primera cadena.
1 punto medio alto, 1 punto bajo y q punto deslizados juntos.
Repetir hasta tener las 5 puntas de la estrella.
Tomando solo el lado de atrás hacer 5 puntos deslizados para posicionar la aguja en la punta de la estrella. Luego hacer 30 cadenas para formar el asa y terminar con 1 punto deslizado en la cadena de inicio. Coser la estrella.
Coser las cuentas rojas al árbol.
With yellow thread make 10 single crochets in a ring and repeat the following sequence of stitches:
1 slip stitch, 1 single crochet and 1 half double crochet together.
Make 2 chains and a slip stitch in the first chain.
1 half double crochet, 1 single crochet and q stitch slipped together.
Repeat until you have the 5 points of the star.
Taking only the back side make 5 slip stitches to position the needle at the point of the star. Then chain 30 to form the handle and finish with 1 slip stitch in the beginning chain. Sew the star
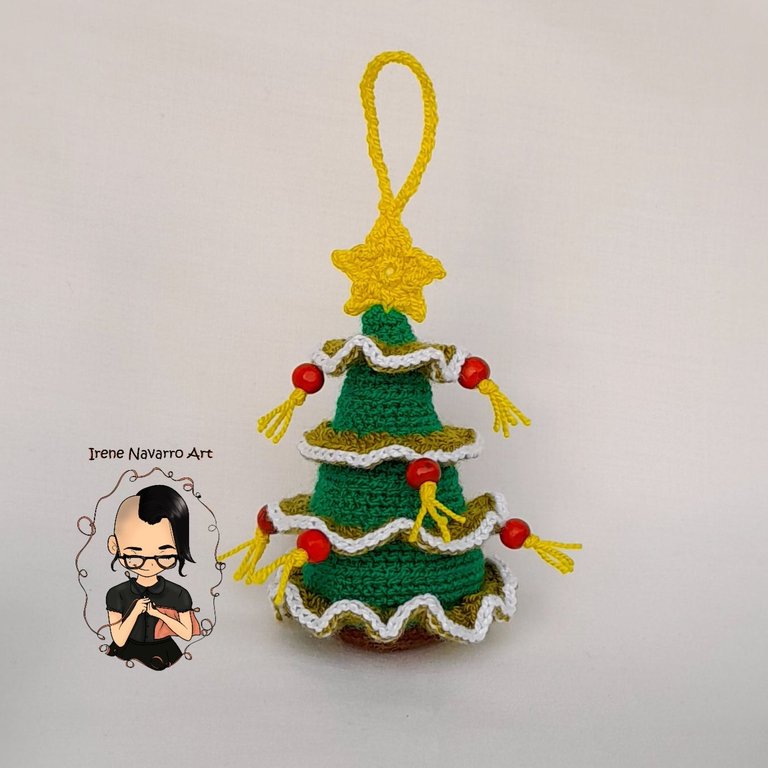
Sew the red beads to the tree.
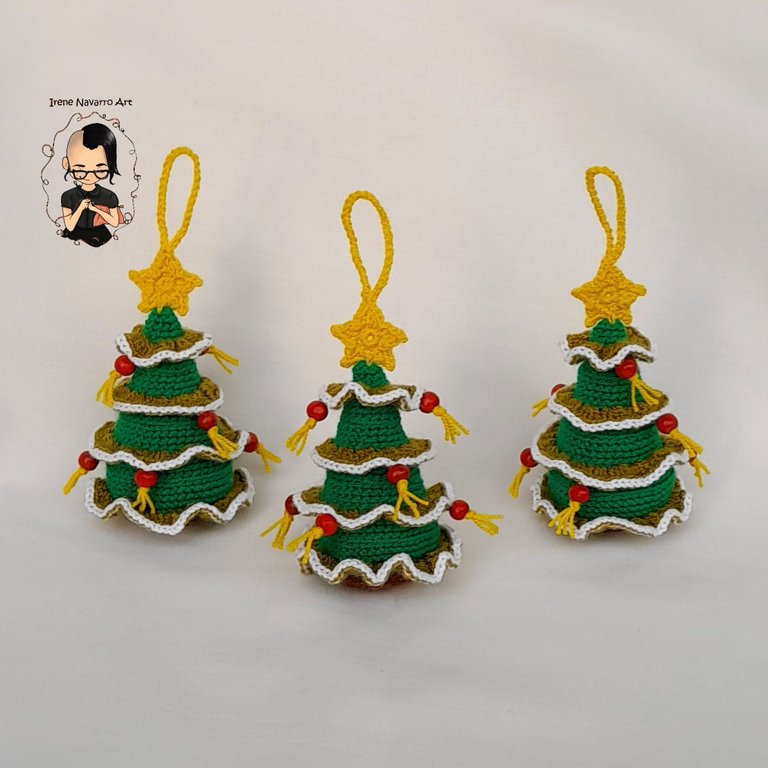
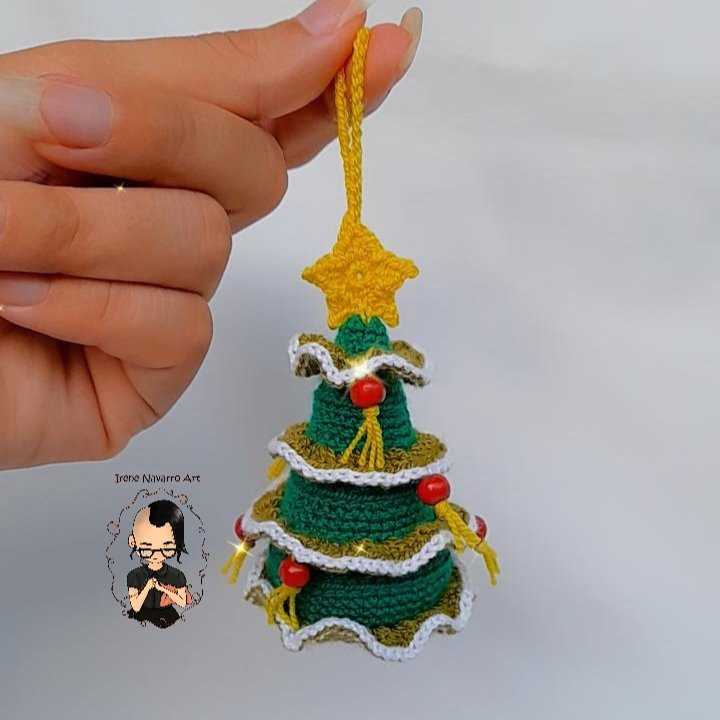
Resultado / Result
I still find it funny to place trees in a Christmas tree, it's somewhat redundant but I love the idea and I think the amigurumi trees have turned out very cute.
Imágenes tomadas con dispositivo Samsung A12. Portada editada en InShot
Pictures taken with Samsung A12 device. Cover edited in InShot

Espero les haya gustado. Les invito a leer mis próximas publicaciones y siempre estaré dispuesta a responder sus preguntas y comentarios, también pueden seguirme y contactarme en cualquiera de mis redes sociales. ¡Muchas gracias!
I hope you liked it. I invite you to read my next publications and I will always be willing to answer your questions and comments, you can also follow me and contact me on any of my social networks. Thank you!
Aww todos los que has hecho están demasiado lindos! Yo es que no sé traer sino cadeneta y tachones!
Están muy bonitos!
Muchas gracias, bueno yo siempre digo que la base de todo es la cadeneta, si sabes hacer ese movimiento de la mano ya con naturalidad, puedes aprender a hacer los demás puntos fácilmente, todo es motivarse 🤗
https://twitter.com/1571281090756624384/status/1599204060220968960
https://twitter.com/2471487180/status/1599205631574953991
The rewards earned on this comment will go directly to the people( @rlathulerie, @irenenavarroart ) sharing the post on Twitter as long as they are registered with @poshtoken. Sign up at https://hiveposh.com.
Quedaron preciosos!
Me encantan.
🎆🎇🎉🎊🌧️💐✨🌾🌱🌹🌙🌿🍃🥀⚡🌺☘️🍀🌈🌷⭐🪴🌵🌸🌟💮🌴🌳💫☀️💮☔🌲🌳🌍🌌🌠☄️🏵️🐝🌻🌼🍄🐞🦋💙☕💜🍍🎆🎇🎉🎊🎆🎇🎉🎊🌧️💐✨🌾🌱🌹🌙🌿🍃🥀⚡🌺☘️🍀🌈🌷⭐🪴🌵🌸🌟💮🌴🌳💫☀️💮☔🌲🌳🌍🌌🌠☄️🏵️🐝🌻🌼🍄🐞🦋💙☕💜🍍🎆🎇🎉🎊
Muchas gracias 🤗
que lindo quedara tu arbolito, muy laborioso la cantidad de amigurumis que haz realizado pero es muy satisfactorio el resultado final. :D
Muchas gracias 😃
¡Una belleza total, cada una de las figuras! 😍
Muchas gracias 🥰
I love check and reading through your post because your work are always beautiful and neat. Thanks for sharing this love it
Thank you 😊
Un trabajo muy delicado, todo está súper bello.
Admiro tú arte.
Pienso que si debe descansar tus manitas.
El tejido es para des estresarse no para estresarse.
Cuida tus manos.
Saludos
Muchas gracias @mercmarg Saludos 🤗
Saludos @irenenavarroart, los arbolitos te quedaron lindos, todos los proyectos para el árbol de navidad están hermosos, si me ponen a escoger los 5 tienen 💯👏👍.
Feliz noche!
Que bella muchas gracias 🥰
Saludos querida Irene, feliz inicio de semana, como todas tus creaciones este arbol quedó hermoso, admiro tu creatividad y te felicito.
Un fuerte abrazo
Muchas gracias @gladymar1973 Abrazo 🤗
Lindo, me encanto, te quedaron preciosos, bendiciones.
Muchas gracias 🤗
Esta publicación fue seleccionada como ganadora del Borago, correspondiente a
¡Felicitaciones!